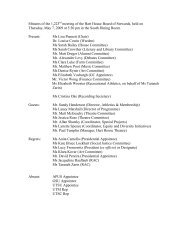
How-to's > Guidelines > Resources - Hart House
How-to's > Guidelines > Resources - Hart House
How-to's > Guidelines > Resources - Hart House

You also want an ePaper? Increase the reach of your titles
YUMPU automatically turns print PDFs into web optimized ePapers that Google loves.
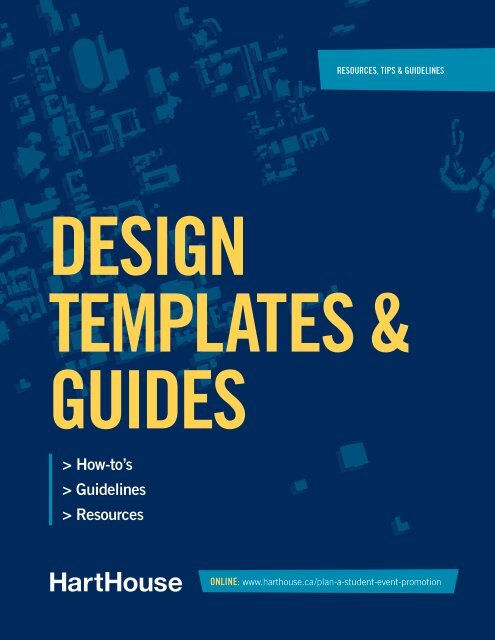
<strong>Resources</strong>, tips & <strong>Guidelines</strong><br />
Design<br />
Templates &<br />
Guides<br />
> <strong>How</strong>-to’s<br />
> <strong>Guidelines</strong><br />
> <strong>Resources</strong><br />
Online: www.harthouse.ca/plan-a-student-event-promotion
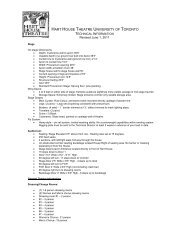
7 <strong>Hart</strong> <strong>House</strong> Circle / Toronto, ON / M5S 3H3 / Canada / 416.978.2452 / www.harthouse.ca
What’s<br />
included?<br />
These design templates were created to give you to the tools you need to successfully promote<br />
your event from start to finish. We’ve created over 100 templates with various designs, colours,<br />
formats and sizes and made them available for different software applications.<br />
Included in this guide:<br />
1. <strong>How</strong> and where to access the templates<br />
2. Photography available for use<br />
3. A step-by-step guide on how to use the templates in InDesign<br />
4. A step-by-step guide on how to use the templates in Photoshop<br />
5. A step-by-step guide on how to use the templates in Microsoft Word<br />
6. A step-by-step guide on how to use the templates in PowerPoint<br />
7. Basic design tips and tricks<br />
8. A guide to preparing and sending your materials for print<br />
9. <strong>How</strong> to get your materials proofed and approved by the <strong>Hart</strong> <strong>House</strong> Communications Department<br />
Included in the template folders:<br />
Posters:<br />
Design style: modern, photo background, illustration background<br />
Sizes: 11” x 17” and 8.5” x 11”<br />
Software: InDesign, Photoshop, Microsoft Word and PowerPoint<br />
Postcards / flyers:<br />
Design style: modern, photo background, illustration background<br />
Size: 4” x 6”<br />
Software: InDesign, Photoshop, Microsoft Word and PowerPoint<br />
Event program:<br />
Design style: basic event program<br />
Size: 5.5” x 8.5”<br />
Software: Microsoft Word<br />
Logos:<br />
All formats of the Club & Committee logos<br />
All formats of the <strong>Hart</strong> <strong>House</strong> logo<br />
All formats of the Accessibility logo<br />
7 <strong>Hart</strong> <strong>House</strong> Circle / Toronto, ON / M5S 3H3 / Canada / 416.978.2452 / www.harthouse.ca
1. <strong>How</strong> to access files<br />
All template folders and files are hosted online at:<br />
www.harthouse.ca/plan-a-student-event-promotion<br />
Step 1:<br />
Choose either the PC or Mac folder; each one is specifically formatted for these operating<br />
systems. Click the link to download.<br />
Step 2:<br />
Once the folder has been downloaded, you will need to extract (or unzip) it. Usually, double<br />
clicking on the compressed files will do this automatically.<br />
Step 3:<br />
Open up the folder and familiarize yourself with all of the different options available to you.<br />
Have fun and be creative!<br />
*Note: These templates are for <strong>Hart</strong> <strong>House</strong> Clubs & Committees and staff. These are not to be sent<br />
to any other faculty, department or student group.<br />
2. Photography<br />
Available in the template folders online at:<br />
www.harthouse.ca/plan-a-student-event-promotion<br />
We have provided some general photos for you to use, these are for <strong>Hart</strong> <strong>House</strong> events only and<br />
are not to de distributed to any other faculty, department or student group.<br />
7 <strong>Hart</strong> <strong>House</strong> Circle / Toronto, ON / M5S 3H3 / Canada / 416.978.2452 / www.harthouse.ca
3. Using InDesign<br />
Adobe InDesign is a page layout application and is the standard program used in graphic design<br />
for all document layout and design work. Our templates were created in InDesign 5.5 so be sure<br />
to use at least that version of the software. We have also created a version saved in InDesign 4,<br />
but it’s always preferred that you work in the most up to date software.<br />
Important Tools:<br />
Selection Tool<br />
Type Tool<br />
Frame Tool (for adding images)<br />
Zoom Tool<br />
Select either outline colour or fill colour<br />
Step 1: Opening the file<br />
Open the poster template that best suits your needs, according to design and<br />
function (and the amount of content you have to include on it).<br />
Step 2: View it in high resolution<br />
To view your work in a finished high resolution format, go to the View drop down<br />
menu at the top, choose Display Performance and then High Quality Display.<br />
7 <strong>Hart</strong> <strong>House</strong> Circle / Toronto, ON / M5S 3H3 / Canada / 416.978.2452 / www.harthouse.ca
Step 3: Setting up your workspace<br />
Open up your toolbars/palettes, you’ll need these to do the layout and design. You’ll need to use Character,<br />
Paragraph, Layers, Pages, Swatches and Links. You can select which ones to open by going to Window in the drop<br />
down menus at the top.<br />
Step 4: Changing the title or text<br />
To change the title on your poster, select the Type Tool from the toolbar on the left side of your screen (it looks like<br />
an uppercase letter T). Once you have selected this tool, highlight the title text and replace it with your event title.<br />
You can change all of the text on the poster the same way by selecting the type with Type Tool and replacing it with<br />
your info.<br />
Step 6: Making your title or text fit<br />
You may need to change the size or weight of the font to get your text to fit. Select the text with Type Tool, using<br />
either the Character palette or the toolbar at the top of your screen, and change the size of the text or change the<br />
weight of the font from bold to regular. You can also adjust the letter spacing in the Character palette (this is called<br />
tracking) to tighten it up.<br />
Step 7: Changing the colour of the text<br />
To change the colour of the text, select the Type Tool again and highlight the text you want to change. Select the<br />
colour you want to use from the Swatches palette.<br />
Step 8: Changing the background colour or image<br />
To change the colour of the background, use the Selection Tool to select the background (if the layer is locked<br />
and you can’t select it, go to your Layers palette and unlock the layer by clicking on the little lock icon). With<br />
the background selected, choose the colour you want to use from the Swatches palette. To add an image, use<br />
the Selection Tool and select the background. Go to File at the top left of your window and select Place, this will<br />
prompt you to choose an image file on your computer.<br />
Step 9: Changing the Club &<br />
Committee logos<br />
Select the Selection Tool from the toolbar<br />
on the left of your screen. Click on the logo<br />
in the bottom left corner of your document,<br />
then go to File in the top drop down menu.<br />
From here you will click Place and be prompted to choose the file you would like to place in that box. The Club &<br />
Committee logos are located in the template folder.<br />
Step 10: Adding logos for event partners<br />
If you have partner(s) for your event and need to include their logo, you will place it the same way as your Club<br />
7 <strong>Hart</strong> <strong>House</strong> Circle / Toronto, ON / M5S 3H3 / Canada / 416.978.2452 / www.harthouse.ca
& Committee logo in Step 8. Three gray place holder boxes are under the footer for these logos, if you don’t have<br />
any sponsors you can simply delete those boxes by using your Selection Tool to select and delete them. Before you<br />
place the logos in these boxes, you need to get rid of the gray background colour. Using your Selection Tool, select<br />
the three gray boxes, go to your Swatches palette and click on the white box with the red line through it, this will<br />
clear any colours from the box.<br />
Step 11: The address line and accessibility logo<br />
Do not change the address line or the accessibility logo. They must appear in this exact format on all materials.<br />
Step 12: Saving your file<br />
Once you have completed all of your revisions, you’ll need to save you file. Go to File and select Save As. Be sure<br />
to choose a file name that represents your event (eg. janedoe_reading.indd).<br />
Step 13: Packaging your file for future revisions<br />
Packaging your file creates a folder with all of your images and links in one place. This makes future revisions,<br />
edits and sharing your files easier. Go to File > Package, you may get an error stating that you can’t copy the fonts<br />
over but it’s ok to ignore that. Select Package and continue with the process. You’ll need to choose a location to<br />
save it in and a name for the folder.<br />
Step 14: Creating a PDF<br />
Make a PDF of your poster by going to File > Adobe PDF Presets > Press Quality<br />
and click Save (remember the place that you save the PDF). Be sure that in the<br />
Export Adobe PDF window that the Adobe PDF Preset is set on Press Quality.<br />
Select the Export button.<br />
Step 15: Getting your work approved by the <strong>Hart</strong> <strong>House</strong> Communications Department<br />
Send the final PDF to the <strong>Hart</strong> <strong>House</strong> Communications department for final review and approval. Send your file to<br />
communications@harthouse.ca with the subject line: Communications Review - Design<br />
7 <strong>Hart</strong> <strong>House</strong> Circle / Toronto, ON / M5S 3H3 / Canada / 416.978.2452 / www.harthouse.ca
4. Using Photoshop<br />
Adobe Photoshop is meant for photo editing and image creation but can be used for design<br />
work in a pinch. We have created these templates in Photoshop 5.5.<br />
Important Tools:<br />
Move Tool<br />
Paint Bucket Tool<br />
Horizontal Type Tool<br />
Zoom Tool<br />
Step 1: Opening the file and setting up your workspace<br />
Open the poster template that best suits your needs, according to design and<br />
function (and the amount of content you have to include on it). Select Window<br />
from the drop down menus at the top of the screen and select Layers, Character,<br />
Paragraph and Swatches.<br />
Step 2: Layers<br />
Every element on the poster has it’s own layer and it is editable when you are in<br />
that layer. You must select the appropriate layer before you are able to make any<br />
edits. You can view all layers in the Layers palette.<br />
7 <strong>Hart</strong> <strong>House</strong> Circle / Toronto, ON / M5S 3H3 / Canada / 416.978.2452 / www.harthouse.ca
Step 3: Editing titles and text<br />
Select the text you want to edit with the Horizontal Type Tool from the toolbar on the left. You might want to<br />
change the size, weight or colour by using the formatting options available in the Character palette.<br />
Step 4: Changing the Club &<br />
Committee logos<br />
To change the logo you need to first open the logo file<br />
itself (located in the Clubs & Committees logos folder),<br />
be sure that when you open the file the resolution is<br />
set to 200 or 300 dpi. Go to Select, located at the top<br />
of your screen in the drop down menus and choose<br />
All, go to Edit > Copy. Go back to your poster document and go to Edit > Paste, this will create<br />
a new layer with your logo. You can resize the logo by going to Edit > Free Transform, hold down<br />
shift while dragging the corner of the selected box and size it down to suit your needs. Once you’ve<br />
resized the logo, you can use the Move Tool to drag it to the correct location on the page.<br />
Step 5: Deleting the old logo<br />
Go to your Layers palette and select the layer with the old logo in it, once you have the layer selected you can click<br />
on the little trash can icon at the bottom of the Layers palette.<br />
Step 6: Adding sponsor or partner logos<br />
Follow the instructions in Step 4 to add sponsor or partner logos.<br />
Step 7: Changing the background colour<br />
Select the background layer. Choose a colour from your Swatches palette and select the Paint Bucket Tool from the<br />
toolbar on the left. Click on the background with the Paint Bucket Tool to change the colour.<br />
Step 9: Saving your file<br />
When you are finished with your design, click Save As and save your file as a .psd, this will allow you to edit it<br />
again later. Be sure to name your file after your event (eg. eventname.psd).<br />
Step 10: Getting ready for print<br />
Save your file as a Photoshop PDF.<br />
Step 11: Getting your work approved by the <strong>Hart</strong> <strong>House</strong> Communications Department<br />
Send the final PDF to the <strong>Hart</strong> <strong>House</strong> Communications Department for final review and approval. Send your file to<br />
communications@harthouse.ca with the subject line: Communications Review - Design<br />
7 <strong>Hart</strong> <strong>House</strong> Circle / Toronto, ON / M5S 3H3 / Canada / 416.978.2452 / www.harthouse.ca
5. Using Word<br />
Although Microsoft Word is meant for creating word processing documents, it can also be used<br />
to create basic posters and event flyers.<br />
Step 1: Opening the file<br />
Open the poster template that best suits your needs, according to design and function (and the amount of content<br />
you have to include on it).<br />
Step 2: Editing the title<br />
Select the title by highlighting it and type in your event title. You may have to change the<br />
size of the font to make it fit properly, you can do this by going to the Formatting Palette. If<br />
the Formatting Palette is not open, you can open it by going to View > Formatting Palette.<br />
Step 3: Editing text<br />
You can change the rest of the text in the same way as explained in Step 2.<br />
Step 4: Changing logos and images<br />
Click on the logo or image you would like change, delete it. To insert the new logo or<br />
image, go to Insert > Picture > From a File. You will be prompted to choose a new file.<br />
Note: In some poster templates, all logos and the address line are in the footer. You will<br />
have to double click on the footer to be able to edit that area. Click close when you are<br />
done to return to the full document preview.<br />
Step 5: Changing the footer information<br />
The footer must remain exactly how it is with the exception of switching the logo.<br />
Step 6: Saving your document<br />
Select Save As, name your document after your event (eg. eventname.doc) to easily recognize and edit it in the future.<br />
Step 7: Preparing for print<br />
Go to Word Preferences, check the Print Background Colors and Images box in the Print pop up menu from the<br />
Output and Sharing section. Go the File > Print, select Save As PDF. Save to desktop.<br />
Step 8: Getting your work approved by the <strong>Hart</strong> <strong>House</strong> Communications Department<br />
Send the final PDF to the <strong>Hart</strong> <strong>House</strong> Communications Department for final review and approval. Send your file to<br />
communications@harthouse.ca with the subject line: Communications Review - Design<br />
7 <strong>Hart</strong> <strong>House</strong> Circle / Toronto, ON / M5S 3H3 / Canada / 416.978.2452 / www.harthouse.ca
6. Using PowerPoint<br />
PowerPoint is meant for creating presentations but can be used to easily create simple posters<br />
and flyers for your events.<br />
Step 1: Opening the file<br />
Open the poster template that best suits your needs, according to design and function (and the amount of content<br />
you have to include on it).<br />
Step 2: Editing the title and text<br />
Select the title or text by highlighting it and typing in your new information. You may<br />
need to change the size of the font to make it fit properly, you can do this in the<br />
Formatting Palette.<br />
Step 3: Changing logos and images<br />
To change the Club & Committee logo, go to Insert in the drop down menu at the top<br />
and choose Picture. In the Choose Picture window, locate your Club & Committee logo<br />
folder and select either the white-EPS or black-EPS (depending on whether the background<br />
is light or dark). You can insert partner or sponsor logos or other images with<br />
the same steps.<br />
Step 4: Saving your file<br />
Select Save As, name your document after your event (eg. eventname.ppt) to easily recognize and edit it in the<br />
future.<br />
Step 5: Preparing for print<br />
You can’t create a proper PDF file from PowerPoint, you have to send the actual PowerPoint file to the printer. Be<br />
sure to only use system fonts in your design, otherwise there can be compatability issues and your design will be<br />
altered.<br />
Step 6: Getting your work approved by the <strong>Hart</strong> <strong>House</strong> Communications Department<br />
Send the final PDF to the <strong>Hart</strong> <strong>House</strong> Communications department for final review and approval. Send your file to<br />
communications@harthouse.ca with the subject line: Communications Review - Design<br />
7 <strong>Hart</strong> <strong>House</strong> Circle / Toronto, ON / M5S 3H3 / Canada / 416.978.2452 / www.harthouse.ca
7. Basic tips & tricks<br />
Here’s a few things to keep in mind when designing your promotional materials.<br />
1. Be concise: You only have a split second to grab someone’s attention. Bio’s, background information and excessive<br />
contact details are all things to have on your website. Keep the poster clean and only include the most important info.<br />
2. Contrast: Be sure to choose background and text colours that contrast well. Using yellow type on a white background<br />
can be very difficult to read and is not accessible for people with a visual impairment<br />
3. Formatting your text: It is standard to lay out your text so that it is read from left to right, this means that you<br />
should always left align you text and titles. Centering blocks and right aligning text makes it difficult to read and<br />
understand.<br />
Lorem ipsum dolor sit amet, consectetur<br />
adipisicing elit, sed do eiusmod tempor<br />
incididunt ut labore et dolore magna<br />
aliqua.<br />
Lorem ipsum dolor sit amet, consectetur<br />
adipisicing elit, sed do eiusmod tempor<br />
incididunt ut labore et dolore magna<br />
aliqua.<br />
Lorem ipsum dolor sit amet, consectetur<br />
adipisicing elit, sed do eiusmod tempor<br />
incididunt ut labore et dolore magna<br />
aliqua.<br />
4. Choosing the right image: When choosing an image to use for your event remember that you have to be able to read<br />
the text over top of it. Choose something that isn’t too busy or has a lot of contrast so that your text still pops out.<br />
5. Keep the design simple and clean: The more you add to the poster, the more opportunity there is for people to<br />
miss the important information. Less is more.<br />
6. Don’t distort text or images: Never stretch or compress any text, photos or illustrations.<br />
7 <strong>Hart</strong> <strong>House</strong> Circle / Toronto, ON / M5S 3H3 / Canada / 416.978.2452 / www.harthouse.ca
8. Preparing for print<br />
Not sure how to prepare your files for print or where to send them? We’ve got you covered.<br />
File format: Always send your documents to print as a PDF file.<br />
Printing deadlines:<br />
It’s important to leave enough time for printing, on average it takes 3-5 days to receive your materials from the<br />
printer. Always work this in to your promotions timeline.<br />
<strong>How</strong> to send your files for print:<br />
Here’s an example of the specs you need to include when ordering your posters or flyers:<br />
filename.pdf<br />
- document size (11 x 17, 8.5 x 11 or 4 x 6)<br />
- full colour or b/w<br />
- paper type (also called stock) which would usually be Bond<br />
- no bleed (the colour does not extend past the edge of the document)<br />
- double or single sided (flyers & postcards that have information on both sides, you need to print double sided)<br />
- quantity<br />
While you are welcome to use whatever printing company you want, if you use Captain Printworks you can use you<br />
Club & Committee account number for payment and the invoice will be mailed to <strong>Hart</strong> <strong>House</strong>.<br />
The contact info for Captain Printworks:<br />
730 Yonge Street, Unit 1<br />
416-920-4114<br />
www.captainprint.com<br />
Contact name: Brenda Massie, brenda.massie@captainprint.com<br />
Account Numbers:<br />
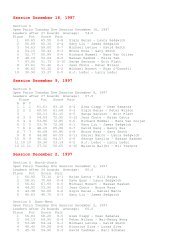
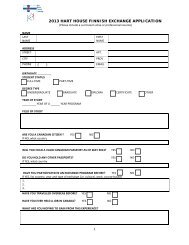
Alumni Committee: 2612 <strong>Hart</strong> <strong>House</strong> Finnish Exchange: 2626<br />
Archery Club: 2613 Literary and Library Committee: 2627<br />
Art Committee: 2614 <strong>Hart</strong> <strong>House</strong> Players: 2628<br />
Bridge Club: 2615 <strong>Hart</strong> <strong>House</strong> Investment Club: 2629<br />
Camera Club: 2616 <strong>Hart</strong> <strong>House</strong> Jazz Choir: 2630<br />
<strong>Hart</strong> <strong>House</strong> Chamber Strings: 2617 <strong>Hart</strong> <strong>House</strong> Jazz Ensemble: 2631<br />
Chess Club: 2618 Music Committee: 2632<br />
<strong>Hart</strong> <strong>House</strong> Chorus: 2619 <strong>Hart</strong> <strong>House</strong> Orchestra: 2633<br />
Debating Club: 2620 Recreational Athletics Committee: 2634<br />
Debates Committee: 2621 <strong>Hart</strong> <strong>House</strong> Singers: 2635<br />
Farm Committee: 2622 Social Justice Committee: 2636<br />
<strong>Hart</strong> <strong>House</strong> Film Board: 2623 <strong>Hart</strong> <strong>House</strong> Symphonic Band: 2637<br />
<strong>House</strong> Committee: 2624 Theatre Committee: 2638<br />
Finance Committee: 2625 <strong>Hart</strong> <strong>House</strong> Underwater Club: 2639<br />
7 <strong>Hart</strong> <strong>House</strong> Circle / Toronto, ON / M5S 3H3 / Canada / 416.978.2452 / www.harthouse.ca
9. Getting your design<br />
reviewed & approved<br />
It’s mandatory that you receive sign off from the <strong>Hart</strong> <strong>House</strong> Communications Department on all<br />
printed materials.<br />
Why is it mandatory?<br />
It is crucial that we review all <strong>Hart</strong> <strong>House</strong> materials before printing and distribution in order to maintain brand<br />
integrity. Here are some of the things we’ll be looking for:<br />
• spelling and errors<br />
• correct logo usage<br />
• brand integrity and consistency<br />
• ensuring the content is accessible and readable<br />
<strong>How</strong> do you get your materials reviewed?<br />
Send the final PDF to the <strong>Hart</strong> <strong>House</strong> Communications Department for final review and approval. Send your file<br />
to communications@harthouse.ca with the subject line: Communications Review - Design. We will respond to you<br />
within 48 hours with approval or a list of revisions. Once you have our approval, you can send your work to print<br />
and begin distribution.<br />
Still have questions?<br />
We will be holding open office hours every Wednesday from 2:30 – 4:30 pm, if you have any questions or concerns<br />
you are more than welcome to stop by and ask in person, or send us an email at communications@harthouse.ca<br />
and we will get back to you as soon as possible.<br />
7 <strong>Hart</strong> <strong>House</strong> Circle / Toronto, ON / M5S 3H3 / Canada / 416.978.2452 / www.harthouse.ca
7 <strong>Hart</strong> <strong>House</strong> Circle / Toronto, ON / M5S 3H3 / Canada / 416.978.2452 / www.harthouse.ca
7 <strong>Hart</strong> <strong>House</strong> Circle / Toronto, ON / M5S 3H3 / Canada / 416.978.2452 / inquiries@harthouse.ca / www.harthouse.ca