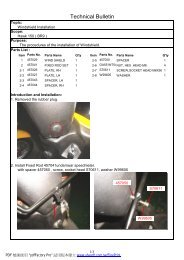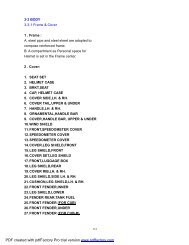
150GTIR - Service manual.pdf - Mojo Motorcycles
150GTIR - Service manual.pdf - Mojo Motorcycles
150GTIR - Service manual.pdf - Mojo Motorcycles

Create successful ePaper yourself
Turn your PDF publications into a flip-book with our unique Google optimized e-Paper software.
CF150T-6/CF150T-6A/CF125T-22/CF125T-22A is designed only for one driver and one passenger; the total<br />
load must be within the limit specified on the specification label.<br />
.<br />
.<br />
The scooter is designed only for on-road driving .<br />
Pay special attention to all the sentences or paragraphs marked with WARNING in this <strong>manual</strong>.<br />
As the <strong>manual</strong> is considered as indispensable, it should be always kept with the driver for consultation.
Thanks for choosing the scooter CF150T-6/ CF150T-6A/ CF125T-22/ CF125T-22A. For safer and more<br />
pleasant driving, a complete understanding of all the instructions in this <strong>manual</strong> is necessary. Your safety is not<br />
only ensured by your own alertness and your understanding of all operations but also related to your<br />
understanding of the mechanic performance of the scooter. Making inspections before driving and performing<br />
periodical maintenance are basic conditions for your safety.<br />
When periodic maintenance or repair is necessary, please consult with your local dealer.<br />
Wish you a pleasant drive.<br />
The manufacturer reserves the rights to make improvement of the product at any time without prior notice<br />
and without any obligation whatever.
A driver will always spend much time on learning driving methods and technique before driving on the<br />
highway in less traffic area.<br />
1. Many accidents occur due to that automobile driver cannot see the scooter driver. Therefore, the scooter<br />
driver should make all his effort to be seen clearly by automobile driver.<br />
For example: Wear noticeable clothing.<br />
Avoid driving carelessly.<br />
2. Many accidents occur at the crossroad entrance or exit of parking lot and driveway. Therefore pay<br />
attention to the above places.<br />
3. Over speed is one of the main causes for many scooter accidents. Please obey the traffic rules and drive<br />
within the speed limit.<br />
4. Many scooter accidents occur due to insufficient experience. A new driver shall comprehend each<br />
performance of scooter before riding on the highway. Never lend scooter to inexperienced drivers.<br />
5. Most injuries of scooter accidents are on head. Therefore please wear helmet and other protections, e.g.<br />
dust-tight glasses, boots and thick coat.<br />
6. Avoid driving on bump road, which will result in losing control or damaging machine.
1. Before starting the engine, please carefully inspect the scooter. (Refer to Page 17).<br />
2. For safety, please wear helmet as well as boots, gloves, dust-tight glasses and noticeable clothing;<br />
3. The top box or cargo box mounted by customer himself is for lightweight stuff only. If cargo boxes are<br />
mounted on both sides of scooters, please load equally on both and tight properly to avoid moving during driving.<br />
For detail, refer to page 3;<br />
4. When driving, please hold the handlebar with both hands and step on the decks;<br />
5. Please exercise on road in less traffic area and be familiar with scooter performance before driving on the<br />
roadway;<br />
6. Turn on turning signal, when turning or changing lane.<br />
7. Remember not to drive on the road shoulder. And please remember not to destroy natural scene and not<br />
forget to cherish public property.<br />
8. The run-in period of this scooter is 1500km. Max. Speed: 50km/h within 0~1000km, and 60km/h within<br />
1000~1500km. Please avoid rapid acceleration, rapid deceleration or climbing long slope with heavy load.<br />
Adjust and inspect the scooter, change engine oil and clean air cleaner according to maintenance interval. Fail to<br />
operate in such process will reduce the performance and shorten the scooter life.
Rear brake handle<br />
Instruments<br />
Fuel tank lock<br />
Fuel tank<br />
Trunk<br />
Battery<br />
Rear bracket<br />
Main stand<br />
Side stand<br />
Front turning signal (LH)<br />
The position marked with<br />
represents the invisible parts.
Seat<br />
Ignition switch<br />
Front brake handle<br />
Headlight<br />
Front turning signal (RH)<br />
Front wheel<br />
Reservoir tank<br />
Rear wheel<br />
Muffler<br />
Taillight ASSY.<br />
The position marked with<br />
represents the invisible parts.
Horn button<br />
Turning switch<br />
Turning reset switch<br />
High/low beam switch<br />
Kill switch<br />
Night switch<br />
Starting button
Fuel indicator<br />
Turning indicator (LH)<br />
High beam indicator<br />
Speedometer<br />
Speed digital indicator<br />
Parking indicator<br />
Turning indicator (RH)<br />
Water temperature indicator<br />
Engine oil indicator<br />
Odometer<br />
Clock indicator<br />
CF150T-6/CF125T-22 Instrument
Fuel indicator<br />
Turning indicator (LH)<br />
High beam indicator<br />
Speedometer<br />
Speed digital indicator<br />
Parking indicator<br />
Turning indicator (RH)<br />
Water temperature indicator<br />
Engine oil indicator<br />
Odometer<br />
Clock indicator<br />
Failure indicator<br />
CF150T-6A/CF125T-22A Instrument
Insert the key into the main switch to turn: ON, OFF or LOCK.<br />
1. ON when turning the switch to the power is on the<br />
engine can be started and the key cannot be taken out.<br />
2. OFF when turning the switch to the power is off the<br />
engine will be shut down and the key can be taken out.<br />
3. LOCK Turn the handlebar to the most left position, press<br />
the key and turn to and then take out the key. The handlebar<br />
cannot be moved and the engine and all lights cannot be turned on.<br />
.<br />
Temperature indicator is on the right side of the instrument<br />
panel which indicates the water temperature. The green area of side C indicates that the temperature is normal,<br />
while the red area of side H indicates that the temperature is high. In case the temperature is so high repeatedly,<br />
please check the amount of the coolant when temperature is down, or check the cooling system at your dealer.
Fuel gauge is on the left side of the instrument panel which indicates the amount of the fuel in the fuel tank.<br />
The location F indicates that the amount of the fuel is full, and the location E indicates that the amount of the<br />
fuel will be used up, please refill immediately.<br />
Baggage Hook<br />
Max. Load capacity is about 1.5kg.<br />
can be used for lightweight loads,
CF150T-6A/CF125T-22A is equipped with fuel injection system. The failure indicator light is lower side of<br />
instrument panel. When the light flashes, it indicates the ECU failure, refer to attached table for details. Failure<br />
indicator light has two kinds of flash signals, long signal indicates tens digit , while short signal indicates<br />
unit digit<br />
. Long signal flashes first and then the short signal. And one long signal mean 10, two long signals<br />
means 20, and three long signals means 30. For example, when the error code is 23 , the failure indicator<br />
light will flash two long signals first and then three short signals, after the failure indicator light is on.<br />
ERROR TYPE<br />
ERROR-TPS-LOW<br />
ERROR-TPS-HIGH<br />
ERROR-TH2O-LOW<br />
ERROR-TH2O-HIGH<br />
ERROR-TAir-LOW<br />
ERROR-TAir- HIGH<br />
ERROR-PAir-LOW<br />
ERROR-PAir- HIGH<br />
ERROR-VB-LOW<br />
ERROR-VB- HIGH<br />
FLASH<br />
1<br />
2<br />
3<br />
4<br />
5<br />
6<br />
7<br />
8<br />
9<br />
10<br />
FAILURE DESCRIPTION<br />
Incorrect lower position of throttle valve angle to be adjusted<br />
Incorrect higher position of throttle valve angle to be adjusted<br />
Earthing of water-temperature signal<br />
Open or short circuit of water temperature to 5V<br />
Earthing of air-temperature signal<br />
Open or short circuit of air temperature to 5V<br />
Open circuit of environmental air pressure sensor in ECU<br />
Short circuit of ECU environmental air pressure sensor in ECU to 5V<br />
Lower battery voltage, rectifier failure<br />
Higher battery voltage, rectifier failure
ERROR TYPE<br />
ERROR-INJ-SC<br />
ERROR-INJ-OC<br />
ERROR-IDLE-SC<br />
ERROR-IDLE-OC<br />
ERROR-FANR-SC<br />
ERROR-FANR-OC<br />
ERROR-MAINR-SC<br />
ERROR-MAINR-OC<br />
ERROR-ENSTR-SC<br />
ERROR-LAMBDA<br />
ERROR-SAFETYSW1<br />
ERROR-TECU-HIGH<br />
ERROR-TECU-LOW<br />
ERROR-PK-OC<br />
ERROR-PK<br />
ERROR-IGN-CURRENT<br />
FLASH<br />
11<br />
12<br />
13<br />
14<br />
15<br />
16<br />
17<br />
18<br />
19<br />
23<br />
25<br />
28<br />
29<br />
30<br />
31<br />
32<br />
FAILURE DESCRIPTION<br />
Short circuit of injector to battery positive terminal<br />
Open circuit or short circuit to earth of Injector<br />
Short circuit of idle speed valve to battery positive terminal<br />
Open circuit or short circuit to earth of Idle speed valve<br />
Short circuit of fan relay to battery positive terminal<br />
Open circuit or short circuit to earth of fan relay<br />
Short circuit of main relay to battery positive terminal<br />
Open circuit or short circuit to earth of main relay<br />
Short circuit of start relay to battery positive terminal<br />
Oxygen sensor failure<br />
Roll over sensor failure<br />
Higher temperature in ECU<br />
Lower temperature in ECU<br />
Open or short circuit of pickup signal to battery positive terminal<br />
Pickup signal failure<br />
Short circuit of ignition coil or lower current
Clock is in the lower of instrument. Open the<br />
seat, remove electric unit waterproof cover, and two<br />
adjust buttons can be seen. Clock adjust button (RH)<br />
will be used to adjust the hour in clock, while<br />
button (LH) to adjust the minute.<br />
Engine oil indicator is on the lower side of<br />
instrument for reminding the users to replace the<br />
engine oil. Oil Replacing Interval 1st replacement within 500km then replace engine oil every 3000km
There are three switches on left handlebar switch<br />
1. Beam switch<br />
The beam switch has two positions<br />
press to this position<br />
press to this position<br />
the high beam is on;<br />
the low beam is on.<br />
2. Turning switch<br />
Turn the button to , left turning light is on;<br />
Turning the button to , right turning light is on;<br />
Press the upper small button, then turning light will be off.<br />
3. Horn button<br />
Press the button, and the horn will be on.
1. The illumination switch consists of three positions and :<br />
when the switch is at this position<br />
headlight,<br />
the pilot light, taillight and instrument light are<br />
on<br />
when the switch is at this position, the pilot light,<br />
taillight and instrument light are on<br />
When the switch is at this position, headlight, the<br />
pilot light, taillight and instrument light are off.<br />
2. Starting button<br />
Press this button to start the engine. For detailed<br />
procedures, please refer to Page 22.<br />
3. Kill switch<br />
Press the button and engine will be shut; Press the button , and engine can be started.
Insert the key into the lock at the left side of the seat<br />
and turn the key clockwise to open the seat.<br />
1. Open the seat and the trunk will be opened. Raincoat,<br />
tools, books and some newspapers can be put in.<br />
2. Max. Load capacity is 10.0 kg.<br />
3. Close the seat, and the trunk will be locked.
To ensure the performance and safety, a routine<br />
inspection shall be performed before daily drive.<br />
Once the fuel is insufficient, please refill the fuel<br />
tank in time. (Refer to fuel gauge on Page 10).<br />
Fuel tank capacity<br />
Turn the dust cap<br />
8.0 L CF150T-6/CF125T-22<br />
7.5 L CF150T-6A/CF125T-22A<br />
on the fuel tank cover, insert<br />
the key into the lock and turn the key clockwise, remove the fuel tank cover, and then refill fuel.<br />
Align the fuel tank cover at bayonet of fuel tank, and then press into the fuel tank port. The fuel tank cover<br />
will be locked when the key returns automatically, and the key can be taken out.
1. Park the scooter on a level surface and support it with its central<br />
stand. Remove the oil dip rod and clean it with a rag. Insert the oil<br />
dip rod without screwing tight. Remove again and check oil level.<br />
2. If the oil level is at the Lower Limit , fill the crankcase with<br />
SAE15W-40/SF engine oil till the oil level is between Upper<br />
Limit and Lower Limit. Install and tighten the oil dip rod. Check<br />
for any leakage.
Check the brake fluid level: Brake fluid should be above<br />
the LOWER mark.<br />
.<br />
end)<br />
Brake lever free play<br />
: 10~30mm (at brake lever<br />
.<br />
Replace the front and rear brake disk if the thickness is<br />
less than 3mm.
This scooter is assembled with tubeless tires. Only tires marked with TUBELESS TIRE APPLICABLE<br />
can be used.<br />
Proper tire pressure will provide you with maximum stability, comfort riding and longer tire life. Please<br />
check the tire pressure periodically and adjust if necessary.<br />
Tire size<br />
Tire pressure under cool condition (Kpa)<br />
Front tire<br />
100/80-14<br />
225 22.5<br />
Rear tire<br />
120/80-14<br />
225 22.5<br />
Check the tires for any cut, nail or other sharp objects, and the rim for any indentation or deformation. In<br />
case of any damage, consult the local dealer for repairing, replacing and adjustment of the wheel balance.
When the tread height of the tire reaches the mark<br />
, the tire should be replaced.
Hold the rear brake lever to lock the rear wheel.<br />
.<br />
Insert the key into main switch, and turn to<br />
Turn kill switch to<br />
Return side stand<br />
Press start button to start the engine
.<br />
1. Push the scooter forward and the main stand returns.<br />
2. Sit on the seat with right foot on the footrest and left foot on the ground.<br />
3. Release rear brake lever;
4. Increase throttle slowly, and the scooter will start to<br />
run.<br />
5. Turn or release throttle for acceleration or deceleration.<br />
1. Throttle down<br />
Throttle down to lower the speed, and it is important to engage the front and rear brake simultaneously.
2. Engage the front and rear brake simultaneously.<br />
When driving down a steep slope, release the throttle, and engage the front and rear brake simultaneously.<br />
Don t brake c ontinuously; otherwise t he brake will be overheated which will r esult i n l ower brake e fficiency.<br />
.<br />
When you want to park the scooter, release the throttle, then engage the front and rear brakes simultaneously<br />
till the scooter is stopped. Turn the start key to , stop the engine.<br />
Step on the main stand with right foot, lift the scooter by holding the rear bracket and park the scooter.<br />
Lock the handlebar and pull out the key. (Refer to page 9).<br />
.<br />
1) Lock the handlebar and never leave the key in the main switch.<br />
2) Check the registration if it is correct or expired.
3) If possible, park the scooter in the garage.<br />
4) Use high quality anti-theft device.<br />
The maintenance interval is based on the accumulated mileage and is the guideline for maintenance and<br />
lubrication of the scooter. The maintenance interval shall be shorter if the scooter always works in foul<br />
conditions at high speed. Please consult our local dealer for maintenance. If the scooter has been overhauled or<br />
collided, please consult technicians of the local dealer to check the main parts such as the frame, steering part,<br />
and suspension.<br />
If necessary to adjust the emission, consult a specialized center.
Perform the instructions in the Inspection Before<br />
Driving section (Refer to P17) prior to each<br />
periodical maintenance.<br />
I: Inspecting, cleaning, adjusting, lubricating or<br />
replacing when necessary.<br />
C: Cleaning R: Replacing<br />
A: Adjusting L: Lubricating<br />
Item<br />
Interval<br />
Fuel pipe<br />
Throttle<br />
Air cleaner (2)<br />
Spark plug<br />
Valve clearance<br />
Engine oil<br />
Oil screen<br />
Carburetor idle speed<br />
Coolant (4)<br />
Cooling system<br />
Driving belt<br />
Gearbox oil<br />
Brake disc<br />
Brake system<br />
Brake light switch<br />
Brake lock<br />
Head lights<br />
Clutch shoe<br />
Main/ side stand<br />
Suspension<br />
Bolts, nuts, fasteners (3)<br />
Wheel and tire<br />
Steering fork bearing<br />
Battery<br />
Odometer reading (KMS)/month (1)<br />
which occurs first<br />
1000<br />
4000/<br />
6000<br />
8000/<br />
12000 12000/<br />
18000<br />
Page<br />
I I I<br />
I I I<br />
I R R R 28<br />
I R I 33<br />
I I I I<br />
R R for every 3000km 31<br />
C 31<br />
I I I I<br />
I<br />
29<br />
I<br />
I R for every 16000km<br />
R I<br />
I 32<br />
I<br />
I<br />
I I<br />
I<br />
I<br />
I<br />
I I<br />
I<br />
I<br />
I<br />
I<br />
I<br />
I<br />
I<br />
I<br />
I<br />
I<br />
I<br />
I<br />
I<br />
I<br />
I<br />
I I<br />
I I<br />
I<br />
I I<br />
I<br />
I for every 3000km<br />
21
Air cleaner is located up under the seat.<br />
1. Remove air cleaner bolts<br />
2. Remove top cover<br />
3. Take out air cleaner filter element<br />
4. Clean filter element with non-combustible or high flash<br />
point solvent, and then air-dry it.
Radiator is located in middle part of front foot deck. Clean dust and mud from the radiator periodically<br />
according to the road condition.<br />
Only use the high quality Ethylene Glycol based antifreeze with erosion inhibitor, which is special for<br />
aluminum engines. This scooter has been filled with coolant contains 50% anti-freezer and 50% water.<br />
.<br />
1. Remove right decorative plate and check the coolant storage<br />
capacity in reservoir tank Refer to page 5<br />
2. If the coolant level is at the L mark, remove the reservoir tank<br />
cover to add coolant until the coolant level is up to the H<br />
mark.<br />
3. The coolant capacity between H and L is 130mL ~ 330mL.
High quality engine oil is of ideal performance. Only high quality scooter engine oil SE or SF Grade with<br />
high de-pollution performance can be used. No additive is needed.<br />
SE Grade<br />
SF Grade<br />
SAE10W-30<br />
SAE15W-40<br />
SAE20W-50<br />
The viscosity of the engine oil shall be in accordance with<br />
the local climate condition. The figure on the right provided a<br />
guideline for selecting the engine oil viscosity for different atmospheric temperatures.
First filling: 0.9L Replacing: 0.85L<br />
Replacing interval: First time at 500kms, then every 3000kms<br />
Park the scooter with main stand and replace oil when the engine is<br />
still warm for complete drainage of the used oil.<br />
1. Remove the oil dip rod (refer to page 18) and oil filter cover ,<br />
and then screw drain bolt;<br />
2. Clean the oil screen with solvent.<br />
3. Assemble oil screen, spring, and oil screen cover and drain bolt.<br />
4. Fill the crankcase with qualified engine oil till it reaches up middle<br />
between UPPER and LOWER mark. When checking the oil level, screw the oil dip rod.<br />
5. Install oil dip rod.
Recommended gearbox oil type: SAE10W-30/SE<br />
1. Park scooter with main stand.<br />
2. Remove the filling bolt and drain bolt .<br />
3. Clean drain bolt, install and tighten it.<br />
4. Fill gear oil through the filling hole till it overflows.<br />
5. Install the filling bolt, and tighten it.
TYPE OF SPARK PLUG DPR7EA-9 NGK /D7RTC TORCH<br />
(1) Remove cap and remove spark plug with wrench.<br />
(2) Check the electrode and the central ceramic point for carbon deposit,<br />
or wearing. If necessary, replace the spark plug. Clean off the<br />
deposit with spark plug cleaning detergent or brush.<br />
(3) Measure the spark plug gap with a feeler gauge. Bend the side<br />
electrode to adjust the gap to 0.8mm~1.0mm. The gap should not<br />
be too small.<br />
Battery type 12V7Ah CF150T-6/CF125T-22<br />
12V10Ah<br />
CF150T-6A/CF125T-22A<br />
Open the seat, remove electric unit waterproof cover, and battery<br />
can be seen. Loosen the screws to take out the battery.
The main fuse is located on the starter relay under the seat on left<br />
lower side of electric unit waterproof cover, with rated current capacity<br />
of 20A. Remove starter relay coupler, and you will see it.<br />
Fuse box is located on the electric unit waterproof cover under the<br />
rear seat. Rated current capacity of fuse: 10A&5A.<br />
If the fuse is burnt frequently, it indicates short circuit or overload<br />
in the electrical system; you should consult the local dealer.<br />
.<br />
Replace the fuse: Remove the used fuse and install a new one.
The tools are in the compartment below the seat. These tools are enough for minor repairing, adjusting or<br />
part replacing.<br />
The tool kit includes:<br />
8 10mm open end wrench 12 14mm open end wrench<br />
13 15mm open end wrench S=5 internal hex wrench<br />
Double-end screwdriver<br />
16 18mm socket wrench<br />
Double-end screwdriver handle
The serial number of the frame and the engine are used for registration, applying driving license and<br />
ordering parts.<br />
When order or replace some parts, above numbers should be<br />
supplied.<br />
The frame number (VIN) is under trunk, remove VIN plate cover, and it can be seen.<br />
Label plate is on the front frame on right of engine.<br />
.<br />
The engine number<br />
Frame No.:(VIN)<br />
is marked on the rear left upper part.<br />
Engine No.:
If the scooter will be stored for a long time, such as in winter, necessary measures shall be taken to prevent<br />
damage or malfunction of parts. In addition, some repairing is necessary.<br />
1. Replace the engine oil and the oil screen.<br />
.<br />
2. Drain the fuel tank and carburetor completely.<br />
3. Remove the spark plug; fill the cylinder with 15 to 20 ml engine oil. Start the engine for several times to<br />
spread the oil over the cylinder.<br />
Install the spark plug.<br />
.<br />
4. Remove the battery, and store the battery in a place with no icing or direct sunlight. Charge the battery once a<br />
month.<br />
5. Clean all surfaces of the scooter and wipe dry. All the painted surfaces shall be coated with wax and anti-rust<br />
oil.<br />
6. Inflate the tires to the standard pressure. Park the scooter and support the tires with wooden blocks.<br />
7. Cover the scooter with a cover made of non-plastic or non-glue-coated cloth, and place it in a dry, shady and<br />
cool environment without direct sunlight.
1. Remove the scooter cover and wipe it clean. If the scooter has been stored for more than 4 months, replace the<br />
engine oil.<br />
2. Check the electrolyte s l evel. Charge t he battery, i f necessary.<br />
3. Fill the fuel tank.<br />
4. Perform the procedures specified in Inspection Before Driving (Page 17) and drive the scooter at lower speed<br />
in areas with less traffic.
Type<br />
Single cylinder, liquid cooled,<br />
4 stroke, horizontal<br />
Length<br />
1950 mm<br />
Bore<br />
Stroke<br />
58 57.8 mm<br />
Height<br />
1195 mm<br />
Compression Ratio<br />
11 1<br />
Width<br />
715 mm<br />
Displacement<br />
152.7 ml<br />
Wheel base<br />
1320 mm<br />
Ground clearance<br />
130 mm<br />
Type<br />
DPR7EA-9 NGK /D7RTC<br />
Gap<br />
0.8~1.0 mm<br />
Net Weight<br />
138 kg<br />
Front<br />
100/80-14 M/C 48L<br />
Engine oil<br />
Crankcase0.9L, Gearbox0.15L<br />
Rear<br />
120/80-14 M/C 58L<br />
Fuel tank (CF150T-6)<br />
8.0 L<br />
Fuel tank (CF150T-6A)<br />
7.5 L<br />
Max. Power (CF150T-6)<br />
8.3 kW/7500 r/min<br />
Max. Load<br />
150 kg<br />
Max Power (CF150T-6A)<br />
8.1 kW/8500 r/min<br />
Max Speed<br />
90 km/h
Fuel consumption<br />
2.5 L/100km<br />
Fuse<br />
20A/10A/5A<br />
Idle speed (CF150T-6)<br />
1600 160 r/min<br />
Turning signal<br />
F<br />
12V 10W 2<br />
Idle speed (CF150T-6A)<br />
1700 170 r/min<br />
Turning signal<br />
R<br />
12V 10W 2<br />
Instrument<br />
LED<br />
Final reduction ratio<br />
12.10<br />
Turning signal indicator<br />
LED<br />
High/Low beam indicator<br />
LED<br />
Battery<br />
CF150T-6<br />
12V 7Ah<br />
Side stand indicator<br />
LED<br />
Battery<br />
CF150T-6A<br />
12V 10Ah<br />
Fuel indicator<br />
LED<br />
Alternator<br />
AC Magneto<br />
Water temperature<br />
indicator<br />
LED<br />
Headlight (Low Beam)<br />
HS1/12V 35W/35W 1<br />
Headlight (High Beam)<br />
HS1/12V 35W/35W 1<br />
Headlight (Pilot light)<br />
W3W 12V 3W 2<br />
Brake/taillight<br />
12V 21W/5W
Type<br />
Single cylinder, liquid cooled,<br />
4 stroke, horizontal<br />
Length<br />
1950 mm<br />
Bore<br />
Stroke<br />
52.4 57.8 mm<br />
Height<br />
1195 mm<br />
Compression Ratio<br />
11 1<br />
Width<br />
715 mm<br />
Displacement<br />
124.6 ml<br />
Wheel base<br />
1320 mm<br />
Ground clearance<br />
130 mm<br />
Type<br />
DPR7EA-9 NGK /D7RTC<br />
Gap<br />
0.8~1.0 mm<br />
Net Weight<br />
138 kg<br />
Front<br />
100/80-14 M/C 48L<br />
Engine oil<br />
Crankcase0.9L, Gearbox0.15L<br />
Rear<br />
120/80-14 M/C 58L<br />
Fuel tank (CF125T-22)<br />
8.0 L<br />
Fuel tank (CF125T-22A)<br />
7.5 L<br />
Max. Power (CF125T-22)<br />
6.5 kW/7500 r/min<br />
Max. Load<br />
150 kg<br />
Max Power (CF125T-22A)<br />
6.7 kW/9000 r/min<br />
Max Speed<br />
85 km/h
Fuel consumption<br />
2.5 L/100km<br />
Fuse<br />
20A/10A/5A<br />
Idle speed (CF125T-22)<br />
1600 160 r/min<br />
Turning signal<br />
F<br />
12V 10W 2<br />
Idle speed (CF125T-22A)<br />
1700 170 r/min<br />
Turning signal<br />
R<br />
12V 10W 2<br />
Instrument<br />
LED<br />
Final reduction ratio<br />
12.10<br />
Turning signal indicator<br />
LED<br />
High/Low beam indicator<br />
LED<br />
Battery<br />
CF125T-22<br />
12V 7Ah<br />
Side stand indicator<br />
LED<br />
Battery<br />
CF125T-22A<br />
12V 10Ah<br />
Fuel indicator<br />
LED<br />
Alternator<br />
AC Magneto<br />
Water temperature<br />
indicator<br />
LED<br />
Headlight (Low Beam)<br />
HS1/12V 35W/35W 1<br />
Headlight (High Beam)<br />
HS1/12V 35W/35W 1<br />
Headlight (Pilot light)<br />
W3W 12V 3W 2<br />
Brake/taillight<br />
12V 21W/5W