Siemens Building Technologies, Inc. P84469-003 B 8 ... - Faraday
Siemens Building Technologies, Inc. P84469-003 B 8 ... - Faraday
Siemens Building Technologies, Inc. P84469-003 B 8 ... - Faraday

You also want an ePaper? Increase the reach of your titles
YUMPU automatically turns print PDFs into web optimized ePapers that Google loves.
INSTALLATION INSTRUCTIONS<br />
MULTI-HIGH-CANDELA FOUR WIRE APPLIANCES<br />
(WALL MOUNT VERSIONS)<br />
IMPORTANT – All audible and visual signaling appliances must be<br />
installed in accordance with all applicable national and local fire alarm<br />
codes and any other required regulatory agencies.<br />
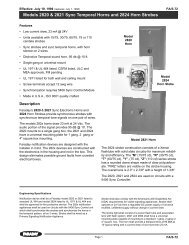
Series HS-HMC Multi-Candela Horn Strobe provides two selectable<br />
candela settings (135, 185). The HS-HMC allows for independent<br />
operation of the strobe circuit and the horn circuit. It is the ideal choice<br />
for retrofit applications as well as new installations. The HS-HMC<br />
appliance is UL Listed under Standard 1971 for Signaling Appliances<br />
for the Hearing Impaired and UL Standard 464 for Audible Signal<br />
Appliances. It is listed for indoor use only and can be mounted to<br />
double-gang, 4” backbox, 100mm European backbox or SHBBS<br />
surface backbox (See wiring and mounting information). This<br />
appliance is listed for wall mounting only. The HS-HMC appliance<br />
uses a xenon flashtube with solid state circuitry enclosed in a<br />
polycarbonate lens to provide maximum visibility and reliability for<br />
effective visible signaling.<br />
<strong>Siemens</strong> Series HS appliances provide a selectable continuous or<br />
Code 3 horn tone and non-synchronized strobe when connected<br />
directly to a Fire Alarm Control Panel (FACP). They can also provide a<br />
synchronized Code 3 (or March Time) horn tone and synchronized<br />
strobe when connected to a notification appliance circuit running the<br />
<strong>Siemens</strong> sync protocol. HS appliance can be field set for High (HI),<br />
medium (MED) dBA or low (LO) dBA sound output.<br />
NOTE: The Code 3 temporal pattern (1/2 second on, 1/2 second off,<br />
1/2 second on, 1/2 second off, 1/2 second on, 1-1/2 off and repeat) is<br />
specified by ANSI and NFPA 72 for standard emergency evacuation<br />
signaling. The Code 3 Horn should be used only for fire<br />
evacuation signaling and not for any other purpose.<br />
The HS-HMC is designed for use with either filtered DC or unfiltered<br />
full-wave-rectified (FWR) input voltage. All inputs are polarized for<br />
compatibility with standard reverse polarity supervision of circuit wiring<br />
by an FACP.<br />
NFPA 72/ANSI 117.1 conform to ADAAG Equivalent Facilitation<br />
Guidelines in using fewer, higher intensity strobes within the same<br />
protected area.<br />
NOTE: Refer to P/N 315-096363 for the maximum number of<br />
appliances on a single notification appliance circuit.<br />
SPECIFICATIONS:<br />
Table 1: UL Listed Models and Ratings<br />
Model*<br />
Operating Voltage<br />
(Special Application)<br />
Per UL 1971<br />
Strobe<br />
Candela<br />
(cd)<br />
(VDC/VRMS)<br />
HS-HMC 16.0-33.0 135/185<br />
*Available in red and white.<br />
Table 2: dBA Sound Output for 24VDC Models<br />
Description Volume<br />
Reverberant Per UL 464<br />
16.0VDC 24VDC 33.0VDC<br />
Low 80 83 86<br />
Continuous Horn Medium 85 88 91<br />
High 88 91 93<br />
Low 75 79 82<br />
Code 3 Horn Medium 80 84 86<br />
or March Time** High 84 87 89<br />
**Available in sync mode only.<br />
NOTES:<br />
1. The strobe will produce 1 flash per second over the Input Voltage range.<br />
2. This horn/strobe model meets the required light distribution patterns defined in UL1971.<br />
3. This model is UL Listed for indoor use with a temperature range of +32°F to +120°F (0°C to +49°C) and maximum humidity of 93% ± 2% RH. The<br />
effect of shipping and storage temperatures shall not adversely affect the performance of the appliance when it is stored in the original cartons and<br />
not subjected to misuse or abuse.<br />
CANDELA SETTING WILL DETERMINE THE CURRENT DRAW OF THE PRODUCT.<br />
Table 3: Current Ratings (Horn Only)<br />
Maximum RMS Current (Amps)<br />
Voltage Lo Med Hi<br />
DC 16-33VDC 0.027 0.068 0.110<br />
FWR 16-33VRMS 0.041 0.050 0.094<br />
Table 3A: Current Ratings (Strobe Only)<br />
Maximum RMS Current (Amps)<br />
Voltage 135cd 185cd<br />
DC 16-33VDC 0.318 0.445<br />
FWR 16-33VRMS 0.482 0.684<br />
<strong>Siemens</strong> <strong>Building</strong> <strong>Technologies</strong>, <strong>Inc</strong>.<br />
<strong>P84469</strong>-<strong>003</strong> B<br />
8 Fernwood Road Page 1 of 3<br />
Florham Park, New Jersey 07932.
B<br />
R<br />
When calculating the total current: Use Tables 3 & 3A to determine the highest value of “RMS Current” for an individual HS-HMC then multiply the value<br />
by the total number of HS Appliances. Be sure to add the currents for any other appliances powered by the same source and to include any required<br />
safety factors.<br />
Note: These notification appliances are UL Listed as “Special Application”. They are intended to be used only with <strong>Siemens</strong> notification appliance<br />
circuits.<br />
Note: Refer to the installation instructions for the appropriate NAC to find the maximum allowed voltage drop. Use this value along with the current draw<br />
for the appliance to determine the allowable wire resistance. The maximum wire resistance between strobes shall not exceed 35 ohms.<br />
MAKE SURE THAT THE TOTAL RMS CURRENT REQUIRED BY ALL APPLIANCES THAT ARE CONNECTED TO THE SYSTEM’S PRIMARY AND<br />
SECONDARY POWER SOURCES DO NOT EXCEED THE POWER SOURCES’ RATED CAPACITY OR THE CURRENT RATINGS OF ANY FUSES<br />
ON THE CIRCUITS TO WHICH THESE APPLIANCES ARE WIRED. OVERLOADING POWER SOURCES OR EXCEEDING FUSE RATINGS COULD<br />
RESULT IN LOSS OF POWER AND FAILURE TO ALERT OCCUPANTS DURING AN EMERGENCY, WHICH COULD RESULT IN PROPERTY<br />
DAMAGE AND SERIOUS INJURY OR DEATH TO YOU AND/OR OTHERS.<br />
CAUTION: The strobe is not designed to be used on coded systems in which the applied voltage is cycled on and off.<br />
NOTE: The horn circuit is compatible with coded systems only if the unit is wired for independent horn and strobe operation per Figure 3.<br />
SOUND OUTPUT (SPL) AND CANDELA SETTINGS:<br />
Figure 1:<br />
Showing Location of Candela Selector and Jumper Plugs<br />
TOP<br />
CANDELA SELECTOR<br />
P83511 ( )<br />
AH<br />
C1<br />
R5<br />
135 185<br />
J3<br />
+ STR -<br />
J2<br />
J1 C<br />
H O<br />
M D<br />
L E<br />
TB 1 3<br />
+ AUD -<br />
J2<br />
J1<br />
H<br />
M<br />
L<br />
C<br />
O<br />
D<br />
E<br />
3<br />
CANDELA<br />
POINTER<br />
Factory setting is on 185 Candela, Medium dB and Code 3 (or March Time).<br />
WARNING: THE CANDELA SELECT SWITCH MUST BE FIELD SET TO THE REQUIRED CANDELA INTENSITY BEFORE INSTALLATION.<br />
WHEN CHANGING THE SETTING OF THE CANDELA SELECT SWITCH, MAKE CERTAIN THAT IT “CLICKS” IN PLACE. AFTER CHANGING THE<br />
CANDELA SETTING, THE APPLIANCE MUST BE RETESTED TO VERIFY PROPER OPERATION.<br />
WARNING: THE HS APPLIANCES MUST BE FIELD SET TO THE DESIRED TONE AND dBA SOUND OUTPUT LEVEL BEFORE THEY ARE<br />
INSTALLED. THIS IS DONE BY PROPERLY INSERTING JUMPER PLUGS IN ACCORDANCE WITH THESE INSTRUCTIONS.<br />
H<br />
M<br />
L<br />
HIGH<br />
HORN<br />
SETTING<br />
Figure 2: Jumper Plug Settings for High, Medium, Low dB,<br />
Code 3 (or March Time) Horn and Continuous Horn Setting.<br />
J2 J2 J2<br />
H<br />
M<br />
L<br />
MEDIUM<br />
HORN<br />
SETTING<br />
H<br />
M<br />
L<br />
LOW<br />
HORN<br />
SETTING<br />
J1 J1<br />
C C<br />
O O<br />
D D<br />
E E<br />
3 3<br />
CODE 3 CONTINUOUS<br />
HORN * HORN<br />
SETTING SETTING<br />
• Use needle nose pliers to pull and properly insert the jumper<br />
plug.<br />
• No jumper plug is needed for continuous horn setting.<br />
However, it is recommended that the jumper plug be retained<br />
in the unit for future use (if needed) as shown in Figure 2.<br />
• The HS-HMC must be set for Code 3 horn when used with the<br />
sync module. If the HS-HMC audible is connected to a coded<br />
system, the continuous horn setting must be used<br />
WIRING AND MOUNTING INFORMATION:<br />
Figure 3: Audible signal and strobe operate independently.<br />
Figure 3A: Audible and strobe operate in unison. Shunt wires are<br />
supplied.<br />
FROM FIRE ALARM CONTROL<br />
PANEL (FACP) OR<br />
+<br />
-<br />
PRECEDING APPLIANCE<br />
TO NEXT APPLIANCE +<br />
OR END OF LINE -<br />
RESISTOR (EOLR).<br />
TB1<br />
+ STR - + AUD -<br />
- FROM FACP OR<br />
+ PRECEDING APPLIANCE<br />
+ -<br />
TO NEXT APPLIANCE<br />
OR EOLR.<br />
FROM FACP OR +<br />
PRECEDING APPLIANCE -<br />
RED SHUNT WIRE<br />
TB1<br />
+ STR - + AUD -<br />
BLACK SHUNT WIRE<br />
- TO NEXT APPLIANCE<br />
+ OR EOLR<br />
<strong>Siemens</strong> <strong>Building</strong> <strong>Technologies</strong>, <strong>Inc</strong>.<br />
<strong>P84469</strong>-<strong>003</strong> B<br />
Page 2 of 3
Figure 4:<br />
• HS-HMC appliances have in-out wiring terminals that accepts two #12 to #18 American Wire Gauge<br />
(AWG) wires at each screw terminal. Strip leads 3/8” inches for connection to screw terminals.<br />
• Break all in-out wire runs on supervised circuit supervision as shown in Figure 4. The polarity shown<br />
in the wiring diagrams is for the operation of the appliances. The polarity is reversed by the FACP<br />
during supervision.<br />
The following figures (A-D) show the maximum number of field wires (conductors) that can enter the backbox used with each mounting option. If these<br />
limits are exceeded, there may be insufficient space in the backbox to accommodate the field wires and stresses from the wires could damage the<br />
product. Check that the installed product will have sufficient clearance and wiring room prior to installing backboxes and conduit, especially if sheathed<br />
multiconductor cable or 3/4" conduit fittings are used.<br />
Figure A<br />
FLUSH (4" BOX)<br />
4" SQ. X 2-1/8"<br />
DEEP BACKBOX<br />
#8-32 SCREWS<br />
SCREW COVERS<br />
MAXIMUM NUMBER OF CONDUCTORS<br />
AWG #18 AWG #16 AWG #14 AWG #12<br />
8 8 8 4<br />
Figure C<br />
SURFACE MOUNTING<br />
BACKBOX<br />
(MT-SUR-BOX)<br />
#8-18 SCREWS<br />
WOOD SCREWS<br />
SCREW COVERS<br />
MAXIMUM NUMBER OF CONDUCTORS<br />
AWG #18 AWG #16 AWG #14 AWG #12<br />
8 8 8 8<br />
Figure B<br />
FLUSH (2-GANG BOX)<br />
2-GANG x 3-1/2"<br />
DEEP BACKBOX<br />
#6-32 SCREWS<br />
SCREW COVERS<br />
MAXIMUM NUMBER OF CONDUCTORS<br />
AWG #18 AWG #16 AWG #14 AWG #12<br />
8 8 8 8<br />
Figure D<br />
CONCEALED CONDUIT MOUNTING<br />
EXISTING<br />
BOX IN WALL<br />
BACKBOX<br />
(MT-SUR-BOX)<br />
#8-18 SCREWS<br />
SCREW COVERS<br />
MAXIMUM NUMBER OF CONDUCTORS<br />
AWG #18 AWG #16 AWG #14 AWG #12<br />
8 8 8 8<br />
MOUNTING PROCEDURES:<br />
1. This HS-HMC model can be flush mounted to a 100mm<br />
backbox (Figure A) or double-gang backbox (Figure B). It<br />
can also be surface mounted to a indoor/outdoor backbox<br />
(Figures C & D). Mounting hardware for each mounting<br />
option is supplied.<br />
2. Conduit entrances to the backbox should be selected to<br />
provide sufficient wiring clearance for the installed product.<br />
Do not pass additional wires (used for other than the<br />
signaling appliance) through the backbox. Such additional<br />
wires could result in insufficient wiring space for the<br />
signaling appliance.<br />
3. When terminating field wires, do not use more lead length<br />
than required. Excess lead length could result in insufficient<br />
wiring space for the appliance.<br />
4. Use care and proper techniques to position the field wires in<br />
the backbox so that they use minimum space and produce<br />
minimum stress on the product. This is especially important<br />
for stiff, heavy gauge wires and wires with thick insulation or<br />
sheathing.<br />
5. Connect field wires to the HS-HMC terminal block (polarity<br />
must be observed). Bend the field wires up 90° at the<br />
connection to the terminal block.<br />
6. Carefully push the field wires into the backbox by hand.<br />
Press the HS-HMC to the backbox, verifying that it is seated<br />
and aligned correctly.<br />
7. Fasten the HS-HMC to the backbox using the supplied<br />
screws.<br />
The 135/185cd settings are Listed for use in sleeping or non-sleeping areas when installed in accordance with appropriate NFPA Standards and the<br />
Authority Having Jurisdiction.<br />
WARNING: IF 135/185 CANDELA STROBES ARE INSTALLED IN SLEEPING AREAS, THEY SHOULD BE WALL MOUNTED AT LEAST 24"<br />
BELOW THE CEILING AS FOLLOWS: (1) THE ON-AXIS (CENTER OF LENS) LIGHT OUTPUT SHOULD BE DIRECTED AT THE EYELIDS OF THE<br />
SLEEPING PERSON, E.G. PILLOW END OF BED, BED HEAD; (2) NO PART OF THE BED SHALL BE MORE THAN SIXTEEN FEET FROM THE<br />
STROBE NOTIFICATION APPLIANCE. INSTALLERS MUST ADVISE OWNERS AND OPERATORS OF BUILDINGS WITH SLEEPING<br />
OCCUPANTS, E.G. HOTELS AND MOTELS, TO WARN GUESTS, RESIDENTS AND EMPLOYEES TO NOT MOVE THE BED LOCATION TO A<br />
POSITION VIOLATING POINTS (1) AND (2) ABOVE OR SERIOUS INJURY AND/OR LOSS OF LIFE MAY OCCUR DURING A FIRE EMERGENCY.<br />
WARNING: A SMALL POSSIBILITY EXISTS THAT THE USE OF MULTIPLE STROBES WITHIN A PERSON'S FIELD OF VIEW, UNDER<br />
CERTAIN CIRCUMSTANCES, MIGHT INDUCE A PHOTO-SENSITIVE RESPONSE IN PERSONS WITH EPILEPSY. STROBE REFLECTIONS IN A<br />
GLASS OR MIRRORED SURFACE MIGHT ALSO INDUCE SUCH A RESPONSE. TO MINIMIZE THIS POSSIBLE HAZARD, SIEMENS STRONGLY<br />
RECOMMENDS THAT THE STROBES INSTALLED SHOULD NOT PRESENT A COMPOSITE FLASH RATE IN THE FIELD OF VIEW WHICH<br />
EXCEEDS FIVE Hz AT THE OPERATING VOLTAGE OF THE STROBES. SIEMENS ALSO STRONGLY RECOMMENDS THAT THE INTENSITY AND<br />
COMPOSITE FLASH RATE OF INSTALLED STROBES COMPLY WITH LEVELS ESTABLISHED BY APPLICABLE LAWS, STANDARDS,<br />
REGULATIONS, CODES AND GUIDELINES.<br />
NOTE: This equipment has been tested and found to comply with the limits for a Class B digital appliance, pursuant to Part 15 of the FCC Rules. These<br />
limits are designed to provide reasonable protection against harmful interference in residential installation. This equipment generates, uses and can<br />
radiate radio frequency energy and, if not installed and used in accordance with the instructions, may cause harmful interference to radio<br />
communications. However, there is no guarantee that interference will not occur in a particular installation. If this equipment does cause harmful<br />
interference to radio or television reception, which can be determined by turning the equipment off and on, the user is encouraged to try to correct the<br />
interference by one or more of the following measures: 1) Reorient or relocate the receiving antenna, 2) <strong>Inc</strong>rease the separation between the<br />
equipment and receiver, 3) Connect the equipment into an outlet on a circuit different from that to which the receiver is connected, and 4) Consult the<br />
dealer or an experienced radio/TV technician for help.<br />
<strong>Siemens</strong> <strong>Building</strong> <strong>Technologies</strong>, <strong>Inc</strong>.<br />
<strong>P84469</strong>-<strong>003</strong> B<br />
Page 3 of 3