MPC-1000 Plus Fire Alarm System Control Unit Owner's ... - Faraday
MPC-1000 Plus Fire Alarm System Control Unit Owner's ... - Faraday
MPC-1000 Plus Fire Alarm System Control Unit Owner's ... - Faraday
- No tags were found...

Create successful ePaper yourself
Turn your PDF publications into a flip-book with our unique Google optimized e-Paper software.
12120 OWNER'S MANUAL12507/12508 Serial Relay <strong>Unit</strong>/Serial Relay Extender - 447073 ...............................................XI-1912509/12510 Serial Annunciator <strong>Unit</strong>/Serial Annunciator Extender - 447074 .............................XI-21401403 <strong>Fire</strong> <strong>Alarm</strong> Accessory Enclosure - 447138 ..................................................................XI-23XII.APPENDIX-E: GLOSSARY .............................................................................................. XII-1P/N 447192 Issue I (preliminary 10/31/2001)iv
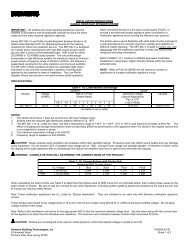
12120 OWNER'S MANUALI. INTRODUCTIONCONTROL UNIT LIMITATIONSThis control unit may not show an alarm condition without compatible initiating devices (smoke detectors,etc.) and notification devices (horn, lights, etc.) connected to it. Electrical ratings of the initiation andnotification appliances must be compatible with the electrical ratings of the control unit and must beproperly interconnected. The wiring used for interconnection must be large enough to carry the totalcurrent for all appliances without excessive voltage drop.The control unit must be connected to a dedicated primary electrical source that has a high degree ofreliability and adequate capacity for this control unit. The only means of disconnecting this power sourceshall be available only to authorized personnel and clearly marked "<strong>Fire</strong> <strong>Alarm</strong> Circuit <strong>Control</strong>".The control unit must also have connected to it a battery set (24v) that has enough capacity to properlyoperate the system for 24 or 60 (depending on system type) hours standby and 5 minutes alarm perNFPA 72 (chapter 1). These batteries do lose capacity with age. Batteries must be replaced when theyfail to provide the control unit with the required standby and alarm power or after 4 years, whicheverhappens first. These batteries must be checked for performance at least two (2) times a year or moreoften if local requirements dictate.<strong>Fire</strong> alarm control units cannot last forever. Even though this control unit was made to last for theexpected life of the fire alarm system, any part could fail at any time. Therefore a regular test programshould be followed and documented to make sure that each part of the system is tested as in Chapter 7of NFPA 72 or more often if dictated by local code requirements. Malfunctioning units must be replacedor repaired immediately by factory authorized service personnel.NOTE: This control unit is designed to show an alarm condition when theinitiating devices connected to it detect specific conditions. These conditionsmay or may not represent a life-threatening condition. Also, evacuation of abuilding or area unnecessarily may subject individuals to an unnecessaryhazard. Therefore, it is most important that the building owner, manager, orrepresentative promulgate, distribute, and/or post instructions describingsteps to be taken when the fire alarm control unit signals an alarm condition.These instructions should be developed in cooperation and conformance withrepresentatives of the local authority having jurisdiction.As a backup or precautionary measure, it is strongly suggested that one of these steps should be to notifythe local fire department of an abnormal condition even where the DACT option (or similar device) isincluded in the system.P/N 447192 Issue I (preliminary 10/31/2001) I-1
12120 OWNER'S MANUALINSTALLATION AND WARRANTY INFORMATIONWarranty Information: <strong>Faraday</strong>, LLC (the Manufacturer) provides a limited warranty to the originalpurchaser of this product. The original purchaser is the party to whom the manufacturer issued its salesorder, generally the manufacturer's distribution. In order to preserve this warranty, it is important that onlypersons who have been properly trained and authorized by the manufacturer service the product.Other parties involved in the installation of this product may have also provided a warranty, which may bedifferent from that of the manufacturer. The manufacturer will only be responsible to the originalpurchaser and only for the manufacturer's own warranty. For further information regarding themanufacturers warranty, contact the original purchaser.OWNER'S MANUAL: The owner's manual does not purport to cover all the details or variations in theequipment described, nor does it provide for every possible contingency to be met in connection withinstallation, operation and maintenance. All specifications subject to change without notice. Shouldfurther information be desired or should particular problems arise which are not covered sufficiently, thematter should be referred to the installer or original purchaser listed below.Installer Information:Company:Installer:Phone:Address:City:State:Zip:Date installed:Installer's signature:Original Purchaser Information:Company:Phone:Address:City:State:Zip:Purchaser's purchase order number:Date purchased:<strong>Faraday</strong> sales order acknowledgment number:Original purchaser's signature:P/N 447192 Issue I (preliminary 10/31/2001) I-2
12120 OWNER'S MANUALPREFACEAlong with the use of this instruction manual, the appropriate following standards and the manufacturer'sinstructions for initiating and notification devices should be used to install and maintain a functioning firealarm signaling system.NFPA 70 National Electrical CodeNFPA 72 National <strong>Fire</strong> <strong>Alarm</strong> CodeNFPA 101 Life Safety CodeFor other standards that may apply contact the authority having jurisdiction.For NFPA publications, contact:National <strong>Fire</strong> Protection AssociationBatterymarch ParkQuincy, Massachusetts 02269P/N 447192 Issue I (preliminary 10/31/2001) I-3
12120 OWNER'S MANUALThis page is intentionally blank.P/N 447192 Issue I (preliminary 10/31/2001) I-4
12120 OWNER'S MANUALII. DESCRIPTIONSSYSTEM DESCRIPTIONThe 12120 is an advanced modular fire alarm control unit. It features addressable/analog detection,programming, and memory capability. Its base configuration includes one addressable device circuit, withfour conventional notification appliance circuits.The basic 12120 control unit mounts in a 14-3/8" x 14-3/8" back-box with overall cover size of 14-3/4" x14-21/32". Operating controls and indicators are mounted on the plate with a polycarbonate decal foridentification. An 80-character LCD display provides specific indications for addressable devices whileLEDs indicate general panel status.Semi-flush mounting kits are available for the enclosure.HARDWARE CONFIGURATIONThe main board mounts in the rear of the enclosure. The power supply is physically contiguous with themain board. The 12120 main board provides the interface for external analog system connections, for theaddressable device circuit, four notification appliance circuits, remote signaling and indicating interfaces,and the electronics of the main system power supply. Optional boards mount on the main board.The display board mounts on the front plate, allowing it to carry the controls and displays which must beaccessible.All normal operation is controlled from the front of the control unit via push-button switches. Displays areprovided by an 80-character, alphanumeric, backlit LCD display and by discrete LED indicators for majorcontrol unit functions.The 80-character LCD display is used to display event data, including alarms and troubles, identificationof zone or device, and presentation of history. The display is controlled by a set of four push-buttonswitches commanding the control processor. A back light is included in the display to assure visibility inlow light, but to conserve power, it is only activated during a reported event or on operation of a displaycontrol switch.Individual LEDs on the panel are provided to indicate SYSTEM ALARM, PREALARM, SUPERVISORY,ALARM SILENCED, SYSTEM TROUBLE and AC POWER ON. Direct push-button controls are providedfor ALARM SILENCE, TROUBLE SILENCE/ACKNOWLEDGE, MENU and SYSTEM RESET.P/N 447192 Issue I (preliminary 10/31/2001)II-1
12120 OWNER'S MANUALMINIMUM CONTROL UNIT CONFIGURATIONPower SupplyA 3A, 24V nominal power supply provides all operating power to the control unit for both standby andalarm conditions. Sufficient battery charging capability is available to charge sealed lead-acid batterieswithin code requirements for 60 hour quiescent plus 5 minutes alarm. The cabinet will hold batteries onlyup to 7 AH. The back-up battery is 24V, maintained by floating on the power supply. The power supply isphysically contiguous with the main board.Addressable Device CircuitThe 12120 control unit has one addressable device circuit, that is programmed for connection to <strong>Faraday</strong>or <strong>System</strong> Sensor addressable devices.<strong>Faraday</strong> Addressable Devices:The addressable device circuit drives up to 60 addressable devices, detectors and/or modules.<strong>System</strong> Sensor Addressable Devices:The addressable device circuit drives up to 99 addressable sensors and 99 addressablemodules.Notification Appliance CircuitsThe 12120 control unit has four independent notification appliance circuits (NACs). Each circuit can beselected to give continuous output or one of eight sounding patterns available in the control unit. There isalso a system coder capable of zone coded operation. All of the NACs are power limited and can bewired for Class A (Style Z) or Class B (Style Y) operation.RS485 Communications CircuitThe 12120 control unit has a RS485 Communications Circuit that will drive up to 16 remote LCDannunciators and 8 Serial Relay <strong>Unit</strong>s and Serial Annunciator <strong>Unit</strong>s on the RS485 communication line.Status RelaysThree dry relay contacts are provided. These contacts are dedicated to alarm, trouble and supervisoryindications. The relay contacts are form C and are rated 1A @ 28VDC resistive.OPTIONAL CONTROL UNIT CONFIGURATIONA maximum control unit configuration can include all of the minimum configuration items plus additions asnoted below. Details of these accessories are given in Appendix D.City Tie BoardThe <strong>Faraday</strong> 12101 city tie board provides local energy and polarity reversal connections. The polarityreversal connections provide a trouble circuit and an alarm circuit with optional trouble output.RS232 Communication BoardThe <strong>Faraday</strong> 12103 RS232 communication board will allow event data to a serial printer or terminal.DACT BoardThe <strong>Faraday</strong> 12105 Digital <strong>Alarm</strong> Communication Transmitter board will send control unit status data to aremote receiving station.P/N 447192 Issue I (preliminary 10/31/2001)II-2
12120 OWNER'S MANUALBATTERY SETSThe 12120 control unit is designed to use only sealed lead-acid or equivalent batteries for back-up power.Attaching a close-coupled battery box, if required, may use battery sets beyond the physical capacity ofthe enclosure (7 AH).AUXILIARY MODULESRemote LCD AnnunciatorThe <strong>Faraday</strong> 12506 remote LCD annunciator consists of a backlit 80 character LCD alphanumericdisplay, 4 menu buttons, 4 dedicated buttons for operator interaction, 6 LED indicators, and a securitykey-switch. The display and controls on the annunciator are the same as those on the front of the controlunit, including a key-switch for security. The back light operates only when the data are being accessed,to conserve power.Up to sixteen annunciators may be addressed by the communications circuit, but some may require12408 auxiliary power supplies, depending on the total accessory power loading.Serial Relay <strong>Unit</strong> and Serial Relay ExtenderThe <strong>Faraday</strong> 12507 includes a processor board and a relay board. The processor board receivescommands from the control unit for activating the relays and transmits supervision and control functionsto the control unit. The processor board can control up to 3 relay boards. Each relay board provides 8relays with form C contacts. The control unit can address up to 8 Serial Relay <strong>Unit</strong>s and/or SerialAnnunciator <strong>Unit</strong>s. 12408 auxiliary power supplies will be required to power units beyond the control unitcapability.Serial Annunciator <strong>Unit</strong> and Serial Annunciator ExtenderThe <strong>Faraday</strong> 12509 includes a processor board and an annunciator driver board. The processor boardreceives commands from the control unit for activating the outputs and transmits supervision and controlfunctions to the control unit. The processor board can control up to 4 annunciator driver boards. Eachdriver board provides 16 supervised outputs for LEDs or incandescent lamps. The control unit canaddress up to 8 Serial Relay <strong>Unit</strong>s and/or Serial Annunciator <strong>Unit</strong>s. 12408 auxiliary power supplies willbe required to power units beyond the control unit capability.ADDRESSABLE DEVICES<strong>Faraday</strong> Addressable DetectorsThe control unit processor sends the sensitivity and pre-alarm settings to the detectors and polls thedetectors as to their status. The detector determines normal, trouble, pre-alarm or alarm conditions andrelays the status to the control unit.Variable ThresholdsThe obscuration level for alarm can be adjusted from the control unit on a permanent or time-variablebasis. This facility also means that the control unit can display information on individual points formaintenance or service.P/N 447192 Issue I (preliminary 10/31/2001)II-3
12120 OWNER'S MANUALOperator AlertsThe control unit can trigger an alarm or trouble automatically on the occurrence of a number of conditionsof the detector. These include:• Maintenance alert• Pre-alarm alert• No response• Incorrect responseOther <strong>Faraday</strong> Addressable DevicesHeat DetectorsAddressable heat sensing detectors may be intermixed on the circuit for locations where heat sensingmay be the most effective detection mode. The heat detectors may be programmed, through the controlunit, for rate of rise operation.Addressable Modules (Monitor and <strong>Control</strong>)In addition to detectors, the circuit can communicate with addressable modules, allowing initiating devicesor notification appliances with local power sources, and supervising the power sources.Manual StationsAddressable manual stations may be intermixed on the circuit with proper response programmed into thecontrol unit.<strong>System</strong> Sensor Addressable/Analog SensorsSince an analog fire sensor is essentially a transducer rather than a warning device, all of the operatingcontrols are included in the control unit processor program. The control unit interprets the pulse widthsfrom the sensor and determines normal, trouble or alarm conditions.Variable ThresholdsThe obscuration level for alarm can be adjusted from the control unit on a permanent or time-variablebasis. This facility also means that the control unit can display information on individual points formaintenance or service. These displays include:• Status• Current % obscuration for smoke sensorsOperator AlertsThe control unit can trigger an alarm or trouble automatically on the occurrence of a number of conditionsof the sensor devices. These include:• Maintenance alert• Pre-alarm alert• No response• Incorrect responseP/N 447192 Issue I (preliminary 10/31/2001)II-4
12120 OWNER'S MANUALOther <strong>System</strong> Sensor Addressable DevicesHeat SensorsCompatible heat sensing addressable devices may be intermixed on the circuit for locations where heatsensing may be the most effective detection mode.Addressable Modules (Monitor and <strong>Control</strong>)In addition to sensors, the circuit can communicate with addressable modules, allowing initiating devicesor notification appliances with local power sources, and supervising the power sources.Manual StationsSingle and dual-stage manual stations with monitor modules may be intermixed on the circuit with properresponse programmed into the control unit. For fastest response, manual stations should be connectedso that their address is 1-9.PROCESSOR CONTROLLED OUTPUT ZONESWhile the notification appliance circuits are essentially hardware circuits, the fact that the outputs arecommanded and controlled by the processor does provide more versatility than in a total hardwaresystem. All functional selections are included in the control unit programming process.Output Sounding PatternsThe notification appliance circuits are operable in different sounding patterns. Any circuit is selectable toany of eight software-generated patterns or continuous sounding. For convenience, three of the patternsare preprogrammed for March Time, Temporal, and Californian patterns.<strong>Control</strong> of Audible SilencingIt is possible to select an “auto-silence” mode, adjustable from 0 to 255 minutes. Each notificationappliance circuit programmed for alarm silence sequence, will be silenced upon time-out of the autosilencetimer. The alarm silenced LED will flash, indicating the auto-silence time-out.Audible Silence InhibitIn addition to designation of waterflow zones, the entire control unit may be programmed to inhibit audiblesilence for 0, 1, 3, or 6 minutes from the last alarm. <strong>System</strong> reset may also be inhibited.P/N 447192 Issue I (preliminary 10/31/2001)II-5
12120 OWNER'S MANUALEVENT HISTORYThe control unit includes a non-volatile memory recording up to 500 system events. Identified alarm,trouble, supervisory trouble, and other significant events will be recorded along with the date and time ofoccurrence, and can be inspected by operating front panel push buttons.Events recorded in the history are:• <strong>Alarm</strong>, Trouble, or Supervisory conditions.• Drill, Tornado, Recall and General Evacuation.• Activation of NACs or modules used for sounders or strobes.• <strong>Unit</strong> used for command functions. (Silence, acknowledge, reset, etc.)• PAS_INHIBIT switch activation.• <strong>Alarm</strong> silence (manual and automatic).• <strong>System</strong> reset.• Power up.• Entry to Programmer Mode.• Secondary configuration edited.• Validity check on backup configuration. (Errors detected or no errors detected)• Running of comparison function. (Same or different)• Replacement of primary configuration.• Execution of Auto-program.• Exit from Programmer Mode.• <strong>System</strong> time or date change.• Input point disable/enable.• Start and stop of walk test.• Expiration of Walk Test Timer.• Expiration of re-ring timer.• <strong>Alarm</strong>/trouble/supervisory Acknowledgment.• Trouble/supervisory restored to normal.• <strong>Alarm</strong> verification counter rollover.• Pre-alarm activation.• Pre-alarm acknowledgment/restore.• <strong>Alarm</strong> of zone with no outputs.• Activation of points defined for logging.• Sensor maintenance alertsP/N 447192 Issue I (preliminary 10/31/2001)II-6
12120 OWNER'S MANUALGENERAL DESIGN FEATURESEnvironmentalAll hardware is suitable for use in an interior or protected location.Power LimitingThe AC power and battery wiring are not power limited. All other circuits leaving the control unit arepower limited, provided the proper installation rules are maintained.Ground Fault DetectionThe control unit provides ground fault detection and a ground fault will trigger the common fault buzzerand system trouble LED.Transient ProtectionTransient protection devices are provided where needed to meet the requirements of UL864.Security FunctionsProcessor control and addressing allow inclusion of several functions to assure security of the system.Multi-level password protection of programming functions prevents unauthorized configuration changes.Device type supervision: If the type reported by an addressable sensor or module, does not agree withthe configuration, the system reports a trouble.Device address supervision: The system checks that all configured devices on the addressable devicecircuit and the RS485 circuit responds to an address poll. If a configured device is missing, the systemreports a trouble. The system also polls unused addresses periodically. If a device responds to such apoll of a non-configured device, the system reports a trouble. Two devices addressed the same alsocause a trouble to be reported.REGULATORY STANDARDSThe 12120 control unit meets the requirements of industry and government regulatory agencies as noted.Federal Communications CommissionThe 12105 meets the requirements of the Code of Federal Regulations (CFR 47), Part 68, for connectionof equipment to the public switched telephone network.Underwriters LaboratoriesThe 12120 <strong>Fire</strong> <strong>Alarm</strong> control unit is listed under UL Standard 864 for compliance to NFPA Standard 72for fire serviceP/N 447192 Issue I (preliminary 10/31/2001)II-7
12120 OWNER'S MANUALGENERAL SPECIFICATIONSOperating specifications for the 12120 are as follows:Environmental• Operating temperature32 - 120°F (0 - 49°C)• Relative humidityUp to 85% @ 86°F (30°C)Primary Supply• Primary Input Voltage: 120 VAC (60 Hz) nominal (12120-120)• Maximum primary input current: 1.3A at 120 VACSecondary and Trouble Power Supply• 24 volt lead-acid battery set:• Maximum Charge Voltage: 27.8 VDC• Maximum Charge Current: 1.0 A• Maximum Input Current: 3.5A• Battery capacity: 7-38 A.H. (over 7 A.H. requires separate enclosure)Auxiliary Power Outputs• Current:0.5 amp maximum available for auxiliary power outputs, RS485 circuit and option boards0.4 amp maximum per power output• Non-Resettable Power OutputsPower limitedVoltage: 24 VDC nominalRipple: 1.5 VAC maximum• Resettable Power OutputPower limitedVoltage: 24 VDC nominalRipple: 1.5 VAC maximumStatus RelaysIncludes alarm, supervisory and trouble.• Contact Rating:1 A, 28 VDC maximum, resistive• Form “C” ContactNotification Appliance Circuits• Four Class A, Style Z/Class B, Style Y circuits• Power limited• Supervised• Maximum Standby Current: 3.4mA• <strong>Alarm</strong> Voltage: 24 VDC nominal• Maximum <strong>Alarm</strong> Current: 1.5 A• Maximum Ripple: 16 VAC• Maximum Loop Drop Voltage: 1.0 VDCRS485 Communications Circuit• Power limited• SupervisedP/N 447192 Issue I (preliminary 10/31/2001)II-8
12120 OWNER'S MANUAL• Voltage: 24 VDC nominal• Current:0.5 amp maximum available for auxiliary power outputs, RS485 circuit and option boards0.4 amp maximum for RS485 circuit• Maximum wire loop resistance: 25 ohms/line• Communications: RS485Addressable Device Circuit• Power limited• Supervised• Voltage: 24 VDC nominal• Maximum Current (shorted): 0.25A• Maximum wire loop resistance: 20 ohms/line<strong>Faraday</strong> Addressable Devices:• One Style 4 or 6 circuit• 60 detectors and modules max.<strong>System</strong> Sensor Devices:• One Style 4, 6 or 7 circuit• 99 sensors (smoke, heat) max• 99 monitor and control modules max.City Tie (Optional City Tie Board P/N 12101)CACTLEReverse Polarity: Selectable for <strong>Alarm</strong> with Trouble or <strong>Alarm</strong> only operation• Power limited• Supervised by receiver for short or open circuit.• Supervised by control unit for grounded circuit.• Voltage: 24 VDC nominal• Current: 0.020A maximum (normal or trouble)• Current: 0.025A maximum (shorted)• Ripple: 1.5 VAC maximumReverse Polarity: Programmable for Trouble or Supervisory or either operation• Power limited• Supervised by receiver for short or open circuit.• Supervised by control unit for grounded circuit.• Voltage: 24 VDC nominal• Current: 0.020A maximum (normal or alarm)• Current: 0.025A maximum (shorted)• Ripple: 1.5 VAC maximumLocal Energy• Not power limited• Supervised for open or grounded circuit by control unit.• Voltage: 24 VDC nominal• Standby Current: 0.007A maximum• <strong>Alarm</strong> Current: 0.400A maximum• Ripple: 1.5 VAC maximum• Maximum wire loop resistance: 30 ohms• Trip coil impedance: 14.5 ohmsRS232 Output (Optional RS232 Board P/N 12103)• Power limited• Not supervised• Voltage Range: -15 VDC to +15 VDC• Maximum Current (shorted): 0.050A• Baud Rate: 4800• Maximum wire loop resistance: 25 ohmsP/N 447192 Issue I (preliminary 10/31/2001)II-9
12120 OWNER'S MANUALDACT Circuit (Optional DACT Board P/N 12105)• Power limited• Supervised for short or open circuit• Maximum Voltage: 60 VDC• Maximum Current (shorted): 0.100 AP/N 447192 Issue I (preliminary 10/31/2001)II-10
12120 OWNER'S MANUALIII. CONTROL UNIT OPERATIONOPERATION INSTRUCTIONSA. Standby ConditionIn normal standby operation, the green AC POWER ON LED should be illuminated and no other indicatoroperating. The display will show the system name, “<strong>System</strong> Normal” announcement and the current date,day, and time.B. <strong>Alarm</strong> Condition1) Normal <strong>Alarm</strong>sa) In case of alarm, the system alarm LED will operate in a flashing mode and the buzzer will sound.Local audible and visual signals and remote alarm signals will operate, and the LCD panel display willindicate the zone or point initiating the alarm.b) On receipt of an alarm, proceed in accordance with the established emergency plan. Assure that allpersonnel are accounted for, and notify the <strong>Fire</strong> Department.c) To silence the audible after evacuation, where permitted by the codes and control unit programming,press ALARM SILENCE. The alarm audible will be silenced, the alarm silence LED will beilluminated and a system trouble indicated. Operating the ACKNOWLEDGE button will silence thelocal buzzer and change the LED alarm indicator from flashing to steady.2) Waterflow <strong>Alarm</strong>s<strong>Alarm</strong>s detected on zones designated “waterflow” indicate sprinkler operation and the audible alarmscannot be silenced in this condition. Operation of alarm silence will produce no effect.3) Positive <strong>Alarm</strong> Sequence (PAS)a) Activation of a point programmed for PAS, including two-stage manual stations, activates the <strong>Alarm</strong>LED, display and buzzer (pulsing), but delays all other outputs (system and user) for 15 seconds.b) Operation of the ACKNOWLEDGE button within 15 seconds will add 165 seconds to the timer value,to make the total delay 180 seconds.c) If an ALARM SILENCE button is pressed or the sensor returns to a normal reading before theextended PAS delay time, the alarm sequence is aborted.d) An alarm condition on a sensor programmed for direct alarm response (such as the key switch on amanual station) will over-ride the PAS timer and activate the outputs.4) Pre-Signala) A point activated by a PRE-SIGNAL alarm activates the alarm relay, alarm DACT, city tie, alarmLEDs and buzzers, and all user programmed outputs normally, but does not activate any NACs.b) Operation of the ALARM SILENCE button less than 180 seconds after initiation of the alarm preventsoperation of the NACs.c) Failure to act within 180 seconds will result in activation of the NACs.d) Receipt of another pre-signal or standard alarm during the delay period immediately sounds theNACs.e) A SYSTEM RESET is required to return the zone and input point to normal, whether or not the NACswere activated.NOTE: Do not reset the system until the alarm condition has been cleared. The LCD display on the willindicate the area in which the alarm was detected. The detector initiating the alarm will display a light. Ifmore than one zone is in alarm, the last zone to be alarmed will be indicated on the display.P/N 447192 Issue I (preliminary 10/31/2001)III-1
12120 OWNER'S MANUALf) When the alarm condition has been corrected, return the system to standby operation by pressing theSYSTEM RESET button.C. Trouble Conditiona) In case of a trouble condition, the system trouble LED and any programmed trouble LEDs will beflashing, the LCD display will identify the problem, and the buzzer will sound. Refer to the applicablesection of the system manual to determine the probable cause of the trouble and the action to betaken.b) When a trouble has been noted, the buzzer may be silenced by pressing the ACKNOWLEDGEbutton. The trouble LEDs will change to a continuous display. If the trouble has not been correctedwhen the trouble re-ring timer expires, the trouble display will revert to its original condition and thebuzzer resound.c) If the control unit is programmed for trouble acknowledge required, when the indicated troublecondition has been cleared, the system will revert to standby condition after the ACKNOWLEDGEbutton is pressed.Note: Some trouble conditions require a system reset to restore the control unit.D. Supervisory ConditionSupervisory troubles are indicated similar to regular system troubles except that when a supervisorytrouble is cleared, the cleared condition continues to be indicated until it is acknowledged.E. MaintenanceIn order to insure continued safe and reliable operation of the fire alarm system, periodic inspection andtesting should be performed in accordance with applicable NFPA 72 standards.CAUTION: If the system has remote connections to the <strong>Fire</strong> Department or other monitor, be sure todisable the remote signals and/or notify the remote monitoring station before performing test operations.For any required service, refer to the system manual or contact a factory authorized representative.P/N 447192 Issue I (preliminary 10/31/2001)III-2
12120 OWNER'S MANUALADDITIONAL OPERATING PROCEDURESIn addition to the basic fire alarm instructions above, several features are included to facilitatemaintenance and increase the versatility of the system. Following are procedures to call up thesefunctions.A. Lamp TestTo operate the lamp test, press the MENU button. The LCD display will change to a MENU screen.Press the button next to the “More” indication twice. Then press the button by the “Lamp Test” indication.All lamps on the unit being operated will then light. Operating the button next to “Esc” will then return thecontrol unit to normal display. Note that the lamp test operates the indicators only on the unit beingoperated, and no record is reported to system history.B. DrillTo activate a fire alarm drill, proceed as follows:1. Press "MENU".2. On the MENU display, select "More".3. At the next screen, select "DRILL".4. At the next screen, select "Yes".5. Operate ALARM SILENCE to terminate drill signal.C. RecallTo signal recall after a drill, proceed as follows:1. Press "MENU".2. At the next screen, select "More".3. Select "RECALL".6. At the next screen, select "Yes".4. Operate ALARM SILENCE to terminate recall signal.D. Pre-<strong>Alarm</strong>1. A pre-alarm condition is annunciated by Pre-alarm LEDs and buzzers on the control unit and RS485LCD Annunciators and RS485 Remote Processors. The LEDs flash and buzzers are on steady untilacknowledgment.2. Acknowledging the Pre-alarm condition puts LEDs on steady and buzzers off.3. If pre-alarm has been acknowledged and restores to normal, the condition clears. If the systemproceeds into an alarm condition, the pre-alarm condition clears whether or not it has beenacknowledged and is replaced by alarm.E. General <strong>Alarm</strong>To activate a general alarm, proceed as follows:1. Press "MENU".2. On the MENU display, select "GENERAL ALARM".3. At the next screen, select "Yes".4. Silence and reset the system as with any alarm.F. TornadoTo activate a tornado alarm, proceed as follows:1. Press "MENU".2. On the MENU display, select "TORNADO".3. At the next screen, select "Yes".4. Operate ALARM SILENCE to terminate tornado signal.P/N 447192 Issue I (preliminary 10/31/2001)III-3
12120 OWNER'S MANUALG. HistoryThe last 500 system events are time-tagged and recorded for review in the user level event history. Thishistory is available to anyone with the door key, but may be erased only at the maintenance security level.1. Operation of history:a) New events overwrite old when filled.b) Printer (if used) records all events.c) For more information see the event history section2. Access to history:To recall past events, proceed as follows:a) Press MENU button.b) Operate button identified as "More".c) Operate button identified as "More".d) Operate button identified as "View History".e) Operate upper left button for previous event display.f) Operate lower left button for next event display.g) Operate upper right button to exit to MENU DISPLAY.P/N 447192 Issue I (preliminary 10/31/2001)III-4
12120 OWNER'S MANUAL12120 OPERATING INSTRUCTIONS<strong>Alarm</strong> OperationIn case of alarm, the <strong>System</strong> <strong>Alarm</strong> LED flashes, LCD will display alarm conditions and the panel buzzersounds. Local audible and visual signals and remote alarm signals operate.When an alarm occurs, proceed according to the established emergency plan. Assure that all personnelare accounted for, and notify the <strong>Fire</strong> Department to advise of the alarm and/or verify that an automaticsignal has been received at the <strong>Fire</strong> Department.Authorized Personnel OnlyTo silence the alarm:To silence the notification appliances after evacuation, where permitted, press the <strong>Alarm</strong> Silenceswitch. The notification appliances and panel buzzer will be silenced, and LED indications willchange from flashing to continuous. The <strong>Alarm</strong> Silenced LED will be lit.Note: Do not reset the panel until the alarm has been cleared.Warning: <strong>Alarm</strong> silence inhibit (if set) prevents the alarm from being silenced for apredetermined time.To reset panel after alarm:When the alarm condition is corrected, return the panel to normal standby operation by pressingthe <strong>System</strong> Reset switch.Trouble is indicated by:<strong>System</strong> Trouble LED flashesLCD will display trouble conditionsPanel buzzer soundsTrouble OperationTo silence the trouble buzzer:Press the Trouble Silence switch. The Trouble Silenced LED lights and the specific troubleLED(s) may change to continuous display. When the trouble condition has been cleared, youmay need to reset the panel to restore to a normal standby condition.Warning: Leaving the panel in a trouble condition may cause a fire alarm condition not toinitiate a fire alarm sequenceNormal Standby ConditionThe green AC Power On LED will be lit and no other indicators on.For service, contact: ___________________________________________Telephone Number: ___________________________________________Frame these instructions and mount them near the control unit for operator reference.P/N 447192 Issue I (preliminary 10/31/2001)III-5
12120 OWNER'S MANUAL12506 OPERATING INSTRUCTIONS<strong>Alarm</strong> OperationIn case of alarm, the <strong>System</strong> <strong>Alarm</strong> LED flashes, LCD will display alarm conditions and the buzzersounds. Local audible and visual signals and remote alarm signals operate.When an alarm occurs, proceed according to the established emergency plan. Assure that all personnelare accounted for, and notify the <strong>Fire</strong> Department to advise of the alarm and/or verify that an automaticsignal has been received at the <strong>Fire</strong> Department.Authorized Personnel OnlyTo silence the alarm:To silence the notification appliances after evacuation, where permitted, operate the ButtonEnable keyswitch and press the <strong>Alarm</strong> Silence switch. The notification appliances and buzzerwill be silenced, and LED indications will change from flashing to continuous. The <strong>Alarm</strong> SilencedLED will be lit.Note: Do not reset the panel until the alarm has been cleared.Warning: <strong>Alarm</strong> silence inhibit (if set) prevents the alarm from being silenced for apredetermined time.To reset panel after alarm:When the alarm condition is corrected, return the panel to normal standby operation by using theButton Enable keyswitch and then pressing the <strong>System</strong> Reset switch.Trouble is indicated by:<strong>System</strong> Trouble LED flashesLCD will display trouble conditionsBuzzer soundsTrouble OperationTo silence the trouble buzzer:Operate the Button Enable keyswitch and press the Trouble Silence switch. The <strong>System</strong>Trouble LED changes to continuous display. When the trouble condition has been cleared, youmay need to reset the panel to restore to a normal standby condition.Warning: Leaving the panel in a trouble condition may cause a fire alarm condition not toinitiate a fire alarm sequenceNormal Standby ConditionThe green Power On LED will be lit and no other indicators on.For service, contact: ___________________________________________Telephone Number: ___________________________________________Frame these instructions and mount them near the annunciator for operator reference.P/N 447192 Issue I (preliminary 10/31/2001)III-6
12120 OWNER'S MANUALIV. CONTROL UNIT INSTALLATIONPARTS SUPPLIED447039, 447040 or 447041 Back-box Assembly (red, white or black)413768, 413769 or 413770 Door Assembly (red, white or black)413535 Transformer Assembly (120VAC) 18965 #6-32 Keps Nuts (6)413688 Front Plate Assembly 29529-11 #6-32 x 1/4” Screws (16)413763 Main Board 942155 #8-32 Sems Screw, (4)413694 Display Board 942667 24K Ohm 1/2W Resistor (4)446054 Cable Assembly, 16 Pin 443269 Screwdriver447071 Lexan Window 447192 Owner’s Manual447196 Overlay 447194 Operating Instructions943966 Programming Keypad 942664 120 Ohm 1/2W Resistor (2)The fire alarm control unit must be mounted in a properly accessible location as required by applicablecodes. Any auxiliary battery box or other accessory not connected through a protective device or a circuitdesigned for remote connection must be within the same room and connected through electrical conduit.Installation is to be done only by qualified personnel who have thoroughly read and understood theseinstructions.CAUTIONSIt is recommended that the printed circuit boards be removed for any procedure that may cause dust,metal shavings, grease or any such matter that may affect the circuit boards and/or parts. There may beseveral sources of power into the control unit. Each source must be disconnected prior to installing orremoving modules, connecting or disconnecting wiring, and programming jumpers.CONTROL UNIT LOCATIONThe control unit should be located near an exit at ground level, where the normal ambient temperature ismaintained within the control unit specification (See General Specifications in Section III). The unitshould be in an area that is free of dust, vibration, moisture and condensation.ENCLOSURE MOUNTINGFollow the appropriate instructions for surface or semi-flush mounting.P/N 447192 Issue I (preliminary 10/31/2001)IV-1
12120 OWNER'S MANUALA. Surface Mounting InstructionsTo mount the enclosure:1. Mount the enclosure at a convenient height for viewing indicators and operating switches.2. Use four #10 lag screws (not supplied) to secure the control unit to the wall. The screw type andlength must support the control unit, options and battery set.Note: You may need a different screw type, depending on the wall material.3. The 12408 Auxiliary Power Supply or battery enclosure may be mounted immediately below the mainenclosure, close nipple, allowing a minimum of 1 inch in between the enclosures for clearancebetween the doors. Keeping the wire run to the control unit short will keep the voltage drop to aminimum.P/N 447192 Issue I (preliminary 10/31/2001)IV-2
12120 OWNER'S MANUALB. Semi-Flush Mounting InstructionsTo mount the enclosure:1. Mount the enclosure at a convenient height for viewing indicators, and operating switches.2. Use four #10 lag screws (not supplied) to secure the control unit to the wall. The screw type andlength must support the control unit, options and battery set.Note: You may need a different screw type, depending on the wall material.3. The back-box can be mounted up to 3 1/2 inches into the wall. Place the semi-flush trim around theback-box and affix to the wall with four #10 x 3/4 inch wood screws (provided with trim).Note: You may need a different screw type, depending on the wall material.4. The 12408 Auxiliary Power Supply or battery enclosure may be mounted immediately above or belowthe main enclosure, close nipple, allowing a minimum of 3 inches in between the enclosures forclearance between the semi-flush trims. Keeping the wire run to the control unit short will keep thevoltage drop to a minimum.P/N 447192 Issue I (preliminary 10/31/2001)IV-3
12120 OWNER'S MANUALC. Knock-Outs1. Prepare the enclosure for electrical wiring, break out the appropriate conduit entry points. Note thewiring diagram requirements for non-power limited and power limited wiring separation.2. Attach conduit (if required) and run wires as required. Label each field cable for future reference.D. Main Board Installation1. Secure the board to the back of enclosure using six of the provided #6-32 x 1/4 screws (P/N 29529-11).2. Set jumpers J7, J8, J4, J6 & J9 to the “F” position for <strong>Faraday</strong> or to “S” for <strong>System</strong> Sensoraddressable devices.E. Transformer Mounting1. Place the transformer assembly (P/N 413535) over the studs on the left side of the enclosure.Mounting the transformer can be accomplished before mounting the enclosure if desired.2. Tighten transformer-mounting nuts (P/N 18965).3. Plug the transformer assembly into connector P5 on the Main Board.P/N 447192 Issue I (preliminary 10/31/2001)IV-4
12120 OWNER'S MANUALF. Front Plate Assembly1. Secure Display Board (P/N 413694) to Plate Assembly using ten #6-32x1/4” screws (P/N29529-11).2. Apply Overlay (P/N 447196) to Plate Assembly (P/N 413688)G. Front Plate Mounting1. Plug the Cable Assembly (P/N 446054) into connector P4 of the Display Board and to connector P1of the Main Board.2. Secure the Front Plate Assembly to backbox using four #8-32 sems screws (P/N 942155).P/N 447192 Issue I (preliminary 10/31/2001)IV-5
12120 OWNER'S MANUALH. Door Assembly1. Secure the Lexan window (P/N 447071) to door assembly using four #6-32 keps nuts (P/N 18965).2. Place the Door Assembly onto hinges of the Back-box Assembly.I. AC Supply ConnectionWire the AC supply to terminal block TB2 on the main board. The supply should originate from aseparate, fused circuit. It should be provided with a breaker or other means of isolation.Observe the wiring order -- the bottom terminal is ground and must be wired back to the electrical panelground (earth) bonding point or another good ground acceptable to the authority having jurisdiction andthe electrical inspector. The neutral wire must be taken back to the electrical panel neutral distributionbar and must not be grounded./!\ Dangerous voltages will be present on this terminal block and on other componentssurrounding it and the transformer when the AC supply is turned on. Do not touch.J. Battery InstallationWarning:Improper battery connections or shorting battery terminals maydamage the system and/or batteries and may cause personalinjuries.Place the batteries in the space provided in the bottom of the back-box. If larger than 7 AH battery set isrequired, a separate enclosure must be used. The <strong>Faraday</strong> 14050 may be used for battery sets 18 AHand smaller. The <strong>Faraday</strong> BE-1S may be used for battery sets 38 AH and smaller.The control unit uses a 24V battery set. Connect the two 12V batteries (or four 6V batteries) in serieswith #12 AWG wire, minimum. Route the battery leads to the left of the enclosure and up to the batterytermination block, TB5. The battery leads are not power-limited.Observe polarity. Connect the B- terminal from the main board into the black or - terminal of the batteryset and the B+ terminal from the main board into the red or + terminal of the battery set.P/N 447192 Issue I (preliminary 10/31/2001)IV-6
12120 OWNER'S MANUALK. Powering the <strong>Control</strong> <strong>Unit</strong>Apply AC power to the control unit AC POWER ON LED, SYSTEM TROUBLE LED, and the troublebuzzer should be on.L. Checking Supervised CircuitsTo check the supervised circuits of the control unit:1. Place a 24K ohm resistor (color-coded: red, yellow, orange) across each set of NAC terminals.2. Push SYSTEM RESET button.3. The SYSTEM TROUBLE LED, and the trouble buzzer should be off.4. Discard 24K ohm resistors after initial testing is completeM. Optional ModulesFollow the installation instructions provided in Appendix D.N. <strong>System</strong> WiringBefore connecting the field wiring, check the wiring for opens, shorts, grounds and stray voltages.Warning:Damage may result if a high voltage insulation tester isused on wiring while connected to the control unit.Terminate the field wiring to the main board in accordance with the diagrams in Section V and the systemdesign documents.NOTE: All wiring must be in accordance with local codes and the National Electrical Code. Useonly FPL, FPLR and/or FPLP as described in Article 760 of the National Electric Code.O. Check <strong>System</strong> OperationCheck for proper operation of all the system functions. See Section II for Operation Instructions.P/N 447192 Issue I (preliminary 10/31/2001)IV-7
12120 OWNER'S MANUALThis page is intentionally blank.P/N 447192 Issue I (preliminary 10/31/2001)IV-8
12120 OWNER'S MANUALV. SYSTEM WIRINGBasic system wiring and detector siting must be in accordance with NFPA 72 or other instructions fromthe appropriate local authority. <strong>Unit</strong> connections and limitations are as indicated on the wiring diagramincluded below.Devices that may be satisfactorily used with the control unit are shown in the compatible device listing inAppendix B.Wire reference data are included in Appendix A.CONTROL UNIT WIRING OVERVIEWThe overall arrangement of boards in the control unit is shown in the following diagram.132*1. Main Board2. 12105 DACT Board or 12101 City Tie* (Note: When using DACT, 12103 cannot be used)3. 12103 RS-232 Interface BoardP/N 447192 Issue I (preliminary 10/31/2001) V-1
12120 OWNER'S MANUALWIRING SEPARATIONAll high voltage and non-power limited wiring must be kept separate from power limited wiring. A ¼”separation must be maintained, with high voltage and non-power limited wiring running in separateconduit openings from power limited wiring.AC13E2*FA. Non-power limited - High Voltage(AC power) or BB. Non-power limited - High Voltage(AC power) or AC. Power limitedD. Non-power limited(Battery If external enclosure required)E. Non-power limited(Phone line or local energy box)F. Power limited or GG. Power limited or FBDGPRIMARY AND SECONDARY POWER WIRINGThe AC main connections and the battery connections must be made along the left-hand side of theboard. Route all high voltage and non-power limited wiring together and away from power limited wiring.120VAC 60Hz1.3A max., SupervisedNon-Power LimitedACNGNDKeep All Non-Power Limited WiringSeparate from Power Limited Wiring24V Battery Set(7 to 38AH)SupervisedNon-Power LimitedP/N 447192 Issue I (preliminary 10/31/2001) V-2
12120 OWNER'S MANUALSTATUS RELAYS AND AUXILIARY POWER OUTPUTSWIRINGThe right lower edge of the main board provides for connection of contacts and auxiliary powerconnections.ALARMSUPERVISORY TROUBLE - + - R - + - +Status Relay Contacts(Shown in normal standby condition)1A@28VDC max., ResistiveFor Power Limited Source, UnsupervisedAuxiliary Power Outputs0.4A max.@24VDC nominalUnsupervised, Power Limited(Maximum current of all auxiliary outputs,RS485 Circuit and option boards is 0.5A.)<strong>System</strong> Power Requirement CalculationsDevice Item Max.(Amps) Total (Amps)12120 <strong>Control</strong> <strong>Unit</strong> 0.200 0.200Addressable Device Circuit Power # of Devices X 0.0002 AmpsAuxiliary Power Outputs *Depends on devices installed12101 City Tie Board 0.05512103 RS232 Communication Board 0.00812105 DACT Board 0.05412506 Remote LCD Annunciator * 0.03012507/12508 Serial Relay <strong>Unit</strong> * 0.03012509/12510 Serial Annunciator <strong>Unit</strong> * 0.030Total must not exceed 0.75 AmpsAuxiliary Power Supply* Connect a 12408 auxiliary supply when power requirement calculation indicates that an additionalsource is required. For further information, refer to the installation instructions in Appendix DBattery Size CalculationsFor calculation of battery size requirements see appendix A.P/N 447192 Issue I (preliminary 10/31/2001) V-3
12120 OWNER'S MANUALNAC WIRINGAt the right hand side of the main board the terminal blocks are used for the connection of notificationappliances. Four individual NACs marked A through D are provided and the polarity shown is when theNAC is activated.24K 1/2W<strong>Faraday</strong> P/N 10807Notification Appliance Circuit-Style Y, Class B+Supervised, Power LimitedSee Owner’s Manual forCompatible DevicesPolarity shown in activated conditionNotification Appliance Circuit-Style Z, Class A+Supervised, Power LimitedSee Owner’s Manual forCompatible DevicesSee TypicalWiring aboveSee TypicalWiring aboveNAC Rating:<strong>Alarm</strong> Voltage: 24VDC nominalMax. <strong>Alarm</strong> Current: 1.5AMax. Ripple: 16VACMax. Wire Voltage Drop: 1.0VDCMax. Standby Current: 1.0mANOTE: The maximum current forall NACs is 2.5A.P/N 447192 Issue I (preliminary 10/31/2001) V-4
12120 OWNER'S MANUALRS485 COMMUNICATIONS CIRCUITThe RS485 communication circuit can address up to 16 standard annunciators and/or 8 remoteprocessors to drive graphic annunciation or relay modules. Devices on the circuit may be connected upto 4000 feet from the control unit. At the top of the main board the terminal blocks are used for theconnection of remote serial devices.Serial Interface Circuit24VDC nominal, 0.4A max.Wire Resistance-25 ohms/line (4000’ max)Wire Type-Twisted Pair for dataSupervised, Power LimitedSee Owner’s Manual for Compatible Dev icesRemote Device PowerWhen connecting devices on the RS485 communications circuit, a limited amount of current is availablefrom the control unit. If more current supply is required for the connected devices, auxiliary power mustbe provided to each insufficiently powered device. Each address on the circuit must be fully poweredfrom either control unit or auxiliary power (no combined source can be configured).Remote Device DataWhen connecting devices on the RS485 communications circuit, the data wires must be daisy chainedand with no T-taps to preserve the integrity of the data. Each end (two places) must be terminated with a120 ohm termination resistor. The following diagrams show the proper wiring.P/N 447192 Issue I (preliminary 10/31/2001) V-5
12120 OWNER'S MANUALADDRESSABLE DEVICE CIRCUITThe basic configuration of the 12120 control unit includes one addressable device circuit. The control unitcan be programmed for operation with <strong>Faraday</strong> or <strong>System</strong> Sensor addressable devices. These are polledby the control unit every few seconds and input or output functions communicated to determine devicestatus or function. The control unit monitors all device addresses for alarm and trouble conditions.Addressable Device CircuitStyle 4 or 6/7 Operation(set jumper P1 for proper style)24VDC nominalWire Resistance-20 ohms/lineSupervised, Power LimitedSee Owner’s Manual for Compatible DevicesStyle6/74Addressable Device Wiring DiagramsProper connections for UL Listed compatible addressable devices are indicated below. Refer also to theinstruction sheets packed with each device.Sensors and modules may be wired together according to several NFPA defined wiring styles. The wiringstyle that is appropriate for your installation should be determined from the relevant building codes andthe Authority Having Jurisdiction.P/N 447192 Issue I (preliminary 10/31/2001) V-6
12120 OWNER'S MANUALStyle 4 wiring permits branching of circuit connections. The control equipment supervises modulesbecause they are active and must respond periodically to the control units interrogation.ADDRESSABLE DEVICE CIRCUITWIRING / OPERATION COMPARABLE TO NFPA STYLE “4”SUPERVISED,POWER LIMITEDTO OPTIONALBRANCH(ES) OFLOOP CIRCUITNote:<strong>Faraday</strong> Addressable Devices:Detectors, Monitor Modules, or <strong>Control</strong> Modules up to a maximum of 60 devices per addressabledevice circuit. Maximum of 20 devices per Isolator Module. Maximum of 12 Isolator Modules peraddressable device circuit.<strong>System</strong> Sensor Addressable Devices:Sensors, Monitor Modules, or <strong>Control</strong> Modules up to a maximum of 99 Sensors and 99 Modulesper addressable device circuit. Recommended maximum of 25 devices per Isolator Module.P/N 447192 Issue I (preliminary 10/31/2001) V-7
12120 OWNER'S MANUALStyle 6 provides redundant communication paths.ADDRESSABLE DEVICE CIRCUITWIRING / OPERATION COMPARABLE TO NFPA STYLE “6”SUPERVISED,POWER LIMITEDNote:<strong>Faraday</strong> Addressable Devices:Detectors, Monitor Modules, or <strong>Control</strong> Modules up to a maximum of 60 devices per addressabledevice circuit. Maximum of 20 devices between Isolator Modules. Maximum of 12 IsolatorModules per addressable device circuit.<strong>System</strong> Sensor Addressable Devices:Sensors, Monitor Modules, or <strong>Control</strong> Modules up to a maximum of 99 Sensors and 99 Modulesper addressable device circuit. Recommended maximum of 25 devices between IsolatorModules.P/N 447192 Issue I (preliminary 10/31/2001) V-8
12120 OWNER'S MANUALStyle 7 may be used where it is required that a single break or short in the circuit does not cause anymodules to stop functioning.ADDRESSABLE DEVICE CIRCUITWIRING / OPERATION COMPARABLE TO NFPA STYLE “7”SUPERVISED,POWER LIMITEDEACH DEVICE MUST HAVETWO ASSOCIATEDISOLATOR MODULES WITHWIRING ENCLOSED INCLOSED NIPPLED CONDUIT.EACH CIRCUITMUST HAVE TWOASSOCIATEDISOLATORMODULES WITHWIRINGENCLOSED INCLOSED NIPPLEDCONDUIT.EACH DEVICE MUST HAVETWO ASSOCIATEDISOLATOR MODULES WITHWIRING ENCLOSED INCLOSED NIPPLED CONDUIT.Note:EACH DEVICE MUST HAVETWO ASSOCIATEDISOLATOR MODULES WITHWIRING ENCLOSED INCLOSED NIPPLED CONDUIT.<strong>Faraday</strong> Addressable Devi ces:Not applicable to Style 7 wiring.<strong>System</strong> Sensor Addressable Devices:Sensors, Monitor Modules, or <strong>Control</strong> Modules up to a maximum of 99 Sensors and 99 Modulesper addressable device circuit. Maximum of 1 device between Isolator Modules. When using the9298 or 9299 Isolator Base, it will be wired in place of a 9160 and the addressable sensor shownin the wiring above (one 9160 Isolator is required per sensor with an isolator base).P/N 447192 Issue I (preliminary 10/31/2001) V-9
12120 OWNER'S MANUALAddressable/Analog SensorsEach sensor uses a sensor address between 01 and 99 on an addressable device circuit. The device isregularly scanned by the control unit and checked for its current sensor status. The control unit willinterpret and respond to the analog data as programmed. Each time the device is scanned the integralred visible LEDs will flash. In the event of an alarm condition the red LEDs will illuminate and latch on.8406 Low Profile Photoelectric Sensor with ThermalThe 8406 Low Profile Photoelectric Sensor (<strong>System</strong> Sensor 2251T) allows programmable analogsensitivity with fixed thermal temperature of 135° F. Requires a 9189, 9296 or 9298 base (<strong>System</strong>Sensor B210LP, B224RB or B224BI).8407 or 8408 Thermal Sensor9152 Photoelectronic SensorThe 9152 (<strong>System</strong> Sensor 2551B) allows programmable analog sensitivity. Requires a 9155, 9156,9181, 9297 or 9299 base (<strong>System</strong> Sensor B501B, B501BH, B501, B524RB or B524BI).9153 Photoelectronic Sensor with ThermalThe 9153 (<strong>System</strong> Sensor 2551THR) allows programmable analog sensitivity with fixed thermaltemperature of 135° F. Requires a 9155, 9156, 9181, 9297 or 9299 base (<strong>System</strong> Sensor B501B,B501BH, B501, B524RB or B524BI).9154 or 9182 Thermal SensorThe 9154 (<strong>System</strong> Sensor 5551B) has a fixed operating temperature of 135° F. The 9182 (<strong>System</strong>Sensor 5551R) has a fixed operating temperature of 135° F with rate-of-rise detection. Requires a 9155,9156, 9181, 9297 or 9299 base (<strong>System</strong> Sensor B501B, B501BH, B501, B524RB or B524BI).9163 Ionization SensorThe 9163 (<strong>System</strong> Sensor 1551B) allows programmable analog sensitivity. Requires a 9155, 9156,9181, 9297 or 9299 base (<strong>System</strong> Sensor B501B, B501BH, B501, B524RB or B524BI).9187 Low Profile Photoelectronic SensorThe 9187 Low Profile Photoelectric Sensor (<strong>System</strong> Sensor 2251) allows programmable analogsensitivity. Requires a 9189, 9296 or 9298 base (<strong>System</strong> Sensor B210LP, B224RB or B224BI).9188 Low Profile Ionization SensorThe 9188 Low Profile Ionization Sensor (<strong>System</strong> Sensor 1251) allows programmable analog sensitivity.Requires a 9189, 9296 or 9298 base (<strong>System</strong> Sensor B210LP, B224RB or B224BI).NOTE: The devices are set at the factory for address 00. This is a default code. Duringinstallation set address to the predetermined address code.P/N 447192 Issue I (preliminary 10/31/2001) V-10
12120 OWNER'S MANUAL9155, 9156 or 9181 Addressable/Analog BasesThe 9155 or 9181 (<strong>System</strong> Sensor B501B or B501) base is a standard design for use with anaddressable/analog sensor. Provides connection to an optional remote LED. The 9181 is flange-less forspecial mounting applications.The 9156 (<strong>System</strong> Sensor B501BH) audible sensor base is designed for use with an addressable/analogsensor. The 9156 provides means to obtain a local audible alarm at the specific sensor location. Oncethe 9156's associated sensor has latched into the alarm state, the integral horn in the 9156 will sound. Itwill remain on until the sensor is successfully reset. A regulated power supply is required for the integralhorn.9189 Low Profile Addressable/Analog BaseThe 9189 (<strong>System</strong> Sensor B210LP) Low Profile base is used with the 9187 and 9188 addressable/analogLow Profile sensors. Provides connection to an optional remote LED.P/N 447192 Issue I (preliminary 10/31/2001) V-11
12120 OWNER'S MANUALTypical Base Wiring Diagram (9155, 9181 & 9189)From AddressableDevice CircuitOptional <strong>Faraday</strong> 9180 Remote <strong>Alarm</strong>LED (<strong>System</strong> Sensor RA400Z)<strong>Faraday</strong> 9155, 9181 or 9189 BASE:(<strong>System</strong> Sensor B501B, B501 or B210LP)To NextAddressableDeviceTypical Horn Base Wiring Diagram (9156)<strong>Faraday</strong> 9156 BASE:(<strong>System</strong> Sensor B501BH)<strong>Faraday</strong> 9157/9158 Monitor Module(<strong>System</strong> Sensor M500MB/M501M)(9157 module shown)From AddressableDevice CircuitM500MB47K EOL ResistorSupplied with unit24VDCPowerSupply(See Note 4)<strong>Faraday</strong> PM6849 EOL relay(<strong>System</strong> Sensor A77-716B)Notes:1. This wiring diagram shows only general information about this device. For specific wiring andinstallation information, read the instructions provided with the device.2. Wire Size: In alarm, no more than 3.0V drop from power supply to end of power supply loop.3. For power supply supervision use an EOL relay with a 9157 or 9158 monitor module as shown.(Relay contact shown with power applied)4. From the control unit auxiliary power output or an external 24VDC regulated power supply that mustbe power limited and listed for <strong>Fire</strong> Protective Signaling Use.P/N 447192 Issue I (preliminary 10/31/2001) V-12
12120 OWNER'S MANUAL9296 & 9297 Relay BaseThe 9297 (<strong>System</strong> Sensor B524RB) is designed for use with an addressable/analog sensor and providesan alarm relay contact. The 9296 (<strong>System</strong> Sensor B224RB) is used with Low Profile sensors.From AddressableDevice Circuit<strong>Faraday</strong> 9296 or 9297 BASE:(<strong>System</strong> Sensor B524RB or B224RB)To NextAddressableDeviceNotes:1. This wiring diagram shows only general information about this devi ce. For specific wiring andinstallation information, read the instructions provided with the device.9298 & 9299 Isolator BaseThe 9299 (<strong>System</strong> Sensor B524BI) is designed for use with an addressable/analog sensor and providesshort circuit isolation. The 9298 (<strong>System</strong> Sensor B224BI) is used with Low Profile sensors.From AddressableDevice Circuit<strong>Faraday</strong> 9298 or 9299 BASE:(<strong>System</strong> Sensor B524BI or B224BI)To NextAddressableDeviceNotes:1. This wiring diagram shows only general information about this device. For specific wiring andinstallation information, read the instructions provi ded with the device.P/N 447192 Issue I (preliminary 10/31/2001) V-13
12120 OWNER'S MANUAL9161 Duct Housing for Addressable/Analog SensorsThe 9161 (<strong>System</strong> Sensor DH500AC/DC) is designed for use with an addressable/analog Ion or Photosensor. The 9161 is designed for 120VAC, 240VAC, 24VAC, or 24VDC to operate auxiliary functions.Two "Form C" relay contacts are available. The LEDs on the sensor illuminate to indicate an alarm.Remote alarm indication is made possible by utilizing the 9180 remote alarm LED unit.TYPICAL WIRING DIAGRAM FOR A 9161 DUCT HOUSINGFOR ADDRESSABLE ANALOG SENSOR24VDCPowerSupply(See Note 4)<strong>Faraday</strong> PM6849 EOL relay(<strong>System</strong> Sensor A77-716B)<strong>Faraday</strong> 9157/9158 Monitor Module(<strong>System</strong> Sensor M500MB/M501M)(9158 module shown)Optional <strong>Faraday</strong> 9180 Remote <strong>Alarm</strong> LED(<strong>System</strong> Sensor RA400Z)47K EOL ResistorSupplied with unit<strong>Faraday</strong> 9161 Duct Housing:(<strong>System</strong> Sensor DH500AC/DC)From AddressableDevice CircuitTo NextAddressableDeviceNotes:1. This wiring diagram shows only general information about this device. For specific wiring andinstallation information, read the instructions provided with the device.2. Wire Size: In alarm, no more than 3.0V drop from power supply to end of power supply loop.3. For power supply supervision use an EOL relay with a 9157 or 9158 monitor module as shown.(Relay contact shown with power applied)4. From the control unit auxiliary power output or an external 24VDC regulated power supply thatmust be power limited and listed for <strong>Fire</strong> Protective Signaling Use.5 9180 Remote LED and Auxiliary <strong>Control</strong> contacts will not function without separate power.6 Relay contacts are rated at 10 Amps maximum at 30VDC, 10 Amps maximum at 277VAC, 1/2HP at 240VAC and 360VA at 240VAC.P/N 447192 Issue I (preliminary 10/31/2001) V-14
12120 OWNER'S MANUAL9179 Duct Housing for Addressable/Analog SensorsThe 9179 (<strong>System</strong> Sensor DH500) is designed for use with an addressable/analog Ion or Photo sensor.The LEDs on the sensor illuminate to indicate an alarm. Remote alarm indication is made possible byutilizing the 9180 remote alarm LED unit. The 9167 remote test station may be used, if separate power issupplied.TYPICAL WIRING DIAGRAM FOR A 9179 DUCT HOUSINGFOR ADDRESSABLE/ANALOG SENSOROptional <strong>Faraday</strong> 9180 Remote <strong>Alarm</strong> LED:(<strong>System</strong> Sensor RA400Z)<strong>Faraday</strong> 9179 Duct Housing:(<strong>System</strong> Sensor DH500)From AddressableDevice CircuitTo NextAddressableDeviceNotes:1. This wiring diagram shows only general information about this device. For specific wiring andinstallation information, read the instructions provided with the device.2 The 9167 remote test station switch will not function without separate power. (See typical wiringdiagram for a 9161 duct housing for wiring of separate power with supervision).P/N 447192 Issue I (preliminary 10/31/2001) V-15
12120 OWNER'S MANUALAddressable ModulesZone Monitor Module (9157)The 9157 (<strong>System</strong> Sensor M500MB) monitor module provides (1) Style "B" (2-wire) initiating circuit or (1)Style "D" (4-wire) initiating circuit for normally open dry contact fire alarm and supervisory (tamper)devices. The 9157 is designed to mount directly inside a 4" square junction box. The 9157 monitormodule may be used to monitor a single unit or "zone" of units of "4-wire" (separately powered) smokedetectors, manual stations, waterflow switches, tamper (supervisory) switches or other dry, normally opencontact initiation devices.The 9157 uses a module address between 01 and 99 on an addressable device circuit. The 9157module is regularly scanned by the control unit and checked for its current monitored device(s) status (i.e.open (trouble), normal (EOL), shorted (alarm)). Each time the 9157 is scanned the front visible red LEDwill flash. Once the control unit has received the status data it will interpret and respond to this data asprogrammed. In the case of an alarm status or Style "D" open circuit, the front visible red LED willilluminate and latch on the appropriate 9157 module(s) until the system is successfully reset.NOTE: The devices are set at the factory for address 00. This is a default code. Duringinstallation set address to the predetermined address code.P/N 447192 Issue I (preliminary 10/31/2001) V-16
12120 OWNER'S MANUALCONFIGURATION OF 9157 MONITOR MODULETYPICAL CONVENTIONAL STYLE “B” (“2-WIRE”) CONTACT DEVICE INITIATING CIRCUIT<strong>Faraday</strong> 9157 Monitor Module:(<strong>System</strong> Sensor M500MB)SupervisedPower limitedFrom AddressableDevice Circuit47K EOL ResistorSupplied with unitTo NextAddressableDeviceSee NFPA 72 for maximum quantityof devices per initiating device circuit.CONFIGURATION OF 9157 MONITOR MODULETYPICAL CONVENTIONAL STYLE “D” (“4-WIRE”) CONTACT DEVICE INITIATING CIRCUIT<strong>Faraday</strong> 9157 Monitor Module:(<strong>System</strong> Sensor M500MB)SupervisedPower limitedFrom AddressableDevice CircuitTo NextAddressableDeviceSee NFPA 72 for maximum quantityof devices per initiating device circuit.Notes:1. This wiring diagram shows only general information about this device. For specific wiring andinstallation information, read the instructions provided with the device.2. Do not mix <strong>Fire</strong> & Supervisory (Tamper) Devices on the same initiating device circuit.3. Initiating Circuit Requirements:Maximum wire length:Maximum wire resistance:Maximum alarm current:2500 Ft.20 Ohms230uA4. Do not put “2-Wire” (Zone Powered) Smoke Detectors on Monitor Module Initiating loop.5. See Article 370 of the N.E.C. for proper box depth.P/N 447192 Issue I (preliminary 10/31/2001) V-17
12120 OWNER'S MANUALCONFIGURATION OF 9157 MONITOR MODULETYPICAL WIRING DIAGRAM FOR CONVENTIONAL“4-WIRE” (SEPARATELY POWERED) SMOKE DETECTORS STYLE “B” (“2-WIRE”)<strong>Faraday</strong> 9157 Monitor Module:(<strong>System</strong> Sensor M500MB)SupervisedPower limitedSee NFPA 72 for maximum quantityof devices per initiating device circuit.From AddressableDevice CircuitTo NextAddressableDevice47K EOL ResistorSupplied with unit24VDCPowerSupply(See Note 7)<strong>Faraday</strong> PM6849 EOL relay(<strong>System</strong> Sensor A77-716B)Notes:1. This wiring diagram shows only general information about this device. For specific wiring andinstallation information, read the instructions provided with the device.2. Do not mix <strong>Fire</strong> & Supervisory (Tamper) Devices on the same initiating device circuit.3. Initiating Circuit Requirements:Maximum wire length:Maximum wire resistance:Maximum alarm current:2500 Ft.20 Ohms230uA4. Do not put “2-Wire” (Zone Powered) Smoke Detectors on Monitor Module Initiating loop.5. See Article 370 of the N.E.C. for proper box depth.6. For power supply supervision use an E.O.L. relay as shown (relay contact shown with powerapplied).7. From the control unit resettable auxiliary power supply output or an external 24VDC regulatedpower supply that must be power limited and listed for <strong>Fire</strong> Protective Signaling Use.P/N 447192 Issue I (preliminary 10/31/2001) V-18
12120 OWNER'S MANUALCONFIGURATION OF 9157 MONITOR MODULETYPICAL WIRING DIAGRAM FOR CONVENTIONAL“4-WIRE” (SEPARATELY POWERED) SMOKE DETECTORS STYLE “D” (“4-WIRE”)<strong>Faraday</strong> 9157 Monitor Module:(<strong>System</strong> Sensor M500MB)SupervisedPower limitedSee NFPA 72 for maximum quantityof devices per initiating device circuit.From AddressableDevice CircuitTo NextAddressableDevice<strong>Faraday</strong> PM6849 EOL relay(<strong>System</strong> Sensor A77-716B)24VDCPowerSupply(See Note 7)Notes:1. This wiring diagram shows only general information about this device. For specific wiring andinstallation information, read the instructions provided with the device.2. Do not mix <strong>Fire</strong> & Supervisory (Tamper) Devices on the same initiating device circuit.3. Initiating Circuit Requirements:Maximum wire length:Maximum wire resistance:Maximum alarm current:2500 Ft.20 Ohms230uA4. Do not put “2-Wire” (Zone Powered) Smoke Detectors on Monitor Module Initiating loop.5. See Article 370 of the N.E.C. for proper box depth.6. For power supply supervision use an E.O.L. relay as shown (relay contact shown with powerapplied).7. From the control unit resettable auxiliary power supply output or an external 24VDC regulatedpower supply that must be power limited and listed for <strong>Fire</strong> Protective Signaling Use.P/N 447192 Issue I (preliminary 10/31/2001) V-19
12120 OWNER'S MANUALDevice Monitor Module (9158) ("Mini-Monitor")The 9158 (<strong>System</strong> Sensor M501M) addressable mini-monitor module provides a Style "B" (2-wire)initiating circuit for normally open dry contact fire alarm and supervisory (tamper) devices. The 9158'ssmall size and light weight design allows it to be installed inside a single gang box, or behind a devicebeing monitored without being rigidly mounted. The 9158 addressable mini-monitor module may be usedto monitor a single unit or a "zone" of units of "4-Wire" (separately powered) smoke detectors, manualstations, waterflow switches, tamper (supervisory) switches or other dry, normally open contact initiationdevices.NOTE: "2-Wire" (Zone Powered) Smoke detectors and initiation devices are not compatible.The 9158 uses a module address between 01 and 99 on an addressable device circuit. The 9158 isregularly scanned by the control unit and checked for its current monitored device(s) status (i.e. open(trouble), normal (EOL), shorted (alarm)). Once the control unit has received the status data, it willinterpret and respond to this data as programmed.9158 Monitor ModuleYellow(-)Violet(+)Red(+)Black(-)Set the device addresswith these switches.(See note below)InitiatingDevice CircuitAddressableDevice CircuitNOTE: The devices are set at the factory for address 00. This is a default code.During installation set address to the predetermined address code.P/N 447192 Issue I (preliminary 10/31/2001) V-20
12120 OWNER'S MANUALCONFIGURATION OF 9158 MONITOR MODULETYPICAL CONVENTIONAL STYLE “B” (“2-WIRE”) INITIATING CIRCUITSupervisedPower limitedFrom AddressableDevice CircuitTo NextAddressableDevice<strong>Faraday</strong> 9157 Monitor Module:(<strong>System</strong> Sensor M501M)47K EOL ResistorSupplied with unitSee NFPA 72 for maximum quantityof devices per initiating device circuit.Notes:1. This wiring diagram shows only general information about this device. For specific wiring andinstallation information, read the instructions provided with the device.2. Do not mix <strong>Fire</strong> & Supervisory (Tamper) Devices on the same initiating device circuit.3. Initiating Circuit Requirements:Maximum wire length:Maximum wire resistance:Maximum alarm current:2500 Ft.20 Ohms230uA4. Do not put “2-Wire” (Zone Powered) Smoke Detectors on Monitor Module Initiating loop.5. See Article 370 of the N.E.C. for proper box depth.P/N 447192 Issue I (preliminary 10/31/2001) V-21
12120 OWNER'S MANUALInterface Module (9191)The 9191 (<strong>System</strong> Sensor M502M) addressable Interface Module allows the addressable device circuit tointerface and monitor two-wire conventional smoke detectors. All two-wire detectors being monitoredmust be UL compatible with the module. The 9191 is addressed through the communication line ofintelligent systems. When the module is interrogated, it transmits the status of one zone of two-wiredetectors to an intelligent control unit. Status conditions are reported as normal, open, or alarm. Theinterface module supervises the zone of detectors and the connection of an external power supply. Tworotary decade switches allow setting module addresses from 01–99. A status LED indicator is providedand is controlled by code command from the control unit. The module provides a magnetically activatedtest switch for testing the module’s electronics and connections to the control unit.NOTE: The devices are set at the factory for address 00. This is a default code.During installation set address to the predetermined address code.P/N 447192 Issue I (preliminary 10/31/2001) V-22
12120 OWNER'S MANUALCONFIGURATION OF 9191 MONITOR MODULETYPICAL CONVENTIONAL STYLE “B” (“2-WIRE”) CONTACT DEVICE INITIATING CIRCUIT<strong>Faraday</strong> 9191 Monitor Module:(<strong>System</strong> Sensor M502M)SupervisedPower limitedFrom AddressableDevice Circuit24VDCPowerSupply(See Note 6)3.9K EOL ResistorSupplied with unitSupervisedPower limitedTo NextAddressableDeviceCONFIGURATION OF 9191 MONITOR MODULETYPICAL CONVENTIONAL STYLE “D” (“4-WIRE”) CONTACT DEVICE INITIATING CIRCUITFrom AddressableDevice Circuit24VDCPowerSupply(See Note 6)SupervisedPower limited<strong>Faraday</strong> 9191 Monitor Module:(<strong>System</strong> Sensor M502M)3.9K EOL ResistorSupplied with unitNotes:SupervisedPower limitedTo NextAddressableDevice1. This wiring diagram shows only general information about this device. For specific wiring andinstallation information, read the instructions provided with the device.2. Do not mix <strong>Fire</strong> & Supervisory (Tamper) Devices on the same initiating device circuit.3. Initiating Circuit Requirements:Maximum wire resistance:Maximum alarm current:25 ohms92mA4. Use only UL compatible “2-Wire” (Zone Powered) Smoke Detectors listed in the installationinstructions.5. See Article 370 of the N.E.C. for proper box depth.6. From the control unit resettable auxiliary power supply output or an external 24VDC regulatedpower supply that must be power limited and listed for <strong>Fire</strong> Protective Signaling Use.P/N 447192 Issue I (preliminary 10/31/2001) V-23
12120 OWNER'S MANUAL<strong>Control</strong> Module (9159)The 9159 (<strong>System</strong> Sensor M500CH) addressable control module provides (1) Style "Y" (2-Wire") polarityreversal notification appliance circuit or (1) "4-Wire" Class "A" (Style "Z") polarity reversal notificationappliance circuit or (1) dry form "C" contact output format. The selection of any (1) of these formats permodule can be made in the field via an integral programming tab. The 9159 is designed to mount directlyinside a 4" square junction box. When the 9159 control module is used drive conventional polarizedappliances and auxiliary devices, the operating power for the devices must be wired to the 9159separately from an auxiliary power supply. The separate power circuit is then supervised by an E.O.L.and monitor module combination relay in a similar fashion as a "4-Wire" (separately powered)conventional smoke detector power circuit.The 9159 uses a module address between 01 and 99 on an addressable device circuit. The 9159 isregularly scanned by the control unit and checked for it's monitored device(s) status (i.e. open (trouble),normal (EOL), shorted (trouble)). Each time the 9159 is scanned the front visible red LED will flash.Once the control unit has received alarm status data it will interpret and respond to the data asprogrammed thus activating any predetermined 9159 control module(s). When an associated 9159operates, it's red LED will illuminate and the module will latch into the operated mode until reset.NOTE: The devices are set at the factory for address 00. This is a default code.During installation set address to the predetermined address code.P/N 447192 Issue I (preliminary 10/31/2001) V-24
12120 OWNER'S MANUALCONFIGURATION OF 9159 CONTROL MODULETYPICAL CONVENTIONAL STYLE “Y” (“2-WIRE”) NOTIFICATION APPLIANCE CIRCUITFrom AddressableDevice CircuitSupervisedPower limited<strong>Faraday</strong> 9159 <strong>Control</strong> Module:(<strong>System</strong> Sensor M500CH)SupervisedPower limited47K EOL ResistorSupplied with unitSee NFPA 72 for maximum quantityof devices per initiating device circuit.24VDCPowerSupply(See Note 6)SupervisedPower limited47K EOL ResistorSupplied with unit<strong>Faraday</strong> PM6849 EOL relay(<strong>System</strong> Sensor A77-716B)<strong>Faraday</strong> 9157/9158 Monitor Module(<strong>System</strong> Sensor M500MB/M501M)(9158 module shown)47K EOL ResistorSupplied with unitTo NextAddressableDeviceNotes:1. This wiring diagram shows only general information about this device. For specific wiring andinstallation information, read the instructions provided with the device.2. See owners manual for compatible appliances.3. Notification Appliance Circuit Ratings:Maximum alarm current: 1.0AMaximum wire voltage drop: 1.9V4. See Article 370 of the N.E.C. for proper box depth.5. For power supply supervision use an E.O.L. relay as shown (relay contact shown with powerapplied).6. From the control unit auxiliary power supply output or an external 24VDC regulated power supplythat must be power limited and listed for <strong>Fire</strong> Protective Signaling Use.P/N 447192 Issue I (preliminary 10/31/2001) V-25
12120 OWNER'S MANUALCONFIGURATION OF 9159 CONTROL MODULETYPICAL CONVENTIONAL STYLE “Z” (“4-WIRE”) NOTIFICATION APPLIANCE CIRCUITFrom AddressableDevice CircuitSupervisedPower limited<strong>Faraday</strong> 9159 <strong>Control</strong> Module:(<strong>System</strong> Sensor M500CH)See NFPA 72 for maximum quantityof devices per initiating device circuit.24VDCPowerSupply(See Note 6)SupervisedPower limited<strong>Faraday</strong> PM6849 EOL relay(<strong>System</strong> Sensor A77-716B)<strong>Faraday</strong> 9157/9158 Monitor Module(<strong>System</strong> Sensor M500MB/M501M)(9158 module shown)47K EOL ResistorSupplied with unitTo NextAddressableDeviceNotes:1. This wiring diagram shows only general information about this device. For specific wiring andinstallation information, read the instructions provided with the device.2. See owners manual for compatible appliances.3. Notification Appliance Circuit Ratings:Maximum alarm current: 1.0AMaximum wire voltage drop: 1.9V4. See Article 370 of the N.E.C. for proper box depth.5. For power supply supervision use an E.O.L. relay as shown (relay contact shown with powerapplied).6. From the control unit auxiliary power supply output or an external 24VDC regulated power supplythat must be power limited and listed for <strong>Fire</strong> Protective Signaling Use.P/N 447192 Issue I (preliminary 10/31/2001) V-26
12120 OWNER'S MANUALCONFIGURATION OF 9159 CONTROL MODULETYPICAL DRY FORM “C” CONTACT OUTPUTFrom AddressableDevice CircuitNot supervisedBreak tabs<strong>Faraday</strong> 9159 <strong>Control</strong> Module:(<strong>System</strong> Sensor M500CH)CommonNormally closedNormally openNotes:To NextAddressableDeviceBreak tabsNot supervisedCommonNormally closedNormally open1. This wiring diagram shows only general information about this device. For specific wiring andinstallation information, read the instructions provided with the device.2. Relay contact ratings:Resistive: 2 A., 30VDCInductive: 1 A., 30VDC (0.6pf)0.3A., 110VDC (0.35pf)0.3 A., 120VAC (0.35pf)3. See Article 370 of the N.E.C. for proper box depth.P/N 447192 Issue I (preliminary 10/31/2001) V-27
12120 OWNER'S MANUALIsolator Module (9160)The 9180 (<strong>System</strong> Sensor M500X) addressable device circuit isolator module provides the circuitry toautomatically open and thus "isolate" a branch or section of an addressable device circuit. This isolationwill occur when the 9160 senses a short condition after its position on the circuit. By isolating the shortedportion of the circuit the control unit will still be able to communicate with and monitor devices not involvedwith the faulted section or branch of the addressable device circuit.During normal operation the red scan/shorted LED will flash several times a minute. In the event that themonitored portion becomes shorted the red scan/shorted LED will latch on steady and the associatedprotected circuit portion will be automatically disconnected from the system and a defined troublecondition will be reported to the control unit. Once the shorted condition has been removed the 9160module will automatically unlatch thus restoring normal operations between it, its monitored circuitportion, and the rest of the system.P/N 447192 Issue I (preliminary 10/31/2001) V-28
12120 OWNER'S MANUALVI. PROGRAMMING THE CONTROL UNITMAIN BOARD JUMPERFactory setting is shown.P1 – Addressable Device Circuit Wiring Style• Style 6/7•• Style 4LOOP DRIVER BOARD JUMPERSDevice Type Setting (Factory setting is shown.)J7 J8 J4 J6 J9F • • • • •• • • • •S • • • • •KEYPAD PROGRAMMINGCustomized programming of the 12120 control unit may be accomplished through a keypad included inthe control unit. A sixteen-key, telephone-style keypad mounts on the front panel within the cabinet. Thekeypad may also be easily removed if desired. See the <strong>Faraday</strong> 447214 Programmer’s Manual fordetailed information of system programming.PROGRAMMING SECURITYThe following levels of security protect the system from unauthorized use:• User – Locked Door• Maintenance – Locked Door and 4-digit Maint Password• Technician – Locked Door and 5-digit Tech PasswordThe User and Maintenance Levels are also accessible from the Remote LCD Annunciators.P/N 447192 Issue I (preliminary 10/31/2001)VI-1
12120 OWNER'S MANUALThis page is intentionally blank.P/N 447192 Issue I (preliminary 10/31/2001)VI-2
12120 OWNER'S MANUALVII.MAINTENANCEGENERAL• Device sensitivity may be read out and alarm thresholds controlled on a per-point basis, as well assetting overall percent obscuration and day/night variations. Individual points may also be disabledfor service.To perform these functions on the unit, enter the 4-digit maintenance password into the control unit orLCD annunciator. When the menu is displayed, select the desired function or sub-function and press theappropriate operating button. When the function is complete, the menu will provide a command forexiting the maintenance mode.Note that any abnormal condition, such as disabled points, will report atrouble. Confirmation of disabling or re-enabling a point is required tocomplete the action, but acknowledgment of the trouble is not required, sinceit results from operator action.Activation of an alarm condition or a timeout after no button activity terminates Maintenance mode.• The system may automatically scan the operating points and report to a printer, facilitating NFPA 72test requirements. The control unit may perform this scan once a day, with the time selectable by theuser.To initiate a non-programmed automatic test cycle, enter the 4-digit maintenance password into thecontrol unit or LCD annunciator. When the menu is displayed, select Auto-test and press the associatedswitch. The Auto-test cycle will be completed and the control unit returns to normal. Results will bedisplayed on the display (anomalies only) or the printer (full data) according to the selected mode.• The system will automatically monitor drift of quiescent sensor output levels and report amaintenance alert if a preset level is passed, or if a sensor drifts too quickly. This maintenance alertis annunciated as a trouble.• The system may be programmed to report the number of times the alarm verify function is initiated bydevice, time of day, and/or day of week, allowing location of environmental problems. This datum isavailable on the display as described in paragraph 1 above.• The system may be programmed to alert the operator when scheduled maintenance is required.• A 500 event history is maintained, with all events available for chronological review at the operatorlevel. This history may be cleared only with the Maintenance Level Code. For details on includeddata and use of the history, see operation instructions.To clear history when data has been read out and restoration of memory space is desired. Activatemaintenance mode as described above and follow menu instructions for clearing the event history.P/N 447192 Issue I (preliminary 10/31/2001)VII-1
12120 OWNER'S MANUALQUICK TESTCAUTION: If the control unit has remote connections to the <strong>Fire</strong> Department orother monitor, be sure to disable the remote signals and notify the remotemonitoring station before performing test operations, since an off-normalcondition will be indicated.Quick test is possible in one of two modes, (silent or audible) and is selectable on a per-zone basis. Anynumber of zones may be placed into test at the same time, but only one mode of quick test operation ispossible for the whole system at one time. Points not in quick test operate normally. Quick test operationinitiates a system trouble condition.In the silent mode, all alarm outputs are disabled and only the front panel indications and remoteannunciator LEDs operate. In the audible mode all system sounders will sound momentarily as each ordevice is alarmed.The system maintains a counter of the number of activation’s during the quick test and reports this valuewhen quick test mode is exited.Quick test terminates into alarm if more than one device activates simultaneously, or if a device does notreturn to normal after being activated within a configurable length of time.Quick test terminates automatically into normal standby mode using a timer. The value of the timer isconfigurable. The timer can be configured to limit the total time of the quick test (i.e. the timer is startedonly when quick test is entered), or to limit the time between device activation’s (i.e. the timer is re-startedafter each activation).<strong>Alarm</strong> activation’s that occur in a system or zone in quick test or by a point in quick test cause the eventto be logged and printed. No other action is taken.To initiate quick test, enter maintenance mode as described above and follow menu instructions toconfigure and initiate the test.Initiation of General Evacuation from the control unit, an RS485 LCD Annunciator, or an RS485 RemoteProcessor causes termination of quick test and starts the normal alarm sequence.Quick test may be terminated by a menu selection or by timeout (set at 5 to 30 minutes) from the last testactivation. Timeout system reactivation is annunciated by a 1/2 second on, 1/2 second off pattern fromsystem sounders programmed for drill use. A device in alarm condition when quick test is exited causesthe normal alarm sequence.NOTE: When any problem is observed with the system, refer to thetroubleshooting chart in Appendix C. For any required service, contact afactory-authorized representative.P/N 447192 Issue I (preliminary 10/31/2001)VII-2
12120 OWNER'S MANUALVIII. APPENDIX-A: REFERENCE DATAThis appendix provides reference for the following topics:• Wire selection guides• Battery size calculationsWIRE SELECTION GUIDESResistance of Solid Copper WireAWGOhms per Thousand Feet*18 8.0816 5.0814 3.1912 2.01*NEC Chapter 9, Table 8.Notification Appliance Circuit Wire Selection GuideEach Notification Appliance Circuit must not have a voltage drop greater than 1 volt. The following chartis based on the following premises:• The entire load is at the end of the wire run (worst case).• Resistance is of solid copper wireContact your local distributor or the factory if further information is needed in your circumstances.Maximum Wire Loop Distance (Feet)Signal Load (A) 18 AWG 16 AWG 14 AWG 12 AWG0.1 1,237 1968 3134 49750.25 495 787 1253 19900.5 247 393 626 9950.75 165 262 417 6631.0 123 196 313 4971.25 99 157 250 3981.5 82 131 208 331P/N 447192 Issue I (preliminary 10/31/2001)VIII-1
12120 OWNER'S MANUALAddressable Device Circuit Wire Selection GuideEach addressable device circuit must meet the following requirements:• Total loop resistance - 40 ohm maximum.• Total loop capacitance - 0.28uF maximum (56pF/ft. max.)• Twisted pair wire.• Unshielded cable.• Low capacitance cable.• High velocity of propagation cable - 60% minimum.• Each loop runs separate from all other circuits.• Run + out and - out separately from + in and - in.• Different models or types of cable should not be in the same loop.Maximum Wire Loop Distance (Feet)(Includes all branches of a Style 4 loop)Wire size: 18AWG 16AWG 14AWG * 12AWGWire length: 6150 9750 10,000 10,000Cable length: 3075 4875 5,000 5,000* The terminal blocks of <strong>Faraday</strong> addressable devices are rated for a maximum of 14AWG wire.P/N 447192 Issue I (preliminary 10/31/2001)VIII-2
12120 OWNER'S MANUALBATTERY SIZE CALCULATIONSStandby Current (A.) <strong>Alarm</strong> Current (A.)12120 <strong>Control</strong> <strong>Unit</strong> 0.110 0.20012101 City Tie Standby 0.005 0.005 + NA<strong>Alarm</strong> 0.028 0.028 NA +Standby (note 5) + NA<strong>Alarm</strong> (note 5) NA +12103A RS232 Standby 0.008 0.008 + NABoard<strong>Alarm</strong> 0.008 0.008 NA +12105 DACT Board Standby 0.038 0.038 + NA<strong>Alarm</strong> 0.054 0.054 NA +12506 Remote Standby 0.020 X = + NAAnnunciator <strong>Alarm</strong> 0.030 X = NA +12507 Serial Standby 0.010 X = + NARelay <strong>Unit</strong> <strong>Alarm</strong> 0.170 X = NA +12508 Serial Standby 0.000 X = + NARelay Extender <strong>Alarm</strong> 0.160 X = NA +12509 Serial Standby 0.015 X = + NAAnnunciator <strong>Unit</strong> <strong>Alarm</strong> (note 4) 0.040 X = NA +12510 Serial Annun- Standby 0.005 X = + NAciator Extender <strong>Alarm</strong> (note 4) 0.000 X = NA +12523 Network Standby 0.085 0.085 + NAInterface Board <strong>Alarm</strong> 0.085 0.085 NA +12526 Iso. Network Standby 0.093 0.093 + NAInterface Board <strong>Alarm</strong> 0.093 0.093 NA +Addressable DevicesCatalog # Quantity X Current (A.)Standby X = + NA<strong>Alarm</strong> X = NA +Standby X = + NA<strong>Alarm</strong> X = NA +Standby X = + NA<strong>Alarm</strong> X = NA +Standby X = + NA<strong>Alarm</strong> X = NA +4-wire Smoke DetectorsCatalog # Quantity X Current (A.)Standby X = + NA<strong>Alarm</strong> X = NA +Standby X = + NA<strong>Alarm</strong> X = NA +End of Line RelayCatalog # Quantity X Current (A.)X = + +Notification AppliancesCatalog # Quantity X Current (A.)X = NA +X = NA +X = NA +X = NA +Other = + +TOTALP/N 447192 Issue I (preliminary 10/31/2001)VIII-3
12120 OWNER'S MANUALTotal Standby Current Hours of Standby Required per AH for Standby(from above) NFPA 72 Standard (4, 24 or 60)A. x ____ Hours =Total <strong>Alarm</strong> Current 5 Minutes of <strong>Alarm</strong> Operation(from above)per NFPA 72 Standard*A. x 0.33 Hours =AH for <strong>Alarm</strong>A.H. forStandbyA.H. for<strong>Alarm</strong>CalculatedA.H.De-ratingFactorA.H. RequiredBattery Capacity+ = X 1.25 =Notes:1. An additional multiplier is included to compensate for the higher discharge rate in alarm. Battery capacity decreases with age.2. The Standby current + <strong>Alarm</strong> current must never exceed 3.0 Amps3. The following states the maximum standby current allowed using a 38 AH battery set:60 hours of standby time is 0.5 Amps24 hours of standby time is 1.2 Amps4. Does not include lamp or LED current, add separately.5. When using the 12101 City Tie Board add the following currents for standby and alarm:Type of City Tie Connection Standby <strong>Alarm</strong>Local Energy + 0 + 0Reverse Polarity <strong>Alarm</strong> Output (CA)<strong>Alarm</strong><strong>Alarm</strong> w/Trouble+ 0.020+ 0+ 0.020+ 0.020Reverse Polarity Trouble Output (CT) + 0.020 + 0.020P/N 447192 Issue I (preliminary 10/31/2001)VIII-4
12120 OWNER'S MANUALIX. APPENDIX-B: COMPATIBLE DEVICESDEVICES FOR ADDRESSABLE DEVICE CIRCUITS<strong>Faraday</strong> Addressable Modules<strong>Faraday</strong>Cat. No.8800 Manual Station8801 Mini- Module for Contact Devices8802 Module for Contact Devices8803 Dual Module for Contact Devices8804 Module for Contact Devices with Relay8805 Module for Conventional Detectors8806 NAC Module<strong>Faraday</strong> Addressable DetectorsDescription<strong>Faraday</strong>DescriptionCompatible BaseCat. No.8810 Photo Detector 8853, 8815, 8816, 8840, 88178811 Photo/Thermal Detector 8853, 8815, 88168812 Thermal Detector, Fixed or Fixed/Rate of Rise 8853, 8815, 8816<strong>Faraday</strong> Bases<strong>Faraday</strong>DescriptionCompatible DetectorCat. No.8853 Base 8810, 8811, 88128815 Audible Base 8810, 8811, 88128816 Relay Base 8810, 8811, 88128840 Duct Housing 8810, 88118817 Duct Housing with Relay 8810, 8811<strong>Faraday</strong> Accessories<strong>Faraday</strong>DescriptionCompatible BaseCat. No.8809 Isolator Module8922 Remote LED Annunciator, 4” Octagon Mounting 8853, 88408923 Remote LED Annunciator, Single Gang Mounting 8853, 8840Notes:1. <strong>Faraday</strong> devices, detectors and modules, up to a maximum of 60 devices may be used peraddressable device circuit.2. For specific wiring and installation information, read the instructions provided with each device.P/N 447192 Issue I (preliminary 10/31/2001)IX-1
12120 OWNER'S MANUAL<strong>System</strong> Sensor Addressable/Analog Sensors<strong>Faraday</strong> <strong>System</strong>DescriptionCompatible BaseCat. No. Sensor P/N8406 2251T Photoelectric Sensor w/Thermal - Low 9156, 9181, 9189, 9296, 9298profile9152 2551HR Photoelectric Sensor 9155, 9156, 9181, 9297, 92999153 2551BT Photoelectric w/Thermal 9155, 9156, 9181, 9297, 92999154 5551B Thermal Sensor, Fixed 9155, 9156, 9181, 9297, 92999163 1551B Ionization Sensor 9155, 9156, 9181, 9297, 92999187 2251 Photoelectric Sensor - Low profile 9156, 9181, 9189, 9296, 92989188 1251 Ionization Sensor - Low profile 9156, 9181, 9189, 9296, 9298<strong>System</strong> Sensor Bases<strong>Faraday</strong> <strong>System</strong>DescriptionCompatible SensorCat. No. Sensor P/N9155 B501B Base 9152, 9153, 9154, 91639156 B501BH Base w/Horn 8406, 9152, 9153, 9154, 9163, 9187, 91889161 DH500AC/DC Duct Housing with Base With Relay 9152, 91639179 DH500 Duct Housing with Base 9152, 91639181 B501 Base 8406, 9152, 9153, 9154, 9163, 9187, 91889189 B210LP Base, Low profile 8406, 9187, 91889296 B224RB Relay Base, Low profile 8406, 9187, 91889297 B524RB Relay Base 9152, 9153, 9154, 91639298 B224BI Isolator Base, Low profile 8406, 9187, 91889299 B524BI Isolator Base 9152, 9153, 9154, 9163<strong>System</strong> Sensor Addressable/Analog Modules<strong>Faraday</strong>Cat. No.<strong>System</strong>Sensor P/N9157 M500MB Zone Monitor Module9158 M501M Device Monitor Module9159 M500CH <strong>Control</strong> Module9191 M502M Interface ModuleDescription<strong>System</strong> Sensor Accessories<strong>Faraday</strong> <strong>System</strong>DescriptionCompatible BaseCat. No. Sensor P/N9160 M500X Isolator Module9180 RA400Z Remote LED Annunciator, Single Gang Mounting 9155, 9161, 9179, 9181, 9189Notes:1. <strong>System</strong> Sensor devices, sensors, monitor modules, or control modules, up to a maximum of 99sensors and 99 modules may be used per addressable device circuit.2. For specific wiring and installation information, read the instructions provided with each device.P/N 447192 Issue I (preliminary 10/31/2001)IX-2
12120 OWNER'S MANUALDEVICES FOR INITIATING CIRCUITSManual Stations<strong>Faraday</strong>Cat. No.Mfg.P/N<strong>Faraday</strong>, LLCF1GT 17-450334-35F1GGT 17-450334-38F1GHT 17-450334-37AdaletPM3823 XHFA-N4R.S.G. Inc.PM6700 RMS-1P-KLPM6608 RMS-1T-KLPM6696 RMS-2T-LP-KLPM6695 RMS-1T-PS-KLPM6697 RMS-2T-KO-KLPM6699 RMS-2T-WP-KLPM6767 RMS-EX-WP-KLNotes:Any UL Listed contact type non-coded station with compatible contact ratings is acceptable. The aboveare listed here for your convenience.For specific wiring and installation information, read the instructions provided with each device.Waterflow Switches<strong>Faraday</strong> Mfg. P/NCat. No.<strong>System</strong> SensorPM6615 WFD20PM6616 WFD25PM6617 WFD30PM6618 WFD35PM6619 WFD40PM6620 WFD50PM6621 WFD60PM6622 WFD80PM6779 EPS10-1PM6780 EPS10-2Notes:1. Any UL Listed contact type waterflow switch with compatible contact ratings is acceptable. Theabove are listed here for your convenience.2. For specific wiring and installation information, read the instructions provided with each device.P/N 447192 Issue I (preliminary 10/31/2001)IX-3
12120 OWNER'S MANUALSupervisory Switches<strong>Faraday</strong>Cat. No.PM6623PM6624PM6781PM6782Mfg.P/N<strong>System</strong> SensorOSY2PIBV2EPS40-1EPS40-2Notes:1. Any UL Listed contact type supervisory switch with compatible contact ratings is acceptable. Theabove are listed here for your convenience.2. For specific wiring and installation information, read the instructions provided with each device.Contact Type Heat Detectors<strong>Faraday</strong>Cat. No.Mfg. PartNumberChemetronics9341 6019342 6029343 6039344 6049345 6219346 6229347 6239348 6249300-136 A-1359300-190 A-2009301-136 AT-1359301-190 AT-200PM2872-136 EPB501PM2872-190 EPB502PM2872-136F EPB503PM2872-190F EPB504Notes:1. Any UL Listed contact type heat detector with compatible contact ratings is acceptable. The aboveare listed here for your convenience.2. For specific wiring and installation information, read the instructions provided with each device.P/N 447192 Issue I (preliminary 10/31/2001)IX-4
12120 OWNER'S MANUALUL Compatible Four-Wire (Separately Powered) Smoke Detectors<strong>Faraday</strong>Detectorw/BaseMfg. Detector w/BaseMaximumStandbyCurrentMaximum<strong>Alarm</strong> CurrentNotesAir Products & <strong>Control</strong>s9269 RW-DC-N 0.081mA 115mA Must use EOL Relay9270 RW-DC-P 0.110mA 115mA Must use EOL RelayApollo <strong>Fire</strong> Detectors9221 w/9266 55000-380 w/45681-227 0.205mA 100mA Must use EOL Relay9222 w/9266 55000-150 w/45681-227 0.086mA 100mA Must use EOL Relay9259 w/9266 55000-151 w/45681-227 0.086mA 100mA Must use EOL Relay9260 w/9266 55000-350 w/45681-227 0.130mA 100mA Must use EOL Relay9261 w/9266 55000-250 w/45681-227 0.081mA 100mA Must use EOL Relay9264 w/9266 55000-153 w/45681-227 0.086mA 100mA Must use EOL Relay9274 w/9266 55000-152 w/45681-227 0.096mA 100mA Must use EOL Relay<strong>System</strong> Sensor8416 2124S 0.050mA 25mA Must use EOL Relay8417 2124TS 0.050mA 25mA Must use EOL Relay8418 2124R 0.050mA 45mA Must use EOL Relay8419 2124TR 0.050mA 45mA Must use EOL Relay8420 2124AT 0.050mA 65mA Must use EOL Relay8421 2124ATR 0.050mA 65mA Must use EOL Relay8422 2124AITR 0.050mA 65mA Must use EOL Relay9175 6424 20mA 38.4mA Must use EOL Relay & six wires9184 w/9186 1151 w/B112LP 0.120mA 36mA Must use EOL Relay9183 w/9186 2151 w/B112LP 0.120mA 36mA Must use EOL Relay9338 2124 0.050mA 25mA Must use EOL Relay9339 2124T 0.050mA 25mA Must use EOL Relay9340 2124TSRB 15mA 45mA Must use EOL Relay9358 w/9362 1451 w/B402B 0.120mA 36mA Must use EOL Relay9359 w/9362 2451 w/B402B 0.120mA 36mA Must use EOL Relay9360 w/9362 2451TH w/B402B 0.120mA 36mA Must use EOL RelayNotes:1. For specific wiring and installation information, read the instructions provided with each device.2. Each 9273 EOL Relay requires 15 mA. standby current.P/N 447192 Issue I (preliminary 10/31/2001)IX-5
12120 OWNER'S MANUALDEVICES FOR NOTIFICATION APPLIANCE CIRCUITSNotification Appliances<strong>Faraday</strong>CatalogNumberDescriptionAudibleVoltage(Volts)AudibleCurrent(Amps)StrobeVoltage(Volts)StrobeCurrent(Amps)446(*1) Bell - Vibrating 21-30 DC 0.110476(*1) Bell - Vibrating 21-30 DC 0.070477(*1) Bell - Single Stroke 21-30 DC 0.3602700-E Strobe Light 20-31 DC 0.0592700-G Strobe Light 20-31 DC 0.0892700-J Strobe Light 20-31 DC 0.1552700-K Strobe Light 20-31 DC 0.1642700-L Strobe Light 20-31 DC 0.2492700-M(*2) Sync Strobe Light 20-31 DC 0.0592700-R(*2) Sync Strobe Light 20-31 DC 0.0882700-T(*2) Sync Strobe Light 20-31 DC 0.1542700-Y(*2) Sync Strobe Light 20-31 DC 0.1702700-Z(*2) Sync Strobe Light 20-31 DC 0.2492701-E Strobe Light 20-31 DC 0.0592701-G Strobe Light 20-31 DC 0.0892701-J Strobe Light 20-31 DC 0.1552701-K Strobe Light 20-31 DC 0.1642701-L Strobe Light 20-31 DC 0.2492701-M(*2) Sync Strobe Light 20-31 DC 0.0592701-R(*2) Sync Strobe Light 20-31 DC 0.0882701-T(*2) Sync Strobe Light 20-31 DC 0.1542701-Y(*2) Sync Strobe Light 20-31 DC 0.1702701-Z(*2) Sync Strobe Light 20-31 DC 0.2492705-E Strobe Light 20-31 DC 0.0592705-L Strobe Light 20-31 DC 0.2492705-M(*2) Sync Strobe Light 20-31 DC 0.0592705-Z(*2) Sync Strobe Light 20-31 DC 0.2492820(*2) Sync Electronic Horn 20-31 DC 0.0302821(*2) Sync Electronic Horn 20-31 DC 0.0302824-M(*3) Sync Electronic Horn w/Sync Strobe 20-31 DC 0.030 20-31 DC 0.0592824-R(*3) Sync Electronic Horn w/Sync Strobe 20-31 DC 0.030 20-31 DC 0.0882824-T(*3) Sync Electronic Horn w/Sync Strobe 20-31 DC 0.030 20-31 DC 0.1542824-Y(*3) Sync Electronic Horn w/Sync Strobe 20-31 DC 0.030 20-31 DC 0.1702824-Z(*3) Sync Electronic Horn w/Sync Strobe 20-31 DC 0.030 20-31 DC 0.2492880 Electronic Signal-8T 20-31 DC 0.024-0.050 (*4)2881 Electronic Signal-8T 20-31 DC 0.024-0.050 (*4)2884-E Electronic Signal-8T w/Strobe 20-31 DC 0.024-0.050 (*4) 20-31 DC 0.0592884-G Electronic Signal-8T w/Strobe 20-31 DC 0.024-0.050 (*4) 20-31 DC 0.0892884-J Electronic Signal-8T w/Strobe 20-31 DC 0.024-0.050 (*4) 20-31 DC 0.1552884-K Electronic Signal-8T w/Strobe 20-31 DC 0.024-0.050 (*4) 20-31 DC 0.1642884-L Electronic Signal-8T w/Strobe 20-31 DC 0.024-0.050 (*4) 20-31 DC 0.2492884- M(*2) Electronic Signal-8T w/Sync Strobe 20-31 DC 0.024-0.050 (*4) 20-31 DC 0.0592884-R(*2) Electronic Signal-8T w/Sync Strobe 20-31 DC 0.024-0.050 (*4) 20-31 DC 0.0882884-T(*2) Electronic Signal-8T w/Sync Strobe 20-31 DC 0.024-0.050 (*4) 20-31 DC 0.1542884-Y(*2) Electronic Signal-8T w/Sync Strobe 20-31 DC 0.024-0.050 (*4) 20-31 DC 0.1702884-Z(*2) Electronic Signal-8T w/Sync Strobe 20-31 DC 0.024-0.050 (*4) 20-31 DC 0.2495330 Electronic Horn-3T 21-32 DC 0.020-0.025 (*4)5333 Electronic Horn-3T 21-32 DC 0.020-0.025 (*4)5334 Electronic Horn-3T 21-32 DC 0.020-0.025 (*4)5335 Electronic Horn-3T 21-32 DC 0.020-0.025 (*4)P/N 447192 Issue I (preliminary 10/31/2001)IX-6
12120 OWNER'S MANUAL<strong>Faraday</strong>CatalogNumberDescriptionAudibleVoltage(Volts)AudibleCurrent(Amps)StrobeVoltage(Volts)StrobeCurrent(Amps)5340 Electronic Horn 21-32 DC 0.0205343 Electronic Horn 21-32 DC 0.0205344 Electronic Horn 21-32 DC 0.0205345 Electronic Horn 21-32 DC 0.0205350 Electronic Horn-3T 21-32 DC 0.020-0.025 (*4)5353 Electronic Horn-3T 21-32 DC 0.020-0.025 (*4)5354 Electronic Horn-3T 21-32 DC 0.020-0.025 (*4)5355 Electronic Horn-3T 21-32 DC 0.020-0.025 (*4)5360 Electronic Horn 21-32 DC 0.0205363 Electronic Horn 21-32 DC 0.0205364 Electronic Horn 21-32 DC 0.0205365 Electronic Horn 21-32 DC 0.0205370 Electronic Horn-8T 12-32 DC 0.020-0.050 (*4)5373 Electronic Signal-8T 12-32 DC 0.020-0.050 (*4)5374 Electronic Signal-8T 12-32 DC 0.020-0.050 (*4)5375 Electronic Signal-8T 12-32 DC 0.020-0.050 (*4)5380 Electronic Horn-8T 12-32 DC 0.020-0.050 (*4)5383 Electronic Signal-8T 12-32 DC 0.020-0.050 (*4)5384 Electronic Signal-8T 12-32 DC 0.020-0.050 (*4)5385 Electronic Signal-8T 12-32 DC 0.020-0.050 (*4)5390 Electronic Chime 21-30 DC 0.0205394-E Electronic Chime w/Strobe 21-30 DC 0.020 20-31 DC 0.0595394-G Electronic Chime w/Strobe 21-30 DC 0.020 20-31 DC 0.0895394-J Electronic Chime w/Strobe 21-30 DC 0.020 20-31 DC 0.1555394-K Electronic Chime w/Strobe 21-30 DC 0.020 20-31 DC 0.1645394-L Electronic Chime w/Strobe 21-30 DC 0.020 20-31 DC 0.2495394- M(*2) Electronic Chime w/Sync Strobe 21-30 DC 0.020 20-31 DC 0.0595394-R(*2) Electronic Chime w/Sync Strobe 21-30 DC 0.020 20-31 DC 0.0885394-T(*2) Electronic Chime w/Sync Strobe 21-30 DC 0.020 20-31 DC 0.1545394-Y(*2) Electronic Chime w/Sync Strobe 21-30 DC 0.020 20-31 DC 0.1705394-Z(*2) Electronic Chime w/Sync Strobe 21-30 DC 0.020 20-31 DC 0.2495395 Electronic Chime 21-30 DC 0.0205398-E Electronic Chime w/Strobe 21-30 DC 0.020 20-31 DC 0.0595398-G Electronic Chime w/Strobe 21-30 DC 0.020 20-31 DC 0.0895398-J Electronic Chime w/Strobe 21-30 DC 0.020 20-31 DC 0.1555398-K Electronic Chime w/Strobe 21-30 DC 0.020 20-31 DC 0.1645398-L Electronic Chime w/Strobe 21-30 DC 0.020 20-31 DC 0.2495398- M(*2) Electronic Chime w/Sync Strobe 21-30 DC 0.020 20-31 DC 0.0595398-R(*2) Electronic Chime w/Sync Strobe 21-30 DC 0.020 20-31 DC 0.0885398-T(*2) Electronic Chime w/Sync Strobe 21-30 DC 0.020 20-31 DC 0.1545398-Y(*2) Electronic Chime w/Sync Strobe 21-30 DC 0.020 20-31 DC 0.1705398-Z(*2) Electronic Chime w/Sync Strobe 21-30 DC 0.020 20-31 DC 0.2495405 Sync <strong>Control</strong> <strong>Unit</strong> 20-31 DC 0.0205406 Sync <strong>Control</strong> <strong>Unit</strong> 20-31 DC 0.0206120 Horn 21-30 DC 0.0356140 Horn 21-30 DC 0.0656220 Horn 21-30 DC 0.0386223 Horn 21-30 DC 0.0386224 Horn 21-30 DC 0.0386225 Horn 21-30 DC 0.0386230 Horn 21-30 DC 0.0386234-E Horn w/Strobe 21-30 DC 0.038 20-31 DC 0.0596234-G Horn w/Strobe 21-30 DC 0.038 20-31 DC 0.0896234-J Horn w/Strobe 21-30 DC 0.038 20-31 DC 0.1556234-K Horn w/Strobe 21-30 DC 0.038 20-31 DC 0.1646234-L Horn w/Strobe 21-30 DC 0.038 20-31 DC 0.249P/N 447192 Issue I (preliminary 10/31/2001)IX-7
12120 OWNER'S MANUAL<strong>Faraday</strong>CatalogNumberDescriptionAudibleVoltage(Volts)AudibleCurrent(Amps)StrobeVoltage(Volts)StrobeCurrent(Amps)6234-M(*2) Horn w/Sync Strobe 21-30 DC 0.038 20-31 DC 0.0596234-R(*2) Horn w/Sync Strobe 21-30 DC 0.038 20-31 DC 0.0886234-T(*2) Horn w/Sync Strobe 21-30 DC 0.038 20-31 DC 0.1556234-Y(*2) Horn w/Sync Strobe 21-30 DC 0.038 20-31 DC 0.1706234-Z(*2) Horn w/Sync Strobe 21-30 DC 0.038 20-31 DC 0.2496235-E Horn w/Strobe-WP 21-30 DC 0.038 20-31 DC 0.0596235-L Horn w/Strobe-WP 21-30 DC 0.038 20-31 DC 0.2496235-M(*2) Horn w/Sync Strobe-WP 21-30 DC 0.038 20-31 DC 0.0596235-Z(*2) Horn w/Sync Strobe-WP 21-30 DC 0.038 20-31 DC 0.2496238-E Horn w/Strobe 21-30 DC 0.038 20-31 DC 0.0596238-G Horn w/Strobe 21-30 DC 0.038 20-31 DC 0.0896238-J Horn w/Strobe 21-30 DC 0.038 20-31 DC 0.1556238-K Horn w/Strobe 21-30 DC 0.038 20-31 DC 0.1646238-L Horn w/Strobe 21-30 DC 0.038 20-31 DC 0.2496238-M(*2) Horn w/Sync Strobe 21-30 DC 0.038 20-31 DC 0.0596238-R(*2) Horn w/Sync Strobe 21-30 DC 0.038 20-31 DC 0.0886238-T(*2) Horn w/Sync Strobe 21-30 DC 0.038 20-31 DC 0.1556238-Y(*2) Horn w/Sync Strobe 21-30 DC 0.038 20-31 DC 0.1706238-Z(*2) Horn w/Sync Strobe 21-30 DC 0.038 20-31 DC 0.2496240 Horn 21-30 DC 0.0656243 Horn 21-30 DC 0.0656244 Horn 21-30 DC 0.0656245 Horn 21-30 DC 0.0656250 Horn 21-30 DC 0.0656254-E Horn w/Strobe 21-30 DC 0.065 20-31 DC 0.0596254-G Horn w/Strobe 21-30 DC 0.065 20-31 DC 0.0896254-J Horn w/Strobe 21-30 DC 0.065 20-31 DC 0.1556254-K Horn w/Strobe 21-30 DC 0.065 20-31 DC 0.1646254-L Horn w/Strobe 21-30 DC 0.065 20-31 DC 0.2496254-M(*2) Horn w/Sync Strobe 21-30 DC 0.065 20-31 DC 0.0596254-R(*2) Horn w/Sync Strobe 21-30 DC 0.065 20-31 DC 0.0886254-T(*2) Horn w/Sync Strobe 21-30 DC 0.065 20-31 DC 0.1556254-Y(*2) Horn w/Sync Strobe 21-30 DC 0.065 20-31 DC 0.1706254-Z(*2) Horn w/Sync Strobe 21-30 DC 0.065 20-31 DC 0.2496255-E Horn w/Strobe-WP 21-30 DC 0.065 20-31 DC 0.0596255-L Horn w/Strobe-WP 21-30 DC 0.065 20-31 DC 0.2496255-M(*2) Horn w/Sync Strobe-WP 21-30 DC 0.065 20-31 DC 0.0596255-Z(*2) Horn w/Sync Strobe-WP 21-30 DC 0.065 20-31 DC 0.2496258-E Horn w/Strobe 21-30 DC 0.065 20-31 DC 0.0596258-G Horn w/Strobe 21-30 DC 0.065 20-31 DC 0.0896258-J Horn w/Strobe 21-30 DC 0.065 20-31 DC 0.1556258-K Horn w/Strobe 21-30 DC 0.065 20-31 DC 0.1646258-L Horn w/Strobe 21-30 DC 0.065 20-31 DC 0.2496258-M(*2) Horn w/Sync Strobe 21-30 DC 0.065 20-31 DC 0.0596258-R(*2) Horn w/Sync Strobe 21-30 DC 0.065 20-31 DC 0.0886258-T(*2) Horn w/Sync Strobe 21-30 DC 0.065 20-31 DC 0.1556258-Y(*2) Horn w/Sync Strobe 21-30 DC 0.065 20-31 DC 0.1706258-Z(*2) Horn w/Sync Strobe 21-30 DC 0.065 20-31 DC 0.2496300 Mini-Horn 20-31 DC 0.0256301 Mini-Horn 20-31 DC 0.0256304-E Mini-Horn w/Strobe 20-31 DC 0.025 20-31 DC 0.0596304-G Mini-Horn w/Strobe 20-31 DC 0.025 20-31 DC 0.0896304-J Mini-Horn w/Strobe 20-31 DC 0.025 20-31 DC 0.1556304-K Mini-Horn w/Strobe 20-31 DC 0.025 20-31 DC 0.1646304-L Mini-Horn w/Strobe 20-31 DC 0.025 20-31 DC 0.2496304-M(*2) Mini-Horn w/Sync Strobe 20-31 DC 0.025 20-31 DC 0.059P/N 447192 Issue I (preliminary 10/31/2001)IX-8
12120 OWNER'S MANUAL<strong>Faraday</strong>CatalogNumberDescriptionAudibleVoltage(Volts)AudibleCurrent(Amps)StrobeVoltage(Volts)StrobeCurrent(Amps)6304-R(*2) Mini-Horn w/Sync Strobe 20-31 DC 0.025 20-31 DC 0.0886304-T(*2) Mini-Horn w/Sync Strobe 20-31 DC 0.025 20-31 DC 0.1546304-Y(*2) Mini-Horn w/Sync Strobe 20-31 DC 0.025 20-31 DC 0.1706304-Z(*2) Mini-Horn w/Sync Strobe 20-31 DC 0.025 20-31 DC 0.2496310 Mini-Horn-S/T 20-31 DC 0.0256311 Mini-Horn-S/T 20-31 DC 0.0256314-E Mini-Horn-S/T w/Strobe 20-31 DC 0.025 20-31 DC 0.0596314-G Mini-Horn-S/T w/Strobe 20-31 DC 0.025 20-31 DC 0.0896314-J Mini-Horn-S/T w/Strobe 20-31 DC 0.025 20-31 DC 0.1556314-K Mini-Horn w/Strobe 20-31 DC 0.025 20-31 DC 0.1646314-L Mini-Horn-S/T w/Strobe 20-31 DC 0.025 20-31 DC 0.2496314-M(*2) Mini-Horn-S/T w/Sync Strobe 20-31 DC 0.025 20-31 DC 0.0596314-R(*2) Mini-Horn-S/T w/Sync Strobe 20-31 DC 0.025 20-31 DC 0.0886314-T(*2) Mini-Horn-S/T w/Sync Strobe 20-31 DC 0.025 20-31 DC 0.1546314-Y(*2) Mini-Horn-S/T w/Sync Strobe 20-31 DC 0.025 20-31 DC 0.1706314-Z(*2) Mini-Horn-S/T w/Sync Strobe 20-31 DC 0.025 20-31 DC 0.2496320(*2) Sync Electronic Horn 20-31 DC 0.0306321(*2) Sync Electronic Horn 20-31 DC 0.0306380 Electronic Signal-8T 20-31 DC 0.024-0.050 (*4)6381 Electronic Signal-8T 20-31 DC 0.024-0.050 (*4)Key:(*1) 1=10” gong, 4=4” gong, 5=chime, 6=6” gong, 8=8” gong(*2) Sync Strobe Light or Sync Electronic Horn require 5405 Sync <strong>Control</strong> Module(*3) Sync Electronic Horn and Sync Strobe Light require 5405 or 5406 Sync <strong>Control</strong> Module(*4) See Installation Instructions for the current of the desired tone.Cat. No. xxxx-E = Strobe Light (UL1971 15/75cd) Cat. No. xxxx-M = Sync Strobe Light (UL1971 15/75cd)Cat. No. xxxx-G = Strobe Light (UL1971 30/75cd) Cat. No. xxxx-R = Sync Strobe Light (UL1971 30/75cd)Cat. No. xxxx-J = Strobe Light (UL1971 60/75cd) Cat. No. xxxx-T = Sync Strobe Light (UL1971 60/75cd)Cat. No. xxxx-K = Strobe Light (UL1971 75cd) Cat. No. xxxx-Y = Sync Strobe Light (UL1971 75cd)Cat. No. xxxx-L = Strobe Light (UL1971 110cd) Cat. No. xxxx-Z = Sync Strobe Light (UL1971 110cd)Accessory Devices<strong>Faraday</strong> Mfg. Part Number DescriptionCat. No.<strong>Faraday</strong>, LLCR711-1 711-1 Polarized Auxiliary RelayMEP-100 15050 Mini-Evac <strong>Control</strong> <strong>Unit</strong>RSE-100 15070 Remote Signal Expander15222A 15222A Signal Expander PanelMVP-500 15060 Mini-Voice <strong>Control</strong> <strong>Unit</strong>MVP-501 15061 Mini-Voice <strong>Control</strong> <strong>Unit</strong>Notes:1. The accessory devices listed above may be wired to activate from the notification appliance circuits.2. For specific wiring and installation information, read the instructions provided with each device.P/N 447192 Issue I (preliminary 10/31/2001)IX-9
12120 OWNER'S MANUALDEVICES FOR AUXILIARY POWER OUTPUTSThe following lists compatible devices for the auxiliary power outputs.• Door Holders• RelaysFour Wire (Separately Powered) Heat & Smoke Detectors, See Devices for Initiating Device Circuits.Door HoldersNot applicable at this time.Relays<strong>Faraday</strong> Mfg. Part Number DescriptionCat. No.<strong>Faraday</strong>, LLCR711-1 711-1 Remote Relay <strong>Unit</strong>Air Products & <strong>Control</strong>sR712-1 MR-101/C Remote Relay <strong>Unit</strong>R712-2 MR-201/C Remote Relay <strong>Unit</strong>R712-4 MR-104/C Remote Relay <strong>Unit</strong>R712-8 MR-204/C Remote Relay <strong>Unit</strong>9273 PAM-4 E.O.L. Relay<strong>System</strong> SensorPM6849 A77-716B E.O.L. RelayNotes:1. The accessory devices listed above may be wired to the auxiliary power outputs.2. For specific wiring and installation information, read the instructions provided with each device.P/N 447192 Issue I (preliminary 10/31/2001)IX-10
12120 OWNER'S MANUALX. APPENDIX-C: TROUBLESHOOTINGDEFINITIONS FOR EVENT HISTORY ENTRIESA. GeneralENTRYALARMALRMAVCntrBlankCrossZoneCZ1ACZ1BCZ2ACZ2BDETECTORHEATIONLCDxxMAINMANL PULLMntcPASPAS INHBTPHOTOPRE SIGNLPreASUPERVSRYSUPRTRBLTROUBLEUSERxWATERFLOWINDICATESGeneral alarm<strong>Alarm</strong><strong>Alarm</strong> Verify counterPlain alarmcross zone pointCross zoneCross zoneCross zoneCross zoneGeneral alarmThermal sensorIon sensorLCD Annunciator xxMain panelManual pull stationSensor maintenance alertPositive alarm sequencePAS inhibit switchPE sensorpre-signalPre-alarmSupervisorySupervisoryTroubleTroubleUser-defined input xWaterflowP/N 447192 Issue I (preliminary 10/31/2001) X-1
12120 OWNER'S MANUALB. <strong>System</strong> TroublesENTRYINDICATESAC TroubleAC input low or offAddrLp 1 DBLSHT Double short trouble on addressable loop 1AddrLp 1 OPEN Open circuit trouble on addressable loop 1AddrLp 1 SHORT Short circuit trouble on addressable loop 1BATT TroubleBattery input low or offCITY TroubleLocal Energy circuit openCM1aa NoRespons Programmed control module not responding on loop 1 at address aaCM1aa DataError More than one device responding on loop 1 at address aaCM1aa OPEN<strong>Control</strong> module NAC wiring open on loop 1 at address aaCM1aa SHORT <strong>Control</strong> module NAC wiring shorted on loop 1 at address aaDACT Acct TrbDACT account reporting troubleDACT Com Trouble DACT communication trouble with main processorDACT PL x Trouble Open or short on DACT phone line xFLASH FATAL Trb Configuration Flash memory troubleGRND FAULT Trbl Ground Fault troubleLCDxx NoRespons LCD Annunciator xx programmed but is not respondingLCDxx Not Pgmd LCD Annunciator xx is not programmed but is respondingLCDxx TroubleLCD Annunciator xx reports troubleMD100 Addr=00 Module on loop 1 responded to address 00MD1aa Not Pgmd Module responding is not programmed on loop 1 address aaMM1aa NoRespons Programmed monitor module not respondingMM1aa DataError More than one device responding on loop 1 at address aaMM1aa Bad PWs Module responses are not valid on loop 1 address aaMM1aa Bad Pgm Module responding is not the type programmed on loop 1 address aaMM1aa OPENModule IDC wiring open on loop 1 address aaMNLP Bad Msg Main processor to loop processor communication troubleMNLP Fifo Xmit Main processor to loop processor communication troubleMNLP NoRespons Main processor to loop processor communication troubleNACxx TroubleNAC xx wiring is open or shortedPC Pgmr Trb<strong>Control</strong> unit is not receiving communication from PCQuickTest Abort Quick Test Timer expired causing abnormal exit of Quick TestSN100 Addr=00 Sensor on loop 1 responded to address 00SN1aa DataError More than one device responding on loop 1 at address aaSN1aa NoRespons Programmed sensor not responding on loop 1 address aaSN1aa Bad PWs Sensor responses are not valid on loop 1 address aaSN1aa Tst FltSensor is not entering or exiting test mode on loop 1 address aaSN1aa Bad Pgm Sensor responding is not the type programmed on loop 1 address aaSN1aa TRBLSensor needs maintenance on loop 1 address aaSN1aa Not Pgmd Sensor responding is not programmed on loop 1 address aaSN1aa MaintAlrt Sensor needs cleaning on loop 1 address aaSN1aa TestValue Not receiving valid sensor test reading on loop l address aaTrb ReminderTrouble Reminder timer expiredP/N 447192 Issue I (preliminary 10/31/2001) X-2
12120 OWNER'S MANUALC. <strong>System</strong> EventsENTRYINDICATES/NOTES<strong>Alarm</strong> SilencedMAIN, LCDxx shown on bottom lineAll AV Ctrs ClrAll AV counters clearedAutoProgram Run Auto programming function runBackup Cnfg Check Backup configuration validated, result on bottom lineBackup Cnfg Edit Backup configuration editedCMlaa ActvnCnfd Non-relay CM activation confirmed by trouble input onConfigsCompared Backup and primary configurations compared, result on bottom lineConfigsSwapped Backup and Primary configurations swappedEventHist ClearEvent History clearedMnt Levl EnterEntered Maintenance levelMnt Levl ExitExited Maintenance levelMnt Levl PW Changed Changed Maintenance level passwordMM1aa Disabled MAIN or LCDxx shown on bottom lineMM1aa Enabled MAIN or LCDxx shown on bottom lineNACxx Active Confirm NAC activation confirmedPanel ResetMAIN, LCDxx shown on bottom linePower UpPriConfigCopied Primary configuration copied to backupQuickTest ExitExited Quick Test, MAIN or LCDxx shown on bottom lineQuickTest Start Started Quick Test, MAIN or LCDxx shown on bottom lineSN1aa AV CtrClr AV counter for sensor SN1aa clearedSN1aa AV CtrRll <strong>Alarm</strong> Verification counter rolled over to 0SN1aa Disabled MAIN or LCDxx shown on bottom lineSN1aa Enabled MAIN or LCDxx shown on bottom line<strong>System</strong> Date Changed Changed system date, old and new dates shown on lines 3 and 4<strong>System</strong> Time Changed Changed system time, old and new times shown on lines 3 and 4Tech Levl EnterEntered Tech levelTech Levl ExitExited Tech levelTech Levl PW Changed Changed Tech level passwordUser Levl EnterEntered User levelUser Levl ExitExited User levelP/N 447192 Issue I (preliminary 10/31/2001) X-3
12120 OWNER'S MANUALThis page is intentionally blank.P/N 447192 Issue I (preliminary 10/31/2001) X-4
12120 OWNER'S MANUALXI. APPENDIX-D: INSTALLATIONINSTRUCTIONSThis Appendix provides installation instructions for the following option modules and accessories:• 12101 City Tie Board 447052• 12103A RS232 Board 447223• 12105 Serial Digital Communicator 447063• 12408 Auxiliary Power Supply 446066• 12506 Remote LCD Annunciator 446983• 12507 Serial Relay <strong>Unit</strong> 44707312508 Serial Relay Extender• 12509 Serial Annunciator <strong>Unit</strong> 44707412510 Serial Annunciator Extender• 401403 <strong>Fire</strong> <strong>Alarm</strong> Accessory Enclosure 447138P/N 447192 Issue I (preliminary 10/31/2001)XI-1
12120 OWNER'S MANUALThis page is intentionally blank.P/N 447192 Issue I (preliminary 10/31/2001)XI-2
INSTALLATION INSTRUCTIONS AND WIRING FORCITY TIE BOARDCAT. NO. CT-1K P/N 12101The 12101 City Tie Board is an optional module for the 12120 <strong>Fire</strong> <strong>Alarm</strong> <strong>System</strong> <strong>Control</strong> <strong>Unit</strong>. The City TieBoard provides local energy and polarity reversal connections. The polarity reversal connections provide atrouble circuit and an alarm circuit with optional trouble output. The City Tie Board is mounted on the MainBoard. The trouble outputs of the two polarity reversal circuits are interconnected and the control unit maybe programmed to send trouble, supervisory or either.PARTS SUPPLIED1 12101 City Tie Board4 943165 Spacers, 1”1 18965 Keps Nut, #6-321 50040-392 Resistor 3.9K ohm, 1/4W1 447052 Instruction SheetStep 1.) Installation is to be done by qualified personnelwho have thoroughly read and understood thisinstruction sheet.Step 2.) Disconnect all power into system, includingbatteries.Main Board12101 MOUNTINGSpacers (4)City Tie BoardTB2LE1Step 3.) Set jumper J2 for proper operation.J2 – REVERSE POLARITY ALARM CIRCUIT• ALARM•• ALARM WITH TROUBLEStep 4.) Mount City Tie Board as shown, using fourspacers (P/N 943165) to the Main Board.NOTE: Check to see that the header andconnectors are mated properly.LE2+CAStep 5.) Attach ground wire as shown, using #6-32 KepsNut (P/N 18965) to backbox stud.J3J1J2ALARMALARM WITHTROUBLETB1-+CT-Step 6.) If the local energy circuit is not used, connect the3.9K ohm (P/N 50040-392) across the terminals.Step 7.) Attach conduit and run wires as required.Step 8.) Connect wires to the fire alarm system controlunit as required.Step 9.) Apply power to system.Keps Nut, #6-32Step 10.) Program for proper operation of functions.a) Tech Level>>Outputs>Option Mods>City Tie(Set City Tie status to Installed)b) Tech Level>>Sys Params>CityTrbActvn(Set City Tie trouble activation to Trb, Sup or Either)c) Maint Level>>Disable/Enable>Outputs>City Tie>EnabledNOTE: See Programmer’s Manual (P/N 447214)for more details on programming.Step 11.) Check for proper operation of functions.FARRADY, LLC447052 ISSUE I (Preliminary 10/31/2001) PAGE 1 OF 2
12101 WIRINGLocal Energy City Tie Connection Ratings:Non-Power LimitedSupervised for open or grounded circuit at control unit.Voltage: 24VDC nominalStandby Current: 0.007A maximum<strong>Alarm</strong> Current: 0.400A maximum (Momentary pulse)Ripple: 1.5VAC maximumMaximum Wire Loop Resistance: 30 ohmsTrip Coil Impedance: 14.5 ohmsTB2LE1LE2Local EnergyCity Box+CA-Reverse Polarity Receiver(Set J2 for proper operation)J2ALARMALARM WITHTROUBLETB1+CT-Reverse Polarity Receiver(Program for trouble and/orsupervisory operation)Intended for connection to a polarity reversal circuit of aremote station receiving unit having compatible ratings.Reverse Polarity City Tie Connections Ratings:Power LimitedSupervised for grounded circuit at control unit.Supervised for open or shorted circuit by receiver.Voltage: 24VDC nominalCurrent: 0.020A maximum (normal or alarm)Current: 0.025A maximum (shorted)Ripple: 1.5VAC maximum447052 ISSUE I (Preliminary 10/31/2001) PAGE 2 OF 2
CR1INSTALLATION INSTRUCTIONS AND WIRING FORRS232 INTERFACE BOARDCAT. NO. IM232A P/N 12103AThe 12103A Interface Board is an optional module for the 12100 <strong>Fire</strong> <strong>Alarm</strong> <strong>System</strong> <strong>Control</strong> <strong>Unit</strong>. TheInterface Board provides a serial RS232 connection for logging events to a printer, terminal or computer. TheInterface Board is mounted on the Main Board.PARTS SUPPLIED1 12103A RS232 Interface Board4 943165 Spacers, 1”1 18965 Keps Nut, #6-321 944139 Cable Assembly1 447223 Instruction Sheet12103A MOUNTINGInterface BoardKepsNut, #6-32Spacers (3)Main BoardStep 1.) Installation is to be done by qualified personnelwho have thoroughly read and understood thisinstruction sheet.Step 2.) Disconnect all power into system, includingbatteries.Step 3.) Mount RS232 Interface Board as shown, usingthree spacers (P/N 943165) to the Main Board orusing four spacers (P/N 943165) to the City TieBoard (if used).NOTE: Check to see that the header andconnectors are mated properly.Step 4.) Secure ground wire, using keps nut (P/N 18965).Step 5.) Plug proper cable assembly into connector P4 asshown below.Step 6.) Apply power to system.Step 7.) Check for proper operation of functions.Note: This connection is limited to be in the same room.12103A COMPUTER CONNECTION<strong>Faraday</strong> 944138Cable AssemblyJ1P4CR3CR1CR2U1J3Note: The 944138 Cable Assembly provides a 9-pin femaleconnector. A 9-pin male to 25 pin female adapter may berequired for some computers.12103A PRINTER OR TERMINALCONNECTION <strong>Faraday</strong> 944139Cable AssemblyJ1P4CR3CR2U1J3FARADAY, LLC447223 ISSUE I Page 1 of 1
INSTALLATION INSTRUCTIONS AND WIRING FORDACT BOARDCAT. NO. DC-1K P/N 12105The 12105 DACT Board is an optional module for the 12100 or 12120 <strong>Fire</strong> <strong>Alarm</strong> <strong>System</strong> <strong>Control</strong> <strong>Unit</strong>. TheDACT (Digital <strong>Alarm</strong> Communicator Transmitter) Board provides telephone line connections forcommunication with a DACR (Digital <strong>Alarm</strong> Communicator Receiver). The DACT Board is mounted on theMain Board. The DACT Board options are set through the control unit programming sequence.PARTS SUPPLIED1 12105 DACT Board4 943165 Spacers, 1”1 18965 Keps Nut, #6-321 447063 Instruction SheetStep 1.) Installation is to be done by qualified personnelwho have thoroughly read and understood thisinstruction sheet.Step 2.) Disconnect all power into system, includingbatteries.Main Board12105 MOUNTINGSpacers (4)DACT BoardKeps Nut, #6-32Step 3.) Mount DACT Board as shown, using fourspacers (P/N 943165) to the Main Board.NOTE: Check to see that the header andconnectors are mated properly.Step 4.) Attach ground wire as shown, using #6-32 KepsNut (P/N 18965) to backbox stud.Step 5.) Attach conduit and run wires as required.Step 6.) Connect wires to the fire alarm system controlunit as required.Step 7.) Apply power to system.Step 8.) Program for proper operation of functions.a) Tech Level>>Outputs>Option Mods>DACT CFG(Set DACT line and general configurations)b) Tech Level>>Outputs>Option Mods>DACT ACCTS(Set DACT account configurations)c) Maint Level>>Disable/Enable>Outputs>DACT>EnabledNOTE: See Programmer’s Manual (P/N 447064 for12100 or 447193 for 12120) for moredetails on programming.Step 9.) Check for proper operation of functions.FARADAY, LLC447063 ISSUE I Rev. B PAGE 1 OF 4
413699 WIRING<strong>Faraday</strong> P/N 447109Cable AssemblyTelephone Line Connection Ratings:Non-Power LimitedSupervised for open or shorted circuit.Voltage: 24VDC nominalRinger Equivalence: 0.4BREDGREENGREYBROWN8-PINMODULARPLUGRJ31XJACKTIPRINGTIPRINGTelephone Line #1 Connectionfrom TELCOOptional Output to telephone(Note: The DACT may seizethe line to report events)REDGREENGREYBROWN8-PINMODULARPLUGRJ31XJACKTIPRINGTIPRINGTelephone Line #2 Connectionfrom TELCOOptional Output to telephone(Note: The DACT may seizethe line to report events)NOTE: The RJ31X provides a convenient connection allowing theDACT to be installed and removed without requiring re-wiringand can be installed by the telephone installer.413699 FORMAT DESCRIPTIONFormatDescriptionSIA DCS 8 Security Industry Association - Digital Communications Standard. Format may send up to eight events acall. SIA 1997 Level Ia compatibility with support for O (old) blocks and 300 Baud (FAST) operation.Sends an account number (up to 6 digits), a 2 character code and 3-digit identifier up to four times withFSK frequency encoding.SIA DCS 20 See SIA DCS 8, except format may send up to twenty events a call.Ademco Contact ID Sends a 4-digit account number, a 3-digit code and 3-digit identifier up to four rounds of dual tone multiplefrequency with 1400 and 2300 Hz handshake frequency.3/1 1400HZ Sends a 3-digit account number and a 1-digit code up to four rounds at 20 pps with 1400 Hz handshakefrequency.3/1 2300HZ Sends a 3-digit account number and a 1-digit code up to four rounds at 20 pps with 2300 Hz handshakefrequency.4/2 1400HZ Sends a 4-digit account number and a 2-digit code up to four rounds at 20 pps with 1400 Hz handshakefrequency.4/2 2300HZ Sends a 4-digit account number and a 2-digit code up to four rounds at 20 pps with 2300 Hz handshakefrequency.COMPATIBLE RECEIVERS/FORMATSReceiverManufacturerCompatibleReceiversSIA DCS8SIA DCS20AdemcoContact ID3/11400HZ3/12300HZ4/21400HZ4/22300HZOsborne-Hoffman,Inc.QUICKALERT!Model IIAdemcoContact IDFast 3+11400HZFast 3+12300HZFast 4+21400HZFast 4+22300HZOsborne-Hoffman,Inc.OH2000 SIA 1 SIA 1 AdemcoContact IDFast 3+11400HZFast 3+12300HZFast 4+21400HZFast 4+22300HZRadionics, Inc. D6500 3x1 3x1 4x2 4x2Silent Knight Security 9000 SIA 8 SIA 20 SK 3/1 SK 3/1 SK 4+2 SK 4+2Corp.Silent Knight Security 9500 SIA DCS SIA DCS Ademco SK 3/1 SK 3/1 SK 4+2 SK 4+2Corp.Contact IDSilent Knight SecurityCorp.9800 SIA DCS SIA DCS AdemcoContact IDSK 3/1 SK 3/1 SK 4+2 SK 4+2447063 ISSUE I Rev. B PAGE 2 OF 4
413699 EVENT CODESEvent TypeSIA DCS(8 or 20)AdemcoContact ID3/1 *1400HZ or 2300HZ4/2 **1400HZ or 2300HZ<strong>Fire</strong> <strong>Alarm</strong> FA xyz 1 110 00 xyz 0 01Sprinkler <strong>Alarm</strong> SA xyz 1 113 00 xyz 0 02<strong>Fire</strong> <strong>Alarm</strong> Restore FH xyz 3 110 00 xyz 2 21Sprinkler <strong>Alarm</strong> Restore SH xyz 3 113 00 xyz 2 22<strong>Fire</strong> Supervisory FS xyz 1 200 00 xyz 6 64Sprinkler Supervisory SS xyz 1 203 00 xyz 6 66AC Restore AR 3 301 00 7 70Power Up RR 0 1 305 00 0 7 70<strong>Fire</strong> Unbypass FU xyz 3 571 00 xyz 7 71Phone Line 1 Restore LR 1 3 351 00 1 7 71Phone Line 2 Restore LR 2 3 352 00 2 7 72<strong>Fire</strong> Trouble Restore FJ xyz 3 373 00 xyz 7 73<strong>Fire</strong> Trouble Restore (all clear) FJ 9 3 373 00 9 7 79<strong>Fire</strong> Restore FR xyz 3 110 00 xyz 7 74Sprinkler Trouble Restore SJ xyz 3 203 00 xyz 7 75Sprinkler Restore SR xyz 3 203 00 xyz 7 76<strong>System</strong> Battery Restore YR 3 302 00 7 77AC Trouble AT 1 301 00 8 80<strong>Fire</strong> Bypass FB xyz 1 571 00 xyz 8 81Phone Line 1 Trouble LT 1 1 351 00 1 8 81Phone Line 2 Trouble LT 2 1 352 00 2 8 82<strong>Fire</strong> Trouble FT xyz 1 373 00 xyz 8 83<strong>System</strong> Battery Trouble YT 1 302 00 8 87<strong>Fire</strong> Test Begin FI 0 1 604 00 0 9 90<strong>Fire</strong> Test End FK 3 604 00 9 92Automatic Test (unit normal) RP N 1 602 00 N 9 93Automatic Test (unit abnormal) RP A 1 602 00 A 9 93Manual Test (unit normal) RX N 1 601 00 N 9 94Manual Test (unit abnormal) RX A 1 601 00 A 9 94* The 1-digit code is programmable (3/1 codes).** The first digit is programmable (3/1 codes)EVENT CODE IDENTIFER DESCRIPTIONSx y zSensor 0 Address (00-99)Module 1 Address (00-99)NAC Trouble 2 Circuit (01-04)Trouble 2 9 8GND Trouble 2 9 9456789447063 ISSUE I Rev. B PAGE 3 OF 4
FCC Requirements - Part 68This equipment complies with Part 68 of the Federal Communication Commission (FCC) Rules andRegulations. On the bottom is a label that contains, among other information, the FCC Registration Numberand Ringer Equivalence Number (REN) for this equipment. If requested, this information must be provided tothe telephone company.FCC Registration Number:USOC telephone jack:ABK USA-34988-AL-ERJ31XRinger Equivalence Number (REN): 0.4BThe REN is useful to determine the quantity of devices which may connect to the telephone line. ExcessiveREN’s on the telephone line may result in the devices not ringing in response to an incoming call. In most,but not all areas, the sum of the REN’s should not exceed five (5.0). To be certain of the number of devicesthat may be connected to the line, as determined by the total REN’s, contact the telephone company todetermine the maximum REN for the calling area.If the Model 413699 equipment causes harm to the telephone network, the telephone company will notifyyou in advance that temporary discontinuance of service may be required. If advance notice is not practical,the telephone company will notify you of the discontinuance as soon as possible. Also, you will be advisedof your right to file a complaint with the FCC if you believe it is necessary.The telephone company may make changes in its facilities, equipment, operations or procedures that couldaffect the operation of your telephone equipment. If this happens, the telephone company will provideadvance notice so that you can modify your equipment as required to maintain uninterrupted service.If you experience trouble with the DACT Board for repair and/or warranty information please contact:<strong>Faraday</strong>, LLC / 805 S. Maumee Street / Tecumseh, Michigan 49286 / 517-423-2111If the trouble is causing harm to the telephone network, the telephone company may request you disconnectto equipment from the network until the problem is solved. You should not attempt to repair this equipmentyourself. This equipment contains no customer or user serviceable parts.This device may not be used on public coin or party line services.Changes or modifications not expressly approved by <strong>Faraday</strong>, LLC could void your authority to operate thisequipment.447063 ISSUE I Rev. B PAGE 4 OF 4
INSTALLATION INSTRUCTIONS AND WIRING FORAUXILIARY POWER SUPPLYCAT. NO. APS-1 P/N 12408The 12408 Auxiliary Power Supply is an optional accessory for a fire alarm system control unit. This unitprovides two power supply outputs, each can supply up to 1.5 amps of current, for a total of 3 amps of alarmcurrent. The power supply is limited to a total of 2 amps of normal standby current. A dry contact troubleoutput is provided which can be monitored by the fire alarm system control unit. The 12408 also providesground fault supervision of the power supply outputs.PARTS SUPPLIED1 12408-120 or Auxiliary Power Supply12408-2401 443269 Screwdriver1 446066 Instruction Sheet12408 DIMENSIONSStep 1.) Installation is to be done by qualified personnelwho have thoroughly read and understood thisinstruction sheet.CAUTION: It is recommended that the p.c. boardbe removed for any procedure that maycause dust, metal shavings, grease orany such matter that may affect thecircuit board and/or parts.2 5/8"14 3/8"11 3/4"9 1/2"4 7/8"1 9/32"Step 2.) Disconnect all power into system, includingbatteries.Step 3.) Mount backbox as required. If the power supplyis to be mounted semi-flush, the backbox may bemounted up to 3.5” into the wall. Place the 12409Semi-Flush Trim around the backbox and secureto the wall with four #10 x 3/4” wood screws(P/N 940454).NOTE: The screw type may be required to bedifferent depending on the wall material.1" 12 3/8"8 7/32"7/16"TYP.Step 4.) Attach conduit and run wires as required.NOTE: The nonpower-limited wiring must be runin separate conduit and maintain 1/4”separation from power-limited wiring.Step 5.) Connect wires to auxiliary power supply asrequired.Step 6.) Apply power to system.Step 7.) Check for proper operation of functions.12408 SURFACE MOUNTINGBox 14 3/8"Door 14 3/4"6"12408 SEMI-FLUSH MOUNTINGBox 10"Door 10 9/32"17 1/2"3 1/2" Max.13 7/8"NOTE: See box dimensions at left for opening size.FARADAY, LLC446066 ISSUE I Rev. C PAGE 1 OF 6
12408 WIRING24V Battery Set(7 to 38AH)Supervised,Non-PowerlimitedInput Current 6A max.Charge Voltage 28V max.Charge Current 2.5A max.B+B-PowerBatteryGroundFaultOACTrouble Relay ContactRated: 3A at 30VDC/AC, resistiveFor Powerlimited Source, Not supervised120VAC 50/60 Hz3A max.or240VAC 50/60 Hz1.5A max.Supervised,Non-PowerlimitedACNTotal current availablefrom all outputs:<strong>Alarm</strong> 3A max.Standby 2A max.+-+-Non-resettable Auxiliary Power Output, 1.5A max.24 VDC nominal, Powerlimited, Not supervisedNon-resettable Auxiliary Power Output, 1.5A max.24 VDC nominal, Powerlimited, Not supervisedNOTE: Branch-Currentmust be porotected by a15A overcurrent device.See Installation Instructions for U.L. Listed compatibledevices.All wiring must be in accordance with local codes andNational Electric Code. Use only FPL, FPLR and/orFPLP as described in Article 760 of N.E.C.Devices for auxiliary power outputsThe following lists compatible devices for the auxiliary power outputs.• Door Holders• Relays• Four-Wire (Seperately Powered) Heat & Smoke Detectors• Notification AppliancesDoor Holders<strong>Faraday</strong>Cat. No.Mfg Part NumberDescriptionR.S.G. Inc.9552 DH-24120FC1 Door Holder9553 DH-24120SC1 Door Holder9554 DH-24120GC1 Door Holder9555 DH-24120GC2 Door HolderEdwards Co.1501-002 1501-G1 Door Holder1502-002 1502-G1 Door Holder1503-002 1503-G1 Door Holder1504-002 1504-G1 Door Holder1505-002 1505-G1 Door Holder1508-002 1508-G1 Door Holder1509-002 1509-G1 Door HolderRelays<strong>Faraday</strong> Cat. No. Mfg Part Number Description<strong>Faraday</strong>, LLC.R711-1 711-1 Remote Relay <strong>Unit</strong>Air Products &<strong>Control</strong>sR712-1 MR-101/C Remote Relay <strong>Unit</strong>R712-2 MR-201/C Remote Relay <strong>Unit</strong>R712-4 MR-104/C Remote Relay <strong>Unit</strong>R712-8 MR-204/C Remote Relay <strong>Unit</strong>9273 PAM-4 E.O.L. Relay<strong>System</strong> SensorPM6849 A77-716B E.O.L. RelayNotes:1. For specific wiring and installation information, read the instructions provided with each device.FARADAY, LLC446066 ISSUE I Rev. C PAGE 2 OF 6
Four-Wire (Separately Powered) Smoke & Heat Detectors<strong>Faraday</strong>Detectorw/BaseMfg Detector w/BaseMaximumStandbyCurrentMaximum<strong>Alarm</strong>CurrentNotesAir Products & <strong>Control</strong>s9269 RW-2W-NA 0.081mA 115mA Must use EOL Relay9270 RW-2W-PA 0.110mA 115mA Must use EOL RelayApollo <strong>Fire</strong> Detectors Limited9260 w/9266 55000-350 w/45681-227 0.110mA 130mA Must use EOL Relay9261 w/9266 55000-250 w/45681-227 0.081mA 130mA Must use EOL Relay9264 w/9266 55000-153 w/45681-227 0.057mA 130mA Must use EOL Relay9274 w/9266 55000-152 w/45681-227 0.057mA 130mA Must use EOL Relay<strong>System</strong> Sensor9377 1424 0.100mA 41mA Must use EOL Relay9378 2424 0.120mA 41mA Must use EOL Relay9379 2424TH 0.120mA 41mA Must use EOL Relay9337 112/24 0.050mA 25mA Must use EOL Relay9338 2112/24 0.050mA 25mA Must use EOL Relay9339 2112/24T 0.050mA 25mA Must use EOL Relay9340 2112/24TSRB 15mA 45mA Must use EOL Relay9358 w/9362 1451 w/B402B 0.120mA 41mA Must use EOL Relay9359 w/9362 2451 w/B402B 0.120mA 41mA Must use EOL Relay9360 w/9362 2451TH w/B402B 0.120mA 41mA Must use EOL Relay9447 w/9362 5451 w/B402B 0.120mA 39mA Must use EOL Relay9421 w/9362 4451HT w/B402B 0.120mA 39mA Must use EOL Relay9164 DH400ACDCI 25mA 110mA Must use 6 wires9165 DH400ACDCP 25mA 110mA Must use 6 wires9175 6424 10mA 28.4mA Must use EOL Relay and 6wiresNotes:1. For specific wiring and installation information, read the instructions provided with each device.2. Each 9273 EOL Relay requires 15 mA standby current.Compatible Notification AppliancesCatalogNumberDescriptionAudibleVoltageAudibleCurrentStrobeVoltageStrobeCurrent446(*1) Bell-Vibrating 21-30 VDC 0.110A476(*1) Bell-Vibrating 21-30VDC 0.070A477(*1) Bell-Single Stroke 21-30VDC 0.360A2700-E Strobe Light 20-31VDC 0.059A2700-G Strobe Light 20-31VDC 0.089A2700-J Strobe Light 20-31VDC 0.155A2700-K Strobe Light 20-31VDC 0.164A2700-L Strobe Light 20-31VDC 0.249A2700-M (*2) Sync Strobe Light 20-31VDC 0.059A2700-R (*2) Sync Strobe Light 20-31VDC 0.088A2700-T (*2) Sync Strobe Light 20-31VDC 0.154A2700-Y (*2) Sync Strobe Light 20-31VDC 0.170A2700-Z (*2) Sync Strobe Light 20-31VDC 0.249A2701-E Strobe Light 20-31VDC 0.059A2701-G Strobe Light 20-31VDC 0.089A2701-J Strobe Light 20-31VDC 0.155A2701-K Strobe Light 20-31VDC 0.164A2701-L Strobe Light 20-31VDC 0.249A2701-M (*2) Sync Strobe Light 20-31VDC 0.059A2701-R (*2) Sync Strobe Light 20-31VDC 0.088A2701-T (*2) Sync Strobe Light 20-31VDC 0.154A2701-Y (*2) Sync Strobe Light 20-31VDC 0.170A2701-Z (*2) Sync Strobe Light 20-31VDC 0.249A2705-E WP Strobe Light 20-31VDC 0.059A2705-L WP Strobe Light 20-31VDC 0.249A446066 ISSUE I Rev. C PAGE 3 OF 6
CatalogNumberDescriptionAudibleVoltageAudibleCurrentStrobeVoltageStrobeCurrent2705-M (*2) WP Sync Strobe Light 20-31VDC 0.059A2705-Z (*2) WP Sync Strobe Light 20-31VDC 0.249A2820 (*2) Sync Electronic Horn 20-31VDC 0.030A2821 (*2) Sync Electronic Horn 20-31VDC 0.030A2824-M (*3) Sync Electronic Horn w/Sync Strobe 20-31VDC 0.030A 20-31VDC 0.059A2824-R (*3) Sync Electronic Horn w/Sync Strobe 20-31VDC 0.030A 20-31VDC 0.088A2824-T (*3) Sync Electronic Horn w/Sync Strobe 20-31VDC 0.030A 20-31VDC 0.154A2824-Y (*3) Sync Electronic Horn w/Sync Strobe 20-31VDC 0.030A 20-31VDC 0.170A2824-Z (*3) Sync Electronic Horn w/Sync Strobe 20-31VDC 0.030A 20-31VDC 0.249A2880 Electronic Signal-8T 20-31VDC 0.024-0.050A (*4)2881 Electronic Signal-8T 20-31VDC 0.024-0.050A (*4)2884-E Electronic Signal-8T w/Strobe 20-31VDC 0.024-0.050A (*4) 20-31VDC 0.059A2884-G Electronic Signal-8T w/Strobe 20-31VDC 0.024-0.050A (*4) 20-31VDC 0.089A2884-J Electronic Signal-8T w/Strobe 20-31VDC 0.024-0.050A (*4) 20-31VDC 0.155A2884-K Electronic Signal-8T w/Strobe 20-31VDC 0.024-0.050A (*4) 20-31VDC 0.164A2884-L Electronic Signal-8T w/Strobe 20-31VDC 0.024-0.050A (*4) 20-31VDC 0.249A2884-M (*2) Electronic Signal-8T w/Sync Strobe 20-31VDC 0.024-0.050A (*4) 20-31VDC 0.059A2884-R (*2) Electronic Signal-8T w/Sync Strobe 20-31VDC 0.024-0.050A (*4) 20-31VDC 0.088A2884-T (*2) Electronic Signal-8T w/Sync Strobe 20-31VDC 0.024-0.050A (*4) 20-31VDC 0.154A2884-Y (*2) Electronic Signal-8T w/Sync Strobe 20-31VDC 0.024-0.050A (*4) 20-31VDC 0.170A2884-Z (*2) Electronic Signal-8T w/Sync Strobe 20-31VDC 0.024-0.050A (*4) 20-31VDC 0.249A5330 Electronic Horn-3T 21-32VDC 0.020-0.025A (*4)5333 Electronic Horn-3T 21-32VDC 0.020-0.025A (*4)5334 Electronic Horn-3T 21-32VDC 0.020-0.025A (*4)5335 Electronic Horn-3T 21-32VDC 0.020-0.025A (*4)5340 Electronic Horn 21-32VDC 0.020A5343 Electronic Horn 21-32VDC 0.020A5344 Electronic Horn 21-32VDC 0.020A5345 Electronic Horn 21-32VDC 0.020A5350 Electronic Horn-3T 21-32VDC 0.020-0.025A (*4)5353 Electronic Horn-3T 21-32VDC 0.020-0.025A (*4)5354 Electronic Horn-3T 21-32VDC 0.020-0.025A (*4)5355 Electronic Horn-3T 21-32VDC 0.020-0.025A (*4)5360 Electronic Horn 21-32VDC 0.020A5363 Electronic Horn 21-32VDC 0.020A5364 Electronic Horn 21-32VDC 0.020A5365 Electronic Horn 21-32VDC 0.020A5370 Electronic Signal-8T 12-32VDC 0.020-0.050A (*4)5373 Electronic Signal-8T 12-32VDC 0.020-0.050A (*4)5374 Electronic Signal-8T 12-32VDC 0.020-0.050A (*4)5375 Electronic Signal-8T 12-32VDC 0.020-0.050A (*4)5380 Electronic Signal-8T 12-32VDC 0.020-0.050A (*4)5383 Electronic Signal-8T 12-32VDC 0.020-0.050A (*4)5384 Electronic Signal-8T 12-32VDC 0.020-0.050A (*4)5385 Electronic Signal-8T 12-32VDC 0.020-0.050A (*4)5390 Electronic Chime 21-30VDC 0.020A5394-E Electronic Chime w/Strobe 21-30VDC 0.020A 20-31VDC 0.059A5394-G Electronic Chime w/Strobe 21-30VDC 0.020A 20-31VDC 0.089A5394-J Electronic Chime w/Strobe 21-30VDC 0.020A 20-31VDC 0.155A5394-K Electronic Chime w/Strobe 21-30VDC 0.020A 20-31VDC 0.164A5394-L Electronic Chime w/Strobe 21-30VDC 0.020A 20-31VDC 0.249A5394-M (*2) Electronic Chime w/Sync Strobe 21-30VDC 0.020A 20-31VDC 0.059A5394-R (*2) Electronic Chime w/Sync Strobe 21-30VDC 0.020A 20-31VDC 0.088A5394-T (*2) Electronic Chime w/Sync Strobe 21-30VDC 0.020A 20-31VDC 0.154A5394-Y (*2) Electronic Chime w/Sync Strobe 21-30VDC 0.020A 20-31VDC 0.170A5394-Z (*2) Electronic Chime w/Sync Strobe 21-30VDC 0.020A 20-31VDC 0.249A5395 Electronic Chime 21-30VDC 0.020A5398-E Electronic Chime w/Strobe 21-30VDC 0.020A 20-31VDC 0.059A5398-G Electronic Chime w/Strobe 21-30VDC 0.020A 20-31VDC 0.089A5398-J Electronic Chime w/Strobe 21-30VDC 0.020A 20-31VDC 0.155A5398-K Electronic Chime w/Strobe 21-30VDC 0.020A 20-31VDC 0.164A5398-L Electronic Chime w/Strobe 21-30VDC 0.020A 20-31VDC 0.249A5398-M (*2) Electronic Chime w/Sync Strobe 21-30VDC 0.020A 20-31VDC 0.059A5398-R (*2) Electronic Chime w/Sync Strobe 21-30VDC 0.020A 20-31VDC 0.088A446066 ISSUE I Rev. C PAGE 4 OF 6
CatalogNumberDescriptionAudibleVoltageAudibleCurrentStrobeVoltageStrobeCurrent5398-T (*2) Electronic Chime w/Sync Strobe 21-30VDC 0.020A 20-31VDC 0.154A5398-Y (*2) Electronic Chime w/Sync Strobe 21-30VDC 0.020A 20-31VDC 0.170A5398-Z (*2) Electronic Chime w/Sync Strobe 21-30VDC 0.020A 20-31VDC 0.249A5405 Sync <strong>Control</strong> <strong>Unit</strong> 20-31VDC .020A5406 Sync <strong>Control</strong> <strong>Unit</strong> 20-31VDC .020A6120 Horn 21-30VDC 0.035A6140 Horn 21-30VDC 0.065A6220 Horn 21-30VDC 0.038A6223 Horn 21-30VDC 0.038A6224 Horn 21-30VDC 0.038A6225 Horn 21-30VDC 0.038A6230 Horn 21-30VDC 0.038A6234-E Horn w/Strobe 21-30VDC 0.038A 20-31VDC 0.059A6234-G Horn w/Strobe 21-30VDC 0.038A 20-31VDC 0.089A6234-J Horn w/Strobe 21-30VDC 0.038A 20-31VDC 0.155A6234-K Horn w/Strobe 21-30VDC 0.038A 20-31VDC 0.164A6234-L Horn w/Strobe 21-30VDC 0.038A 20-31VDC 0.249A6234-M (*2) Horn w/Sync Strobe 21-30VDC 0.038A 20-31VDC 0.059A6234-R (*2) Horn w/Sync Strobe 21-30VDC 0.038A 20-31VDC 0.088A6234-T (*2) Horn w/Sync Strobe 21-30VDC 0.038A 20-31VDC 0.154A6234-Y (*2) Horn w/Sync Strobe 21-30VDC 0.038A 20-31VDC 0.170A6234-Z (*2) Horn w/Sync Strobe 21-30VDC 0.038A 20-31VDC 0.249A6235-E WP Horn w/ Strobe 21-30VDC 0.038A 20-31VDC 0.059A6235-L WP Horn w/ Strobe 21-30VDC 0.038A 20-31VDC 0.249A6235-M (*2) WP Horn w/ Sync Strobe 21-30VDC 0.038A 20-31VDC 0.059A6235-Z (*2) WP Horn w/ Sync Strobe 21-30VDC 0.038A 20-31VDC 0.249A6238-E Horn w/Strobe 21-30VDC 0.038A 20-31VDC 0.059A6238-G Horn w/Strobe 21-30VDC 0.038A 20-31VDC 0.089A6238-J Horn w/Strobe 21-30VDC 0.038A 20-31VDC 0.155A6238-K Horn w/Strobe 21-30VDC 0.038A 20-31VDC 0.164A6238-L Horn w/Strobe 21-30VDC 0.038A 20-31VDC 0.249A6238-M (*2) Horn w/Sync Strobe 21-30VDC 0.038A 20-31VDC 0.059A6238-R (*2) Horn w/Sync Strobe 21-30VDC 0.038A 20-31VDC 0.088A6238-T (*2) Horn w/Sync Strobe 21-30VDC 0.038A 20-31VDC 0.154A6238-Y (*2) Horn w/Sync Strobe 21-30VDC 0.038A 20-31VDC 0.170A6238-Z (*2) Horn w/Sync Strobe 21-30VDC 0.038A 20-31VDC 0.249A6240 Horn 21-30VDC 0.065A6243 Horn 21-30VDC 0.065A6244 Horn 21-30VDC 0.065A6245 Horn 21-30VDC 0.065A6250 Horn 21-30VDC 0.065A6254-E Horn w/Strobe 21-30VDC 0.065A 20-31VDC 0.059A6254-G Horn w/Strobe 21-30VDC 0.065A 20-31VDC 0.089A6254-J Horn w/Strobe 21-30VDC 0.065A 20-31VDC 0.155A6254-K Horn w/Strobe 21-30VDC 0.065A 20-31VDC 0.164A6254-L Horn w/Strobe 21-30VDC 0.065A 20-31VDC 0.249A6254-M (*2) Horn w/Sync Strobe 21-30VDC 0.065A 20-31VDC 0.059A6254-R (*2) Horn w/Sync Strobe 21-30VDC 0.065A 20-31VDC 0.088A6254-T (*2) Horn w/Sync Strobe 21-30VDC 0.065A 20-31VDC 0.154A6254-Y (*2) Horn w/Sync Strobe 21-30VDC 0.065A 20-31VDC 0.170A6254-Z (*2) Horn w/Sync Strobe 21-30VDC 0.065A 20-31VDC 0.249A6255-E WP Horn w/ Strobe 21-30VDC 0.065A 20-31VDC 0.059A6255-L WP Horn w/ Strobe 21-30VDC 0.065A 20-31VDC 0.249A6255-M (*2) WP Horn w/ Sync Strobe 21-30VDC 0.065A 20-31VDC 0.059A6255-Z (*2) WP Horn w/ Sync Strobe 21-30VDC 0.065A 20-31VDC 0.249A6258-E Horn w/Strobe 21-30VDC 0.065A 20-31VDC 0.059A6258-G Horn w/Strobe 21-30VDC 0.065A 20-31VDC 0.089A6258-J Horn w/Strobe 21-30VDC 0.065A 20-31VDC 0.155A6258-K Horn w/Strobe 21-30VDC 0.065A 20-31VDC 0.164A6258-L Horn w/Strobe 21-30VDC 0.065A 20-31VDC 0.249A6258-M (*2) Horn w/Sync Strobe 21-30VDC 0.065A 20-31VDC 0.059A6258-R (*2) Horn w/Sync Strobe 21-30VDC 0.065A 20-31VDC 0.088A6258-T (*2) Horn w/Sync Strobe 21-30VDC 0.065A 20-31VDC 0.154A6258-Y (*2) Horn w/Sync Strobe 21-30VDC 0.065A 20-31VDC 0.170A446066 ISSUE I Rev. C PAGE 5 OF 6
CatalogNumberDescriptionAudibleVoltageAudibleCurrentStrobeVoltageStrobeCurrent6258-Z (*2) Horn w/Sync Strobe 21-30VDC 0.065A 20-31VDC 0.249A6300 Mini-Horn 20-31VDC 0.025A6301 Mini-Horn 20-31VDC 0.025A6304-E Mini-Horn w/Strobe 20-31VDC 0.025A 20-31VDC 0.059A6304-G Mini-Horn w/Strobe 20-31VDC 0.025A 20-31VDC 0.089A6304-J Mini-Horn w/Strobe 20-31VDC 0.025A 20-31VDC 0.155A6304-K Mini-Horn w/Strobe 20-31VDC 0.025A 20-31VDC 0.164A6304-L Mini-Horn w/Strobe 20-31VDC 0.025A 20-31VDC 0.249A6304-M (*2) Mini-Horn w/Sync Strobe 20-31VDC 0.025A 20-31VDC 0.059A6304-R (*2) Mini-Horn w/Sync Strobe 20-31VDC 0.025A 20-31VDC 0.088A6304-T (*2) Mini-Horn w/Sync Strobe 20-31VDC 0.025A 20-31VDC 0.154A6304-Y (*2) Mini-Horn w/Sync Strobe 20-31VDC 0.025A 20-31VDC 0.170A6304-Z (*2) Mini-Horn w/Sync Strobe 20-31VDC 0.025A 20-31VDC 0.249A6310 Mini-Horn-S/T 20-31VDC 0.025A6311 Mini-Horn-S/T 20-31VDC 0.025A6314-E Mini-Horn-S/T w/Strobe 20-31VDC 0.025A 20-31VDC 0.059A6314-G Mini-Horn-S/T w/Strobe 20-31VDC 0.025A 20-31VDC 0.089A6314-J Mini-Horn-S/T w/Strobe 20-31VDC 0.025A 20-31VDC 0.155A6314-K Mini-Horn-S/T w/Strobe 20-31VDC 0.025A 20-31VDC 0.164A6314-L Mini-Horn-S/T w/Strobe 20-31VDC 0.025A 20-31VDC 0.230A6314-M (*2) Mini-Horn-S/T w/Sync Strobe 20-31VDC 0.025A 20-31VDC 0.059A6314-R (*2) Mini-Horn-S/T w/Sync Strobe 20-31VDC 0.025A 20-31VDC 0.088A6314-T (*2) Mini-Horn-S/T w/Sync Strobe 20-31VDC 0.025A 20-31VDC 0.154A6314-Y (*2) Mini-Horn-S/T w/Sync Strobe 20-31VDC 0.025A 20-31VDC 0.170A6314-Z (*2) Mini-Horn-S/T w/Sync Strobe 20-31VDC 0.025A 20-31VDC 0.249A6320 (*2) Sync Electronic Horn 20-31VDC 0.030A6321 (*2) Sync Electronic Horn 20-31VDC 0.030A6380 Electronic Signal-8T 20-31VDC 0.024-0.050A (*4)6381 Electronic Signal-8T 20-31VDC 0.024-0.050A (*4)Key:(*1) 1=10” gong, 4=4” gong, 5=chime, 6=6” gong, 8=8” gong(*2) Sync Strobe Light or Sync Electronic Horn require 5405 or 5406 Sync <strong>Control</strong> Module(*3) Sync Electronic Horn and Sync Strobe Light require 5405 or 5406 Sync <strong>Control</strong> Module(*4) See Installation Instructions for the current of the desired tone.Cat. No. xxxx-E = Strobe Light (UL1971 15/75cd) Cat. No. xxxx-M = Sync Strobe Light (UL1971 15/75cd)Cat. No. xxxx-G = Strobe Light (UL1971 30/75cd) Cat. No. xxxx-R = Sync Strobe Light (UL1971 30/75cd)Cat. No. xxxx-J = Strobe Light (UL1971 60/75cd) Cat. No. xxxx-T = Sync Strobe Light (UL1971 60/75cd)Cat. No. xxxx-K = Strobe Light (UL1971 75cd)Cat. No. xxxx-Y = Sync Strobe Light (UL1971 75cd)Cat. No. xxxx-L = Strobe Light (UL1971 110cd)Cat. No. xxxx-Z = Sync Strobe Light (UL1971 110cd)Compatible Accessory DevicesOrder No. Mfg Part Number Description<strong>Faraday</strong>R711-1 711-1 Polarized Auxiliary RelayMEP-100 15050 Mini-Evac <strong>Control</strong> <strong>Unit</strong>RSE-100 15070 Signal Expander Panel15222A 15222A Signal Expander PanelMVP-600 15612 Voice Evacuation <strong>Unit</strong>MVP-500 15060 Mini-Voice <strong>Control</strong> <strong>Unit</strong>MVP-501 15061 Mini-Voice <strong>Control</strong> <strong>Unit</strong>Notes:1. The accessory devices listed above may bewired to activate from the notificationappliance circuits.2. For specific wiring and installation information,read the instructions provided with eachdevice.446066 ISSUE I Rev. C PAGE 6 OF 6
INSTALLATION INSTRUCTIONS AND WIRING FORREMOTE LCD ANNUNCIATORCAT. NO. RDC-1 P/N 12506The 12506 Remote LCD Annunciator is an optional accessory for the 12100, 12120, 12500, 12530 or 12540<strong>Fire</strong> <strong>Alarm</strong> <strong>System</strong> <strong>Control</strong> <strong>Unit</strong>. The 12506 provides a 80 character LCD display along with the systemstatus LEDs. The button enable keyswitch allows system reset, trouble silence/acknowledge, alarmsilence and menu access. The lamp test operation is also enabled by the keyswitch, but the function islimited to the annunciator. The annunciator mounts to a horizontally mounted 6-gang box, 2” deepminimum. The <strong>Faraday</strong> 12411 Surface Backbox may be used for surface mounting.PARTS SUPPLIED1 12506 Remote LCD Annunciator4 940865 Mounting Screws1 443269 Screwdriver1 446983 Instruction Sheet1 446984 Operating Instructions4 1/2"12506 DIMENSIONS11 13/16"12506 WIRINGPower Limited and SupervisedStep 1.) Installation is to be done by qualified personnelwho have thoroughly read and understood thisinstruction sheet.Step 2.) Disconnect all power into system, includingbatteries.Step 3.) Mount 6-gang backbox horizontally as required(see mounting below).Step 4.) Set dip switch for proper remote address (1- 16).Step 5.) Attach conduit and run wires as required.Step 6.) Connect IN wires from fire alarm system controlunit or previous remote as required.Step 7.) Connect OUT wires to next remote or 120 ohmterminating resistor (<strong>Faraday</strong> P/N 942664), if lastremote.Step 8.) Attach unit to backbox, using four P/N 940865screws.Step 9.) Apply power to system.Step 10.) Check for proper operation of functions.Cable for power (+ & -) andTwisted pair Cable for data(X+ & X-) from panel orprevious remote connects toTB1. Match Connections.Cable for power (+ & -) andTwisted pair Cable for data (X+ &X-) to next remote or 120 ohmtermination resistor (<strong>Faraday</strong> P/N942664) on the last remote.4 3/4"12411 DIMENSIONS12 1/16"2 1/8"Cut jumper WJ1 whenexternal power is used.TB3 allows for connection to an externalregulated and power limited 24VDC powersupply listed for fire protective signaling use.Notes:1.) <strong>Unit</strong>s to be installed in accordance with all localcodes.2.) T-Tapping is not allowed! Communication wiringmust be daisy chained from remote to remote.3.) Terminal block will accept a maximum of 12 AWGwiring4.) Use twisted pair cable with a characteristicimpedance of approximately 120 ohms. 4000 feetmaximum distance from panel to last remote.FARADAY, LLC446983 ISSUE I REV. C PAGE 1 OF 2
The following table shows the dip switch settings for proper addressing of the 12506 remotes.SW-9OFF ON1234Address Switch 1 Switch 2 Switch 3 Switch 41 On On On On2 Off On On On3 On Off On On4 Off Off On On5 On On Off On6 Off On Off On7 On Off Off On8 Off Off Off On9 On On On Off10 Off On On Off11 On Off On Off12 Off Off On Off13 On On Off Off14 Off On Off Off15 On Off Off Off16 Off Off Off Off446983 ISSUE I REV. C PAGE 2 OF 2
INSTALLATION INSTRUCTIONS AND WIRING FORSERIAL RELAY UNITCAT. NO. SRU-1 P/N 12507 ANDSERIAL RELAY EXTENDERCAT. NO. SRE-8 P/N 12508The 12507 Serial Relay <strong>Unit</strong> is an optional accessory for the 12100, 12120, 12500, 12530 or 12540 <strong>Fire</strong><strong>Alarm</strong> <strong>System</strong> <strong>Control</strong> <strong>Unit</strong>. The 12507 includes a processor board and a relay board. The processor boardreceives commands from the control unit for activating the relays and transmits supervision and controlfunctions to the control unit. The processor board can control up to 3 relay boards. Each relay boardprovides 8 relays with form C contacts. The control unit can address up to 8 Serial Relay <strong>Unit</strong>s and/orSerial Annunciator <strong>Unit</strong>s. Auxiliary power supplies will be required to power units beyond the control unitcapability.12507 PARTS SUPPLIED1 413320 Processor Board Assembly1 413321 Relay Board Assembly1 446653 34 pin Cable Assembly, 3 1/2”1 447042 PCB Track, 14 1/2”1 447080 10 pin Cable Assembly, 6”1 443269 Screwdriver3 18965 Keps Nut, #6-321 447073 Instruction Sheet12508 PARTS SUPPLIED1 413321 Relay Board Assembly1 446652 34 pin Cable Assembly, 15”1 446653 34 pin Cable Assembly, 3 1/2”1 447042 PCB Track, 14 1/2”3 18965 Keps Nut, #6-321 447073 Instruction SheetStep 1.) Installation is to be done by qualified personnelwho have thoroughly read and understood thisinstruction sheet.Step 2.) Disconnect all power into system, includingbatteries.Step 3.) Mount enclosure as required.Note:Enclosure must be UL Listed for <strong>Fire</strong> ProtectiveSignaling Use (<strong>Faraday</strong> P/N 401403 <strong>Fire</strong> <strong>Alarm</strong>Accessory Enclosure).Step 4.) Attach conduit and run wires as required.Step 5.) Set processor board dip switch for properremote address (1- 8).Step 6.) Set each relay board dip switch for proper relayset number (1- 8, 9-16, 17-24).Note:Relays are numbered from left to right:Relay Set TB1 TB2 TB3 TB4(1-8) 1 2 3 4 5 6 7 8(9-16) 9 10 11 12 13 14 15 16(17-24) 17 18 19 20 21 22 23 24Step 7.) Set jumper P6 for desired buzzer operation.J6 – BUZZER ACTIVATION• REMOTE (Header P2)•• LOCAL (Processor Board Buzzer)12507 DIMENSIONS12508 DIMENSIONSStep 8.) Mount PCB Track(s) using #6-32 keps nuts (P/N18965) and snap in PCB assemblies.Step 9.Plug in the cable assembly(s) to the PCBassemblies as required.Step 10. Connect ground wire(s) to chassis ground using#6-32 keps nut(s) (P/N 18965).Step 11.) Connect IN wires from fire alarm system controlunit or previous remote as required.Step 12.) Connect OUT wires to next remote or 120 ohmterminating resistor (<strong>Faraday</strong> P/N 942664), if lastremote.Step 13.) Connect relay contacts, as required.Step 14.) Apply power to system.Step 15.) Program control unit for required relay operation.Step 16.) Check for proper operation of functions.FARADAY, LLC447073 ISSUE I REV. C PAGE 1 OF 2
12507/12508 WIRINGPower Limited, SupervisedCable for power (+ & -) andTwisted pair Cable for data(X+ & X-) from panel orprevious remote.Cable for power (+ & -) andTwisted pair Cable for data(X+ & X-) to next remote or120 ohm termination resistor(<strong>Faraday</strong> P/N 942664) onthe last remote.TB3 allows for connectionto an external regulated andpower limited 24VDC powersupply, listed for fireprotective signaling use.Cut jumper WJ1 whenexternal power is used.Relay Contacts(Shown in normal standby condition)1A@28VDC max., ResistiveFor Power Limited Source, UnsupervisedNotes:1.) <strong>Unit</strong>s to be installed in accordance with all local codes.2.) T-Tapping is not allowed! Communication wiring must be daisy chained from unit to unit.3.) Terminal block will accept a maximum of 12 AWG wiring4.) Use tw isted pair cable with a characteristic impedance of approximately 120 ohms. 4000 feet maximum distance fromend to end.5.) Power Limited wiring must be kept separate from non-power limited wiring, ¼ “ minimum.6.) The following table gives the currents necessary for power supply and battery calculations.Model Standby Current <strong>Alarm</strong> Current12507 0.010 A. 0.170 (All relays activated)12508 0.000 A. 0.160 (All relays activated)12507 ADDRESS SETTINGSW-1OFF ON1234Address Switch 1 Switch 2 Switch 3 Switch 41 On On On Not Used2 Off On On Not Used3 On Off On Not Used4 Off Off On Not Used5 On On Off Not Used6 Off On Off Not Used7 On Off Off Not Used8 Off Off Off Not UsedPROCESSOR BOARD HEADER CONNECTIONSPinP2 - Processor Board1 24V Output2 Not Used3 Lamp Test Switch4 <strong>Alarm</strong> Silence Switch5 Trouble Acknowledge/Silence Switch6 <strong>System</strong> Reset Switch7 Remote Buzzer Output (open collector)8 <strong>Alarm</strong> Silence Output (open collector)9 Trouble Output (open collector)10 Minus447073 ISSUE I REV. C PAGE 2 OF 2
INSTALLATION INSTRUCTIONS AND WIRING FORSERIAL ANNUNCIATOR UNITCAT. NO. SAU-1 P/N 12509 ANDSERIAL ANNUNCIATOR EXTENDERCAT. NO. SAE-16 P/N 12510The 12509 Annunciator <strong>Unit</strong> is an optional accessory for the 12100, 12120, 12500, 12530 or 12540 <strong>Fire</strong><strong>Alarm</strong> <strong>System</strong> <strong>Control</strong> <strong>Unit</strong>. The 12509 includes a processor board and an annunciator driver board. Theprocessor board receives commands from the control unit for activating the outputs and transmitssupervision and control functions to the control unit. The processor board can control up to 4 annunciatordriver boards. Each driver board provides 16 supervised outputs for LEDs or incandescent lamps. Thecontrol unit can address up to 8 Serial Relay <strong>Unit</strong>s and/or Serial Annunciator <strong>Unit</strong>s. Auxiliary powersupplies will be required to power units beyond the control unit capability.12509 PARTS SUPPLIED1 413320 Processor Board Assembly1 413322 Annunciator Driver Board Assembly1 446653 34 pin Cable Assembly, 3 1/2”1 447042 PCB Track, 14 1/2”3 447080 10 pin Cable Assembly, 6”2 18965 Keps Nut, #6-321 443269 Screwdriver1 447074 Instruction Sheet12510 PARTS SUPPLIED1 413322 Annunciator Driver Board Assembly1 446652 34 pin Cable Assembly, 15”1 446653 34 pin Cable Assembly, 3 1/2”1 447042 PCB Track, 14 1/2”2 447080 10 pin Cable Assembly, 6”2 18965 Keps Nut, #6-321 447074 Instruction Sheet12509 DIMENSIONS12510 DIMENSIONSStep 1.) Installation is to be done by qualified personnelwho have thoroughly read and understood thisinstruction sheet.Step 2.) Disconnect all power into system, includingbatteries.Step 3.) Mount enclosure as required.Note:Enclosure must be UL Listed for <strong>Fire</strong> ProtectiveSignaling Use (<strong>Faraday</strong> P/N 401403 <strong>Fire</strong> <strong>Alarm</strong>Accessory Enclosure).Step 4.) Attach conduit and run wires as required.Step 5.) Set processor board dip switch for properremote address (1- 8).Step 6.) Set jumper P6 for desired buzzer operation.J6 – BUZZER ACTIVATION• REMOTE•• LOCALStep 7.) Mount PCB Track(s) using #6-32 keps nuts (P/N18965) and snap in PCB assemblies.Step 8.) Plug in the cable assembly(s) to the PCBassemblies as required.Step 9.) Connect IN wires from fire alarm system controlunit or previous remote as required.Step 10.) Connect OUT wires to next remote or 120 ohmterminating resistor (<strong>Faraday</strong> P/N 942664), if lastremote.Step 11.) Connect LED’s or lamps, as required.Step 12.) Apply power to system.Step 13.) Program control unit for required annunciatoroperation.Step 14.) Check for proper operation of functions.FARADAY, LLC447074 ISSUE I REV. C PAGE 1 OF 2
12509/12510 WIRINGAnnunciator Driver OutputsActivated Voltage Range: 16-28VDCActivated Current (max.): 0.070APower Limited, Supervised for opensUnused outputs must have a 220K ohm dummy resistorPower Limited, SupervisedCable for power (+ & -) andTwisted pair Cable for data(X+ & X-) from panel orprevious remote.Cable for power (+ & -) andTwisted pair Cable for data(X+ & X-) to next remote or120 ohm termination resistor(<strong>Faraday</strong> P/N 942664) on thelast remote.TB3 allows for connection toan external regulated andpower limited 24VDC powersupply, listed for fireprotective signaling use.Cut WJ1 when externalpower is used.Notes:1.) <strong>Unit</strong>s to be installed in accordance with all local codes.2.) T-Tapping is not allowed! Communication wiring must be daisy chained from unit to unit.3.) Terminal block will accept a maximum of 12 AWG wiring4.) Use twisted pair cable with a characteristic impedance of approximately 120 ohms. 4000 feet maximum distance fromend to end.5.) Power Limited wiring must be kept separate from non-power limited wiring, ¼” minimum..6.) The following table gives the currents necessary for power supply and battery calculations.Model Standby Current Activated Current12509 0.015 A. 0.040 + Lamp or LED current12510 0.005 A. 0.000 + Lamp or LED current12509 ADDRESS SETTINGSW-1OFF ON1234Address Switch 1 Switch 2 Switch 3 Switch 41 On On On Not Used2 Off On On Not Used3 On Off On Not Used4 Off Off On Not Used5 On On Off Not Used6 Off On Off Not Used7 On Off Off Not Used8 Off Off Off Not Used12509/12510 HEADER CONNECTIONSPin P2 - 12509 Processor Board P3 - 12509 or 12510 Driver Board P4 - 12509 or 12510 Driver Board1 24V Output 24V Output 24V Output2 Not Used Indicator #1 Indicator #93 Lamp Test Switch Indicator #2 Indicator #104 <strong>Alarm</strong> Silence Switch Indicator #3 Indicator #115 Trouble Acknowledge/Silence Switch Indicator #4 Indicator #126 <strong>System</strong> Reset Switch Indicator #5 Indicator #137 Remote Buzzer Output (openIndicator #6 Indicator #14collector)8 <strong>Alarm</strong> Silence Output (open collector) Indicator #7 Indicator #159 Trouble Output (open collector) Indicator #8 Indicator #1610 Minus Not Used Not Used447074 ISSUE I REV. C PAGE 2 OF 2
INSTALLATION INSTRUCTIONS AND WIRING FORFIRE ALARM ACCESSORY ENCLOSURECAT. NO. FAE-21 P/N 401403 ANDSEMI-FLUSH TRIMCAT. NO. SFT-21 P/N 401404The 401403 <strong>Fire</strong> <strong>Alarm</strong> Accessory Enclosure is an optional accessory for the 12100, 12120, 12500, 12530or 12540 <strong>Fire</strong> <strong>Alarm</strong> <strong>System</strong> <strong>Control</strong> <strong>Unit</strong>. The 401403 provides an enclosure for 12507 and 12508 SerialRelay <strong>Unit</strong>s and 12509 and 12510 Serial Annunciator <strong>Unit</strong>s. The 401403 enclosure provides mounting of upto two 12507 units and two 12508 extenders or two 12509 units and five 12510 extenders.401403 PARTS SUPPLIED1 447160 Back Box1 413754 Door Assembly1 447138 Instruction Sheet401404 PARTS SUPPLIED1 447166 Semi-Flush Trim4 940454 Wood Screw, #10x3/4”401403 SURFACE MOUNTINGStep 1.) Installation is to be done by qualified personnelwho have thoroughly read and understood thisinstruction sheet.Step 2.) Mount enclosure as required.Step 3.) Attach conduit and run wires as required.Step 4.) Mount PCB Tracks as required.Note:See the installation instructions provided withrelay or annunciator units for installation andwiring.KNOCK-OUT LOCATIONA BEGIKM NC DFHJLO PNote: Use knockoutsA, E, K or Mfor powerlimitedconnections tothe fire alarmcontrol unit.401403 SEMI-FLUSH MOUNTINGWITH 401404 SEMI-FLUSH TRIM401403 DIMENSIONSFARADAY, LLC447138 ISSUE I REV. A PAGE 1 OF 2
SAMPLE LAYOUT FOR RELAY UNITSSAMPLE LAYOUT FOR ANNUNCIATOR UNITS447138 ISSUE I REV. A PAGE 2 OF 2
12120 OWNER'S MANUALXII.APPENDIX-E: GLOSSARY<strong>Alarm</strong> Signal. A signal indicating an emergency requiring immediate action, such as an alarm for firefrom a manual station, a waterflow alarm, or an automatic smoke detector.<strong>Alarm</strong> Silence Inhibit. An option that prevents a human operator from silencing the notificationappliances for a preset period of time.<strong>Alarm</strong> <strong>System</strong>. A combination of compatible initiating devices, control units, and notification appliancesdesigned and installed to produce an alarm signal in the event of a fire.<strong>Alarm</strong> Verification. A preset option that causes the control unit to verify alarms originated by smokedetectors before indicating an alarm.Annunciator. A remotely located, electrically powered display, separate from the control unit, containingLEDs or lamps to indicate the states of the fire alarm system.Audible Signal. An audible signal is a sound made by one or more audible notification appliances, suchas bells or horns, in response to the operation of an initiating device.Authority Having Jurisdiction (AHJ). The organization, office, or individual responsible for approvingequipment, installation or procedure.Auto-Silence. The capability of a control to automatically silence the notification appliances after apreset period of time.Auxiliary Relays. <strong>Control</strong> relays that energize only during alarm conditions that are used to either applypower to or remove power from other equipment during an alarm condition.Class A Circuit. An initiating device or notification appliance circuit within which all components remainfully functional, even though a single open or ground exists in the circuit.Class B Circuit. An initiating device or notification appliance circuit within which some or all componentsmay be disabled with a single open or ground exists in the circuit.Detector - Smoke, Ionization Type. A detector employing the principle of smokes effect on anelectrical current flowing in an ionized air chamber.Detector - Smoke, Photoelectric Type. A detector employing the photoelectric principle of reflection orobstruction of light by smoke.End Of Line (EOL). A device used to terminate a supervised circuit.General <strong>Alarm</strong>. A term usually applied to the simultaneous operation of all the notification appliances ona system.Ground Fault. A trouble condition in which a low resistance has been detected between the systemwiring and conduit ground.Initiating Device. A manually or automatically operated device such as a manual pull station, smokedetector, heat detector, waterflow switch or tamper switch.P/N 447192 Issue I (preliminary 10/31/2001)XII-1
12120 OWNER'S MANUALInitiating Device Circuit (IDC). A circuit to which initiating devices are connected.Labeled. Equipment or materials to which have been attached a label, symbol, or other identifying markof an organization acceptable to the authority having jurisdiction and concerned with product evaluation,that maintains periodic inspection of the production of such labeled equipment or materials. And bywhose labeling the manufacturer indicates compliance with appropriate standards or performance in aspecified manner.Listed. Equipment or materials included in a list published by an organization acceptable to the authorityhaving jurisdiction and concerned with product evaluation, that maintains periodic inspection of productionof listed equipment or materials. And whose listing states either that the equipment or material meetsappropriate standards or has been tested and found suitable for use in a specified manner.NEC. National Electrical Code also published as NFPA standard 70.Notification Appliance. An electrically operated appliance used to indicate the system status such as abell, horn, strobe light or speaker.Notification Appliance Circuit (NAC). A circuit to which notification appliances are connected.Power Supply. That portion of the fire alarm control unit, which provides the power needed to operate allcontrol unit modules, as well as that, needed to operate all electrically powered initiating devices and allnotification appliances.Quick Test. A term pertaining to the test mode of the system, that automatically resets after a servicetechnician tests initiating devices.Supervisory <strong>Alarm</strong>. A signal indicating the operation of a supervisory device.Supervisory Device. A device that monitors the condition of a sprinkler system such as a gate-valveswitch, water-level switch, low pressure switch, low temperature switch or fire pump monitor.Trouble Signal. An audible signal indicating trouble of any nature, such as a circuit break or ground,occurring in the device or wiring associated with a fire alarm signal.Waterflow Switch. An assembly approved for service and so constructed and installed that any flow ofwater from a sprinkler system equal to or greater than that from a single automatic sprinkler head willresult in activation of this switch and subsequent indication of an alarm condition.Zone. A designated area of a building. Commonly, zone, is interchanged with initiating device circuit.P/N 447192 Issue I (preliminary 10/31/2001)XII-2