the Conservation Rooflight® Pleated Blind Installation Manual
the Conservation Rooflight® Pleated Blind Installation Manual
the Conservation Rooflight® Pleated Blind Installation Manual

Create successful ePaper yourself
Turn your PDF publications into a flip-book with our unique Google optimized e-Paper software.
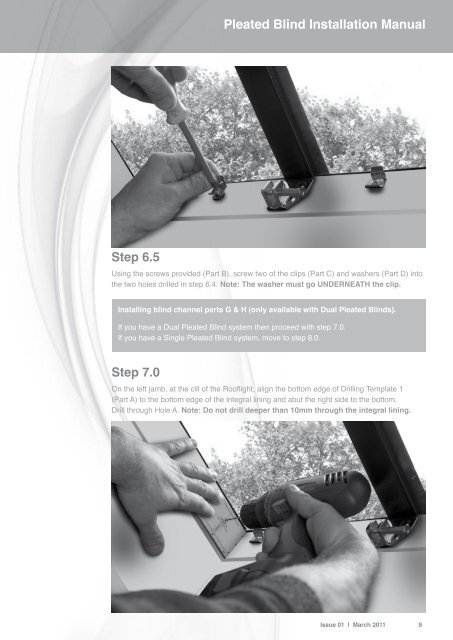
<strong>Pleated</strong> <strong>Blind</strong> <strong>Installation</strong> <strong>Manual</strong>Step 6.5Using <strong>the</strong> screws provided (Part B), screw two of <strong>the</strong> clips (Part C) and washers (Part D) into<strong>the</strong> two holes drilled in step 6.4. Note: The washer must go UNDERNEATH <strong>the</strong> clip.Installing blind channel parts G & H (only available with Dual <strong>Pleated</strong> <strong>Blind</strong>s).If you have a Dual <strong>Pleated</strong> <strong>Blind</strong> system <strong>the</strong>n proceed with step 7.0.If you have a Single <strong>Pleated</strong> <strong>Blind</strong> system, move to step 8.0.Step 7.0On <strong>the</strong> left jamb, at <strong>the</strong> cill of <strong>the</strong> Rooflight, align <strong>the</strong> bottom edge of Drilling Template 1(Part A) to <strong>the</strong> bottom edge of <strong>the</strong> integral lining and abut <strong>the</strong> right side to <strong>the</strong> bottom.Drill through Hole A. Note: Do not drill deeper than 10mm through <strong>the</strong> integral lining.Issue 01 | March 2011 9