
Create successful ePaper yourself
Turn your PDF publications into a flip-book with our unique Google optimized e-Paper software.
<strong>Accusys</strong> <strong>InneRAID</strong> ® <strong>Slim</strong> <strong>SATA</strong><strong>User</strong> <strong>Manual</strong>Http://www.accusys.com.tw
<strong>User</strong>’s <strong>Manual</strong>Preface ..........................................................................................................................2Notice......................................................................................................................2Trademarks..............................................................................................................2About This manual....................................................................................................3Symbols used in this manual .....................................................................................31. Introduction to the <strong>Accusys</strong> <strong>InneRAID</strong> ® <strong>Slim</strong>..................................................................41.1. <strong>InneRAID</strong> ® <strong>Slim</strong> capabilities ................................................................................41.2. Regulatory information .......................................................................................51.3. Understanding RAID Level ..................................................................................61.3.1. RAID 1 (mirroring)....................................................................................62. Know your <strong>InneRAID</strong> ® <strong>Slim</strong> <strong>SATA</strong>..................................................................................72.1. Package content ................................................................................................72.2. Front View.........................................................................................................72.3. Rear view:.........................................................................................................73. Set up your <strong>InneRAID</strong> ® <strong>Slim</strong> <strong>SATA</strong> ................................................................................93.1. Mounting your <strong>InneRAID</strong>® <strong>Slim</strong> <strong>SATA</strong>..................................................................93.2. Loading hard disks in your <strong>InneRAID</strong>® <strong>Slim</strong> <strong>SATA</strong>...............................................103.2.1. Application 1: Two new disk drives (identical or non-identical) ....................113.2.2. Application 2: Installing one drive with data and one new backup drive.......123.3. Status of all LED indicators.........................................................................133.4. Formatting and Partitioning your <strong>InneRAID</strong>® <strong>Slim</strong> <strong>SATA</strong> ......................................133.4.1. Windows <strong>User</strong>s.......................................................................................134. Management.............................................................................................................154.1. StorConn GUI introduction ................................................................................154.1.1. RAID status monitoring window......................................................................155. Update Firmware.......................................................................................................165.1. Firmware updating steps ..................................................................................166. FAQ .........................................................................................................................197. Contact <strong>Accusys</strong> ........................................................................................................20<strong>Accusys</strong>, Inc...........................................................................................................20<strong>Accusys</strong> U.S.A., Inc. ................................................................................................20<strong>Accusys</strong> China, Inc..................................................................................................20<strong>Accusys</strong> EU B.V ......................................................................................................21<strong>Accusys</strong> Korea, Inc. ................................................................................................21http://www.accusys.com.tw 1
<strong>User</strong>’s <strong>Manual</strong>PrefaceNoticeProduct features and specifications described in this manual are subject to change withoutnotice.The manufacturer shall not be liable for any damage, or for the loss of information resultingfrom the performance or use of the information contained herein.Trademarks<strong>Accusys</strong> and the names of <strong>Accusys</strong> products and logos referenced herein are trademarks and/orservice marks or registered trademarks and/or service marks of <strong>Accusys</strong>, Inc.Microsoft, Windows, Windows NT, MS-DOS are either trademarks or registered trademarks ofMicrosoft Corporation. Other product and company names mentioned herein may betrademarks and/or service marks of their respective owners.All contents of this manual are copyrighted by <strong>Accusys</strong>. The information contained herein is theexclusive property of <strong>Accusys</strong>, Inc. and shall not be copied, transferred, photocopied, translatedon paper, film, electronic media, or computer-readable form, or otherwise reproduced in anyway, without the express written permission of <strong>Accusys</strong> Inc.<strong>Manual</strong> version 1.0© Copyright 2007 <strong>Accusys</strong>, Inc.All rights reserved.http://www.accusys.com.tw 2
<strong>User</strong>’s <strong>Manual</strong>About This manualThis manual is designed and written for users of the <strong>Accusys</strong> <strong>InneRAID</strong> ® <strong>Slim</strong>. The user shouldideally be familiar with RAID planning and data storage operations and have experience inelectronic or computer engineering.Symbols used in this manualImportant information that users should be aware of is indicated with the following icons:CautionThis icon indicates the existence of a potential hazard thatcould result in personal injury, damage to your equipment orloss of data if the safety instruction is not observedNoteThis icon indicates useful tips on getting the most from yourRAID controller.http://www.accusys.com.tw 3
<strong>User</strong>’s <strong>Manual</strong>1. Introduction to the <strong>Accusys</strong> <strong>InneRAID</strong> ® <strong>Slim</strong>Congratulations on the purchase of your new <strong>Accusys</strong> <strong>InneRAID</strong> ® <strong>Slim</strong>. The <strong>InneRAID</strong> ® <strong>Slim</strong>RAID box is an excellent solution of protecting data and improving system availability forindustrial computing and communication platforms. It performs block-level data mirroring toprotect data of all types and of any operating systems. It also seeks to secure every bit of yourdata while streamlines the IO access serving by its intelligent RAID technology.The <strong>InneRAID</strong> ® <strong>Slim</strong> is equipped with StorConn Java-based GUI (graphical user interface)monitoring program, by which users can easily monitor the RAID status from web browsers at aremote site. The monitoring program is also capable of sending out notification mail to users sothat you can always be informed of the updated status of your <strong>InneRAID</strong> ® <strong>Slim</strong>.1.1. <strong>InneRAID</strong> ® <strong>Slim</strong> capabilities.Hardware-accelerated RAID 1 (disk mirroring).High-speed data buffer for read pre-fetch and write cache.Automatic online fast disk data rebuilding.Automatic disk failure detection.Online bad sector recovery and reallocation.Hot swappable hard diskshttp://www.accusys.com.tw 4
<strong>User</strong>’s <strong>Manual</strong>1.2. Regulatory informationFCC StatementThis equipment has been tested and found to comply with the limits for a Class B digital device,pursuant to Part 15 of FCC Rules. These limits are designed to provide reasonable protectionagainst harmful interference in a residential installation. This equipment generates, uses, andcan radiate radio frequency energy and, if not installed and used in accordance with theinstructions, may cause harmful interference to radio communications. However, there is noguarantee that interference will not occur in particular installation. If this equipment does causeharmful interference to radio or television reception, which can be determined by turning theequipment off and on, the user is encouraged to try to correct the interference by one or moreof the following measures:1. Reorient or relocate the receiving antenna.2. Increase the separation between the equipment and receiver.3. Connect the equipment into an outlet on a circuit different from that to which the receiver isconnected.4. Consult the dealer or an experienced radio/television technician for help.The changes or modifications not expressly approved by the party responsible for compliancecould void the user’s authority to operate the equipment.Shielded interface cables, if any, must be used in order to comply with the emission limits.CE MarkThis equipment is in conformity with the EMC directive.UL ListedThis equipment meets UL's safety requirements.http://www.accusys.com.tw 5
1.3. Understanding RAID Level<strong>User</strong>’s <strong>Manual</strong>1.3.1. RAID 1 (mirroring)RAID 1 is commonly referred to as Disk Mirroring, Disk Shadowing or DiskDuplexing as all data is duplicated across both disks. RAID 1 can only be performedwith two hard drives. As data is identical on both disks, storage capacity is that ofthe smaller disk. RAID 1 has normal performance for write operations but highperformance for read intensive operations.Characteristics• Better Read transaction rate than single disks, same Write transaction rate as single disks.• 100% redundancy of data means no rebuild of data is necessary in case of disk failure,just a copy to the replacement disk.• All the disks have the same data.• Raid level 1 requires two drives.• Storage capacity = Capacity of smaller diskRecommended Uses• Accounting• Payroll• Financial• Any application requiring high availabilityhttp://www.accusys.com.tw 6
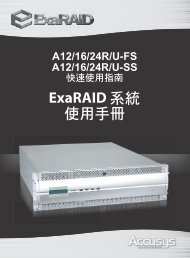
<strong>User</strong>’s <strong>Manual</strong>2. Know your <strong>InneRAID</strong> ® <strong>Slim</strong> <strong>SATA</strong>2.1. Package content1. <strong>InneRAID</strong> ® <strong>Slim</strong> <strong>SATA</strong> RAID box with 2 drive trays2. <strong>InneRAID</strong> ® <strong>Slim</strong> Quick Install Guide3. <strong>Accusys</strong> <strong>InneRAID</strong> <strong>User</strong> Kit CD4. Internal RS232 (3 to 9) cable with bracket5. Serial/RS232 (9 to 9) cable6. Two keys for drive trays7. Mounting screw pack (18 in 1)2.2. Front View2.3. Rear view:1. <strong>SATA</strong> DC power input connector2. <strong>SATA</strong> host connector3. RS232 connector (J10)4. Reserved for future functions (J9 default is closed)http://www.accusys.com.tw 7
<strong>User</strong>’s <strong>Manual</strong>5. Standard AT/ATX DC power input connectorNote<strong>InneRAID</strong> ® slim provides a <strong>SATA</strong> form DC power connector andreserves an AT/ATX standard DC power connector. Most ofcurrent AT/ATX power supply module provides the <strong>SATA</strong> formDC power output connectors. Just choose one of them for theDC power input connection of <strong>InneRAID</strong> ® <strong>Slim</strong>.http://www.accusys.com.tw 8
<strong>User</strong>’s <strong>Manual</strong>3. Set up your <strong>InneRAID</strong> ® <strong>Slim</strong> <strong>SATA</strong>CautionBefore starting any kind of hardware installation, please ensure that allpower switches have been turned off and all power cords are disconnectedto prevent personal injury and damage to the hardware.CautionStatic electricity can damage electronic components. To guard againstsuch damage:Work in a static-free environmentWear a grounded anti-static wrist strapStore uninstalled components in anti-static bagsHandle PCBs by their edges and avoid touching chips and connectors.3.1. Mounting your <strong>InneRAID</strong>® <strong>Slim</strong> <strong>SATA</strong>The <strong>InneRAID</strong> ® <strong>Slim</strong> <strong>SATA</strong> can be installed inside an external 3.5” bay of your computer case.The steps below describe the installing procedure.CautionTurn off and disconnect all electrical power from the system beforebeginning installation.1. Remove the cover and front bezel from the system case.2. Feed a power cable through the opening.3. Feed a <strong>SATA</strong> cable through the opening.4. Connect the two cables to the connectors on the rear of the <strong>InneRAID</strong> ® <strong>Slim</strong>.5. For the optional, if planning to use the StorConn GUI to monitor the status of RAID boxthrough out-band or upgrade firmware through hyper terminal, you should also connect a3-pin RS-232 cable to the terminal on the J10 of <strong>InneRAID</strong> ® <strong>Slim</strong>. (Figure 3.2.A)http://www.accusys.com.tw 9
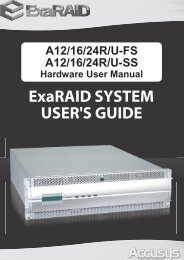
<strong>User</strong>’s <strong>Manual</strong>| Pin1 to A | Pin2 to B | Pin3 to C |6. Insert the <strong>InneRAID</strong> ® <strong>Slim</strong> into the bay, and secure it in place with the screws provided.(Figure 3.2.B)3.2. Loading hard disks in your <strong>InneRAID</strong>® <strong>Slim</strong> <strong>SATA</strong>1. Unlock the drive tray and slide it out of the RAID box.2. Place the disk drive in the drive tray.3. Secure the disk drive by screwing it to the drive tray case. (Figure 3.3.A)http://www.accusys.com.tw 10
<strong>User</strong>’s <strong>Manual</strong>4. Slide the loaded disk drive tray into the RAID Box and lock it.5. If you have installed two new disk drives go to Application 1. If you have installed one drivewith data and one new disk drive go to Application 2.3.2.1. Application 1: Two new disk drives (identical or non-identical)1. Install and lock both drive trays.2. Turn on the computer system.3. When the system prompts you to enter the BIOS setup program shortly after power-on,follow the instructions and enter the BIOS setup program. The device name of hard disk willbe <strong>Accusys</strong> <strong>InneRAID</strong> <strong>Slim</strong> <strong>SATA</strong>.4. Reboot the computer and your system is now ready to start using the RAID and toautomatically mirror all data written to it on two disk drives.5. If you have installed two hard drives with different capacity, the usable RAID capacity will bethe same as the capacity of the smaller hard drive.http://www.accusys.com.tw 11
<strong>User</strong>’s <strong>Manual</strong>3.2.2. Application 2: Installing one drive with data and one new backup drive1. The new drive must have the same capacity or a larger capacity than the drive with data.Installing the drive with data and leave the new drive uninstalled. This identifies the drivewith data as the source drive.NoteWhen you install the drives, the first drive to get installed is designated as thesource drive and the other drive becomes the backup drive.2. Turn on the computer system.3. When the system prompts you to enter the BIOS setup program shortly after power-on,follow the instructions and enter the BIOS setup program. The device name of hard disk willbe <strong>Accusys</strong> <strong>InneRAID</strong> <strong>Slim</strong> <strong>SATA</strong>.4. Reboot the computer and install the new drive. This identifies the new drive as the backupdrive.5. The system will immediately begin mirroring the data from the first drive to the backup drive.Any old data on the backup drive will be lost, and is overwritten with the mirror image of thefirst drive.http://www.accusys.com.tw 12
<strong>User</strong>’s <strong>Manual</strong>3.3. Status of all LED indicatorsStatus indicator Access indicator RAID statusGreen Off Disk is properly installedGreen On/flash (Yellow) Disk is being accessedRed Off No disk installed or disk failureFlash (Red/Green) On/flash (Yellow) Disk is rebuilding3.4. Formatting and Partitioning your <strong>InneRAID</strong>® <strong>Slim</strong> <strong>SATA</strong>If you installed two new disks in <strong>InneRAID</strong> ® <strong>Slim</strong>, it needs to be formatted. During this process,the array can also be customized with partition. As you format the drive, you will have theopportunity to divide the hard drive into sections, called partitions. A partition is a section of thehard drive’s capacity that is created to contain file and data.3.4.1. Windows <strong>User</strong>sCautionFormatting drive will crash all data in the drive.After having followed the steps to install two new disks in <strong>InneRAID</strong> ® <strong>Slim</strong> and connect the<strong>SATA</strong> cable to the host computer, the RAID must now be formatted and partitioned before it canbe used.1. Right click My Computer and click Manage.2. From the Computer Management window, select Disk Management. (Figure 3.4.1.A)3. If the Initialize and Convert Disk Wizard window appears, click Cancel.4. Windows operation system will list all the hard drives that are installed on the system.Locate the <strong>InneRAID</strong> ® <strong>Slim</strong> drive that is represented by the icon. Right click the iconand select Initialize.5. In the drive box to the right shows Unallocated, right click and select New Partition.http://www.accusys.com.tw 13
<strong>User</strong>’s <strong>Manual</strong>(Figure 3.4.1.B)6. The New Partition Wizard dialog box will appear, click Next to continue. (Figure3.4.1.C)7. After selecting partition type, specifying partition size and assigning drive letter, theFormat Partition dialog box (Figure 3.4.1.D) will appear, you have the option of selectingthe Quick Format option. This allow mach fast formatting, however, this disallow DiskManagement to check the drive sector for errors. Click Next to start the format process.8. Your drive should now appear in your My Computer and ready for use.http://www.accusys.com.tw 14
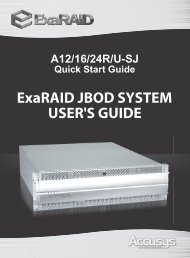
<strong>User</strong>’s <strong>Manual</strong>4. Management4.1. StorConn GUI introduction<strong>InneRAID</strong> ® <strong>Slim</strong> supports remote RAID subsystem monitoring by web-based GUI. This sectioncovers the introduction of the monitoring software.StorConn monitoring program, aKey Featuresweb-based GUI supporting In-band• Graphical <strong>User</strong> Interface (GUI)• Multi-interface supportinterface via <strong>SATA</strong> channel and• Remote monitoringOut-band interface via RS-232, by• Web-based environmentwhich customers can monitor the RAID• Event notificationstatus from web browsers at a remotesite of LAN (Local Area Network). The StorConn is also capable of sending out notification mailto the customers.4.1.1. RAID status monitoring window1. RAID controller tab: Allows customer to select which RAID that connected to local hostsystem both through out-band and in-band to monitor.2. Controller information: Lists model name, serial number and current RAID level.3. Disk status: Allows customer to monitor the status of each disk drive.4. Disk information: Lists model name and capacity of each disk drive.5. Re-build / initialize progress: Tracks the re-building or initialization process.http://www.accusys.com.tw 15
<strong>User</strong>’s <strong>Manual</strong>5. Update Firmware<strong>InneRAID</strong> ® <strong>Slim</strong> allows updating firmware via RS-232 interface. The firmware can be updatedfrom a host PC with third party communication software, such as HyperTerminal, that supportsANSI terminal emulation. The setup process for HyperTerminal will be guided in this chapter.NoteThe data and configurations on the array are not affected byfirmware updating.NoteThe HyperTerminal is bundled as standard with MicrosoftWindows operating system. It will be found in theCommunications folder. The program can also be downloadfrom Higraeve Software at http://www.higraeve.com/htpr/5.1. Firmware updating steps1. Ensure your <strong>InneRAID</strong> ® <strong>Slim</strong> is turned off.2. Connect one end of the supplied RS-232 cable to the RS-232 3pin port from the Pin1,2,3 ofthe J10 on your <strong>InneRAID</strong> ® <strong>Slim</strong>, and connect the other end to one of the host computer’sCOM port.| Pin1 to A | Pin2 to B | Pin3 to C |3. Launch HyperTerminal from the host computer: Start > Programs > Accessories >Communications > HyperTerminal.4. Select COM1 or COM2 from the Connect using: dropdown menu, depending on which porthttp://www.accusys.com.tw 16
<strong>User</strong>’s <strong>Manual</strong>is connecter to <strong>InneRAID</strong> ® <strong>Slim</strong>.5. The COM properties dialog box will appear. Set the following values:Bit per second: 19200Data bits: 8Parity: NoneStop bits: 1Flow Control: Xon/Xoff6. Turn on the <strong>InneRAID</strong> ® <strong>Slim</strong> and press the ESC button on the host computer keyboard.The “>>>” prompt will appear.7. Type in the command “download” to go to the firmware download mode, then type “1” tohttp://www.accusys.com.tw 17
<strong>User</strong>’s <strong>Manual</strong>download code (Firmware or Bootcode).>>> downloadrestart …FF9E 01 AGPIO 01 RAID level = 01 01 AAA 01 01============= <strong>InneRAID</strong> <strong>Slim</strong> PATA Download Mode ============Enter ‘1’ to Download Code (Firmware, Bootcode)‘ESC’ exit‘r’ reset--------------------------- version: Boot ---- 10 (a) ---- 04 Downloading Code!Flash type: SST39VF0408. Locate the updates firmware file to send. For HyperTerminal, go to the Transfer menu andselect Send Text File.9. Send the firmware file as a text file. The file will start to download.CautionDo not turn off the system or interrupt programduring firmware-updating procedure.10. When the file has been downloaded, after <strong>InneRAID</strong> ® <strong>Slim</strong> restarted, the firmwareupdating procedure is finished.http://www.accusys.com.tw 18
<strong>User</strong>’s <strong>Manual</strong>6. FAQIf you encounter a problem while using <strong>InneRAID</strong> ® <strong>Slim</strong>, check this section for help.1. Can I monitor the status of <strong>InneRAID</strong> <strong>Slim</strong> remotely?Answer: Yes, we provide a web-based GUI program “StorConn”, the program and manualboth included with CD-ROM, please refer to manual for installing StorConn on your hostsystem.2. Why does red indicator turn on and alarm beeper sounds?Answer: the disk status indicator shows red to alert that disk failed, for data security, pleaseimmediately replace the failed disk with a new one, data rebuilding will then begin.3. Why doesn’t host computer detect the RAID box while booting?Answer: 1. Make sure the host interface connection cable is attached securely to <strong>SATA</strong> portof RAID box.2. Please enter BIOS to check the configuration of <strong>SATA</strong> channel. Make sure the<strong>SATA</strong> channel is enabled.4. Why does the RAID box fail when removing J9 jumper cap?Answer: the J9 is reserved for functions expand. Please always leave it shorted for ensuringthat the RAID box functions properly.CautionRisk of Explosion if Battery is replaced by anIncorrect Type. Dispose of Used Batteries Accordingto the Instructionshttp://www.accusys.com.tw 19
<strong>User</strong>’s <strong>Manual</strong>7. Contact <strong>Accusys</strong><strong>Accusys</strong>, Inc.• 5F., No.38, Taiyuan St., Jhubei City, Hsinchu County 30265, Taiwan R.O.C.• Tel : +886-3-560-0288• Fax : +886-3-560-0299• Website: www.accusys.com.tw• Sales : sales@accusys.com.tw• Support: support@accusys.com.tw<strong>Accusys</strong> U.S.A., Inc.• 46710 Fremont Blvd. Fremont, CA 94538, U.S.A.• Tel:+1-510-661-0800• Fax:+1-510-661-9800• Toll-free number:+1-866-277-5888• Website: www.accusysusa.com• Sales : sales@accusysusa.com• Support: support@accusysusa.com<strong>Accusys</strong> China, Inc.• 1701, Blk B, Horizon International Tower, No. 6 Zhichun Street, Haidian District, Beijing,postcode 100088, China.• Tel : +86-10-82800080 /81 /82 /83• Fax : +86-10-82800784• Website: www.accusys.com.cn• Sales: sales@accusys.com.cn• Support: support@accusys.com.cnhttp://www.accusys.com.tw 20
<strong>Accusys</strong> EU B.V<strong>User</strong>’s <strong>Manual</strong>• Columbusstraat 22-26, Distripark Eemhaven, 3165 AD Rotterdam, Netherlands• Tel : +31-10-4284117• Fax : +31-10-4284114• Website: www.accusyseu.com• Sales : sales@accusyseu.com• Support: support@accusyseu.com<strong>Accusys</strong> Korea, Inc.• Baegang B/D 5F Shinsa-Dong 666-14 Kanggnam-Gu, Seoul, Korea• Tel : (02)6245-9050• Fax : (02)3443-9050• Website: www.accusys.co.kr• Email : sales@accusys.co.krhttp://www.accusys.com.tw 21