

Geotech Geopump Peristaltic Pump Manual
Geotech Geopump Peristaltic Pump Manual
Geotech Geopump Peristaltic Pump Manual

Create successful ePaper yourself
Turn your PDF publications into a flip-book with our unique Google optimized e-Paper software.
Table of ContentsSection 1: System Description …………………………………………………..…….. 5Section 2: System Installation …………………………………………………….……. 6Section 3: System Operation ………………………………………..………………… 8Section 4: System Maintenance …………………………………….…………….…… 9Section 5: System Troubleshooting ………………………………….………………... 10Section 6: System Specifications ………………………….……………………….….. 11Section 7: System Schematics …………………………………………………………. 12Section 8: Replacement Parts List ………………….……………….………………… 13Warranty and Repair ……..…………………………………………..………………… 151
NOTICESIn order to ensure your <strong>Geopump</strong> has a long service life and operates properly,adhere to the following cautions and read this manual before use.Disconnect from power source when not in use.Power input source must not exceed maximum ratings.Equipment must be wired to a negative ground system.Equipment may not operate properly with excess wiring not supplied bymanufacturer .Avoid spraying fluid directly at equipment.Never submerge equipment.Avoid pulling on wires to unplug equipment wiring.Avoid using equipment with obvious physical damage.To prevent equipment damage, avoid dropping it.The <strong>Geotech</strong> <strong>Geopump</strong> <strong>Peristaltic</strong> <strong>Pump</strong> cannot be madedangerous or unsafe as a result of failure due to EMC interference.Do not operate this equipment if it has visible signs of significantphysical damage other than normal wear and tear.WARNING3
Notice for consumers in Europe:This symbol indicates that this product is to be collectedseparately.The following applies only to users in European countries:This product is designated for separate collection at an appropriate collectionpoint. Do not dispose of as household waste.For more information, contact the seller or the local authorities in charge of wastemanagement.4
Section 1: System DescriptionFunction and TheoryThe <strong>Geotech</strong> Series I and II <strong>Peristaltic</strong> <strong>Pump</strong>s (<strong>Geopump</strong>) are designed for single andmulti-stage pressure or vacuum pumping of liquids for field or laboratory use. Since the<strong>Geopump</strong> can operate to a depth of 27 feet (8m) at sea level, it is ideally suited for sampleremoval from shallow wells and all surface water sources.The <strong>Geopump</strong> operates by mechanical peristalsis, therefore the sample only comes incontact with the tubing. This allows for sample integrity as well as easy cleaning andtubing replacement. Tubing can also be lowered to a specific depth without curling orfloating on the surface of the water with the use of an optional stainless steel tubingweight.Differences between the two models affect the number of pump heads which may be usedwith the <strong>Geopump</strong> at one time and the speed(s) at which the pump heads operate.Therefore, the instructions for general operations will be covered only once.System ComponentsSERIES I <strong>Peristaltic</strong> <strong>Pump</strong>s are available in AC only, DC only, or an AC/DC combination.These units have one pumping station which can also be piggy-backed for multi-stationpumping. The variable speed range is from 0 RPM to 350 RPM.SERIES II <strong>Peristaltic</strong> <strong>Pump</strong>s are available in AC only, DC only, or an AC/DCcombination. They have two pumping stations which can also be piggy-backed. The firstpumping station is rated at 0 RPM to 350 RPM and the second station at 0 RPM to 600RPM. Each pumping station works in conjunction with the other.5
Section 2: System InstallationStandard <strong>Pump</strong> Head Instructions1. Separate the pump halves. Hold the pump head as shown with the rollers in the2, 6, and 10 o’clock positions and the rotor shaft facing down.2. Place the tubing around the rollers.3. Turn rotor counterclockwise until tubing completely surrounds the rotor.4. The tubing is now in place. Next, position other pump half onto the motor shaftand snap shut. Be careful not to pinch tubing between plastic halves.6
Easy-Load II <strong>Pump</strong> Head Instructions1. Attach the Easy-Load II pump to the <strong>Geopump</strong> with the screws provided.2. Set the lever to the left to open the pump. Place the tubing left to right.3. Set the lever to the right to close the pump housing onto the tubing.7
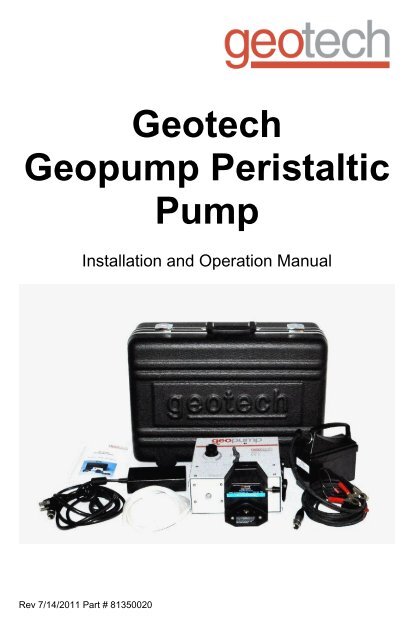
Section 3: System OperationThe <strong>Geopump</strong> arrives packed in a hard-shell peristaltic pump carry case with the pumphead properly attached to the pump (purchased separately). See Section 8 on availablepump parts.To place the pump into service:1. Remove the pump from the case and verify the pump is switched to “OFF” (red,open circle)2. For AC/DC combination units, plug in the appropriate power cord into the outletin the back of the pump and the other end of the power cord into the powersource.3. Insert the tubing into the pump head.4. Put one end of the tubing into the sample source (well, river, ditch, lagoon, etc.)and the other end into the sample container.5. Determine the desired direction of flow and set the toggle switch for the flowdirection.6. Turn the pump “ON” (the black filled circle).7. Once pumping has begun, the speed dial can be adjusted to increase or reducethe fluid pumping speed as needed.8
Section 4: System MaintenanceThe <strong>Geopump</strong> has a strong reputation for durability and being virtually maintenance free.The following maintenance steps will assure your pump’s long-term reliability:<strong>Pump</strong> Tubing:Depending on the pump head design, different sizes of tubing may be used. Use ofincorrect tubing, size, or type, will cause damage to the pump and/or the pump head andvoid the warranty. <strong>Geotech</strong> recommends regular tubing replacement for optimumperformance. Using the proper size and type of tubing for the pump head is essential. Ifyou are unsure of the tubing type for your application, please call <strong>Geotech</strong>.<strong>Pump</strong>:Keep your <strong>Geopump</strong> clean and dry. In the event that the <strong>Geopump</strong> is subjected tosignificant splashing or immersion, discontinue use and wipe the unit down immediatelywith a clean dry cloth.To keep your <strong>Geopump</strong> reliable follow these simple guidelines:Do not drop your <strong>Geopump</strong>.Do not immerse your <strong>Geopump</strong>.Do not subject your <strong>Geopump</strong> to poor power supplies.Do not subject your <strong>Geopump</strong> to extreme heat or cold when in use.Power Cords:Always replace a kinked or damaged power cord. Replacement power cords are availablefor AD/DC combination units. Units with a hard-wired power cord are to be sent back to<strong>Geotech</strong> for proper repair. Refer to the <strong>Geotech</strong> Warranty and Repair page in the back ofthis manual.<strong>Pump</strong> Head:Clean the <strong>Geopump</strong> pump head periodically using a phosphate-free cleaning detergentand water solution.9
Section 5: System TroubleshootingProblem: Unit will not turn on.Solution:1. No power to unit: (rollers not moving):- Check power source and compatibility.- Check connections.2. Speed control not set fast enough to overcome tubing resistance:- Check speed setting; if too low turn it up.3. Check tubing size and type. Make sure it is the correct size and type for the pumphead.4. Check circuit breaker; if tripped press it in to reset.Problem: Unit turns on, but not pumping (pump head rollers are moving).Solution:1. Verify fluid level in well (max suction lift unit can pump from is 27 feet (8m) belowground at sea level).2. Water level is below down well tubing intake. Increase tubing length.3. If using a combination of flexible and rigid tubing, check connection between tubing. Apoor connection may cause a vacuum leak. Secure tubing connection.4. Flexible tubing in pump head compromised or worn out:- Replace flexible tubing regularly.5. Obstruction in tubing:- Check for clogs and kinks.- Clear any obstructions.6. Using incorrect tubing type for pump head:- Tubing may have collapsed.- Replace with proper tubing type.Problem: <strong>Pump</strong> head rollers are not moving .Solution:1. <strong>Pump</strong> head is loose from the pump housing:- Tighten pump head screws to engage pump head to gear.- Possible internal damage, call <strong>Geotech</strong> for consultation.10
Section 6: System SpecificationsOperating rangePrinciple of OperationDimensionsPower source (DC)Power source (AC)Nominal operating currentOver current ProtectionPower cordRange of speed: Series IRange of speed: Series IISpeed controlLiquid delivery rate<strong>Pump</strong>ing options<strong>Pump</strong> head rotor27 feet (8m) (at sea level)Mechanical peristalsis3.5 x 8 x 8 inches (9 x 20 x 20cm)Any rated external 12-18 VDC @ 70 Watts90-260 VAC, 47-65 Hz3 amps DC5 amps DC12 VDC cord0 to 350 RPMFirst pumping station 0 to 350 RPMSecond pumping station 0 to 600 RPMStep-less variable speed control1.67 ml per revolution (for size 15 tubing)Pressure or vacuum (reversible flow)Cold rolled steelOPTIONSModels: <strong>Geopump</strong> 1, <strong>Geopump</strong> 2Tubing:Silicone, Tygon, Viton, C-Flex<strong>Pump</strong> Heads: Standard, Easyload, Easyload 211
Section 7: System Schematics12
Old Style Non-CE PartsPart NumberPart Description57500007 Assy, Power Cord, AC, w/Amp51350007 Assy, Diode, PP57500009 Assy, Rectifier Bridge, PP-Logic51350013 Assy, Transformer w/Jumper, PP51350004 Assy, Wiring Harness, PP14
The WarrantyFor a period of one (1) year from date of first sale, product is warranted to be free fromdefects in materials and workmanship. <strong>Geotech</strong> agrees to repair or replace, at <strong>Geotech</strong>’soption, the portion proving defective, or at our option to refund the purchase price thereof.<strong>Geotech</strong> will have no warranty obligation if the product is subjected to abnormal operatingconditions, accident, abuse, misuse, unauthorized modification, alteration, repair, orreplacement of wear parts. User assumes all other risk, if any, including the risk of injury,loss, or damage, direct or consequential, arising out of the use, misuse, or inability to usethis product. User agrees to use, maintain and install product in accordance withrecommendations and instructions. User is responsible for transportation chargesconnected to the repair or replacement of product under this warranty.Equipment Return PolicyA Return Material Authorization number (RMA #) is required prior to return of anyequipment to our facilities, please call our 800 number for appropriate location. An RMA #will be issued upon receipt of your request to return equipment, which should includereasons for the return. Your return shipment to us must have this RMA # clearly markedon the outside of the package. Proof of date of purchase is required for processing of allwarranty requests.This policy applies to both equipment sales and repair orders.FOR A RETURN MATERIAL AUTHORIZATION, PLEASE CALL OURSERVICE DEPARTMENT AT 1-800-833-7958.Model Number:Serial Number:Date of Purchase:________________________________________________Equipment DecontaminationPrior to return, all equipment must be thoroughly cleaned and decontaminated. Pleasemake note on RMA form, the use of equipment, contaminants equipment was exposed to,and decontamination solutions/methods used. <strong>Geotech</strong> reserves the right to refuse anyequipment not properly decontaminated. <strong>Geotech</strong> may also choose to decontaminate theequipment for a fee, which will be applied to the repair order invoice.15
Declaration of Conformity<strong>Geotech</strong> Environmental Equipment, Inc.2650 E 40th AvenueDenver, CO 80205Following products are covered:<strong>Geotech</strong> product PNThese products comply with the directive 2004/108/EC (EMC),harmonized standard EN 61010-1 2001-12-07, emissions class A.These products comply with harmonized standard EN 61326-1 May 2006.Signatory:Joe LeonardProduct DevelopmentYear of manufacture:EMC conformity established 8/14/2009.This declaration is issued under the sole responsibility of<strong>Geotech</strong> Environmental Equipment, Inc.ModelSerial number________________________________16
<strong>Geotech</strong> Environmental Equipment, Inc.2650 East 40th Avenue Denver, Colorado 80205(303) 320-4764 ● (800) 833-7958 ● FAX (303) 322-7242email: sales@geotechenv.com website: www.geotechenv.comIn the EU<strong>Geotech</strong> Equipos Ambientales S.L.Abat Escarré # 12 Mollet del Valles, Barcelona 08100, EspañaTlf: 93 5445937email: international@geotechenv.com website: www.geotechenv.com/spain.htmlPrinted in the United States of America


