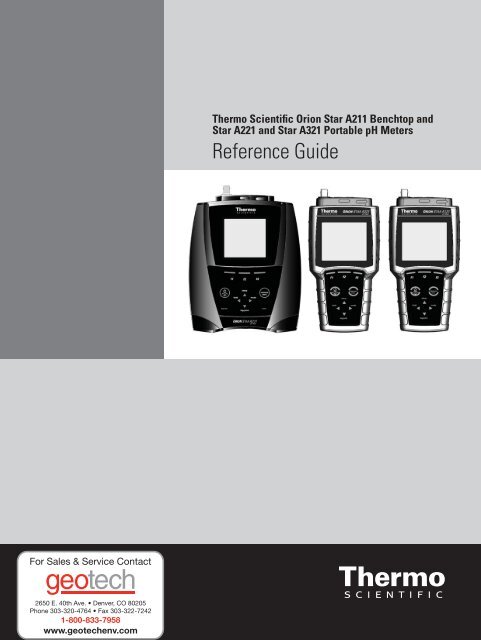
Thermo Scientific Orion Star A221 Reference Guide - Geotech ...
Thermo Scientific Orion Star A221 Reference Guide - Geotech ...
Thermo Scientific Orion Star A221 Reference Guide - Geotech ...
- No tags were found...
Create successful ePaper yourself
Turn your PDF publications into a flip-book with our unique Google optimized e-Paper software.
This page intentionally left blank.2 <strong>Thermo</strong> <strong>Scientific</strong> <strong>Orion</strong> <strong>Star</strong> A211 Benchtop and <strong>Star</strong> <strong>A221</strong> and <strong>Star</strong> A321 Portable pH Meter <strong>Reference</strong> <strong>Guide</strong>
Electrodes and Other Connections1. Prepare the pH electrode and any other applicable electrodes according to the directions in theelectrode user guide. GroundRef.DO/RDOATC/CONBNCPower Stirrer USB RS232DO/RDOPOWERUSBATC/CONDREFBNC<strong>Star</strong> A211 Meter Back PanelRS232<strong>Star</strong> <strong>A221</strong> and <strong>Star</strong> A321 Meter Back Panel<strong>Orion</strong> <strong>Star</strong> A211 benchtop meters only.<strong>Orion</strong> <strong>Star</strong> A211 benchtop meters only.4 <strong>Thermo</strong> <strong>Scientific</strong> <strong>Orion</strong> <strong>Star</strong> A211 Benchtop and <strong>Star</strong> <strong>A221</strong> and <strong>Star</strong> A321 Portable pH Meter <strong>Reference</strong> <strong>Guide</strong>
Meter DisplayDisplay IconDescription25.0˚CATCHOLD is pressed and the displayed measurement is frozen.alarm value is reached.saved calibration and measurement stability.M100pH ready Specifies the stability of the electrode as stabilizing or ready.7.000 pH0.0mVBUFFERS: 1.68,… <strong>Orion</strong> <strong>Star</strong> A211 and <strong>Star</strong> A321 meters only.<strong>Orion</strong> <strong>Star</strong> A211 and <strong>Star</strong> A321 meters only.calsample IDchannelf1 is pressed.f2 is pressed.f3 is pressed.6 <strong>Thermo</strong> <strong>Scientific</strong> <strong>Orion</strong> <strong>Star</strong> A211 Benchtop and <strong>Star</strong> <strong>A221</strong> and <strong>Star</strong> A321 Portable pH Meter <strong>Reference</strong> <strong>Guide</strong>
Meter Keypad<strong>Orion</strong> <strong>Star</strong> A200and A300 SeriesPortable Keypadholdsetupmeasure(esc)mode<strong>Orion</strong> <strong>Star</strong> A200 SeriesBenchtop Keypadlog/printPress the f1, f2 and f3Press to turn the meter on.turn the meter off.measurement mode.again to release (unfreeze) the measurement.(relative mV) and ORP.<strong>Orion</strong> <strong>Star</strong> A211 benchtop meters only.Press to start or stop the stirrer probe. <strong>Orion</strong> <strong>Star</strong> A211 benchtop meters only.<strong>Thermo</strong> <strong>Scientific</strong> <strong>Orion</strong> <strong>Star</strong> A211 Benchtop and <strong>Star</strong> <strong>A221</strong> and <strong>Star</strong> A321 Portable pH Meter <strong>Reference</strong> <strong>Guide</strong>7
1. Press to turn the backlighton or off or press and hold 2. Press 3. The f1, f2, and f3f1 in the measurement mode to start a calibration. , , or the measurement mode, manually log or print a measurement and hold (freeze) a displayed measurement in thecontinuous measurement mode. is pressed and the measurement is being held (frozen), only the <strong>Orion</strong> <strong>Star</strong> A211 benchtop meters only. to access the calibration log and data log. <strong>Orion</strong> <strong>Star</strong> A211 benchtop meters only.Meter Maintenancemeter using the proper cleaning procedure for the type of spill.8 <strong>Thermo</strong> <strong>Scientific</strong> <strong>Orion</strong> <strong>Star</strong> A211 Benchtop and <strong>Star</strong> <strong>A221</strong> and <strong>Star</strong> A321 Portable pH Meter <strong>Reference</strong> <strong>Guide</strong>
Chapter 3 Meter SetupNavigating the Setup Menu to enter the main setup menu.2. Press , , or to scroll through the main setup menu options. Press f3 (select) toselect a main setup menu option.3. Press or to scroll through setup submenu options. Press f3 (select) to select a setup submenu option. a. To select a value from a list of options, press or to highlight the desired value and pressf3 (select) to set the value.b. To enter a numeric value, use the numeric entry screen.i. Select the value to be entered by pressing f3 (select) or f3 (edit)ii. Press , , or to highlight a number, decimal place or negative sign; pressf3 (enter)entry screen.iii. Press f2 (done) f1 (back) and thento return to the measurement mode at any time.Setup Menu OverviewpH Channel Settings Log View DiagnosticsMethod (<strong>Star</strong> A211 and <strong>Star</strong> A321 meters only)Mode & Settings(<strong>Star</strong> A211 and <strong>Star</strong> A321 meters only)(<strong>Star</strong> A211 and <strong>Star</strong> A321 meters only)Temperature(<strong>Star</strong> A211 meters only)(<strong>Star</strong> A211 and <strong>Star</strong> A321 meters only)(<strong>Star</strong> A211 and <strong>Star</strong> A321 meters only)Calibration<strong>Thermo</strong> <strong>Scientific</strong> <strong>Orion</strong> <strong>Star</strong> A211 Benchtop and <strong>Star</strong> <strong>A221</strong> and <strong>Star</strong> A321 Portable pH Meter <strong>Reference</strong> <strong>Guide</strong>9
pH Channel Menumeasurements and calibrations.Main Setup Menu 2nd Level 3rd Level Menu Options Menu DescriptionpH ChannelMethodList of Methods<strong>Star</strong> A211 and <strong>Star</strong> A321 meters only.Mode and SettingsMeasure ModeAuto ( )– Press to take a measurement. When themeasurement is stable, it is locked on the display untilisRead Type(<strong>Star</strong> A211 and <strong>Star</strong>A321 meters only)pressed again.Continuous – The measurement is constantly updated on thedisplay and stabilizing or readymeasurement stability.Timed – Measurements are taken at a set time interval. To enterthe time interval, highlight Timed pressto highlight thehours (HH), minutes (MM) or seconds (SS), press f3 (edit) and useResolutionBuffer Groupthe numeric entry screen to change the values.Menu used to select the resolution for the displayed measurement values.Menu used to select the buffer group used for automatic bufferrecognition during pH calibrations.10 <strong>Thermo</strong> <strong>Scientific</strong> <strong>Orion</strong> <strong>Star</strong> A211 Benchtop and <strong>Star</strong> <strong>A221</strong> and <strong>Star</strong> A321 Portable pH Meter <strong>Reference</strong> <strong>Guide</strong>
pH Channel Menu (cont.)Main Setup Menu 2nd Level 3rd Level Menu Options Menu DescriptionStabilityvalues is indicated. Smart Stability automatically compensates formeasurement conditions and optimizes the meter response time.<strong>Star</strong> A211 and <strong>Star</strong> A321 meters only.AveragingMenu used to turn the averaging function on or off. Automatic Smartautomatically compensates for measurement conditions and optimizesthe meter response time.<strong>Star</strong> A211 and <strong>Star</strong> A321 meters only.Mode and Settings(cont.)OnOffHighMenu used to turn the limit alarm on or off and to set the limit alarmparameters. The limit alarm is triggered if the measurement goes above orto change the setting on each line, press or to selectanother line and use the numeric entry screen to enter limit values.<strong>Star</strong> A211 and <strong>Star</strong> A321 meters only.pH Channel(cont.)OnOffMenu used to turn the calibration due alarm on or off and to set thecalibration due alarm time. The calibration due alarm is triggered if a setor to change the setting on the top line, or toselect another line and use the numeric entry screen to enter thecalibration due value in hours.<strong>Star</strong> A211 and <strong>Star</strong> A321 meters only.<strong>Star</strong> <strong>A221</strong> meters have the cal due alarm with a fixed value of 12 hours.TemperatureManual Temp Valueentered value.the temperature.Menu used to select the temperature units.Temperature Calibrationbuilt in to an electrode) to be adjusted by the operator.Menu used to select the source of the temperature measurement.<strong>Thermo</strong> <strong>Scientific</strong> <strong>Orion</strong> <strong>Star</strong> A211 Benchtop and <strong>Star</strong> <strong>A221</strong> and <strong>Star</strong> A321 Portable pH Meter <strong>Reference</strong> <strong>Guide</strong>11
Settings MenuMain Setup Menu 2nd Level Menu Options Menu DescriptionSettingsMenu used to turn on or off the data log feature.Menu used to set the language for all displayed meter prompts.Menu used to turn on or off the beep sound made every time a meter key is pressed.Alarm Beep12 <strong>Thermo</strong> <strong>Scientific</strong> <strong>Orion</strong> <strong>Star</strong> A211 Benchtop and <strong>Star</strong> <strong>A221</strong> and <strong>Star</strong> A321 Portable pH Meter <strong>Reference</strong> <strong>Guide</strong>
Settings Menu (cont.)Main Setup Menu 2nd Level Menu Options Menu DescriptionStirrerMenu used to turn the stirrer probe on or off and to set the stirrer probe speed.<strong>Star</strong> A211 meters only.Settings (cont.)ContrastMenu used to set the display contrast.Auto Shut Offentered value.<strong>Star</strong> A211 and <strong>Star</strong> A321 meters only.f2 (sampleID) and using the alphanumeric entry screen.<strong>Star</strong> A211 and <strong>Star</strong> A321 meters only.View Log MenuStorage and Retrieval chapter for detailed information on using this setup menu.Diagnostics Menudetailed information on using this setup menu.<strong>Thermo</strong> <strong>Scientific</strong> <strong>Orion</strong> <strong>Star</strong> A211 Benchtop and <strong>Star</strong> <strong>A221</strong> and <strong>Star</strong> A321 Portable pH Meter <strong>Reference</strong> <strong>Guide</strong>13
This page intentionally left blank.14 <strong>Thermo</strong> <strong>Scientific</strong> <strong>Orion</strong> <strong>Star</strong> A211 Benchtop and <strong>Star</strong> <strong>A221</strong> and <strong>Star</strong> A321 Portable pH Meter <strong>Reference</strong> <strong>Guide</strong>
Chapter 4 pH, RmV and ORP CalibrationpH Calibrationsample pH and are one to four pH units apart. Prepare the pH electrode according to the instructions in the electrode useguide. Connect the pH electrode and any other electrodes to be used (stirrer probe, ATC probe, reference electrode) to theNote: In most calibration screens, press f1 (esc) to return to the measurement mode without saving the calibration. f1 (cal). into the pH buffer.3. When the electrode and buffer are ready, press f3 (start)f3 (start) is pressed and stopstirring once the reading stabilizes. a. Press f2 (accept) to accept the displayed value.b. Press f3 (edit) to access the numeric entry screen and edit the value.i. Press , , or to highlight a number, decimal point or negative sign; pressf3 (enter) to select the highlighted item and repeat until the value at the measured temperature isii. Press f2 (done)iii. Press f2 (accept) to accept the entered value. f2 (next) press f3 (cal done) to save and endf2 (accept) to accept the displayed slope value or pressf3 (edit) to access the numeric entry screen, enter the slope value and press f2 (accept). f1 (meas) to proceed to the measurement mode or press f2 (print)to a printer or computer.<strong>Thermo</strong> <strong>Scientific</strong> <strong>Orion</strong> <strong>Star</strong> A211 Benchtop and <strong>Star</strong> <strong>A221</strong> and <strong>Star</strong> A321 Portable pH Meter <strong>Reference</strong> <strong>Guide</strong>15
Calibration Editing<strong>Star</strong> A211 and <strong>Star</strong> 321 Meters Only press f3 (cal edit) to edit the calibration points.2. Press or to highlight the calibration point to be edited and press f2 (select).3. Press or to highlight Remeasure, Edit or Delete and press f2 (select). RemeasureEdit is selected, press f3 (edit)f2(done) and then press f2 (accept). Select another calibration point to edit or press f1 (back).Deletecalibration to a one point calibration, enter the slope using the numeric entry screen.RmV Calibration f1 (meas)to proceed to the measurement mode, press f2 (print)printer or computer or press f3 (cal edit) to edit another calibration point.instructions in the electrode use guide. Connect the electrode and any other electrodes to be used (stirrer probe, ATC probe,Note: In most calibration screens, press f1 (esc) to return to the measurement mode without saving the calibration. f1 (cal). the standard.3. When the electrode and standard are ready, press f3 (start)f3 (start) is pressed and stop stirring once the reading stabilizes. stabilizing or solid ready icon, and performa. Press f2 (accept)Rel Value line.b. Press f3 (edit)Rel Value line.i. Press , , or to highlight a number, decimal point or negative sign; press f3 (enter) to select theii. Press f2 (done)iii. Press f2 (accept) to accept the entered mV value. f1 (meas) to proceed to the measurement mode or press f2 (print)the data to a printer or computer.16 <strong>Thermo</strong> <strong>Scientific</strong> <strong>Orion</strong> <strong>Star</strong> A211 Benchtop and <strong>Star</strong> <strong>A221</strong> and <strong>Star</strong> A321 Portable pH Meter <strong>Reference</strong> <strong>Guide</strong>
ORP CalibrationThe mV reading of an ORP standard is dependent on the ORP electrode reference system, reference material and filling H Htemperatures.the instructions in the electrode use guide. Connect the electrode and any other electrodes to be used (stirrer probe, ATCNote: In most calibration screens, press f1 (esc) to return to the measurement mode without saving the calibration. f1 (cal). into the standard.3. When the electrode and standard are ready, press f3 (start)f3 (start) is pressed and stop stirring once the reading stabilizes. stabilizing or solid ready icon, and press f2(accept) once the value is stable. Press f1 (meas) to proceed to the measurement mode or press f2 (print) to proceed to the measurement mode and<strong>Thermo</strong> <strong>Scientific</strong> <strong>Orion</strong> <strong>Star</strong> A211 Benchtop and <strong>Star</strong> <strong>A221</strong> and <strong>Star</strong> A321 Portable pH Meter <strong>Reference</strong> <strong>Guide</strong>17
This page intentionally left blank.18 <strong>Thermo</strong> <strong>Scientific</strong> <strong>Orion</strong> <strong>Star</strong> A211 Benchtop and <strong>Star</strong> <strong>A221</strong> and <strong>Star</strong> A321 Portable pH Meter <strong>Reference</strong> <strong>Guide</strong>
Chapter 5 Temperature Calibrationto calibrate the temperature readings taken by the ATC probe. Since the temperature offset calculated during thecalibration is applied to all future temperature measurements, recalibrate if a different ATC probe is used.Temperature calibration is for the calibration of an ATC probe (separate or built in to a pH electrode or ORP electrode.)set the manual temperature value using the Manual Temp Value menu. The temperature calibration menu is notaccessible unless an ATC probe is connected to the meter. .2. Press , , or to highlight pH Channel and press f3 (select).3. Press or to highlight Temperature and press f3 (select). or to highlight Temperature Calibration and press f3 (select). or to highlight ATC f3 (select). traceable thermometers be used to measure and verify the temperature of the solution. f3 (edit) to access the numeric entry screen and edit the temperature value.a. Press , , or to highlight a number, decimal point or negative sign; press f3 (enter)to select the highlighted item and repeat until the temperature value read by the thermometers isb. Press f2 (done) <strong>Reference</strong> Temp line, the original temperature readby the ATC probe on the ATC readings on the Offset line. Press f2 (accept) f1 (meas) to proceed to the measurement mode or press f2 (print) to proceed to the measurement mode<strong>Thermo</strong> <strong>Scientific</strong> <strong>Orion</strong> <strong>Star</strong> A211 Benchtop and <strong>Star</strong> <strong>A221</strong> and <strong>Star</strong> A321 Portable pH Meter <strong>Reference</strong> <strong>Guide</strong>19
This page intentionally left blank.20 <strong>Thermo</strong> <strong>Scientific</strong> <strong>Orion</strong> <strong>Star</strong> A211 Benchtop and <strong>Star</strong> <strong>A221</strong> and <strong>Star</strong> A321 Portable pH Meter <strong>Reference</strong> <strong>Guide</strong>
Chapter 6 Measurementmeasurements on the display.Press a second time to unfreeze the display and continue the measurement. Press into the sample.2. <strong>Star</strong> A211 meters only to start the measurement. Whenthe sample. Press ready andrecord the applicable measurement parameters and temperature of the sample.c. <strong>Star</strong> A211 and <strong>Star</strong> A321 meters only –ready. <strong>Star</strong> A211 meters onlyto turn off the stirrer probe. <strong>Thermo</strong> <strong>Scientific</strong> <strong>Orion</strong> <strong>Star</strong> A211 Benchtop and <strong>Star</strong> <strong>A221</strong> and <strong>Star</strong> A321 Portable pH Meter <strong>Reference</strong> <strong>Guide</strong>21
This page intentionally left blank.22 <strong>Thermo</strong> <strong>Scientific</strong> <strong>Orion</strong> <strong>Star</strong> A211 Benchtop and <strong>Star</strong> <strong>A221</strong> and <strong>Star</strong> A321 Portable pH Meter <strong>Reference</strong> <strong>Guide</strong>
Chapter 7 MethodsThe <strong>Orion</strong> <strong>Star</strong> A211 and <strong>Star</strong> A321 meters can save up to ten methods per channel and the corresponding calibrationdata for each method, for the fast and easy recollection of different meter setup parameters. The default meterSaving the Current Meter Settings as a New Method .2. Press , , or to highlight pH Channel and press f3 (select).3. Press or to highlight Method and press f3 (select). Current Settings(M101) and the date, time and mode of each method (07/01/11 12:45 pH) if methods have been previously created. or to highlight Current Settings and press f3 (save). or f2 (accept). a. Press f3 (edit) to access the numeric entry screen.b. Press , , or to highlight a number, press f3 (enter) to select the c. Press f2 (done)d. Press f2 (accept) Loading an Existing Method .2. Press , , or to highlight pH Channel and press f3 (select).3. Press or to highlight Method and press f3 (select). Current Settingsmethods (M101) and the date, time and mode of each method (07/01/11 12:45 pH) if methods have been previouslycreated. or to highlight the method to be loaded and press f2 (load). <strong>Thermo</strong> <strong>Scientific</strong> <strong>Orion</strong> <strong>Star</strong> A211 Benchtop and <strong>Star</strong> <strong>A221</strong> and <strong>Star</strong> A321 Portable pH Meter <strong>Reference</strong> <strong>Guide</strong>23
Editing, Copying or Deleting an Existing Method .2. Press , , or to highlight pH Channel and press f3 (select).3. Press or to highlight Method and press f3 (select). Current Settingsmethods (M101) and the date, time and mode of each method (07/01/11 12:45 pH) if methods have beenpreviously created. or to highlight the desired method and press f3 (options). a. Press f3 (edit) to access the numeric entry screen.b. Press , , or to highlight a number, press f3 (enter) to select the highlighted c. Press f2 (done)d. Press f2 (accept) or to highlight Edit, Copy or Delete and press f2 (accept). Edit is selected – press or to highlight any setup menu parameters that need to bechanged and press f3 (select)f1(back) to return to the list of methods and then press to return to the measurement mode. Copy is selected – press or to highlight a method number that the selected f2 (accept)measurement mode.Delete is selected – press f2 (yes) to delete the method or press f3 (no) to keep the method.24 <strong>Thermo</strong> <strong>Scientific</strong> <strong>Orion</strong> <strong>Star</strong> A211 Benchtop and <strong>Star</strong> <strong>A221</strong> and <strong>Star</strong> A321 Portable pH Meter <strong>Reference</strong> <strong>Guide</strong>
Chapter 8 Data Storage and RetrievalData Storage Settingsif the data log is enabled in the setup menu, and to a printer or computer, if a printer or computer is connected to theRead Type Selection .2. Press , , or to highlight pH Channel and press f3 (select).3. Press or to highlight Mode and Settings and press f3 (select). or to highlight Read Type and press f3 (select). or to highlight Auto, Continuous or Timed and press f3 (select).a. <strong>Star</strong> A211 and <strong>Star</strong> A321 meters only – Timed is selected and the time interval needs to be changed – highlight Timed; press to highlighthours (HH), minutes (MM) or seconds (SS); press f3 (edit) to access the numeric entry screen; use thenumeric entry screen to change the values and press f1 (back) to return to the measurement mode.<strong>Thermo</strong> <strong>Scientific</strong> <strong>Orion</strong> <strong>Star</strong> A211 Benchtop and <strong>Star</strong> <strong>A221</strong> and <strong>Star</strong> A321 Portable pH Meter <strong>Reference</strong> <strong>Guide</strong>25
Computer and Printer Export Settings .2. Press , , or to highlight Settings and press f3 (select).3. Press or to highlight Export Data and press f3 (select). or to highlight Printing and press f3 (select). Press or to highlight On or Off andpress f3 (select). Select On or to highlight Comm Setup and press f3 (select). Press or to highlight RS232 orUSB and press f3 (select). Select RS232USB or to highlight Data Format and press f3 (select). Press or to highlight Printer orPC (CSV) and press f3 (select). Select PrinterPC (CSV) to or to highlight Comm Config and press f3 (select). Press or to highlight 1200, 2400,4800, 9600, 19200 or 38400 and press f3 (select). Select the baud rate best for the data transfer requirements. f1 (back) and then pressto return to the measurement mode.Data Log Settings .2. Press , , or to highlight Settings and press f3 (select).3. Press or to highlight Data Log and press f3 (select). or to highlight Off or On and press f3 (select). f1 (back) and then pressto return to the measurement mode.26 <strong>Thermo</strong> <strong>Scientific</strong> <strong>Orion</strong> <strong>Star</strong> A211 Benchtop and <strong>Star</strong> <strong>A221</strong> and <strong>Star</strong> A321 Portable pH Meter <strong>Reference</strong> <strong>Guide</strong>
Viewing the Calibration Log and Data LogViewing the Calibration Log .2. Press , , or to highlight View Log and press f3 (select).3. Press or to highlight Calibration Log and press f2 (accept). or to highlight pH – Channel and press f2 (select). or to highlight pH, RmV or ORP and press f2 (select). (07/01/2011 12:45). or to highlight a specific calibration and press f2 (select). Pressf2 (print) to print the calibration, press f3 (info)f1 (back) to return to the list of calibrations. to return to the measurement mode.Viewing the Data Log .2. Press , , or to highlight View Log and press f3 (select).3. Press or to highlight Data Log and press f2 (accept). or to highlight pH – Channel and press f2 (select). (07/01/2011 12:45). or to highlight the data pointand press f2 (select). Press f2 (print) to print the data point or press f1 (back) to return to the list of data points. to return to the measurement mode.<strong>Thermo</strong> <strong>Scientific</strong> <strong>Orion</strong> <strong>Star</strong> A211 Benchtop and <strong>Star</strong> <strong>A221</strong> and <strong>Star</strong> A321 Portable pH Meter <strong>Reference</strong> <strong>Guide</strong>27
Exporting the Data Log to a Computer or Printer .2. Press , , or to highlight View Log and press f3 (select).3. Press or to highlight Data Log and press f2 (accept). or to highlight pH – Channel and press f3 (select). (07/01/2011 12:45). f3 (options). or to highlight Log Export and press f2 (accept). or to highlight Today, Last 10, Range or Alland press f2 (accept).Today, Last 10 or All is selected – press f2 (yes)Rangei. Press f3 (edit) to display the numeric entry screen.ii. Press , , or to highlight a number, press f3 (enter) to select the highlighteddisplay.iii. Press f2 (done)iv. Press to enter the last data point.v. Press f3 (edit) to display the numeric entry screen.vi. Press , , or to highlight a number, press f3 (enter) to select the highlightedvii. Press f2 (done)viii. Press f2 (accept) and then press f2 (yes) 28 <strong>Thermo</strong> <strong>Scientific</strong> <strong>Orion</strong> <strong>Star</strong> A211 Benchtop and <strong>Star</strong> <strong>A221</strong> and <strong>Star</strong> A321 Portable pH Meter <strong>Reference</strong> <strong>Guide</strong>
Clearing the Data Log .2. Press , , or to highlight View Log and press f3 (select).3. Press or to highlight Data Log and press f2 (accept). or to highlight pH – Channel and press f3 (select). (07/01/2011 12:45). f3 (options). or to highlight Log Clear and press f2 (accept). f2 (yes) 111111 and pressing f2 (accept)f1 (back) and then pressto return to the measurement mode.<strong>Thermo</strong> <strong>Scientific</strong> <strong>Orion</strong> <strong>Star</strong> A211 Benchtop and <strong>Star</strong> <strong>A221</strong> and <strong>Star</strong> A321 Portable pH Meter <strong>Reference</strong> <strong>Guide</strong>29
Interfacing a PrinterInterfacing a Computeroption is turned on in the setup menu. Alternatively, measurements and calibration data can be sent to the data logand calibration log. From the data log and calibration log, the operator can chose to print a single data log point, arange of data log points or the entire data log.send measurements and calibration data to the computer if the computer option is turned on in the setup menu.Alternatively, measurements and calibration data can be sent to the data log and calibration log. From the data logand calibration log, the operator can chose to send a single data log point, a range of data log points or the entiredata log to the computer.A complimentary copy of general data logging software is available for use with the <strong>Orion</strong> <strong>Star</strong> A200 and <strong>Star</strong> A300 seriesmeters. This can be found on the CD included with the meter or at www.thermoscientific.com/water.30 <strong>Thermo</strong> <strong>Scientific</strong> <strong>Orion</strong> <strong>Star</strong> A211 Benchtop and <strong>Star</strong> <strong>A221</strong> and <strong>Star</strong> A321 Portable pH Meter <strong>Reference</strong> <strong>Guide</strong>
Chapter 9 Customer ServicesMeter Errors and Recommended ActionsErrorOver Range Measurement orMeasurement Out of RangeRecommended Actionsrepeat the self test.Make sure that all of the electrodes are disconnected from the meter (including the reference input),Make sure that all of the electrodes are disconnected from the meter (including the ground input),Repeat the self test. When the meter prompts, press each of the keys one at a time, including theappropriate meter input and the electrode parameters are entered correctly in the setup menu.Make sure that the electrode is connected to the appropriate meter input and the electrodeparameters are entered correctly in the setup menu. Clean the electrode according to the electrode<strong>Thermo</strong> <strong>Scientific</strong> <strong>Orion</strong> <strong>Star</strong> A211 Benchtop and <strong>Star</strong> <strong>A221</strong> and <strong>Star</strong> A321 Portable pH Meter <strong>Reference</strong> <strong>Guide</strong>31
Meter Self Test and CheckoutMeter Self Test .2. Press , , or to highlight Diagnostics and press f3 (select).3. Press or to highlight Self Test and press f2 (accept). and press f2 (yes). f2 (yes) to start the self test. Accuracy Test Passed, press f2 (next). E2Prom Test Passed, press f2 (next). ) one at a time inany order. When the meter displays Keypad Test Passed, press f2 (next). Self Test Passed. Pressto return to the measurement mode.Meter Checkout (pH) instructions. 32 <strong>Thermo</strong> <strong>Scientific</strong> <strong>Orion</strong> <strong>Star</strong> A211 Benchtop and <strong>Star</strong> <strong>A221</strong> and <strong>Star</strong> A321 Portable pH Meter <strong>Reference</strong> <strong>Guide</strong>
Electrode Stability Test .2. Press , , or to highlight Diagnostics and press f3 (select).3. Press or to highlight Stability Test and press f2 (accept). or to highlight pH – Channel and press f2 (next). press f2 (yes). f2 (yes). Stability Test Passed or Stability Test Failed. Press f1 (esc) ormeasurement mode.to return to theMeter Factory ResetMeter User Reset .2. Press , , or to highlight Diagnostics and press f3 (select).3. Press or to highlight Factory Reset and press f2 (accept). f2 (yes) to reset the meter. .2. Press , , or to highlight Diagnostics and press f3 (select).3. Press or to highlight User Reset and press f2 (accept).f2 (yes) to reset the meter.<strong>Thermo</strong> <strong>Scientific</strong> <strong>Orion</strong> <strong>Star</strong> A211 Benchtop and <strong>Star</strong> <strong>A221</strong> and <strong>Star</strong> A321 Portable pH Meter <strong>Reference</strong> <strong>Guide</strong>33
About Meter .2. Press , , or to highlight Diagnostics and press f3 (select).3. Press or to highlight About Meter and press f2 (accept). f1 (back) to return to the diagnostics menu or pressto return to the measurement mode.AssistanceWarranty and Registration34 <strong>Thermo</strong> <strong>Scientific</strong> <strong>Orion</strong> <strong>Star</strong> A211 Benchtop and <strong>Star</strong> <strong>A221</strong> and <strong>Star</strong> A321 Portable pH Meter <strong>Reference</strong> <strong>Guide</strong>
Ordering Information<strong>Orion</strong> <strong>Star</strong> A200 Series Benchtop MetersCat. No.STARA2110STARA2115STARA2120STARA2125STARA2126STARA2130STARA2135STARA2136STARA2140STARA2145STARA2146STARA2147STARA2148STARA2150STARA2155STARA2160STARA2165DescriptionStorage SolutionStandard<strong>Thermo</strong> <strong>Scientific</strong> <strong>Orion</strong> <strong>Star</strong> A211 Benchtop and <strong>Star</strong> <strong>A221</strong> and <strong>Star</strong> A321 Portable pH Meter <strong>Reference</strong> <strong>Guide</strong>35
Ordering Information (cont.)<strong>Orion</strong> <strong>Star</strong> A200 and <strong>Star</strong> A300 Series Portable MetersCat. No.STAR<strong>A221</strong>0STAR<strong>A221</strong>5STARA2220STARA2225STARA2230STARA2235STARA3210STARA3215STARA3220STARA3225STARA3230STARA3235STARA3240STARA3245STARA3250STARA3255STARA3260STARA3265STARA3290STARA3295Description<strong>Star</strong> <strong>A221</strong> pH Portable Meter<strong>Star</strong> A222 Conductivity Portable Meter<strong>Star</strong> A321 pH Portable Meter<strong>Star</strong> A322 Conductivity Portable Meter<strong>Star</strong> A Meter Armor36 <strong>Thermo</strong> <strong>Scientific</strong> <strong>Orion</strong> <strong>Star</strong> A211 Benchtop and <strong>Star</strong> <strong>A221</strong> and <strong>Star</strong> A321 Portable pH Meter <strong>Reference</strong> <strong>Guide</strong>
Ordering Information (cont.)Cat. No.STARA-BEASTARA-HBSTARA-CSSTARA-ARSTARA-ESPHSTARA-ESCDDescription<strong>Orion</strong> <strong>Star</strong> A Series Accessories and Electrodes<strong>Orion</strong> <strong>Star</strong> A Series Portable Hard Carrying Caseseparately)1010003 8102BNUWP8302BNUMD8157BNUMD8107UWMMD927005MD927007MD9179BNMD9180BNMD9512HPBNWP9609BNWP8611BNWP013005MD013010MD013020MD013025MD013016MD083005MD083010MD083025MD086030MD087010MD087020MD087030MDStainless Steel ATC Probe096019 <strong>Thermo</strong> <strong>Scientific</strong> <strong>Orion</strong> <strong>Star</strong> A211 Benchtop and <strong>Star</strong> <strong>A221</strong> and <strong>Star</strong> A321 Portable pH Meter <strong>Reference</strong> <strong>Guide</strong>37
This page intentionally left blank.38 <strong>Thermo</strong> <strong>Scientific</strong> <strong>Orion</strong> <strong>Star</strong> A211 Benchtop and <strong>Star</strong> <strong>A221</strong> and <strong>Star</strong> A321 Portable pH Meter <strong>Reference</strong> <strong>Guide</strong>
Chapter 10 Meter ComplianceNotice of ComplianceThis equipment generates, uses, and can radiate radio frequency energy and if not installed and used inappareils numeriques (de la class A) prescrites dans le Reglement sur le brouillage radioelectrique edicte par leWEEE Compliancedirectives, the recyclers in your country, and information on <strong>Thermo</strong> <strong>Scientific</strong> <strong>Orion</strong> products that may assist the<strong>Thermo</strong> <strong>Scientific</strong> <strong>Orion</strong> <strong>Star</strong> A211 Benchtop and <strong>Star</strong> <strong>A221</strong> and <strong>Star</strong> A321 Portable pH Meter <strong>Reference</strong> <strong>Guide</strong>39
Declaration of ConformityManufacturer:Address:<strong>Thermo</strong> Fisher <strong>Scientific</strong> Inc.Ayer Rajah CrescentSingaporeHereby declares that the following products:Benchtop Meters<strong>Orion</strong> <strong>Star</strong> A211 pH<strong>Orion</strong> <strong>Star</strong> A212 ConductivityPortable Meters<strong>Orion</strong> <strong>Star</strong> <strong>A221</strong> pH<strong>Orion</strong> <strong>Star</strong> A222 Conductivity<strong>Orion</strong> <strong>Star</strong> A321 pH<strong>Orion</strong> <strong>Star</strong> A322 ConductivityEquipment Class:Measurement, control and laboratoryConforms with the following directives and standards:EN61326-1:2006Electromagnetic Compatibility (EMC Directive)EN61010-1:2001Safety StandardsUL61010-1:2004Safety requirements for electrical equipment for measurement,CAN/CSA C22.2 No. 61010-1-04Singapore40 <strong>Thermo</strong> <strong>Scientific</strong> <strong>Orion</strong> <strong>Star</strong> A211 Benchtop and <strong>Star</strong> <strong>A221</strong> and <strong>Star</strong> A321 Portable pH Meter <strong>Reference</strong> <strong>Guide</strong>
Meter SpecificationsMeter Operating ConditionsOperating Ambient TemperatureOperating Relative HumidityStorage TemperatureStorage Relative HumidityPollutionOvervoltageWeightSizeRegulatory and SafetyShock and VibrationWarranty3 year meter replacementUniversal Power Adapter Operating ConditionsOperating Ambient Temperature Operating Relative HumidityStorage TemperatureStorage Relative HumidityPollutionOvervoltage<strong>Thermo</strong> <strong>Scientific</strong> <strong>Orion</strong> <strong>Star</strong> A211 Benchtop and <strong>Star</strong> <strong>A221</strong> and <strong>Star</strong> A321 Portable pH Meter <strong>Reference</strong> <strong>Guide</strong>41
Meter Parameter SpecificationspHRangeResolutionRelative AccuracyCalibration PointsmV/RmVRangeResolutionRelative Accuracy HORP ModeTemperature MeasurementRangeResolutionRelative AccuracyOffset CalibrationData LoggingInputsATC ProbeOutputPowerAC Adapter1 point42 <strong>Thermo</strong> <strong>Scientific</strong> <strong>Orion</strong> <strong>Star</strong> A211 Benchtop and <strong>Star</strong> <strong>A221</strong> and <strong>Star</strong> A321 Portable pH Meter <strong>Reference</strong> <strong>Guide</strong>
Electrode Condition IconThe electrode condition icon indicates the performance of the pH electrode, based on the last saved calibrationand electrode measurement stability.IconpH Electrode Definition of Icontroubleshoot the electrode.44 <strong>Thermo</strong> <strong>Scientific</strong> <strong>Orion</strong> <strong>Star</strong> A211 Benchtop and <strong>Star</strong> <strong>A221</strong> and <strong>Star</strong> A321 Portable pH Meter <strong>Reference</strong> <strong>Guide</strong>
Multipoint Calibration Curve Feature<strong>Thermo</strong> <strong>Scientific</strong> <strong>Orion</strong> <strong>Star</strong> A211 Benchtop and <strong>Star</strong> <strong>A221</strong> and <strong>Star</strong> A321 Portable pH Meter <strong>Reference</strong> <strong>Guide</strong>45
This page intentionally left blank.
Water Analysis InstrumentsNorth America166 Cummings CenterBeverly, MA 01915 USAToll Free: 1-800-225-1480Tel: 1-978-232-6000info.water@thermo.com9 0 0 1 : 2 0 0 8NetherlandsTel: (31) 033-2463887info.water.uk@thermo.comIndiaTel: (91) 22-4157-8800wai.asia@thermofisher.comJapanTel: (81) 045-453-9175wai.asia@thermofisher.comChinaTel: (86) 21-68654588wai.asi@thermofisher.comSingaporeTel: (65) 6778-6876wai.asia@thermofisher.comAustraliaTel: (613) 9757-4300in Australia (1300) 735-296InfoWaterAU@thermofisher.comwww.thermoscientific.com/water© 2011 <strong>Thermo</strong> Fisher <strong>Scientific</strong> Inc. All rights reserved.68X576701 RevA 10-11


