
You also want an ePaper? Increase the reach of your titles
YUMPU automatically turns print PDFs into web optimized ePapers that Google loves.
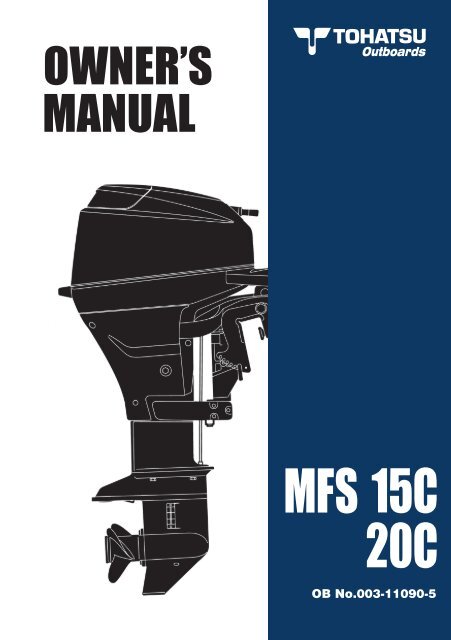
OWNER’SMANUAL<strong>MFS</strong><strong>15C</strong><strong>20C</strong>OB No.003-11090-5
!READ THIS MANUAL BEFORE USING THE OUTBOARD MOTOR. FAILURE TO FOLLOW THEINSTRUCTIONS AND SAFETY PRECAUTIONS IN THIS MANUAL CAN RESULT IN SERIOUSINJURY OR DEATH. KEEP THIS MANUAL IN A SAFE LOCATION FOR FUTURE REFERENCE.Copyright © 2009-2012 <strong>Tohatsu</strong> Corporation. All rights reserved. No part of this manualmay be reproduced or transmitted in any from or by any means without the expresswritten permission of <strong>Tohatsu</strong> Corporation.
1011121314INSPECTION AND MAINTENANCE . . . . . . . . . . . . . . . . . . . . . . . . . . . . . . . . . . . . 481. Daily Inspection . . . . . . . . . . . . . . . . . . . . . . . . . . . . . . . . . . . . . . . . . . . . . . . . . . 492. Periodic Inspection . . . . . . . . . . . . . . . . . . . . . . . . . . . . . . . . . . . . . . . . . . . . . . . 563. Off-season storage . . . . . . . . . . . . . . . . . . . . . . . . . . . . . . . . . . . . . . . . . . . . . . . 614. Pre-season check . . . . . . . . . . . . . . . . . . . . . . . . . . . . . . . . . . . . . . . . . . . . . . . . 625. Motor submerged in water . . . . . . . . . . . . . . . . . . . . . . . . . . . . . . . . . . . . . . . . . 626. Cold weather precautions . . . . . . . . . . . . . . . . . . . . . . . . . . . . . . . . . . . . . . . . . 637. Checking after striking underwater object .. . . . . . . . . . . . . . . . . . . . . . . . . . . 63TROUBLESHOOTING . . . . . . . . . . . . . . . . . . . . . . . . . . . . . . . . . . . . . . . . . . . . . . . . 64TOOL KIT AND SPARE PARTS .. . . . . . . . . . . . . . . . . . . . . . . . . . . . . . . . . . . . . . . 67OPTIONAL ACCESSORIES . . . . . . . . . . . . . . . . . . . . . . . . . . . . . . . . . . . . . . . . . . . 68PROPELLER TABLE . . . . . . . . . . . . . . . . . . . . . . . . . . . . . . . . . . . . . . . . . . . . . . . . . 69
INDEXGENERAL SAFETY INFORMATION1. SPECIFICATIONS2. NAMES OF PARTS3. LOCATIONS OF WARNING LABELS4. INSTALLATION5. PRE-OPERATING PREPARATIONS6. ENGINE OPERATION71234567. REMOVING AND CARRYING THE OUTBOARD MOTOR8. TRAILERING9. ADJUSTMENT10. INSPECTION AND MAINTENANCE11. TROUBLESHOOTING12. TOOL KIT AND SPARE PARTS13. OPTIONAL ACCESSORIES14. PROPELLER TABLE7891011121314
GENERAL SAFETY INFORMATION 9SAFE OPERATION OF BOATAs the operator/driver of the boat, you are responsible for the safety of thoseaboard and those in other boat around yours, and for following local boatingregulations. You should be thoroughly knowledgeable on how to correctly operatethe boat, outboard motor, and accessories. To learn about the correct operationand maintenance of the outboard motor, please read through this manual carefully.It is very difficult for a person standing or floating in the water to take evasive actionshould he or she see a power boat heading in his /her direction, even at a slowspeed. Therefore, when your boat is in the immediate vicinity of people in the water,the outboard motor should be shifted to neutral and shut off.! WARNINGSERIOUS INJURY IS LIKELY IF A PERSON IN THE WATER MAKES CONTACT WITHA MOVING BOAT, GEAR HOUSING, PROPELLER, OR ANY SOLID DEVICE RIGIDLYATTACHED TO A BOAT OR GEAR HOUSING.SERVICING, REPLACEMENT PARTS & LUBRICANTSWe recommend that only an authorized service shop perform service ormaintenance on this outboard motor. Be sure to use genuine parts, genuinelubricants, or recommended lubricants.MAINTENANCEAs the owner of this outboard motor, you should be acquainted with correctmaintenance procedures. It is the operator's responsibility to perform all safetychecks and to ensure that all lubrication and maintenance instructions arecomplied with for safe operation. Please comply with all instructions concerninglubrication and maintenance. You should take the engine to an authorized dealeror service shop for periodic inspection at the prescribed intervals.Correct periodic maintenance and proper care of this outboard motor will reducethe chance of problems and limit overall operating expenses.MOUNTINGOutboard motor mounting must be performed by trained service person(s) usinglift or hoist with sufficient capacity.
10 SPECIFICATIONSSPECIFICATIONS1MF , EF , EFTItemMODEL<strong>15C</strong> MF<strong>20C</strong> MF<strong>15C</strong> EF<strong>20C</strong> EF<strong>15C</strong> EFT<strong>20C</strong> EFTOverall Length mm (in) 980 (38.6)Overall Width mm (in) 365 (14.4)Overall Height S·L·UL mm (in) 1,065 (41.9) · 1,215 (47.8) · 1,342 (52.8)Transom Height S·L·UL mm (in) 413 (16.3) · 562 (22.1) · 689 (27.1)WeightS Kg (lb) 51.5 (114) 55.0 (121) 62.0 (136)L Kg (lb) 53.0 (117) 56.5 (125) 63.5 (139)UL Kg (lb) 54.5 (120) 58.0 (128) 65.0 (142)Output kW (Hp) <strong>15C</strong> : 11.0 (15) <strong>20C</strong> : 14.7 (20)Max. Operating Rangerpm<strong>15C</strong> : 5,000-6,000<strong>20C</strong> : 5,400-6,100Idle Speed in Forward Gear rpm 900Idle Speed in Neutrl Gear rpm 950Engine Type4-StrokeNumber of Cylinder 2Bore × Stroke mm (in) 61 × 60 (2.40 × 2.36)Piston Displacement mL (Cu in) 351 (21.42)Exhaust SystemCooling SystemEngine LubricationThrough hub exhaustWater coolingTrochoid pumpStartring System Manual Electric starter motor*Ignition SystemSpark PlugFlywheel Magneto C.D. ignitionNGK DCPR6ETrim Position 6Engine OilGear OilFuelmL (fl.oz.)mL (fl.oz.)API SF, SG, SH, SJ, SL or SMFCW 10W-30, Approx. 1,000 (33.8)Genuine Gear Oil or API GL5,SAE #80-90, Approx. 370 (12.5)Unleaded regular gasoline : Pump posted 87 Octane(research octane rating of 91)Fuel Tank Capacity L (US gal) 12 (3.17)Gear Reduction Ratio 2.15 (13 : 28)Emission Control SystemOperator Sound Pressure(ICOMIA 39/94) dB(A)Hand Vibration Level(ICOMIA 38/94) m/sec2Engine modification (EM)83.92.5* : with manual※ This specifications might change without a previous notice.
SPECIFICATIONS 11EP , EPT1ItemMODEL<strong>15C</strong> EP<strong>20C</strong> EP<strong>15C</strong> EPT<strong>20C</strong> EPTOverall Length mm (in) 640 (25.2)Overall Width mm (in) 345 (13.6)Overall Height S·L·UL mm (in) 1,065 (41.9) · 1,215 (47.8) · 1,342 (52.8)Transom Height S·L·UL mm (in) 413 (16.3) · 562 (22.1) · 689 (27.1)WeightS Kg (lb) 54.0 (119) 61.0 (134)L Kg (lb) 55.5 (122) 62.5 (138)UL Kg (lb) 57.0 (126) -Output kW (Hp) <strong>15C</strong> : 11.0 (15) <strong>20C</strong> : 14.7 (20)Max. Operating Rangerpm<strong>15C</strong> : 5,000-6,000<strong>20C</strong> : 5,400-6,100Idle Speed in Forward Gear rpm 900Idle Speed in Neutral Gear rpm 950Engine Type4-StrokeNumber of Cylinder 2Bore Stroke mm (in) 61 × 60 (2.40 × 2.36)Piston Displacement mL (Cu in) 351 (21.42)Exhaust SystemCooling SystemEngine LubricationStartring SystemIgnition SystemSpark PlugThrough hub exhaustWater coolingTrochoid pumpElectric starter motor*Flywheel Magneto C.D. ignitionNGK DCPR6ETrim Position 6 5Engine OilmL (fl.oz.)API SF, SG, SH, SJ, SL or SMFCW 10W-30/40, Approx. 1,000 (33.8)Gear OilmL (fl.oz.)Genuine Gear Oil or API GL5,SAE #80-90, Approx. 370 (12.5)FuelUnleaded regular gasoline : Pump posted 87 Octane(research octane rating of 91)Fuel Tank Capacity L (US gal) 12 (3.17)Gear Reduction Ratio 2.15 (13 : 28)Emission Control SystemOperator Sound Pressure(ICOMIA 39/94) dB(A)Hand Vibration Level(ICOMIA 38/94) m/sec2Engine modification (EM)83.9—* : with manual※ This specifications might change without a previous notice.
12 NAMES OF PARTSNAMES OF PARTSMF , EF , EP , EFT , EPT2*:MF, EF and EFT type only.☆:EF and EFT type only.1 Tilt Handle2 Top Cowl3 Bottom Cowl4 Cooling Water Check Port5 Power Tilt Switch(EPT and EFT type only)6 Oil Drain Bolt7 Anti Ventilation Plate8 Anode / Trim Tab9 Sub Water Inlet10 Water Inlet○11 Propeller○12 Drive Shaft Housing○13 Thrust Rod○14 Clamp Bracket○15 Clamp Screw○16 * Throttle Grip○17 * Shift Lever○18○19○20○21○22○23○24○25○26Starter HandleStop SwitchWarning LampFuel Connector☆ Starter Switch* Choke KnobWater PlugOil Plug (Upper) (Level)Oil Plug (Lower) (Fill)
NAMES OF PARTS 132Power Tilt TypeEP and EPT type onlyEFT type only○27○28○29○30○31○32Primer BulbFuel Tank CapAir Vent ScrewFuel ConnectorFuel Pick up ElbowFuel Tank○33○34Clamp Screw(EFT type only)Power Tilt○35○36○37○38○39○40Power Tilt Switch(EPT type only)Remote Control BoxMain SwitchStop SwitchCord AssemblyEngine Stop Switch Cord
This fuel tank & cap meets EPA/CARB low permeation regulations. Low permeationfuel tanks remain full sealed (pressurized) to limit the amount of evaporativeemissions. This tank requires that a Fuel Demand Valve (FDV) or a New style fuelconnector (with sealing mechanism). The FDV and New style fuel connector preventspressurized fuel from entering the engine and causing a fuel system overflow orpossible fuel spillage.Only use a primer bulb/hose assembly that has a Fuel Demand Valve installed in thefuel hose or a sealing mechanism in the fuel connector as shown below.New style fuel connectorWith sealing mechanism(With sealing mechanism)For TLDI modelsFor 4 stroke modelsFDV in fuel hoseFor 4 stroke modelsDo NOT use a primer bulb/hose assembly that does not contain a Fuel Demand Valveor a sealing mechanism as shown below:Without sealing mechanism– Do NOT Use !For 4 stroke modelsP#09537NOTICE – Pursuant to section 213 of the Clean Air Act (42 U.S.C. section 7545) 40 CFR1060, in addition to the California Air Resources Board Regulation governing PortableOutboard Marine Tanks, this portable marine tank and cap assembly has been manufacturedto meet the January 2011 regulations contained within the applicable regulationsfor emission permeation and fuel vapour retention. This system has a 2 year limitedwarranty from Date of Sale.As part of the fuel vapour retention system your tank will expand under internalpressures. This is normal.Open VENT SCREW on top of cap FULLY (VENT SCREW should be CLOSEDfor TRANSPORTATION and OPEN for OPERATION AND CAP REMOVAL.)Locate Pressure Relief Tab under cap. Turn cap untilPressure Relief Tab Lock engages.Press down on tab, rotate cap 1/4 turn (to relieve pressure beforeopening tank) and release tab. STOP. Lock will engage again.PRESS Pressure Relief Tab down again and turn to remove cap.DIRECTIONS FOR USE:1. Always loosen cap to relieve tank pressure BEFORE connecting ordisconnecting fuel line.2. Always disconnect fuel line from engine or fuel tank when not in use.3. Closure caps should be tightened until an audible “click” is heard.4. Always remove from vessel for refueling.5. When removing the closure cap ALWAYS FOLLOW INSTRUCTIONS ANDREMOVE CAP SLOWLY TO REDUCE INTERNAL PRESSURE AND AVOID FUELSPILLAGE – CONTENTS MAY BE UNDER PRESSURE!DIAGRAM LOCATED ON BACKSCHÉMA SITUÉ AU VERSODIAGRAMA SITUADO EN LA PARTE POSTERIORFRENCH AND SPANISH ON INSIDE VERSION ESPAGNOLE SUR LE CÔTÉ INTÉRIEURFRANCÉS Y ESPAÑOL EN EL INTERIOR14 LOCATIONS OF WARNING LABELSLOCATIONS OF WARNING LABELSLocations of warning labelsWarning label regarding owner's manual, top cowl, engine stop switch, engine oillevel and unleaded gasoline3Warning label on positionof outboard motorwhen setting downWarning label onengine stop switchCAUTIONOnly for USA and CANADA modelsWarning regarding combination of fuel tank andprimer bulb ass’y.Only for USA and CANADA modelsWarning regarding fuel connector (See P22 , P26 - P29 ).Only for USA and CANADA modelsWhen opening or closing fuel tank cap, be sureto observe warning note on fuellingOnly for USA and CANADA modelsWarning regarding fuel tank cap(See P22 , P26 - P29 )SPECIAL FEATURES OF THIS SYSTEMThe closure cap includes:• 2 way vent valve which allows air to enter the tank while engine is inoperation, and a pressure relief valve which is designed for fuel vapourretention when not in use• Click-to-close audible close indication• Manual vent screw (on top of cap) which should be CLOSED forTRANSPORTATION and OPEN for OPERATION AND CAP REMOVAL.• Pressure Relief Tab under capSTOPWARNING - CONTENTS MAY BE UNDER PRESSURE!TO REMOVE CAP FOLLOW THESE STEPS:1234Individual symbol marks means as described below.Warning/CautionRead manualthoroughly.Check oil level.Use unleadedgasoline only.Lay as indicated.Flammable - KeepFire Away.
INSTALLATION1. Mounting the outboard motor on boat! WARNINGMost boats are rated and certifiedin terms of their maximum allowablehorsepower, as shown on the boat’scertification plate. Do not equip your boatwith an outboard motor that exceeds thislimit. If in doubt, contact your dealer.Do not operate the outboard motor until ithas been securely mounted on the boatin accordance with the instructions below.INSTALLATION 15MF, EF, EP type1 To attach the outboard motor to theboat, tighten the clamp screws byturning their handles.Also, tighten the bolts. Securethe outboard motor with a rope toprevent loss overboard.NoteA rope is not included in the standardaccessories.4Position ... Above keel lineSet engine at center of boat.Center of BoatTransom matchingBe sure that the anti ventilation plateof the outboard motor is below thewater surface when running with thethrottle wide open.If the above condition cannot be metdue to the shape of the bottom of yourboat, please consult your authorizeddealer.Bottom of hullBoat Transom5-25mm(0.2-1”)Anti Ventilation PlateWasherBolt (885)! CAUTIONNutWasherClamp Screw: Option● Before beginning the running test,check that the boat with maximumcapacity loading floats on the water ina proper attitude. Check the positionof water surface on the driveshafthousing. If the water surface is nearthe bottom cowling, in high waves,water may enter the engine cylinders.● Incorrect outboard motor mountingheight or existence of underwaterobject(s), such as hull bottomdesign, bottom surface conditionsor underwater accessories, cancause water spray possibly reachingthe engine through an opening ofthe bottom cowling during cruising.Exposing engine to such conditionsfor extended periods can lead tosevere engine damage.
16 INSTALLATIONEFT, EPT type2 Power Tilt and Gas Assist typeAClamp Screw(EFT type only)Notes1. Apply sealing agent such assilicone sealed between the boltsand transom board holes beforetightening the bolts.2. Be sure to tighten mounting boltnuts to the specified torque. (30Nm(3.0kgf)13ft·lb)4Bolt(885)WasherNoteNutWasher ! WARNING● Mounting the outboard motor withoutfollowing this manual can lead tounsafe conditions such as poormaneuverability, lack of control or fire.● Loose clamp screws and/or mountingbolts can lead to the release ordisplacement of the outboard motor,possibly resulting in lost of control and/or serious personal injury. Be sure thatfasteners are tightened to the specifiedtorque (30 Nm (3.0kgf)13ft·lb). Checkthe fasteners for tightness from time totime.● Be sure to use outboard mountingfasteners included in the outboardmotor package or their equivalentsin terms of size, material, quality andstrength.Tighten fasteners to the specifiedtorque (30 Nm (3.0kgf)13ft·lb). Testcruise to check if fasteners aretightened securely.● Outboard motor mounting mustbe performed by trained serviceperson(s) using lift or hoist withsufficient capacity.It is recommended to install uppermounting bolts with bolt head atinside surface of transom. Bolts withthreaded end at inside surface oftransom can cause personal injury.
INSTALLATION 172. Installing the remote control devices! WARNINGWhen using other than <strong>Tohatsu</strong>'s genuineremote control box, DO NOT select theone without neutral safety switch thatprevents in-gear start.Use of remote control box without neutralsafety switch can allow start of engine withgear at other than neutral shift, potentiallyleading passengers to falling or causingpassenger to be thrown overboard.It is recommended that you consult withyour authorized dealer for installationand adjustment of the remote controldevice.■ Installation of the Remote ControlCables (Box side) :Follow the instruction manualprovided with the remote control.Remote control cable2 Fitting of Remote Control Cable toEngine.NoteLock nutCable jointApprox. 10mm(0.39 inch)Put the control lever in the Neutralposition and the Free Accel lever inthe fully closed position.4■ Installation of the Remote Controlon your boat :Follow the instruction manualprovided with the remote control.CableHarness BShift CableThrottle Cable■ Installation of the Remote ControlCable (engine side) and the CordAssembly (Wiring Harness) :1 Fitting of connecting parts tocablesDrag LinkScrew the tip of the remote controlcable into the cable joint up toapprox. 10 mm (0.39 inch), then lockthem with a lock nut. Apply grease tothe hole of the cable joint.! CAUTIONBe careful not to loop the remote control cablesto a diameter of 406 mm (16 inches) or less.
18 INSTALLATION4NoteConfirm whether the shift of engineis in gear when shifting the controllever of the Remote Control to its firstposition in Forward or Reverse (about32˚) and whether the throttle valveis fully open when shifting the leverfurther.Confirm whether the throttle valve isfully closed when the control lever isshifted to the Neutral position.3 Connecting the Cord assembly(Wiring Harness)Connect cable harness B to cableharness A.Location of the connectors is near therecoil starter of starboard side in thecowl.Cable Harness A(Outboard motor side)Cable Harness B(From remote control)! WARNINGDo not disconnect the cord assemblywhen the outboard motor is inoperation or you will lose control of theoutboard motor.3. Installing the battery1 P l a c e t h e b a t t e r y b o x i n aconvenient position away frompossible water spray. Securelyfasten both the box and the batteryso they do not shake loose.! WARNINGBattery electrolyte contains sulfuric acidand thus is hazardous, causing a burnif it comes in contact with your skin, orpoisonous if swallowed.Keep battery and electrolyte away fromreach of childrenWhen handling the battery, be sure to;● Read all warnings shown on thebattery case● Prevent electrolyte from coming incontact with any part of your body.Contact can cause serious burn or,if it comes in contact with your eye,loss of sight. Use safety glasses andrubber gloves.In case battery electrolyte comes incontact with :● Skin, flush thoroughly with water.● Eye, flush thoroughly with water,and then seek immediate medicaltreatment.In case battery electrolyte is swallowed :● Seek immediate medical treatment.
INSTALLATION 19NoteMinimum recommended battery : 12V,70AH (800 Marine Cranking Amps(MCA) or 650 Cold Cranking Amps(CCA))Specifications and features of batteriesvary among the manufacturers. Consultthe manufacturer for details.! WARNINGBattery generates explosive hydrogengas. Be sure to:● Charge the battery in a wellventilatedplace.● Place the battery away from anysource of fire, sparks and openflames such as burners or weldingequipment.● Do not smoke when handling thebattery.● Do not smoke near the battery whenthe battery is charging.! CAUTIONDo not use a battery that is notrecommended. Use of a batterynot recommended can lead to poorperformance of, and/or damage to, theelectrical system.2 Connect the positive lead (+) to thepositive terminal (+) of the battery,and then connect the negativelead (−). When disconnectingthe battery always remove thenegative lead (−) first. Afterconnecting the positive terminal(+), securely place a cap on it toprevent short circuits.4! CAUTION● Make sure that the battery leads donot get stuck between the outboardmotor and boat when turning, etc.● The starter motor may fail tooperate if the leads are incorrectlyconnected.● Be sure to correctly connect the (+)and (−) leads. If not, the chargingsystem will be damaged.● Do not disconnect the battery leadsfrom battery while the engine isoperating, the electrical parts couldbe damaged.● Always use a fully charged battery.Battery cord(red)Battery cord(black)
520 PRE-OPERATING PREPARATIONSPRE-OPERATING PREPARATIONS! DANGERConsult an authorized dealer for detailson handling gasoline, if necessary.Gasoline and its vapors are ver yflammable and can be explosive.When carrying a fuel tank containinggasoline:● Close the air vent screw of fuel tankcap, or gasoline vapor will be emittedthrough the air vent screw, creating afire hazard.● Do not smoke.When or before refueling:● Stop the engine, and do not start theengine during refueling.● Do not smoke.● Be careful not to overfill fuel tank.W i p e u p a ny s p ille d g a s o lineimmediately.When or before cleaning the gasolinetank:● Dismount fuel tank from the boat.● Place the fuel tank away from everysource of ignition, such as sparks oropen flames.● Do the work outdoors or in a wellventilated area.● Wipe off gasoline well immediately ifspilt.After cleaning gasoline tank:● Wipe off gasoline well immediately ifspilt.● If the fuel tank is disassembledfor cleaning, reassemble carefully.Imperfect assembly may cause afuel leak, possibly leading to fire orexplosion.● Dispose aged or contaminatedgasoline in accordance with localregulations.1. Recommended gasoline types! CAUTIONUse of improper gasoline can damageyour engine. Engine damage resultingfrom the use of improper gasoline isconsidered misuse of the engine, anddamage caused thereby will not becovered under the limited warranty.FUEL RATINGT O H AT S U e n g i n e s w i l l o p e r a t esatisfactorily when using a major brand ofunleaded gasoline meeting the followingspecifications:USA and Canada ‐ having a postedpump Octane Rating of 87 (R +M)/2minimum. Premium gasoline (92 [R+M]/2Octane) is also acceptable. Do not useleaded gasoline.O u t s i d e USA a n d Cana d a ‐ Useunleaded gasoline with declared octanerating of 90 RON or over. Use of premiumgasoline of 98 RON is also allowed. Useof name-brand leaded gasoline may beallowed only if unleaded gasoline is notavailable.GASOLINES CONTAINING ALCOHOLThe fuel system components on yourTOHATSU engine will withstand up to10% alcohol content in the gasoline.But if the gasoline in your area containseither methanol (methyl alcohol) orethanol (ethyl alcohol), you should beaware of certain adverse effects thatcan occur. These adverse effects aremore severe with methanol. Increasingthe percentage of alcohol in the fuel canalso worsen these adverse effects. Someof these adverse effects are caused
PRE-OPERATING PREPARATIONS 21because the alcohol in the gasoline canabsorb moisture from the air, resulting ina separation of the water/alcohol from thegasoline in the fuel tank.These may cause increased:● Corrosion of metal parts● Deterioration of rubber or plasticparts● Fuel permeation through rubber fuellines● Starting and operating difficulties! WARNINGFuel leakage can cause fire or explosion,potentially leading to severe injury orloss of life. Every fuel system part shouldbe checked periodically, and especiallyafter long term storage, for fuel leak,change of hardness of rubber, expansionand/or corrosion of metals. In case anyindication of fuel leakage or degradationof fuel part is found, replace relevant partimmediately before continuing operation.If the use of gasoline containingalcohol is inevitable, or presence ofalcohol is suspected in the gasoline,it is recommended to add a filter thathas water separating capability, andcheck the fuel system for leaks andmechanical parts for corrosion andabnormal wear more frequently.And, in case any of such abnormalityis found, discontinue the use of suchgasoline and contact our dealerimmediately.Damages resulting from the use ofgasolines that contain alcohol are notcovered under the limited warranty.Fuel tank capacity :12 liters (3.17 U.S. gal)Fuel Tank : When using a fixed fueltank in place of genuine fuel tank, it isrecommended to select a one with astructure facilitating interior cleaning.! WARNINGDo not fill the fuel tank over capacity. Therise of gasoline temperature may causegasoline to expand which, if overfilled,may leak through air vent screw when itis open. Leaking gasoline is a dangerousfire hazard.! CAUTIONWhen operating a TOHATSU engine ongasoline containing alcohol, storage ofgasoline in the fuel tank for long periodsshould be avoided. Long periods ofstorage, common to boats, createunique problems. In cars, alcohol blendfuels normally are consumed beforethey can absorb enough moisture tocause trouble, but boats often sit idlelong enough for phase separationto take place. In addition, internalcorrosion may take place during storageif alcohol has washed protective oil filmsfrom internal components.2. Low permeation fuel hose requirementEQUIPPED FOR UNITED STATESAND CANADA MODELRequired for outboards manufacturedfor sale, sold, or offered for sale in theUnited States● TOHATSU engine has used fuelhoses for The EnvironmentalProtection Agency (EPA) requiresfrom January 1, 2011.5
22 PRE-OPERATING PREPARATIONS53. EPA pressurized portable fuel tank requirementsEQUIPPED FOR UNITED STATESAND CANADA MODELThe Environmental Protect ion Agency(EPA) required portable fuel systemsthat are produced after January 1,2011 for use with outboard engines toremain fully sealed (pressurized) upto 34.4 kPa (5.0 psi). These tanks maycontain the following:● An air inlet that opens to allow air toenter as the fuel is drawn out of thetank.● An air outlet that opens (vents) tothe atmosphere if pressure exceeds34.4 kPa (5.0 psi). A hissing noisemay be heard as the tank vents tothe atmosphere. This is normal.● When installing the fuel tank cap,turn the cap to the right until youhear two click. This signals that thefuel cap is fully seated. A built-indevice prevents overtightening.● The fuel tank has a manual ventscrew which should be closed fortransportation and full open foroperation and cap removal.Since sealed fuel tanks are not openlyvented, they will expand and contractas the fuel expands and contractsduring heating and cooling cycles ofthe outside air. This is normal.REMOVING THE FUEL CAPManual vent screwFuel capTab lockIMPORTANT: Contents may be underpressure. Rotate the fuel cap 1/4 turnto relieve pressure before opening.1 Open the manual vent screw on topof the fuel cap completely.2 Turn the fuel cap until it contactsthe tab lock.3 Press the tab lock and turn toremove cap.4. EPA approval Primer valve/hose assemblyEQUIPPED FOR UNITED STATESAND CANADA MODELTOHATSU adopts Primer bulb/hoseassembly approved by the EnvironmentProtection Agency (EPA).Please use the EPA approved primerbulb/hose assembly with the identificationmark on the fuel connector.
PRE-OPERATING PREPARATIONS 23! CAUTIONBe sure to use EPA approved tankand EPA approved primer bulb/hoseassembly as a set. Confirm shapes ofEPA approved tank and regular tank.Except for U.S. model(regular tank)For U.S. and Canada model(EPA approved tank)5. Recommended engine oilUse only high quality 4-strokeengine oil to insure performance andprolonged engine life.Use NMMA FC-W certified 4-strokeengine oil below.10W-30: is recommended for use inall temperature.25W-40: may be used at temperaturesabove 4˚C (40˚F).You can also use oils that carry theAPI rating of SF, SG, SH, SJ, SL, orSM. Select the appropriate viscosity,based on atmospheric temperature,from the chart below.20W−40, 20W−505ENGINEOIL15W−40, 15W−5010W−40, 10W−5010W−30-30-22-20-4-101403210502068Atmospheric temp.30864096˚C˚F! CAUTIONThe engine oil is drained for shippingfrom the factory. Be sure to fill theengine to the proper level beforestarting engine. (To properly fill theengine with oil follow the instructions insection 9 of this manual)NoteUse of engine oils that do not meetthese requirements will result inreduced engine life, and other engineproblems.
24 PRE-OPERATING PREPARATIONS6. Break-inYour new outboard motor and lowerunit require break-in for the movingc o m p o n e n t s a c c o rd i n g t o t h econditions described in the followingtime table.! CAUTIONOperating the outboard motor withoutbreak-in can shorten service life of theproduct.If any abnormality is experiencedduring the break-in;Discontinue the operation immediately.Have the dealer check the product andtake proper action(s) if necessary.51-10min 10min-2hrs 2-3hrs 3-10hrs After 10hrsThrottle PositionIdleLess than 1/2throttleLess than 3/4throttle3/4 throttleFull throttleavailableSpeedApprox.3,000 rpm maxFull throttle runallowed for 1 minevery 10 minApprox.4,000 rpm.Full throttle runallowed for 2 minevery 10 minNoteProper break-in allows outboardmotor to deliver it full performance forlonger service life.! DANGERDo not operate the outboard motorin closed area or area with no forcedventilation.Exhaust gas emitted by this outboardmotor contains carbon monoxide thatwill cause death if inhaled continuously.Inhaling the gas initially causessymptoms such as feeling of sickness,drowsiness and headache.During operation of the outboard motor:● Keep peripheral area well ventilated.● Always attempt to stay on thewindward side of emission.
PRE-OPERATING PREPARATIONS 257. Engine oil warning lampOil pressure is required to lubricateinternal engine parts.When the warning lamp (Red) is off,indicates that oil pressure is present.Remark : When engine is first started,the red light will turn on for severalseconds to confirm that it is workingand then turn off.! CAUTIONNever run the engine if the warninglamp is on or blinking on and off.When the warning lamp is on orblinking on and off, as an additionalalert of the low oil pressure condition,the engine will run rough and notexceed 2,000 rpm;* Stop the engine immediately andcheck the engine oil level.If the oil level is lower than theappropriate level : Replenishengine oil.I f t h e o i l l e v e l i s w i t h i n t h eappropriate level : Consult withyour dealer.8. ESG (A device preventing over revolution)ESG is a device to prevent overrevolution of the engine (more thanapproximately 6,400 rpm).If you sense that the ESG is activatedreturn to shore at a reduced speed(rpm).Possible causes of ESG activationare : Worn, broken, bent propeller.Slipping propeller rubber, Makingsharp turns at high speeds.NoteIf the engine speed drops frequentlyafter restarting the engine, pleasecontact your dealer.5Warning lamp
26 ENGINE OPERATIONENGINE OPERATION6Before starting! CAUTIONThe engine oil is drained for shippingfrom the factory. Be sure to fill theengine to the proper level before startingengine. (To properly fill the engine withoil follow the instructions in section 9 ofthis manual)! CAUTIONBefore starting engine for the firsttime after reassembling engine oroff-season storage, disconnect stopswitch lock and pull the starter handlecompletely out approximately 10 timesin order to prime the oil pump.1. Filling the fuel! DANGERConsult an authorized dealer for detailson handling gasoline, if necessary.Gasoline and its vapors are veryflammable and can be explosive.When carrying a fuel tank containinggasoline:● Close the fuel tank cap and air ventscrew of fuel tank cap, or gasolinevapor will be emitted through the airvent screw, creating a fire hazard.● Do not smoke.When or before refueling:● Stop the engine, and do not startthe engine during refueling.● Do not smoke.● Be careful not to overfill fuel tank.Wipe up any spilled gasolineimmediately.When or before cleaning the gasolinetank:● Dismount fuel tank from the boat.● Place the fuel tank away from everysource of ignition, such as sparks oropen flames.● Do the work outdoors or in a wellventilated area.● Wipe off gasoline well immediately ifspilt.After cleaning gasoline tank:● Wipe off gasoline well immediately ifspilt.● If the fuel tank is disassembledfor cleaning, reassemble carefully.Imperfect assembly may cause afuel leak, possibly leading to fire orexplosion.● Dispose aged or contaminatedgasoline in accordance with localregulations.
ENGINE OPERATION 27! WARNINGWhen opening fuel tank cap, be sure tofollow the procedure described below.Fuel could blast out through the fueltank cap in case the cap is loosened byusing another procedure when internalpressure of fuel tank is raised by heatfrom sources such as engine or sunlight.Except for USA and Canada model1 Full open the air vent screw onthe tank cap and release internalpressure.Full open the Airvent screwFor USA and Canada model1 Full open the air vent screw onthe tank cap and release internalpressure.Full openAir vent screwTab lock2 Loosen the tank cap until itcontacts the tab lock and releaseinternal pressure completely. Afterthat, press down the tab lock andopen the tank cap.3 Fill the fuel carefully not to overflow.62 Open the fuel tank cap slowly.3 Fill the fuel carefully not to overflow.4 After filling the tank, close the tankcap until two clicks sound is heard.4 After filling the tank, close the tankcap.
28 ENGINE OPERATION62. Feeding the fuelExcept for USA and Canada model1 Full open the air vent screw on thetank cap.2 Open the fuel tank cap slowlyand release internal pressurecompletely. After that, close thefuel tank cap.3 Connect the fuel connector to theengine and squeeze primer bulbuntil it becomes stiff to feed fuelto carburetor. Direct arrow markupward when priming.For USA and Canada model1 Full open the air vent screw on thetank cap.2 Loosen the tank cap untill contactsthe tab lock and release internalpressure completely. After that,close the tank cap until two clickssound is heard.3 Connect the fuel connector to theengine and squeeze primer bulbuntil it becomes stiff to feed fuelto carburetor. Direct arrow markupward when priming.Engine sideEngine sideFuel tank sideFuel tank side
ENGINE OPERATION 29! CAUTIONWhen using EPA approval fuel tank,only use a primer bulb/hose assemblythat has a Fuel Demand Valve installedin the fuel hose or a sealing mechanismin the fuel connector as shown below.(FDV and fuel connector that has ansealing mechanism prevent pressurizedfuel from entering the engine andcausing a fuel system overflow orpossible fuel spillage.)FDV in fuel hoseSealing mechanism infuel connectorIdentification3. Starting1 After making sure the stop switchlock has been installed, connectthe hook to a part of the operator'sbody.StopSwitchLockStopSwitchLockHook6Do NOT use a primer bulb/hoseassembly that does not contain a FuelDemand Valve or a sealing mechanismas shown below:otherwise overflow thefuel system or fuel spillage may occor.Emergency Stop LineMF, EF, EFT type2 Place the shift lever in the Neutralposition.Be sure that the shift is in Neutralwhen starting the engine.This model is provided with start ingear protection.RNF
30 ENGINE OPERATION6! CAUTIONIf the engine starts in gear, do not useit. Contact an authorized dealer.NoteStart-in-gear protection preventsengine from starting at other thanneutral shift. In-gear starting of enginewill move the boat immediately,potentially leading to falling down orcausing passenger(s) to be thrownoverboard.3 Set the throttle grip to "START"position.NoteChoke is not necessary when theengine is warm. Set the throttle grip to"RE-START" position.NoteIf engine does not start with 4 or 5times starting operation, push theknob back and restart.MF typeEngine is equipped with a compressionrelease mechanism.5 Pull the starter handle slowly untilyou feel engagement, keep pullingtill you feel less resistance. Then pullit quickly.Repeat if necessary until started.6 When starting the engine, push thechoke knob back.4 Pull the choke knob fully.Choke Knob
ENGINE OPERATION 31SlowlyQuicklyNoteChoke operation is not necessary ifthe engine is warm.6 Stop pushing the key when theengine has started.The key returns to the originalposition, automatically.7 Returns the Free accel lever toclose position.Lock buttonEF, EFT type5 Push the starter switch button.6 Release the button when theengine has started.7 When starting the engine, push thechoke knob back.Neutral (N)Control leverOFFONSTARTPush tooperate choke6Fully openFully closedFree Accel leverMain switch keyStop switchNoteThe free accel lever can not be raisedwhen the control lever shift is inForward or Reverse.EP, EPT type2 Insert the main switch key.3 Set the control lever in the Neutralposition.4 Raise the free accel lever a little(both of cold engine and warmengine).5 Turn the main switch key to STARTposition. Then, continuously pushthe key to operate the choke.! CAUTIONDo not keep turning starter motor forover 5 seconds, or the battery maybe consumed, potentially making theengine starting impossible and/ordamaging the starter.If cranking over 5 seconds fails to startengine, return main switch to "ON", andcrank engine again after 10 seconds ormore.
32 ENGINE OPERATIONIf the recoil starter fails to operate◎ Remove the top cowl and the recoilstarter. Wrap a rope around thestarter pulley then pull quickly tostart.◎ Use a 10 mm socket wrench as arope handle.◎ Reinstall top cowl after enginestarts.! WARNING● Be sure that no bystander(s) iswithin 2 meters from back of startingoperator.● Do not operate the outboard motorwith top cowl removed from thepower unit, or contacting turningflywheel which can lead to seriouspersonal injury.If the choke solenoid fails tooperate (EP and EPT type only)61 Remove the top cowl.2 Close the choke plate by finger.3 Raise the Free accel lever a little.4 Turn the main switch key to startposition.5 Stop pushing the key when theengine has started.6 Return the choke plate to openposition.! WARNINGBe careful that your clothes or otheritems do not get caught in the rotatingengine parts.To prevent accident and injury, do notre-attach the recoil starter after theengine has been started using theemergency starter rope. Be sure to putthe top cowl back on.Immediately contact an authorizeddealer when reaching shore.
ENGINE OPERATION 336
34 ENGINE OPERATION64. Warming up the engineWarm the engine at low enginespeeds for about three minutes. Thisallows the lubricating oil to circulate toall parts of the engine. Operating theengine without warm up shortens theengine's life.Be sure to check that cooling water iscoming out of the cooling water checkport during warm up.! CAUTIONIf the engine is operated without waterdischarging from the check port, theengine may over heat.Engine speedsIdling speed after warming up.Remark: In case of cold enginestarting, idling speed is increasedabout 300 rpm for several minutes.Clutch in (In gear)900rpmClutch off (Out of gear)950rpmPROPELLER SELECTIONPropeller must be selected thatw i l l a l l o w t h e e n g i n e t o re a c hrecommended rpm when cruising atwide-open throttle.Wide-open throttle rpm range15 205,0006,000rpm5,4006,100rpmGenuine propellers are listed onPROPELLER TABLE of this manual.Cooling watercheck port! CAUTIONBe sure to stop engine immediatelyif cooling water check port is notdischarging water, and check if coolingwater intake is blocked. Operatingengine could lead to overheatingpotentially leading to engine damage.Consult an authorized dealer if thecause cannot be found.
ENGINE OPERATION 355. Forward and reverse! WARNINGNoteDo not increase engine speedunnecessarily in reverse.Before shifting into forward or reverse,make sure that boat is properly mooredand outboard motor can be steeredfully to the right and left. Make surethat no swimmer(s) is ahead or asternof the boat.MF/EF and EFT type! WARNING● Attach other end of emergencystop switch tether to the operator'sclothing or arm and keep it attachedduring cruising.● Do not attach the tether to a part ofclothing that can be torn easily whenpulled.● Arrange the tether so that will not becaught by any object when pulled.● Be careful not to pull the tetheraccidentally during cruising.Unintentional stop of engine cancause loss of control of outboardmotor. Rapid loss of enginepower can lead to falling down orcausing passenger(s) to be thrownoverboard.! WARNINGBe sure to connect the emergencytethered stop hook to your waist orclothing.The engine will shut down when theswitch lock becomes disconnectedfrom the engine.! WARNINGSevere damage, and personal injury,may occur if shifting at high enginespeed.Engine must be in the slow idle positionbefore shifting is attempted.■ ForwardTurn the throttle grip to reduce enginespeed. When the engine reachestrolling (or idling) speed, quickly pullthe shift lever to the Forward position.■ ReverseReduce engine speed, when theengine reaches trolling (or idling)speed, quickly push the shift lever tothe Reverse position.! WARNINGShift LeverBefore shifting, make sure that noswimmer(s) or obstacle(s) is ahead orastern of the boat.6
36 ENGINE OPERATION6Be sure to warm up engine well beforestarting cruise. Operating cold enginemay cause damage to your motor.Note! CAUTIONIdle speed may be higher duringwarming up of engine. If shifted toForward or Reverse during warmingup, it may be difficult to shift back toneutral. In such case, stop engine,shift to neutral, and restart engine towarm up.NoteFrequent shifting to forward or reversecan accelerate wear or degradationof parts. In such case, replace gearoil earlier than the period specified.■ ForwardQuickly push the control lever to theForward (F) position 32˚, where thegear is connected, while lifting up onthe lock button located at the bottomof the control lever grip. Furthershifting will open the throttle.■ ReverseQuickly pull the control lever to theReverse (R) position at 32˚, where thegear is connected, while lifting up onthe lock button located at the bottomof the control lever grip. Furthershifting will open the throttle.NoteThe control lever is inoperative unlessthe free accel lever is in the fullyclosed position.EP, EPT typeControl LeverLock ButtonNoteReduce the engine speed whenthe control lever is in Neutral anddo not increase the engine speedunnecessarily.ThrottleFullyopenForward(F)Shiftabout32°Fully closeNeutral(N)Shiftabout32°Fully closeReverse( R )ThrottleFullyopenFreeAccelLever
ENGINE OPERATION 376. StoppingEP, EPT typeMF, EF, EFT typeOFFONSTARTStop switchStop SwitchLock1 Turn the throttle grip to the slowposition.2 Put the shift lever in the Neutralposition.Run the engine for 2-3 minutes atidling speed if it has been runningat full speed.3 Push the stop switch to stop theengine or release the stop switchlock.! WARNING● Do not shift into Reverse duringplanning, or control will be lostleading to serious personal injury,boat may swamp, and/or hull maybe damaged.● Do not shift into Reverse duringcruising, or control may belost, falling down or causingpassenger(s) to be thrownoverboard. Leading to seriouspersonal injury, and steering systemand/or shifting mechanism may bedamaged.Stop switch lock1 Put the shift lever in the Neutralposition and run the engine for 2-3minutes at idling speed if it hasbeen running at full speed.2 Turn the main switch key to theOFF position.Notes(N)● After stopping the engine, close theair vent screw on the tank cap.● Disconnect the fuel connector ofthe engine or the fuel tank.● Disconnect the battery cord of the EFor EP type engine, if the engine willnot be used for more than 3 days.6
38 ENGINE OPERATION7. Trim angleThe trim angle of the outboard motorcan be adjusted to suit the transomangle of the hull, and load conditions.Choose an appropriate trim anglethat will allow the anti-ventilation plateto run parallel to the water surfaceduring operation.6MF, EF, EP type■ Proper trim angleThe position of the thrust rod iscorrect if the hull is horizontal duringoperation.Perpendicular to thewater surface■ Improper trim angleSet the thrust rod lower if the bow ofthe boat rises above horizontal.■ Improper trim angleSet the thrust rod higher if the bow ofthe boat is below horizontal.Higher! WARNINGThrust rodLower● Do not put hand or finger in betweenoutboard motor body and clampbracket when adjusting trim angle toprevent injury in case the outboardmotor body falls.● Unsuitable trim position can causeloss of control of boat.When testing a trim position, runboat slow initially to see if it can becontrolled safely.! WARNINGExcessive trim up or down may leadto unstable boat operation, potentiallycausing the steering difficulty thatleads to accident during cruising.● Do not cruise at high speed ifimproper trim position is suspected.Stop the boat and readjust trimangle before continuing cruise.● For outboard motor model with PTTswitch on the bottom cowl, do notoperate the switch during cruising,or control of boat may be lost.
ENGINE OPERATION 39EFT, EPT type■ Improper Trim Angle(bow rises too high)If the trim angle is excessive, thebow will rise out of the water and thespeed will decrease.Furthermore, the bow may sway orthe bottom may slam the water whilecruising.In this case, decrease the trim angleby pressing the switch on the remotecontrol level to "DN".Down(DN)■ Proper Trim AngleThe trim angle is optimum when the boat isparallel to the water surface while running.UPDNPower tilt switchEFT typeEPT type! WARNING6■ Improper Trim Angle(bow dips into the water)If the trim angle is too small, the bowwill dip into the water, the speedwill decrease, and water may enterthe boat. In this case, the trim angleshould be increased by pressing theswitch on the remote control lever to"UP".UP● Do not put hand or finger in betweenoutboard motor body and clampbracket when adjusting trim angle toprevent injury in case the outboardmotor body falls.● Unsuitable trim position can causeloss of control of boat.When testing a trim position, runboat slow initially to see if it can becontrolled safely.! WARNINGExcessive trim up or down may leadto unstable boat operation, potentiallycausing the steering difficulty thatleads to accident during cruising.● Do not cruise at high speed ifimproper trim position is suspected.Stop the boat and readjust trimangle before continuing cruise.● For outboard motor model with PTTswitch on the bottom cowl, do notoperate the switch during cruising,or control of boat may be lost.
40 ENGINE OPERATION68. Tilt up, tilt down and shallow water operationMF, EF, EP type■ Tilt upPush the reverse lock lever down untilit stops. (This is the tilt up position.)Now, tilt the outboard motor all theway up until it is locked in place.Note! WARNINGWhen tilting up or down, be careful notto place your hand between the swivelbracket and the stern bracket.Be sure to tilt the outboard motor downslowly.Stop the engine before tilting up.! WARNING● Do not put hand or finger in betweenoutboard motor body and clampbracket when adjusting trim angle toprevent injury in case the outboardmotor body falls.● When tilting up outboard motor withfuel joint for over a few minutes,be sure to disconnect fuel hose orclose fuel cock, or fuel may leak,potentially catching fire.! CAUTIONDo not tilt up outboard motor duringoperation, or engine may be damagedfrom overheating due to lack ofsufficient cooling water.Reverse lock leverReverse lock lever■ Tilt downPull the reverse lock lever upwarduntil it stops. (This is the tilt downposition.) Now, lift up the outboardmotor slightly, and then allow gravityto lower it for you.Tilt DownpositionReverse lock leverTilt Up position
ENGINE OPERATION 41■ Shallow water operation! WARNINGDuring shallow water operation, becareful not to place your hand betweenthe swivel bracket and the stern bracket.Be sure to tilt the outboard motor downslowly.2 Return to normal running position:Put the reverse lock lever in the tiltdown position, slightly lift up theoutboard motor, and then put itdown.Tilt DownpositionReverse lock leverNoteSlow down to trolling speed, and shiftinto neutral before setting outboardmotor to shallow water drive position.! WARNING● Run at lowest possible speed whenusing shallow water drive.● Tilt lock is disabled when in shallowwater drive position.● When driving shallow water, becareful not to strike outboard motoragainst sea bottom, or propellermay be pushed out of water,resulting in loss of control.1 Shallow water running position:Put the reverse lock lever in thetilt up position, and tilt up theoutboard motor to put the outboardmotor in the shallow water runningposition.Reverse lock leverTilt Up position! CAUTIONWhile in shallow water drive position,do not operate the outboard motor inreverse. Operate the outboard motor atslow speed and keep the cooling waterintake submerged.Sub WaterInlet! CAUTIONDo not overtilt outboard motorwhen driving shallow water, or airmay be sucked through subwaterinlet, potentially leading to engineoverheating.6
42 ENGINE OPERATIONEFT, EPT type1 Operate the Power Trim & Tilt switchand tilt the outboard motor up.UPDNThe outboard motor can also be tiltedup using the switch provided underthe bottom cowl.! CAUTIONDo not tilt up outboard motor whileengine operates, or no cooling watermay be fed, leading to engine seizuredue to overheating.2 Lock the tilt with the Tilt stopperafter the outboard motor has beentilted up.UPEPT type6DNPower tilt switchTilt Stopper! WARNINGDo not tilt up or down outboard motorwhen swimmer(s) or passenger is nearto prevent them from being caughtbetween outboard motor body andclamp bracket in case the outboardmotor body falls.! WARNINGEFT typeWhen tilting up outboard motor with fueljoint for over a few minutes, be sure todisconnect fuel hose or close fuel cock,or fuel may leak, potentially catching fire.◎ Manual tiltingIf the battery is dead, and thepower trim & tilt switch thusinoperative, turn the manual valvea few turns in the Manual direction.This will allow manual tilting of theoutboard motor.POWERMANUAL
ENGINE OPERATION 43EFT, EPT typeThe provided Power tilt makes tiltup/downelectrically. It may beused as a power trim and tilt whenthe engine is used with the lightload condition. In this case, it canbe adjusted to set the desired trimangle of the engine in relation to thetransom shape, planning speedsand load. It is imperative that the trimangle is adjusted correctly. Incorrectadjustment will cause the boat tosway, deteriorate engine performanceand may cause unsafe steeringconditions.! CAUTIONThe Power Trim & Tilt can be set toany trim angle, however, avoid cruisingwith the engine tilted in the tilt range.Operating the boat in this manner, theengine may ingest air into the watercooling system, resulting in engineoverheating.6Trim angle75°4°6°Tilt rangeNoteFor U.S.A. market onlyHigh altitude:When engine operates at high altitude engine may need to have a high altitude kitinstalled. Otherwise, operating the engine at high altitude may increase its emissionsand decrease fuel efficiency and performance. Please see "LIMITED WARRANTYINFORMATION" for more detail.
744 REMOVING AND CARRYING THE OUTBOARD MOTORREMOVING AND CARRYING THE OUTBOARD MOTOR1. Removing the outboard motor1 Stop the engine.2 Disconnect the fuel connector,the remote control cables and thebattery cords from the outboardmotor.3 Remove the outboard motor fromboat and completely drain thewater from the gear case.! CAUTIONEngine may be hot immediately afteroperating and could cause burns iftouched. Allow Engine to cool downbefore attempting to carry the outboard.2. Carrying the outboard motorKeep the outboard motor in a verticalposition when carrying.! WARNING● Close air vent screw of fuel tank andfuel cock before carrying or storingoutboard motor and fuel tank, or fuelmay leak, potentially catching fire.● Do not give a shock to an outboardmotor during transpor tation. Itbecames a cause of breakage.3. Storing the outboard motorOutboard motor should be stored in avertical position.NoteIf the outboard motor must be laiddown be sure the tiller handle facesdown as shown in the drawing above.Elevate power unit 2 inches to 4inches if traveling to avoid oil spillage.! CAUTIONDo not carry or store outboard motor inany of positions described below.Otherwise, engine damage or propertydamage could result from leaking oil.
TRAILERING! WARNINGDo not go under outboard motor tiltedup even if it is supported by supportbar, or accidental fall of outboard motorcould lead to severe personal injury.! WARNINGClose air vent screw of fuel tank andfuel cock before carrying or storingoutboard motor and fuel tank, or fuelmay leak, potentially catching fire.! CAUTIONTRAILERING 45When trailering the outboard motorshould be in a vertical (normal running)position, fully down. Trailering in thetilted position may cause damage to theoutboard motor, boat, etc.If trailering with outboard motor fullydown is not available (the gear caseskeg is too close to the road in a verticalposition), fix the outboard motor securelyusing a device (like a transom saver bar)in the tilted position.! WARNINGWhen taking outboard motor frompackage or removing outboard motor fromthe boat, never release the lock lever. Ifthe lock lever is released, it will very easyfor the clamp bracket to spring up to thetilting direction because it is not fixed.! WARNINGNever attempt to disassemble shockabsorber of gas assist tilt system. It isdangerous because high pressure gasis included in the shock absorber.*Care must be taken so as not torelease lock lever by accident.*For more safety, tie the clamp bracketto the outboard motor with a rope.*Pay attention to the tilting direction soas not to be injured by the springingstern bracket.! CAUTIONThe tilt support device supplied on youroutboard motor is not intended for towing.It is intended to support the outboard motorwhile the boat is docked, beached, etc.A:Ground clearance shouldbe provided sufficiently.! WARNINGPlease disconnect fuel connectorexcept when operating engine.Fuel leakage is a fire or explosion hazard,which can cause serious injury or death.A8
46 ADJUSTMENTADJUSTMENT1. Steering friction 2. Throttle gripAdjust this lever to achieve thedesired steering friction (drag) onthe tiller handle. Move lever towards(a) to tighten friction and move levertowards (b) to loosen friction.Friction adjustment of the throttlegrip can be made with the throttleadjustment screw.LighterHeavier9aHeavierbLighter! WARNINGDo not increase throttle frictionexcessively, or heavy movement ofthrottle grip or remote control levermovement could cause loss of throttlecontrol potentially leading to accident.3. Remote Control Lever Load(Throttle friction adjustment screw)To adjust the load of the remotecontrol lever, turn the throttle frictionadjustment screw on the front ofthe remote control. Turn clockwiseto increase the load and counterclockwiseto decrease it.LighterHeavierThrottle frictionadjustment screw
ADJUSTMENT 474. Trim Tab AdjustmentIf straight-line cruising can not beachieved, adjust the trim tab locatedunder the anti-ventilation plate.◎ If the boat veers toward the right,direct the trim tab towards A.◎ If the boat veers toward the left,direct the trim tab towards B.BA! WARNING● Be sure that outboard motor issecured to transom or servicestand, or accidental drop or fall ofoutboard motor could lead to severepersonal injury.● Be sure to lock outboard motor ifit is tilted up, or accidental fall ofoutboard motor could lead to severepersonal injury.● Do not go under outboard motortilted up and locked, or accidentalfall of outboard motor could lead tosevere personal injury.Trim tabNotes● The trim tab also acts as an anodeto prevent electrolytic corrosion.Therefore do not paint or greasethis part.● After adjustment securely tightenthe trim tab fixing bolt.● Check for looseness of the bolt andthe trim tab at regular intervals.9! WARNING● Inappropriate adjustment of trim tabcould cause steering difficulty. Afterinstalling or readjusting trim tab,check if steering load is even.● Tighten trim tab bolt to specifiedtorque.
1048 INSPECTION AND MAINTENANCEINSPECTION AND MAINTENANCECare of your outboard motorTo keep your outboard motor in thebest operating condition, it is veryimportant that you perform daily andperiodic maintenance as suggestedin the maintenance schedules thatfollow.! CAUTION● Your personal safety and that of yourpassengers depends on how wellyou maintain your outboard motor.Carefully observe all of the inspectionand maintenance proceduresdescribed in this section.● The maintenance intervals shown inthe checklist apply to an outboardmotor in normal use. If you useyour outboard motor under severeconditions such as frequent fullthrottleoperation, frequent operationin brackish water, or for commercialuse, maintenance should beperformed at shorter intervals. If indoubt, consult your dealer for advice.● We strongly recommend that youuse only genuine replacement partson your outboard motor. Damage toyour outboard motor arising from theuse of other than genuine parts is notcovered under the warranty.EPA Emissions RegulationsEPA (United States EnvironmentalProtection Agency) has emissionregulations regulating air pollutionfrom new outboard motors. All newoutboard motors manufactured by usare certified to EPA as conforming tothe requirements of the regulations.This certification depends uponfactory standards. Therefore, factoryspecifications must be followed whenservicing emission related controls,or making adjustments. Maintenance,replacement, or repair of the emissioncontrol devices and systems may beperformed by any marine SI (SparkIgnition) engine repair establishmentor individual.
INSPECTION AND MAINTENANCE 491. Daily InspectionPerform the following checks beforeand after use.! WARNINGDo not use outboard motor on which anyabnormality is found during pre-operationcheck, or it could go into trouble duringcruising potentially leading to accident.Item Points to Check RemedyFuel SystemFuel Tank Cap● Check the amount of fuel in the tank.● Check for debris or water in the fuel filters.● Check the rubber hoses for fuel leakage.● Check for crack, leakage, damage in the fuel tank cap.● Check for crack, damage in the gasket and teather.● Check for leakage at full close.● Check for ratchet performance.ReplenishClean or replaceReplaceReplaceReplaceReplaceReplaceEngine Oil ● Check the oil level. Fill oilElectricalEquipmentThrottle SystemRecoil StarterClutch andPropeller SystemInstallation ofMotorPower TiltCooling WaterTools and Spares● Check that the main switch functions normally.● Check that the battery electrolyte level and specificgravity are normal.● Check for loose connections on the battery terminal.● Check that the stop switch functions normally and makesure the lock plate is there.● Check cords for loose connections and damage.● Check the spark plugs for dirt, wear and carbon build-up.● Check carburetor linkage is working normaly whenturning the throttle grip.● Check the rope for wear and chafing.● Check the ratchet engagement.● Check that the clutch engages correctly when operatingthe shift lever.● Visually Check propeller for bent or damaged blades.● Check the propeller nut is tightened.● Check all the bolts attaching the motor to the boat.● Check the thrust rod installation.● Check working of the tilt up and down of the motor.● Check that cooling water is discharged from the coolingwater check port after the engine has started.● Check that there are tools and spare parts for replacingspark plugs, the propeller, etc.● Check that you have the spare rope.ReplaceReplenish or rechargeRetightenRemedy or replaceCorrect or replaceClean or replaceCorrectReplaceCorrect or replaceAdjustReplaceTightenRepairSteering Devices ● Check the operation of the steering handle. RepairOther parts● Check if the anode is securely installed.● Check the anode for corrosion and deformation.Repair if necessaryReplace10
50 INSPECTION AND MAINTENANCE10Maintaining engine oilIf the engine oil is low, the life of theengine will be shortened significantly.■ Checking oil level1 Stop the engine and set it in avertical position.2 Remove the top cowl.3 Remove the dipstick.4 Wipe oil off the oil dipstick with aclean rag.5 Put in the dipstick.6 Take out the dipstick and checkthe oil level.7 Replace the dipstick.Oil filter capDipstickNotesConsult with an authorized dealerif the engine oil is milky color, orappears contaminated.■ Replenishing engine oilIf the oil level is low, or at lowest mark,add recommended oil to the upperdipstick mark.! CAUTION● Do not add engine oil of brand andgrade other than existing one. Incase engine oil of other brand orgrade is added, drain all oil and askdealer for treatment.● In case other than engine oil suchas gasoline is put in the oil chamber,empty the chamber and ask dealerfor treatment.● When replenishing engine oil, becareful not to allow entry of foreignmatters such as dust and water intooil chamber.● Wipe off engine oil well immediatelyif spilled.● Do not replenish engine oil overupper limit. If overfilled, remove oilto upper limit. If engine oil is overthe upper limit, it can leak potentiallyleading to engine damage.Upper Level 1,000 mLLower Level 750 mLNotesThe oil level should be checked whenthe engine is cold.
INSPECTION AND MAINTENANCE 51Washing outboard motorIf outboard motor is used in saltwater, brackish water or water with ahigh acidic level, use fresh water toremove salt, chemicals or mud fromexterior and cooling water passageafter every cruising or before storingoutboard motor for long time. Beforeflushing, remove the propeller and theforward thrust holder.! CAUTIONKeep cooling water passage free ofclogs, or lack of cooling water flowcould lead to engine overheating,potentially resulting in engine trouble.NotesIt is recommended to check chemicalproperties of water on which youroutboard motor is regularly used.! WARNINGDo not start engine without removingpropeller, or accidentally turningpropeller could cause personal injury.■ Use flushing attachment.1 Remove propeller (refer to PropellerReplacement). Remove the waterplug from the outboard motor, andscrew in the flushing attachment.2 Attach a water hose to the flushingattachment. Turn on the water andadjust the flow. (Be sure to sealthe water inlet and sub water inlet,located in the gear case, withtape.3 Insert a hose connected to a watertap into the flushing attachmentand let the water running.4 Put the shift lever in the neutralposition and start the engine.5 Make sure of cooling water flowingout of water pump indicator holeand continue engine running for 3to 5 minutes.6 Stop the engine and water supply.Remove the flushing attachmentand tape, and then reinstall thewater plug and the propeller.Flushingattachment(Option)10! WARNINGNever start or operate the engineindoors or in any space which is notwell ventilated. Exhaust gas containscarbon monoxide, a colorless andodorless gas which can be fatal ifinhaled for any length of time.! CAUTIONKeep engine at idle speed duringflushing.
52 INSPECTION AND MAINTENANCEReplacing the propellerA worn-out or bent propeller will lowerthe motor's performance, and causeengine trouble.Before removing the propeller, removethe spark plug caps from the sparkplugs to protect against personalinjury.! WARNINGDo not begin propeller removal andinstallation procedure with sparkplug caps attached, shift in forwardor reverse, main switch at other than"OFF", engine stop cord attached tothe switch, and starter key attached, orengine could accidentally start leadingto serious personal injury. Disconnectbattery cable if possible.! WARNINGDo not hold propeller with hand(s)when loosening or tightening propellernut. Put a piece of wood block betweenpropeller blade and anti-ventilationplate to hold propeller.! CAUTION● Do not install propeller without thrustholder, or propeller boss could bedamaged.● Do not reuse split pin.● After putting split pin, open the endto prevent it from coming off whichcould lead to coming off of propeller.101 Remove the split pin, propeller nutand washer.2 Remove the propeller and thrustholder.3 Apply genuine grease to thepropeller shaft before installing anew propeller.4 Install the thrust holder, propeller,washer and propeller nut onto theshaft.5 Install a new split pin into the nuthole and bend it.PropellershaftPropellerWasherSplit pinThrustholderNut
INSPECTION AND MAINTENANCE 53Replacing the spark plugs! WARNINGDo not reuse spark plug with damagedinsulation, or sparks can leakthrough crack, potentially leading toelectric shock, explosion and/or fire.Do not touch spark plugs immediatelyafter stopping engine as they willl behot and could cause severe burns iftouched. Allow motor to cool downfirst.1 Stop the engine.2 Remove the top cowl.3 Remove the spark plug caps.4 Remove the spark plugs by turningit counter-clockwise, using a 5/8"socket wrench and handle.5 Attach spark plug and tighten tospecified torque.Use spark plug NGK DCPR-6E.If the spark plug(s) is fouled, hascarbon build up, or is worn, it shouldbe replaced.When reusing spark plugs, removedirt from the electrodes and adjustspark gap to specification.NotesWhen inspecting the plug, alwaysclean the gasket surface and use anew gasket. Wipe off any dirt from thethreads and screw in the spark plugto the correct torque.ElectrodeNotesSpark gap(0.8 to 0.9 mm, 0.031 to 0.035 in)◎ Spark plug torque :18.0Nm(13.3ft-lb)(1.8kgf-m)If a torque-wrench is not availablewhen you are fitting a spark plug, agood estimate of the correct torqueis 1/4 to 1/2 a turn past finger-tight.Have the spark plug adjusted to thecorrect torque as soon as possiblewith a torque-wrench.10
54 INSPECTION AND MAINTENANCEReplacing the anodeThe anode protects the outboardmotor from galvanic corrosion(metal corrosion caused by feebleelectoricity).Anodes are installed under the untiventilationof the gear case, the leftcramp bracket (port side) and the leftmount bracket (port side).When an anode is worn down under2/3 of its original size (of new port),replace it.Notes● Never grease or paint the anode.● At each inspection re-tighten theanode attaching bolt. As it is likelyto be subjected to electrolyticcorrosion.Checking and Refilling Oil in thePower Trim & Tilt.1 Check the oil level of the reservoirtank as shown on the right whilethe tank is kept in a verticalposition. Tilt the outboard motor upto check the oil level in the tank.Remove the oil cap by turningcounter-clockwise, then check ifthe oil level reaches the bottomline of the plug hole.Oil capOil level10AnodeAnode(Trim tab)! WARNING● Be sure that outboard motor issecured to transom or servicestand, or accidental drop or fall ofoutboard motor could lead to severepersonal injury.● Be sure to lock outboard motor ifit is tilted up, or accidental fall ofoutboard motor could lead to severepersonal injury.● Do not go under outboard motortilted up and locked, or accidentalfall of outboard motor could lead tosevere personal injury.AnodeAnode
INSPECTION AND MAINTENANCE 55! CAUTIONDo not unscrew the oil plug with theoutboard motor tilted down. Pressurizedoil in the oil tank may spurt out.Recommended oilUse an automatic transmissionfluid or equivalent.Recommended oils are as shownbelow.ATF Dexron IIIAir purging from the Power Trim andTilt unit.Entrapped air in the Power Trim& Tilt unit will cause poor tiltingmovement and increased noise.With the outboard motor mountedon the boat, set the manual releasevalve to the Manual side, andtilt the outboard motor manuallyup/down 5-6 times while checkingthe oil level. When done, closethe valve by turning it clockwisetowards the Power side.10POWERMANUAL
56 INSPECTION AND MAINTENANCE2. Periodic InspectionIt is important to inspect and maintain your outboard motor regularly. At eachinterval on the chart below, be sure to perform the indicated servicing. Maintenanceintervals should be determined according to the number of hours or number ofmonths, whichever comes first.Inspection intervalsDescriptionFirst 20 Every 50 Every 100 Every 200hours of 1 hours of 3 hours of 6 hours or 1month months months yearInspection procedureRemarksFuelSystemIgnitionCarburetor *1 ○ ○ Strip clean, and adjust.Fuel filter ○ ○ ○ ○Check and clean or Replace ifnecessary.Piping/Hoses *2 ○ ○ ○ ○Check and clean or Replace ifnecessary.Fuel tank *2 ○ ○ ○ CleanFuel tank Cap *2 ○ ○ ○ ○Check and clean or Replace ifnecessary.Fuel Pump *1 ○ ○ ○ ○Check and clean or Replace ifnecessary.Check gaps.Spark plug ○ ○ ○ Remove carbon deposits orReplace if necessary.Ignition timimg *1 ○ ○ ○ Check timing.Starter rope *1 ○ ○ ○ ○ Check for wear or chafing.Entire cartridge0.8-0.9mm(0.031-0.035in)StartingSystemStarter motor *1 ○ ○Battery ○ ○ ○ ○Engine oilReplace○Replace○Replace○Check for salt deposits andthe battery cable condition.Check installation, fluid quantity,gravity.Replace if necessary.10EngineLowerUnitOil filter *1 Replace evry 200 hrs or 2 years Entire cartridgeValve Clearance *1 ○ ○ ○ Check & adjustTiming belt *1 ○ ○ Check and Replace if necessary.Thermostat *1 ○ ○ Check and Replace if necessary.Propeller ○ ○ ○ ○Check for bent blades, damage,wear.Gear oilReplace○Replace○Replace○Change or replenish-oil andcheck for water leaks.Water pump *1 ○ ○ ○ Check for wear or damage.Check & replenish oil, manuallyPower trim & tilt *1 ○ ○ ○operateWarning system *1 ○ ○ ○ Check function370mL(12.5 fl.oz.)Replace impellerevery 12 months.Bolts and Nuts ○ ○ ○ ○ RetightenSliding and Rotating Parts.Grease Nipples.○ ○ ○ ○ Apply and pump in grease.Outer Equipment ○ ○ ○ ○ Check for corrosion.Anode ○ ○ ○*1 Have this handled by your dealer.*2 In USA, you have to use EPA approved part (See P21 - P23 ).Check for corrosion anddeformation.Replace ifnecessary.
INSPECTION AND MAINTENANCE 57NotesDrain holeYour outboard motor should receivecareful, and complete inspection at300 hours. This is the best time formajor maintenance procedures to becarried out.Replacing engine oilEngine oil mixed with dust or waterwill dramatically shorten the life of theengine.To change engine oil:1 Stop the engine and set it in a tiltedposition.2 Remove the top cowl and oil fillercap. Allow it to cool.3 Turn the steering on the outboardmotor so that the drain hole isfacing downward.4 Put a oil drain pan under the oildrain screw.5 Remove the oil drain screw andcompletely drain oil from theengine.6 R e l e a s e t h e t i l t l o c k f r o mengagement and stand up theengine upright.7 Remove the oil drain plug againand drain out the oil.8 Replace the drain plug seal witha new one and apply oil onto thesealed part.9 Install the drain plug.10 Fill new engine oil through the oilfiller until the oil level reaches theupper limit.○11 Tighten the oil filler cap.Use only high quality 4-strokeengine oil to insure performance andprolonged engine life.Use oils that carry the API rating ofSF, SG, SH, SJ, SL, or SM. Selectthe appropriate viscosity, based onatmospheric temperature, from thechart below.ENGINEOIL-30-22-20-4-101420W−40, 20W−5015W−40, 15W−5010W−40, 10W−5010W−3003210502068Atmospheric temp.30864096˚C˚FYou can also use NMMA FC-Wcertified 4-stroke outboard oil below.10W-30: is recommended for use inall temperature.25W-40: may be used at temperaturesabove 4˚C (40˚F).! CAUTIONUse of engine oils that do not meetthese requirements will result in reducedengine life, and other engine problems.10
58 INSPECTION AND MAINTENANCE! CAUTIONYou may be injured due to high enginetemperatures if you fill engine oil justafter stopping. Changing engine oilshould be done after the engine hasbeen cooled.! CAUTION● Do not overfill engine oil, or engineoil could leak and/or engine could bedamaged. If engine oil level is overupper limit marks of oil gauge, drainoil to level lower than upper limit.● Be sure that outboard motor is inupright and level position whenchecking or changing oil.● Stop engine immediately if low oilpressure warning lamp is lit or oilleak is found, or engine could beseverely damaged. Consult dealer.Replacing oil filter1 Drain oil from the engine.2 Place a rag or towel below the oilfilter to absorb any spilled oil.3 Unscrew old filter by turning thefilter to the left.4 Clean the mounting base. Applyfilm of clean oil to filter gasket.Do not use grease. Screw newfilter on until gasket contacts base,then tighten 3/4 to 1 turn.P/N 3AC-99090-0P/N 3AC99090M(US.CANADA Only)Oil filter wrench10Notes● If any amount of water is found inengine oil, making it milky white,consult dealer.● If engine oil is contaminated withfuel, emitting strong fuel smell,consult dealer.Oil filter
INSPECTION AND MAINTENANCE 59Cleaning the fuel filters and thefuel tankFuel filters are provided inside the fueltank and engine.! WARNINGGasoline and its vapors are veryflammable and can be explosive.● Do not start this procedure whileengine is operating or hot even afterstopping it.● Place fuel filter away from everysource of ignition such as sparks oropen flames.● Wipe off gasoline well immediately ifspilled.● Install fuel filter with all related partsin place, or fuel leak could occur,leading to catching fire or explosion.● Check fuel system regularly forleakage.● Contact an authorized dealer forfuel system services. Services byunqualified person could lead toengine damage.■ Fuel tank filterLoosen the fuel pickup elbow shown atleft, remove it and clean the fuel filter.FilterFuelpick upelbow■ Fuel tankWater or dirt in the fuel tank will causeengine performance problems.Check and clean the tank at specifiedtimes or after the motor has beenstored for a long period of time (overthree months).■ Engine filter1 Replace the fuel filter providedinside of engine cover if there iswater or dirt inside.10Fuel filter
60 INSPECTION AND MAINTENANCEReplacing gear oil! WARNING● Be sure that outboard motor is securedto transom or service stand, oraccidental drop or fall of outboard motorcould lead to severe personal injury.● Be sure to lock outboard motor ifit is tilted up, or accidental fall ofoutboard motor could lead to severepersonal injury.● Do not go under outboard motortilted up and locked, or accidentalfall of outboard motor could lead tosevere personal injury.Oil plug (Upper)3 Install the upper oil plug, and thenremove oil tube nozzle and installthe lower oil plug.1 Remove the oil plugs (upper andlower), and completely drain thegear oil into a pan.10Notes2 Insert the oil tube nozzle into thelower oil plug hole, and fill with gearoil by squeezing the oil tube until oilflows out of the upper plug hole.! CAUTIONDo not reuse oil plug gasket. Always usenew gasket and tighten oil plug properlyto prevent entry of water into lower unit.If water in the oil, giving it a milkycolored appearance. Contact yourdealer.NotesUse genuine gear oil or therecommended one (API GL-5: SAE#80 to #90).Required volume: approx. 370 ml.
INSPECTION AND MAINTENANCE 613. Off-season storageBefore you put your outboard motorin storage, it is a good opportunity tohave it serviced and prepared by yourdealer.! CAUTIONBefore servicing the motor for storage:● Remove the battery cables.● Remove the spark plug caps fromthe spark plugs.● Do not run the motor out of the water.■ Engine1 Wash the engine exterior andflush the cooling water systemthoroughly with fresh water. Drainthe water completely.Wipe off any surface water with anoily rag.2 Use a dry cloth to completelywipe off water and salt from theelectrical components.3 Drain all fuel from the fuel hoses,fuel pump, and vapor separator,and clean these parts.Keep in mind that if gasoline iskept in the vapor separator for along time, gum and varnish willdevelop, causing the float valve tostick, restricting the fuel flow.4 Remove the spark plugs andspray storage oil (available froman authorized dealer) into thecombustion chamber throughthe spark plug holes while slowlyturning the motor over using therecoil starter.5 Change the engine oil.5 Change the engine oil.6 Change the gear oil in the gearcase.7 Apply grease to the propeller shaft.8 Apply grease to all sliding parts,joints, nuts, and bolts.9 Stand the outboard motor upvertically in a dry place.! WARNINGBe sure to use cloth to remove fuelremaining in the cowl and dispose of itin accordance with local fire preventionand environment protection regulations.■ Battery1 Disconnect the battery cables.2 Wipe off any chemical deposits,dirt, or grease.3 Apply grease to the batter yterminals.4 Charge the battery completelybefore storing it for the winter.5 Recharge the battery once a monthto prevent it from discharging andthe electrolyte from deteriorating.6 Store the battery in a dry place.■ Electric Starter MotorCoat the internal pinion gears and theshaft of the electric starter motor withgrease.Do not put grease on the teeth of thestarter pinion or flywheel or increasedwear or damage will occur.10
62 INSPECTION AND MAINTENANCE104. Pre-season check1 Check that the shift and throttlefunction properly.(Be sure to turn the propeller shaftwhen checking the shift functionor else the shift linkage may bedamaged.)NotesThe following steps must be takenwhen first using the engine afterwinter storage.1 Fill the fuel tank completely with 12liters.2 Warm up the engine for 3 minutesin the "NEUTRAL" position.3 Run the engine for 5 minutes at theslowest speed.4 Run the engine for 10 minutes athalf speed.In Steps 2 and 3 above, the oilused for storage inside the enginewill be flushed out to assure optimumperformance.2 Check the electrolyte level, andmeasure the voltage and specificgravity of the battery.SpecificGravity at 20 °CTerminalVoltage (V)1.120 10.5ChargeConditionFullydischarged1.160 11.1 1/4 charged1.210 11.7 1/2 charged1.250 12.0 3/4 charged1.280 13.2 Fully charged5. Motor submerged in waterAfter taking your outboard motor outof the water, immediately take it toyour dealer.The following are the emergencym e a s u r e s t o b e t a k e n f o r asubmerged outboard motor, if youcan not take it your dealer right away.1 Wash the outboard motor with freshwater to remove salt or dirt.2 Remove the engine oil drain screwand completely drain water and oilfrom the engine.3 Remove the spark plugs, andcompletely drain the water fromthe engine by pulling the recoilstarter several times.Replace oil filter and oil to thecorrect level.The oil and filter may need to bechanged again after running ashort period to get all moisturecompletely out of the crankcase.4 Inject a sufficient amount of engineoil through the spark plug holes.Pull the recoil starter several timesto circulate the oil throughout theoutboard motor.! CAUTIONDo not attempt to start submergedoutboard motor immediately after it isrecovered, or engine could be severelydamaged.3 Check that the battery is secureand the battery cables are properlyinstalled.
INSPECTION AND MAINTENANCE 636. Cold weather precautionsIf you moor your boat in cold weatherat temperatures below 0˚C (32˚F),there is the danger of water freezingin the cooling water pump, which maydamage the pump, impeller, etc. Toavoid this problem, submerge thelower half of the outboard motor intothe water.7. Checking after striking underwater objectS t r i k i n g t h e s e a b o t t o m o r a nunderwater object may severelyd a m a g e t h e o u t b o a r d m o t o r.Immediately bring the outboard motorto the dealer and ask for the followingchecks.1 Looseness or damage of powerunit installation bolts, gear caseand extension case bolts, propelleror propeller shaft upper and lowermount rubber bolts, and/or mountbracket bolts.Ask an authorized dealer to tightenany loose bolts and nuts, and toreplace damaged parts.2 Damage to mount rubber, the tiltstopper, thrust rod, gears andclutch, and/or propeller.Ask an authorized dealer to replacedamaged or defective parts.10
64 TROUBLESHOOTINGTROUBLESHOOTINGIf you encounter a problem, consult the check list below to determine the causeand to take the proper action.An authorized dealer will always be happy to provide any assistance andinformation.Engine falling to startEngine starting but stopping soonPoor idlingPoor accelerationEngine speed abnormally highEngine speed abnormally lowOverheating of enginePower tilt inoperativePossible cause● ● Empty fuel tank● ● ● ● ● ● Incorrect connection of fuel system● ● ● ● ● ● Air entering fuel lineFUEL SYSTEM● ● ● ● ● ● Deformed or damaged fuel hose● ● ● ● ● ● Closed air vent on fuel tank● ● ● ● ● ● Clogged fuel filter, fuel pump, or carburetor● ● ● ● Use of improper engine oil● ● ● ● ● Use of improper gasoline● ● Excessive supply of fuel● ● ● ● ● ● Poor carburetor adjustment11
TROUBLESHOOTING 65Engine falling to startEngine starting but stopping soonPoor idlingPoor accelerationEngine speed abnormally highEngine speed abnormally lowOverheating of enginePower tilt inoperativePossible cause● ● ● ● ● ● Spark plug other than specified● ● ● ● ● Dirt, soot, etc. on spark plug● ● ● ● ● No Spark or weak spark●Short circuit of engine etop switchELECTRICAL SYSTEM● ● ● ● Ignition timing incorrect●Lock plate not fitted● ● Disconnection of wire or loose ground connection● ● Blown 20 Amp fuse in the starting circuit●Not shifted into neutral position● ● Weak battery or battery connections are loose or corroded● ● Ignition key switch failure●Wiring or electrical connection faulty●Starter motor or starter solenoid failure11●Power trim & tilt switch defective, Solenoid is defective
66 TROUBLESHOOTINGEngine falling to startEngine starting but stopping soonPoor idlingPoor accelerationEngine speed abnormally highEngine speed abnormally lowOverheating of enginePower tilt inoperativePossible causeCOMPRESSION& OIL SYSTEM● ● ● ● ● Low compression●Carbon deposits in the combustion chamber● ● Incorrect valve clearanceLow oil pressure/level● ● ● ● Incorrect adjustment of throttle link●Insufficient cooling water flow, clogged or defective pump● ● Faulty thermostat● ● ● Cavitation or ventilationOTHERS● ● ● ● Incorrect propeller selection● ● ● ● ● Damaged or bent propeller11● ● ● Improper thrust rod position● ● ● ● Unbalanced load on boat● ● ● ● Transom too high or too low●A great deal of air is contained inside pump
TOOL KIT AND SPARE PARTSTOOL KIT AND SPARE PARTS 67The following a list of the tools and spare parts provided with the motor.Items Quantity RemarkService toolsTool bagPliersSocket wrenchSocket wrenchSocket wrench handleScrewdriversScrewdriver handle111111110 × 13 mm16 mmCross-and straight-pointSpare partsStarter ropeSpark plugSplit pin1211,600 mmNGK DCPR6EFuel tankPrimer bulb11 set12LParts Packagedwith EngineRemote control boxRemote controlattachmentDrag link1 set1 set1EP/EPT onlyEP/EPT onlyEP/EPT onlyBracket fixingBoltNutWasher4488 mm8 mm8 mmEPT/EFT onlyEPT/EFT onlyEPT/EFT only12
68 OPTIONAL ACCESSORIESOPTIONAL ACCESSORIESFlushing attachmentTachometerSelectorGenuine gear oil (500ml)12P4P6PTouch-up paint (300ml)PropellerGenuine engine oil (450ml,1L)13
PROPELLER TABLEPROPELLER TABLE 69Use a genuine propeller.A propeller must be selected so that the engine rpm measured at wide openthrottle while cruising is within the recommended range.15: 5,000 to 6,000 rpm20: 5,400 to 6,100 rpmPropeller MarkPropeller Size (Blades × diameter × pitch)inchmmLight boats11.5 3 × 9.25 × 11.5 3 × 235 × 29210 3 × 9.25 × 10 3 × 235 × 2549 3 × 9.25 × 9 3 × 235 × 2298 3 × 9.25 × 8 3 × 235 × 2037 3 × 9.2 × 6.9 3 × 234 × 1746 3 × 9.2 × 6.1 3 × 234 × 155Heavy boats7 4 × 10 × 4 4 × 254 × 17814
M E M O
OWNER’S MANUAL<strong>MFS</strong><strong>15C</strong><strong>20C</strong>TOHATSU CORPORATIONAddress : 5-4, 3-chome, Azusawa, Itabashi-ku,TOKYO, 174-0051 JAPANPhone : TOKYO (03)3966-3117FAX : TOKYO (03)3966-2951URL : www.tohatsu.co.jp003-11090-51105NBPrinted in Japan