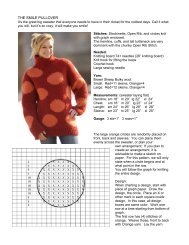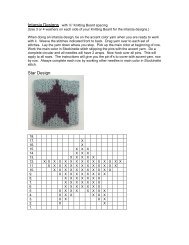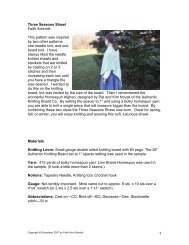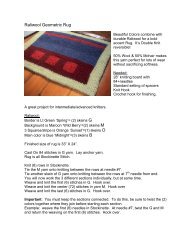
Hemmed Cuff Socks - Authentic Knitting board
Hemmed Cuff Socks - Authentic Knitting board
Hemmed Cuff Socks - Authentic Knitting board
- No tags were found...

You also want an ePaper? Increase the reach of your titles
YUMPU automatically turns print PDFs into web optimized ePapers that Google loves.
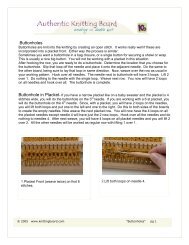
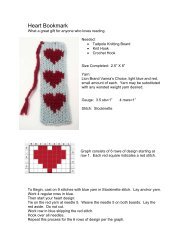
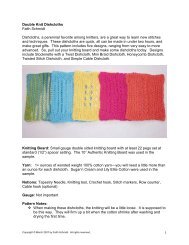
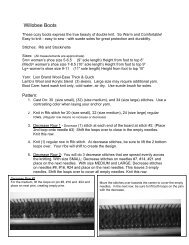
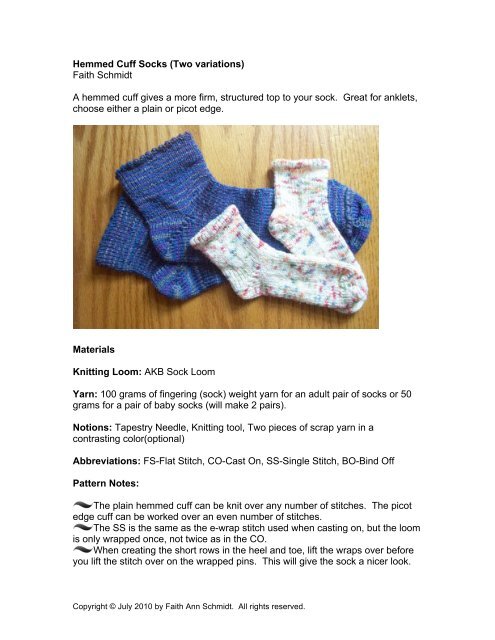
<strong>Hemmed</strong> <strong>Cuff</strong> <strong>Socks</strong> (Two variations)Faith SchmidtA hemmed cuff gives a more firm, structured top to your sock. Great for anklets,choose either a plain or picot edge.Materials<strong>Knitting</strong> Loom: AKB Sock LoomYarn: 100 grams of fingering (sock) weight yarn for an adult pair of socks or 50grams for a pair of baby socks (will make 2 pairs).Notions: Tapestry Needle, <strong>Knitting</strong> tool, Two pieces of scrap yarn in acontrasting color(optional)Abbreviations: FS-Flat Stitch, CO-Cast On, SS-Single Stitch, BO-Bind OffPattern Notes:The plain hemmed cuff can be knit over any number of stitches. The picotedge cuff can be worked over an even number of stitches.The SS is the same as the e-wrap stitch used when casting on, but the loomis only wrapped once, not twice as in the CO.When creating the short rows in the heel and toe, lift the wraps over beforeyou lift the stitch over on the wrapped pins. This will give the sock a nicer look.Copyright © July 2010 by Faith Ann Schmidt. All rights reserved.
For a picture of how to pull up the stitches to make the hemmed cuff (scrolldown to the “Make a Brim” section) see http://www.bevscountrycottage.com/howto-loom-knit.html#brimThe FS was used in these socks. It is important to make sure that you donot pull the yarn too tightly. If you do, the stitches will be very difficult to hookover. To help make the FS looser, after hooking over the stitch, pull the stitchaway from the pin slightly. If you have too much trouble with tight stitches, usethe knit stitch instead of the FS.The toe of the sock can be closed in a couple of different ways. You mayclose as directed in the DVD, by binding the sock off and then sewing theopening closed. An alternative method is to slip the first half of the stitches on toa contrasting piece of sock yarn. Slip the second half of the stitches onto anotherpiece of sock yarn. Cut the working yarn, leaving a long tail. Thread the yarn tailonto a yarn needle. Starting with the first stitch (the side closest to the toe) takethe needle through the stitch from right to left, being careful not to catch thewaste yarn. Now, take the needle over to the other piece of scrap yarn andthrough the first stitch on the second side, going from left to right. Continueweaving from one side to the other until all the stitches have been woven.Remove the scrap yarn; gently pull on working yarn to tighten the toe stitchesand weave in loose end. I prefer the second method as it makes a less bulkyseam. If desired, the Kitchner Stitch (used in hand knitting) could also be used,but is a bit more complicated. There are many online tutorials on this method ifyou are interested in trying it.The best book, and the only one at this point, on knitting socks on looms isLoom <strong>Knitting</strong> <strong>Socks</strong> by Isela Phelps. This is a wonderful resource.Instructions-Plain <strong>Cuff</strong> (Toddler Sock)The instructions include both generic instructions on how to make this sockin any size as well as the numbers, in parentheses that were used tocreate the sock in the picture. This sock will fit a 1-2 year old. I designed itCopyright © July 2010 by Faith Ann Schmidt. All rights reserved.
for my 2 year old daughter, and it ended up being a bit snug (she haschubby feet). If you knit this for a 1 year old, I would keep the CO numberthe same, but shorten the length of the foot. For a 2 year old, I would COa few more pins.1. Determine the amount of pins to cast on by following the directions that camewith the loom. (CO 32 stitches)2. CO using the e-wrap CO as shown in the DVD that came with the loom.3. Knit, using the FS until the cuff section is twice as long as desired. (Knit 10rows)4. Reach inside the loom and find the CO edge. The stitches will be loopy. Findthe loop that is attached to the yarn tail and place the loop over the first pin.Continue around the loom until all the pins have 2 loops on them. Pick thebottom loop over the top. <strong>Hemmed</strong> cuff is completed. For a picture of thisprocess see the link in the Pattern Notes section.5. Knit in FS until the leg section is the desired length. (Knit 25 rows)6. Turn heel using short row shaping as directed in the DVD. (There will be 6unwrapped stitches)7. Knit in FS until foot is desired length minus toe length. (Knit 40 rows)8. Repeat the heel instructions to form the toe.9. Close toe. See explanation in the Pattern Notes section for various ways ofdoing this.Instructions-Picot <strong>Cuff</strong> (Woman’s Sock)The instructions include both generic instructions on how to make this sockin any size as well as the numbers, in parentheses that were used tocreate the sock in the picture. These socks were designed to fit anaverage woman’s size 8 (8.5” circumference of the foot and 9.5” length).1. Follow steps 1 and 2 from the plain cuff section. (CO 50 stitches)2. Knit, using the FS, until the cuff section is the desired length. Make a note ofthe number of rows. You will need to know this for step 6. (Knit 15 rows)3. Knit 1 row using the SS (see Pattern Notes).Copyright © July 2010 by Faith Ann Schmidt. All rights reserved.
4. Make eyelets as follows: Lift the loops from all odd numbered pins and placethem on the even numbered pins. All the odd numbered pins will be empty andthe even number pins will have 2 loops. Wrap the row using the SS. The oddpins will have 1 wrap, the even pins will have 3 wraps. Hook over, only hookingover the pins that have 3 wraps, and lifting the bottom 2 over the top 1. All pinsshould now have 1 wrap.5. Knit 1 row using the SS.6. Knit, using the FS, the same number of rows as step 2. (Knit 15 rows)7. Follow steps 4-9 in the plain cuff section. (Leg--Knit 20 rows, Heel Turn--There will 9 unwrapped stitches, Foot--Knit 70 rows)Copyright © July 2010 by Faith Ann Schmidt. All rights reserved.