Ribbed Baby Bib - Authentic Knitting board
Ribbed Baby Bib - Authentic Knitting board
Ribbed Baby Bib - Authentic Knitting board

Create successful ePaper yourself
Turn your PDF publications into a flip-book with our unique Google optimized e-Paper software.
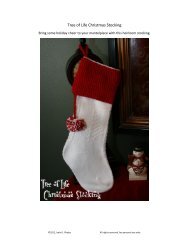
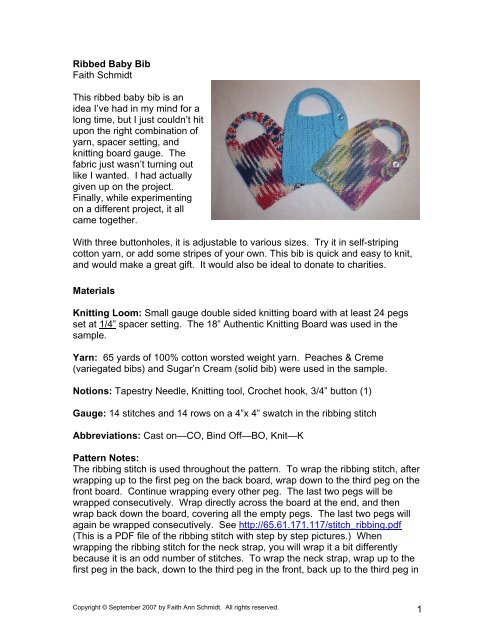
<strong>Ribbed</strong> <strong>Baby</strong> <strong>Bib</strong>Faith SchmidtThis ribbed baby bib is anidea I’ve had in my mind for along time, but I just couldn’t hitupon the right combination ofyarn, spacer setting, andknitting <strong>board</strong> gauge. Thefabric just wasn’t turning outlike I wanted. I had actuallygiven up on the project.Finally, while experimentingon a different project, it allcame together.With three buttonholes, it is adjustable to various sizes. Try it in self-stripingcotton yarn, or add some stripes of your own. This bib is quick and easy to knit,and would make a great gift. It would also be ideal to donate to charities.Materials<strong>Knitting</strong> Loom: Small gauge double sided knitting <strong>board</strong> with at least 24 pegsset at 1/4” spacer setting. The 18” <strong>Authentic</strong> <strong>Knitting</strong> Board was used in thesample.Yarn: 65 yards of 100% cotton worsted weight yarn. Peaches & Creme(variegated bibs) and Sugar’n Cream (solid bib) were used in the sample.Notions: Tapestry Needle, <strong>Knitting</strong> tool, Crochet hook, 3/4” button (1)Gauge: 14 stitches and 14 rows on a 4”x 4” swatch in the ribbing stitchAbbreviations: Cast on—CO, Bind Off—BO, Knit—KPattern Notes:The ribbing stitch is used throughout the pattern. To wrap the ribbing stitch, afterwrapping up to the first peg on the back <strong>board</strong>, wrap down to the third peg on thefront <strong>board</strong>. Continue wrapping every other peg. The last two pegs will bewrapped consecutively. Wrap directly across the <strong>board</strong> at the end, and thenwrap back down the <strong>board</strong>, covering all the empty pegs. The last two pegs willagain be wrapped consecutively. See http://65.61.171.117/stitch_ribbing.pdf(This is a PDF file of the ribbing stitch with step by step pictures.) Whenwrapping the ribbing stitch for the neck strap, you will wrap it a bit differentlybecause it is an odd number of stitches. To wrap the neck strap, wrap up to thefirst peg in the back, down to the third peg in the front, back up to the third peg inCopyright © September 2007 by Faith Ann Schmidt. All rights reserved.1
the back, and then down to the fifth (last) peg in the front. Now, take the yarnstraight across to the fifth peg in the back, and wrap back to the beginning,covering all the empty pegs.To knit the buttonhole row, move the loop on the third peg to a peg adjacent to it.Do this to both the front and back <strong>board</strong>. I suggest moving the front and backloop opposite each other, so that all the extra bulk won’t end up on just one sideof the buttonhole. The third peg will now be empty. Wrap the <strong>board</strong> as usual.When picking over, pick 2 over 1 on the pegs that have 3 loops on them. Do notpick over the pegs with only one loop on them. When finished with the row, eachpeg should have just 1 loop on it.Every once in a while I’ll have a stitch or two on the edge that looks a little moreloopy than the rest. To remedy this, find where that yarn loop enters the body ofthe knitting and gently pull in the excess yarn. Distribute the excess yarn into thebody of the knitting.InstructionsFinished size is 7”x 7”, excluding neck strapThe ribbing stitch is used throughout the pattern.1. Co 24 pegs using the stockinette cast on.2. K 25 rows or 7”.3. BO 19 stitches (there will be 5 stitches remaining), starting at the endopposite the working yarn. After binding off, there will be one loop left onthe crochet hook. Place the remaining loop on the back peg nearest it thathas a loop on it.4. K 25 rows or 7” over the remaining 5 stitches. When picking over the firstrow, make sure to pick 2 over 1 on the peg that has 3 loops on it frombinding off.5. Buttonhole row.6. K 3 rows.7. Buttonhole row.8. K 3 rows.9. Buttonhole row.10. K 3 rows.11. BO. Weave in all loose ends. Sew on the button to the front of bib, nearthe top corner opposite the strap.********************************************************************************************Faith is a home schooling mom of seven. In the summer of 2006 she picked upa one dollar spool knitter. From there, she graduated to the larger round looms,and then double sided knitting <strong>board</strong>s, her favorite type of loom. At the beginningCopyright © September 2007 by Faith Ann Schmidt. All rights reserved.2
of 2007, she began designing her own patterns, which she finds very rewarding.When she’s not loom knitting, she also likes to read, crochet, and knit withneedles.Copyright © September 2007 by Faith Ann Schmidt.Copyright © September 2007 by Faith Ann Schmidt. All rights reserved.3