SIL99-2A - The Fly Baby Home Page
SIL99-2A - The Fly Baby Home Page
SIL99-2A - The Fly Baby Home Page
- No tags were found...
Create successful ePaper yourself
Turn your PDF publications into a flip-book with our unique Google optimized e-Paper software.
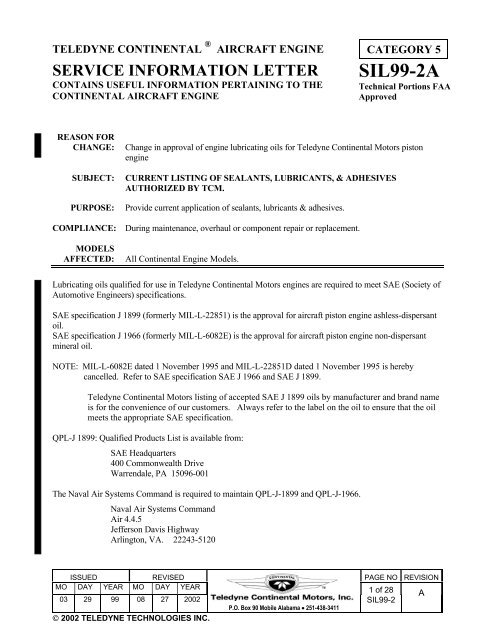
Recommended Oil Grade:Above 40°F ambient air, sea level SAE 50 or Multi ViscosityBelow 40°F ambient air, sea level SAE 30 or Multi ViscosityNOTE…See TCM Engine Preservation for Active and Stored Aircraft Service Information Letter <strong>SIL99</strong>-1 forpreservation information.In listing the product names, TCM makes no claim of verification of the marketer’s statements or claims.Listing is made alphabetically and is provided only for convenience of the users. If the aviation oil you use orwish to use is not listed, contact the Naval Air Systems CommandQUALIFIED LUBRICATING OIL-ASHLESS DISPERSANT(SAE J 1899)SUPPLIERBRANDBP Oil CorporationBP Aero OilCastrolCastrol Aero AD OilCastrol Limited (Australia) Castrolaero AD OilChevron USAChevron Aero OilContinental OilConoco Aero SDelta Petroleum Company Delta Avoil OilExxon Company, USAExxon EliteExxon Company, USAExxon Aviation Oil EEGulf Oil CompanyGulfpride Aviation ADMobil Oil CompanyMobile Aero OilNYCO SA Turbonycoil 3570Pennzoil CompanyPennzoil Aircraft Engine OilPhillips Petroleum Company Phillips 66 Aviation Oil,Type A 100 AD, 120 ADPhillips Petroleum Company X/C Aviation Multiviscosity OilSAE 20W-50, SAE 25W-60Quaker State Oil & Refining Co. Quaker State AD Aviation OilRed Ram Limited (Canada) Red Ram X/C Avaition Oil 20W-50Shell - AustraliaAeroshell (R) WShell Canada LimitedAeroshell Oil W, 15W – 50 Anti-wear FormulationShell USAAeroshell Oil W, 15W – 50 Anti-wear FormulationShell USAAeroshell Oil W PlusSinclair Oil CompanySinclair AvoilTexaco Inc.Texaco Aircraft Engine Oil-Premium ADTotal France Total Aero DM 15W - 50Union Oil Company of California Union Aircraft Engine Oil HDISSUED REVISED PAGE NO REVISIONMO DAY YEAR MO DAY YEAR 2 of 28 A03 29 99 08 27 2002<strong>SIL99</strong>-2P.O. Box 90 Mobile Alabama • 251-438-3411
Break-in OilSAE J 1966- Aviation (replaces MIL-L-6082) non-dispersant mineral lubricating oil for piston aircraft engines.MIL-C-6529 Type II Corrosion preventive mineral oil (fly-away-oil)NOTE . . . Mineral oil conforming with MIL-C-6529 Type II contains a corrosion preventive additive and must not beused for more than 25 hours or six months, whichever occurs first. If oil consumption has not stabilized in this time,drain and replenish the oil and replace the oil filter.,Preservative OilTYPE EQUIVALENT APPLICATIONMIL-P-46002 Grade 1 oil, (NOX RUST VCI-105) For Temporary and Indefinite storageOIL CHANGE INTERVALSRefer to the engine operator/maintenance manual and/or the aircraft manufacturer’s or Supplemental TypeCertificate (STC) holders POH/AFM for fuel specifications, specified oil change intervals and inspectionprocedures.<strong>The</strong> oil change intervals published in the Operators Manuals are minimum requirements. Teledyne ContinentalMotors feels that more frequent oil and filter changes enhance engine service life. As such TCM recommendsthat engine oil be drained and replenished every 25 hours of operation or 4 months for engines that incorporatean oil screen. Engines with full flow oil filters, either large or small, should have the oil changed every 50 hoursor 4 months.NOTE…When using the small (4.80 inch high oil filter) do not exceed 50 hours and/or 6 months between oil and filterchanges. When using the larger (5.80 inch high oil filter) do not exceed 100 hours and/or 6 months between oiland filter changes Oil screens and oil filter elements must be inspected for contaminates at each oil change. Oilanalysis may be used in addition to the oil screen or filter element inspection, but not as a replacement for it.ADDITIVES<strong>The</strong>re are many fuel and oil additives and/or concentrates on the market today which were formulated primarilyfor automotive and industrial engine applications. From time to time, we receive inquiries as to the use of theseproducts in our aircraft engines. Most of these additives and concentrates, while they may be highly beneficialto automotive and industrial operation, are not compatible with air-cooled, light aircraft engines in theiroperating environments. With the exception of the use of isopropyl alcohol and ethylene glycol monomethylether compound as described in the following paragraph, we do not recommend the use of additives orconcentrates in any of our aircraft engines. In fact, the use of such can be cause for voiding the warranty. Useonly fuels and lubricants as recommended herein and in current engine operating manuals.Under certain ambient conditions of temperature/humidity, water can be supported in the fuel in sufficientquantities to create restrictive ice formation along various segments of fuel system. To alleviate the possibilityof this occurring, it is permissible to add Isopropyl Alcohol to the fuel supply in quantities not to exceed 3percent of the total. Also, ethylene glycol monomethyl ether compounds conforming to military specificationMIL-DTL-27686G, if approved for use in the aircraft fuel system by the aircraft manufacturer, may be addedfor this purpose. <strong>The</strong> ethylene glycol monomethyl ether compound must be carefully mixed with the fuel inconcentrations not to exceed 0.15 percent by volume.ISSUED REVISED PAGE NO REVISIONMO DAY YEAR MO DAY YEAR 3 of 28 A03 29 99 08 27 2002<strong>SIL99</strong>-2P.O. Box 90 Mobile Alabama • 251-438-3411
WARNINGMixing of the EGME compound with the fuel is extremely important because concentration inexcess of that recommended (0.15 percent volume maximum) can have a harmful effect onengine components. Use only blending equipment that is recommended by the manufacturer toobtain proper proportioning.LubricantsTYPE APPLICATION REMARKSMolyshield GreaseStarter Worm Gear Drive Teeth &Bevel Gear TeethNeedle bearings and ball bearingsAll ModelsAt engine AssemblyP/N 654568-1Valve stemsAdapter-Tach Reduction (TSIO & L/TSIO 360)All Accessory drive splines andcouplingsAll models as applicableIdler gear and pinGTSIO/IO/TSIO-520, IO/O/TSIO-470all 550Grade 50 Break-in Non-compoundedAviation Oil SAE J 1966Oil Seal Lips onlyFuel injection controls, o-rings,springs, shafts and bushingsMagneto rubber drive bushingsOil Pumps (Pressure & Scavenge)Crankshaft BearingsConnecting Rod BearingsProp Driver, Driven Gears &BearingsCamshaft BearingsTachometer Gears & AdaptersAccessory Spur Gear TeethQuill Shaft SplinesProp Governor Trans Collar & SleeveStarter Cone, Bushing & NutStarter Clutch Spring (ID & OD)Valve Guide SealsPistons, Piston Pins & Piston RingsFuel connections to carb. (malethreads only)V.T.C. Unit Pistons & centrifugalvalves. Rocker arms, pivots, valvesand tappetsThrust WashersOil Filter adapter sealsO-RingsAll ModelsExcept models: TSIO-520-D, all 360,& GTSIO-520-K which use grade 50WAll ModelsAll Models / Coat gear cavity atassembly of pumpAll ModelsAll Models / Apply to sealing surfaceAll ModelsCarburetor equipped modelsTIARA 6-285, 6-230All ModelsISSUED REVISED PAGE NO REVISIONMO DAY YEAR MO DAY YEAR 4 of 28 A03 29 99 08 27 2002<strong>SIL99</strong>-2P.O. Box 90 Mobile Alabama • 251-438-3411
SealantsTYPE APPLICATION REMARKSPermatex Aviation Grade 3DAnd P/N 641543 Silk ThreadCrankcase parting faceAll Models / Apply in accordance withFigures 1 through 7 as applicableStarter adapter to accessory case Apply in accordance with Figure 19Accessory Drive Adapter Apply in accordance with Figure 20Pressure oil pump covers,Apply in accordance with Figures 10P/N 653692 - PrimerorLoctite LocQuic Primer 7649P/N 646942 - Gasket MakerorLoctite 515Gasket EliminatorSealantPressure scavenge pump coversCrankcase crankshaft nose oil sealareaSump to crankcasethrough 18All modelsTSIO-520-UB, TSIOL-550-BP/N 642188 - Gasket Sealant(K & W Copper Coat 1504-12)Crankcase parting faceEngine nose seal, scavenge oil pumpcovers, between crankcase and sumpgasket, oil pump coversBetween starter adapter gasket &crankcaseBetween Oil sump and Sump Gasket642910 OIL SEAL, O.D. of alluncoated oil seals, except fuel pumpadapter sealAll gaskets both sides, exceptmagneto gasket & gaskets betweenintake manifold & cylinder headsGasket - Accessory case to crankcase(Crankcase side only)Gasket - Cam bore cover (exceptbeaded gaskets)All Models / Apply in accordance withFigures 1 through 7 as applicableAll ModelsPermold model enginesAll Models (Non beaded gaskets only)All models where applicableTIARA 6-285, 6-230C-90, O-200, O-300, 360 & IO-240470, 520, 550, GTSIO-520 Models andIO-240Gasket - Idler Pin 470, 520, GTSIO-520, all 550Gasket - Intake ManifoldAll modelsOil drain back tubes C-90, O-200, O-300Gasket & Oil filler neck holes 470, 520, 550 (Sandcast) and GTSIO-520Gasket - Oil cooler both sides All 360 modelsOil seal at alternator drive (O.D. only) TIARA 6-285, 6-230All press type plugs (Hubbard etc) All ModelsIn parting line area of 3-way joints Sump to crankcase or sump to crankcaseto accessory caseISSUED REVISED PAGE NO REVISIONMO DAY YEAR MO DAY YEAR 6 of 28 A03 29 99 08 27 2002<strong>SIL99</strong>-2P.O. Box 90 Mobile Alabama • 251-438-3411
Sealants (Continued)ContinuedP/N 642188 - Gasket Sealant(K & W Copper Coat 1504-12)Loctite 592 Teflon PS/T Pipe SealantP/N 646940 - F/I SealantorLoctite 569 Hydraulic SealantP/N 649246 Loctite 290 SealantMiller-StephensonMS 122DFOil seal accessory drive (O.D. only)TSIO-360, A, AB, C, CB, D, DB and IO-360-C, CB,G,GB2 Bolt suction tube gasket - both sides All 470, 520, 550 models as applicableUse on all pipe threads except asnotedAll pressure relief valve housingthreadsPermold 2 studs engine mount 1-3-5side bottomAll threaded fasteners installed in a Apply before installing threaded partthrough hole to an oil sourceAll pipe thread fittings in fuelApply in accordance with Figure 9injection systemData plate screw installation onthrottle bodiesIgnition harness terminals at magnetoblock endAll models where applicableAll ModelsAdhesivesTYPE APPLICATION REMARKSLoctite 271 High Strength Adhesive Rocker cover stud, rocker arm pivot TIARA 6-285, 6-230 onlySealant (used withstuds, push rod retainer studP/N 653693 Primer or Loctite 7471) Cylinder deck studs All models breakaway torque 100 inlbs.after 2 hrsCrankcase breather tubes470 & 520 (Sandcast) & GTSIO-520Bolts for nose seal retainer to crankcaseAll ModelsSquirt nozzleAll ModelsMechanical Tach Drive Studs to an oil Engine models as applicablesourceOil pump gear mounting pin in 360 modelsaccessory coverAll press fit breather and oil filler necks 360 & IO-240 modelsIntake manifold mount studs C-75, C-85, C-90 & O-200V.T.C. unit bushing retaining screwV.T.C. unit housing to crankshaftTop accessory drive gear (breatherslinger) boltsTIARA 6-285, 6-230Studs on coolant manifoldFuel manifold valve diaphragm &plunger assemblyAll liquid cooled modelsIO-240 All 360, 470, 520, 550 modelsISSUED REVISED PAGE NO REVISIONMO DAY YEAR MO DAY YEAR 7 of 28 A03 29 99 08 27 2002<strong>SIL99</strong>-2P.O. Box 90 Mobile Alabama • 251-438-3411
Loctite 271 High Strength AdhesiveSealant (used with #653693 Primeror Loctite 7471) (Cont’d)P/N 649306Loctite 222 Sealant (optional LoctiteHydraulic Sealant 569) or TCM P/N646940P/N 654562Loctite 609 Adhesive / SealantAdhesives (Continued)Oil gauge rod housing to crankcaseTiming indicator pinThrough stud holes on accessory end ofcrankcaseSolenoid valve assembly (Bracket tovalve)Manifold valve to bracket screwsCoolant pump impeller ring screwsStuds .25 diameter and smallerData plate screws on manifold valveassemblyBearing O.D. installed on starter clutchassemblyAll IO-360 & TSIO-360, IO-470, AllO-470, All TSIO-470 all IO-520-A,D, E, G, J, K, L; IO-550-D, E, FTSIO-520-A, AE, AF, C, CE, G, H,M, P, R, TAll GTSIO-520All 470, 520, 550 models (apply wheninstalling studs)TSIO-360-MB & SB &IO-360-ES2BAll ModelsAll liquid cooled modelsAll ModelsAll ModelsO-200-A, B, IO-240-A, B, O-300-AFuel pump adapter sealFuel pump shaft sealAll ModelsLoctite 620 Adhesive/Sealant Coolant pump mechanical seal All liquid cooled modelsP/N 654743 / 3M Scotchcast 10 Epoxy field coil leads to starter 24 Volt Starters(XR5241) EpoxyhousingP/N 654470 / 3M Brand EC 1252White Spot Seal PuttyAir throttle & fuel metering assemblyMagneto flangesCylinder deck stud nuts & all throughboltsAll fuel pump, manifold valve, throttleAll ModelsP/N 655114 Adhesive Sealant(Devcon)P/N 649366 Loctite 242)and control fittingsUse for sealing aneroid air referencepath between basic fuel pump housingand vapor separator body (Setup only)Fitting Magneto Housing(Pressurization)Fuel Pumps 646766, 646767 &646824Engine models as applicableMiscellaneousTYPE APPLICATION REMARKSTCM P/N 626531-1Enamel - Gold (1qt)TCM P/N 626531-2Enamel - Gold (1 gal)TCM P/N 535011Lockwire -.032 in dia. Steel,Corrosion Resistant“ACCELAGOLD”Turco® ProductsHigh temp. paint for cosmetic andcorrosion protectionWhere applicable for lockwiringCorrosion protection interior andexterior aluminum partsISSUED REVISED PAGE NO REVISIONMO DAY YEAR MO DAY YEAR 8 of 28 A03 29 99 08 27 2002<strong>SIL99</strong>-2P.O. Box 90 Mobile Alabama • 251-438-3411
Product LocatorDow Corning® G-N Paste is a registered trademark ofDow Corning CorporationDow Corning® No. 4For Distributor information call - 1-800-248-2481, havestate & city information availablePermatexPermatex Aviation Grade 3DFor Distributor information call: Permatex CustomerService @ Phone: 1-800-641-7376LoctiteLoctite Gasket EliminatorLoctite LocQuic Primer 7649Loctite Teflon PS/T Pipe SealantLoctite Hydraulic Sealant 569Loctite 271Loctite LocQuic Primer 7471Loctite Adhesive Sealant 222May be purchased throughyour local TCM Distributoror For Distributor information: Loctite Customer Service@ Phone: 1-800-243-4874Alvania (Shell #2)MIL-S-3545C Grease (Shell #5)For Distributor information: Shell Product InformationCenter, Phone: 1-800-231-6950CHAMPION® is a registered trademark of CooperIndustriesFor Champion Products Distributor information: Phone:803-843-5400K & W Copper CoatFor Distributor information call: K & W ProductsCustomer Phone: 1-800-423-9446Miller-Stephenson MS 122/C02 SprayFor Distributor information: Miller-Stephenson CustomerService, Phone: 1-800-992-2424Molyshield GreaseMay be purchased through:American Lubricants1227 DeedsDayton, Ohio 45401Phone: (937) 222-28513M Brand EC1252 White Spot Putty3M Scotchcast 10 (XR5241) Epoxy“ACCELAGOLD” [Manufactured by Turco® Products,Inc.]Elf Atochem N.A. Turco® Products Div.P.O. Box 195State Route 95 WestMarion, Ohio, 43302,215-419-5376MIL-P-46002Grade 1 oil, (NOX RUST VCI-105)May be purchased through:Rock Island Lubricant & Chemical Co.P.O. Box 50151320 1st StreetRock Island, Illinois 61204Phone: 1-800-522-1150Chesterton Technical Product InformationPhone: 1-803-843-5400ISSUED REVISED PAGE NO REVISIONMO DAY YEAR MO DAY YEAR 9 of 28 A03 29 99 08 27 2002<strong>SIL99</strong>-2P.O. Box 90 Mobile Alabama • 251-438-3411
FIGURE 1. C75, C85, C90, 0200 CRANKCASE THREADING DIAGRAMCRANKCASE SEALANT ANDTHREADING PROCEDURE1. Use full strength non-thinned Permatex aviationgrade 3D. Shake or mix well before using.WARNINGApply thread and permatex only asillustrated.2. Apply Permatex Number 3D to the 2-4 case half.Apply Permatex only in areas where thread isshown. When applying, use short light brushstrokes until an even thin coat is obtained. <strong>The</strong>Permatex should be viscous enough that most ofthe brush marks disappear; if not, use a new canof Aviation Permatex. Allow the Permatex to airdry to a tacky condition before threading.NOTE…Do not apply Permatex to crankshaft nose sealarea.3. Apply a thin translucent coat of TCM GasketMaker P/N 646942 not to exceed .010 inch thickto 1-3 case half. Apply Gasket Maker in allareas that will mate with areas wherePermatex was applied on 2-4 case half except thethrough bolt bosses.4. Apply and position grade D silk thread P/N641543 on case halves as specified in Figure 1.Be sure free ends of thread are covered bygaskets except at the nose oil seal.5. Clean crankcase crankshaft front oil seal landwith Locquic Primer “N” and apply an even coatof gasket maker.6. Assemble crankcase halves, install and torque allcrankcase hardware in proper sequence inaccordance with the applicable overhaul manualas soon as possible.NOTE…Take care to prevent displacement or damage to thecrankshaft oil seal and silk thread. Insure thrustwasher halves and bearing halves remain in place.ISSUED REVISED PAGE NO REVISIONMO DAY YEAR MO DAY YEAR 10 of 28 A03 29 99 08 27 2002<strong>SIL99</strong>-2P.O. Box 90 Mobile Alabama • 251-438-3411
CRANKCASE SEALANT AND THREADINGPROCEDURE1. Use full strength non-thinned Permatex aviationgrade 3D. Shake or mix well before using.SILK THREAD P/N 641543 NOTREQUIRED IN THESE POSITIONS IFUSING THROUGH BOLTS P/N 531212WITH NEW O-RINGS P/N AS3570-011WARNINGApply thread and permatex only asillustrated.2. Apply Permatex Number 3D to the 2-4-6 casehalf. Apply Permatex only in areas where threadis shown. When applying, use short light brushstrokes until an even thin coat is obtained. <strong>The</strong>Permatex should be viscous enough that most ofthe brush marks disappear; if not, use a new canof Aviation Permatex. Allow the Permatex to airdry to a tacky condition before threading.FIGURE 2. 0300 CRANKCASE THREADING DIAGRAMCRANKCASE SEALANT AND THREADINGPROCEDURE1. Use full strength non-thinned Permatex aviationgrade 3D. Shake or mix well before using.WARNINGApply thread and permatex only asillustrated.2. Apply Permatex Number 3D to the 2-4-6 casehalf. Apply Permatex only in areas where threadis shown. When applying, use short light brushstrokes until an even thin coat is obtained. <strong>The</strong>Permatex should be viscous enough that most ofthe brush marks disappear; if not, use a new canof Aviation Permatex. Allow the Permatex to airdry to a tacky condition before threading.NOTE…Do not apply Permatex to crankshaft nose seal area.3. Apply a thin translucent coat of TCM GasketMaker P/N 646942 not to exceed .010 inch thickto 1-3-5 case half. Apply Gasket Maker in allareas that will mate with areas where Permatexwas applied on 2-4-6 case half.4. Apply and position grade D silk thread P/N641543 on 2-4-6 case half as specified in Figure2. Be sure free ends of thread are covered bygaskets except at the nose oil seal.5. Clean crankcase crankshaft front oil seal landwith Locquic Primer “N” and apply an even coatof gasket maker.6. Assemble crankcase halves, install and torque allcrankcase hardware in proper sequence inaccordance with the applicable overhaul manualas soon as possible.NOTE…Take care to prevent displacement or damage to thecrankshaft oil seal and silk thread. Insure thrustwasher halves and bearing halves remain in place.ISSUED REVISED PAGE NO REVISIONMO DAY YEAR MO DAY YEAR 11 of 28 A03 29 99 08 27 2002<strong>SIL99</strong>-2P.O. Box 90 Mobile Alabama • 251-438-3411
FIGURE 3. I0240 CRANKCASE THREADING DIAGRAMCRANKCASE SEALANT ANDTHREADING PROCEDURE1. Use full strength non-thinned Permatex aviationgrade 3D. Shake or mix well before using.WARNINGApply thread and permatex only asillustrated.2. Apply Permatex Number 3D to the 2-4 case half.Apply Permatex only in areas where thread isshown. When applying, use short light brushstrokes until an even thin coat is obtained. <strong>The</strong>Permatex should be viscous enough that most ofthe brush marks disappear; if not, use a new canof Aviation Permatex. Allow the Permatex to airdry to a tacky condition before threading.NOTE…Do not apply Permatex to crankshaft nose sealarea.3. Apply a thin translucent coat of TCM GasketMaker P/N 646942 not to exceed .010 inch thickto 1-3 case half. Apply Gasket Maker in allareas that will mate with areas wherePermatex was applied on 2-4 case half except thethrough bolt bosses.4. Apply and position grade D silk thread P/N641543 on 2-4 case half as specified in Figure 3.Be sure free ends of thread are covered bygaskets except at the nose oil seal.5. Clean crankcase crankshaft front oil seal landwith Locquic Primer “N” and apply an even coatof gasket maker.6. Assemble crankcase halves, install and torque allcrankcase hardware in proper sequence inaccordance with the applicable overhaul manualas soon as possible.NOTE…Take care to prevent displacement or damage to thecrankshaft oil seal and silk thread. Insure thrustwasher halves and bearing halves remain in place.ISSUED REVISED PAGE NO REVISIONMO DAY YEAR MO DAY YEAR 12 of 28 A03 29 99 08 27 2002<strong>SIL99</strong>-2P.O. Box 90 Mobile Alabama • 251-438-3411
SILK THREAD P/N 641543 NOT REQUIRED IN THESE POSITIONS IFUSING THROUGH BOLTS P/N 652420-5.56, 652420-6.80, 652420-9.02 OR 652420-9.42 WITH NEW O-RINGS P/N 630979-9FIGURE 4. I0360, L/TSI0360 CRANKCASE THREADING DIAGRAMCRANKCASE SEALANT AND THREADINGPROCEDURE1. Use full strength non-thinned Permatex aviationgrade 3D. Shake or mix well before using.WARNINGApply thread and permatex only asillustrated.2. Apply Permatex Number 3D to the 2-4-6 casehalf. Apply Permatex only in areas where threadis shown. When applying, use short light brushstrokes until an even thin coat is obtained. <strong>The</strong>Permatex should be viscous enough that most ofthe brush marks disappear; if not, use a new canof Aviation Permatex. Allow the Permatex to airdry to a tacky condition before threading.NOTE…Do not apply Permatex to crankshaft nose sealarea.3. Apply a thin translucent coat of TCM GasketMaker P/N 646942 not to exceed .010 inch thickto 1-3-5 case half. Apply Gasket Maker in allareas that will mate with areas where Permatexwas applied on 2-4-6 case half.4. Apply and position grade D silk thread P/N641543 on 2-4-6 case half as specified in Figure4. Be sure free ends of thread are covered bygaskets except at the nose oil seal.5. Clean crankcase crankshaft front oil seal landwith Locquic Primer “N” and apply an even coatof gasket maker.6. Assemble crankcase halves, install and torque allcrankcase hardware in proper sequence inaccordance with the applicable overhaul manualas soon as possible.NOTE…Take care to prevent displacement or damage to thecrankshaft oil seal and silk thread. Insure thrustwasher halves and bearing halves remain in place.ISSUED REVISED PAGE NO REVISIONMO DAY YEAR MO DAY YEAR 13 of 28 A03 29 99 08 27 2002<strong>SIL99</strong>-2P.O. Box 90 Mobile Alabama • 251-438-3411
SILK THREAD P/N 641543 NOT REQUIRED IN THESE POSITIONS IF USINGTHROUGH BOLTS P/N 652887-5.31, 652887-6.74, 652887-6.50, 652887-6.19,652887-6.96 OR 652887-7.58 WITH NEW O-RINGS P/N MS29513-011FIGURE 5. I0520, TSI0520, I0550, TSI0550 PERMOLD ENGINE CRANKCASETHREADING DIAGRAMCRANKCASE SEALANT AND THREADINGPROCEDURE1. Use full strength non-thinned Permatex aviationgrade 3D. Shake or mix well before using.WARNINGApply thread and permatex only asillustrated.2. Apply Permatex Number 3D to the 2-4-6 casehalf. Apply Permatex only in areas where threadis shown. When applying, use short light brushstrokes until an even thin coat is obtained. <strong>The</strong>Permatex should be viscous enough that most ofthe brush marks disappear; if not, use a new canof Aviation Permatex. Allow the Permatex to airdry to a tacky condition before threading.NOTE…Do not apply Permatex to crankshaft nose seal area.3. Apply a thin translucent coat of TCM GasketMaker P/N 646942 not to exceed .010 inch thickto 1-3-5 case half. Apply Gasket Maker in allareas that will mate with areas where Permatexwas applied on 2-4-6 case half.4. Apply and position grade D silk thread P/N641543 on 2-4-6 case half as specified in Figure5. Be sure free ends of thread are covered bygaskets except at the nose oil seal.5. Clean crankcase crankshaft front oil seal landwith Locquic Primer “N” and apply an even coatof gasket maker.6. Assemble crankcase halves, install and torque allcrankcase hardware in proper sequence inaccordance with the applicable overhaul manualas soon as possible.NOTE…Take care to prevent displacement or damage to thecrankshaft oil seal and silk thread. Insure thrustwasher halves and bearing halves remain in place.ISSUED REVISED PAGE NO REVISIONMO DAY YEAR MO DAY YEAR 14 of 28 A03 29 99 08 27 2002<strong>SIL99</strong>-2P.O. Box 90 Mobile Alabama • 251-438-3411
SILK THREAD P/N 641543 NOT REQUIRED IN THESE POSITIONSIF USING THROUGH BOLTS P/N 652887-8.88, 652887-10.00, OR652887-11.35 WITH NEW O-RINGS P/N 630979-9FIGURE 6. 0470, I0470, L/I0520, L/TSI0520, I0550 SANDCASTENGINE CRANKCASE THREADING DIAGRAMCRANKCASE SEALANT ANDTHREADING PROCEDURE1. Use full strength non-thinned Permatex aviationgrade 3D. Shake or mix well before using.WARNINGApply thread and permatex only asillustrated.2. Apply Permatex Number 3D to the 2-4-6 casehalf. Apply Permatex only in areas where threadis shown. When applying, use short light brushstrokes until an even thin coat is obtained. <strong>The</strong>Permatex should be viscous enough that most ofthe brush marks disappear; if not, use a new canof Aviation Permatex. Allow the Permatex to airdry to a tacky condition before threading.NOTE…Do not apply Permatex to crankshaft nose sealarea.3. Apply a thin translucent coat of TCM Gasket MakerP/N 646942 not to exceed .010 inch thick to 1-3-5case half. Apply Gasket Maker in all areas thatwill mate with areas where Permatex was appliedon 2-4-6 case half.4. Apply and position grade D silk thread P/N641543 on case halves as specified in Figure 6.Be sure free ends of thread are covered bygaskets except at the nose oil seal.5. Clean crankcase crankshaft front oil seal landwith Locquic Primer “N” and apply an even coatof gasket maker.6. Assemble crankcase halves, install and torque allcrankcase hardware in proper sequence inaccordance with the applicable overhaul manualas soon as possible.NOTE…Take care to prevent displacement or damage to thecrankshaft oil seal and silk thread. Insure thrustwasher halves and bearing halves remain in place.ISSUED REVISED PAGE NO REVISIONMO DAY YEAR MO DAY YEAR 15 of 28 A03 29 99 08 27 2002<strong>SIL99</strong>-2P.O. Box 90 Mobile Alabama • 251-438-3411
FIGURE 7. GTSI0520 CRANKCASE THREADING DIAGRAMCRANKCASE SEALANT AND THREADINGPROCEDURE1. Use full strength non-thinned Permatex aviationgrade 3D. Shake or mix well before using.WARNINGApply thread and permatex only asillustrated.2. Apply Permatex Number 3D to the 2-4-6 casehalf. Apply Permatex only in areas where threadis shown. When applying, use short light brushstrokes until an even thin coat is obtained. <strong>The</strong>Permatex should be viscous enough that most ofthe brush marks disappear; if not, use a new canof Aviation Permatex. Allow the Permatex to airdry to a tacky condition before threading.NOTE…Do not apply Permatex to crankshaft nose seal area.3. Apply a thin translucent coat of TCM GasketMaker P/N 646942 not to exceed .010 inch thickto 1-3-5 case half. Apply Gasket Maker in allareas that will mate with areas where Permatexwas applied on 2-4-6 case half.4. Apply and position grade D silk thread P/N641543 on 2-4-6 case half as specified in Figure7. Be sure free ends of thread are covered bygaskets except at the nose oil seal.5. Clean crankcase crankshaft front oil seal landwith Locquic Primer “N” and apply an even coatof gasket maker.6. Assemble crankcase halves, install and torque allcrankcase hardware in proper sequence inaccordance with the applicable overhaul manualas soon as possible.NOTE…Take care to prevent displacement or damage to thecrankshaft oil seal and silk thread. Insure thrustwasher halves and bearing halves remain in place.ISSUED REVISED PAGE NO REVISIONMO DAY YEAR MO DAY YEAR 16 of 28 A03 29 99 08 27 2002<strong>SIL99</strong>-2P.O. Box 90 Mobile Alabama • 251-438-3411
CAUTION…NEVER USE TEFLON TAPE ON FLUID FITTINGS OR FUEL NOZZLESFIGURE 8. GENERAL ANTISEIZE LUBRICANT APPLICATIONFIGURE 9. GENERAL FUEL INJECTION SEALANT APPLICATIONISSUED REVISED PAGE NO REVISIONMO DAY YEAR MO DAY YEAR 17 of 28 A03 29 99 08 27 2002<strong>SIL99</strong>-2P.O. Box 90 Mobile Alabama • 251-438-3411
FIGURE 10. THREADING DIAGRAM FOR 640741, 640766A2, A5, A8, A9,652019, 652019A1, 652088A2, A3, A4, A5, A6 SCAVENGE PUMP BODIES USEDON STARTER ADAPTERS 642087A27, A31, A35, A41, A47, A51, A55 ANDCORRESPONDING 0.015 OVERSIZE ADAPTERS1. Use full strength, non thinned, aviationPermatex Grade 3D. shake or mix well beforeusing.2. Apply Permatex to the surface to be threadedusing short light brush strokes until an even,thin coat is obtained. the Permatex should beviscous enough that most of the brush marksdisappear, if not, use a new can of Permatex.Allow the Permatex to dry to a tacky conditionbefore threading.3. Apply a thin translucent coat of TCM GasketMaker P/N 646942 not to exceed .010 inch thickto all mating areas on non threaded part.4. Apply silk thread part number 641543 andposition as shown by dashed lines.5. Assemble and torque as soon as possible inaccordance with the applicable overhaulmanual.ISSUED REVISED PAGE NO REVISIONMO DAY YEAR MO DAY YEAR 18 of 28 A03 29 99 08 27 2002<strong>SIL99</strong>-2P.O. Box 90 Mobile Alabama • 251-438-3411
FIGURE 11. THREADING DIAGRAM FOR 639407, 640194 SCAVENGE PUMP BODIESUSED ON STARTER ADAPTERS 642085A2 THROUGH A9, A11 THROUGH A16 ANDCORRESPONDING 0.015 OVERSIZE ADAPTERS1. Use full strength, non thinned, aviationPermatex Grade 3D. shake or mix well beforeusing.2. Apply Permatex to the surface to be threadedusing short light brush strokes until an even,thin coat is obtained. the Permatex should beviscous enough that most of the brush marksdisappear, if not, use a new can of Permatex.Allow the Permatex to dry to a tacky conditionbefore threading.3. Apply a thin translucent coat of TCM GasketMaker P/N 646942 not to exceed .010 inch thickto all mating areas on non threaded part.4. Apply silk thread part number 641543 andposition as shown by dashed lines.5. Assemble and torque as soon as possible inaccordance with the applicable overhaulmanual.ISSUED REVISED PAGE NO REVISIONMO DAY YEAR MO DAY YEAR 19 of 28 A03 29 99 08 27 2002<strong>SIL99</strong>-2P.O. Box 90 Mobile Alabama • 251-438-3411
FIGURE 12. THREADING DIAGRAM USED ON OIL PUMP ASSEMBLIES 632623A16,A17, A20, A21, A22, A24, A25, A26, A27 AND A281. Use full strength, non thinned, aviationPermatex Grade 3D. shake or mix well beforeusing.2. Apply Permatex to the surface to be threadedusing short light brush strokes until an even,thin coat is obtained. the Permatex should beviscous enough that most of the brush marksdisappear, if not, use a new can of Permatex.Allow the Permatex to dry to a tacky conditionbefore threading.3. Apply a thin translucent coat of TCM GasketMaker P/N 646942 not to exceed .010 inch thickto all mating areas on non threaded part.4. Apply silk thread part number 641543 andposition as shown by dashed lines.5. Assemble and torque as soon as possible inaccordance with the applicable overhaulmanual.ISSUED REVISED PAGE NO REVISIONMO DAY YEAR MO DAY YEAR 20 of 28 A03 29 99 08 27 2002<strong>SIL99</strong>-2P.O. Box 90 Mobile Alabama • 251-438-3411
FIGURE 13. THREADING DIAGRAM USED ON OIL PUMP ASSEMBLIES 632563A5-0,A25, A26, A27, A28, A29, A30, A31, A35, A36 AND A381. Use full strength, non thinned, aviationPermatex Grade 3D. shake or mix well beforeusing.2. Apply Permatex to the surface to be threadedusing short light brush strokes until an even,thin coat is obtained. the Permatex should beviscous enough that most of the brush marksdisappear, if not, use a new can of Permatex.Allow the Permatex to dry to a tacky conditionbefore threading.3. Apply a thin translucent coat of TCM GasketMaker P/N 646942 not to exceed .010 inch thickto all mating areas on non threaded part.4. Apply silk thread part number 641543 andposition as shown by dashed lines.5. Assemble and torque as soon as possible inaccordance with the applicable overhaulmanual.ISSUED REVISED PAGE NO REVISIONMO DAY YEAR MO DAY YEAR 21 of 28 A03 29 99 08 27 2002<strong>SIL99</strong>-2P.O. Box 90 Mobile Alabama • 251-438-3411
FIGURE 14. THREADING DIAGRAM USED ON OIL PUMP ASSEMBLIES 646194A1,653536A1, A2 AND 655121A11. Use full strength, non thinned, aviationPermatex Grade 3D. shake or mix well beforeusing.2. Apply Permatex to the surface to be threadedusing short light brush strokes until an even,thin coat is obtained. the Permatex should beviscous enough that most of the brush marksdisappear, if not, use a new can of Permatex.Allow the Permatex to dry to a tacky conditionbefore threading.3. Apply a thin translucent coat of TCM GasketMaker P/N 646942 not to exceed .010 inch thickto all mating areas on non threaded part.4. Apply silk thread part number 641543 andposition as shown by dashed lines.5. Assemble and torque as soon as possible inaccordance with the applicable overhaulmanual.ISSUED REVISED PAGE NO REVISIONMO DAY YEAR MO DAY YEAR 22 of 28 A03 29 99 08 27 2002<strong>SIL99</strong>-2P.O. Box 90 Mobile Alabama • 251-438-3411
FIGURE 15. THREADING DIAGRAM USED ON OIL PUMP ASSEMBLIES 637709637709-2 AND 6416021. Use full strength, non thinned, aviationPermatex Grade 3D. shake or mix well beforeusing.2. Apply Permatex to the surface to be threadedusing short light brush strokes until an even,thin coat is obtained. the Permatex should beviscous enough that most of the brush marksdisappear, if not, use a new can of Permatex.Allow the Permatex to dry to a tacky conditionbefore threading.3. Apply a thin translucent coat of TCM GasketMaker P/N 646942 not to exceed .010 inch thickto all mating areas on non threaded part.4. Apply silk thread part number 641543 andposition as shown by dashed lines.5. Assemble and torque as soon as possible inaccordance with the applicable overhaulmanual.ISSUED REVISED PAGE NO REVISIONMO DAY YEAR MO DAY YEAR 23 of 28 A03 29 99 08 27 2002<strong>SIL99</strong>-2P.O. Box 90 Mobile Alabama • 251-438-3411
FIGURE 16. THREADING DIAGRAM USED ON OIL PUMP ASSEMBLIES 643716A3, A4643717-1, 653358A2, A3, A4, A5, 655119A2, A31. Use full strength, non thinned, aviationPermatex Grade 3D. shake or mix well beforeusing.2. Apply Permatex to the surface to be threadedusing short light brush strokes until an even,thin coat is obtained. the Permatex should beviscous enough that most of the brush marksdisappear, if not, use a new can of Permatex.Allow the Permatex to dry to a tacky conditionbefore threading.3. Apply a thin translucent coat of TCM GasketMaker P/N 646942 not to exceed .010 inch thickto all mating areas on non threaded part.4. Apply silk thread part number 641543 andposition as shown by dashed lines.5. Assemble and torque as soon as possible inaccordance with the applicable overhaulmanual.ISSUED REVISED PAGE NO REVISIONMO DAY YEAR MO DAY YEAR 24 of 28 A03 29 99 08 27 2002<strong>SIL99</strong>-2P.O. Box 90 Mobile Alabama • 251-438-3411
FIGURE 17. THREADING DIAGRAM USED ON OIL PUMP ASSEMBLIES 643716A3, A4,643717-1, 643743-1A1, 643778, 643778-1, 643779, 653494A2, 653538A2, A3, A4, A5, 653542,65354<strong>2A</strong>1, 653553, 655117A2, 655119A2, A3, 655124, 655127 AND 655127A11. Use full strength, non thinned, aviationPermatex Grade 3D. shake or mix well beforeusing.2. Apply Permatex to the surface to be threadedusing short light brush strokes until an even,thin coat is obtained. the Permatex should beviscous enough that most of the brush marksdisappear, if not, use a new can of Permatex.Allow the Permatex to dry to a tacky conditionbefore threading.3. Apply a thin translucent coat of TCM GasketMaker P/N 646942 not to exceed .010 inch thickto all mating areas on non threaded part.4. Apply silk thread part number 641543 andposition as shown by dashed lines.5. Assemble and torque as soon as possible inaccordance with the applicable overhaulmanual.ISSUED REVISED PAGE NO REVISIONMO DAY YEAR MO DAY YEAR 25 of 28 A03 29 99 08 27 2002<strong>SIL99</strong>-2P.O. Box 90 Mobile Alabama • 251-438-3411
FIGURE 18. THREADING DIAGRAM USED ON OIL PUMP ASSEMBLIES 632970,632977A4, A5, A6, A7, A8, A9, A10, A11, A12 AND 6544371. Use full strength, non thinned, aviationPermatex Grade 3D. shake or mix well beforeusing.2. Apply Permatex to the surface to be threadedusing short light brush strokes until an even,thin coat is obtained. the Permatex should beviscous enough that most of the brush marksdisappear, if not, use a new can of Permatex.Allow the Permatex to dry to a tacky conditionbefore threading.3. Apply a thin translucent coat of TCM GasketMaker P/N 646942 not to exceed .010 inch thickto all mating areas on non threaded part.4. Apply silk thread part number 641543 andposition as shown by dashed lines.5. Assemble and torque as soon as possible inaccordance with the applicable overhaulmanual.ISSUED REVISED PAGE NO REVISIONMO DAY YEAR MO DAY YEAR 26 of 28 A03 29 99 08 27 2002<strong>SIL99</strong>-2P.O. Box 90 Mobile Alabama • 251-438-3411
FIGURE 19. THREADING DIAGRAM USED ON STARTER ADAPTER ASSEMBLIES641348A7, 641348A11, 641348A12, 653074A2, 653074A2M015, 653074A3, 653074A4, 653074A4M015,653074A6, 653074A7, 653074A7M015, 653074A8, 653074A8M015, 653074A9, 653074A9M015, 653074A10,653074A11, 653074A11M015, 653074A12, 653074A12M015, 653074A14, 653074A14M015, 653074A15,653074A16, 653074A16M015, 653074A17, 653074A17M015, 653074A19, 653074A19M015, 653074A20,653074A21, 653074A21M015, 653074A22, 653074A22M015, 653074A23, 653074A25, 653074A26,653074A26M015, 653074A27, 653074A28, 653074A28M015, 653074A29, 653074A29M015, 653074A30,653074A30M015, 653074A31, 653074A31M015, 653074A32, 653074A32M015, 653074A33, 653074A34,653074A34M015, 653074A38, 653074A38M015, 653074A39, 653074A40, 653074A40M015, 653074A41,653074A41M015, 653074A42, 653074A42M015, 653074A44, 653074A44M015, 653074A43, 653074A43M015,653074A45, 653074A46 AND 653074A46M015INSTALLATION:After permatex and thread have been applied to thestarter adapter in accordance with the aboveillustration and prior to installation, apply a thincoat of blue loctite gasket maker to the accessorycase, starter adapter mounting flange. Temporarilyinstall the starter adapter to make an impression ofthe thread on the accessory case. Carefully removethe starter adapter so that the shaft gear does notpull out. Inspect the thread impression for 100%contact between the adapter and accessory case.Wipe excess gasket maker off of accessory case andinstall starter adapter in accordance with theapplicable overhaul instructions.ISSUED REVISED PAGE NO REVISIONMO DAY YEAR MO DAY YEAR 27 of 28 A03 29 99 08 27 2002<strong>SIL99</strong>-2P.O. Box 90 Mobile Alabama • 251-438-3411
FIGURE 20. ACCESSORY DRIVE ADAPTER THREADING PROCEDURE FORSTARTER ADAPTER ASSEMBLIES: 641348A7, 641348A11, 641348A12, 653074A2, 653074A2M015,653074A3, 653074A4, 653074A4M015, 653074A6, 653074A7, 653074A7M015, 653074A8, 653074A8M015,653074A9, 653074A9M015, 653074A10, 653074A11, 653074A11M015, 653074A12, 653074A12M015,653074A14, 653074A14M015, 653074A15, 653074A16, 653074A16M015, 653074A17, 653074A17M015,653074A19, 653074A19M015, 653074A20, 653074A21, 653074A21M015, 653074A22, 653074A22M015,653074A23, 653074A25, 653074A26, 653074A26M015, 653074A27, 653074A28, 653074A28M015, 653074A29,653074A29M015, 653074A30, 653074A30M015, 653074A31, 653074A31M015, 653074A32, 653074A32M015,653074A33, 653074A34, 653074A34M015, 653074A38, 653074A38M015, 653074A39, 653074A40,653074A40M015, 653074A41, 653074A41M015, 653074A42, 653074A42M015, 653074A44, 653074A44M015,653074A43, 653074A43M015, 653074A45, 653074A46 AND 653074A46M0151. Use full strength, non thinned, aviationPermatex Grade 3D. shake or mix well beforeusing.2. Apply Permatex to the surface to be threadedusing short light brush strokes until an even,thin coat is obtained. the Permatex should beviscous enough that most of the brush marksdisappear, if not, use a new can of Permatex.Allow the Permatex to dry to a tacky conditionbefore threading.3. Apply a thin translucent coat of TCM GasketMaker P/N 646942 not to exceed .010 inch thickto all mating areas on non threaded part.4. Apply silk thread part number 641543 andposition as shown by dashed lines.5. Assemble and torque as soon as possible inaccordance with the applicable overhaulmanual.ISSUED REVISED PAGE NO REVISIONMO DAY YEAR MO DAY YEAR 28 of 28 A03 29 99 08 27 2002<strong>SIL99</strong>-2P.O. Box 90 Mobile Alabama • 251-438-3411


