Image 628 - Rick English - Swimming Pool Consultant
Image 628 - Rick English - Swimming Pool Consultant
Image 628 - Rick English - Swimming Pool Consultant
Create successful ePaper yourself
Turn your PDF publications into a flip-book with our unique Google optimized e-Paper software.
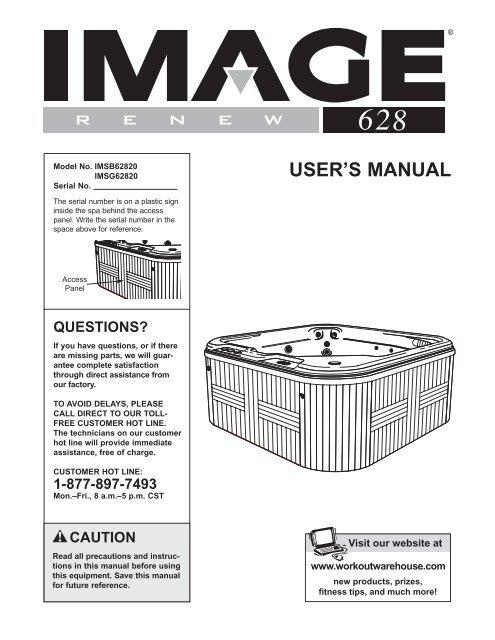
®Model No. IMSB<strong>628</strong>20IMSG<strong>628</strong>20Serial No.USER’S MANUALThe serial number is on a plastic signinside the spa behind the accesspanel. Write the serial number in thespace above for reference.AccessPanelQUESTIONS?If you have questions, or if thereare missing parts, we will guaranteecomplete satisfactionthrough direct assistance fromour factory.TO AVOID DELAYS, PLEASECALL DIRECT TO OUR TOLL-FREE CUSTOMER HOT LINE.The technicians on our customerhot line will provide immediateassistance, free of charge.CUSTOMER HOT LINE:1-877-897-7493Mon.–Fri., 8 a.m.–5 p.m. CSTCAUTIONRead all precautions and instructionsin this manual before usingthis equipment. Save this manualfor future reference.Visit our website atwww.workoutwarehouse.comnew products, prizes,fitness tips, and much more!
Table of ContentsPosting the Warning Sign . . . . . . . . . . . . . . . . . . . . . . . . . . . . . . . . . . . . . . . . . . . . . . . . . . . . . . . . . . . . . . . . 2Important Safety Instructions . . . . . . . . . . . . . . . . . . . . . . . . . . . . . . . . . . . . . . . . . . . . . . . . . . . . . . . . . . . . . . 3Before You Begin . . . . . . . . . . . . . . . . . . . . . . . . . . . . . . . . . . . . . . . . . . . . . . . . . . . . . . . . . . . . . . . . . . . . . . 6Choosing a Location for the Hydrotherapy Spa . . . . . . . . . . . . . . . . . . . . . . . . . . . . . . . . . . . . . . . . . . . . . . . . 7Assembly . . . . . . . . . . . . . . . . . . . . . . . . . . . . . . . . . . . . . . . . . . . . . . . . . . . . . . . . . . . . . . . . . . . . . . . . . . . . 8Using the Hydrotherapy Spa . . . . . . . . . . . . . . . . . . . . . . . . . . . . . . . . . . . . . . . . . . . . . . . . . . . . . . . . . . . . . 10Spa Shell Diagram . . . . . . . . . . . . . . . . . . . . . . . . . . . . . . . . . . . . . . . . . . . . . . . . . . . . . . . . . . . . . . . . . . . . 11Using the Controls . . . . . . . . . . . . . . . . . . . . . . . . . . . . . . . . . . . . . . . . . . . . . . . . . . . . . . . . . . . . . . . . . . . . 12Maintenance . . . . . . . . . . . . . . . . . . . . . . . . . . . . . . . . . . . . . . . . . . . . . . . . . . . . . . . . . . . . . . . . . . . . . . . . . 13Troubleshooting . . . . . . . . . . . . . . . . . . . . . . . . . . . . . . . . . . . . . . . . . . . . . . . . . . . . . . . . . . . . . . . . . . . . . . 16Part List . . . . . . . . . . . . . . . . . . . . . . . . . . . . . . . . . . . . . . . . . . . . . . . . . . . . . . . . . . . . . . . . . . . . . . . . . . . . 18Exploded Drawing . . . . . . . . . . . . . . . . . . . . . . . . . . . . . . . . . . . . . . . . . . . . . . . . . . . . . . . . . . . . . . . . . . . . . 19Ordering Replacement Parts . . . . . . . . . . . . . . . . . . . . . . . . . . . . . . . . . . . . . . . . . . . . . . . . . . . . . . Back CoverLimited Warranty . . . . . . . . . . . . . . . . . . . . . . . . . . . . . . . . . . . . . . . . . . . . . . . . . . . . . . . . . . . . . . . Back CoverPosting the Warning SignThe warning sign, shown below, must be posted on a wall or fence where it will be visible to all users of thehydrotherapy spa. Whenever the spa is moved, the sign must also be moved and reposted near the spa. If thesign becomes lost or illegible, call our toll-free Customer Hot Line at 1-877-897-7493 to obtain a replacementsign. Post the sign as described above.WESLO is a registered trademark of ICON Health & Fitness, Inc.2
Important Safety InstructionsWARNING: To reduce the risk of drowning, electric shock, or serious injury, read the followingimportant precautions before using the hydrotherapy spa.READ AND FOLLOW ALL INSTRUCTIONS1. It is the responsibility of the owner to ensurethat all users of the hydrotherapy spa areadequately informed of all precautions.2. Use the hydrotherapy spa only as describedin this manual.3. The hydrotherapy spa is intended for homeuse only. Do not use the spa in a commercial,rental, or institutional setting.4. Use the hydrotherapy spa only on a level surface.Do not use the spa on carpet or othermaterials that could be damaged by moisture.5. The hydrotherapy spa will weigh approximately2,900 pounds when it is filled withwater. Make sure that the location you selectfor the spa will support this weight, plus theweight of the occupants.6. Inspect and tighten all parts regularly.Replace any worn parts immediately.7. DANGER—Risk of injury: Do not remove oralter the covers on the suction fittings. Neveroperate the hydrotherapy spa if the suctionguard is missing or broken. If you need toreplace a suction fitting or pump, make sureyou use only manufacturer recommendedreplacement parts. Keep hair and body partsaway from the suction guard. Do not allowlong hair to float freely in the water; long hairshould be restrained with a bathing cap.8. IMPORTANT: Do not allow the hydrotherapyspa to be exposed to direct sunlight when itis empty. The surface of the spa shell canreach temperatures as high as 150°F in a matterof minutes if exposed to the sun while it isempty. These high temperatures can causesignificant damage, such as blistering of theshell surface and warping of the spa shell.Any damage caused by sun exposure is notcovered under the warranty.9. Do not bring any object into the hydrotherapyspa that could damage the spa shell.10. Never insert any object into any opening.11. Do not use breakable containers in or nearthe hydrotherapy spa.12. Do not sit on the spa cover or place objectson it; it is not designed to support weight.13. Remove any water or debris that may collecton the spa cover.14. Keep children under the age of 12 and petsaway from the hydrotherapy spa when it isnot in use.15. Keep all chemicals away from children andpets.16. The pH and chemical balance of the watermust be maintained as explained in this manual(see pages 10 and 14). Failure to do somay cause injury to users or damage to thehydrotherapy spa, and will void the warranty.17. Individuals with infections and open sores orwounds should not use the hydrotherapyspa. Bacteria thrive in warm and hot water.Always keep your spa disinfected and maintainthe proper chemical balance.18. Shower before and after using the hydrotherapyspa. This will remove any deodorant, perspiration,or body oils that could contaminatethe water. Showering after will remove anyresidual chemicals and any bacteria that mayhave been in the spa.19. WARNING—The Ground Fault CircuitInterrupter (GFCI), must be tested beforeeach use. To test the GFCI, press the “test”button while the hydrotherapy spa is running.The spa should shut off. Press the “reset”button. The spa should resume normal operation.If the spa continues to run after the“test” button is pressed, then the GFCI isdamaged. Do not use the spa until the GFCIhas been repaired or replaced by a qualifiedelectrician.3
20. DANGER—Risk of electric shock. Keep allelectrical appliances such as radios, telephones,televisions, and lights at least fivefeet away from the water.21. A wire connector is provided on the electronicspack of the hydrotherapy spa to connect aminimum No. 6 AWG (13.3 mm 2 ) solid copperconductor between the spa and any metalequipment, electrical enclosure made ofmetal, metal water pipes, or conduit withinfive feet of the spa.22. DANGER—Risk of electric shock: Do not setthe hydrotherapy spa within five feet of anymetal objects or surfaces. As an alternative,you may use the spa within five feet of metalobjects if each metal object is permanentlyconnected to the wire connector on the electronicspack of the spa by a minimum No. 6AWG (13.3 mm 2 ) solid copper conductor (seeinstruction 21).23. Do not operate the pump motor when thehydrotherapy spa is empty. The pump motormay be seriously damaged if it is operatedwithout water circulating.24. DANGER—Risk of drowning: Exerciseextreme caution to prevent unauthorized andunsupervised use of the hydrotherapy spa bychildren. Children must always be supervised.25. DANGER—To reduce the risk of drowning:• Never use the hydrotherapy spa alone.• Children should not use the spa unless theyare supervised by an adult.• Keep pets away from the spa at all times.• Always replace and lock the spa cover whenthe spa is not in use.26. WARNING—To reduce the risk of injury: Thewater temperature should never exceed104°F. Temperatures between 100°F and 104°Fare considered to be safe for healthy adults.However, if you plan to remain in the hydrotherapyspa for more than 10 to 15 minutes, alower temperature is recommended. Lowertemperatures are also recommended for children.Children should not be allowed to swimunder the surface of the water in the spa.27. WARNING—To reduce the risk of injury:Before entering the hydrotherapy spa, alwaysuse an accurate thermometer to determinethe water temperature.28. WARNING—To reduce the risk of injury:Pregnant women should consult with theirphysician before using the hydrotherapy spa.Pregnant women should not use the spa ifthe water temperature is above 100°F; theunborn child could be seriously harmed. Thisis especially important during the first 90days of the pregnancy.29. DANGER—To reduce the risk of drowning:Prolonged immersion in the hydrotherapy spamay cause hyperthermia. The causes, symptomsand effects of hyperthermia may bedescribed as follows: Hyperthermia occurswhen the internal temperature of the bodyreaches a level several degrees above thenormal body temperature of 98.6°F. The symptomsof hyperthermia include an increase inthe internal temperature of the body, dizziness,lethargy, drowsiness and fainting. Theeffects of hyperthermia include failure to perceiveheat; failure to recognize the need toexit the spa or hot tub; unawareness ofimpending hazard; fetal damage in pregnantwomen; physical inability to exit the spa orhot tub and unconsciousness resulting indanger of drowning. WARNING: The use ofalcohol, drugs or medication can greatlyincrease the risk of fatal hyperthermia.30. WARNING—To reduce the risk of drowning:Do not use the hydrotherapy spa if you areunder the influence of alcohol or drugs. Heatfrom the water, in conjunction with alcohol ordrugs, can cause loss of consciousness.31. WARNING—To reduce the risk of injury ordrowning: Consult your physician about possibleside-effects of any medications you maybe taking before using the hydrotherapy spa.Heat from the water, in conjunction with somemedications, may cause drowsiness andincrease the risk of drowning. Other medicationscan effect blood pressure, heart rate,and circulation.32. Do not use the hydrotherapy spa immediatelyafter strenuous exercise.33. If you feel pain or dizziness at any time whileusing the hydrotherapy spa, discontinue useand contact a physician.34. WARNING—To reduce the risk of injury: It isespecially important for persons over the ageof 35 or persons with pre-existing healthproblems, such as obesity, heart disease,high or low blood pressure, circulatory problems,or diabetes to consult their physicianbefore using the hydrotherapy spa.4
35. WARNING: The spa jets produce a stream ofwater with relatively high pressure. Prolongedexposure of a localized area of the body maycause bruises to the skin.36. The included warning sign must be postedwhere all users of the hydrotherapy spa cansee and read it. (See POSTING THE WARNINGSIGN on page 2.)37. WARNING DECAL PLACEMENT: Locate thedecals shown below and familiarize yourselfwith the information on the decals.WARNING: Read all instructions before using the hydrotherapy spa. ICON assumes noresponsibility for personal injury or property damage sustained by or through the use of this product.SAVE THESE INSTRUCTIONS5
Before You BeginThank you for selecting the innovative RENEW <strong>628</strong>hydrotherapy spa by IMAGE ® . The RENEW <strong>628</strong>hydrotherapy spa offers the features and quality of atraditional hot tub at an affordable price, giving you thebenefits of hydrotherapy in the comfort and privacy ofyour own home.Hydrotherapy is a proven method for soothing tiredmuscles after exercise or for relieving the stress of abusy life. The warm environment stimulates blood flow,which is essential in the healing process, and the powerfulmassage action further eases tension and stress.The RENEW <strong>628</strong> hydrotherapy spa gives you the specializedtreatment you need to feel your best.For your safety and benefit, read this manual carefullybefore using the RENEW <strong>628</strong>. If you have additionalquestions, please call our Customer ServiceDepartment toll-free at 1-877-897-7493, Mondaythrough Friday, 5 a.m. until 8 p.m. Central Time(excluding holidays). To help us assist you, pleasenote the product model number and serial numberbefore calling. The model number is IMSB<strong>628</strong>20 orIMSG<strong>628</strong>20. The serial number can be found on adecal attached to the frame inside the spa (see thefront cover of this user’s manual).Before reading further, please familiarize yourself withthe parts that are labeled in the drawing below.JetsAir ControlsConsoleSpa ShellJetFilterAccess PanelPanelLocking BuckleCorner Panel6
Choosing a Location for the Hydrotherapy SpaThere are many factors to consider when choosing a location to set up the hydrotherapy spa. These factors varydepending on whether you plan to use the spa inside or outside. We have listed several factors you may wish toconsider as you decide where to set up the spa.If you set up the hydrotherapy spa inside:1. The spa will increase the level of humidity in yourhome. The location you choose should be wellventilated. You may need to install a ventilation fanor use a dehumidifier.2. The spa should be located near a 240-volt powersource. It must be wired directly into a groundedcircuit with a Ground Fault Circuit Interrupter(GFCI) capable of carrying 30 amps. No otherappliance should be on the same circuit.3. The spa should be close to a source of water.4. Do not use the spa on carpet or other material thatmay be damaged by moisture. We recommendthat you place the spa on a water- and stain-resistant,non-slip surface with a floor drain for anywater that may splash from the spa.5. Be sure that the location you choose is stable. Itmust be able to support the weight of the spawhen it is filled with water, plus the weight of theoccupants. The spa weighs approximately 2,900pounds when it is filled with water.6. Do not use the spa above a finished living area,due to the risk of water damage.7. Be sure that there is room around the spa to permitservicing of the unit. The dimensions of the spaare 84” W x 84” L x 36” H. You should allow for thissize when choosing the location.8. The spa is not designed for in-floor installation.However, it is compatible with a deck system thatis built flush with the top of the spa, provided youleave access to the motor for service.9. Be sure to note any other considerations, such asaesthetics or privacy concerns, that may affect thesafety or enjoyment of using the spa.If you set up the hydrotherapy spa outside:1. Check local building codes concerning the use ofoutdoor spas.2. The spa should be located near a 240-volt powersource. It must be wired directly into a groundedcircuit with a Ground Fault Circuit Interrupter(GFCI) capable of carrying 30 amps. No otherappliance should be on the same circuit.3. The spa should be close to a source of water.4. We recommend that you place the spa on a waterandstain-resistant, non-slip surface. Do not usethe spa on rough or sharp surfaces such as gravelor wood chips.5. Be sure that the location you choose is stable. Itmust be able to support the weight of the spawhen it is filled with water, plus the weight of theoccupants. The spa weighs approximately 2,900pounds when it is filled with water.6. Consider environmental factors such as rain, wind,shade, sunlight, and so forth.7. You should be able to monitor the use of the spafrom your home, to prevent unauthorized use bychildren. You may want to enclose the spa with afence and self-latching gate to prevent unauthorizeduse.8. Be sure that there is room around the spa to permitservicing of the unit. The dimensions of the spaare 84” W x 84” L x 36” H. You should allow for thissize when choosing the location.9. The spa is not designed to be installed belowground level. However, it is compatible with a decksystem that is built flush with the top of the spa,provided you leave access to the motor for service.10.Be sure to note any other considerations, such asaesthetics or privacy concerns, that may affect thesafety or enjoyment of using the spa.7
AssemblyBefore beginning assembly, carefully read thefollowing information and instructions:• Place all parts in a cleared area and remove thepacking materials from the spa shell. Do not disposeof the packing materials until assembly iscompleted and the spa is operating.• During assembly, make sure that all parts areoriented as shown in the drawings.• Read each assembly step before you begin.• Tighten all parts as you assemble them, unlessinstructed to do otherwise.ASSEMBLY REQUIRES THE FOLLOWINGTOOLS (not included):• One phillips screwdriver• You will also need a small amount of soap anda damp cloth.A wire connector is provided on the electronicspack of the spa to connect a minimum No. 6AWG (13.3 mm 2 ) solid copper conductorbetween the spa and any metal equipment,electrical enclosure made of metal, metal waterpipes, or conduit within five feet of the spa.1. Before beginning assembly, make sure that youhave read and understand the information in thebox above and on the previous two pages.Remove the four indicated #10 x 2” Sheet MetalScrews (6). Remove the Access Panel (15) by slidingit down and then pulling the bottom away from thespa. Be careful not to damage the spa shell.1Spa Shell61562. Locate the drain hose. Make sure that the cap (notshown) is fully tightened onto the end of the drainhose.Locate the two indicated gate valves inside of thespa. Make sure that the gate valves are open andthat the locking clips are snapped onto the stems ofthe gate valves as shown in the inset drawing.2Gate ValveCollarMake sure that all of the collars such as the oneindicated are tightened.See step 1. Re-attach the Access Panel (15) withthe four #10 x 2” Sheet Metal Screws (6).Locking ClipDrainHose8
3. The hydrotherapy spa operates on a 240-volt power source and must be wired directly to a 30 amp GroundFault Circuit Interrupter (GFCI) installed in your home. This procedure must be performed by a qualified,licensed electrician. A wiring diagram is found on the inside of the electronics package for reference.Under no circumstances should the spa be wired by someone other than a qualified electrician. Beforeyou have the spa wired, make sure it is in the desired position, and that it can be easily serviced, if needed.4. Remove the two warning decals (not shown) fromthe spa shell. Using a damp cloth, wipe the spa shellclean. Before filling the spa, make sure that it isin the desired position and that there is room toservice the spa. Once the spa is filled, it willhave to be drained before it can be moved.Remove the filter cap, basket, diverter, cartridgeplug, and filter cartridge.Insert a garden hose into the filter housing and fillthe spa. Do not use soft water. The spa may befilled with cold water; however, if warm or hot wateris used, the spa will be ready for use sooner. Fill thespa until the water is at the middle of the filter housingdoor (not shown). Do not overfill the spa.Insert the filter cartridge, cartridge plug, diverter, andbasket into the filter housing. Cover the filter housingwith the filter cap.4Water LevelGardenHoseFilterHousingFilterCapBasketDiverterCartridgePlugFilterHousingFilterCartridge5. Pull down one of the straps on the Spa Cover (11)and hold the Buckle (26) against one of the premiumcedar panels on the spa. (Note: To position the Bucklecorrectly, have a second person hold the strap on theopposite side of the Spa Cover snug.) The SpaCover must be snug. Do not place the Buckle overthe grooves between the panels. Refer to the insetdrawing. Remove the latch from the Buckle (26).Attach the Buckle to the premium cedar panel withtwo #4 x 3/4” Screws (27).51127StrapLatch26Attach the other three Buckles (26) to the panels inthe same way.StrapRemove the Spa Cover (11) from the spa.269
Using the Hydrotherapy SpaThe hydrotherapy spa is designed to seat six adults.The spa holds 300 gallons of water and offers a heatingsystem (80°F to 104°F), a filtration system, andadjustable hydrotherapy jets. Follow the guidelinesbelow to use and maintain the spa for your long-termenjoyment.WIRING THE HYDROTHERAPY SPAThe hydrotherapy spa is designed to operate with a240-volt power source. It must be wired directly into agrounded circuit with a Ground Fault CircuitInterrupter (GFCI) capable of carrying 30 amps. Noother appliance should be on the same circuit.Connection of the spa to the 240-volt powersource must be performed by a qualified, licensedelectrician and must comply with all local, state,and federal electrical codes. Please refer to theinstructions on the inside of the electronics packagefor information about connecting the spa to a 240-voltpower source.Once the spa is filled with water, the power can beturned on. Note: The first time the power is turned on,the spa will start automatically.TESTING AND TREATING THE WATERThe first time you use the spa, you should test andtreat the water. You must also treat the water eachtime you refill the spa. A test strip and a chemicalpack are available at your local pool and spa store.Follow the directions carefully on the chemical pack totest and treat the water. Always keep the chemicalsaway from children and pets.See WATER CHEMISTRY on page 13 for informationconcerning proper water maintenance.STARTING THE HYDROTHERAPY SPAYou should always test the GFCI before using thehydrotherapy spa. First, turn on the spa by pressingthe pump button on the console (see USING THECONTROLS on page 12). Once the spa is running,press the GFCI “test” button. The spa should shut off.Press the “reset” button. The spa should resume normaloperation. If the spa continues to run after the“test” button is pressed, the GFCI is damaged. Do notuse the spa until the GFCI has been repaired orreplaced by a qualified electrician.Once you have tested the GFCI, you should verify thewater flow from the pumping unit. Set the air controlon the console to the lowest setting (see USING THECONTROLS on page 12). The pumping unit will heatthe water as it pumps. Cover the hydrotherapy spawith the spa cover. The spa cover must be tight(see SECURING THE SPA COVER ON THE SPAbelow). The water will heat at about 6°F per hour withthe cover on. If you are using the spa indoors, andthe room temperature is maintained at 70°F, it willtake approximately 6 to 8 hours for the water to reachthe set temperature.The temperature and the water flow can be set orchanged with the controls on the console (see USINGTHE CONTROLS on page 12).SECURING THE SPA COVER ON THE SPATo secure the spa cover,snap the latches on the spacover into the buckles on thepremium cedar panels.LatchTo lock the buckles, insertKeythe key and turn it clockwise1/4 turn. To unlock thebuckles, insert the key andturn it counterclockwise 1/4Buckleturn. Always keep thebuckles locked when thespa is not in use. Keep the keys in a safe place,out of the reach of children.10
Spa Shell DiagramJMNL1INSeat 1BCESeat 2FDFLL1NSeat 3LSeat 4MNKJHOGSeat 6Seat 5KKL1ALKA. The filter can be removed for cleaning or replacement(see CHECKING AND CLEANING THE FILTERCARTRIDGE on page 13).B. The underwater light can be used for night operation(see USING THE CONTROLS on page 12). Thespa includes both red and blue covers for the light.C. The temperature probe monitors water temperature.D. The volcano jet provides a soothing foot massage.E. The whirlpool jet diverts the water flow four ways.Turn the outer ring clockwise or counterclockwiseuntil the ring stops and you hear a click. With eachclick, the water flow is diverted as follows: to seat 3,and the jet labeled D; next, to the seats labeled 1, 4,5, and 6; next, to the whirlpool jet; and then to allthe jets and seats. Note: The outer ring may behard to turn while the pump is turned on high.F. The two suction covers provide water to the pump.Never operate the spa without the suction covers inplace over the fittings.G. The ozone jet provides ozone sanitation to the spa.The ozone generator engages during the spa’s filtrationcycles to destroy algae, viruses, and bacteriawhile breaking down chemicals and solids for easyremoval by the filtration system. Ozone oxidizes combinedchlorine and bromine, freeing them to be continuouslyre-used, reducing the chemical needs andcosts of the spa’s sanitation.H. The console controls the spa jets, turns the underwaterlight on and off, and adjusts the water temperaturesetting (see USING THE CONTROLS on page 12).I. The three air controls regulate the air flow to thehydrotherapy jets.J. The four neck jets can be adjusted to spray soothingwater on your neck.K. The nine rotary jets provide a spinning massage.L. The six dual rotary jets provide a pulsating massageaction. Rotate the outer ring counterclockwise toturn the jets on. Rotate the outer ring clockwise toturn the jets off. The jets labeled L1 are always onregardless of the position of the whirlpool jet (E).M. The two power massage jets provides a soothingmassage to your lower back. Turn the outer ring toregulate the flow.N. The four adjustable, directional jets can be pivotedto direct their water flow. To open the jets, turn theouter rings counterclockwise; to close the jets, turn theouter rings clockwise. If no air flows through the jets,turn the jets counterclockwise. Close the jets toincrease the water pressure to other jets.O. The skimmer cleans the surface of the water.11
Using the ControlsAir ControlsDisplayTempUpPumpButtonLightButtonTempDownRefer to the diagram above. The function of eachcontrol is explained below:Temperature Buttons: Control the temperature settingof the water. The temperature can be set from 80°F to104°F. The water heats at about 6°F per hour with thecover on. Use a medical or other accurate thermometerto check the temperature of the water.To change the water temperature, push either thetemp up or temp down button until the desired temperatureis reached.If the letters OH, FL, or Sn appear in the display, referto page 17.Pump Button: Turns the spa jets on and off. This is atwo-speed button. If the button is pressed once, thespa jets will run at low speed, providing gentlehydrotherapy. If the button is pressed twice, the spajets will run at high speed, providing moderate-pressurehydrotherapy. If the button is pressed again, thejets will shut off.The spa also features an automatic mode that heatsand filters the water when the spa is left unattended.When the power to the spa is first turned on, or if thewater temperature is below the set temperature, thewater will be heated as required to maintain the settemperature. Note: To keep the filter and heatcycles from running, the power to the spa must beturned off.Light Button: Turns the underwater light on and off.Air Controls: Determine the amount of air flowingthrough the spa jets. If a control is turned counterclockwise,the amount of air flowing through the jetswill increase; if a control is turned clockwise, theamount of air will decrease. Test each of the air controlsto determine which jets are controlled by whichair control.12
MaintenanceThe hydrotherapy spa is designed to provide years ofenjoyment. Please follow the guidelines below toproperly maintain your spa.MAINTENANCE SCHEDULEDaily• Check the water level and refill the spa to the levelshown in step 4 on page 9.• Check the pH balance and sanitizer level. Adjust ifnecessary (see WATER CHEMISTRY on page 14).Weekly• Clean the spa shell at the waterline.• Check and thoroughly clean the filter (see CHECK-ING AND CLEANING THE FILTER CARTRIDGE onthis page).• Replace the filter cartridge if needed (see ORDER-ING REPLACEMENT PARTS on the back cover).Monthly• Clean the spa cover (see MAINTAINING THE SPACOVER on this page).• Soak the filter for two hours in a trisodium phosphate(TSP) solution. Rinse the filter in clean water.• Replace the filter if needed (see ORDERINGREPLACEMENT PARTS on the back cover).Every Three Months• Drain the spa and refill it with clean water. Sanitizeand test the pH of the water.• Check for any leaks around the pump or joints inthe pipes. The seals will wear out over time; detectingleaks early can reduce repair costs.• Clean the interior of the spa. Do not use solvents orwaxes.MAINTAINING THE SPA EXTERIORThe premium cedar surround has been treated at thefactory. For information and supplies to maintain thebeauty and color of the premium cedar surround, contactyour local pool and spa supply store.CLEANING THE SPA SHELLThe spa shell should be cleaned with a mild soapsolution; do not use solvents. The spa should alwaysbe clean and dry before being moved or stored.MAINTAINING THE SPA COVERThe spa cover should be cleaned monthly. To cleanthe spa cover, use water and a non-abrasive cleaneron the entire cover. Rinse the cover with a gardenhose to remove any cleaner residue. Dry the coverentirely. Use a non-silicone-based vinyl conditioner onthe cover after you clean it. This will help protect thecover from sun damage.CHECKING AND CLEANING THE FILTERCARTRIDGEThe filter cartridge should be checked periodically forbuild-up of dirt and oil. If the cartridge needs to becleaned, follow the steps below:1. Turn off the power.2. Remove the filtercover.3. Remove basket,diverter, cartridgeplug, and filter cartridgefrom the filterhousing.4. Check the filter cartridgefor dirt anddebris. If the cartridgeneeds to becleaned, rinse it witha hose. If the cartridgeis still dirty,soak it in cleaning solution from a pool and spasupply store.5. Inspect the filter cartridge for damage. Replace thecartridge if it is damaged.6. Insert the cleaned or new filter cartridge into the filterhousing.7. Re-attach the filter cover.WATER CHEMISTRYFilterCapBasketDiverterCartridgePlugFilterHousingFilterCartridgeThe maintenance of the pH level is very important tothe operation of the spa. To maintain the proper pHlevel and to sanitize the spa, you can purchase achemical starter kit from your local pool and spa supplystore.CAUTION: The chemicals used to maintain the pHbalance of the water and to sanitize the water canbe dangerous. Always follow these basic guidelineswhen handling the chemicals:1. Always read and follow the directions on thelabel, unless directed otherwise.2. Never mix different chemicals.3. Do not exceed the recommended amounts ofchemicals—follow the directions on the labelclosely.4. Keep all chemicals out of the reach of childrenand pets.13
5. Keep containers closed tightly when not in use.6. Never add water to the chemicals—always addthe chemicals to the water as directed.7. Always store chemicals in a cool, dry place.MAINTAINING THE PROPER PH BALANCEThe pH factor is a measure of the relative acidity oralkalinity in the water, and is measured on a scale of1 to 14. Pure water has a value of 7, which is neutral.Any value above 7 is alkaline, and any value below 7is acidic. You should maintain a slightly alkaline pHlevel, between 7.2 and 7.8, in the hydrotherapy spa.Severe problems can occur when the pH balance isnot maintained within this range. If the pH levelexceeds 7.8, dissolved minerals can build up and clogthe plumbing in the spa jet unit. If the pH level fallsbelow 7.2, the acid level in the water will begin to corrodethe metal parts in the spa jet unit. Also, the sanitationagents in the water will not be effective if the pHlevel is not properly maintained. Damage caused byimproper pH levels is not covered under the warranty.To maintain the proper pH level, test the pH of thewater regularly. To test the water, purchase a pH testkit at a pool and spa supply store. The pH readingshould be between 7.2 and 7.8. If the level is too low,add a pH increaser (usually soda ash). If the level istoo high, add a pH reducer (usually sodium bisulfate).Test the water again after five minutes. See theinstructions with your pH test kit for additional informationabout testing and adjusting the pH.SANITIZING THE HYDROTHERAPY SPAThe most common sanitizing agent is a solid bromineconcentrate. The amount required varies according toseveral factors, such as user load, temperature, andwater conditions. Proper water maintenance is a complexprocess. Contact your local pool and spa supplierfor information concerning which chemicals youshould use in your area to sanitize the spa.CHANGING THE FILTER CYCLEThe spa will filter the water every 12 hours. The durationof the cycle can be adjusted to last 2 to 5 hours.Press the temperature up or temperature down buttonon the console. When the display begins to flash,press the pump button. The display will read F2. Tochange the time, press the temp up button until thedesired time is reached. Press the pump button toconfirm the selection. As spa usage increases, theduration of the filter cycle may need to be increased.REMOVING AND ATTACHING THE ACCESS PANELTo locate the access panels, refer to the drawing onpage 6. Turn off the power to the spa. To remove anaccess panel, first remove the four indicated screws.Slide the access panel down and then pull the bottomof it away from the spa. Note: Be careful not todamage the spa shell as you remove the accesspanel.ScrewAccessPanelScrewTo re-attach the access panel, insert the top of theaccess panel under the edge of the spa shell. Slidethe access panel up until the bottom of the accesspanel clears the trim along the bottom of the spa.Then, slide the access panel into place and re-attachit with the four screws.DRAINING THE HYDROTHERAPY SPAThe hydrotherapy spa should be drained at least fourtimes per year and refilled with clean water. You mayneed to drain the spa more often, depending on theuser load. This must be done because after repeatedchemical treatment the water becomes chemicallysaturated. Once this happens, additional chemicaltreatment of the water is no longer effective. The spashould also be drained if you will not be using it forlong periods of time. The spa must always be drainedbefore major repairs are made.The hydrotherapy spa should always be coveredwhen it is empty. Direct sunlight can cause extensivedamage. The surface of the spa shell canreach temperatures as high as 150°F in a matterof minutes if exposed to the sun while it is empty.These high temperatures can cause significantdamage, such as blistering of the shell surfaceand warping of the spa shell. Any damage causedby sun exposure is not covered under warranty.14
To drain the hydrotherapy spa, follow the steps below:1. Using the console, adjust the temperature to thelowest setting.2. Shut off the power to the spa, at the circuit breakeror GFCI.3. Remove the pump access panel from the spa.4. Pull the hose out and hold it above the waterline.Remove the cap and attach a garden hose to thedrain hose. Lower the hose and drain the spa.Cap5. When the spa is empty, close the valve andremove the garden hose. Re-attach the cap andreturn the drain hose inside the spa.6. Re-attach the access panel.7. Refill the spa and treat the water with chemicals(see pages 10 and 14).DRAINING THE PUMPSDrainHoseAfter the hydrotherapy spa is drained, the jet pumpsshould also be drained if the spa will be stored formore than thirty days or if it may be exposed to freezingtemperatures.WINTER USE AND CAREThe hydrotherapy spa is designed for year-round use.If you decide to store the spa for the winter, store it ina warm, dry location. Follow the steps below to winterizethe spa.1. Make sure the power to the spa is turned off.2. Drain the spa (see DRAINING THE HYDROTHER-APY SPA on the previous page and this page).3. Remove all remaining water from the spa shell. Drythe spa shell with towels.4. Set the air control to the lowest setting. Use awet/dry vacuum to pull any remaining water fromthe system. To do this, place the vacuum nozzleover each jet, starting with the highest jet and finishingwith the lowest jet.5. Set the air control on the console to the highestsetting and repeat step 3.6. Drain the pumps (see DRAINING THE PUMPS onthis page). Once the water is drained from thepumps, place the vacuum nozzle over the drainagehole in the pumps and vacuum any additionalwater from the pumps. Note: For additional protection,remove the pump/motors from the spaand store them in a climate-controlled room.7. Clean the spa shell (see page 13).8. Clean the filter (see page 13).9. Shut the power off at the breaker. Label thebreaker in such a way that the breaker will notbe turned on accidentally.10. Re-attach the access panel and the spa cover.REPLACING THE LIGHT BULBIf the underwater light burns out, you will need toremove the pump access panel to replace it (seeATTACHING AND REMOVING THE ACCESS PANELon page 14). Make sure the spa power is turned off.Next, locate the light housing. Turn the light housingcounterclockwise and remove it from the spa shell.Turn off the power tothe spa. To drain the jetpumps, remove theaccess panel from thespa unit (see ATTACH-ING AND REMOVINGTHE ACCESS PANELon page 14). Locatethe jet pumps insidethe spa. Loosen theindicated collar oneach of the pumps.CollarLight HousingLightBulbLightHousingTo replace the light bulb, pull the old light bulb out ofthe housing and insert a new light bulb. Re-attach thelight housing to the spa shell. Re-attach the accesspanel to the spa.15
TroubleshootingMost problems can be solved by following the simple steps below. Find the symptom that applies, andfollow the steps listed. If further assistance is needed, call our Customer Service Department toll-free at1-877-897-7493, Monday through Friday, 8 a.m. until 5 p.m. Central Time.1. SYMPTOM: THE SPA WILL NOT OPERATEa. Check to see if the GFCI breaker is tripped orwas not turned on. Reset the GFCI breaker.2. SYMPTOM: THE CIRCUIT BREAKER OR THEGFCI TRIPS WHILE THE SPA IS OPERATINGa. Reset the circuit breaker or the GFCI. If the circuitbreaker or the GFCI trips again, contact aqualified electrician for service.3. SYMPTOM: THE PUMP HUMSa. The filter may be dirty or damaged. Removethe filter from the filter housing and clean orreplace the filter (see page 13).b. The pump may have a foreign object stuck inthe impeller. Contact our customer servicedepartment.c. The pump may have a loose wire connection.Contact our customer service department.4. SYMPTOM: THE PUMP HUMS, BUT DOES NOTROTATEa. The pump may be jammed. Contact our customerservice department. If your spa is nolonger under warranty, contact a local spa andpool service provider.5. SYMPTOM: THE PUMP IS NOISY WHILEOPERATINGa. There may be debris in the pump. Contact ourcustomer service department.b. The pump may have a bad bearing. Contactour customer service department.6. SYMPTOM: THE WATER DOES NOT HEATa. Make sure that the hydrotherapy spa is fullycovered with the spa cover. The spa covermust be tight for the water to heat. Set theair control to low. The water will heat at a rateof 6°F per hour. If you are using the spaindoors and the room temperature is maintainedat 70°F, it will take approximately 6 to 8hours for the water to reach the set temperature.b. If you are using the hydrotherapy spa outdoors,it may take longer for the water to heat. Seethe chart below for the approximate heatingtime.Air Temperature Heating Time70°F + 6 to 8 hours50°F to 70°F 9 to 11 hours30°F to 50°F 12 to 14 hoursb. If the water still has not heated after 24 hours,contact our customer service department.7. SYMPTOM: THE WATER IS NOT BEINGCLEANED BY THE FILTERa. Check to see if the filter is in place. Clean thefilter if it is dirty.b. Check the chemical balance of the water. If thepH is incorrect, the sanitizing agents will notfunction properly. See the section on maintainingthe proper pH balance on page 14.8. SYMPTOM: THE WATER PULSATES ORTHERE IS MINIMUM WATER FLOWa. This usually occurs only when the water level islow. Add water until it is 2” to 4” above the basket.9. SYMPTOM: THE WATER LEVEL DROPSa. A clamp or seal inside the pump compartmentmay be loose. Check inside the pump compartmentfor excess water and watch the pump unitwhile it is operating to see if water drips fromany of the plumbing. If you can identify thelocation of the leak inside the spa jet unit, tightenthe clamp or replace the damaged seal.b. Some water loss due to evaporation is normal.If rapid water loss occurs, or if you notice wetnesson the floor around the hydrotherapy spa,the spa shell may have a leak. Contact yourlocal pool and spa service provider for repairs.16
EXPLODED DRAWING—Model Nos. IMSB<strong>628</strong>20, IMSG<strong>628</strong>20R0602A1132210 16323520462024354619*13135331239484536*304914*38299493027261828284766156345022143417 84152534424044513712631392517 1719
Trasmissione dell'infezione:mediante sporeDa 1 sola larva morta: circa 3 miliardi di spore.Perché si manifesti la malattia sono necessarie da 1 a 100 larve morte (da50x10 6 a 300x10 9 spore).Resistenza delle api estremamente variabile!Dove possiamo ritrovare le spore: arnia, favi, melari, materiale apistico ingenere, prodotti dell’alveare, adulti di famiglie infette.


