
Create successful ePaper yourself
Turn your PDF publications into a flip-book with our unique Google optimized e-Paper software.
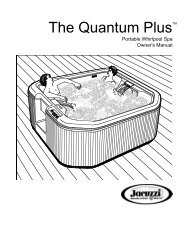
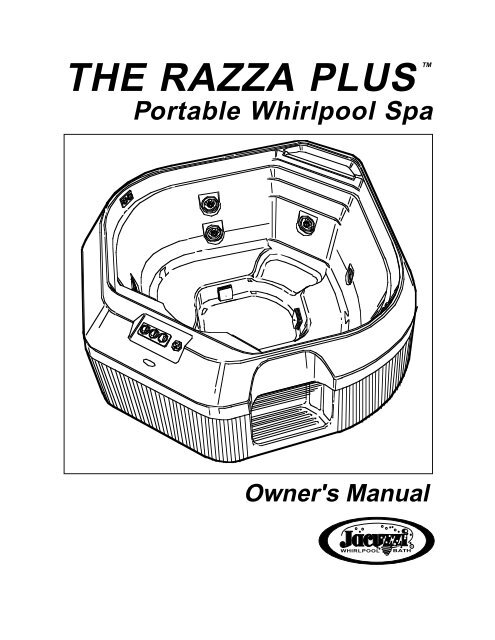
THE RAZZA PLUSTMPortable Whirlpool SpaOwner's ManualWHIRLPOOLRBATH
IMPORTANT SAFETY INFORMATIONREAD AND FOLLOW ALL INSTRUCTIONSJacuzzi Whirlpool Bath does not recommend spa waterotemperatures in excess of 104 F. High water temperaturesin excess of 104 F. and prolonged periods of useocan raise internal human body temperature excessivelyand impair the body’s ability to regulate its internaltemperature. Limit your initial use of the spa to 10 - 15minutes. High body temperatures affect people differently;consult your physician about your safety andcomfort before using the spa.The elderly, the infirm, and children should not use thespa unattended. Infants should not be permitted in theospa at water temperatures over 100 F. Pregnantwomen and people with heart conditions should consulttheir physicians before using the spa at water temperaturesover 100 F.oExtra care should be taken when using the spa andconsuming alcoholic beverages. Alcohol, drugs, orcertain medications such as tranquilizers affect a person’sability to withstand high temperatures and mayproduce dangerous effects.Keep body, hair, and clothing a minimum of 12 inchesaway from suction fitting and skimmers at all times whenthe spa is operating. Hair longer than shoulder lengthshould be secured close to the head, or a bathing capshould be worn. Do not remove the suction grille! It isa safety device and must always be in place on thesuction fitting to minimize the potential hazard of hairentanglement or body entrapment.The wet surface of the spa is slippery. Use care whenentering and exiting.The optional cover available for your spa is rigid but is notdesigned to support any weight. Therefore, as a safetyprecaution, you must not sit, stand, or lie on it.The spa must be installed with adequate access andwater drainage system. (See Installation Instructions.)When using the electrical equipment, basic safetyprecautions should always be followed:This unit is provided with a ground fault circuit interrupter(GFCI) located in the System Control Module. Check tobe sure this is operational once a month. (The procedurefor testing is described on page 6 of this manual.)Do not use electrically connected devices such astelevision, radio, or stereo speakers, lights, cookingdevices, or telephones within 5 feet of the spa while thespa is being used. Lighting fixtures must not be locateddirectly above or within 5 feet of the spa. If located within10 feet of the spa, they must be on a circuit protected bya GFCI.Do not turn on power to the spa unless it is filled withwater to the normal water level, which is to the waterlevel indicator mark on the skimmer frame. Activatingthe spa when there is an insufficient amount of water candamage the circulation pump and may cause a fire.Read manufacturer’s safety information provided withall optional equipment.Save These Instructions for Future Use.Owner’s RecordDate Purchased ____________________________________________________________Purchased From ____________________________________________________________Installed By ________________________________________________________________Spa Serial Number ____________________________ Model #9400000(See page 2 for location of serial number.)
The <strong>Razz</strong>a Plus Portable Whirlpool SpaOwner’s ManualModel 9400000ContentsPageInstallation Instructions _________________________________________ 2-5Inspection and Shipping Claim ___________________________________________ 2Unpacking ___________________________________________________________ 2Positioning Your Spa___________________________________________________ 3Electrical Requirements ________________________________________________ 3Electrical Precautions __________________________________________________ 4Outdoor Installation ____________________________________________________ 4Drainage ____________________________________________________________ 4Indoor Installations ____________________________________________________ 4Equipment Set-Up _____________________________________________________ 5Operating Instructions __________________________________________ 6-10Basic Control Set-Up___________________________________________________ 6-7Setting the Timer ______________________________________________________ 8Controls _____________________________________________________________ 9Temperature Control ___________________________________________________ 9Setting the Thermostat _________________________________________________ 10Note on Determining Water Temperature ___________________________________ 10Normal Operation _____________________________________________________ 10Whirlpool System _____________________________________________________ 10Air Blower ___________________________________________________________ 10Silent Air Induction ____________________________________________________ 10Filtration ____________________________________________________________ 10Maintenance __________________________________________________ 11-15Water Quality and Water Chemistry _______________________________________ 11Filtration ____________________________________________________________ 11Water Chemistry ______________________________________________________ 11-12Disinfecting __________________________________________________________ 12Balancing pH _________________________________________________________ 12Balancing Total Alkalinity _______________________________________________ 12Water Quality Definitions________________________________________________ 12Water Level/Drain _____________________________________________________ 13Skimmer Basket Maintenance ___________________________________________ 13Filter Maintenance _____________________________________________________ 13Automatic Filtration/Maintenance _________________________________________ 14Winterizing __________________________________________________________ 14Factory Installed Redwood Skirt __________________________________________ 14Spa Light ____________________________________________________________ 15Covering Your Spa ____________________________________________________ 15Cleaning Your Spa ____________________________________________________ 15Repairs to the Acrylic __________________________________________________ 15Troubleshooting Guide __________________________________________ 16-18Optional 1-1/2" Permanent Drain _________________________________________ 19
The <strong>Razz</strong>a Plus Portable Whirlpool SpaSpecifications and Installation InstructionsThe <strong>Razz</strong>a Plus is an exquisite tear-drop shaped whirlpool spa by Jacuzzi Whirlpool Bath designed with fullfeaturedelegance to provide the comfort and luxurious spa experience you expect from a Jacuzzi whirlpool spa. The<strong>Razz</strong>a Plus features multi-level contoured seating for 5 or more people. Entry and exit from the spa are made easierand safer by the built-in exterior and interior steps. And for a revitalizing hydromassage, five fully adjustable, colorcoordinated PowerPro whirlpool jets and three directionally adjustable jet are located strategically to massagelumbar, upper back, and neck regions, depending on where you are seated. The stacked jets ensure this simultaneoushydrotherapy.A unique feature of the <strong>Razz</strong>a Plus is a cascadewaterfall which creates a dazzling, shimmering cascadeof water while the spa's whirlpool or filter mode isoperating.The <strong>Razz</strong>a Plus also features a clearly labeled controlpanel. Push button controls give you convenient command87"87"of the heater, filter, whirlpool, light, and air blowerfunctions. Two control panels having knobs for adjustmentof the silent air induction are located at the rim ofthe spa. A 7-day timer (located on the System ControlModule) can be set for automatic control of temperatureand filtration. The <strong>Razz</strong>a Plus also features a lowvoltage underwater light and interchangeable coloredlenses, adding even more luxury and excitement to yourspa experience.The <strong>Razz</strong>a Plus offers the convenience of two patentedfront-load skimmer/filters for maximum efficiency.The unique 50 sq. ft. filtration system, designed byJacuzzi Whirlpool Bath, allows easy access from insidethe spa to both filter cartridges without having to drainthe spa or open the skirt door.The spa shell is foam-insulated to save energy costs,and the spa is tastefully surrounded by a factory installed37"redwood skirt.The complete equipment pack of the <strong>Razz</strong>a Plus ismounted within the perimeter of the spa, so the spa iseasy to install. The spa requires a 230 VAC 50 AMP 4-wire grounded, separate circuit and is equipped with aground fault circuit interrupter (GFCI). An optional gasheater is available as an alternate heating source andcan be installed remotely. The <strong>Razz</strong>a Plus is availablein a wide range of lustrous acrylic colors. (See theJacuzzi Whirlpool Bath color guide.)OPTIONSSPECIFICATIONSOPTIONSGas HeaterRigid Insulating CoverPillowSERIAL NUMBER LOCATIONMODELDIMENSIONSWHIRLPOOLMOTOR/PUMPFILTERMOTOR/PUMPOPERATINGGALLONAGEELECTRICHEATERPRODUCTWEIGHTSHIPPINGWEIGHTELECTRICALREQUIREMENTS<strong>Razz</strong>a940000087" L. (221 cm)87" W. (221 cm)37" H. (94 cm).75 HP230 VAC4.8 AMPS3450 RPMSingle Phase60 Hz..75 HP230 VAC4.8 AMPS3450 RPMSingle Phase60 Hz.310 US Gal.(1173 Ltrs.)6 Kw26 AMPS1021 lbs.(465 kg.)685 lbs.(312 kg)909 lbs.(414 kg.)230 VAC50 AMPS60 Hz.Separate Circuit4 WirePRODUCT SPECIFICATIONS ARE SUBJECT TO CHANGE WITHOUT NOTICE 1
INSTALLATION INSTRUCTIONSInspection and Shipping ClaimCheck for shipping damage upon receipt of the spa. Jacuzzi Whirlpool Bath is not responsible for damage to thespa sustained during shipping. If damage is evident before unpacking, see instructions regarding shipping claims onthe outside of the carton and immediately file a claim with the carrier.Once the spa has been removed from the carton and before it is permanently installed (see below on this page forunpacking instructions), check the spa completely for damage. Fill the shell with water and operate the system (seeOperating Instructions) to check for leaks which may have resulted from shipping or handling. All Jacuzzi WhirlpoolBath spas are factory tested for proper operation and water tight connections prior to shipping. If leaks or otherproblems are detected, immediately notify your Jacuzzi Whirlpool Bath dealer or Authorized Service Agent, or callJacuzzi Whirlpool Bath, (510) 938-7411 or, (510) 938-7070 for Warranty Service.Note: Damage or defects which could have been discovered and repaired prior to installation and which are claimedafter final installation of the spa, are excluded from our warranty.UnpackingINSTALLATION1. Remove sides and top of crate, as well as plasticbags, leaving pallet intact.2. Check for shipping damage. Register damageclaim with carrier. See Notice on this carton.3. Remove and set aside unattached cartons andaccessory pieces.4. Move spa to final site with pallet still attached asshown. (See note below if spa must be movedafter pallet has been detached.)CAUTION: DO NOT CUT OR REMOVE THEFOUR BANDS OR THE BOLTS THAT SECURETHE PALLET TO THE SPA UNTIL AFTER THESPA HAS BEEN TIPPED OVER.5. Place a 4"x4"x72" wooden block beside the panside of the spa so it is parallel with the pallet.6. Tip the spa over onto its bottom with block supportingthe spa.8. Remove the pallet and the 4"x4" block, then carefullylower the spa to a horizontal position.9. Attach the skirt panel according to instructions includedwith the skirt panel.Note: If the pallet must be detached before the spa ismoved, detach it as instructed above, but do not attachthe skirt panel; see below.10. Locate area where reinforcement has been installed.11. Place spa on dolly so only reinforced area contactsthe dolly for adequate support. The spa must notlie on its skirt.12. Attach skirt panel after moving spa to final location.Important! Read all the instructions contained inthe Owner's Manual before beginning installation.7. Remove brackets and bolts securing the pallet tothe spa.BANDINGREINFORCED AREA(FOR MOVING SPAWITHOUT PALLET)4"X 4" X72" BLOCKSTRAPPING (4)SUPPORTPALLETSPA RIMREMOVEBOLTSSECURINGPALLETDOLLYSPA PAN4" X 4" X 72" BLOCK2
INSTALLATIONImportant: Read complete instructions before beginning installation.Positioning Your SpaBecause your <strong>Razz</strong>a Plus spa is portable, you can locate it just about anywhere you wish--on a deck,patio, or evenindoors. Just be sure to position it above ground in an area with good drainage and on a level, continuous surfacewhich can support the weight of the spa when filled with water and people; this weight is approximately 4017 lbs. Youmust also provide access to the spa's equipment for service and general maintenance.MINIMUM SERVICE ACCESSEQUIPMENTDOOR24"26"Electrical RequirementsYour <strong>Razz</strong>a Plus, requires a 230 VAC 50 AMP 4-wiregrounded type electrical service having copper conductorsand must be in a separate circuit having no otherappliance connected in that circuit. If you do not havethis kind of circuit, a qualified electrician should be calledin to install the necessary wiring. Inadequately sizedwiring may cause a voltage drop which might cause theunit to malfunction and bring about permanent damageto the spa's electrical system. We recommend that thewire be sized for a 3% maximum voltage drop. (SeeNEC.) Each "leg"of the incoming power to neutral mustbe 105 VAC minimum at the spa when all the spaequipment is running.The circuit must also have a groundwire in order to take advantage of the designed-in safetyfeatures of the spa. A bond wire must also be used.Bond according to procedure described on the nextpage.Caution: Without proper grounding and bonding, asystem malfunction may cause fatal shock.3
INSTALLATIONCAUTION: Do not apply electrical power to thespa unless it is filled with water to the normalwater level, which is approx. 9" below the spa rim(see location of water level indicator on face ofskimmer on page 13). If the spa's motor/pumpsare actuated when there is not sufficient water inthe unit, the circulation pump could be irreparablydamaged. Not heeding this caution will nullifythe warranty. In addition to damaging the unit,operating the unit with insufficient water couldcause a fire.Do not locate lighting fixtures directly above the spa;lighting and electrical receptacles must be located atleast 5 ft. from the spa. Lighting located between 5and 10 ft. from the spa must be on a circuit protectedby a GFCI. (See National Electrical Code, 680-6.)Do not use electrically connected devices, such asElectrical Precautionstelevision, radio, toys, telephones, stereo speakers,lights or cooking devices within 5 ft. of the spa whenthe spa is being used.Bonding and GroundingAll fixed metal objects located within 5 ft. of the spa,such as fence posts, railings, door frames greenhousestructures, gutters, etc., must be attached tothe bonding bar on the outside of the spa electricalcabinet using #8 solid copper wire. With #8 solidcopper wire, bond the spa to the house electricalpanel or approved local bond.An approved ground may be an 8 ft. long groundrod, a plate electrode, or a buried metal waterpipe with at least 10 ft. of buried pipe. Check yourlocal building code for requirements. Bondinglugs are available at your local electrical supplystore. (Bond bar location is shown on page 7.)Outdoor InstallationIf you install the spa outdoors, we recommend thatyou provide a concrete pad for it to rest on. To do this,construct forms for a 8' x 8' x 4" (approx.) thick level pad.Install a #10 gauge wire mesh 6" x 6" steel reinforcedgrid. Attach a #8 solid copper wire to the grid with aground clamp. This wire should be long enough to reachthe bond bar on the spa System Control Module (min.36"), but should not be located under the base of the spa.Then pour the concrete pad.DrainageWhether you install your spa indoors or outdoors, youcan drain it by attaching a garden hose to the drain valvelocated on the suction tee of the spa. Simply run thehose to the house sewer line or drain field and open thedrain valve. See inside back cover for a quicker, permanentdrain method.Make sure the area surrounding the spa has gooddrainage to keep water from collecting at the base of thespa, especially near the equipment area. If drainage ispoor, install a drain line and/or gravel drain field (seeillustration below).Indoor InstallationsWater which splashes on the floor during use of thespa may cause a walking hazard and/or structural damageunless good drainage is provided and properwaterproof building materials are used in the area surroundingand beneath the spa. Take into consideration,also, the high room humidity which will exist due to highspa water temperatures. Providing natural or forcedventilation of the room will help maintain comfort andminimize moisture damage to the building. JacuzziWhirlpool Bath is not responsible for damages resultingfrom excess moisture or water spillage. Consult anarchitect or engineer for aid in designing your indoorinstallation.BOND BAR#8 BOND WIRE(TO HOUSE ELECTRICALPANEL OR LOCAL BOND)8' X 8' X 4"CONCRETEPADTO BOND BARDRAIN VALVE(HOSE BIBB)WIRE MESHGRIDGRAVELDRAINFIELD4
INSTALLATIONEquipment Set-Up1. Remove the plastic sheet covering the spa. Usecare; stepping into the spa with shoes will scratchthe acrylic surface.2. Remove any packing materials from the spa.3. Remove each filter cartridge from its plastic bag.4. Pull open each skimmer/filter door by the handlelocated in the middle of the door and remove theskimmer basket. Then insert the filter cartridge intothe filter housing and re-insert the strainer so that itfits in place over the filter cartridge and close theskimmer/filter door. See illustration on page 13.5. Clean the interior of the spa of any remaining constructiondebris. Remove stubborn stains, paint, ortar with turpentine, isopropyl alcohol or paint thinner.A mild liquid dishwashing detergent on a dampcloth is fine for cleaning off other dirt. Plaster can beremoved by scraping with a wooden edge; do notuse a metal scraper, wire brush, or other metal tools,as they will damage the spa's surface.6. Install the skirt panel which was not installed on thespa at the factory. To do this, secure with the screwsprovided in your spa accessory package and followinstructions provided with panels.7. On initial start-up, it is necessary to purge andsanitize the system. Carefully follow the proceduredescribed here to purge and sanitize your spa.• Remove the optional spa cover completely.• Close the drain valve located on the suction tee.• Fill the spa with water to its normal operating level,which is to the water level indicator mark on theskimmer/filter frame.• Turn on circuit breakers at the main electricalpanel.• Select JETS on the SYSTEM switch.• Add 1/4 cup sodium dichlor (a fast dissolvinggranular type of chlorine) to the water and let thewhirlpool run for 15-20 minutes only.• Turn off JETS.• Turn off circuit breakers.• Immediately open the drain valve and drain thespa completely.CAUTION: Leave the optional rigid cover offthe spa during this procedure. Do not use thespa during this procedure. Drain the spa immediatelyafterward.8. Close the drain valve and fill the spa with water toapprox. 9 inches below the spa rim, or to water lineindicator mark on the skimmer frame. (See illustrationon page13.)9. Turn on circuit breakers at the main service panel.10. Set the heater thermostat for the maximum temperature.11. Test the spa for proper operation. (Refer to OperatingInstructions.)12. Refer to Water Quality section of the OperatingInstructions. Test for water quality; then add treatmentchemicals to ensure proper levels.All Jacuzzi Whirlpool Bath spas are factory tested forproper operation and water tight connections prior toshipping. If leaks or other malfunctions are detected,immediately notify your Jacuzzi Whirlpool Bath dealer orAuthorized Service Agent, or call Jacuzzi WhirlpoolBath, (510) 938-7411 or, (510) 938-7070 for WarrantyService.SKIMMER/FILTERDOOR (2)AIR INDUCTIONCONTROL KNOBSFULLY ADJUSTABLEWHIRLPOOL JET (5)UNDERWATERLIGHTSUCTIONCOVER5
OPERATIONOPERATING INSTRUCTIONSNow that your <strong>Razz</strong>a Plus spa is in place, you are probably eager to take advantage of its unique designed-infeatures—especially the patented Jacuzzi Whirlpool Bath hydromassage performance. Besides being a beautifuladdition to your indoor decor or outdoor landscaping, your Jacuzzi ® whirlpool spa will provide you with the ultimatein spa pleasure.Basic Control Set-UpThe control set-up on your <strong>Razz</strong>a Plus spa is designed to give you fingertip control of the heater, air induction, lightand whirlpool, filter, and blower systems of your unit from inside or outside your spa. Follow the basic control setupdescribed below to familiarize yourself with the several functions of the control panels located on the top of the spa.CAUTIONDo not turn on power to the spa unless it is filled with water to the normal water level. (See water line indicatormark on skimmer frame.) When the power is on, the built-in timer may activate the system even though theSYSTEM is turned off at the control panel. If the spa’s motor/pump is actuated when there is not sufficientwater in the unit, the circulation pump and heater could be irreparably damaged. Not heeding this caution willnullify the warranty. In addition to damaging the unit, operating the spa with insufficient water could causea fire.• Using a garden hose, fill the spa with water to thewater line indicator mark on the skimmer frame.• At the house service panel, turn on the circuit breakeror switch that controls the electrical service to yourspa. (Make sure there is no other appliance on thatcircuit.)• Open the skirt door giving access to the SystemControl Module.• Your spa is provided with a ground fault circuit interrupter(GFCI). At initial start-up and at least once amonth thereafter, with power on, push the test buttonlocated on the System Control Module. The resetbutton should pop out. Push this button in to reset. Ifthe interrupter fails to operate in this manner, there isa ground current flowing or a device malfunctioning,indicating the possibility of electric shock. Turn offpower and do not use the spa until the source ofthe breakdown has been identified and corrected.6
OPERATIONBasic Control Set-Up (Continued)• Make sure the circuit protector buttons are pushed in.• Locate the HIGH TEMPERATURE SAFETY SWITCHwhich is a raised button on the end of the heater. Pushthis button to be sure it is in the reset mode. Thepurpose of this switch is to shut down the spa if thewater becomes excessively hot. If, for some reason,the switch is tripped, the reset button must be pushedin for the heater to operate again after the water hascooled to about 100 O F.• Set the built-in timer (see below). Use of the timerallows two modes of operation: timed HTR/FLTR andtimed FILTER . With the SYSTEM switch turned OFFSetting the TimerThe built-in 7-day timer is located in the SystemControl Module. The tooth-like tabs that are located onthe dial can be set to activate the filter system for twohourperiods on any day(s) of the week. First set thecorrect time. Set the time of day by rotating the outer dialand aligning the correct time with the small arrow in theinside of the dial. Note: Both correct time and day mustSYSTEM CONTROL MODULEGFCICIRCUITPROTECTORBUTTONSHIGH TEMPERATURESAFETY SWITCHFIELD WIRING BOXFOR 230 VOLTINCOMING POWERPLUG-INCONNECTORSBOND BARTIMERbe set. Next slide one of the tabs toward the center ofthe dial at the time at which you wish the filter system tooperate. Note that the timed mode can begin at any timeof day or night on any specified day of the week.Note: If filtration is being controlled by the timer but youdo not want the water heated to a higher temperature,adjust the HEATER knob to its lowest setting. Becausethe thermostat is connected in this circuit, the heater willmaintain a minimum water temperature.CONTROLSA switch panel giving you convenient control of thejets, filter, HTR/FLTR, light and air blower is located onthe spa rim.To ensure your safety and allow easy operation, yourspa is equipped with two air-activated switches. TheSYSTEM switch, controls the whirlpool jets, heat, andfiltration. The other switch, ACCESSORY controls theTIMERPUSH IN ONE TABFOR EACH TWOHOUR PERIOD OFOPERATIONM o n d a yTu e s d a ySundayWednesdaySaturdayThursdayFriday7
OPERATIONair blower and light. Refer to the Control Panel illustrationfor an explanation of the various switch functions.SYSTEMThe SYSTEM switch controls the following four functionsin the continuous sequence indicated:1. OFF2. JETS3. HTR/FLTR4. FILTER(The next selection is OFF again.)Use the JETS function as a reference to indicate yourlocation in the function sequence, since that function isthe most obvious when operating.For best performance and increased equipment life,pause a second or two between push-button selections.Not pausing may cause the switch to malfunction.ACCESSORYcontinuous sequence indicated:1. OFF2. AIR3. AIR/LIGHT4. LIGHTTemp. ControlTurn on the heater by selecting the HTR/FLTR modewith the SYSTEM switch.With this selection, you can verify that the spa’sheater is operating by viewing the indicator light on thespa control panel.(The next selection is OFF again.)The ACCESSORY switch controls these functions in theOFF(Time clock controlsfilter pump. Heater will turnon with filterpump if thermostat is set.)JETS(Maximum whirlpoolaction. Heater willmaintain temperature setby thermostat if convertedto 230 VAC.)HTR/FILTER(Filter pump and heaterwill turn on as necessaryto maintain watertemperature setting.)TEMP.CONTROLKNOBTEMPERATUREREADOUTSACCESSORY SWITCH(Controls Air Blower andlight functions.)SYSTEM SWITCH(Controls Jets,Heater/Filter and FliterOnly functions.)FILTER(Filter pump will runcontinuously; heater willturn on as necessary tomaintain watertemperature setting.)HEATERINDICATORLIGHTBATTERY8
Set the HEATER knob by rotating it to the desiredtemperature. When the water temperature is lower thanthat set by the HEATER knob, the heater and filter motor/pump will be activated. The heater and filter functions willautomatically turn off when the desired temperature isreached. When the heater is on, the water is also beingfiltered. The heater will also maintain water temperaturein the JETS mode.The Temperature Control is designed to maintain aminimum temperature of approximately 45 - 50 O , itslowest setting. This does not necessarily protect the spafrom freezing. See page 14 for winterizing procedures.Setting the ThermostatYou will notice by the indicator light that the heater ison when the water temperature falls below the desiredtemperature and will turn off when that temperature hasbeen reached.When the spa is not in use, you can set the thermostatto a lower temperature; then, when you wish to use thespa, adjust the HEATER knob to the desired temperature.The water temperature will rise at a rate of about 6 Oper hour with the optional spa cover, foam insulation andskirt panels in place and if the air temperature is 50 O orwarmer. This rate will necessitate a waiting periodbefore using the spa, the length of which will be determinedby the temperature of the water before turning onthe heater. For example, if the water in the spa is keptat about 70 O when the spa is not in use, and the desiredtemperature is 100 O , it will take about 5 hours to heat upOPERATIONsufficiently.Once you have determined the desired setting on thethermostat knob, it is not necessary to change or readjustit again during normal operation unless youdecide on a different setting.The optional spa cover available for your spa will helpcontrol heat loss from the water surface and therebyreduce energy consumption. You can improve the spa’sheat retention by keeping the spa cover in place on thespa while heating the water.Note on Determining Water Temperature:The spa is furnished with a temperature gauge foryour convenience. For the best reference, take watertemperature readings in the HTR/FILTER mode whenthe heater has just turned off; the indicator lamp on thecontrol panel will turn off at this time.TEMPERATURECONTROL KNOBSYSTEMSWITCHACCESSARYSWITCHTHERMOMOTER9
OPERATIONNormal OperationWhirlpool SystemYou can enjoy the <strong>Razz</strong>a Plus spa with or withoutactivating the whirlpool. Either way, bathing in your spacan be pleasurable, as well as therapeutic.For an invigorating spa experience, you can takeadvantage of the built-in whirlpool system. To do this,push the SYSTEM switch button to select the JETSmode. Sit or recline in the spa so you are comfortable.The fully adjustable whirlpool jets can be adjusted tocontrol the force of the water coming into the spa. Forstimulating action, increase the force of the flow byrotating the jet handle to the left. For a more relaxingeffect, rotate the handle to the right (clockwise). Thedirectionally adjustable whirlpool jets can be directedtoward any location on the body, particularly toward anyarea that feels tense or stiff. The warmth of the water andthe stimulating water flow from the jet will pleasantlyincrease circulation.Or, for the total whirlpool effect and all-over feeling ofwell-being, you can adjust all jets so they point in aclockwise or counter-clockwise direction to circulate theair and water mixture in a circular motion all about thespa.Finally, after a busy, stressful day, you can lookforward to soaking in your spa in still water with noturbulence-only the gentle warmth of the soothing andrelaxing water.Silent Air InductionThe intensity of the whirlpool action is determined byhow much air is inducted into the water. You havecontrol of this by adjusting the air induction control knobslocated on both control panels. For maximum air induction,rotate each control knob fully counter clockwise tothe largest circle. For fewer air bubbles, decrease theamount of air induction by rotating the control knobclockwise. When the knobs are turned to the smallestcircles, only water is being circulated.Air BlowerThe <strong>Razz</strong>a Plus features a built-in air blower andfactory drilled air holes in the seats of the spa to add toyour enjoyment. The blower sends air to a channellocated under the spa's seats; this air is distributedthrough the air holes, forming tiny bubbles which travelupward until they reach the surface and burst. Theexciting visual effect of the bursting bubbles contributesto the overall hydromassage experience.Activate the blower by pushing the ACCESSORYswitch. (Note that the filter pump will also come onat this time.)FiltrationWhen you are ready to leave the spa, push theSYSTEM switch button to turn off the whirlpool. Thenselect the HTR/FLTR mode. Adjust the HEATER knobto the temperature at which you wish the water maintained.In this way, the water will be filtered when theheater goes on to maintain the temperature. Wheneverthe water temperature reaches the desired temperature,the pump will turn off.For continuous filtration, select FILTER on the SYS-TEM switch. In this mode, the filter pump will run until itis manually deactivated while maintaining the watertemperature selected by the HEATER knob. Set theHEATER knob to its lowest setting unless you wish thehigher temperature to be maintained. Running the filterpump for at least two hours per day is sufficient.Another way to be sure the water will be filtered is toturn the SYSTEM off and set the built-in timer in theSystem Control Module to turn the system on at a certaintime to filter the water. Be sure there is sufficient water inthe spa (filled to the water line indicator mark on theskimmer/filter frame) when the timer is set, or the spa’smotor/pump could be damaged. (See page 7 for instructionson setting the timer.)HIGH VOLUME FULLYADJUSTABLE WHIRLPOOL JETSILENT AIR CONTROLSMAXIMUM AIROUTPUT (COUNTERCLOCKWISEROTATION)MAXIMUM AIROUTPUT(CLOCKWISEROTATION)WHIRLPOOLWATER JETSONLY10
MAINTENANCEBalancing pH:For good hygiene and equipment longevity, maintainthe pH of your spa water according to the instructionsprovided. pH is the measure to determine if the spawater is too acid (low pH) or too alkaline or basic (highpH). The ideal range for spa water is 7.2 to 7.6 pH. Forexcessive acidity (below 7.2 pH) add soda ash or sodiumbicarbonate to the spa water. For excessive alkalinity(above 7.6 pH) add dry acid to the spa water.Caution: Refer to the spa chemical manufacturer’sinstructions for the initial amount of chemicals toadd for the gallonage of your spa. Low pH can causeequipment damage, as acid water will dissolve metals,while high pH can cause scale or calcium depositsto build up in the system or on the shell. Afteradding chemicals, run the filter system for at least 30minutes before testing water quality again for accuratereadings.Balancing Total Alkalinity:Total alkalinity is the measure of base materials in thewater. The recommended range for total alkalinity isbetween 80 ppm and 150 ppm. If the chemistry of thewater is not within this range, you will have difficultyadjusting your pH level, which will affect your adjustmentsfor the proper amount of free available chlorine.If the alkalinity of your spa water is high, it is advisableto drain the water from the spa and begin the balancingprocess over again. Purge and sanitize your spa(according to instructions in Equipment Set-Up sectionof the Installation Instructions) and clean the spa surfacesthoroughly before refilling with fresh water. Thenre-establish water chemistry. If the spa is used heavily,change the water at least every month.WATER QUALITY DEFINITIONSCalcium Hypochlorite: A granular chlorine productthat is inexpensive and effective but not recommendedbecause it often tends to form calciumdeposits on heater parts and plumbing fittings andleaves an unattractive film on the spa at the waterline.Sodium Hypochlorite: A liquid chlorine productthat is inexpensive and effective but not recommendedbecause the liquid is readily spilled ontothe spa or a surrounding area, causing permanentdamage.Total Alkalinity: The measure of amount ofalkaline materials (such as carbonates, bicarbonatesand hydroxides) in the water. High alkalinityinhibits the effectiveness of chemicals to changethe pH. If the alkalinity of your spa water is high(above 150 ppm), it is advisable to drain the waterfrom the spa and begin the balancing process overagain. Low total alkalinity (below 60 ppm) could becorrosive and damage your spa system.Superchlorination: (also referred to as “shocktreatment) The addition of an above-normal levelof disinfectant to kill any bacteria or algae thatmight have become resistant to normal levels ofdisinfectant.pH: A chemical term used in expressing relativeacidity or alkalinity in numeric values with 7.0usually regarded as neutral, and for purposes ofthis manual, indicating pure water. From 7 to 0indicates increasing acidity, and 7 to 14 indicatesalkalinity.PPM: Parts per million.Free Chlorine: Chlorine that has not combinedwith other chemicals and that is available to destroybacteria in the spa water.TriChlor: A form of chlorine used in pool or spawater treatment; usually supplied in tablet form.Not recommended because of its higher acidicnature and slow dissolving action. Prolongedcontact with the spa shell may bleach or permanentlymark the shell.Sodium DiChlor: The type of chlorine that isrecommended for spa use, as it is available in fastdissolving granular form. It is neither excessivelyacid nor alkaline in character and does not readilydissipate in higher water temperatures.12
MAINTENANCEWater Level/DrainThe water level in the spa must be maintained at itsnormal level. Evaporation and splashing will cause thewater level to drop.When concentrations of impurities from evaporation,water quality chemicals, body oils, perfumes, dirty feet,and winds, etc., accumulate in the spa and cannot befiltered out, it is necessary to drain your spa and refill itwith fresh water. This should be done every 2 months ormore often, depending on the amount of use.To drain the spa, first turn all controls to OFF. Thenturn off circuit breakers at the main electrical panel. Passa garden hose through a hole in the pan and connect itto the drain valve in the suction plumbing. Turn thehandle and drain the spa.After draining the spa, clean the spa shell, suctionstrainers, skimmers, and filters; then close the drainvalve and refill the spa with fresh water. Check the pHlevel and maintain water quality.spa is not occupied. In addition, its use will reduceenergy consumption.Skimmer Basket MaintenanceThe basket located in each skimmer of the spa shouldbe checked at least once a week for collection of debris,such as leaves, hair, etc., and cleaned as necessary. Toclean the basket, remove it from the skimmer by pullingit out; then backflush it with a garden hose and re-install.Make sure the basket is properly seated in the filterhousing, or the door will not close.WATER LEVELINDICATORMARKFILTERCARTRIDGEWATER LEVEL MARKSThe suction strainers located in the foot well areashould be checked at least once a week for collecteddebris, such as leaves, hair, etc., and cleaned as necessary.It may not be necessary to remove the strainer toclean it, but should you need to, remove the center screwwith a Phillips type screwdriver and clean the strainer byflushing with water from a hose.CAUTION: Be sure to replace the suction strainerimmediately after cleaning. It is a safety device andmust be in place over the suction fitting to minimizepotential hazard of hair and body entrapment.If heavy rains raise the spa water level, drain the spato its normal level.A rigid spa cover (available as an option), when inplace over the spa, will help reduce evaporation andcontrol the amount of debris entering the spa when theSKIMMERBASKETFilter MaintenanceThe filters should be checked periodically. In normaluse, check the filters at least once a month. Keep thefilters clean; obstructed filters reduce water quality andinhibit proper system performance.A removable filter cartridge is located inside eachskimmer. To remove it, pull open the skimmer door bythe handle located in the middle of the door. Slide thebasket out; then pull the filter cartridge upward and outof the housing by the loop at the top of the filter. Cleanthe filter by separating the folds of the filter and sprayingwith fresh water from a garden hose; then re-install thecartridge in the housing and replace the basket, reversingthe above procedure.Oils will coat the filters, resulting in a reduced flow. Toremove such materials, soak the cartridges in a plasticpail containing a commercial filter cleaning solution(available from your Jacuzzi Whirlpool Bath dealer ormost spa supply stores). Follow the manufacturer’sinstructions for use. Another method is to soak the filtercartridges in a plastic pail containing a mild solution of trisodiumphosphate (TSP) and water. An hour of soakingtime is usually required to break down oil coatings fromthe cartridge. Use a stronger solution of TSP and waterto remove algae. Most hardware or paint stores stockTSP. Use the same method of cleaning when cartridgesbecome plugged with clay or vegetation.Replacement cartridges are available through yourJacuzzi Whirlpool Bath dealer.13
MAINTENANCEAutomatic Filtration/MaintenanceIf you plan to be away, you should maintain minimum water quality by running the filter system. To do this, set thetimer to turn the system on for at least two hours each day. This will cause the filter system to turn on at a desired time.Set the timer according to instructions on page 7 with the SYSTEM switch OFF. If you do not want the water to beheated, turn the HEATER knob to its minimum setting.If you will be away for an extended period, however, we recommend that you drain the spa (following the proceduredescribed under Winterizing on this page), as long periods without maintenance of water quality could be detrimentalto the spa.Another means of maintaining minimum water quality while away for less than two weeks is to follow the procedureoutlined for winterizing your spa in a warm climate. See Winterizing. Note: We do not recommend using this procedureif you are absent during the summer, when algae build-up is most likely.)Always keep your spa covered when not in use to reduce heat loss and evaporation and to prevent debrisfrom falling in.WinterizingIn a climate where winter temperatures are belowfreezing, follow this procedure when the spa willNOT be used:1. Select the OFF mode.2. Turn off power to the unit at the house circuit breaker.Drain the spa by attaching a garden hose to the drainvalve on the suction plumbing. Then remove the hoseand leave the drain valve open to completely drain thespa. Close the drain valve.3. Remove the filter cartridges, clean them, and storethem dry.4. Keep water and debris out by covering with a rigid spacover.5. Before using the spa again, review the OperatingInstructions.CAUTION: Not winterizing will cause irreversibledamage (at freezing temperatures) to the pump and/or plumbing lines.Note: If the spa is to be used during winter in a coldclimate, see warm climate instructions below.In a warm climate where there are occasional freezingtemperatures, follow this procedure:1. Select the HTR/FLTR mode.2. Set the thermostat to its minimum temperature (45 -50 F.)by turning the dial all the way counter-clockwise.3. Maintain a chemical balance.(See Water Quality section.)4. Keep the spa covered.Factory Installed Redwood SkirtYour <strong>Razz</strong>a Plus spa is supplied with a factoryinstalledredwood skirt which completely surrounds thespa. The door can be opened for routine maintenance,setting the timer, and for testing the GFCI before use.The skirt is made of kiln-dried redwood and can beleft natural to weather, or you may choose to apply astain or clear finish. Consult your local paint dealer forthe appropriate product. NOTE: WE RECOMMEND AWATER BASED MATERIAL. OIL OR SOLVENTBASED FINISHING MATERIALS DEGRADE THESKIRT BACKING MATERIAL.It may become necessary to remove one or more ofthe skirt panels for major service access, but all thepanels must be securely in place during use of thespa.To detach any of the panels, first remove all screwsfrom the panel being detached.The panels can be re-attached to the spa by reversingthe above procedure.FACTORY INSTALLEDREDWOOD SKIRTREMOVEALL SCREWSFROM PANELSKIRT PANEL14
MAINTENANCESpa LightColored filters are provided with your spa. To changea filter, simply pull the filter out of the fitting and replaceit with the desired colored filter. Replacement bulbs(#912) are also included. Put them in a safe place forfuture use. When a bulb burns out, replace it from theback of the light fitting, pulling out the bulb receptacle.LIGHT BULBREPLACEMENTLIGHT BULBLOCKINGNUTNORMALLENSCOLOREDFILTERCovering Your SpaAn optional rigid spa cover is available to place on topof the spa. Use of this cover will help to minimize heatloss and evaporation, and thus reduce energy costs.The cover is also an attractive and efficient means ofpreventing debris such as leaves and dirt from enteringyour spa when not in use. Follow the instructions for useand care provided with the spa cover.CAUTION: While the spa cover is rigid, it is notdesigned to support any weight. Therefore, as asafety precaution and to preserve the life of yourcover, you must not sit, stand, or lie on it; nor shouldyou place objects of any kind on top of it.Jacuzzi Whirlpool Bath does not guarantee or warrantthis cover. Refer to the spa cover manufacturer'sinformation provided with the cover.RAZZA SPA WITHOPTIONAL COVERBULBRECEPTACLELIGHTBEZELSHELLCleaning Your SpaYour <strong>Razz</strong>a Plus spa shell consists of two layers ofplastic materials. Its smooth top surface of acrylic istough and durable and contains concentrated color.This is supported by a substantial thickness of fiberglass-reinforcedpolyester resin. A catalyst causes achemical reaction during manufacture that bonds theselayers permanently into a hard, strong material. With aminimum amount of care and cleaning, your whirlpoolspa will look new for years.To clean your spa, simply use a mild, non-abrasiveliquid detergent, isopropyl alcohol, or commercially preparedspa cleaner. Do not use abrasive cleaners. Youcan protect and restore the gloss to a dulled surface byapplying Meguiar’s #10 Mirror Glaze, which is a productspecifically designed for use on acrylic finishes. IfMeguiar’s is not available, an acrylic polish of equalquality or automotive paste wax will do.Use a spa cleaner for residue buildup at the waterlevel of the spa surface. This may be applied to theacrylic surface with a soft cloth and wiped clean. Usesparingly in small amounts to avoid contaminating thespa water. If heavily soiled, it may be advisable to lowerthe water level 2-3 inches before cleaning; then refill tonormal level.Repairs to the AcrylicMinor scratches which do not penetrate the colorfinish (acrylic) can be removed with 600-grit wet/drysandpaper. Restore the glossy finish with Meguiar’s #10Mirror Glaze or comparable automotive paste wax.Major scratches or gouges which penetrate the acrylicsurface will require refinishing. Ask your Jacuzzi WhirlpoolBath dealer for special instructions.15
TROUBLESHOOTING GUIDEPROBLEM1. Control Switches do notrespond.PROBABLE CAUSEA. No power to the unit.B. Actuated too rapidly.C. High Temperature Safety Switch istripped.REMEDYA. Turn on circuit breakers. Reset GFCI.B. Wait 60 seconds; system will berestored automatically.C. Reset button on heater after water hascooled.cooled. See *Note if switchcontinues to trip.2. Heater not functioning. A. Heater mode not selected.B. High temperature safety switchtripped.C. Thermostat set lower than watertemperature.D. No power to heater.E. Abnormally low water flow.F. Heater relay not operating.G. Heater element failure.H. Flow switch not operating.A. Select HTR/FLTR mode.B. Reset button on heater after waterhas cooled; see *Note if switchcontinues to trip.C. Turn to desired temperature.D. Check house circuit breaker andGFCI.C. Turn to desired temperature.E. *F. *G. *3. Heater not functioning butheater light on.A. Heater plug loose.B. Element malfunction.C. Relay malfunction.A. Check Heater Plug connectionSystem Control Module.B. *C. *4. Water not clean.A. Clogged or blocked suctionstrainer or skimmer basket.B. Filter clogged (dirty).C. Poor water chemistry.D. Insufficient filtering time.E. Improper maintenance.F. High content of solids in water.G. Filter motor plug not connectedto System Control Module.A. Clean strainer/skimmer basket.B. Clean or replace.C. See “Chemistry” section.D. Run filter.E. See Maintenance section.F. Use clarifier or drain and refil spa.G. Check Filter Motor connection onSystem Control Module.5. Abnormal water usage. A. Leak in suction line, dischargeline, or connections.B. Excessive evaporation and/orsplashing.A. Repair leak.B. Use rigid spa cover; lower thermostatsetting.6. Low water flow from jets. A. Normal operation in FILTER orHTR/FLTR or AIR mode.B. Low water level.C. Clogged or blocked suctionstrainer or skimmer basket.D. Dirty filter.E. Adjustable jet partially closed.A. Select JETS mode for maximumflow.B. Fill to water level indicator mark onskimmer/filter frame.C. Clean strainers or skimmer baskets.D. Clean or replace.E. Open jet.16*Note: The skills and tools necessary for the safe repair of this spa require theservices of qualified service personnel. Contact your Jacuzzi Whirlpool BathAuthorized Service Agent or Dealer.
TROUBLESHOOTING GUIDEPROBLEM6. Low water flow from jets.(Continued)PROBABLE CAUSEE. Suction or discharge line partiallyplugged.F. Pump running at subnormalspeed.G. Worn or damaged pump seal.H. Subnormal voltage.E. *F. *REMEDYG. *H. Call an electrician or your powercompany.7. No water flow from jets. A. Power turned off.B. Selector switch in OFF.C. House circuit breaker tripped; nopower to system.D. Spa circuit protector tripped.E. High temperature safety switchtripped.F. GFCI tripped.G. Faulty pump or motor.H. Motor(s) not connected.I. Jet (or jets) closed.A. Turn on power at service panel.B. Select other function.C. Reset circuit breaker.D. Reset circuit protector.E. Reset button on heater after water hascooled; see *Note if switch continues totrip.F. Reset GFCIG. *H. Check motor plug connection on SystemControl Module.I. Open jet.8. Noisy pump and motor. A. Clogged strainer(s).B. Leakage of air into suction line.C. Vibrating parts attached to motoror support bracketsD. Low water level.E. Damaged or worn motor bearings.F. Impeller rubbing inside case.G. Debris inside pump.A. Clean strainer(s).B. Locate and repair leaks.C. Lighten fasteners.D. Add water to normal water level.E. *F. *G. *9. Water leakage at pump shaft(rotating connection betweenpump and motor).A. Worn or damaged pump seal. A. *10. Motor will not start. A. Power off.B. OFF mode selected.C. House circuit breaker tripped or inOFF position.D. Spa circuit protectors tripped.E. GFCI tripped.F. Improper or defective wiring.G. High temperature safety switchtripped.A. Turn on power at service panel.B. Select FILTER, HTR/FLTR, or JETSmode.C. Reset circuit breaker.D. Reset circuit protectors.E. Reset GFCI.F. *G. Reset button on heater after water hascooled; see *Note if switch continues totrip.*Note: The skills and tools necessary for the safe repair of this spa require the servicesof qualified service personnel. Contact your Jacuzzi Whirlpool Bath AuthorizedService Agent or Dealer.17
TROUBLESHOOTING GUIDEPROBLEM10. Motor will not start.(Continued)PROBABLE CAUSEI. Subnormal voltage.J. Locked shaft or impeller.K. Motor windings burned out.L. Defective starting switch insidemotor.REMEDYI. Call an electrician or your powercompany.J. *K. *L. *11. Motor stops. A. Motor overload condition.B. High temperature safety switchtripped.C. Selector switch failure.D. Relay failure.E. Inadequate supply wiring.A. Let cool for one hour. Motoroverload will reset if problempersists, see *Note.B. Reset button on heater afterwater has cooled; see *Note ifswitch continues to trip.C. *D. *E. Consult electrician to correctwiring to unit.12. Air Blower does not operate. A. Power off.B. ACCESSORY switch in OFF.C. House circuit breaker tripped, nopower to system.D. GFCI tripped.E. Faulty motor.A. Turn on power at service panel.B. Select other function.C. Reset circuit breaker.D. Reset GFCI.E. *13. Accessory Switch and systemswitch in off position, but motorand heater still operating.14. Timer will not activate spa.A. Timer is functioning.A. System and/or accessory switchis not in off position.B. Spa is up to temperature seton thermostat.A. Normal function. Turn timerto an off position, or resettabs in off position.A. Turn both system switch andaccessory switch to off position.B. Turn thermostat down. Ifthermostat is already at minimumsetting, and spa is at or abovethat temperature, timer willnot operate.*Note: The skills and tools necessary for the safe repair of this spa require the servicesof qualified service personnel. Contact your Jacuzzi Whirlpool Bath AuthorizedService Agent or Dealer.18
ALEVELSPA SHELLWEIR BLADELeveling the CascadeFirst make sure spa is in its final position and thatit is level before proceeding.To ensure an equal flow of water over the cascadeweir it may be necessary to level the weir blade. (Seeillustration A above.) Loosen the three screws thatsecure the weir blade to the spa shell; then proceed tolevel the weir blade by placing a small level on top of theweir blade. When the blade is level, tighten the screws.Recheck for level after the screws are tightened.If you do not have a level, an alternative method is tofill the spa to its normal water level. Before turning on thespa, loosen the three screws that secure the weir bladeto the spa just enough to be able to adjust the weir blade.Turn on the spa to filter or jet mode. As the water isrunning over the weir blade, adjust the weir blade byhand until there is an even flow of water cascading overthe entire width of the weir blade. After making sure youhave an even flow of water, turn off the spa and tightenthe three screws.Optional 1-1/2" Permanent DrainIf you wish to connect a permanent drain line to the 1-1/2" plumbing of the spa, you may modify the plumbingas shown in illustration B on this page. Note that noneof the piping required for the modification is provided.BAS SUPPLIED FOR HOSE CONNECTION:CUTCAP3/4" BALLVALVEALTERNATE PERMANENT SYSTEM:1-1/2" PVC PIPE1-1/2" BALLVALVE19
PRODUCT SPECIFICATIONS ARE SUBJECT TO CHANGE WITHOUT NOTICE.USE INSTALLATION INSTRUCTIONS SUPPLIED WITH PRODUCT.Jacuzzi Whirlpool Bath has obtained applicable code (standards) listings generally available on a national basis for products ofthis type. It is the responsibility of the installer/owner to determine specific local code compliance prior to installation of the product.Jacuzzi Whirlpool Bath makes no representation or warranty regarding, and will not be responsible for any code compliance.Jacuzzi Whirlpool Bath National HeadquartersP.O. Drawer J, Walnut Creek, CA 94596 (510) 938-7070Service Support: Call (800) 288-4002©1988 Jacuzzi Whirlpool Bath C788000 8/92Printed on Recycled PaperPrinted in the U.S.A.