Owner's Manual - La Toile des batteurs
Owner's Manual - La Toile des batteurs
Owner's Manual - La Toile des batteurs

Create successful ePaper yourself
Turn your PDF publications into a flip-book with our unique Google optimized e-Paper software.
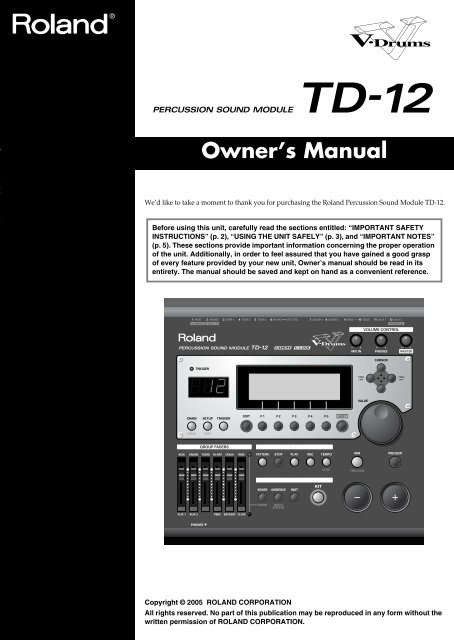
Owner’s <strong>Manual</strong>We’d like to take a moment to thank you for purchasing the Roland Percussion Sound Module TD-12.201bBefore using this unit, carefully read the sections entitled: “IMPORTANT SAFETYINSTRUCTIONS” (p. 2), “USING THE UNIT SAFELY” (p. 3), and “IMPORTANT NOTES”(p. 5). These sections provide important information concerning the proper operationof the unit. Additionally, in order to feel assured that you have gained a good graspof every feature provided by your new unit, Owner’s manual should be read in itsentirety. The manual should be saved and kept on hand as a convenient reference.202Copyright © 2005 ROLAND CORPORATIONAll rights reserved. No part of this publication may be reproduced in any form without thewritten permission of ROLAND CORPORATION.
WARNING: To reduce the risk of fire or electric shock, do not expose this apparatus to rain or moisture.CAUTIONRISK OF ELECTRIC SHOCKDO NOT OPENATTENTION: RISQUE DE CHOC ELECTRIQUE NE PAS OUVRIRCAUTION: TO REDUCE THE RISK OF ELECTRIC SHOCK,DO NOT REMOVE COVER (OR BACK).NO USER-SERVICEABLE PARTS INSIDE.REFER SERVICING TO QUALIFIED SERVICE PERSONNEL.The lightning flash with arrowhead symbol, within anequilateral triangle, is intended to alert the user to thepresence of uninsulated “dangerous voltage” within theproduct’s enclosure that may be of sufficient magnitude toconstitute a risk of electric shock to persons.The exclamation point within an equilateral triangle isintended to alert the user to the presence of importantoperating and maintenance (servicing) instructions in theliterature accompanying the product.INSTRUCTIONS PERTAINING TO A RISK OF FIRE, ELECTRIC SHOCK, OR INJURY TO PERSONS.IMPORTANT SAFETY INSTRUCTIONSSAVE THESE INSTRUCTIONSWARNING - When using electric products, basic precautions should always be followed, including the following:1. Read these instructions.2. Keep these instructions.3. Heed all warnings.4. Follow all instructions.5. Do not use this apparatus near water.6. Clean only with a dry cloth.7. Do not block any of the ventilation openings. Install inaccordance with the manufacturers instructions.8. Do not install near any heat sources such as radiators,heat registers, stoves, or other apparatus (includingamplifiers) that produce heat.9. Do not defeat the safety purpose of the polarized orgrounding-type plug. A polarized plug has two bla<strong>des</strong> withone wider than the other. A grounding type plug has twobla<strong>des</strong> and a third grounding prong. The wide blade or thethird prong are provided for your safety. If the provided plugdoes not fit into your outlet, consult an electrician forreplacement of the obsolete outlet.10. Protect the power cord from being walked on or pinchedparticularly at plugs, convenience receptacles, and thepoint where they exit from the apparatus.11. Only use attachments/accessories specifiedby the manufacturer.12. Unplug this apparatus during lightning storms or whenunused for long periods of time.13. Refer all servicing to qualified service personnel. Servicingis required when the apparatus has been damaged in anyway, such as power-supply cord or plug is damaged, liquidhas been spilled or objects have fallen into the apparatus,the apparatus has been exposed to rain or moisture, doesnot operate normally, or has been dropped.WARNING:IMPORTANT:For the U.K.THIS APPARATUS MUST BE EARTHEDTHE WIRES IN THIS MAINS LEAD ARE COLOURED IN ACCORDANCE WITH THE FOLLOWING CODE.GREEN-AND-YELLOW: EARTH, BLUE: NEUTRAL, BROWN: LIVEAs the colours of the wires in the mains lead of this apparatus may not correspond with the coloured markings identifyingthe terminals in your plug, proceed as follows:The wire which is coloured GREEN-AND-YELLOW must be connected to the terminal in the plug which is marked by theletter E or by the safety earth symbol or coloured GREEN or GREEN-AND-YELLOW.The wire which is coloured BLUE must be connected to the terminal which is marked with the letter N or coloured BLACK.The wire which is coloured BROWN must be connected to the terminal which is marked with the letter L or coloured RED.2
USING THE UNIT SAFELYUsed for instructions intended to alertthe user to the risk of death or severeinjury should the unit be usedimproperly.Used for instructions intended to alertthe user to the risk of injury or materialdamage should the unit be usedimproperly.* Material damage refers to damage orother adverse effects caused withrespect to the home and all itsfurnishings, as well to domesticanimals or pets.The symbol alerts the user to important instructionsor warnings.The specific meaning of the symbol isdetermined by the <strong>des</strong>ign contained within thetriangle. In the case of the symbol at left, it is used forgeneral cautions, warnings, or alerts to danger.The symbol alerts the user to items that must neverbe carried out (are forbidden). The specific thing thatmust not be done is indicated by the <strong>des</strong>ign containedwithin the circle. In the case of the symbol at left, itmeans that the unit must never be disassembled.The ● symbol alerts the user to things that must becarried out. The specific thing that must be done isindicated by the <strong>des</strong>ign contained within the circle. Inthe case of the symbol at left, it means that the powercordplug must be unplugged from the outlet.001• Before using this unit, make sure to read theinstructions below, and the Owner’s <strong>Manual</strong>.................................................................................................001-50• Connect mains plug of this model to a mainssocket outlet with a protective earthing connection.................................................................................................002a• Do not open or perform any internal modificationson the unit.................................................................................................003• Do not attempt to repair the unit, or replace partswithin it (except when this manual provi<strong>des</strong>specific instructions directing you to do so). Referall servicing to your retailer, the nearest RolandService Center, or an authorized Rolanddistributor, as listed on the “Information” page.................................................................................................004• Never use or store the unit in places that are:• Subject to temperature extremes (e.g., directsunlight in an enclosed vehicle, near a heatingduct, on top of heat-generating equipment); orare• Damp (e.g., baths, washrooms, on wet floors); orare• Humid; or are• Exposed to rain; or are• Dusty; or are• Subject to high levels of vibration.................................................................................................007• Make sure you always have the unit placed so it islevel and sure to remain stable. Never place it onstands that could wobble, or on inclined surfaces.................................................................................................008a• The unit should be connected to a power supplyonly of the type <strong>des</strong>cribed in the operating instructions,or as marked on the bottom of unit.................................................................................................008e• Use only the attached power-supply cord. Also,the supplied power cord must not be used withany other device.................................................................................................009• Do not excessively twist or bend the power cord,nor place heavy objects on it. Doing so can damagethe cord, producing severed elements and shortcircuits. Damaged cords are fire and shock hazards!................................................................................................010• This unit, either alone or in combination with anamplifier and headphones or speakers, may becapable of producing sound levels that could causepermanent hearing loss. Do not operate for a longperiod of time at a high volume level, or at a levelthat is uncomfortable. If you experience anyhearing loss or ringing in the ears, you shouldimmediately stop using the unit, and consult anaudiologist.................................................................................................011• Do not allow any objects (e.g., flammable material,coins, pins); or liquids of any kind (water, softdrinks, etc.) to penetrate the unit.................................................................................................3
012a• Immediately turn the power off, remove the powercord from the outlet, and request servicing by yourretailer, the nearest Roland Service Center, or anauthorized Roland distributor, as listed on the“Information” page when:• The power-supply cord, or the plug has beendamaged; or• If smoke or unusual odor occurs• Objects have fallen into, or liquid has beenspilled onto the unit; or• The unit has been exposed to rain (or otherwisehas become wet); or• The unit does not appear to operate normally orexhibits a marked change in performance.................................................................................................013• In households with small children, an adult shouldprovide supervision until the child is capable offollowing all the rules essential for the safeoperation of the unit.................................................................................................014• Protect the unit from strong impact.(Do not drop it!)................................................................................................015• Do not force the unit’s power-supply cord to sharean outlet with an unreasonable number of otherdevices. Be especially careful when using extensioncords—the total power used by all devices youhave connected to the extension cord’s outlet mustnever exceed the power rating (watts/amperes) forthe extension cord. Excessive loads can cause theinsulation on the cord to heat up and eventuallymelt through.................................................................................................016• Before using the unit in a foreign country, consultwith your retailer, the nearest Roland ServiceCenter, or an authorized Roland distributor, aslisted on the “Information” page.................................................................................................026• Do not put anything that contains water (e.g.,flower vases) on this unit. Also, avoid the use ofinsectici<strong>des</strong>, perfumes, alcohol, nail polish, spraycans, etc., near the unit. Swiftly wipe away anyliquid that spills on the unit using a dry, soft cloth.................................................................................................101a• The unit should be located so that its location orposition does not interfere with its proper ventilation.................................................................................................102b• Always grasp only the plug on the power-supplycord when plugging into, or unplugging from, anoutlet or this unit.................................................................................................103a• At regular intervals, you should unplug the powerplug and clean it by using a dry cloth to wipe alldust and other accumulations away from itsprongs. Also, disconnect the power plug from thepower outlet whenever the unit is to remainunused for an extended period of time. Anyaccumulation of dust between the power plug andthe power outlet can result in poor insulation andlead to fire.................................................................................................104• Try to prevent cords and cables from becomingentangled. Also, all cords and cables should beplaced so they are out of the reach of children.................................................................................................106• Never climb on top of, nor place heavy objects onthe unit.................................................................................................107b• Never handle the power cord or its plugs with wethands when plugging into, or unplugging from, anoutlet or this unit.................................................................................................108a• Before moving the unit, disconnect the power plugfrom the outlet, and pull out all cords fromexternal devices.................................................................................................109a• Before cleaning the unit, turn off the power andunplug the power cord from the outlet.................................................................................................110a• Whenever you suspect the possibility of lightningin your area, pull the plug on the power cord outof the outlet.................................................................................................118a• Should you remove screws from the bottom panelof the unit (p. 16), keep them in a safe place out ofchildren’s reach, so there is no chance of thembeing swallowed accidentally.................................................................................................4
IMPORTANT NOTES291bIn addition to the items listed under “IMPORTANT SAFETY INSTRUCTIONS” and “USING THE UNITSAFELY” on pages 2–4, please read and observe the following:Power Supply301• Do not connect this unit to same electrical outlet that isbeing used by an electrical appliance that is controlled byan inverter (such as a refrigerator, washing machine,microwave oven, or air conditioner), or that contains amotor. Depending on the way in which the electricalappliance is used, power supply noise may cause this unitto malfunction or may produce audible noise. If it is notpractical to use a separate electrical outlet, connect a powersupply noise filter between this unit and the electricaloutlet.307• Before connecting this unit to other devices, turn off thepower to all units. This will help prevent malfunctionsand/or damage to speakers or other devices.308• Although the LCD and LEDs are switched off when thePOWER switch is switched off, this does not mean that theunit has been completely disconnected from the source ofpower. If you need to turn off the power completely, firstturn off the POWER switch, then unplug the power cordfrom the power outlet. For this reason, the outlet intowhich you choose to connect the power cord’s plug shouldbe one that is within easy reach and readily accessible.Placement351• Using the unit near power amplifiers (or other equipmentcontaining large power transformers) may induce hum. Toalleviate the problem, change the orientation of this unit; ormove it farther away from the source of interference.352a• This device may interfere with radio and televisionreception. Do not use this device in the vicinity of suchreceivers.352b• Noise may be produced if wireless communicationsdevices, such as cell phones, are operated in the vicinity ofthis unit. Such noise could occur when receiving or initiatinga call, or while conversing. Should you experiencesuch problems, you should relocate such wireless devicesso they are at a greater distance from this unit, or switchthem off.355b• When moved from one location to another where thetemperature and/or humidity is very different, waterdroplets (condensation) may form inside the unit. Damageor malfunction may result if you attempt to use the unit inthis condition. Therefore, before using the unit, you mustallow it to stand for several hours, until the condensationhas completely evaporated.Maintenance401a• For everyday cleaning wipe the unit with a soft, dry clothor one that has been slightly dampened with water. Toremove stubborn dirt, use a cloth impregnated with a mild,non-abrasive detergent. Afterwards, be sure to wipe theunit thoroughly with a soft, dry cloth.402• Never use benzine, thinners, alcohol or solvents of anykind, to avoid the possibility of discoloration and/or deformation.Repairs and Data452• Please be aware that all data contained in the unit’smemory may be lost when the unit is sent for repairs.Important data should always be backed up in anotherMIDI device (e.g., a sequencer), or written down on paper(when possible). During repairs, due care is taken to avoidthe loss of data. However, in certain cases (such as whencircuitry related to memory itself is out of order), we regretthat it may not be possible to restore the data, and Rolandassumes no liability concerning such loss of data.Memory Backup501b• This unit contains a battery which powers the unit’smemory circuits while the main power is off. When thisbattery becomes weak, the message shown below willappear in the display. Once you see this message, have thebattery replaced with a fresh one as soon as possible toavoid the loss of all data in memory. To have the batteryreplaced, consult with your retailer, the nearest RolandService Center, or an authorized Roland distributor, aslisted on the “Information” page.“Backup Battery Low!”5
IMPORTANT NOTESAdditional Precautions551• Please be aware that the contents of memory can beirretrievably lost as a result of a malfunction, or theimproper operation of the unit. To protect yourself againstthe risk of loosing important data, we recommend that youperiodically save a backup copy of important data youhave stored in the unit’s memory in another MIDI device(e.g., a sequencer).552• Unfortunately, it may be impossible to restore the contentsof data that was stored in the unit’s memory or in anotherMIDI device (e.g., a sequencer) once it has been lost.Roland Corporation assumes no liability concerning suchloss of data.553• Use a reasonable amount of care when using the unit’sbuttons, sliders, or other controls; and when using its jacksand connectors. Rough handling can lead to malfunctions.554• Never strike or apply strong pressure to the display.556• When connecting / disconnecting all cables, grasp theconnector itself—never pull on the cable. This way you willavoid causing shorts, or damage to the cable’s internalelements.557• A small amount of heat will radiate from the unit duringnormal operation.558a• To avoid disturbing your neighbors, try to keep the unit’svolume at reasonable levels. You may prefer to useheadphones, so you do not need to be concerned aboutthose around you (especially when it is late at night).558c• Since sound vibrations can be transmitted through floorsand walls to a greater degree than expected, take care notto allow such sound to become a nuisance to neighbors,especially at night and when using headphones. Althoughthe drum pads and pedals are <strong>des</strong>igned so there is aminimal amount of extraneous sound produced whenthey’re struck, rubber heads tend to produce loudersounds compared to mesh heads. You can effectivelyreduce much of the unwanted sound from the pads byswitching to mesh heads.559a• When you need to transport the unit, package it in the box(including padding) that it came in, if possible. Otherwise,you will need to use equivalent packaging materials.562• Use a cable from Roland to make the connection. If usingsome other make of connection cable, please note thefollowing precautions.• Some connection cables contain resistors. Do not usecables that incorporate resistors for connecting to thisunit. The use of such cables can cause the sound level tobe extremely low, or impossible to hear. For informationon cable specifications, contact the manufacturerof the cable.6
ContentsUSING THE UNIT SAFELY ........................................................................3IMPORTANT NOTES..................................................................................5Features ...................................................................................................11Panel Descriptions ..................................................................................13Top Panel.............................................................................................................................13Rear Panel ...........................................................................................................................15Setting Up the Kit ....................................................................................16Mounting the TD-12 on the Stand ...................................................................................16Connecting the Pads and Pedals......................................................................................17Connecting Headphones, Audio Equipment, Amps, or Other Gear .........................18Turning On/Off the Power ..............................................................................................19Connecting the Hi-Hat (VH-11) and Setting the “VH Offset” ....................................20Connecting the Hi-Hat ............................................................................................................................ 20Adjusting the Offset................................................................................................................................. 20Adjusting Mesh Head Tension ........................................................................................21Adjusting the PD-105 Head Tension ..................................................................................................... 21Adjusting the PD-85 Head Tension ....................................................................................................... 21Playing Methods......................................................................................22Pad (PD-105/PD-85)..........................................................................................................22Change the Nuance of the Rim Shot...................................................................................................... 22Brush Sweeps ............................................................................................................................................ 22Cymbal (CY-12R/C) ..........................................................................................................22Choke Play................................................................................................................................................. 23Positional Sensing..................................................................................................................................... 23Hi-Hat (VH-11/VH-12).....................................................................................................23Button Operation and Displays..............................................................24Saving Your Settings..........................................................................................................24Buttons, Sliders, Dial and Knobs .....................................................................................24Cursor ..................................................................................................................................24Function Buttons ([F1]–[F5]).............................................................................................24Changing Data Values.......................................................................................................24Choosing Pads from the TD-12’s Top Panel ..................................................................25Convenient [PREVIEW] Functions ........................................................................................................ 25How to Play Patterns.........................................................................................................25How to Turn the Metronome (Click) On/Off................................................................25How to Adjust the Tempo ................................................................................................26Adjusting the Display Contrast .......................................................................................26About the Display in the Upper Right of the Screen ....................................................26Group Faders......................................................................................................................26Listening to the Demo Song...................................................................27Changing the Drum Kits...................................................................................................27Changing the Volume Balance.........................................................................................27Muting the Performance of the Backing Instruments and Drums .............................27Turning the Metronome (Click) On/Off ........................................................................277
ContentsUseful Functions to Know ......................................................................28About the Preset Drum Kits .............................................................................................28Playing Patterns to Check Drum Kit Tones ...................................................................28Restoring Edited Drum Kits to the Factory Default Settings ......................................28Restoring All Settings to the Factory Settings...................................................................................... 28Restoring the Factory Settings to Individual Kits................................................................................ 28Playing Back Patterns by Striking the Pads (Pad Pattern Function) ..........................29Stopping Playback of the Pattern Being Played...................................................................................29Disabling the Pad Pattern Function....................................................................................................... 29Striking a Pad to Switch the Drum Kits (Pad Switch Function)..................................29Enabling Cross Sticks ........................................................................................................29Playing Along with Patterns ............................................................................................29Choosing a Pattern ................................................................................................................................... 29Muting a Specific Part.............................................................................................................................. 29Chapter 1. Drum Kit Settings [KIT] ........................................................30Choosing a Drum Kit.........................................................................................................30About the “DRUM KIT” Screen ............................................................................................................. 30Selecting a Drum Kit from the List [F1 (LIST)]..............................................................31Kit Parameters [F2 (FUNC)] .............................................................................................31Adjusting the Volume [F1 (VOLUME)] ................................................................................................ 31Assigning a Tempo for Each Kit [F2 (TEMPO)]................................................................................... 31Playing Brushes [F3 (BRUSH)] ............................................................................................................... 32Disabling the Pad Pattern Function [F4 (PAD PTN)] ......................................................................... 32Naming a Drum Kit [F3 (NAME)]...................................................................................32Effects On and Off Switches [F4 (FX SW)] .....................................................................32Playing Cross Stick [F5 (XSTICK)]...................................................................................32Chapter 2. Drum Instrument Settings [INST] ........................................33Choosing a Pad to Edit......................................................................................................33Choose by Hitting a Pad.......................................................................................................................... 33Choose with the Buttons ......................................................................................................................... 33Lock the Pad You are Editing (TRIG LOCK) [SHIFT] + [RIM] ......................................................... 33Assign an Instrument to a Pad.........................................................................................33Selecting an Instrument from the List [F1 (LIST)].........................................................34Editing Drum Sounds [F2 (EDIT)]...................................................................................34Editing an Acoustic Drum Kit (V-EDIT)............................................................................................... 34Editing Other Instruments ...................................................................................................................... 34Editing Procedure..................................................................................................................................... 34Using the Compressor and EQ [F3 (COMP/EQ)].........................................................36Using Pads/Pedal as Controllers [F4 (CONTROL)].....................................................37Playing a Pattern by Hitting a Pad (Pad Pattern) [F1 (PATTERN)].................................................. 37Changing the Pitch with the Hi-Hat Pedal [F2 (PDLBEND)] ............................................................ 38MIDI Settings for Each Pad [F3 (MIDI)]................................................................................................ 38MIDI Note Numbers transmitted by Hi-Hat [F4 (HH MIDI)]........................................................... 38MIDI Note Number transmitted by Brush Sweep/Cross Stick [F5 (BR MIDI)] ............................. 38Chapter 3. Mixer Settings .......................................................................39Mixer Parameters [MIXER] ..............................................................................................39Using Group Faders to Edit (MIX EDIT) .............................................................................................. 398
ContentsChapter 4. Effect Settings.......................................................................40Effects On and Off Switches [KIT] - [F4 (FX SW)].........................................................40Using the Compressor and EQ [INST] - [F3 (COMP/EQ)]..........................................40Compressor (COMP) ............................................................................................................................... 41Equalizer (EQ)........................................................................................................................................... 41Ambience [AMBIENCE] ...................................................................................................42Multi-Effects [SHIFT] + [AMBIENCE]............................................................................42Multi-Effects Parameters......................................................................................................................... 43Chapter 5. Trigger Settings [TRIGGER].................................................44Selecting the Pad Type [F1 (BANK)]...............................................................................44Trigger Inputs and Pad/Playing Methods corresponding chart ...................................................... 44Setting the Pad Sensitivity [F2 (BASIC)].........................................................................45Pad Sensitivity .......................................................................................................................................... 45Minimum level for the pad (Threshold) ............................................................................................... 45How Playing Dynamics Changes the Volume (Velocity Curve) ...................................................... 45Hi-Hat Settings [F3 (HI-HAT)].........................................................................................46Connecting the VH-11 and Adjusting the TD-12................................................................................. 47Connecting the VH-12 and Adjusting the TD-12................................................................................. 48Connecting and Setting the Hi-Hat Control Pedal (FD Series).......................................................... 48Eliminate Crosstalk Between Pads [F4 (XTALK)].........................................................49Advanced Trigger Parameters [F5 (ADVANCE)].........................................................50Trigger Signal Detection Time (Scan Time).......................................................................................... 50Detecting Trigger Signal Attenuation (Retrigger Cancel) .................................................................. 50Double Triggering Prevention (Mask Time) ........................................................................................51Rim/Edge Dynamic Response (Rim Gain)........................................................................................... 51Rim Shots Response (Rim Shot Adjust) ................................................................................................ 51Cross Stick Threshold (XStick Thrshld) ................................................................................................ 51Playing Bow, Bell, and Edge (3-Way Triggering)................................................................................ 52Naming a Trigger Bank [F5 (Name)]..................................................................................................... 52Chapter 6. Sequencer (Playback)...........................................................53Basic Operation ..................................................................................................................53Choosing a Pattern [PATTERN] ......................................................................................54About the “PATTERN” screen ............................................................................................................... 54Select a Pattern from the List [F1 (LIST)]........................................................................54Playing Back a Pattern [PLAY] ........................................................................................54Tempo Adjustment ............................................................................................................55Setting the Tempo by Hitting a Pad (Tap Tempo) .............................................................................. 55Synchronizing with an External MIDI Device ..................................................................................... 55Part Settings [F2 (PART)]..................................................................................................56Make Settings for the Backing Part [F1 (BACKING)] ......................................................................... 56Master Tuning........................................................................................................................................... 56Percussion Part Settings [F2 (PERC)] .................................................................................................... 57Percussion Set Settings ............................................................................................................................ 57Volume/Pan Settings for Each Part [F3 (MIXER)] .............................................................................. 59Reverb Settings for Backing Parts [F3 (MIXER)] - [F4 (REVERB)] .................................................... 59Muting a Specific Part [F5 (MUTE)] ...................................................................................................... 60Pattern Settings [F3 (FUNC)]............................................................................................60Time Signature/Number of Measures/Tempo Settings [F1 (SETUP)]............................................ 60Choosing a Playback Method [F2 (TYPE)] ........................................................................................... 61Confirming the Usage Status of the TD-12’s Internal Memory [F3 (MEMORY)]........................... 61Naming a Pattern [F5 (NAME)] ............................................................................................................. 62Starting and Stopping the Metronome (Click) On/Off................................................62Using a Indicator as a Click (Tempo Indicator).............................................................62Setting the Click .................................................................................................................639
ContentsChapter 7. Sequencer (Recording/Editing) ...........................................64Recording a Pattern [REC]................................................................................................64How to Record.......................................................................................................................................... 64Checking the Tones and Phrases During Recording (Rehearsal)...................................................... 66Editing a Pattern [F4 (EDIT)]............................................................................................67Copying a Pattern [F1 (COPY)] .............................................................................................................. 67Connecting Two Patterns [F2 (APPEND)]............................................................................................ 68Erasing a pattern [F3 (ERASE)] .............................................................................................................. 68Deleting a Pattern [F4 (DELETE)] .......................................................................................................... 69Chapter 8. Copy Function [COPY] .........................................................70About Copied Settings............................................................................................................................. 71Chapter 9. Settings for the Entire TD-12 [SETUP]................................72MIDI Settings and Operations [F1 (MIDI)] ....................................................................72Setting the MIDI Channels for Each Part [F1 (MIDI CH)].................................................................. 72MIDI Settings for the Entire TD-12 [F2 (GLOBAL)]............................................................................ 72MIDI Messages for Detailed Performance Expressions [F3 (CTRL)]................................................ 74Switching Drum Kits via MIDI (Program Change) [F4 (PROG)]...................................................... 74Saving Data to an external MIDI Device (Bulk Dump) [F5 (BULK)]................................................ 75Selecting Output Destinations [F2 (OUTPUT)] .............................................................76Output Destination for the Drum Instruments.................................................................................... 76Output Destination for the Sequencer Parts/Metronome Click/Sound Input from MIX IN [F2 (OTHER)]............................................................................................. 76Setting the Switches [F3 (CONTROL)] ...........................................................................76Using Pads as Switches [F1 (PAD SW)] ................................................................................................ 76PREVIEW Button Velocity [F2 (PREVIEW)] ........................................................................................ 77Adjusting the Display Contrast [F3 (LCD)].......................................................................................... 77Checking the TD-12’s Internal Program Version [F5 (VERSION)] ................................................... 77Synchronizing Images to a TD-12 Performance [F4 (V-LINK)] ..................................78What is V-LINK? ...................................................................................................................................... 78Connection Examples .............................................................................................................................. 78Using V-LINK ........................................................................................................................................... 78Restoring the Factory Settings [F5 (F RESET)]...............................................................79Chapter 10. Drum Kit Chain [CHAIN].....................................................80Creating a Drum Kit Chain ..............................................................................................80Naming a Drum Kit Chain [F5 (NAME)] .............................................................................................81Playing with a Drum Kit Chain .......................................................................................81Messages and Error Messages..............................................................82Preset Drum Kit List................................................................................84Preset Pattern List...................................................................................86Drum Instrument List ..............................................................................88Preset Percussion Set List .....................................................................92Backing Instrument List..........................................................................94MIDI Implementation Chart.....................................................................96Specifications ..........................................................................................98Block Diagram .......................................................................................100Index .......................................................................................................10210
FeaturesEverything Is New! Module—Stand—V-Hi-Hat—PadsThe TD-12 follows in the foot steps of the TD-20, takingadvantage of Roland’s powerful COSM technology. Velocity,position, and interval of each hit are detected precisely,providing real and natural dynamics. The new, dual triggerPD-105/85 pads give you superior feel, response and controlof the sound. You can play both shallow and deep rim shots.12 trigger inputs let you use lots of pads, leaving room foradvanced Pad Switch applications. (p. 76)* COSM (Composite Object Sound Modeling) is a Rolandtechnology combining multiple sound modeling processes tocreate new sounds.* Positional detection is possible on snare drums (head/rim),toms (rim) and ride cymbals (bow).560 New Drum SoundsExpanded V-EditingHigh-speed triggeringAdvances in trigger technology combined with new pad<strong>des</strong>igns and V-Hi-Hat pads, provide natural response andfeel. Even playing with brushes (plastic only) has improved(p. 32).Audio Signal Routing Stageor StudioFlexibility of audio routing is important in the professionalenvironment. The TD-12 lets you use all of the outputs in avery efficient way. Each sound of the drum kit can be assignedto one of the 4 individual outs. (Master out can be used as anindividual pair. The Effects, Ambience, Backing parts, Clickand even audio coming in the MIX input, can be assigned toindividual outputs. Perfect for any situation.V-Hi-Hat CompatibilityOverviewThe onboard sound library was created for the TD-12, and<strong>des</strong>igned to work with enhanced V-Editing. Besi<strong>des</strong> being ableto change heads, muffling types, shell depth, etc. you can alsoplace sizzles on any cymbal, and add snare buzz to the tomsor kick.An Easy User InterfaceThe interface is very easy to navigate. With the many buttonson the top panel, you won’t lose time searching for functions.Clear graphics, icons and menus guide you through thesimple and complex operations. No matter where you areinside the TD-12, pushing the KIT button always brings youback to the main kit page. Even still, please read this manual.By including the VH-11 V-Hi-Hat, which features a singlepiececonstruction, you can perform with a natural feel. Usingthe VH-12 two-piece hi-hat, you can use pressure on the pedalwhen the hi-hat is closed to create further changes in thenuance and/or pitch of the sound (p. 23).Cables Are Easy To OrganizeThe MDS-12 stand allows you to pass the cables through thepipes, making easy to transport and set up again. Itstreamlines the look as well.11
FeaturesTop Quality SignalProcessingEach instrument assigned to trigger 1–12 head and rim inputshas an individual three-band equalizer and compressor (p.40). There is also a multi-effects unit with delays, flanger,chorus, and phaser (p. 42). There’s also Ambience, with a newroom “shape” feature in addition to being able to change wallmaterials, size, etc. (p. 42) All effects are simple to understandand use. Via the top panel, you can also turn all the effects onor off individually.Functions For StageThe group faders on the top panel let you make quick changesas needed during performance (p. 26). You can play drum kitsin any <strong>des</strong>ired order (Drum Kit Chain, p. 80). The +/- buttonsare large enough to be pressed with a drum stick. (Don’t HITthem!) Another very useful function allows you to send theclick sound ONLY to the headphones if <strong>des</strong>ired (p. 76). Anaudio input (stereo) for custom monitoring (MIX IN jack, p.18) is also provided. The MIX EDIT function allows immediateediting of volume, Ambience send level, and MFX send levelusing the group faders (p. 39).SequencerAdvanced Tempo FunctionsEach KIT can have it’s own tempo setting. The visual indicatorhelps you count off the tempo of a song without needing tohear the click (p. 62). Tap Tempo function allows you to settempo from all trigger inputs or the preview button (p. 55).MIDI Sound ModulePotentialsPercussion sets are accessed on a different MIDI channel thanthe drums. They can be played from the internal sequencer orexternal MIDI source (SPD type pad etc.) and feature a 128note map. And with 262 backing instruments available, thereare sounds for all types of music (p. 94).V-LINK functionV-LINK () is a function that allows music andimages to be performed together. By using MIDI to connecttwo or more V-LINK compatible devices, you can easily enjoyperforming a wide range of visual effects that are linked to theexpressive elements of a music performance. By using the TD-12 and Edirol DV-7PR together, connected pads can be used toswitch the Edirol DV-7PR’s images (clips/palettes) (p. 78).Recording and playing back patterns is very easy. The 6 partbacking section, (including drums) can be used for live orrecording performances. Recording directly from the pads tothe percussion part is a great new feature, too (p. 73).12
Panel DescriptionsTop PanelOverviewfig.top123 14 15 16174567 811918192012101321221. Trigger IndicatorThis lights up each time a trigger signal is received from apad. It monitors the pad connection and is helpful whencustomizing trigger parameters.2. LED DisplayDisplays the Kit number (currently selected drum kit).3. Graphic DisplayDuring normal performance, you see the kit name andother information. When editing, relative graphics andtext will appear depending on the edit mode you are in.4. CHAIN ButtonA Chain allows you to set up a customized order forplaying your kits. There are 16 Chains (32 steps each).Chains can be named also (p. 80).5. SETUP (COPY) ButtonFor access to functions that affect the TD-12 globally,such as MIDI parameters etc. (p. 72)You can copy drum kit, instrument, and other settings bypressing this button together with the SHIFT button (p.70).* In this owner’s manual, this will be referred to as “the display.”13
Panel Descriptions6. TRIGGER ButtonFor access to trigger parameters (p. 44).7. EXIT ButtonPress this to return to the previous screen. Repeatedpressing takes you back to the “DRUM KIT” screen.8. F1–F5 Buttons (Function Buttons)These buttons change their function depending on thecontents of the display. The lower part of the display willindicate the function of each button (p. 24).9. SHIFT ButtonUsed in combination with other buttons. How thisfunctions is explained in respective parts of this manual.10. GROUP FADERSThe faders are switchable, allowing you to adjust thevolume of the kick, snare, toms, hi-hat, cymbals,percussion and backing instruments, and the click sound(p. 26).11. SEQUENCERThese provide access to and control of sequencerfunctions (pattern playback/recording, Percussion set)etc. (p. 53, p. 64)12. DRUM KITThese buttons take you to the screens for creating orediting a drum kit. (p. 33, p. 39, p. 40).13. KIT ButtonOne touch brings you back to the basic display screen. Itworks from any Edit mode as well.14. MIX IN KnobAdjusts the level of the audio source connected to theMIX IN jack. This sound is output from the MASTEROUT jacks and/or the PHONES jack. Other possibilities(p. 76).17. CURSOR (TRIG) ButtonsUsed to move the cursor in the display (p. 24).You can select the pad (trigger number) you want tomake settings for by pressing this button together withthe SHIFT button. You can also use the PREVIEW buttonto check the sound of the instrument assigned to theselected pad.* When you connect a pad to the TD-12, you can then tap thepad to select it as the pad for which settings are made.18. VALUE DialThis dial functions like the + and - buttons. Use it to scrollquickly or make large changes in edited values (p. 24).19. RIM (TRIG LOCK) ButtonPress this to select the rim of a pad. (RIM button lights.)(p. 25).By pressing this button together with the SHIFT button,you can prevent the screen from being switchedinadvertently even if you hit another pad when editinginstruments (Trigger Lock; p. 33).20. PREVIEW ButtonThis button allows you to audition an instrument afteryou have chosen it with the CURSOR (TRIG) buttons orafter you have played a pad/pedal (p. 25).21. + Button, - ButtonThese buttons are used to switch drum kits or to changevalues when editing. The + button increases the value,and the - button decreases it (p. 24). You can also use thetip of your drum stick to press them.* Never hit them with a stick as this can cause malfunctions.22. PHONES JackA pair of stereo headphones can be connected to this jack.Connecting the headphones will not mute the outputfrom the MASTER OUT jacks (p. 18).15. PHONES KnobAdjusts the headphone volume. Plugging in headphonesdoes not affect the master output (like other audiodevice.)16. MASTER KnobAdjusts the volume of the MASTER OUT jacks.14
Panel DescriptionsRear Panelfig.rear_501 2 3 4 5 6 7 8 9Overview1. POWER SwitchThis switch turns the power on/off.* If you need to turn off the power completely, first turn off thePOWER switch, then unplug the power cord from the poweroutlet. Refer to Power Supply (p. 5).2. AC InletConnect the included AC power cable to this inlet.* For details on the power consumption, refer to p. 99.The unit should be connected to a power sourceonly of the type marked on the bottom of theunit.3. TRIGGER INPUT JacksHere is where you plug in pads, kick triggers, or acoustictriggers. With dual trigger pads (PD-125/105/85/8),cymbals (CY series), and a hi-hat (VH-11/12), use a stereo(TRS) cable (p. 17).6. MIX IN JackUsed for connecting any external audio source (p. 18).This audio signal will be output from the MASTER OUTjacks and/or PHONES jack. Other signal routingpossibilities (p. 76).7. DIRECT OUT JacksIndividual outputs have a variety of uses. The TD-12offers many options. See the SETUP screen (p. 76).8. MASTER OUT JacksFor connecting to your amp/audio system. For monauraloutput, use the MASTER OUT L (MONO) jack.9. Security Slot ( )For retail store use.http://www.kensington.com/4. MIDI OUT/THRU ConnectorFor using the TD-12/pads to play sounds in an externalMIDI sound module, or recording/saving data to anexternal MIDI sequencer (pp. 72–75).5. MIDI IN ConnectorTo connect an external MIDI source (sequencer, padcontroller, keyboard, computer, etc.) to play the TD-12’ssounds, or to load data (pp. 72–75).15
Setting Up the KitMounting the TD-12 on the Stand1. Attach the stand holder (included with the optional drum stand) to the TD-12.Using the screws attached to the bottom panel, attach the holder so the unit is oriented as shown in the diagram.* ONLY use the 12 mm screws (M5 x 12) provided with the TD-12. Other screws may damage the unit.fig.StandHolder.eNarrowWide928, 929• When turning the unit upside-down, get a bunch of newspapers or magazines, and place them under thefour corners or at both ends to prevent damage to the buttons and controls. Also, you should try to orientthe unit so no buttons or controls get damaged.• When turning the unit upside-down, handle with care to avoid dropping it, or allowing it to fall or tip over.2. Attach the TD-12 and stand holder to the drum stand (such as the optional MDS-12).See the owner’s manual for the stand for details on assembling the drum stand and attaching the TD-12.005This unit should be used only with a stand that is recommended by Roland.006101cWhen using the unit with a stand recommended by Roland, the rack or stand must be carefully placed so it is leveland sure to remain stable. If not using a rack or stand, you still need to make sure that any location you choose forplacing the unit provi<strong>des</strong> a level surface that will properly support the unit, and keep it from wobbling.This TD-12 for use only with Roland stand MDS series. Use with other stands is capable of resulting in instabilitycausing possible injury.The optional APC-33 All Purpose Clamp can be attached to a pipe of 10.5–28.6 mm radius in case youwant to mount the TD-12 on a cymbal stand or other such stand.16
Setting Up the KitConnecting the Pads and PedalsUsing the provided cables, connect the pads, cymbals, hi-hat, and kick trigger pad.* When mounting a TD-12 on an MDS-12 drum stand, use the built-in connection cables.OverviewSet Up Examplefig.Kit.eTD-12 Rear Panel7 / CRASH 1 (BOW/EDGE)CY-12R/C9 / RIDE (BOW/BELL)10 / EDGE (BOW/EDGE)6 / HI-HAT (TRIGGER OUT)HH CTRL (CTRL OUT)3 / TOM 1 4 / TOM 2CY-12R/CTD-12VH-11PD-85PD-85PD-1052 / SNAREPD-855 / TOM 3KD-851 / KICKThe HI-HAT and RIDE cymbal use two cables each. See p. 20 and p. 52.17
Setting Up the KitConnecting Headphones, Audio Equipment, Amps, or OtherGearfig.Connect.eSpeakers with built-in amp etc.LCD/MD player etc.RStereo set etc.TD-12 Rear PanelStereo phone typePhone typeStereo phone typeTD-12 Front Panel1. Turn off the power of all devices before youmake connections.921* To prevent malfunction and/or damage to speakers or otherdevices, always turn down the volume, and turn off the poweron all devices before making any connections.2. Connect the MASTER OUT L (MONO) and Rjacks on the rear panel to your audio system oramp. Headphones should ONLY be connectedto the PHONES jack.3. Connect the supplied power cord to the ACinlet.4. Plug the power cord plug into a power outlet.The TD-12’s MIX IN jack allows you to play along with aCD or other audio sources.• To adjust the volume of the device connected to the MIXIN jack, turn the [MIX IN] knob on the TD-12’s top panel.• The sound input from the MIX IN jack can be outputfrom the MASTER OUT, PHONES, or DIRECT OUT 1/2jacks (p. 76).926a* When connection cables with resistors are used, the volumelevel of equipment connected to the MIX IN jack may be low. Ifthis happens, use connection cables that do not containresistors, such as those from the Roland PCS series.18
Setting Up the KitTurning On/Off the Power941* Once the connections have been completed (p. 17, p. 18), turnon power to your various devices in the order specified. Byturning on devices in the wrong order, you risk causingmalfunction and/or damage to speakers and other devices.fig.VolMin1. Turn the [MASTER] and [PHONES] completelyto the left to lower the volume to “0.”2. Turn down the volume control on theconnected amp or audio system.No Sound When Hitting the Pads or Using thePedals?Check the following points.When Using an Amp or Audio System• Is the amp or audio system connected to the TD-12’sMASTER OUT jacks?• Is the input of the amp or audio system properlyconnected?• Is there a problem with any connection cables?• Is the volume turned down in the [GROUPFADERS] sliders?• Is [MASTER] turned completely to the left?• Have the input select settings of your audio systemor amp been made correctly?• Is the amp or audio system volume setting correct?Overview3. Push the [POWER] switch on the TD-12’s rearpanel to turn on the power.fig.PowerOn.eLower PositionWhen Using Headphones• Are the headphones connected to the PHONES jack?• Is [PHONES] turned completely to the left?ON942* This unit is equipped with a protection circuit. A brief interval(a few seconds) after power up is required before the unit willoperate normally.Precautions When Turning on thePowerAfter the power is turned on, do NOT hit any pads orstep on the pedals until the drum kit name (followingfigure) appears in the display. Doing so can causetriggering problems.fig.00-006Turning Off the Power1. Completely turn down the volume of the TD-12and any connected external devices.2. Turn off the power to all external devices.3. Push the [POWER] switch on the TD-12’s rearpanel to turn off the power.945* If you need to turn off the power completely, first turn off thePOWER switch, then unplug the power cord from the poweroutlet. Refer to Power Supply (p. 5).4. Turn on the power to the connected amp oraudio system.5. While hitting a pad, gradually turn [MASTER](or [PHONES]) to the right to adjust the volumelevel.19
Setting Up the KitConnecting the Hi-Hat (VH-11)and Setting the “VH Offset”7. Press [F3 (HI-HAT)].The “TRIGGER HI-HAT” screen appears.fig.05-VH11-Offset2When using the VH-12, the “VH Offset” needs to be set up.Connecting the Hi-Hatfig.VH-Connect.e8. Confirm the TD-12’s settings.ParameterValueHi-Hat TypeVH11/FDCC Max 90CC Resolution NORMALCONTROLOUT jackto theTD-12’sHH CTRL jackTRIGGEROUT jackto theTD-12’sTRIGGER INPUTHI-HAT jack9. While reading the meter displayed on the rightside of the TD-12’s screen, adjust the offsetwith the VH-11’s VH offset adjustment screw.Adjust the offset so that a blackmeter.fig.05-VH11-Offset3fig.Offset.eappears in theAdjusting the Offset1. Confirm that the VH-11 and TD-12 areconnected properly.2. After making the hi-hat settings, release yourfoot from the pedal, and while keeping your footoff the pedal, turn on the power to the TD-12.VH OffsetAdjustmentScrewOPENCLOSE* The offset cannot be adjusted correctly if the hi-hat is makingcontact with the motion sensor unit when the power is turned on.3. Loosen the clutch screw and let the hi-hat restnaturally on the motion sensor unit.4. Press [TRIGGER] - [F1 (BANK)].[TRIGGER] lights, and the “TRIGGER BANK” screenappears.5. Press [CURSOR] to move the cursor to thetrigger type for TRIGGER INPUT 6.6. Use [+/-] or [VALUE] to select “VH11.”fig.05-VH11-Offset1VH Offset Adjustment PointsIf the closed hi-hat sound is difficult to attain, rotate theVH offset adjustment screw towards “CLOSE.”If the open hi-hat sound is difficult to attain, rotate thescrew towards “OPEN.”If the sound cuts off when you strike the hi-hatforcefully, rotate the VH Offset adjustment screwtowards “OPEN.”If you need, make further adjustments to the parameters.Hi-Hat Settings [F3 (HI-HAT)] (p. 46)If you do not make VH-11’s setting correctly, it may causemalfunction. For details, refer to the VH-11 owner’smanual.20
The band has a width of 7 mm.Use this for adjusting the head tension.7 mmSetting Up the KitAdjusting Mesh HeadTensionHeads MUST BE TUNED BEFORE PLAYING.When adjusting, use a tuning key.Like with an acoustic drum, accurate and equal head tensionis needed for correct triggering response.Adjusting the PD-85 Head Tension1. Use the included tuning key to tighten thetuning bolts.Tighten the bolts until there is a space of approximately 7mm between the frame and the hoop.* The setup inclu<strong>des</strong> a lock bushing (to prevent loosening), so thebolt should be tightened fairly securely.fig.PD85-Adjust.eOverviewOn the PD-105/85, adjusting the head tension affects onlythe head response, and not the pitch of the sound, as itwould on an acoustic drum.Adjusting the PD-105 Head Tension1. Loosen the tuning bolts until a slight gap isproduced.HoopFrame7mm2. Tighten all tuning bolts by fingers, as tightly asyou can.fig.PD105-Nut.eA black, 7 mm strip is printed at the edge of this page.Use this as a reference when making the adjustment.Tuning boltWasher3. Using the tuning key, turn the tuning bolts twofull revolutions each, thus tightening them.Tighten each tuning bolt one by one, observing thenumerical order shown in the figure.fig.PD105-BoltOrder1 3Slight gapHoopfig.PD85-BoltTighten each tuning bolt one by one, observing thenumerical order shown in the diagram. Do not firmlytighten a single tuning bolt by itself. Doing so will makeit impossible to tension the head evenly, and will causemalfunctions.31542HEAD MADE BY REMO U.S.A.52. Fine-tune the adjustment while continuing tocheck the pad feel and response.64 221
Playing MethodsPad (PD-105/PD-85)fig.Play-Head.eHead ShotHit only the head of the pad.With certain snare sounds,playing position will changethe nuance of the sound.* Select an instrument from the Drum Instrument List (p. 88)with “*P” appended to the name.fig.Play-Rim.eRim ShotStrike the head and the rim ofthe pad simultaneously.fig.Play-Cross.eCross StickOnly strike the rim of the pad.Depending on the instrumentassigned to the rim you canplay rim shots and/or crossstick sounds.HeadHeadRim* Select an instrument from the Drum Instrument List (p. 88)with “*X” appended to the name.* Enable cross sticks with the drum kit (press [KIT] - [F5(XSTICK)]; p. 32).* To play the cross stick, be sure that you only strike the rim ofthe pad. Placing your hand on the head of the pad mightprevent the cross stick sound from being played properly.RimRimfig.Play-Shallow.eShallow Rim ShotSimultaneously strike the head nearthe rim and the rim itself.* Select an instrument from theDrum Instrument List (p. 88)with “*P” appended to the name.Brush SweepsYou can express a sweep sound using brushes (brush sweeps).* Select an instrument from the Drum Instrument List (p. 88)with “*BRUSH” appended to the name.* Enable brush performances with the drum kit (press [KIT] - [F2(FUNC)] - [F3 (BRUSH)], Brush Switch = ON; p. 32).* Brush sweeps can be used only on SNARE.When using brushes, be sure to use nylon brushes. Usingmetal brushes will not only scratch the head, but can alsobe hazardous, since the tip of the brush may catch in themesh of the net.Cymbal (CY-12R/C)Bow ShotThis is the most common playing method, playing the middlearea of the cymbal. It corresponds to the sound of the “headside”of the connected trigger input.fig.Play-CYBowHeadRimChange the Nuance of the Rim ShotWith certain snare and tom sounds, slight changes in the wayyou play rim shots changes the nuance.fig.Play-Rim.eNormal Rim Shot(Open Rim Shot)Strike the head and rimsimultaneously.HeadRimEdge ShotThis playing method involves striking the edge with theshoulder of the stick. When played as shown in the figure, the“rim-side” sound of the connected input is triggered.fig.Play-CYEdge.eEdge sensor22
Playing MethodsBell ShotThis playing method involves striking the bell. When playedas shown in the figure, the “rim-side” sound of the connectedinput is triggered.fig.Play-BellHi-Hat (VH-11/VH-12)Open/ClosedThe hi-hat tone changes smoothly and continuously fromopen to closed in response to how far the pedal is pressed.You can also play the foot closed sound (playing the hi-hatwith the pedal completely pressed down) and foot splashsound (playing the hi-hat with the pedal fully pressed andthen instantly opening it).Overview* Strike the bell somewhat strongly with the shoulder of the stick.Choke PlayChoking (pinching) the cymbal’s edge with the handimmediately after hitting the cymbal makes the sound stop.Choke the location of the edge sensor shown in the figure. Ifyou choke an area where there is no sensor, the sound doesnot stop.fig.Play-Choke.eRoland logoPressure (VH-12 Only)When you strike the hi-hat while pressing on the pedal withthe hi-hat closed, you can then change the closed tone inresponse to the pressure you place on the pedal.Bow ShotThis playing method involves striking the middle area of thetop hi-hat. It corresponds to the sound of the “head-side” ofthe connected trigger input.fig.Play-VHBowEdge sensorPositional Sensingfig.Play-CYPosiEdge ShotThis playing method involves striking the edge of the top hihatwith the shoulder of the stick. When played as shown inthe figure, the “rim-side” sound of the connected trigger inputis triggered.fig.Play-VHEdge.eWith certain ride sounds, playing position will change thenuance of the sound.* Only TRIGGER INPUT 9 RIDE corresponds to the positionalsensing.* Select an instrument from the Drum Instrument List (p. 88)with “*P” appended to the name.Edge Sensor* Do not strike the bottom hi-hat or the underside of the top hihat.23
Button Operation and DisplaysOperations common to all aspects TD-12 operations.Saving Your SettingsChanging Data Valuesfig.00-004_40Every time you change a value during the editing process, it’sautomatically stored in the TD-12’s memory. There’s no“write/save” process.Buttons, Sliders, Dial andKnobsReferences for top panel buttons, sliders, dial and knobs willbe printed in square brackets [ ]; e.g., [SETUP].Cursorfig.00-001e_70Cursor refers to the highlighted characters indicating an onscreenparameter that can be set. When there is more than onepossibility within the screen, use the [CURSOR] buttons tomove it.fig.00-002_50Cursor[+] and [-] (referred to in this manual as [+/-]) and the[VALUE] dial are both used to change the values of settings.Both methods have advantages.[+/-]• Each time [+] is pressed, the value increases. Each time [-]is pressed, the value decreases. This is convenient for fineadjustments.• When making an on/off setting, [+] will turn the settingon and [-] will turn it off.• If you hold down [+] and press [-], the value will increaserapidly. If you hold down [-] and press [+], the value willdecrease rapidly.[VALUE] dialThe dial allows you to make major changes to the valuequickly. If you hold down [SHIFT] and turn [VALUE], thevalue will change even more rapidly.Function Buttons ([F1]–[F5])fig.00-003_50The [F1]–[F5] buttons are called “function buttons.” Thebottom part of the display will show the names of thefunctions available for [F1]–[F5]. For example, if this owner’smanual makes reference to [INST] - [F2 (EDIT)], press [INST],and then press [F2] (in this case, “EDIT” is displayed above[F2]).24
Button Operation and DisplaysChoosing Pads from the TD-12’s Top Panelfig.00-007_70Changing the Tone Through the StrikePosition and Rim Shot Nuance andConfirming the Closed Hi-Hat ToneYou can change the tone by changing the strike position andrim shot nuance and confirm the closed hi-hat tone by holdingdown [SHIFT] and pressing [PREVIEW].OverviewCorresponding Inputs and Tone Changes That CanBe CheckedThe [CURSOR] (TRIG) buttons can be used to select the pad/trigger input to be edited without needing to hit a pad.• Holding down [SHIFT] and pressing [CURSOR (left)]:The next lower-numbered trigger will be selected.• Holding down [SHIFT] and pressing [CURSOR (right)]:The next higher-numbered trigger will be selected.INPUTEffect2 SNARE Head Tone Change from Strike PositionRim Rim Shot Nuance3 TOM 1– Rim Rim Shot Nuance5 TOM 36 HI-HAT Head Closed Hi-Hat ToneRim Closed Hi-Hat Tone9 RIDE Head Tone Change from Strike Position(Bow)11 AUX 1,12 AUX 2Rim Rim Shot NuanceHow to Play Patternsfig.06-003_70If you are using a rim-capable pad, [RIM] selects whether thesettings being made are for the head or the rim. When [RIM] islit, it indicates that the rim is selected.Holding down [SHIFT] as you press [RIM] locks the pad(trigger) being set, so that the pad being set is not switchedeven if another pad is touched. [RIM] flashes when a pad islocked. To cancel the lock, hold down [SHIFT] and press[RIM] once again.* You can switch between the head and rim of the pad being set,even when [RIM] is flashing, by holding down [SHIFT] andpressing [CURSOR (left/right)].Pressing [PATTERN]. The basic screen for the sequencerappears.Press [+/-] or turn [VALUE] in this screen to choose a pattern.Or press [F1 (LIST)] to choose from the pattern list.fig.06-001By using these functions together with [PREVIEW], you canedit the TD-12 only.Convenient [PREVIEW] FunctionsChecking the Tone While Changing theVelocityYou can toggle between three velocity (volume) levels byholding down [KIT] and pressing [PREVIEW].Set the three velocity levels by pressing [SETUP] - F3(CONTROL)] - [F2 (PREVIEW)] (p. 77).Press [PLAY] to start playback of the pattern.Press [STOP] to stop playback.Press [STOP] again to return to the top of the pattern.How to Turn the Metronome(Click) On/OffHold down [SHIFT] and press [TEMPO] to turn ON and OFF.* The [TEMPO] indicator can also be used as a visualmetronome (p. 62).25
Button Operation and DisplaysHow to Adjust the TempoGroup Fadersfig.06-Tempo1_70fig.00-009To adjust the tempo of the sequencer and click, use [+/-] or[VALUE] in the screen displayed by pressing [TEMPO].Adjusting the DisplayContrastDisplay contrast can be influenced by location and lighting.When needed, adjust the display contrast by:holding down [KIT] and turning [VALUE].* You can also adjust it in the screen displayed by pressing[SETUP] - [F3 (CONTROL)] - [F3 (LCD)] (p. 77).About the Display in theUpper Right of the Screenfig.00-005_70Use [GROUP FADERS] sliders to adjust the volume.If you press the [FADER] button, the function of the faderswill change as is explained in the chart below. An LED willlight up at the upper and lower right of the faders to indicatewhich set of sounds is active.• When upper indicator is lit, you can adjust the volume offollowing trigger inputs.KICK 1 (KICK)SNARE 2 (SNARE)TOMS 3 (TOM 1), 4 (TOM 2), 5 (TOM 3)HI-HAT 6 (HI-HAT)CRASH 7 (CRASH 1), 8 (CRASH 2)RIDE 9 (RIDE), 10 (EDGE)Many edit screens require you to hit a pad or press the[PREVIEW] button to access the parameters you want. Theupper right of the display will show the number and triggerinput jack name of the corresponding pad. The first character(“H” or “R”) stands for Head or Rim. ([RIM] lights up whenplayed.)You can use the CURSOR (TRIG) buttons and [PREVIEW] toget the same results. In cases where settings for the head andrim can be edited separately, the following characters will alsobe displayed.fig.00-006_70• When lower indicator is lit, you can adjust the volume offollowing trigger inputs and sequencer parts.AUX 1 11 (AUX 1)AUX 2 12 (AUX 2)(none) –PERC Percussion part (p. 57)BACKING Backing part (p. 56)CLICK Metronome click (p. 62)Example: Adjusting the Snare Volume1. Press [FADER] so the upper indicator is lit.2. Move the [GROUP FADERS] [SNARE] slider.The slider position shows the current snare volume.* After switching with [FADER], the values for the [GROUPFADERS] sliders may not reflect the actual volume of thesound assigned to that fader. So after switching, be sure tomove the faders a bit before making your setting.* This will NOT affect the independent volume balance for eachkit in: Mixer Settings (p. 39).26
Listening to the Demo SongThe internal demo song features the TD-12’s expressivecapabilities and top quality sounds. The drums on this songwere recorded from the TD-12 system to a sequencer in realtime.Changing the Drum KitsYou can change the drum kit used to play the demo songs.Overview1. Hold down [SHIFT] and press [CHAIN].fig.Demo_70The “DEMONSTRATION” screen appears.1. Press [CURSOR (down)] to move the cursor to“Kit.”2. Use [+/-] or [VALUE] to select a drum kit.* Demo songs are normally played using factory preset drumkits.2. Use [+/-] or [VALUE] to select a song.3. Press [F5 (PLAY)].Playback begins; the three demo songs are played backrepeatedly.4. Press [F4 (STOP)] to stop the demo song.5. Press [EXIT] or [KIT] to return to the “DRUMKIT” screen.Caution Concerning VolumeWhen playing back the demo song, turn [MASTER] and[PHONES] to the left (counterclockwise) to bring thevolume level down. The sound levels (volume) of theinstruments may be louder when the demo song isplayed back.Demo SongHatterBrisaCluster HangCopyright © 2005, Roland USCopyright © 2005, Roland USCopyright © 2004, Roland US981a* All rights reserved. Unauthorized use of this material forpurposes other than private, personal enjoyment is a violationof applicable laws.982* No data for the music that is played will be output from MIDIOUT.Changing the VolumeBalanceYou can change the volume balance with [GROUP FADERS](p. 26).Muting the Performance ofthe Backing Instruments andDrumsAs drums are used to play the demo songs, you can mutedrum parts.[F1 (DRUMS)]You can MUTE the entire drum track.[F2 (BACKING)]You can MUTE all the backing instruments.Turning the Metronome(Click) On/OffYou can have the metronome click sound in time with thedemo songs.1. Start by setting the click instrument and count(p. 63).2. Hold down [SHIFT] and press [CHAIN].The “DEMONSTRATION” screen appears.3. Hold down [SHIFT] and press [TEMPO] to turnthe metronome click (p. 62) on/off.27
Useful Functions to KnowAbout the Preset Drum KitsThe TD-12 is shipped from the factory with 50 pre-loadeddrum kits. These drum kits are referred to as Preset DrumKits.The features of each preset drum kit, pad pattern functionsettings, and other information is listed in the Preset DrumKit List (p. 84). Look through this list to find the kit you wantto use.Playing Patterns to CheckDrum Kit TonesThe preset patterns offer a convenient way to check the drumkit sounds.By selecting instruments and then playing back patterns withthese instruments, you can confirm the sounds of instrumentcombinations; for example, kick and snare or snare and tom.No. Name Use1 DrumPreview1 To check the kick, snare, and hihatsounds2 DrumPreview2 To check the kick, snare, and ridecymbal sounds3 DrumFill 1 To check the tom and crash cymbalsounds4 DrumFill 2 To check the tom and crash cymbalsounds* You can use the [GROUP FADERS] to change the volumebalance and mute any unneeded instrument sounds.Restoring Edited Drum Kits tothe Factory Default SettingsRestoring All Settings to the FactorySettingsThis restores the TD-12 to the original factory settings(Factory Reset).All data and settings stored in the TD-12 are lost incarrying out this operation. So if necessary, save yourdata to an external MIDI device before executing thefactory reset.(Bulk Dump; [SETUP] - [F1 (MIDI)] -[F5 (BULK)]; p. 75)1. Press [SETUP] - [F5 (F RESET)].[SETUP] lights, and the “FACTORY RESET” screenappears.2. Press [F5 (RESET)].The confirmation screen appears.* To cancel, press [F1 (CANCEL)].3. Press [F5 (EXECUTE)] to execute FactoryReset.When Factory Reset is finished, the “DRUM KIT” screenappears.Restoring the Factory Settings toIndividual KitsWhen resetting individual drum kits whose instrument and/or effect settings have been changed to the original factorysettings, use the Copy function (p. 70).1. Hold down [SHIFT] and press [SETUP].[SETUP] lights, and the “COPY” screen appears.2. Press [F1 (KIT)].fig.00-CopyKit_70ABCA: copy-source type (PRESET or USER)B: copy-sourceC: copy-<strong>des</strong>tination28
Useful Functions to Know3. Use [+/-] or [VALUE] to select “PRESET” for thecopy-source type.4. Use [CURSOR], [+/-], or [VALUE] to select thecopy-source kit and the copy-<strong>des</strong>tination kit.5. Press [F5 (COPY)].The confirmation screen appears.* To cancel, press [F1 (CANCEL)].6. Press [F5 (EXECUTE)] to carry out.Striking a Pad to Switch theDrum Kits(Pad Switch Function)You can switch drum kits and patterns by striking the padsconnected to AUX 1 and AUX 2 (press [SETUP] - [F3(CONTROL)] - [F1 (PAD SW)]; p. 76).OverviewPlaying Back Patterns byStriking the Pads(Pad Pattern Function)You can set up a pattern beforehand and then strike a pad tostart the performance of the pattern (press [INST] - [F4(CONTROL)] - [F1 (PATTERN)]; p. 37).Some factory set drum kits (Preset drum kits) have thisfunction set.* When playing back patterns with recorded drum kitperformances or demo songs, the patterns assigned to the padsare not played back, even if the Pad Pattern function is enabledfor the selected drum kit.* Performances using the Pad Pattern function cannot berecorded to sequencers.* With Pad Pattern, performance of the pattern starts only whenthe pad is struck with sufficient force.If the pad is struck weakly, only the instrument sound assignedto the pad is played; the pattern is not played back.Enabling Cross Sticks1. Press [KIT].2. Press [F5 (XSTICK)].The cross-stick sound is alternately switched on and offeach time you press this.* Select an instrument from the Drum Instrument List (p. 88)with “*X” appended to the name.Playing Along with PatternsChoosing a Pattern1. Press [PATTERN].[PATTERN] lights, and the “PATTERN” screen appears.2. Use [+/-] or [VALUE] to select the pattern.3. Press [PLAY].[PLAY] lights, and playback of the pattern begins.Stopping Playback of the PatternBeing PlayedPress [STOP].Disabling the Pad Pattern FunctionYou can switch off the Pad Pattern function for the entire kit,without having to individually change the settings for eachpad.Set PadPtn Master Sw (press [KIT] - [F2 (FUNC)] - [F4 (PADPTN)]; p. 32) to “ALL PADS OFF.”Muting a Specific Part1. Press [PATTERN] - [F2 (PART)] - [F5 (MUTE)].The “PART MUTE” screen appears.2. Press [F1]–[F5] to turn each part muted orplayed.29
Chapter 1. Drum Kit Settings [KIT]A “drum kit” refers to a configuration of settings that includethe sounds played with each pad, the hi-hat used, effectsettings, and so on.fig.01-KitParam.eDrum Kit 50Choosing a Drum Kit1. Press [KIT].[KIT] lights, and the “DRUM KIT” screen appears.fig.01-001*_70Drum Kit 1Pad settingsKICKHead 1SNAREHead 2TOM1Head 3TOM2Head 42. Use [+/-] or [VALUE] to select drum kits.Rim 1Rim 2Rim 3Rim 4TOM3Head 5HI-HATHead 6CRASH1Head 7CRASH2Head 8Pads can be programmed to make selections (p. 76).Rim 5Rim 6Rim 7Rim 8RIDEHead 9EDGEHead 10AUX1Head 11AUX2Head 12The selected or current kit number is indicated at alltimes in the LED display at the left of the LCD display.Rim 9Rim 10Rim 11Rim 12Instrument settingsInstrument, V-EDIT/EDITMixer settingsVolume, Pan, Minimum VolumeEffects settingsCompressor, Equalizer settingsAmbience/Multi-Effects Send LevelVarious Function SettingsPad Pattern setttingsPitch Control function settings, MIDI settingsAmbience settingsON/OFF, Room Type, Wall Type, etc.About the “DRUM KIT” Screenfig.01-001_70BA: Drum Kit NameB: Overall Kit Effects On/Off status (p. 40)AMulti-Effects settingsON/OFF, Type, effect level, etc.Pressing [KIT] always takes you back to the “DRUM KIT”screen, from any Edit mode in the TD-12.Settings Affecting the Entire Drum KitVolume, Drum Kit Name, MIDI settings, etc.30
Chapter 1. Drum Kit Settings [KIT]Selecting a Drum Kit from theList [F1 (LIST)]Assigning a Tempo for Each Kit[F2 (TEMPO)]You can select a drum kit by accessing the list of available kits.fig.01-002_70Each kit can have an individual tempo setting.When you select a kit of which Kit Tempo is set to “ON,” thetempo you define here will be set automatically.fig.01-004_70Chapter 1[KIT]1. Press [KIT] - [F1 (LIST)].The “DRUM KIT LIST” screen appears.2. Use [VALUE], [+/-], or [CURSOR] to select adrum kit.Function Buttons[F1 (< PAGE)]The previous page of the list appears.[F2 (PAGE >)]The next page of the list appears.3. Press [EXIT] (or just press [KIT]) to return to the“DRUM KIT” screen.Parameter Value DescriptionKit Tempo OFF, ON OFF: tempo is not definedON: tempo is definedTempo 20–260 defined tempoWhen you select a kit of which Kit Tempo is set to “ON,”the current tempo appears in the upper right of thedisplay.fig.01-004a_70Kit Parameters [F2 (FUNC)]1. Press [KIT] - [F2 (FUNC)].2. Press [F1]–[F4] and [CURSOR (up/down)] toselect the parameter.3. Use [+/-] or [VALUE] to make settings.Adjusting the Volume [F1 (VOLUME)]fig.01-003_70Confirming the Tempo BeforeGiving the CountFirst, set up the drum kits for each song to be performedwith the tempos set in advance.Setting the Tempo indicator (p. 62) to “ON” then allowsyou to confirm the song tempo each time you switch thedrum kit. You can also check the tempo with the clicksound.Parameter Value DescriptionKit Volume 0–127 Volume of the entire drumkitPedal HH Volume 0–127 Volume of the hi-hat’s footclosed soundXStick Volume 0–127 Volume of cross stick sound31
Chapter 1. Drum Kit Settings [KIT]Playing Brushes [F3 (BRUSH)]In each kit, you can choose whether sticks or brushes will beused.fig.01-005_701. Press [KIT] - [F3 (NAME)].The “DRUM KIT NAME” screen appears.2. Press [CURSOR (left/right)] to move the cursorto the character to be changed.3. Use [VALUE], [+/-], or [CURSOR (up/down)] tochange the character.Function ButtonsParameter Value DescriptionBrush OFF, ON OFF: for using sticksSwitchON: for using brushes* Select an instrument from the Drum Instrument List (p. 88)with “*BRUSH” appended to the name.When Brush Switch is set to “ON,” the brush iconappears in the “DRUM KIT” screen.fig.01-005_70Disabling the Pad Pattern Function[F4 (PAD PTN)][F1 (INSERT)]: A blank space is inserted at the cursorposition, and characters after this point aremoved to the right one space.[F2 (DELETE)]: Character at the cursor position is deleted,and characters after this point are moved tothe left one space.[F3 (SPACE)]: Character at the cursor position is replacedby a blank space.[F4 (CHAR)]: Type of character at the cursor positionchanges between uppercase/lowercasealphabet, or numbers and symbols.Effects On and Off Switches[F4 (FX SW)]These switches allow you to turn all individual effects on/offwithin each drum kit.fig.04-001_70You can switch the Pad Pattern function setting on and off foreach individual kit.fig.01-PadPtnSw_70Refer to Effects On and Off Switches [KIT] - [F4 (FXSW)] (p. 40).ParameterPadPtnMaster SwValue and DescriptionALL PADS OFF:Pad Pattern function not usedON:Pad Pattern function usedPlaying Cross Stick[F5 (XSTICK)]In each kit, you can choose to use/not use cross stick bypressing [F5 (XSTICK)] in the “DRUM KIT” screen.You can also switch this with the pads (p. 76).Naming a Drum Kit[F3 (NAME)]• Cross-stick sound playedfig.01-007_70Each kit’s name can use up to 12 characters.fig.01-005_70• Cross-stick sound not playedfig.01-008_70* Select an instrument from the Drum Instrument List (p. 88)with “*X” appended to the name.32
Chapter 2. Drum Instrument Settings [INST]Here’s how to select and edit sounds, such as the snare drumand kick drum.Choosing a Pad to EditThere are two basic ways to select the sound you want to edit.Choose by Hitting a Pad1. Press [INST].[INST] lights, and the “INST” screen appears.fig.02-001_70Lock the Pad You are Editing(TRIG LOCK) [SHIFT] + [RIM]When editing instruments, you can prevent the screen frombeing switched inadvertently even if you hit another pad.1. Select the pad to be locked.The settings screen for the pad appears.2. Hold down [SHIFT] and press [RIM] to make itflash.The pad is locked and other pads cannot be selected.Chapter 2[INST]2. Strike a pad.The settings screen for the struck pad appears.To select a pad’s rim, strike the rim.Choose with the Buttons1. Press [INST].[INST] lights, and the “INST” screen appears.2. Hold down [SHIFT] and press [CURSOR (left/right)] to select the trigger input number.The trigger input number is indicated in the upper part ofthe screen.3. Press [RIM] to select the head or rim.Head:Rim:fig.02-002_70[RIM] is unlit.[RIM] is lit.When MIDI Note Number (p. 38) corresponding to a padis received, the pad is selected and shown in the screen.3. To release the lock, hold down [SHIFT] andpress [RIM] to make it stop flashing.* You can change the pad to be locked by using buttons even ifthe [RIM] is flashing.Assign an Instrument to aPadAll the TD-12 sounds are referred to as instruments (INST).fig.02-001_701. Press [INST].[INST] lights, and the “INST” screen appears.“Group”: Type of instrument (Inst Group)“Inst”:2. Strike a pad.Name of instrument (Inst Name)The settings screen for the struck pad appears.3. Press [CURSOR (up/down)] to move the cursorto “Group” or “Inst.”4. Use [+/-] or [VALUE] to select the Inst group/instrument.5. Press [EXIT] to return to the “DRUM KIT”screen.Pressing [F5 (H & R)], you can choose to set the head andrim simultaneously or individually. When you select thehead and rim simultaneously, the rim’s instrumentnumber is one bigger than head.33
Chapter 2. Drum Instrument Settings [INST]Selecting an Instrument fromthe List [F1 (LIST)]Here you can select from the list of all available instruments.fig.02-003_70Editing Drum Sounds[F2 (EDIT)]Editing methods differ according to the type of instrument.Editing an Acoustic Drum Kit (V-EDIT)1. Press [INST] - [F1 (LIST)].The “INST LIST” screen appears.2. Strike a pad.The settings screen for the struck pad appears.3. Use [VALUE], [+/-], or [CURSOR] to select theinstrument.Function Buttons[F1 (< PAGE)]The previous page of the list appears.[F2 (PAGE >)]The next page of the list appears.[F3 (< GROUP)], [F4 (GROUP >)]Selects the Inst Group.[F5 (H & R)]Switches to select the head and rim instrumentssimultaneously or individually.4. Press [EXIT] to return to the “INST” screen.About the Display at the Lower of theInstrument Namefig.02-InstInfo_70V-EDIT allows you to select a head type, shell depth, muffling,etc. Please see the charts on next page.When V-EDIT Can Be UsedV-EDIT is possible in the following instrument groups“KICK,” “SNARE,” “TOM,” “HI-HAT,” “CRASH,”“SPLASH,” “CHINA,” or “RIDE.”The following icon appears to indicate instruments whichare V-EDIT compatible.fig.02-004_70Editing Other InstrumentsOther instruments only allow “Pitch” and “Decay Time”adjustment.Editing Procedure1. Press [INST] - [F2 (EDIT)].The “INST EDIT” screen appears.2. Strike a pad.The settings screen for the struck pad appears.3. Use [F1]–[F3] and [CURSOR (up/down)] toselect the parameter.4. Use [+/-] or [VALUE] to adjust the setting.POSI: Instrument marked with “*P” (p. 91)You can select the effect on/off with pressing[F4 (CONTROL)] - [F3 (MIDI)] “Position Ctrl.”It can be correspond only to some special inputs (p.44)INTRVL: Instrument marked with “*I” (p. 91)XSTK: Instrument marked with “*X” (p. 91)5. When finished, press [EXIT] to return to the“INST” screen.* These appear only when [F5 (H & R)] is off.34
Chapter 2. Drum Instrument Settings [INST]KICKfig.02-KICK_70TOMfig.02-TOM_70Parameter Value[F1 (SHELL)]Shell Depth NORMAL, DEEP1–2[F2 (HEAD)]Head Type CLEAR, COATED, PINSTRIPEHead Tuning -480–+480[F3 (MUFFLE)]MufflingOFF, TAPE1–2, BLANKET, WEIGHTSnare Buzz OFF, ONParameter Value[F1 (SHELL)]Shell Depth NORMAL, DEEP1–2[F2 (HEAD)]Head Type CLEAR, COATED, PINSTRIPEHead Tuning -480–+480[F3 (MUFFLE)]MufflingOFF, TAPE1–2, FELT1–2Snare Buzz OFF, ONChapter 2[INST]SNARE* PINSTRIPE is a registered trademark of Remo Inc., U.S.A.fig.02-SNARE_70HI-HATfig.02-HIHAT_70Parameter Value[F1 (SHELL)]MaterialWOOD, STEEL, BRASSShell Depth 1.0”–20.0”[F2 (HEAD)]Head Type CLEAR, COATED, PINSTRIPEHead Tuning -480–+480[F3 (MUFFLE)]MufflingOFF, TAPE1–2, DOUGHNUTS1–2Strainer Adj. OFF, LOOSE, MEDIUM, TIGHTParameter Value[F1 (SIZE)]Size 1"–40"[F2 (FIXED)]Fixed Hi-Hat NORMAL, FIXED1–4NORMAL: The gap between the top and bottom hi-hat iscontrolled by the pedal.FIXED:The gap is fixed.35
Chapter 2. Drum Instrument Settings [INST]CRASH/SPLASH/CHINA/RIDEfig.02-CYM_70Parameter Value[F1 (SIZE)]Size 1"–40"[F2 (SIZZLE)]Sizzle Type OFF, RIVET[F3 (SUSTAIN)]Sustain -31–+31Other Instrumentsfig.02-005_70For some instruments, raising or lowering the valuebeyond a certain point may not produce further change.• KICK/SNARE/TOM: “Head Tuning”• CRASH/SPLASH/CHINA/RIDE: “Sustain”• Other Instruments: “Pitch” and “Decay”Some instruments have the parameters cannot be edited.• SNARE: “Material” and “Strainer Adj.”Using the Compressor andEQ [F3 (COMP/EQ)]Compressor (COMP)A compressor adjusts the envelope (changes in the volumeover time) and changes the character of the sound in responseto playing dynamics.fig.04-003_70Parameter ValuePitch -480–+480Decay Time -31–+31You can edit the instruments of the head and rimsimultaneously. Pressing [F5 (H & R)], you can choose toset the head and rim simultaneously or individually.Equalizer (EQ)You can use three-band equalizers (for high, middle, and lowfrequency ranges) to adjust the sound.fig.04-004_70* When the instruments assigned to the head and rim are not inthe same Inst Group, you only can set the head and rimindividually even if [F5 (H & R)] is set to ON.Refer to Using the Compressor and EQ [INST] - [F3(COMP/EQ)] (p. 40).36
Chapter 2. Drum Instrument Settings [INST]Using Pads/Pedal asControllers [F4 (CONTROL)]Playing a Pattern by Hitting a Pad(Pad Pattern) [F1 (PATTERN)]1. Press [INST] - [F3 (CONTROL)].2. Strike a pad.The settings screen for the struck pad appears.You can select by using [SHIFT] and [CURSOR (left/right)].3. Press [F1]–[F5] and [CURSOR (up/down)] toselect the parameter.4. Use [+/-] or [VALUE] to adjust settings.5. When finished, press [EXIT] to return to the“INST” screen.Parameter Value Description[F1 (PATTERN)]PadPtnMaster SwALL OFF,ONPadPtn OFF, P 1–150,U 151–250PadPtn OFF, ONVelocityTap Ptn OFF, 1–8Mute Grp[F2 (PDLBEND)]Pedal BendRange[F3 (MIDI)]Tx ChannelRefer to Playing a Patternby Hitting a Pad (Pad Pattern)[F1 (PATTERN)] (p.37).-24–0– +24 Refer to Changing thePitch with the Hi-Hat Pedal[F2 (PDLBEND)] (p. 38).CH1–CH16,GLOBALNote No. 0 (C -)–127(G9), OFFGate Time 0.1–8.0 (s)Position OFF, ONCtrl Sw[F4 (HH MIDI)]Note No. 0 (C -)–127(G9), OFFGate 0.1–8.0 (s)[F5 (BR MIDI)]Brush Note 0 (C -)–127No.(G9), OFFXStick NoteNo.0 (C -)–127(G9), OFFRefer to MIDI Settings forEach Pad [F3 (MIDI)] (p.38).Refer to MIDI Note Numberstransmitted by Hi-Hat [F4 (HH MIDI)] (p. 38).Refer to MIDI Note Numbertransmitted by BrushSweep/Cross Stick [F5(BR MIDI)] (p. 38).This function starts playback of a pattern when a pad is struck.This function provi<strong>des</strong> a very convenient way to use patternsduring a live performance.If different patterns have been assigned to two or more pads,striking another pad while a pattern is playing back will causepattern playback to switch to the newly selected pattern.* When playing back patterns with recorded drum kitperformances or demo songs, the patterns assigned to the padsare not played back, even if the Pad Pattern function is enabledfor the selected drum kit.* Performances using the Pad Pattern function cannot berecorded to sequencers.PadPtn Master Sw: ALL OFF, ONYou can switch use of the Pad Pattern function on and offin each individual drum kit.ALL OFF: The Pad Pattern function is not used.ON: The Pad Pattern function is used.PadPtn: OFF, P 1–150, U 151–250Selects the played back pattern when the pad is struck.* If all pads are set to “OFF,” icon appears.PadPtn Velocity: OFF, ONOFF:The pattern plays back at the velocity set for the pattern,regardless of the strength with which the pad is struck.ON:The pattern plays back with the velocity changing inresponse to the strength with which the pad is struck.Tap Ptn Mute Grp: OFF, 1–8In Tap playback (p. 61), if one sound (pattern) is set toplay before the previous sound (pattern) has finishedplaying, this setting allows you to either have theprevious sound stop and the subsequent sound startplaying or have the two sounds layered.Patterns set to the same number:The previous sound stops while in progress, and thesubsequent sound (pattern) starts playing.Patterns set to the different numbers:The previous sound continues to play to the end, whilethe subsequent sound (pattern) is superimposed on it.Regarding Sounds Played with PadPatternWith Pad Pattern, performance of the pattern starts only whenthe pad is struck with sufficient force.If the pad is struck weakly, only the instrument soundassigned to the pad is played; the pattern is not played back.Chapter 2[INST]37
Chapter 2. Drum Instrument Settings [INST]Changing the Pitch with the Hi-HatPedal [F2 (PDLBEND)]This setting allows you use the hi-hat pedal as a pitch benderfor sounds assigned to any pad or rim.Specified in semitone steps.Pedal Bend Range: -24–0– +24* The Pitch Control function uses the same Control Changemessage as the hi-hat open/close function (factory setting:“FOOT (4)”). For details, refer to p. 73.MIDI Settings for Each Pad [F3 (MIDI)]Tx Channel: CH1–CH16, GLOBALMIDI transmit channel for each pad.GLOBAL: Transmits on the same channel as the drum kitpart (p. 72).Note No.: 0 (C -)–127 (G 9), OFFOFF: Note messages are not transmitted.Gate Time: 0.1–8.0 (s)See the column.Position Ctrl: OFF, ONThis can be set for trigger inputs SNARE (Head, Rim),TOM (Rim), RIDE (Bow), and AUX (Rim).This turns the changing of the sound by strike position/rim shot nuance ON or OFF.SNARE (Head): Strike positionSNARE (Rim): Rim shot nuanceTOM (Rim): Rim shot nuanceRIDE (Bow): Strike positionAUX (Rim): Rim shot nuanceMIDI Note Numbers transmitted byHi-Hat [F4 (HH MIDI)]* The HH Note# Border setting is required to transmit switchesbetween the open and closed hi-hat. For details, refer to p. 74.Open (Bow): Bow shot of open hi-hatClosed (Bow): Bow shot of closed hi-hatOpen (Edge): Edge shot of open hi-hatClosed (Edge): Edge shot of closed hi-hatPedal: Pedal hi-hat (Foot closed)MIDI Note Number transmitted byBrush Sweep/Cross Stick[F5 (BR MIDI)]Brush Note No.: 0 (C -)–127 (G 9), OFFOFF: Note messages are not transmitted.XStick Note No.: 0 (C -)–127 (G 9), OFFOFF: Note messages are not transmitted.When Setting Multiple Pads to theSame Note NumberWhen the note number is set to be more than one padreceived, the instrument assigned to the pad with the lowestTRIGGER INPUT number is played. When note numbers forthe head and rim are duplicated, the head instrument isplayed.An asterisk (*) appears at the right of the note number forTRIGGER INPUTS that are not sounded.Example:Note number “38 (D 2)” is set for the head and rim ofTRIGGER INPUT 2 (SNARE) and the head of TRIGGERINPUT 3 (TOM 1). In this case, when Note Number “38” isreceived, the instrument assigned to the head of TRIGGERINPUT 2 (SNARE) is played.About the Gate TimePercussion sound modules normally produce sound onlyin response to “Note on” messages, and ignore “Note off”messages. However general-purpose sound modules orsamplers do receive the note-off messages that aretransmitted and respond by turning off the sound.For example, if you are triggering a “loop” in a sampler,or other sounds then the gate time parameter is veryimportant. With the factory defaults (preset values), thetransmitted gate time is set to the minimum value.Note No.: 0 (C -)–127 (G 9), OFFOFF: Note messages are not transmitted.Gate: 0.1–8.0 (s)See the column.38
Chapter 3. Mixer SettingsMixer Parameters [MIXER]Here you can adjust the volume, pan, etc.fig.03-001_70Using Group Faders to Edit (MIX EDIT)You can use the GROUP FADERS to make adjustments.fig.03-002_701. Press [MIXER].[MIXER] lights.2. Use [F1]–[F4] or [CURSOR (up/down)] to selectthe parameter.3. Use [CURSOR (left/right)] or [RIM] to select theinstrument you wish to set.You can also select the instrument by striking a pad.4. Use [+/-], [VALUE], or [CURSOR (up/down)] tomake the setting.1. Press [INST] and [MIXER] simultaneously.[MIXER] flashes.You can change the function of the faders by holdingdown [SHIFT] and pressing [MIXER]. When lowerindicator is lit, you can adjust the volume of AUX 1 andAUX2.2. Press [F1]–[F3] to select the parameter.3. Move the fader which corresponds to theTRIGGER INPUT you wish to adjust.* You can also use [+/-], [VALUE], or [CURSOR (up/down)].Chapter 3[MIXER]Parameter Value Description[F1 (VOLUME)]Volume 0–127 Volume of each trigger input[F2 (PAN)]PanL15–CTR– Pan of each trigger inputR15[F3 (MIN VOL)]MinimumVolume0–10 Minimum volume of eachtrigger input(This is used to narrow thedynamic range.)[F4 (KIT VOL)]Kit Volume 0–127 Volume of the entire drumkitPedal HHVolumeXStick Volume0–127 Volume of the hi-hat’s footclosed sound0–127 Volume of cross stick sound* Pressing [F5 (H & R)] in the [F1 (VOLUME)], [F2 (PAN)], or[F3 (MIN VOL)] setting screen, you can choose to set the headand rim simultaneously or individually.5. Press [EXIT] to return to the “DRUM KIT”screen.Parameter Value Description[F1 (VOLUME)]Volume 0–127 Volume of each trigger input[F2 (AMB SND)]AMB SENDLEVEL[F3 (MFX SND)]MFX SENDLEVEL0–127 Send level to the ambience foreach trigger input0–127 Send level to the multi-effectsfor each trigger input* These settings are always common to the head and rim.4. Press [EXIT] or [FADER] to return to the “DRUMKIT” screen.* After pressing [EXIT] or [FADER], the values for the[GROUP FADERS] sliders may not reflect the actual volumeof the sound assigned to that fader. Be sure to move the faders abit before making your setting.39
Chapter 4. Effect SettingsEffects On and Off Switches[KIT] - [F4 (FX SW)]These switches allow you to turn all individual effects on/offwithin each drum kit.fig.04-001_70Using the Compressor andEQ [INST] - [F3 (COMP/EQ)]An individual Compressor and EQ can be applied to everysound assigned to a trigger input.1. Press [INST] - [F3 (COMP/EQ)].[INST] lights.2. Strike the pad you wish to set.1. Press [KIT] - [F4 (FX SW)].[KIT] lights, and the “EFFECTS SWITCH” screenappears.2. Press [F1]–[F4] to turn the following on/off.[F1]: Pad Compressor (*1)[F2]: Pad Equalizer (*1)[F3]: Ambience[F4]: Multi-effects3. Press [EXIT] to return to the “DRUM KIT”screen.* Effect on/off status appears in the “DRUM KIT” screen.fig.04-002e_703. Press [F2], [F3], or [CURSOR] to select theparameter.Function Buttons[F2 (COMP)][F3 (EQ)]Pad compressor parameters appear.Pad equalizer parameters appear.4. Use [+/-] or [VALUE] to adjust the setting.5. Press [F1] and/or [F4] to turn on thecompressor/equalizer for each trigger input.[F1]: Turns the pad compressor on/off[F4]: Turns the pad equalizer on/offON OFF* 1: All pad compressors or pad equalizers are turned on/offsimultaneously.,COMP/EQ setting is ON, EFFECTS SWITCH is ONEffect applies.,COMP/EQ setting is ON, EFFECTS SWITCH is OFFEffect does not apply.COMP/EQ setting is OFFEffect does not apply.* Pressing [F5 (H & R)], you can choose to set the head and rimsimultaneously or individually.The sound may be distorted in a certain setting.40
Chapter 4. Effect SettingsCompressor (COMP)A compressor adjusts the envelope (changes in the volumeover time) and changes the character of the sound in responseto playing dynamics.fig.04-003_70About Threshold and RatioAs shown in the diagram below, these parameters determinehow the volume is to be compressed.fig.Compressor.e0.5:11:1RatioOutput Level1.7:14:1Parameter Value DescriptionAttack EMPHASIS,CRUSHEMPHASISEmphasizes the attackof the sound.CRUSHPress the attack.Type COMP SOFT 1–2,COMP MED 1–3,COMP HARD 1–2,LIMITER 1–2,EXPANDER 1–3Time KICK 1–3,SNARE1–3,TOM 1–3,CYM 1–2,OTHER1–3This changes Threand Ratio values.This changes Atck,Hold, and Rels values.Gain -15– +20 (dB) Output level of thecompressorEqualizer (EQ)You can use three-band equalizers (for high, middle, and lowfrequency ranges) to adjust the sound.fig.04-004_7050:1ThresholdInput LevelChapter 4[EFFECTS]For more detailed setting, adjust the parameters below.Parameter Value DescriptionThre(Threshold)-30–0 (dB) Volume level atwhich compressionbeginsRatio 0.5:1–50:1 Compression ratioAtck(Attack)0–255 (ms) Time from when thevolume goes up thethreshold level untilthe compressor effectappliesHold 2–9999 (ms) Time compression iskeptRels (Release)2–9999 (ms) Time from when thevolume falls belowthe threshold leveluntil the compressoreffect no longer appliesParameter Value DescriptionQ 0.5–8.0(only for MID)Freq(Frequency)20–1k (LOW),20–8k (MID),1k–8k (HIGH)Width of the frequencyrangeA higher Q narrowsthe affected area.Point at which theboost/cut will occurGain -15– +15 (dB) Amount of boost/cut41
Chapter 4. Effect SettingsAmbience [AMBIENCE]You can choose the type of room where the drums are to beplayed and modify the sound.fig.04-005_70Multi-Effects[SHIFT] + [AMBIENCE]The multi-effects allow you to further customize your soundand also provi<strong>des</strong> a choice of output configurations.fig.04-006_701. Press [AMBIENCE].[AMBIENCE] lights.2. Press [F2]–[F4] or [CURSOR] to select theparameter.3. Use [+/-] or [VALUE] to adjust the setting.4. Press [F1] to turn the ambience on.Parameter Value Description[F2 (TYPE)]Room Type BEACH,Type of ambienceLIVING ROOM,BATH ROOM,STUDIO,GARAGE,LOCKER ROOM,THEATER, CAVE,GYMNASIUM,DOME STADIUMLevel 0–127 Total ambience level[F3 (ROOM)]Room Size TINY, SMALL, 5 size availableMEDIUM,LARGE, HUGEWall Type WOOD, PLAS- Wall materialTER, GLASSMic Position LOW, HIGH Ambience mic positionRoom Shape 0–100 Shape of the room[F4 (AMB SND)]Send Level 0–127 Ambience send levelfor each instrument1. Hold down [SHIFT] and press [AMBIENCE].[AMBIENCE] lights.2. Press [F2], [F3], or [CURSOR] to select theparameter.3. Use [+/-] or [VALUE] to adjust the setting.4. Press [F1] to turn the multi-effects on.Parameter Value Description[F2 (MFX)]TypeDELAY,PANNING DELAY,FLANGER,PHASER,CHORUSType of multieffectsLevel 0–127 Total effect level[F3 (MFX SND)]Send Level 0–127 Effect SENDlevel for eachinstrument* Pressing [F5 (H & R)] in the [F3 (MFX SND)] setting screen,you can choose to set the head and rim simultaneously orindividually.* Pressing [F5 (H & R)] in the [F4 (AMB SND)] setting screen,you can choose to set the head and rim simultaneously orindividually.42
Chapter 4. Effect SettingsMulti-Effects ParametersDELAYAdds the delay sound.Parameter Value DescriptionTime 0–1600 (ms) Time until the delaysound is heardFeedback -98–98 (%) Amount of the delaysound that is fed backinto the effect (minus:inverts the phase)PANNING DELAYThis is a delay effect with echoes that pan left and right.PHASERAdds a phase-shifted sound to the original sound, producinga swirling modulation.Parameter Value DescriptionFreq 100–8000 (Hz) Basic frequency at whichthe sound will be modulatedLFO Rate 1–128 Frequency of modulationDepth 0–127 Depth of modulationResonance 0–127 Amount of feedbackCHORUSParameter Value DescriptionTimeL 0–1600 (ms) Time until the delayTimeRsound is heardLevel L 0–127 Volume level of the delayLevel RsoundFeedback -98–98 (%) Amount of the delaysound that is fed backinto the effect (minus:inverts the phase)Gives richness and spaciousness to the sound.Parameter Value DescriptionDelay 8.0–30.0 (ms) Tone of the chorusLFO Rate 1–128 Frequency of modulationDepth 0–127 Depth of modulationPhase 0–180 Spatial spread of thesoundChapter 4[EFFECTS]FLANGERProduces a metallic resonance that rises and falls somewhatlike a jet airplane taking off or landing.Parameter Value DescriptionDelay 0–15.0 (ms) Tone of the flangerLFO Rate 1–128 Frequency of modulationDepth 0–127 Depth of modulationFeedback -98–98 (%) Amount of the flangersound that is fed back intothe effect (minus: invertsthe phase)Phase 0–180 Spatial spread of thesound43
Chapter 5. Trigger Settings [TRIGGER]Selecting the Pad Type[F1 (BANK)]To be sure the TD-12 accurately receives signals sent from thepads, select the trigger type (the type of pads being used) foreach trigger input.Trigger TypeA trigger type is a group of trigger settings with valuesoptimally adjusted for a particular pad. Indications such as“KD85,” “PD85,” or “VH11,” etc. in the above displaycorrespond to this. When you select a trigger type for aconnected pad, each of the parameters is set to the mostappropriate values for that pad, allowing you to play itwithout encountering problems with the settings. Only whenfactors unrelated to the selection of the proper trigger typeprevent you from getting good results in performance shouldyou fine-tune the individual parameters for the pad you areusing.Trigger BankTrigger Banks allow you to store the 15 trigger settings as asingle unit of information. The large number at the left edge ofthe above display is the Trigger Bank number. Move thecursor to this area to select the Trigger Bank.1. Press [TRIGGER] - [F1 (BANK)].[TRIGGER] lights, and the “TRIGGER BANK” screenappears.fig.05-TrigBank_70Trigger TypePD125PD120PD105PD100PD80RPD9PD8PD7PD6KD120KD80KD8KD7CY15RCY12RCCY14CCY8CY6CY12HVH12VH11PAD1PAD2RT7KRT5SRT3TUsed ModelPD-125PD-120PD-105PD-100PD-85, PD-80R, PD-80PD-9PD-8PD-7PD-6KD-120KD-85, KD-80KD-8KD-7CY-15RCY-12R/CCY-14CCY-8CY-6CY-12HVH-12VH-11When using a non-Roland padRT-7KRT-5SRT-3T* When you select the trigger type, the trigger parameters (exceptthe crosstalk cancel parameters) are automatically set to themost efficient values for each pad. Make settings for theparameter as needed.* When 3Way Trigger (p. 52) is set to ON, “RD CTRL” isdisplayed for the trigger type for TRIGGER INPUT 10 EDGE.It cannot be changed.2. Press [CURSOR (left)] to move the cursor to theTrigger Bank number.3. Use [+/-] or [VALUE] to select the Trigger Bank.4. Press [CURSOR (right)] to move the cursor to atrigger type.5. Strike the pad you wish to set.The cursor moves to the trigger type for the struck pad.You can also select by using [CURSOR] or [TRIGSELECT].6. Use [+/-] or [VALUE] to select the trigger type.Trigger Inputs and Pad/PlayingMethods corresponding chartTrigger InputDual TriggerMesh PadPositionalSensingRim ShotNuanceKICK – – –SNARE o o oTOM 1–3 o – oHI-HAT – – –CRASH 1, 2 – – –RIDE – o –EDGE – – –AUX 1, 2 o – o* Brush sweep and Cross Stick can be used only on SNARE.* Each playing method can be used with the instrumentscorresponding to it (p. 91).44
Chapter 5. Trigger Settings [TRIGGER]Setting the Pad Sensitivity[F2 (BASIC)]When you are using pads made by other manufacturers, tryadjusting the following parameters.The velocity monitor at the right of the screen indicatesthe velocity of the last sixteen strikes, starting with themost recent strike.1. Press [TRIGGER] - [F2 (BASIC)].[TRIGGER] lights, and the “TRIGGER BASIC” screenappears.fig.05-TrigBasic_70Minimum level for the pad(Threshold)This setting allows a trigger signal to be received only whenthe pad is above a determined force level (velocity). This canbe used to prevent a pad from sounding because of vibrationsfrom other pads.In the following example, B will sound but A and C will notsound.fig.Threshold.eThresholdABCThreshold: 0–312. Use [CURSOR (up/down)] to select theparameter.3. Strike the pad you wish to set.The setting screen for the struck pad appears.You can also select by using [TRIG SELECT].4. Use [+/-] or [VALUE] to adjust the setting.5. When you’re finished, press [EXIT] to return tothe “DRUM KIT” screen.When set to a higher value, no sound is produced when thepad is struck lightly.Gradually raise the “Threshold” value while striking the pad.Check this and adjust accordingly. Repeat this process untilyou get the perfect setting for your playing style.How Playing Dynamics Changes theVolume (Velocity Curve)This setting allows you to control the relation between playingvelocity (striking force) and changes in volume. Adjust thiscurve until the response feels as natural as possible.Chapter 5[TRIGGER]Parameter Value DescriptionTrig Type refer to p. 44Sensitivity 1–32 Pad sensitivityThreshold 0–31 Minimum levelfor the padCurvePad SensitivityLINEAR, EXP1,EXP2, LOG1,LOG2, SPLINE,LOUD1, LOUD2How playing dynamicschangesthe volumeYou can adjust the sensitivity of the pads to accommodateyour personal playing style.This allows you to have more dynamic control over the soundvolume, based on how hard you play.Curve: LINEARThe standard setting. This produces the most naturalcorrespondence between playing dynamics and volumechange.fig.VeloC-LINEAR.eVolumeLINEARStriking ForceCurve: EXP1, EXP2Compared to LINEAR, strong dynamics produce a greaterchange.fig.VeloC-EXP.eVolumeVolumeSensitivity: 1–32Higher sensitivity allows the pad to produce a loud volumeeven when played softly.Lower sensitivity will keep the pad producing a low volumeeven when played forcefully.EXPONENTIAL 1Striking ForceEXPONENTIAL 245
Chapter 5. Trigger Settings [TRIGGER]Curve: LOG1, LOG2Compared to LINEAR, a soft playing produces a greaterchange.fig.VeloC-LOG.eVolumeVolumeHi-Hat Settings [F3 (HI-HAT)]1. Press [TRIGGER] - [F3 (HI-HAT)].[TRIGGER] lights, and the “TRIGGER HIHAT” screenappears.fig.05-TrigHH_70LOG1Curve: SPLINELOG2Striking ForceExtreme changes are made in response to playing dynamics.fig.VeloC-SPLINE.eVolumeSPLINECurve: LOUD1, LOUD2Very little dynamic response, making it easy to maintainstrong volume levels. If using drum triggers, these settingshelp maintain stable levels.fig.VeloC-LOUD.eVolumeVolumeLOUD1Striking ForceLOUD2Striking Force2. Use [CURSOR (up/down)] to select theparameter.3. Use [+/-] or [VALUE] to adjust the setting.4. When you’re finished, press [EXIT] to return tothe “DRUM KIT” screen.Parameter Value DescriptionHi-Hat CtrlTypeVH12,VH11/FDUsed Hi-Hat ControllerVH12: VH-12VH11/FD: VH-11, FD-8When HH Ctrl Type is set to “VH12”Offset -100– +100 Extent of Opening Hi-HatThe bigger the value is,the wider the openingextent is.After setting the automaticadjustment (p. 48),make fine adjustmentsuntil you achieve the settingsyou like.Foot SplashSens-10– +10 Amount of how easy tomake the Foot SplashNoise Cancel 1–3 Amount of strength to cancelthe bow and edge noisewhen you play “FootClose.”The bigger the value is,the more difficult tohave a noise excludingthe “Foot Close.”When HH Ctrl Type is set to “VH11/FD”Foot SplashSens-10– +10 Amount of how easy tomake the Foot SplashCC Max 90, 127 Amount of ControlChange that is transmittedin stepping the pedal downcompletely.CCResolutionNORMAL,HIGHAmount of Data Resolutionthat is transmittedfrom Hi-Hat Pedal. (*1)*1: When you control the pitch by Hi-Hat Pedal (p. 38), thepitch can be changed smoothly if you set “High.”46
Chapter 5. Trigger Settings [TRIGGER]Connecting the VH-11 and Adjustingthe TD-127. Press [F3 (HI-HAT)].The “TRIGGER HI-HAT” screen appears.fig.05-VH11-Offset2Connecting the Hi-Hatfig.VH-Connect.e8. Confirm the TD-12’s settings.CONTROLOUT jackto theTD-12’sHH CTRL jackTRIGGEROUT jackto theTD-12’sTRIGGER INPUTHI-HAT jackParameterValueHi-Hat TypeVH11/FDCC Max 90CC Resolution NORMAL9. While reading the meter displayed on the rightside of the TD-12’s screen, adjust the offsetwith the VH-11’s VH offset adjustment screw.Adjust the offset so that a blackmeter.fig.05-VH11-Offset3appears in theMaking the Hi-Hat Settings1. Confirm that the VH-11 and TD-12 areconnected properly.2. After making the hi-hat settings, release yourfoot from the pedal, and while keeping your footoff the pedal, turn on the power to the TD-12.* The offset cannot be adjusted correctly if the hi-hat is makingcontact with the motion sensor unit when the power is turned on.fig.Offset.eVH OffsetAdjustmentScrewOPENCLOSEChapter 5[TRIGGER]3. Loosen the clutch screw and let the hi-hat restnaturally on the motion sensor unit.4. Press [TRIGGER] - [F1 (BANK)].[TRIGGER] lights, and the “TRIGGER BANK” screenappears.5. Press [CURSOR] to move the cursor to thetrigger type for TRIGGER INPUT 6.6. Use [+/-] or [VALUE] to select “VH11.”fig.05-VH11-Offset1VH Offset Adjustment PointsIf the closed hi-hat sound is difficult to attain, rotate theVH offset adjustment screw towards “CLOSE.”If the open hi-hat sound is difficult to attain, rotate thescrew towards “OPEN.”If the sound cuts off when you strike the hi-hatforcefully, rotate the VH Offset adjustment screwtowards “OPEN.”10. If you need, make further adjustments to otherparameters (p. 46).47
Chapter 5. Trigger Settings [TRIGGER]Connecting the VH-12 and Adjustingthe TD-12Connecting the Hi-Hat8. Press [F5 (EXECUTE)].[TRIGGER] flashes, and the “VH offset” parameter is setautomatically.fig.05-VH12-Offset2_70fig.VH12-Connect.eClutchscrewWhen finished, [TRIGGER] stops flashing and remainslit, and the following screen appears.fig.05-VH12-Offset3_70TRIGGEROUTPUTjackCONTROLOUTPUTjack9. If you need, make further adjustments to otherparameters (p. 46).to the TD-12’sTRIGGER INPUTHI-HAT jackAdjusting the Offsetto the TD-12’sHH CTRL jackWhen Hi-Hat Type is set to “VH12,” you can alsoperform this operation by holding down [KIT] andpressing [TRIGGER] (p. 20).1. Press [TRIGGER] - [F1 (BANK)].[TRIGGER] lights, and the “TRIGGER BANK” screenappears.2. Press [CURSOR] to move the cursor to thetrigger type for TRIGGER INPUT 6.3. Use [+/-] or [VALUE] to select “VH12.”4. Press [F3 (HI-HAT)].The “TRIGGER HI-HAT” screen appears.5. Set the Hi-Hat Type to “VH12.”6. Press [F5 (OFFSET)].The “VH OFFSET ADJUSTMENT” screen will appear.fig.05-VH12-Offset1_70Connecting and Setting the Hi-HatControl Pedal (FD Series)Making the Hi-Hat Settings1. Press [TRIGGER] - [F3 (HI-HAT)].[TRIGGER] lights, and the “TRIGGER HI-HAT” screenappears.2. Set the Hi-Hat Type to “VH11/FD.”3. If you need, make further adjustments to otherparameters (p. 46).7. Loosen the clutch of the top hi-hat and let it siton the bottom hi-hat.* Do NOT touch the hi-hats or the pedal.48
Chapter 5. Trigger Settings [TRIGGER]Eliminate Crosstalk BetweenPads [F4 (XTALK)]When two pads are mounted on the same stand, hitting onepad may trigger the sound from another pad unintentionally.(This is called crosstalk.) Eliminate this by adjusting XtalkCancel on the pad that is sounding inadvertently.In some cases, you can prevent crosstalk between twopads by increasing the distance between them.Crosstalk Example: If you hit the snare pad andthe tom 1 also soundsSet the snare and tom 1 to the same XTALK GROUP.Raise the “XTALK CANCEL” for the pad being used forthe tom 1. The tom 1 pad will be less prone to receivecrosstalk from other pads. With a setting “OFF,” crosstalkprevention will not work.* If the value is set too high, and two pads are playedsimultaneously, the one that is struck less forcefully maynot sound. Be careful and set this parameter to theminimum value required to prevent crosstalk.1. Press [TRIGGER] - [F1 (BANK)] - [F4 (XTALK)].2. Use [F1]–[F3] to select the parameter.3. Strike the pad you wish to set.The cursor will move to the trigger input number for thestruck pad.You can also select by using [CURSOR] or [TRIGSELECT].4. Use [+/-] or [VALUE] to adjust the setting.5. When you’re finished, press [EXIT] to return tothe “DRUM KIT” screen.[F1 (XTALK)]: XTALK CANCELfig.05-Xtalk1_70Chapter 5[TRIGGER][F2 (MOUNT)]: MOUNT TYPESelect the pad mount type here.SEPARATE: Using a separate stand or no standPAD: Using a pad mountCYMBAL: Using a cymbal mountfig.05-Xtalk2_70[F3 (GROUP)]: XTALK GROUPCrosstalk Cancel affects the pads set to the same number.fig.05-Xtalk3_7049
Chapter 5. Trigger Settings [TRIGGER]Advanced TriggerParameters [F5 (ADVANCE)]The following parameters (Advanced Trigger Parameters) areautomatically set to the most efficient values for each padwhen you select the Trigger Type (p. 44), and don’t requireadjustment, except if you experience any of the problems thatare discussed in the explanation of each parameter.1. Press [TRIGGER] - [F1 (BANK)] -[F5 (ADVANCE)].2. Use [F1]–[F3] and [CURSOR (up/down)] toselect the parameter.3. Strike the pad you wish to set.The setting screen for the struck pad will appear.You can also select by using [TRIG SELECT].4. Use [+/-] or [VALUE] to adjust the setting.5. When you’re finished, press [EXIT] to return tothe “DRUM KIT” screen.Parameter Value Description[F1 (SCAN)]Trigger Signal Detection Time(Scan Time)Since the rise time of the trigger signal waveform may differslightly depending on the characteristics of each pad oracoustic drum trigger (drum pickup), you may notice thatidentical hits (velocity) may produce sound at differentvolumes. If this occurs, you can adjust the “Scan Time” so thatyour way of playing can be detected more precisely.fig.ScanTime.eScan TimeTimeScan Time: 0–4.0 (ms)While repeatedly hitting the pad at a constant force, graduallyraise the Scan Time value from 0 msec, until the resultingvolume stabilizes at the lou<strong>des</strong>t level. At this setting, try bothsoft and loud strikes, and make sure that the volume changesappropriately.* As the value is set higher, the time it takes for the sound to beplayed increases. Set this to the lowest value possible.Trig Type refer to p. 44Scan Time 0–4.0 (ms) Trigger signal detectiontimeRetrig Cancel 1–16 Detecting trigger signalattenuationMask Time 0–64 (ms) Double triggering prevention(p. 51)[F2 (RIM)]Detecting Trigger Signal Attenuation(Retrigger Cancel)Important if you are using acoustic drum triggers. Suchtriggers can produce altered waveforms, which may alsocause inadvertent sounding at Point A in the following figure(Retrigger).fig.Retrigger.eATrig Type refer to p. 44Rim Gain 0–3.2 Rim/Edge dynamic response(p. 51)RimShot Adjust 0–8.0 Rim shots response (p. 51)XStick Thrshld 0–127 Cross stick response (p.51)[F3 (3-WAY)]3Way Trigger(Ride & Edge)OFF, ONPlaying Bow/Bell/Edge(p. 52)[F5 (NAME)] Trigger Bank Name (p. 52)TimeThis occurs in particular at the decaying edge of thewaveform. Retrigger Cancel detects such distortion in andprevents retriggering from occurring.Retrig Cancel: 1–16While repeatedly striking the pad, raise the “Retrig Cancel”value until retriggering no longer occurs.* Although setting this to a high value prevents retriggering, itthen becomes easy for sounds to be omitted when the drumsplayed fast (roll etc.). Set this to the lowest value possible whilestill ensuring that there is no retriggering.50
Chapter 5. Trigger Settings [TRIGGER]You can also eliminate this problem of retriggering withthe Mask Time setting. Mask Time does not detect triggersignals if they occur within the specified amount of timeafter the previous trigger signal was received. RetriggerCancel detects the attenuation of the trigger signal level,and triggers the sound after internally determining whichtrigger signals were actually generated when the headwas struck, while weeding out the other false triggersignals that need not trigger a sound.Double Triggering Prevention(Mask Time)Rim Shots Response (Rim Shot Adjust)When a PD-125/120/105/85/80R or RT-5S (trigger) isconnected, you can adjust the sensitivity of the rim response.RimShot Adjust: 0–8.0There are some cases that you have a rim sound unexpectedlywhen you hit the head strongly. You can improve thissituation with decreasing the value of “RimShot Adjust.”* When you set the value too small, it might be difficult to playthe rim sound.When playing a kick trigger the beater can bounce back andhit the head a second time immediately after the intendednote—with acoustic drums sometimes the beater stays againstthe head—this causes a single hit to “double trigger” (twosounds instead of one). The Mask Time setting helps toprevent this. Once a pad has been hit, any additional triggersignals occurring within the specified “Mask Time” (0–64msec) will be ignored.fig.MaskTime.eMask TimeSound not producedTimeMask Time: 0–64 (ms)Adjust the “Mask Time” value while playing the pad.When using a kick trigger, try to let the beater bounce backand hit the head very quickly, then raise the “Mask Time”value until there are no more sounds made by the beaterrebound.* When set to a high value, it will be difficult to play veryquickly. Set this to as low a value as you can.If two or more sounds are being produced when youstrike the head just once, then adjust Retrig Cancel.Rim/Edge Dynamic Response(Rim Gain)Cross Stick Threshold(XStick Thrshld)When a PD-125/120/105/85/80R or RT-5S (trigger) isconnected, you can determine the “cross over point” betweenthe cross stick and a rim shot sounds.XStick Thrshld: 0–127Setting this to a higher value makes it easier to get cross sticksounds. When set to “0,” playing a cross stick produces theopen rim shot sound.* Increasing the value excessively may cause the cross stick tosound as well when the open rim shot is played.fig.MaskTime.eHighVolume LevelsLowSoftCross StickSoundRim ShotSoundHardCross Stick Threshold(0–127)StrikingforceChapter 5[TRIGGER]When a PD-125/120/105/85/80R, PD-9/8/7, CY series pad,VH-12/11, or RT-5S (trigger) is connected, you can adjust therelation between your playing velocity (force) on the rim/edge and the resulting volume level.Rim Gain: 0–3.2Higher value allows the rim/edge to produce a loud volumeeven when played softly. Lower value will keep the rim/edgeproducing a low volume even when played forcefully.51
Chapter 5. Trigger Settings [TRIGGER]Playing Bow, Bell, and Edge(3-Way Triggering)When using the CY-15R or CY-12R/C for the RIDE, you canthree way triggering (bow, bell, and edge shot) performanceare possible.Naming a Trigger Bank [F5 (Name)]Each trigger bank can be named (up to 12 characters).fig.05-BankName_703Way Trigger: OFF, ONConnect as shown below, set 3Way Trigger to “ON.”fig.05-Ride.eBOW/BELLBOW/EDGERideCY-15R or CY-12R/C1. In the “TRIGGER BANK” screen, select thetrigger bank you want to name.2. [F5 (ADVANCE)] - [F5 (NAME)].The “TRIGGER BANK NAME” screen appears.3. [CURSOR (left/right)] to move the cursor to thecharacter to be changed.4. Use [VALUE], [+/-], or [CURSOR (up/down)] tochange the character.TD-12 Rear PanelEDGERIDEFunction Buttons[F1 (INSERT)]A blank space is inserted at the cursor position.[F2 (DELETE)]Character at the cursor position is deleted.[F3 (SPACE)]Character at the cursor position is replaced by a blankspace.[F4 (CHAR)]Character at the cursor position changes betweenuppercase/lowercase alphabet, or numbers and symbols.5. When finished, Press [EXIT].Correspondences Between PlayingMethod and Trigger InputPlaying MethodBow ShotBell ShotEdge ShotTD-12 TRIGGER INPUT9 RIDE head9 RIDE rim10 EDGE rim* Head-side tone for the TRIGGER INPUT 10 EDGE cannot besounded.* When 3Way Trigger is set to “ON,” “RD CTRL” is displayedfor the trigger type for TRIGGER INPUT 10 EDGE. It cannotbe changed.52
Chapter 6. Sequencer (Playback)The TD-12’s sequencer organizes music into six parts. TheDrum Kit part is used to record/play back what is played onthe pads. Additionally, Melody Part, Bass Part, Backing 1 Part,and Backing 2 Part are the four backing instrument parts, andthere is another Percussion part.The collective performance of these six parts is called apattern.Preset Patterns (Pattern P 1–150)Settings in Preset patterns cannot be modified. These patternsare provided for use in practicing or live performances.User Patterns (Pattern U 151–250)These are patterns for you to use as you wish. You can recorddirectly from the pads or an external MIDI keyboard in realtime (p. 64). User pattern settings are saved automatically.Using Preset PatternsAlthough you can confirm various settings for Preset patterns,you cannot change the settings. You also cannot record thesepatterns.About Preset Pattern CopyrightThe sounds, phrases and patterns contained in this product aresound recordings protected by copyright. Roland hereby grants topurchasers of this product the permission to utilize the soundrecordings contained in this product for the creation andrecording of original musical works; provided however, thesound recordings contained in this product may not be sampled,downloaded or otherwise re-recorded, in whole or in part, for anyother purpose, including but not limited to the transmission of allor any part of the sound recordings via the internet or otherdigital or analog means of transmission, and/or the manufacture,for sale or otherwise, of any collection of sampled sounds, phrasesor patterns, on CD-ROM or equivalent means.The sound recordings contained in this product are the originalworks of Roland Corporation. Roland is not responsible for the useof the sound recordings contained in this product, and assumes noliability for any infringement of any copyright of any third partyarising out of use of the sounds, phrases and patterns in this product.Basic Operationfig.06-001* As you cannot record over a preset pattern, the followingappears in the display if you press [REC].fig.06-002_70If you want to change, edit, or record any Preset patternsettings, copy them to a User pattern (p. 67).[PATTERN]:Selects patterns. This displays the basic screen for thesequencer.[STOP]Stops playback of the pattern. When pressed while thepattern is stopped, this returns you to the beginning ofthe pattern.[PLAY]Starts playback of the pattern.[REC]Enters record-standby mode.[TEMPO]Sets the Tempo (p. 55).[CURSOR (up)]When pressed while the pattern is stopped, this returnsyou to the beginning of the pattern.[CURSOR (left)]When pressed while the pattern is stopped, this returnsyou to the previous measure in the pattern.[CURSOR (right)]When pressed while the pattern is stopped, this advancesyou to the next measure in the pattern.[CURSOR (down)]When pressed while the pattern is stopped, this advancesyou to the end of the pattern.* [CURSOR] cannot be used while the pattern is played back.Chapter 6[PLAY]53
Chapter 6. Sequencer (Playback)Choosing a Pattern[PATTERN]Select a Pattern from the List[F1 (LIST)]fig.06-003_70Here you can select patterns from a list of pattern names.Pattern number, pattern name, beat, measure length, patternplayback type, and tempo are displayed.fig.06-List_701. Press [PATTERN].[PATTERN] lights, and the “PATTERN” screen appears.2. Use [+/-] or [VALUE] to select the pattern.* If you press [F5 (NEW)], an empty pattern with the lowestnumber is called up.About the “PATTERN” screenfig.06-004_70CA: Pattern NumberCurrently selected pattern number.B: Pattern NameThe name of the currently selected pattern.C: Pattern Type“P” is displayed for preset patterns, and “U” isdisplayed for user patterns. When choosing an emptypattern, an asterisk (*) appears.D: Pattern Playback Type (p. 61)E: Measure NumberPlayback begins from the measure indicated herewhen [PLAY] is pressed.F: BeatDBAG: Part Mute Status (p. 60)FEGWhen you have finished making the settings, press[PATTERN] to bring up this screen. This prevents datafrom being overwritten inadvertently duringperformance.1. Press [PATTERN] - [F1 (LIST)].The “PATTERN LIST” screen appears.2. Use [VALUE], [+/-], or [CURSOR (up/down)] toselect the pattern.Function Buttons[F1 (▲ PAGE)]The previous page of the list appears.[F2 (PAGE ▼)]The next page of the list appears.[F5 (NEW)]An empty pattern with the lowest number is called up.3. Press [EXIT] to return to the “PATTERN”screen.Playing Back a Pattern[PLAY]fig.06-Play_701. Select the pattern to play.2. Press [PLAY].[PLAY] lights, and playback of the pattern begins.3. Press [STOP] to stop playback of the pattern.[PLAY] goes off, and returns to the beginning of themeasure played at that moment.4. Press [STOP] once again to return to beginningof the pattern.54
Chapter 6. Sequencer (Playback)Tempo Adjustment1. Press [TEMPO].[TEMPO] lights, and the “TEMPO” screen appears.fig.06-Tempo1_70Synchronizing with an External MIDIDeviceThis section discusses the settings that allow an external MIDIsequencer and the TD-12’s sequencer to be synchronized. Thedevice that is playing back is called the “master” and the devicethat is synchronizing to the playback is called the “slave.”1. Press [TEMPO].[TEMPO] lights, and the “TEMPO” screen appears.2. Use [+/-] or [VALUE] to select the tempo.3. Press [EXIT] to return to the “DRUM KIT”screen.2. Press [F2 (SYNC)].The “TEMPO SYNC” screen appears.fig.06-Tempo4_70Setting the Tempo by Hitting a Pad(Tap Tempo)3. Use [+/-] or [VALUE] to make settings.You can set the tempo by hitting a pad or pressing [PREVIEW]two or more times at quarter-note intervals of the <strong>des</strong>iredtempo.1. Press [TEMPO].[TEMPO] lights, and the “TEMPO” screen appears.2. Press [F3 (TAP)].The “TAP TEMPO” screen appears.fig.06-Tempo2_703. Press [CURSOR (up)] to move the cursor to“Tap Switch.”4. Use [+/-] or [VALUE] to set to “ON.”5. Press [CURSOR (down)] to move the cursor to“Tap Pad.”6. Use [+/-] or [VALUE] to select the pad (or[PREVIEW]) to use for Tap Tempo function.7. Press [KIT] to return to the “DRUM KIT” screen.When Tap Switch is set to “ON,” the tempo is displayed at theupper right of the display.fig.06-Tempo3_704. Press [KIT] to return to the “DRUM KIT” screen.Parameter Value DescriptionSync Mode INTERNAL, EXTERNAL, See below.AUTO, REMOTEINTERNAL:The TD-12’s tempo setting will be used for playback/recording. When shipped from the factory, this setting isselected.EXTERNAL:The TD-12’s sequencer will operate in accordance withtempo data (MIDI Clock) from the external device.AUTO:This is a convenient setting that combines features of boththe INTERNAL and EXTERNAL settings. When nosynchronization signal is being received, the TD-12’stempo setting will be used for playback/recording. Whena synchronization signal is being received from anexternal device, the TD-12 will sync to that signal.REMOTE:The TD-12 will obey start/pause/stop messages from anexternal device, but will playback according to its owntempo setting.Synchronizing to the playback of anexternal sequencerIn this case, the TD-12 will be the slave and an externalsequencer will be master.1. Connect the TD-12’s MIDI IN connector with aMIDI cable to the MIDI OUT connector of theexternal sequencer.Chapter 6[PLAY]2. Set Sync Mode to “EXTERNAL.”3. Begin playback on the external sequencer.Synchronized playback will begin.55
Chapter 6. Sequencer (Playback)Part Settings [F2 (PART)]PATTERN PART screenfig.06-Part_70Make Settings for the Backing Part[F1 (BACKING)]Here you can select the instrument used for the backing parts(other parts than drum kit part and percussion part), etc.1. Press [PATTERN] - [F2 (PART)].The “PATTERN PART” screen appears.Instrument Numbers/InstrumentNamesYou can change the tone by changing the instrumentnumber. Selecting different variations within eachinstrument number changes the instrument name, with adifferent tone being selected.Instrument numbers correspond to the program numbers(1-128).Variation TonesThese are slightly varied tone types found in aninstrument number. The number of variation tones varieswith the instrument number.fig.06-Variation_702. Press [F1 (BACKING)].The “MELODY (BASS, BACKING1, BACKING2) PART”screen appears.fig.06-Backing_70Instrument NameNumber ofVariation TonesMaster Tuning3. Press [F1]–[F4] to select the part you wish toset.[F1]: Melody Part[F2]: Bass Part[F3]: Backing 1 Part[F4]: Backing 2 Part4. Press [CURSOR (up/down)] to select theparameter.Here you can adjust the overall tuning for the Melody, Bass,Backing 1, and Backing 2 part.1. Press [PATTERN] - [F2 (PART)] - [F2(BACKING)] - [F5 (M TUNE)].fig.06-Tune_70The “MASTER TUNE” screen appears.5. Use [+/-] or [VALUE] to make settings.Parameter Value DescriptionInstRefer to Backing Part InstrumentInstrument List(p. 94)Key Shift -24–0– +24 Shifts the overallpitch (in semitonesteps).Bend Range 0– +24 Amount ofchange in pitchwith pitch bendat the maximumlevel (in semitonesteps).2. Use [+/-] or [VALUE] to make setting.Master Tune: 415.3–466.2Hz* You can set this to 440.0 Hz by pressing [F5 (440 Hz)].56
Chapter 6. Sequencer (Playback)Percussion Part Settings [F2 (PERC)]Choosing a Percussion SetAn assembled group of different percussion instruments iscalled a percussion set. There are 8 percussion sets, withpercussion instruments assigned to each note number (128).So multiple instruments can be used at one time. They can beedited and use the effects unit of the backing instruments.1. Press [PATTERN] - [F2 (PART)].The “PATTERN PART” screen appears.2. Press [F2 (PERC)].The “PERCUSSION PART” screen appears.fig.06-PercPart_70Percussion Set Settings1. In the “PERCUSSION PART” screen, press [F5(EDIT)].The “PERCUSSION SET EDIT” screen appears.fig.06-PercSet_702. Make settings of the percussion set.3. When finished, press [EXIT] to return to the“PERCUSSION PART” screen.Selecting a Percussion InstrumentSelect an instrument for each note number.1. Press [CURSOR (up/down)] to select the notenumber you wish to set.3. Use [+/-] or [VALUE] to select the percussionset.2. Use [VALUE] or [+/-] to select the instrument.About the Percussion SetsThe TD-12 features eight percussion sets.You can select which percussion set is to be used in eachpattern with the pattern’s Percussion Part setting(press [PATTERN]) - [(F2 (PART)] - [F2 (PERC)]).PatternPercussion SetPattern 1Percussion Set 1Pattern 2Percussion Set 2Percussion Set 3You can listen the sound of instrument by pressing[PREVIEW].Selecting a Percussion Instrumentfrom the List [F1 (LIST)]Here you can select from the list of all available instruments.1. Press [CURSOR (up/down)] to select the notenumber you wish to set.2. Press [F1 (LIST)].The “PERCUSSION SET INST LIST” screen appears.fig.06-PercList_70Chapter 6[PLAY]Pattern 151Pattern 152Pattern 250Percussion Set 4Percussion Set 5Percussion Set 6Percussion Set 73. Use [VALUE], [+/-], or [CURSOR] to select theinstrument.Percussion Set 8Changing a percussion set’s instrument settingssimultaneously changes the percussion instruments inpatterns using the same percussion sets.* The Preset patterns use Percussion Sets 1--5. If youchange the percussion set settings, it is recommended thatyou first copy the percussion set you want to change toPercussion Set 6 or other percussion set, then change thesettings in the copy.Function Buttons[F1 (< PAGE)]Previous page of the list appears.[F2 (PAGE >)]The next page of the list appears.[F5 (OFF)]Selects the instrument #561 (OFF).4. Press [EXIT] to return to the “PERCUSSIONSET EDIT” screen.57
Chapter 6. Sequencer (Playback)Making the Settings for EachPercussion Instrument [F2 (EDIT)]Set the volume, pan, pitch, decay, etc. for each percussioninstrument.Naming a Percussion Set [F3 (NAME)]Each percussion set can be named (up to 12 characters).fig.06-PercName_701. Press [F2 (EDIT)].The “PERCUSSION SET EDIT” screen appears.fig.06-PercEdit_702. Press [CURSOR] to select the parameter.3. Use [+/-] or [VALUE] to make settings.1. Press [F3 (NAME)].The “PERCUSSION SET NAME” screen appears.2. Press [CURSOR (left/right)] to move the cursorto the character to be changed.3. Use [VALUE], [+/-], or [CURSOR (up/down)] tochange the character.Parameter Value DescriptionPerc Note 0 (C -)–127 (G 9) Note number tobe set(Inst)Refer to Drum InstrumentInstrumentList (p.88).Volume 0–127 –Pan L15–CTR–R15 Stereo positionPitch -480–+480 –Decay Time -31–+31 –Rev Send Level 0–127 Amount of reverbCC 0–127 See below.CC: Specifies how the instrument which changes the tonelike a snare (striking position) or hi-hat (pedal position)sounds.Function Buttons[F1 (INSERT)]A blank space is inserted at the cursor position.[F2 (DELETE)]Character at the cursor position is deleted.[F3 (SPACE)]Character at cursor position is replaced by a blank space.[F4 (CHAR)]Character at the cursor position changes betweenuppercase/lowercase alphabet, or numbers and symbols.4. Press [EXIT] to return to the “PERCUSSIONSET EDIT” screen.4. Press [EXIT] to return to the “PERCUSSIONSET EDIT” screen.58
Chapter 6. Sequencer (Playback)Volume/Pan Settings for Each Part[F3 (MIXER)]* Drum part cannot be set here. Set in the MIXER settings (p.39).* To adjust volume/pan settings for each instrument of thepercussion part, refer to p. 57.1. Press [PATTERN] - [F2 (PART)].The “PATTERN PART” screen appears.Reverb Settings for Backing Parts[F3 (MIXER)] - [F4 (REVERB)]Set the amount of reverb and chorus for each backing part.1. Press [PATTERN] - [F2 (PART)].The “PATTERN PART” screen appears.2. Press [F3 (MIXER)] - [F4 (REVERB)].fig.06-Rev_70The “REVERB” screen appears.2. Press [F3 (MIXER)].The “PART VOLUME”, “PART PAN”, or “PARTREVERB SEND LEVEL” screen appears.fig.06-Mixer_703. Press [CURSOR] to select the parameter.4. Use [+/-] or [VALUE] to make settings.3. Press [F1]–[F3] to select the parameter.5. Press [F5 (REV SW)] to turn the reverb ON orOFF.4. Press [CURSOR (left/right)] to select the partyou wish to set.5. Use [+/-], [VALUE], or [CURSOR (up/down)] tomake settings.ParameterValue[F1 (VOLUME)]PART VOLUME 0–127[F2 (PAN)]PART PANL15–CTR–R15[F3 (REV SND)]PART REVERB SEND LEVEL 0–127Parameter Value DescriptionREVERBType ROOM1, ROOM2, Type of reverbSTAGE1, STAGE2,HALL1, HALL2,DELAY, PAN-DELAYTime 0–127 Reverb Length/Delay TimeChapter 6[PLAY]59
Chapter 6. Sequencer (Playback)Muting a Specific Part [F5 (MUTE)]You can mute specific parts in patterns.1. Press [PATTERN] - [F2 (PART)].The “PATTERN PART” screen appears.2. Press [F5 (MUTE)].The “PART MUTE” screen appears.fig.06-Mute1_70Pattern Settings [F3 (FUNC)]Set various settings for the user patterns.Time Signature/Number ofMeasures/Tempo Settings[F1 (SETUP)]1. Press [PATTERN].The “PATTERN PART” screen appears.2. Press [F3 (FUNC)] - [F1 (SETUP)].The “PATTERN SETUP” screen appears.3. Press [F1]–[F5] to turn each part muted orplayed.fig.06-PtnSetup_70[F1]: Melody Part[F2]: Bass Part[F3]: Backing 1 Part + Backing 2 Part[F4]: Percussion Part[F5]: Drum Kit Part4. Press [PATTERN] to return to the “PATTERN”screen.* You can check the part mute status in the “PATTERN” screen.fig.06-Mute2_703. Press [CURSOR] to select the parameter.4. Use [+/-] or [VALUE] to make settings.Parameter Value DescriptionPattern Length 1–999 Number ofmeasuresTime Signature Numerator: 1–15 BeatDenominator: 2, 4, 8, 16Tempo 20–260 –MUTEPLAYChange the Time Signature setting before recording. Youcannot set 1/8 and 1/16-3/16.60
Chapter 6. Sequencer (Playback)Choosing a Playback Method[F2 (TYPE)]1. Press [PATTERN].The “PATTERN PART” screen appears.2. Press [F3 (FUNC)] - [F2 (TYPE)].The “PATTERN TYPE” screen appears.fig.06-PtnType_703. Press [CURSOR (up/down)] to select theparameter.4. Use [+/-] or [VALUE] to make settings.Parameter Value DescriptionPlay Type LOOP, ONESHOT, See below.TAP, VLINKTap Reset Time OFF, 0.2–4.0Quick Play OFF, ONTAP ( ):When set to Pad Pattern (p. 37), the sounds are playedback in sequence each time the pad is pressed. (You canuse [PLAY] instead of a pad.)For example if you specify “TAP” for a pattern whichcontains a melody line and assign this pattern to a pad,you can play the notes of the melody in order each timeyou strike the pad. You can set the “Tap Reset Time” sothat the pattern will automatically return to thebeginning if that time interval elapses without that padbeing hit again. You can play a bass line with your kickdrum, too.* When using Realtime Recording (p. 64) to record patterns usedfor TAP playback, make the Quantize settings (p. 66) beforeyou begin recording.VLINK ( ):Special “TAP” for the V-LINK function (p. 78).You can switch the images in order each time you strikethe pad (or press [PLAY]).TAP and VLINK cannot be selected on an empty pattern.About Play Type(LOOP, ONESHOT, TAP, and VLINK)Supplementary function for TAP andVLINKLOOP ( ):After the pattern is played back all the way to the end,playback then repeats, starting at the beginning of thepattern. Playback continues until [STOP] is pressed.Loop is useful for practicing and live performance.ONESHOT ( ):Tap Reset Time: OFF, 0.2–4.0 (sec.)This function automatically returns the pattern to thebeginning if the set time interval elapses without the padbeing hit again. This is the time interval that resets thepattern being used. If it is set to “OFF,” this function willbe disabled.Chapter 6[PLAY]Playback stops once the end of the pattern is reached.This is a convenient feature to use when assigningpatterns to the pads (Pad Pattern; p. 37). Each time youhit the pad to which the pattern is assigned, it willautomatically start from the beginning of the pattern.Supplementary function for LOOP andONESHOTQuick Play: OFF, ONQuick Play starts playback of the pattern from the firstnote (first event) even if when you recorded the pattern,you left a pause at the beginning. For example if you hadjust played/recorded freely, ignoring the tempo clock.You can have the velocity of the pattern beingplayed change according to the force with which thepad is tapped (Pad Pattern Velocity). Refer to p. 37.Confirming the Usage Status of theTD-12’s Internal Memory[F3 (MEMORY)]You can confirm the usage status of the TD-12’s internalmemory.fig.06-Memory_7061
Chapter 6. Sequencer (Playback)Naming a Pattern [F5 (NAME)]Each pattern can be named (up to 12 characters).fig.06-PtnName_70Starting and Stopping theMetronome (Click) On/Off1. Press [TEMPO].[TEMPO] lights, and the “TEMPO” screen appears.2. Press [F5] to turn the click ON and OFF.fig.06-Click1_701. Press [PATTERN] - [F3 (FUNC)] - [F5 (NAME)].[PATTERN] lights, and the “PATTERN NAME” screenappears.2. Press [CURSOR (left/right)] to move the cursorto the character to be changed.3. Use [VALUE], [+/-], or [CURSOR (up/down)] tochange the character.Function Buttons[F1 (INSERT)]A blank space is inserted at the cursor position.[F2 (DELETE)]Character at the cursor position is deleted.[F3 (SPACE)]Character at cursor position is replaced by a blank space.[F4 (CHAR)]Character at the cursor position changes between uppercase/lowercase alphabet, or numbers and symbols.3. Press [EXIT] to return to the “DRUM KIT”screen.You can also turn the click on/off by holding down[SHIFT] and pressing [TEMPO].Using a Indicator as a Click(Tempo Indicator)You can use the [TEMPO] indicator as a click.1. Press [TEMPO].[TEMPO] lights, and the “TEMPO” screen appears.2. Press [F4] to turn the [TEMPO] indicatorflashing (ON) or going off (OFF).fig.06-Click2_703. Press [EXIT] to return to the “DRUM KIT”screen.62
Chapter 6. Sequencer (Playback)Setting the Click1. Press [TEMPO] - [F1 (CLICK)].The “CLICK SETTINGS” screen appears.fig.06-Click5_702. Press [CURSOR] to select the parameter.To adjust the click level, move [GROUP FADERS] -[CLICK] (p. 26).Click InstrumentsVOICE, CLICK, BEEP, METRONOME, CLAVES,WOOD BLOCK, STICKS, CROSS STICK, TRIANGLE,COWBELL, CONGA, TALKING DRUM, MARACAS,CABASA, CUICA, AGOGO, TAMBOURINE, SNAPS,909 SNARE, 808 COWBELL3. Use [+/-] or [VALUE] to make settings.Parameter Value Description[F1 (INST)]InstRefer to right column.Sound for the clickPanAmb SendLevelL15–CENTER–R15Stereo position of theclick0–127 Amount of ambiencefor the clickYou have to turn theambience on (p. 42).When “---” is displayed, this level is set to“0” automatically to prevent the click soundfrom leaking.Output MASTER+PHONES,PHONES ONLY,DIRECT 5,DIRECT 6,DIRECT 5+6,DIRECT 7,DIRECT 8,DIRECT 7+8[F2 (TIMESIG)]TimeSignatureInterval[F3 (COUNT)]Count InPlayCount InRecDuringPlayNumerator: 0–13Denominator:2, 4, 8, 16Output <strong>des</strong>tination forthe clickYou can also selectby pressing [SETUP]- [F2 (OUTPUT)] -[F2 (OTHER)] (p.76).When the numerator isset to “0,” no accent isadded to the first beat.1/2 (half note), 3/8 (dotted quarter note),1/4 (quarter note), 1/8 (eighth note),1/12 (eighth-note triplet), 1/16 (16th note)OFF, 1 MEAS,2 MEASOFF, 1 MEAS,2 MEASOFF, ONAdds a count in beforeplayback.Adds a count in beforerecording.Sets the click to playduring pattern playback.During Rec OFF, ON Sets the click to playduring recording.Chapter 6[PLAY]63
Chapter 7. Sequencer (Recording/Editing)Recording a Pattern [REC]What is played on the pads or on an external MIDI keyboardcan be recorded (Realtime Recording).Your performance will be recorded exactly as you play it,including hi-hat control pedal movements and PositionalSensing.Please keep in mind that even though there are 100 userpatterns, the amount of memory available will bedetermined by how much data is recorded into TD-12.How to RecordThe procedure is the same when recording with pads or witha MIDI keyboard.(1) Select an Empty Pattern1. Press [PATTERN].fig.06-003_70[PATTERN] lights, and the “PATTERN” screen appears.You can check the amount of memory available bypressing [PATTERN] - [F3 (FUNC)] - [F3 (MEMORY)].2. Press [F5 (NEW)].An empty pattern is automatically selected.fig.07-Rec1-2_70Storing performance data that <strong>des</strong>cribes every instancewhere the Hi-Hat Control Pedal is used, and thatinclu<strong>des</strong> strike position detection rapidly consumes theUser memory.If all of the patterns have been used, this can’t be selected.Delete an unneeded pattern (p. 69) before you record.* You can also select by using [+/-] or [VALUE].64
Chapter 7. Sequencer (Recording/Editing)(2) Set the Time Signature, theNumber of Measures, and the Tempo1. In the “PATTERN” screen, press [F3 (FUNC)] -[F1 (SETUP)].The “PATTERN SETUP” screen appears.fig.06-PtnSetup_70(3) Select a MIDI ChannelBe sure that the transmit channel on your keyboardcorresponds to the MIDI channel of the part you wish torecord.Each part has it’s own MIDI channel. The factory presetchannels are as follows:2. Press [CURSOR] to select the parameter.3. Use [+/-] or [VALUE] to make settings.PartDrum Kit partPercussion partMelody partBass partBacking 1 partBacking 2 partMIDI ChannelCH10CH11CH1CH2CH3CH4ParameterValuePattern Length 1–999Time Signature Numerator: 1–15Denominator: 2, 4, 8, 16Tempo 20–260You can change the MIDI channel by pressing [SETUP] -[F1 (MIDI)] - [F1 (MIDI CH)] (p. 72).Time Signature can be set on an empty pattern. Youcannot set 1/8 and 1/16–3/16.You can record the percussion part with pads by pressing[SETUP] - [F1 (MIDI)] - [F2 (GLOBAL)] and then settingLocal Control to “ON (PERC)” (p. 73).(4) Part SettingIf REC Mode (p. 66) is set to “Replace,” it is not necessaryto specify the Length. Recording will continue until youpress [STOP], and the number of measures recorded willautomatically become the “LENGTH” setting.Follow the procedures <strong>des</strong>cribed in Part Settings [F2(PART)] (p. 56) to make settings of the parts.You can have a count sound (click) inserted beforerecording begins by pressing [TEMPO] - [F1 (CLICK)] -[F3 (COUNT)] and then setting Count In Rec (p. 63).Chapter 7[REC]If you are recording from the pads,disregard paragraphs (3) and (4) of thissection.65
Chapter 7. Sequencer (Recording/Editing)(5) Set the Recording Method1. In the “PATTERN” screen, press [REC].[PLAY] flashes, and [REC] lights.The “PATTERN REC STANDBY” screen appears, and theclick sound begins to play.(6) Recording1. Press [PLAY] to begin recording.[PLAY] stops flashing and remains lit, and the“PATTERN RECORDING” screen appears.fig.07-Rec6-1_70fig.07-Rec5-1_702. Press [CURSOR (up/down)] to select theparameter.3. Use [+/-] or [VALUE] to make settings.Parameter Value DescriptionTempo 20–260 –Quantize 8th note– See below.64th note,OFFRec Mode LOOP ALL,LOOP 1–2,REPLACESee below.Hit PadStartOFF, ONWhen “ON,” recordingstarts the instant you strikea pad in recording standbymode. Press [F5 (HIT-PAD)] to turn on/off.This function can beused only when LocalControl (p. 73) is set to“ON (DRUM).”2. Play with pads or MIDI keyboards to record.3. Press [STOP] to stop recording.[PLAY] and [REC] go off.You can name the recorded pattern (p. 62).Checking the Tones and PhrasesDuring Recording (Rehearsal)The Rehearsal function temporarily suspends recordingduring the recording process, allowing you to rehearse andthen quickly resume recording.1. Start recording (p. 64).2. While recording is underway, press [REC].[REC] flashes, and the REHEARSAL screen appears.Now, data from pads or keyboard cannot be recorded.fig.07-Rehearsal_70QuantizeQuantize is a function that corrects timing inaccuracies whileyou record. Set the note value before you begin recording andeverything you play will be quantized automatically.The value should be set to the shortest note appearing in thephrase. When set to “OFF,” the pattern is recorded exactly asplayed.3. Press [REC] to resume recording.[REC] lights.* When using Tap Playback to play back a pattern you havecreated, first make sure that this is not set to “OFF,” thenquantize. If set to “OFF,” then Tap Playback cannot beexecuted correctly.Rec ModeLOOP ALL:The entire pattern will be repeated in loop mode and youcan continually record (like overdubbing).LOOP 1, LOOP 2:Recording in a one or two measure loop mode.REPLACE:Recording will continue until you press [STOP]. Anypreviously recorded data for all Parts will be erased.66
Chapter 7. Sequencer (Recording/Editing)Editing a Pattern [F4 (EDIT)]You can edit user patterns.3. When you want to copy selected measures orpart, press [F4 (MEASURE)].fig.07-Cpy4_70The “COPY PATTERN MEASURE” screen appears.PATTERN EDIT screen (Preset Pattern)fig.07-PrstEdit_704. Press [CURSOR] to select the parameter.PATTERN EDIT screen (User Pattern)5. Use [+/-] or [VALUE] to select the pattern, part,and measures.fig.07-UserEdit_70Copying a Pattern [F1 (COPY)]SrcDstPattern Part MeasureCopysourcepatternCopy-<strong>des</strong>tinationpatternCopysourcepartCopy-<strong>des</strong>tinationpartMeasures to be copied(First Measure–<strong>La</strong>st Measure)First measure of thecopy-<strong>des</strong>tinationCopy the pattern as is to the User patterns.fig.07-Cpy11 2 3 4 5 6 7 8Src6. Press [F5 (COPY)].fig.07-Cpy5_70The confirmation screen appears.1 2 3 4 5 6 7 8DstYou can copy selected measures of a part or pattern. Unlikecopying an entire pattern, settings such as instrument and partvolume etc. will not be copied.fig.07-Cpy21 2 3 4 5 6 7 8Src1 2 3 4 5 6 7 8Dst1. Press [PATTERN] - [F4 (EDIT)].The “PATTERN EDIT” screen appears.2. Press [F1 (COPY)].The “COPY PATTERN” screen appears.fig.07-Cpy3_707. Press [F5 (EXECUTE)].* To cancel, press [F1 (CANCEL)].• If the number of measures in the copy-source pattern andthe copy-<strong>des</strong>tination pattern differ, the number ofmeasures in the copy-<strong>des</strong>tination pattern may increase ordecrease according to this difference.• When “ALL” is specified in copy-source part, then only“ALL” may be specified in copy-<strong>des</strong>tination part.Additionally, if other than “ALL” is specified in copysourcepart, then “ALL” cannot be specified in copy<strong>des</strong>tinationpart.• When copying between drum kit parts and percussionparts or backing parts, copy takes place in accord withthe predetermined correspondence between notenumbers and pads. Only note numbers assigned to padswill be copied.Chapter 7[REC]For more on note numbers and trigger inputs, refer toPreset Percussion Set List (p. 92).67
Chapter 7. Sequencer (Recording/Editing)Connecting Two Patterns[F2 (APPEND)]This connects two patterns to create one pattern. The patternspecified as “Dst” will be first, and the pattern specified as“Src” will be connected to it. The new pattern will be createdin “Dst.”fig.07-Apd1Dst1. Press [PATTERN] - [F4 (EDIT)].The “PATTERN EDIT” screen appears.2. Press [F2 (APPEND)].fig.07-Apd2_70Dst1 2 3 4Src1 2 3 4+1 2 3 4 5 6 7 8“APPEND PATTERN” screen appears.Erasing a pattern [F3 (ERASE)]This erases the pattern. Performance data is erased, while beat,measure length, and other settings are left intact.fig.07-Ers11 2 3 4 5 6 7 81 2 3 4 5 6 7 8You can erase portions of the pattern, in measure units. Theerased portions become blank measures.fig.07-Ers21 2 3 4 5 6 7 81 2 3 4 5 6 7 8Although the data is erased, the pattern length isunchanged.3. Press [CURSOR (up)] to move the cursor to“Src.”4. Use [+/-] or [VALUE] to select the pattern thatwill come later.1. Press [PATTERN] - [F4 (EDIT)].The “PATTERN EDIT” screen appears.2. Press [F3 (ERASE)].The “ERASE PATTERN” screen appears.fig.07-Ers3_705. Press [CURSOR (down)] to move the cursor to“Dst.”6. Use [+/-] or [VALUE] to select the pattern thatwill come first.7. Press [F5 (APPEND)].fig.07-Apd3_70The confirmation screen appears.3. When you want to erase selected measures orpart, press [F4 (MEASURE)].fig.07-Ers4_70The “ERASE PATTERN MEASURE” screen appears.8. Press [F5 (EXECUTE)].* To cancel, press [F1 (CANCEL)].4. Press [CURSOR (left/right)] to select theparameter.5. Use [+/-] or [VALUE] to select the pattern, part,and measures.68
Chapter 7. Sequencer (Recording/Editing)2. Press [F4 (DELETE)].Pattern Part MeasurePattern to beerasedPart to beerasedMeasures to be erased(First Measure–<strong>La</strong>st Measure)fig.07-Del3_70The “DELETE PATTERN” screen appears.6. Press [F5 (ERASE)].The confirmation screen appears.fig.07-Ers5_703. When you want to delete selected measures,press [F4 (MEASURE)].The “DELETE PATTERN MEASURE” screen appears.fig.07-Del4_707. Press [F5 (EXECUTE)].* To cancel, press [F1 (CANCEL)].Deleting a Pattern [F4 (DELETE)]This deletes the pattern performance, beat, measure length,part, and all other settings, creating a empty pattern.fig.07-Del11 2 3 4 5 6 7 81You can delete unneeded measures from the pattern, thenconnects the portions before and after the resulting gap.4. Press [CURSOR (left/right)] to select theparameter.5. Use [+/-] or [VALUE] to select the pattern andmeasures.PatternPattern to be deleted6. Press [F5 (DELETE)].fig.07-Del5_70The confirmation screen appears.MeasureMeasures to be deleted(First Measure–<strong>La</strong>st Measure)fig.07-Del21 2 3 4 5 6 7 81 2 3 7 87. Press [F5 (EXECUTE)].* To cancel, press [F1 (CANCEL)].Chapter 7[REC]• The performance data following the deleted range ismoved forward (and the performance data for that part isshortened).• When all parts in the targeted range are specified,deletion results in the pattern itself becoming shorter.• When all measures for all parts are deleted, the patternitself is deleted, resulting in a pattern containing noperformance data (an empty pattern). Settings, includingbeat and measure length, are restored to their initialvalues as well.1. Press [PATTERN] - [F4 (EDIT)].The “PATTERN EDIT” screen appears.69
Chapter 8. Copy Function [COPY]You can copy drum kits, instruments, etc. to the <strong>des</strong>tination ofyour choice.Copying will overwrite the data that was in the new<strong>des</strong>tination. So take caution when performing thisoperation.1. Press [COPY].[COPY] lights, and the “COPY” screen appears.fig.08-CopyMenu_704. Press [F4] or [F5].[F4 (EXCHNG)]:The contents of the copy-source and copy-<strong>des</strong>tination areexchanged. (This can be selected when a “USER” data isused for the copy-source.)[F5 (COPY)]:The previous content of the copy-<strong>des</strong>tination isoverwritten by the content of the copy-source.The confirmation screen appears. (Example: Copying adrum kit)fig.08-Confirm_702. Press [F1]–[F5] to select what you want to copy.[F1 (KIT)]: drum kit[F2 (INST)]: drum instrument[F3 (PERC)]: percussion set[F4 (TRIG)]: trigger bank[F5 (CHAIN)]: drum kit chain3. Use [CURSOR], [+/-], or [VALUE] to select thecopy-source and the copy-<strong>des</strong>tination.fig.08-CopyParam_70ABE* To cancel, press [F1 (EXIT)].5. Press [F5 (EXECUTE)] to carry out theprocedure.• “EXCHNG” is convenient for changing the order of datain a sequence.• To restore the original factory settings, select “PRESET”for the copy-source type.For details on copying a pattern, refer to p. 67.C D FA: copy-source type (PRESET or USER)B: copy-sourceC: copy-<strong>des</strong>tinationD: exchange button(This appears when “USER” is selected for the copysourcetype.)E: copy-source pad(This appears when copying a drum instrument.)F: copy-<strong>des</strong>tination pad(This appears when copying a drum instrument.)70
Chapter 8. Copy Function [COPY]About Copied SettingsDrum KitPad settingsHeadInstrument SettingsRim Mixer SettingsEffect SettingsPad Pattern Settings, etc.Ambience SettingsMulti-effect SettingsGlobal Drum Kit SettingsPercussion SetNote SettingsInstrument SettingsVolume, Pan, Effect, CC SettingsPercussion Set NameTrigger BankInput SettingsTrigger TypeSensitivity, Curve SettingsAdvanced Trigger settingsInstrumentsCopied pad instrument settings include settings for both thehead and rim.Copied Settings• Instrument Settings• V-EDIT/EDIT Settings* Effect and mixer settings are not copied.Percussion SetsAll percussion set settings are copied.Copied SettingsPercussion Set SettingsNote SettingsTrigger BankAll trigger bank set settings are copied.Percussion Set NameInstrument SettingsVolume, Pan, Effect,CC SettingsHi-hat SettingsCrosstalk Cancel Settings3-Way Trigger SettingsTrigger Bank NameDrum Kit ChainStep SettingsDrum Kit SettingsDrum Kit Chain NameCopied SettingsTrigger Bank SettingsInput SettingsHi-hat SettingsCrosstalk Cancel Settings3-Way Trigger SettingsTrigger Bank NameTrigger TypeSensitivity, Curve SettingsAdvanced Trigger settingsDrum KitsAll drum kit settings are copied.Copied SettingsDrum KitSettingsPadSettingsGlobal DrumKit SettingsAmbienceSettingsMulti-effectSettingsInstrumentSettingsEffect SettingsOther VariousFunction SettingsVolume, Drum Kit Name,Midi Settings, etc.On/Off, Performance Space,Wall Material, Effect Level,etc.On/Off, Effect Type,Effect Level, etc.Instrument, V-EDIT/EDIT,Volume, Pan and Other MixerSettingsCompressor, Equalizer,Ambience/Multi-effectsSend LevelPad Pattern Function,Pitch Control Function,MIDI Settings, etc.Drum Kit ChainAll Drum Kit Chain settings are copied.Copied Settings• Drum Kit Chain Name• Stepped Drum Kit settingsChapter 8[COPY]71
Chapter 9. Settings for the Entire TD-12 [SETUP]SETUP screenfig.09-Setup_702. Press [F1 (MIDI)] - [F2 (GLOBAL)].The “MIDI GLOBAL” screen appears.fig.09-MidiGlobal_70MIDI Settings and Operations[F1 (MIDI)]Setting the MIDI Channels for EachPart [F1 (MIDI CH)]For each part, you can specify the channel on which the TD-12will receive and transmit MIDI messages.1. Press [SETUP].[SETUP] lights, and the “SETUP” screen appears.2. Press [F1 (MIDI)] - [F1 (MIDI CH)].The “MIDI CHANNEL” screen appears.fig.09-MidiCh_703. Press [CURSOR (up/down)] to select the partyou wish to set.3. Press [CURSOR (up/down)] to select theparameter.4. Use [+/-] or [VALUE] to make settings.ParameterValueSoft ThruOFF, ONLocal Control OFF, ON (DRUM), ON (PERC)Device ID 1–32V-LINK MIDI Ch CH1–CH16V-LINK Device ID 1–32, 128Soft ThruThis section explains how you can use the Roland SPD-20 (aMIDI controller) together with the TD-12’s pads to playinternal sounds and an external sound module.When Soft Thru is set to “ON,” the messages received at MIDIIN will also be transmitted from the MIDI OUT/THRUconnector.fig.SoftThru.ePad or Pedal SPD-204. Press [CURSOR (left/right)] to select theparameter.5. Use [+/-] or [VALUE] to make settings.MIDI OUTParameter Value DescriptionTx/Rx OFF, ON Turns the transmitting andreceiving MIDI messagesON or OFF.Channel CH1–CH16 transmit and receive channelTRIGGERINPUTMIDI INTo the MIDI IN of anothersound module or samplerMIDIOUT/THRU* Drum kit part and percussion part can be overlaid and set to“CH10.” When a duplicate note number is received, theinstrument assigned to the drum kit part (the pad instrument)sounds. Other note number is received, the percussion partinstrument is played.* Other parts and MIDI channels cannot be overlaid.MIDI Settings for the Entire TD-12[F2 (GLOBAL)]TD-121. Press [SETUP].[SETUP] lights, and the “SETUP” screen appears.72
Chapter 9. Settings for the Entire TD-12 [SETUP]Local ControlThis is required when you want to trigger sounds in anexternal sound module and/or record your performance onan external MIDI sequencer, and NOT use the TD-12’s internalsounds. If that is your need, then turn Local Control to “OFF.”The trigger signals from the pads go directly to the MIDIOUT/THRU connector.The TD-12’s default mode is with Local Control “ON.”fig.LocalCtrl.ePadTrigger InputTD-12Device IDThe setting <strong>des</strong>cribed here is necessary only when you wish totransmit separate data to two or more TD-12 units at the sametime. Do not change this setting in any other case. (At thefactory settings, the device ID is set to “17.”)* If you lose track of the Device ID setting that was used whensaving data via a bulk dump, it will no longer be possible toreload the bulk data that was saved.Example:Suppose that when data was saved via bulk dump (p. 75), theTD-12’s Device ID was set to “17.” When re-transmitting thisdata back to the TD-12, it won’t receive if the Device ID is setto something other than “17.”fig.DeviceID.eTransmit dataDevice ID: 17MIDI INMIDI OUTTrigger→MIDIConverterOUTLocal Control:OFFINOUTINDevice ID: 17Internal Sound GeneratorMIDI INIf you make connections and record as shown, with a settingof Local Control “ON,” duplicate notes will be re-transmittedto the TD-12 and will not be played correctly.ON (DRUM):The performance data from the pad is sent to the drumkit part. Normally set to this.ON (PERC):External MIDI Sequencer(Soft Thru: ON)The performance data from the pad is sent to thepercussion part and drum kits cannot be played. Selectthis only when you record the percussion part with pads.When Local Control is set to “ON (PERC),” the sounddoes not change if you switch drum kits because drumkits cannot be played with pads.Device ID: 16System Exclusiveis not receivedPedalBend CC MaxThis setting specifies the range of Control Changemessages used in the Pitch Control function (p. 38). Nochange to the setting is necessary when performing orrecording with the TD-12 and pads.The Pitch Control function uses the same Control Changemessage as the hi-hat open/close function (factory setting:“FOOT (4)”). As set at the factory, Pitch Control uses valuesranging from 0 to 90 to change the pitch. When a value of 90 isreceived, the pitch changes up to the pitch set in Pedal BendRange. Set PedalBend CC Max to 127 only if you wish to usean external MIDI device to change the pitch using valuesranging from 0 to 127.* There is no need to change the factory settings when recordingTD-12 performances to an external MIDI device and playingback such performances using the external MIDI device.* When set to “127,” the change in pitch stops at the pitch set inPedal Bend Range, even if you continue to press the hi-hatcontrol pedal down completely.Chapter 9[SETUP]73
Chapter 9. Settings for the Entire TD-12 [SETUP]MIDI Messages for DetailedPerformance Expressions [F3 (CTRL)]1. Press [SETUP].[SETUP] lights, and the “SETUP” screen appears.2. Press [F1 (MIDI)] - [F3 (CTRL)].The “MIDI CONTROL” screen appears.fig.09-MidiCtrl_70If you change the Hi-hat Note Number Border setting, thehi-hat of a pattern that was recorded onto the internalsequencer by playing the pads may play back in a waythat is different from the actually recorded performance.Switching Drum Kits via MIDI(Program Change) [F4 (PROG)]Each drum kit/percussion set has its own program changenumber.1. Press [SETUP].3. Press [CURSOR (up/down)] to select theparameter.4. Use [+/-] or [VALUE] to make settings.Parameter Value DescriptionPedal CCSnare CCOFF,MODULATION(1),BREATH(2),FOOT(4),EXPRESSION(11),GENERAL1(16)–GENERAL4(19)Ride CCToms CCHH Note#Border* When a control change is set to be more than one parameter, anasterisk (*) appears at the right of the unavailable parameter.HH Note# Border(Hi-Hat Note Number Border)Control change usedfor transmitting/receivingthe depth towhich the hi-hatpedal pressedControl change usedfor transmitting/receivingthe strike positionof the snare,ride, and tom 1–40–127 See below.The only time you would need to change this setting iswhen you are triggering an external sound module.The note number transmitted when you strike the hi-hat willchange depending on the amount of pressure on the hi-hatpedal. HH Note# Border allows you to adjust the pedalposition at which the note number switches from the open hihatto the closed hi-hat.As you monitor the note number transmitted by the TD-12and the Control Change message value, adjust the setting untilthe note number is switched at the pedal position you want.When using a VH-11 for the hi-hat, setting this value toaround 80 allows you to transmit the closed hi-hat notenumber when the pedal is slightly above the fully depressedposition.[SETUP] lights, and the “SETUP” screen appears.2. Press [F1 (MIDI)] - [F4 (PROG)].The “MIDI PROGRAM CHANGE (DRUM KIT)” or“MIDI PROGRAM CHANGE (PERC SET)” screenappears.fig.09-MidiPcDrum_70fig.09-MidiPcPerc_703. Press [F3 (DRM KIT)], [F4 (PRC GRP)], and[CURSOR (up/down)] to select the drum kit orpercussion set you wish to set.[F3 (DRM KIT)]: Drum Kit[F4 (PRC GRP)]: Percussion Set4. Use [+/-] or [VALUE] to make settings.The drum kits/percussion sets will switch when a ProgramChange message is received from an external MIDI device.When you switch TD-12’s drum kits/percussion sets, theProgram Change number set here is transmitted.Turning the Reception/Transmission ofProgram Changes On/OffIn the “MIDI PROGRAM CHANGE (DRUM KIT)” or “MIDIPROGRAM CHANGE (PERC SET)” screen, pressing [F1]turns the reception of program changes on or off, and pressing[F2] turns the transmission on/off.74
Chapter 9. Settings for the Entire TD-12 [SETUP]Saving Data to an external MIDIDevice (Bulk Dump) [F5 (BULK)]Saving DataTo save data, use the external sequencer as you would whenrecording musical data, and perform the following steps onthe TD-12 as shown in the following diagram.1. Connect the TD-12’s MIDI OUT connector with aMIDI cable to the MIDI IN connector of theexternal sequencer.fig.BulkDump.e5. Start the recording process of the externalsequencer.6. Press [F5 (EXECUTE)] to begin sending thedata.fig.09-MidiBulk2_70* If you want to stop sending, press [F5 (STOP)].7. When finished, the following screen appears.fig.09-MidiBulk3_70MIDI INMIDI OUTSequencerTD-122. Press [SETUP].[SETUP] lights, and the “SETUP” screen appears.3. Press [F1 (MIDI)] - [F5 (BULK)].The “MIDI BULK DUMP” screen appears.fig.09-MidiBulk1_704. Press [+/-], [VALUE], and [CURSOR (up/down)]to select the content to be sent.Bulk Dump is one kind of System Exclusive message. Besure to use an external MIDI sequencer that is capable ofrecording System Exclusive messages. In addition,confirm that the sequencer is not set to “Do not receiveSystem Exclusive messages.”Loading Data to the TD-12At this time, all the TD-12’s current data is overwritten.Make sure you have made the needed backup.1. Connect the TD-12’s MIDI IN connector with aMIDI cable to the MIDI OUT connector of theexternal sequencer.fig.BulkLoad.eTransmit DataALLSETUPDescriptionAll data, including setup, drum kits,user percussion sets, user patternsTrigger, pad, and other kinds of settingsALL DRUM KITS All data for drum kits 1–501 DRUM KIT Only the data for the selected drumkitALL TRIG BANKS All settings for trigger banks 1–41 TRIG BANK Only the settings for the selectedtrigger bankALL PERCGROUPSAll data for the user percussion sets1–81 PERC GROUP Only the data for the selected percussionsetALL PATTERNS All data for the user patterns 151–250MIDI OUTSequencerMIDI INTD-122. Press “PLAY” on the external sequencer totransmit the data to the TD-12.Received data is written into the TD-12.Chapter 9[SETUP]75
Chapter 9. Settings for the Entire TD-12 [SETUP]Selecting Output Destinations[F2 (OUTPUT)]Here you can select the output <strong>des</strong>tination for each TRIGGERINPUTs, sequencer parts, and the sound input from the MIXIN jack.Output Destination for the DrumInstruments1. Press [SETUP].[SETUP] lights, and the “SETUP” screen appears.2. Press [F2 (OUTPUT)] - [F1 (PAD)].The “OUTPUT ASSIGN (PAD)” screen appears.fig.09-OutAsgn1_704. Use [+/-] or [VALUE] to select the output<strong>des</strong>tination.* You can restore all output <strong>des</strong>tinations to factory settings(MASTR L+R and PHONES) by pressing [F5 (DEFAULT)] -[F5 (EXECUTE)].Block Diagram (p. 100)Setting the Switches[F3 (CONTROL)]Using Pads as Switches[F1 (PAD SW)]Pads connected to TRIGGER INPUT 12 (AUX2) and/or 11(AUX1) can be set to switch drum kits and play back patterns.3. Press [CURSOR (left/right)] to select theTRIGGER INPUT.You can also select by striking the pad.4. Use [+/-] or [VALUE] to select the output<strong>des</strong>tination.* You can restore all output <strong>des</strong>tinations to factory settings(MASTR L+R) by pressing [F5 (DEFAULT)] - [F5(EXECUTE)].1. Connect the pad(s) to the TRIGGER INPUT 12(AUX2) and/or 11 (AUX1).2. Press [SETUP].[SETUP] lights, and the “SETUP” screen appears.3. Press [F3 (CONTROL)] - [F1 (PAD SW)].The “PAD SWITCH” screen appears.fig.09-PadSw_70Output Destination for the SequencerParts/Metronome Click/Sound Inputfrom MIX IN [F2 (OTHER)]1. Press [SETUP].[SETUP] lights, and the “SETUP” screen appears.2. Press [F2 (OUTPUT)] - [F2 (OTHER)].The “OUTPUT ASSIGN (OTHER)” screen appears.fig.09-OutAsgn2_703. Press [CURSOR (left/right)] to select thesource.AMB: AmbienceMFX: Multi-effectsBACK: Backing parts of the sequencerPERC: Percussion part of the sequencerCLICK: Metronome clickMIXIN: Sound input from the MIX IN jack4. Use [+/-] or [VALUE] to select the function.5. When setting to “USER,” press [CURSOR] tomove the cursor to “AUX1” and “AUX2.”6. Use [+/-] or [VALUE] to select the functions forthe heads and rims of AUX1 and AUX2.Function AUX1 AUX2Head Rim Head RimOFF OFF OFFKIT SELECT1 OFF KIT#INCKIT SELECT2 KIT# DEC KIT# INCCHAIN SELECT1 OFF CHAIN# INCKIT#DECCHAIN# DECCHAIN SELECT2 CHAIN# DEC CHAIN# INCPATTERNSELECT1OFFPTN#INCPTN#DECPATTERNSELECT2PTN# DEC PTN# INC76
Chapter 9. Settings for the Entire TD-12 [SETUP]Function AUX1 AUX2Head Rim Head RimUSERSelect from the table below.OFFKIT# INCKIT# DECCHAIN# INCCHAIN# DECPTN# INCPTN# DECXSTICK SW• If you don’t want sound from the pad used as a padswitch, press [MIXER] - [F1 (VOLUME)], and set thevolume level for AUX2 and/or AUX1 to “0” (p. 39). Orpress [INST] and select “561 Off” for AUX2 and/or AUX1(p. 33).• To prevent triggering playback of patterns when the padis hit, switch off the Pad Pattern setting (p. 37).• When using pad switches to switch kits in a Drum KitChain (p. 80), FUNCTION should be set to “KIT SELECT1” or “KIT SELECT 2,” and you need to press the[CHAIN], so its indicator is lit. (The Drum Kit Chainsettings need to be made beforehand.)PREVIEW Button Velocity[F2 (PREVIEW)]You can check the sound of the instrument assigned to theselected input by pressing [PREVIEW]. The procedure<strong>des</strong>cribed here sets the velocity (volume) used in playing theinstrument when [PREVIEW] is pressed.1. Press [SETUP].Turns off Pad Switch.Calls up the next kit.Calls up the previous kit.Calls up the next drum kit chain.Calls up the previous drum kit chain.Calls up the next pattern.Calls up the previous pattern.Switches the cross-stick sound on andoff (p. 32).[SETUP] lights, and the “SETUP” screen appears.• You can press [PREVIEW] to preview sounds at thevelocity corresponding to the cursor position.• By holding down [KIT] when you press [PREVIEW], youcan shift through three separate velocity levels set here asyou check the sound (p. 25).Adjusting the Display Contrast[F3 (LCD)]The display contrast is strongly influenced by the location ofthe TD-12 and the lighting of the room it’s in. Adjust thisparameter when needed.1. Press [SETUP].[SETUP] lights, and the “SETUP” screen appears.2. Press [F3 (CONTROL)] - [F3 (LCD)].The “LCD CONTRAST” screen appears.fig.09-Contrast_703. Use [+/-] or [VALUE] to adjust.* You can also adjust it by holding [KIT] and turning [VALUE].Checking the TD-12’s InternalProgram Version [F5 (VERSION)]1. Press [SETUP].[SETUP] lights, and the “SETUP” screen appears.2. Press [F3 (CONTROL)] - [F5 (VERSION)].The “VERSION INFORMATION” screen appears.fig.09-Version_702. Press [F3 (CONTROL)] - [F2 (PREVIEW)].The “PREVIEW” screen appears.fig.09-Preview_70Chapter 9[SETUP]3. Press [CURSOR (up/down)] to select thevelocity you wish to set.4. Use [+/-] or [VALUE] to make settings.77
Chapter 9. Settings for the Entire TD-12 [SETUP]Synchronizing Images to aTD-12 Performance[F4 (V-LINK)]What is V-LINK?V-LINK () is a function that allows music andimages to be performed together. By using MIDI to connecttwo or more V-LINK compatible devices, you can easily enjoyperforming a wide range of visual effects that are linked to theexpressive elements of a music performance.For example, by using the TD-12 and Edirol DV-7PR together,you can use the pads connected to the TD-12 to switch theEdirol DV-7PR’s images (clips/palettes).Using V-LINKTurning V-LINK On/Off1. Press [SETUP] - [F4 (V-LINK)].[SETUP] lights, and the “V-LINK” screen appears.fig.09-VLink_702. Press [F5 (V-LINK)] to turn the V-LINK functionON and OFF.fig.09-VLinkOn1_70* In order to use V-LINK with the TD-12 and Edirol DV-7PR,you will need to make connections using an Edirol UM-1X/UM-1SX (sold separately).Connection Examples* Before connecting this unit to other devices, turn off the powerto all units. This will help prevent malfunctions and/or damageto speakers or other devices.Use an Edirol UM-1X to connect the TD-12’s MIDI OUTconnector to the Edirol DV-7PR’s remote jack.fig.V-LINKconnect.e* Before turning V-LINK on, turn the Edirol DV-7PR’s poweron.3. Press [KIT] to display the “DRUM KIT” screen.When V-LINK is on, the V-LINK icon appears in the “DRUMKIT” screen.fig.09-VLinkOn2_70ProjectorEdirol DV-7PRREMOTE* The V-LINK function will always be OFF when you turn theTD-12’s power on.Edirol UM-1XMIDI OUTDisplayV-LINK MIDI Ch (V-LINK MIDI Channel)When V-LINK function is on, the performance data recordedin the backing part of the sequencer is transmitted on thischannel.* At the factory settings, this is set to “CH16.”V-LINK Device IDSet this ID to match the device ID number of the videoequipment which is controlled by the TD-12. If this is set to“128,” you can control the video equipment regardless of thedevice ID number of it.TD-12* At the factory settings, this is set to “17.”78
Chapter 9. Settings for the Entire TD-12 [SETUP]V-LINK Functions that the TD-12 CanControl and MIDI MessagesWhen playing a pattern by hitting a pad (Pad Pattern; p. 37),you can assign the following functions to the note messagesrecorded in the backing parts of the pattern to control the V-LINK-compatible video equipment.* The backing parts are the parts other than the drum part andpercussion part of the internal sequencer.* Set Play Type (p. 61) of the pattern to “V-LINK.”V-LINK functionTransmittedMIDI messagesPalette 1–20 Selecting a palette Note On (*1)Clip 1–28 Selecting a clip Note On (*2)Dissolve Time Changing the timeof the transition betweenclipsNote On (*2)(Velocity)For details on clips/palettes, dissolve time, and retriggerpoint, refer to the Edirol DV-7PR owner’s manual.The TD-12 does not support the Edirol DV-7PR’s dualstream mode.Restoring the FactorySettings [F5 (F RESET)]This restores the TD-12 to the original factory settings(Factory Reset).*1 *2Palette No. Note No. Clip No. Note No.Palette 1 37 (C#2) Clip 1 36 (C2)Palette 2 39 (D#2) Clip 2 38 (D2)Palette 3 42 (F#2) Clip 3 40 (E2)Palette 4 44 (G#2) Clip 4 41 (F2)Palette 5 46 (A#2) Clip 5 43 (G2)Palette 6 49 (C#3) Clip 6 45 (A2)Palette 7 51 (D#3) Clip 7 47 (B2)Palette 8 54 (F#3) Clip 8 48 (C3)Palette 9 56 (G#3) Clip 9 50 (D3)Palette 10 58 (A#3) Clip 10 52 (E3)Palette 11 61 (C#4) Clip 11 53 (F3)Palette 12 63 (D#4) Clip 12 55 (G3)Palette 13 66 (F#4) Clip 13 57 (A3)Palette 14 68 (G#4) Clip 14 59 (B3)Palette 15 70 (A#4) Clip 15 60 (C4)Palette 16 73 (C#5) Clip 16 62 (D4)Palette 17 75 (D#5) Clip 17 64 (E4)Palette 18 78 (F#5) Clip 18 65 (F4)Palette 19 80 (G#5) Clip 19 67 (G4)Palette 20 82 (A#5) Clip 20 69 (A4)Clip 21 71 (B4)Clip 22 72 (C5)Clip 23 74 (D5)Clip 24 76 (E5)Clip 25 77 (F5)Clip 26 79 (G5)Clip 27 81 (A5)Clip 28 83 (B5)All of the data and settings stored in the TD-12 will beerased. Use the Bulk Dump function (p. 75) to save anydata and settings you need to an external MIDI device.1. Press [SETUP] - [F5 (F RESET)].[SETUP] lights, and the “FACTORY RESET” screenappears.fig.09-Factory1_702. Press [F5 (RESET)].The confirmation screen appears.fig.09-Factory2_70* To cancel, press [F1 (CANCEL)].3. Press [F5 (EXECUTE)] to execute FactoryReset.When Factory Reset is finished, the “DRUM KIT” screenappears.When Factory Reset is carried out, the [GROUP FADERS]settings values are set to the maximum volume,regardless of the slider positions.Chapter 9[SETUP]79
Chapter 10. Drum Kit Chain [CHAIN]Drum Kit Chain allows you to step through the drum kits ofyour choice and in the order you want. The TD-12 lets youcreate and store 16 different chains of up to 32 steps each.fig.10-001e32 steps8. Repeat steps 6 and 7 to create the drum kitchain.fig.10-ChainEdit2_70Chain 1Chain 2Kit7Kit2Kit5Kit109. Press [EXIT].The “DRUM KIT CHAIN” screen appears.Function Buttons1. Press [CHAIN] to switch Drum Kit Chain on.[CHAIN] lights, and the “DRUM KIT CHAIN” screenappears.fig.10-Chain_70Chain 16Creating a Drum Kit Chain[F1 (INSERT)]A step with the same kit is inserted at the cursor position,and steps after this point are moved back one place.[F2 (DELETE)]Step at the cursor position is deleted, and steps after thispoint are moved forward one place.[F5 (NAME)]You can name a drum kit chain.2. Press [F1 (EDIT)].The “CHAIN EDIT” screen appears.fig.10-ChainEdit1_703. Press [CURSOR (left)] to move the cursor to thechain number.4. Use [+/-] or [VALUE] to select the chain number.5. Press [CURSOR (right)] to move the cursor tothe step (the order in which the drum kits will beselected) in the right area of the display.6. Press [CURSOR (up/down)] to select the step.7. Use [+/-] or [VALUE] to select the drum kit.80
Chapter 10. Drum Kit Chain [CHAIN]Naming a Drum Kit Chain[F5 (NAME)]Each chain’s name can use up to 12 characters.fig.10-ChainName_70Playing with a Drum KitChain1. Press [CHAIN] to switch Drum Kit Chain on.[CHAIN] lights.fig.10-ChainPlay_701. Select the drum kit chain you want to name inthe “DRUM KIT CHAIN” screen.2. Press [F1 (C EDIT)] - [F5 (NAME)].The “CHAIN NAME” screen appears.3. Press [CURSOR (left/right)] to move the cursorto the character to be changed.4. Use [VALUE], [+/-], or [CURSOR (up/down)] tochange the character.2. Press [CURSOR (up/down)] to select the chainnumber to be used.3. Use [+/-] or [VALUE] to call up the kits to beused in each selected step in the chain.4. When the performance is finished, press[CHAIN] or [EXIT] to switch Drum Kit Chain off.[CHAIN] goes off.Function Buttons[F1 (INSERT)]A blank space is inserted at the cursor position, andcharacters after this point are moved to the right onespace.[F2 (DELETE)]Character at the cursor position is deleted, and charactersafter this point are moved to the left one space.[F3 (SPACE)]Character at the cursor position is replaced by a blankspace.[F4 (CHAR)]Type of character at the cursor position changes betweenupper case/lowercase alphabet, or numbers andsymbols.5. When you’re finished, press [EXIT] twice toreturn to the “DRUM KIT CHAIN” screen.With the Pad Switch function, you can use the pads tocall up drum kit chains. For more details, refer to UsingPads as Switches [F1 (PAD SW)] (p. 76).If differences in volume levels between kits is a problem,press [MIXER] - [F4 (KIT VOL)] and adjust “Kit Volume”(the overall kit volume).The following Drum Kit Chains have beenpreconfigured in the factory settings.1. Tap Ptns2. Loop Ptns3. Acoustic4. Electronic5. Percussion6. AmbienceChapter 10[CHAIN]81
Messages and Error MessagesThis section lists the messages (error messages) that the TD-12 produces and explains the meaning of eachmessage, giving you the appropriate action to take.fig.Message_70When an indication of “ACCEPT” is shown above [F5] as in thefigure, pressing that button will close the message window.Error MessagesMessage Meaning ActionBackup Battery Low! The internal backup battery of the TD-12 (abattery that maintains data in the user memory)has run down.Backup NG!Data in the TD-12’s memory may be corrupted.The TD-12’s internal backup battery (thebattery used for saving User memory data) isfully drained; internal data has been lost.MIDI Communication Error!System Error!Measure Maximum!Data Overload!Not Enough Memory!BULK DUMPChecksum Error!BULK DUMPReceive Address Error!BULK DUMPReceive Data Error!BULK DUMPReceive Time Out!It is possible that the power has been turnedoff for the MIDI device connected to the TD-12’s MIDI IN connector.A problem has occurred with the internalsystem.The maximum number of measures that canbe recorded to one pattern has been exceeded;no further recording or editing that addsmeasures can be carried out.Pattern contained an excessive amount of data,and as a result could not be output successfullyfrom MIDI OUT.Pattern recording or editing could not be carriedout because there was not enough internalmemory.The checksum value of a system exclusivemessage was incorrect.The receive address of a system exclusivemessage was incorrect.A MIDI message was received incorrectly.The interval in receiving system exclusivemessages were too long.Contact your dealer or a nearby Roland servicecenter to have the battery replaced.Contact your dealer or a nearby Roland servicecenter to have the battery replaced. Follow themessages appearing on the screen to carry outFactory Reset (p. 79); you will then be able touse the unit temporarily.Check the power of the connected MIDI device.Contact your dealer or a nearby Roland servicecenter.Delete unneeded measures from the patternbeing recorded or edited (p. 69).Try eliminating a part that has too much data.Try deleting patterns that are no longer needed(p. 69).Correct the checksum value.Correct the receive address.If the same error message is displayed repeatedly,there is a problem with the MIDI messagesthat are being transmitted to the TD-12.Make the interval of the data shorter.82
Messages and Error MessagesMessagesMessage Meaning ActionBULK DUMPBulk data is now being received. –Receiving... Please Wait.BULK DUMPBulk data transmission was halted. –Aborted!Preset Pattern! You cannot record on the preset pattern. Copy the pattern onto a user pattern.Empty Pattern!This pattern contains no performance data; itcannot be edited.Select the other pattern that contains performancedata.No Empty Pattern! There are no empty patterns for recording. Delete unneeded pattern (p. 69).MIDI Offline!MIDI Buffer Full!Power On Too Long.Please Turn Off!Auto Shutdown Completed.Please Turn Off!A MIDI cable was disconnected. (Or communicationwith the external MIDI devicestopped for some reason.)A large amount of MIDI messages were receivedin a short time, and could not be processedcompletely.The power remains ON for a long time.Make sure that MIDI cables have not beenpulled out or broken.Confirm that the external MIDI device is properlyconnected. If the problem persists, reducethe amount of MIDI messages sent to the TD-12.Turn the TD-12’s power off, then turn onagain.Appendices83
Preset Drum Kit ListNo. Drum Kit Name Pad Pattern Description1 V StageStandard V-drums sound, perfect for testing V-editing possibilities.2 TheEDGE3 Jazz4 Custom5 processing6 FLA>n
Preset Drum Kit ListNo. Drum Kit Name Pad Pattern Description28 DoubleBass * Loop29 PopReggae * Loop30 Booth * Loop31 neo style * Tap, 1Shot32 Airtime33 Zeppy34 Drumline35 SlapBack36 GatePumper37 Stadium38 70s Record39 90s Power40 BreakBeats41 TR-80842 TR-90943 Hexadrum44 Cosmosis45 OrchPerc * Tap, 1Shot46 <strong>La</strong>tinToys * Loop47 AfricanPerc* Loop48 Tabla/Sitar* Loop, Tap49 SurVivor50 My VKitAbout the Pad PatternsDouble-bass kick played with the hi-hat pedal.A fixed hi-hat sound is assigned to the Hi-Hat edge.Reggae drum kit with timbales assigned to the toms.Studio ambient kit. 7/4 patterns are assigned to Crash 1 and Crash 2’s bow.Effects-type sounds. A Tap pattern of Chords is assigned to Crash 1’s edge,and one-shot patterns on Tom 1, 2 & 3’s rims.Fat sounding kit using lots of Ambience.This sounds like a kit in a concert hall, with a slight delay from the walls.Marching band or drum corps sound.This kit features multi-effects delay.These drums sound like they’re a big, dry wood room.Kit with stadium reverberation.Vintage sounding 70’s kit.90’s-style “rhythm machine” sound.Lo-Fi sound.TR-808 rhythm machine kit.TR-909 rhythm machine kit.Old-style “electric drum” sound.Combination of electronic and processed sounds.Orchestra percussion kit. String tap patterns are assigned to Tom 1, 2 & 3’s rims.<strong>La</strong>tin percussion sounds. A 6/4 pattern is played on Crash 1’s bow.African percussion sounds. A xylophone pattern is played on Crash 1’s bow.Indian percussion sounds. Sitar can be played on Crash 1’s bow and Tom 1’s rim.Spacey sound kit with a big ambient feel.Use as a copy <strong>des</strong>tination kit.All parameters are set to default values. EQ, Comp, Ambience, and Effects are set to OFF.Loop: Loop Pattern: Playback starts when the pad to which the pattern is assigned is struck, and stops when hit again.Tap: Tap Pattern: Chords or melodies are played once each time the pad to which the pattern is assigned is struck.1Shot: One-Shot Pattern: Playback (one time only) starts when the pad to which the pattern is assigned is struck.* Drum kits marked with an “*” ( icon in the display) use the Pad Pattern function (Loop, One-Shot, Tap).* To stop a Loop pattern that is playing, either strike the pad used to play the Loop pattern once again, or press the TD-12’s [STOP] button.* To turn off all pad patterns assigned to a drum kit at one time, set the PadPtn Master SW setting to OFF. This is on a “per-kit” basis.Procedure: Press [KIT] - [F2 (FUNC)] - [F4 (PAD PTN)], then set PadPtn Master SW to “ALL PADS OFF.”Appendices85
Preset Pattern ListNo. Name Category T.S Len Tempo Type1 DrumPreview1 Drums 4/4 4 112 Loop2 DrumPreview2 Drums 4/4 4 112 Loop3 DrumFill 1 Drums 4/4 2 112 Loop4 DrumFill 2 Drums 4/4 2 112 Loop5 Wanna Ride? Variety (Rock) 4/4 29 130 Loop6 Early Flight Variety (Pops) 4/4 20 90 Loop7 Djembe’nBass Variety (Fusion) 4/4 16 154 Loop8 Walk Alone Variety (Ballad) 4/4 22 110 Loop9 2-Steppin’ Variety (Misc.) 4/4 16 130 Loop10 12bar4/4Trip Variety (Misc.) 4/4 12 160 Loop11 Paris Nights Variety (Pops) 4/4 8 116 Loop12 Disco LIVES! Variety (Funk/R&B) 4/4 8 135 Loop13 Chillin’ Variety (Ballad) 4/4 4 120 Loop14 Flitting Variety (Misc.) 4/4 8 150 Loop15 Salsa minor Variety (<strong>La</strong>tin) 4/4 24 176 Loop16 80’s Rock Rock 4/4 32 130 Loop17 LittleDoggie Rock 4/4 8 100 Loop18 CrossOver110 Rock 4/4 16 110 Loop19 Rockin’ Rock 4/4 16 110 Loop20 Rockin’ Hard Rock 4/4 18 95 Loop21 Shufflin’ Rock 4/4 26 140 Loop22 Rockmay Rock 4/4 8 100 Loop23 Flee Rock 4/4 4 120 Loop24 ScaryHop Rock 4/4 8 97 Loop25 Grr-unge Rock 4/4 4 111 Loop26 Afterglow Rock 4/4 4 112 Loop27 Rain Dance Pops 4/4 8 115 Loop28 Party Time Pops 4/4 8 102 Loop29 Water Fall Pops 4/4 4 80 Loop30 Happy R&B Pops 4/4 8 104 Loop31 Holiday Pops 4/4 8 111 Loop32 Jammin’ Pops 4/4 8 113 Loop33 Festival Pops 6/4 4 164 Loop34 Pop X Pops 4/4 8 124 Loop35 King Strut Pops 4/4 4 84 Loop36 Funky Strut Funk/R&B 4/4 4 70 Loop37 Blue Funk Funk/R&B 4/4 8 105 Loop38 The Chase Funk/R&B 4/4 4 112 Loop39 Space Funk Funk/R&B 4/4 8 85 Loop40 SmoothSchool Funk/R&B 4/4 10 88 Loop41 In the House Funk/R&B 4/4 4 100 Loop42 Brown Funk Funk/R&B 4/4 18 130 Loop43 Old Soul Funk/R&B 4/4 8 114 Loop44 Funk Hop Funk/R&B 4/4 4 102 Loop45 Night Groove Funk/R&B 4/4 4 88 Loop46 Smooth Sail Funk/R&B 4/4 4 89 Loop47 Thick Funk Funk/R&B 4/4 12 102 Loop48 7/4 Funk A Funk/R&B 7/4 4 110 Loop49 7/4 Funk B Funk/R&B 7/4 4 110 Loop50 NuFunkA 5/4 Funk/R&B 5/4 4 176 LoopNo. Name Category T.S Len Tempo Type51 NuFunkB 4/4 Funk/R&B 4/4 4 176 Loop52 Funk 5/4A Funk/R&B 5/4 2 86 Loop53 Funk 4/4B Funk/R&B 4/4 4 86 Loop54 Jupiter Fusion 4/4 8 93 Loop55 Mars Fusion 4/4 4 70 Loop56 Afro-Shuffle Fusion 4/4 8 120 Loop57 Night Bird Fusion 4/4 20 78 Loop58 Lite as Air Fusion 4/4 16 85 Loop59 Fun Times Fusion 4/4 8 90 Loop60 kool breeze Fusion 4/4 8 105 Loop61 <strong>La</strong>teNiteTalk Fusion 4/4 16 95 Loop62 Fast Track Fusion 4/4 4 105 Loop63 Bug Juice Fusion 4/4 4 74 Loop64 R&B Groove Fusion 4/4 12 80 Loop65 Smooth Grv Fusion 4/4 19 73 Loop66 Suspended Fusion 4/4 18 95 Loop67 Slow Fusion Fusion 4/4 15 85 Loop68 Jazz Swing Jazz 4/4 48 208 Loop69 Jazz Waltz Jazz 3/4 40 110 Loop70 Jazz Ballad Jazz 4/4 36 110 Loop71 6/8 Jazz Jazz 6/8 26 101 Loop72 Smooth Jazz Jazz 4/4 20 183 Loop73 Swing&<strong>La</strong>tin Jazz 4/4 92 188 Loop74 Aqua <strong>La</strong>tin 4/4 26 105 Loop75 LoungeLizard <strong>La</strong>tin 4/4 8 110 Loop76 Ocean <strong>La</strong>tin 4/4 4 94 Loop77 Salsa major <strong>La</strong>tin 4/4 16 176 Loop78 <strong>La</strong>tin 24 <strong>La</strong>tin 4/4 24 130 Loop79 Afro Jazz <strong>La</strong>tin 4/4 22 194 Loop80 <strong>La</strong>tin Jazz <strong>La</strong>tin 4/4 26 167 Loop81 Songo <strong>La</strong>tin 4/4 16 109 Loop82 Blues <strong>La</strong>tin Blues 4/4 12 55 Loop83 Rockabilly Blues 4/4 24 192 Loop84 Sweet Reggae Reggae 4/4 12 150 Loop85 New Reggae Reggae 4/4 4 116 Loop86 Rastamon Reggae 4/4 4 86 Loop87 Ska-Daddle Reggae 4/4 4 156 Loop88 Fallout Ballad 4/4 24 120 Loop89 Just Chill Ballad 4/4 8 92 Loop90 6/8 Ballad Ballad 6/8 21 50 Loop91 Comin’ Home Country 4/4 8 123 Loop92 Country Blld Country 4/4 8 102 Loop93 Kyoto Tale Misc. 4/4 16 100 Loop94 <strong>La</strong> Riviera! Misc. 4/4 2 170 Loop95 THINK FAST Misc. 4/4 8 170 Loop96 Barrel House Misc. 4/4 8 121 Loop97 R 3 D 3 Misc. 4/4 12 120 Loop98 Dopeness Misc. 4/4 4 160 Loop99 Romantico Misc. 4/4 4 133 Loop100 N’Sanity 101 Misc. 4/4 16 170 Loop86
Preset Pattern ListNo. Name Category T.S Len Tempo Type101 Toxic Change Misc. 4/4 4 130 Loop102 Alien Attack Misc. 4/4 4 104 Loop103 Prowl Misc. 4/4 4 80 Loop104 Guttn’ Misc. 4/4 4 68 Loop105 BigBandBass Perc & Bass 4/4 32 145 Loop106 <strong>La</strong>tin Bass Perc & Bass 4/4 8 120 Loop107 Shuffle Bass Perc & Bass 4/4 12 125 Loop108 Fusion Bass Perc & Bass 4/4 16 110 Loop109 ShuffleFnkBs Perc & Bass 4/4 16 100 Loop110 Soul Funk Bs Perc & Bass 4/4 16 140 Loop111 2BeatAfro Lp for Pad Pattern 4/4 2 102 Loop112 Djembe Beat for Pad Pattern 4/4 4 94 Loop113 <strong>La</strong>tin Lp 6/4 for Pad Pattern 6/4 2 170 Loop114 African Xylo for Pad Pattern 4/4 2 100 Loop115 Sitar Drone for Pad Pattern 4/4 1 90 Loop116 Rock Rhythm for Pad Pattern 4/4 2 112 Loop117 Rock Bass for Pad Pattern 4/4 3 112 Tap118 RockGt Chrds for Pad Pattern 4/4 16 112 Tap119 RockGt Lead1 for Pad Pattern 4/4 41 112 Tap120 RockGt Lead2 for Pad Pattern 4/4 25 112 Tap121 RockGt Lead3 for Pad Pattern 4/4 31 112 Tap122 Jam Fretless for Pad Pattern 4/4 8 120 Tap123 Jam SynVibe for Pad Pattern 4/4 36 120 Tap124 Jam Vibes for Pad Pattern 4/4 18 120 Tap125 Jam Sweep for Pad Pattern 4/4 32 120 Tap126 Jam D/E for Pad Pattern 4/4 4 120 1Shot127 Roll Snr Rim for Pad Pattern 2/4 1 168 1Shot128 Roll Tom1Rim for Pad Pattern 2/4 1 168 1Shot129 Roll Tom2Rim for Pad Pattern 2/4 1 168 1Shot130 Roll Tom3Rim for Pad Pattern 2/4 1 168 1Shot131 AsianRoad for Pad Pattern 4/4 16 168 Tap132 Tune Bass for Pad Pattern 4/4 3 120 Tap133 Tune Chord for Pad Pattern 4/4 8 120 Tap134 Tune Alp A1 for Pad Pattern 4/4 4 120 Tap135 Tune Alp A2 for Pad Pattern 4/4 4 120 Tap136 Tune Alp B1 for Pad Pattern 4/4 1 120 Tap137 Tune Alp B2 for Pad Pattern 4/4 2 120 Tap138 Tune Alp C1 for Pad Pattern 4/4 1 120 Tap139 Tune Alp C2 for Pad Pattern 4/4 2 120 Tap140 Tune Ending for Pad Pattern 4/4 2 120 Tap141 Tune Alp Gm6 for Pad Pattern 4/4 28 120 Tap142 8 Chords for Pad Pattern 4/4 16 168 Tap143 Applause for Pad Pattern 4/4 2 116 1Shot144 Samba Tap for Pad Pattern 4/4 1 120 Tap145 Sitar Rag for Pad Pattern 4/4 17 100 Tap146 OrchString1 for Pad Pattern 4/4 8 128 Tap147 OrchString2 for Pad Pattern 4/4 8 128 Tap148 OrchString3 for Pad Pattern 4/4 8 128 Tap149 7 Notes for V-LINK 4/4 7 128 VLink150 12 Notes for V-LINK 4/4 12 128 VLinkT.S: Time SignatureLen: Pattern Length (Number of measures)Type: Play Type (See p. 61.)Loop: Loop PatternTap: Tap Pattern1Shot: One-Shot PatternVLink: V-LINK PatternAppendices87
Drum Instrument ListNo. Name RemarkNo. Name RemarkNo. Name RemarkKICK1 22”Birch K2 22”Solid K3 22”StdMple K4 22”Maple K5 24”Carbon K6 22”CbnMple K7 22”GT K8 22”TitanHp K9 22”Mahogny K10 20”Lite K11 22”RoseWd K12 22”Oak K13 Recording1 K14 Recording2 K15 Universal K16 BigOpen K17 JazzCombo1 K18 JazzCombo2 K19 Cannon K20 Roto K21 Booth K22 Ballad K23 Swing K24 Heavy K25 Can K26 Fusion K27 <strong>La</strong>tin K28 Meat K29 Pillow K30 DryMed K31 Dry K32 Solid K33 Reso K34 Raw K35 Vintage K36 OldMple K37 Hard K38 BigLow K39 Hybrid K40 Gabba1 K41 Gabba2 K42 Gabba3 KKICK PROCESSED43 Cartoon K44 Chicken K45 Jive K46 RB K47 <strong>La</strong>yered K48 <strong>La</strong>zy K49 HardLow K50 Alley K51 DaFloor K52 Croak K53 Plastic K54 Trip K55 Gokigen K56 FX-Wah K57 Lo-Fi KKICK ELEC58 Cosmic K59 Hi-Q K60 Analog1 K61 Analog2 K62 Analog3 K63 ClascElec1 K64 ClascElec2 K65 ClascElec3 K66 ClascElec4 K67 ClascElec5 K68 ClascElec6 K69 TR808 Kick70 TR909 KickSNARE71 RoundBdge S *P *I72 RoundBdge SR *P *I *X73 CoolyMple S *P *I74 CoolyMple SR *P *I *X75 70’sMetal S *P *I76 70’sMetal SR *P *I *X77 WoodBrass S *P *I78 WoodBrass SR *P *I *X79 13”Hole S *P *I80 13”Hole SR *P *I *X81 Aluminum S *P *I82 Aluminum SR *P *I *X83 Titanium S *P *I84 Titanium SR *P *I *X85 Skanky S *P *I86 Skanky SR *P *I *X87 30’sMaple S *P *I88 30’sMaple SR *P *I *X89 BrassPico S *P *I90 BrassPico SR *P *I *X91 Booth S *I92 Booth SR *I *X93 Studio S *I94 Studio SR *I *X95 Ballad S *I96 Ballad SR *I *X97 Swing S *P *I98 Swing SR *I *X99 Street S *P *I *X100 Lite S *P *I *X101 LA Fat S *I *X102 Ring S *I *X103 Whack S *I *X104 Impulse S *I *X105 Cruddy1 S *I *X106 Cruddy2 S *I *X107 HotRod S *I108 HotRod SR *I *XSNARE BRUSH109 Brush1 S *BRUSH110 Brush1 SR111 Brush2 S *BRUSH112 Brush2 SRSNARE PROCESSED113 Basis S *X114 Chunk S *X115 ClapTailS *X116 ClubDry S *X117 Dump S *X118 HopRim1 S *X119 HopRim2 S *X120 HopRim3 S *X121 LzrGate S *X122 Pick S *X123 Planet S *X124 RB S *X125 2Step S *X126 Lo-Fi S *X127 Round XStik128 Cooly XStik129 70’s XStik130 WoodBr XStik131 13” XStik132 Alumi XStik133 Titan XStik134 Skanky XStik135 30’s XStik136 Reggae XStik137 Ballad XStik138 Studio XStik139 Swing XStik140 Hard XStik141 Maple XStikSNARE ELEC142 ClascElec1 S143 ClascElec2 S144 ClascElec3 S145 ClascElec4 S146 ClascElec5 S147 TR808 Snare148 TR808 SnrRim149 TR909 Snare150 TR909 SnrRim88
Drum Instrument ListNo. Name RemarkNo. Name RemarkNo. Name RemarkTOM151 12”Birch T1152 12”Birch T1R *P153 13”Birch T2154 13”Birch T2R *P155 16”Birch T3156 16”Birch T3R *P157 18”Birch T4158 18”Birch T4R *P159 12”GT T1160 12”GT T1R *P161 13”GT T2162 13”GT T2R *P163 16”GT T3164 16”GT T3R *P165 18”GT T4166 18”GT T4R *P167 10”Univ T1168 10”Univ T1R *P169 12”Univ T2170 12”Univ T2R *P171 14”Univ T3172 14”Univ T3R *P173 16”Univ T4174 16”Univ T4R *P175 12”Clasc T1176 12”Clasc T1R *P177 13”Clasc T2178 13”Clasc T2R *P179 16”Clasc T3180 16”Clasc T3R *P181 18”Clasc T4182 18”Clasc T4R *P183 12”Fiber T1184 12”Fiber T1R *P185 14”Fiber T2186 14”Fiber T2R *P187 16”Fiber T3188 16”Fiber T3R *P189 18”Fiber T4190 18”Fiber T4R *P191 12”Maple T1192 12”Maple T1R *P193 14”Maple T2194 14”Maple T2R *P195 16”Maple T3196 16”Maple T3R *P197 18”Maple T4198 18”Maple T4R *P199 12”Oak T1200 12”Oak T1R *P201 14”Oak T2202 14”Oak T2R *P203 16”Oak T3204 16”Oak T3R *P205 18”Oak T4206 18”Oak T4R *P207 8”Roto T1208 8”Roto T1R209 10”Roto T2210 10”Roto T2R211 12”Roto T3212 12”Roto T3R213 14”Roto T4214 14”Roto T4R215 16”Roto T5216 16”Roto T6217 18”Roto T7218 18”Roto T8219 18”RotoExLo1220 18”RotoExLo2221 Ballad T1222 Ballad T2223 Ballad T3224 Ballad T4225 Swing T1226 Swing T2227 Swing T3228 Swing T4229 Pop1 T1230 Pop1 T2231 Pop1 T3232 Pop1 T4233 Pop2 T1234 Pop2 T2235 Pop2 T3236 Pop2 T4237 Round T1238 Round T2239 Round T3240 Round T4241 80’sDry T1242 80’sDry T2243 80’sDry T3244 80’sDry T4245 90’sBig T1246 90’sBig T2247 90’sBig T3248 90’sBig T4249 90’sPower T1250 90’sPower T2251 90’sPower T3252 90’sPower T4253 OctaTom C Hi254 OctaTom B255 OctaTom A256 OctaTom G257 OctaTom F258 OctaTom E259 OctaTom D260 OctaTom C261 Mallet T1262 Mallet T2263 Mallet T3264 Mallet T4265 Brush T1266 Brush T2267 Brush T3268 Brush T4TOM ELEC269 ClscElec1 T1270 ClscElec1 T2271 ClscElec1 T3272 ClscElec1 T4273 ClscElec2 T1274 ClscElec2 T2275 ClscElec2 T3276 ClscElec2 T4277 ClscElec3 T1278 ClscElec3 T2279 ClscElec3 T3280 ClscElec3 T4281 ClscElec4 T1282 ClscElec4 T2283 ClscElec4 T3284 ClscElec4 T4285 TR808 T1286 TR808 T2287 TR808 T3288 TR808 T4289 TR909 T1290 TR909 T2291 TR909 T3292 TR909 T4HI-HAT293 14”P-HatHH294 14”P-HatHHEg295 13”Hatz HH296 13”Hatz HHEg297 14”Hatz HH298 14”Hatz HHEg299 14”Dark HH300 14”Dark HHEg301 14”Edge HH302 14”Edge HHEg303 TriangleHH304 HandCym HH305 Brush HH306 CR78 HH307 TR808 HH308 TR909 HH309 Tekno HH310 Elec HHCRASH311 16”DarK CrBw312 16”DarK CrEg *I313 16”Thin CrBw314 16”Thin CrEg *I315 16”PaperCrBw316 16”PaperCrEg *I317 16”FsPwrCrBw318 16”FsPwrCrEg *I319 18”PowerCrBw320 18”PowerCrEg *I321 18”Med CrBw322 18”Med CrEg *I323 19”NY CrBw324 19”NY CrEg *I325 18”Fast CrBw326 18”Fast CrEg *I327 18”Fast CrBl328 Brush Cr329 Brush CrEg *I330 Mallet Cr *IAppendices89
Drum Instrument ListNo. Name RemarkSPLASH331 6”SplazhSpBw332 6”SplazhSpEg333 8”Thin SpBw334 8”Thin SpEg335 8”Bell SpBw336 8”Bell SpEg337 8”Open SpBw338 8”Open SpEg339 10”Med SpBw340 10”Med SpEgCHINA341 12”PgyBack342 12”PgyBackEg *I343 16”Swish344 16”Swish Eg *I345 18”CB Low346 18”CB Low Eg *I347 20”U-China *I348 China PgBack *I349 Crash PgBack *IRIDE350 18”PRideRd *P351 18”PRideRdBl352 18”PRideRdEg *I353 18”Bop Rd *P354 18”Bop RdBl355 18”Bop RdEg *I356 20”HeavyRd *P357 20”HeavyRdBl358 20”HeavyRdEg *I359 20”Med Rd *P360 20”Med RdBl361 20”Med RdEg *I362 20”TurkyRd *P363 20”TurkyRdBl364 20”TurkyRdEg *I365 19”NY Rd *P366 19”NY RdBl367 19”NY RdEg *I368 20”Lite Rd *P369 20”Lite RdBl370 20”Lite RdEg *I371 22”CleanRd *P372 22”CleanRdBl373 22”CleanRdEg *I374 18”FormuRd *P375 18”FormuRdBl376 18”FormuRdEg *I377 20”Bell Rd *P378 20”Bell RdBl379 20”Bell RdEg *I380 Brush Rd381 Brush RdEg382 Mallet1 Rd *I383 Mallet2 Rd *INo. Name RemarkPERCUSSION384 Bongo Hi385 Bongo HiSlap386 Bongo Lo387 Bongo LoSlap388 Conga Hi389 Conga HiMute390 Conga HiSlap391 Conga Lo392 Conga LoMute393 Cajon Bass394 Cajon Mute395 Cajon Slap396 Cowbell Hi397 Cowbell Lo398 Cowbell Mute399 CowbellMambo400 Claves401 SquareBlock402 Block Hi403 Block Lo404 Maracas405 Caxixi406 Shaker407 Tambourine1408 Tambourine2409 Tambourine3410 Guiro Long411 Guiro Short412 Timbale Hi413 Timbale HiRm414 Timbale Lo415 TimbalePaila416 Agogo Hi417 Agogo Lo418 Cabasa419 Cuica Hi420 Cuica Lo421 Cuica Acc422 Pandeiro423 PandeiroMute424 PandeiroSlap425 Surdo Hi426 Surdo HiMute427 Surdo Lo428 Surdo LoMute429 Whistle430 WhistleShort431 VibraSlap432 Tabla Na433 Tabla Te434 Tabla Ti435 Tabla Tin436 Tabla Tun437 Baya Ge438 Baya Gin439 Baya Ka440 Baya Slide441 PotDrum442 PotDrum Acc443 PotDrum Mute444 Djembe Tone445 Djembe Slap446 Djembe Bass447 TalkingDr448 TalkingDr Up449 Castanet450 WoodBlockNo. Name Remark451 Timpani C452 Timpani G453 ConcertBD454 ConcertBD Mt455 HandCymbal456 HandCymbalMt457 Triangle458 TriangleCls459 Triangle2460 Triangle2Cls461 Crotale462 BellTree463 SleighBell464 TreeChimes465 ThaiGong466 TinyGong467 Gong468 OrchestraHit469 SnareRoll470 ConcertSnare471 SteelDrum472 Celesta473 Glockenspiel474 Kalimba475 Marimba476 TubularBell477 Vibraphone478 XylophonePERC ANALOG479 CR78Cowbell480 CR78Guiro481 CR78Maracas482 CR78MtlBeat483 CR78Tamb484 TR808Clap485 TR808Claves486 TR808Cowbell487 TR808Maracas488 TR808XStick489 TR909ClapSFX490 Hi-Q491 Poa492 Pyon493 Picoon494 Byon495 Kyun496 Psyun497 Boom498 SuperLow499 TimeWarp1500 TimeWarp2501 Transform1502 Transform2503 Tramsform3504 Tekno FX1505 Tekno FX2506 Tekno FX3507 Ring FX508 Drop Out509 <strong>La</strong>serGun510 Spiral511 Emergency512 Wonderer90
Drum Instrument ListNo. Name RemarkOTHER513 Click514 Beep515 Sticks516 Sticks2517 MetroBell518 MetroClick519 FingerSnaps520 Clap521 R8Slap522 Motor523 Engine524 Glass525 Burt526 Boing1527 Boing2528 Bounce529 VerbyHit530 AfroStomp531 Bomb!532 TuningTom533 ReverseCrash534 ReverseChina535 PhaseCrash536 PhaseRide537 Scratch1538 Scratch2539 Scratch3540 Scratch4541 TapeStop542 TapeRewind543 Voice OK544 Voice Yeah545 Vocoder1546 Vocoder2547 TeknoHit548 PhillyHit549 FunkHit550 Bass Gliss551 Guitar Gliss552 GuitarScrtch553 CutGt Down554 CutGt Up555 WahGt1 Down556 WahGt1 Up557 WahGt2 Down558 WahGt2 Up559 Sine 440Hz560 For PadCheck561 OffAbout Remarks*P (Position):Can get various changes of the sound inaccordance with the positioning whereon the pad you hit with a stick. In rimsounds, can get such various changes ofthe sound in accordance with the depthof the stick on the rim.*I (Interval):Can make the sound so smooth inaccordance with a roll or continuousstrokes with sticks.*X (XStick):When the Cross Stick Switch is turnedON, it makes possible to use both “RimShot” and “Cross Stick” on the rim.*BRUSH:Can be played using “Brush Sweep.”About Snare/TomInstrumentsThe last letter of each instrument namemeans the sound of head shot, or rimshot.(Example)S: head sound of SnareSR: rim sound of SnareT1: head sound of Tom 1T1R: rim sound of Tom 1About CymbalInstrumentsThe last letter of each instrument namemeans the sound of bow shot, edge shot,or bell shot.(Example)HH: bow sound of hi-hatHHEg: edge sound of hi-hatCrBw: bow sound of crashCrEg: edge sound of crashRd: bow sound of rideRdBl: bell sound of rideRdEg: edge sound of rideCopyrightWhen you purchase the TD-12percussion sound module from anauthorized Roland dealer, theincluded sounds are licensed, notsold, to you by Roland Corporation,for commercial use in musicproduction, public performance,broadcast, etc.You may use any of the includedsounds in a commercial or noncommercialrecording withoutpaying any additional license fees.However, you must strictly adhereto the following crediting guidelineson any music recording that utilizematerial from TD-12.Reproduction or duplication of anyof the sound contained in the TD-12,either as they exist on this soundmodule or by any means ofreformatting, mixing, filtering, resynthesizing,processing orotherwise editing for use in anotherproduct or for re-sale, is strictlyprohibited without the expresswritten consent of Roland. Allunauthorized giving, trading,lending, renting, re-issue, redistributionor re-sale of the soundsincluded in the TD-12 are expresslyprohibited.In Plain English: Be creative in yourapplication of the TD-12 sounds, andkeep this sounds for your use only.DO NOT COPY IT.* Special thanks to Spectrasonics.Appendices91
Preset Percussion Set ListC-1Note No.024579111719212336810C0 121314151629313335182022C1 242526272841434547303234C2 3637383940535557591424446C3 4849505152545658Percussion Set1. <strong>La</strong>tin ToysBass GlissGuitarScrtchWahGt1 DownWahGt1 UpWahGt2 DownWahGt2 UpCR78GuiroCR78TambTR808ClapTR808CowbellTR808MaracasTR909ClapHi-QR8SlapScratch2Scratch3SticksClickMetroClickMetroBellClapVibraSlapSquareBlockOffBeepCrotaleSquareBlockConga LoConga LoMuteGuiro ShortGuiro LongCuica HiCuica LoCowbell HiCowbell LoCowbellMamboCowbell MutePandeiroSlapPandeiroMuteConga LoMutePandeiroSlapConga LoClavesConga HiClavesBongo LoClavesBongo LoSlapBongo HiTriangleClsBongo HiSlapSleighBellAgogo LoCowbell HiTambourine1TriangleCowbell MuteAgogo HiConga HiMuteTreeChimes2. IndianPercBass GlissGuitarScrtchWahGt1 DownWahGt1 UpWahGt2 DownWahGt2 UpCR78GuiroCR78TambTR808ClapTR808CowbellTR808MaracasTR909ClapHi-QR8SlapScratch2Scratch3SticksClickMetroClickMetroBellClapVibraSlapTriangleClsOffBeepThaiGongTriangleBaya GeBaya SlideTinyGongGongPotDrumPotDrum AccTambourine2Tambourine3PotDrumBaya GeTabla TinTabla NaBaya SlideTabla TinBaya GeTriangleClsBaya GinTriangleClsTabla TunTriangleFingerSnapsTabla TiCrotaleTabla TeThaiGongTreeChimesThaiGongTambourine1TreeChimesCowbell MuteCrotaleBaya KaThaiGong3. AfricanPercBass GlissGuitarScrtchWahGt1 DownWahGt1 UpWahGt2 DownWahGt2 UpCR78GuiroCR78TambTR808ClapTR808CowbellTR808MaracasTR909ClapHi-QR8SlapScratch2Scratch3SticksClickMetroClickMetroBellClapVibraSlapCabasaOffBeepKalimbaCabasaTriangle2Triangle2ClsVibraSlapAfroStompBlock HiBlock LoTambourine2Tambourine3Djembe BassDjembe BassDjembe SlapDjembe TonePotDrum AccDjembe SlapPotDrum MuteCaxixiPotDrumCaxixiTalkingDrCaxixiTalkingDr UpTalkingDrSleighBellTalkingDr UpKalimbaCowbell LoKalimbaTambourine1TreeChimesCowbell MuteCowbell HiPotDrum AccKalimba4. SalsaOffOffOffOffOffOffOffOffOffOffOffOffOffOffOffOffOffOffOffOffOffOffBongo HiBongo HiSlapBongo LoBongo LoSlapCabasaConga HiMuteConga HiSlapConga LoConga LoMuteCajon BassCajon MuteCajon SlapCowbell HiCowbell LoCowbellMamboCowbellMamboPandeiroSurdo LoMutePandeiroSlapSurdo LoMaracasSurdo HiShakerTimbale LoShakerTimbalePailaTimbale HiGuiro ShortTimbale HiRmWhistleShortCuica LoVibraSlapAgogo HiGuiro LongCabasaCuica HiSurdo HiMuteWhistle5. SFXOffOffOffOffOffOffOffOffOffOffOffOffOffOffOffOffOffOffOffOffOffOffOffOffHi-QPoaPyonPicoonByonKyunPsyunBoomSuperLowTimeWarp1TimeWarp2Transform1Transform2Tramsform3Tekno FX1Tekno FX2Tekno FX3Ring FXDrop Out<strong>La</strong>serGunSpiralEmergencyWondererClickBeepSticksSticks2MetroBellMetroClickFingerSnapsClapR8SlapMotorEngineGlassBurt6–8. UserBass GlissGuitarScrtchWahGt1 DownWahGt1 UpWahGt2 DownWahGt2 UpCR78GuiroCR78TambTR808ClapTR808CowbellTR808MaracasTR909ClapHi-QR8SlapScratch2Scratch3SticksClickMetroClickMetroBellClapVibraSlapOffOffBeepOffOffOffOffOffOffSticksClickMetroClickMetroBellOffOffOffOff18”Birch T4ROff18”Birch T4OffOffOffOffOffOffOffOffOffOffOffOffTambourine1OffCowbell MuteOffOffOffDrum KitDrum Kit 1–50(Trigger Inputs)––––––––––––––––––––––(6) Closed HH Rim(for BrushSweep)(p. 38)–(10) Ride-Edge(6) Open HH Rim(11) AUX1(11) AUX1 Rim(12) AUX2(12) AUX2 Rim––––(1) Kick Rim(1) Kick(for X-Stick) (p. 38)(2) Snare–(2) Snare Rim–(6) Closed HH(5) Tom3(6) Pedal HH(4) Tom2(6) Open HH(4) Tom2 Rim(3) Tom1(7) Crash1(3) Tom1 Rim(9) Ride(8) Crash2 Rim(9) Ride Rim–(7) Crash1 Rim–(8) Crash2(5) Tom3 Rim(10) Ride-Edge Rim• Up to eight percussion sets can be stored.• You can change the used instruments in each percussion set.For details, refer to Percussion Set Settings (p. 57).92
Preset Percussion Set ListNote No.C4 606162636465666768697071C5 727374757677787980818283C6 848586878889909192939495C7 96979899100101102103104105106107C8 108109110111112113114115116117118119C9 1201211221231241251261271. <strong>La</strong>tin ToysBongo HiBongo LoConga HiConga HiSlapConga LoTimbale HiTimbale LoAgogo HiAgogo LoCabasaMaracasWhistleShortWhistleGuiro ShortGuiro LongClavesBlock HiBlock LoCuica HiCuica LoTriangleClsTriangleShakerSleighBellBellTreeCastanetSurdo LoMuteSurdo LoBongo HiSlapBongo LoSlapConga HiMuteConga LoMutePandeiroMutePandeiroPandeiroSlapTreeChimesCrotaleGongCajon BassCajon MuteCajon SlapCowbellMamboSquareBlockCaxixiTimbale HiRmTimbalePailaCuica AccSurdo HiSurdo HiMutePotDrumPotDrum AccPotDrum MuteDjembe ToneDjembe SlapDjembe BassTalkingDrTalkingDr UpTabla NaTabla TeTabla TiTabla TunBaya GeBaya GinBaya KaBaya SlideTambourine26”SplazhSpEgOff2. IndianPercBongo HiBongo LoConga HiConga HiSlapConga LoTimbale HiTimbale LoAgogo HiAgogo LoCabasaMaracasWhistleShortWhistleGuiro ShortGuiro LongClavesBlock HiBlock LoCuica HiCuica LoTriangleClsTriangleShakerSleighBellBellTreeCastanetSurdo LoMuteSurdo LoBongo HiSlapBongo LoSlapConga HiMuteConga LoMutePandeiroMutePandeiroPandeiroSlapTreeChimesCrotaleGongCajon BassCajon MuteCajon SlapCowbellMamboSquareBlockCaxixiTimbale HiRmTimbalePailaCuica AccSurdo HiSurdo HiMutePotDrumPotDrum AccPotDrum MuteDjembe ToneDjembe SlapDjembe BassTalkingDrTalkingDr UpTabla NaTabla TeTabla TiTabla TunBaya GeBaya GinBaya KaBaya SlideConcertBDHandCymbalOff3. AfricanPercBongo HiBongo LoConga HiConga HiSlapConga LoTimbale HiTimbale LoAgogo HiAgogo LoCabasaMaracasWhistleShortWhistleGuiro ShortGuiro LongClavesBlock HiBlock LoCuica HiCuica LoTriangleClsTriangleShakerSleighBellBellTreeCastanetSurdo LoMuteSurdo LoBongo HiSlapBongo LoSlapConga HiMuteConga LoMutePandeiroMutePandeiroPandeiroSlapTreeChimesCrotaleGongCajon BassCajon MuteCajon SlapCowbellMamboSquareBlockCaxixiTimbale HiRmTimbalePailaCuica AccSurdo HiSurdo HiMutePotDrumPotDrum AccPotDrum MuteDjembe ToneDjembe SlapDjembe BassTalkingDrTalkingDrTabla NaTabla TeTabla TiTabla TunBaya GeBaya GinBaya KaBaya SlideAfroStompHandCymbalOff4. SalsaPandeiroPandeiroMutePandeiroSlapSurdo HiSurdo HiMuteSurdo LoSurdo LoMuteWhistleWhistleShortVibraSlapTabla NaTabla TeTabla TiTabla TinTabla TunBaya GeBaya GinBaya KaBaya SlidePotDrumPotDrum AccPotDrum MuteDjembe ToneDjembe SlapDjembe BassTalkingDrTalkingDr UpCastanetWoodBlockTimpani CTimpani GConcertBDConcertBD MtHandCymbalHandCymbalMtTriangleTriangleClsTriangle2Triangle2ClsCrotaleBellTreeSleighBellTreeChimesThaiGongTinyGongGongOrchestraHitSnareRollConcertSnareSteelDrumCelestaGlockenspielKalimbaMarimbaTubularBellVibraphoneXylophoneCR78CowbellCR78GuiroCR78MaracasCR78MtlBeatCR78TambTR808ClapTR808ClavesTR808CowbellTR808MaracasTR808XStickTR909Clap5. SFXBoing1Boing2BounceVerbyHitAfroStompBomb!TuningTomReverseCrashReverseChinaPhaseCrashPhaseRideScratch1Scratch2Scratch3Scratch4TapeStopTapeRewindVoice OKVoice YeahVocoder1Vocoder2TeknoHitPhillyHitFunkHitBass GlissGuitar GlissGuitarScrtchCutGt DownCutGt UpWahGt1 DownWahGt1 UpWahGt2 DownWahGt2 UpSine 440HzFor PadCheckOffOffOffOffOffOffOffOffOffOffOffOffOffOffOffOffOffOffOffOffOffOffOffOffOffOffOffOffOffOffOffOffOff6–8. UserBongo HiBongo LoConga HiConga HiSlapConga LoTimbale HiTimbale LoAgogo HiAgogo LoCabasaMaracasWhistleShortWhistleGuiro ShortGuiro LongClavesBlock HiBlock LoCuica HiCuica LoTriangleClsTriangleShakerSleighBellBellTreeCastanetSurdo LoMuteSurdo LoBongo HiSlapBongo LoSlapConga HiMuteConga LoMutePandeiroMutePandeiroPandeiroSlapTreeChimesCrotaleGongCajon BassCajon MuteCajon SlapCowbellMamboSquareBlockCaxixiTimbale HiRmTimbalePailaCuica AccSurdo HiSurdo HiMutePotDrumPotDrum AccPotDrum MuteDjembe ToneDjembe SlapDjembe BassTalkingDrTalkingDr UpTabla NaTabla TeTabla TiTabla TunBaya GeBaya GinBaya KaBaya SlideConcertBDHandCymbalOffDrum Kit 1–50(Trigger Inputs)––––––––––––––––––––––––––––––––––––––––––––––––––––––––––––––––––––Appendices93
Backing Instrument ListPC CC0 Name VOICESPIANO1 0 PIANO 1 18 PIANO 1W 216 PIANO 1D 12 0 PIANO 2 18 PIANO 2W 23 0 PIANO 3 18 PIANO 3W 24 0 HONKY-TONK 28 HONKY-TONK W 2E. PIANO5 0 E.PIANO 1 18 DETUNED EP 1 224 60’S E.PIANO 164 FM+SA EP 265 HARD EP 26 0 E.PIANO 2 264 BRIGHT FM EP 2CLAVI7 0 HARPSICHORD 18 COUPLED HPS. 216 HARPSI.W 224 HARPSI.O 28 0 CLAV. 164 FUNK CLAV. 2CHROMATIC PERCUSSION9 0 CELESTA 110 0 GLOCKENSPIEL 111 0 MUSIC BOX 112 0 VIBRAPHONE 18 VIB.W 213 0 MARIMBA 114 0 XYLOPHONE 115 0 TUBULAR-BELL 18 CHURCH BELL 19 CARILLON 116 0 SANTUR 1ORGAN17 0 ORGAN 1 18 DETUNED OR.1 216 60’S ORGAN 1 132 ORGAN 4 264 SC88 ORGAN 4 165 EVEN BAR 218 0 ORGAN 2 18 DETUNED OR.2 232 ORGAN 5 219 0 ORGAN 3 220 0 CHURCH ORG.1 18 CHURCH ORG.2 216 CHURCH ORG.3 221 0 REED ORGAN 122 0 ACCORDION FR 28 ACCORDION IT 223 0 HARMONICA 124 0 BANDONEON 2GUITAR25 0 NYLON-STR.GT 126 0 STEEL-STR.GT 18 12-STR.GT 264 NYLON+STEEL 227 0 JAZZ GT. 18 HAWAIIAN GT. 128 0 CLEAN GT. 18 CHORUS GT. 229 0 MUTED GT. 164 MUTED GT.2 265 POP GT. 166 FUNK GT. 1 *67 FUNK GT.2 1 *30 0 OVERDRIVE GT 164 FDBK.ODRV.GT 231 0 DISTORTIONGT 18 FEEDBACK GT. 264 HEAVY GT. 165 FDBK. HVY.GT 266 MUTED DIS.GT 167 ROCK RHYTHM 232 0 GT.HARMONICS 18 GT. FEEDBACK 1*: VELOCITY SWITCHThe tone switches at velocity 116.BASS33 0 ACOUSTIC BS. 264 ELCTRC.AC.BS 234 0 FINGERED BS. 164 FUNK BASS 265 REGGAE BASS 235 0 PICKED BS. 164 MUTE PICKBS1 165 MUTE PICKBS2 136 0 FRETLESS BS. 137 0 SLAP BASS 1 164 SLAP BASS 3 165 RESO SLAP 166 SLAP BASS 4 138 0 SLAP BASS 2 1SYN. BASS39 0 SYNTH BASS 1 11 SYNTHBASS101 18 SYNTH BASS 3 164 TB33 BS 1 165 TB33 BS 2 166 TB33 BS 3 140 0 SYNTH BASS 2 216 RUBBER BASS 264 SH101 BS 1 165 SH101 BS 2 166 SH101 BS 3 167 MODULAR BASS 2ORCHESTRA41 0 VIOLIN 18 SLOW VIOLIN 142 0 VIOLA 143 0 CELLO 144 0 CONTRABASS 145 0 TREMOLO STR 146 0 PIZZICATOSTR 147 0 HARP 148 0 TIMPANI 1STRINGS49 0 STRINGS 18 ORCHESTRA 250 0 SLOW STRINGS 151 0 SYN.STRINGS1 18 SYN.STRINGS3 264 SYN.STRINGS4 265 OB STRINGS 252 0 SYN.STRINGS2 253 0 CHOIR AAHS 132 CHOIR AAHS 2 154 0 VOICE OOHS 155 0 SYNVOX 156 0 ORCHESTRAHIT 2BRASS57 0 TRUMPET 158 0 TROMBONE 11 TROMBONE 2 259 0 TUBA 160 0 MUTEDTRUMPET 161 0 FRENCH HORN 21 FR.HORN 2 262 0 BRASS 1 18 BRASS 2 294
Backing Instrument ListSYN. BRASS63 0 SYNTH BRASS1 28 SYNTH BRASS3 216 ANALOGBRASS1 264 SYNTH BRASS5 265 POLY BRASS 266 QUACK BRASS 267 OCTAVE BRASS 264 0 SYNTH BRASS2 28 SYNTH BRASS4 116 ANALOGBRASS2 264 SOFT BRASS 265 VELO BRASS 1 266 VELO BRASS 2 2REED65 0 SOPRANO SAX 166 0 ALTO SAX 167 0 TENOR SAX 168 0 BARITONE SAX 169 0 OBOE 170 0 ENGLISH HORN 171 0 BASSOON 172 0 CLARINET 1PIPE73 0 PICCOLO 174 0 FLUTE 175 0 RECORDER 176 0 PAN FLUTE 177 0 BOTTLE BLOW 278 0 SHAKUHACHI 279 0 WHISTLE 180 0 OCARINA 1SYN. LEAD81 0 SQUARE WAVE 21 SQUARE 18 SINE WAVE 182 0 SAW WAVE 21 SAW 18 DOCTOR SOLO 264 BIG LEAD 265 WASPY SYNTH 283 0 SYN.CALLIOPE 284 0 CHIFFER LEAD 285 0 CHARANG 264 DIST. LEAD 1 265 DIST. LEAD 2 266 FUNK LEAD 286 0 SOLO VOX 287 0 5TH SAW WAVE 264 BIG FIVES 288 0 BASS & LEAD 264 BIG & RAW 265 FAT & PERKY 2SYN. PAD89 0 FANTASIA 290 0 WARM PAD 164 THICK PAD 265 HORN PAD 291 0 POLYSYNTH 264 80’S POLYSYN 292 0 SPACE VOICE 193 0 BOWED GLASS 294 0 METAL PAD 264 PANNER PAD 295 0 HALO PAD 296 0 SWEEP PAD 164 POLAR PAD 165 CONVERGE 1SYN. SFX97 0 ICE RAIN 298 0 SOUNDTRACK 264 ANCESTRAL 265 PROLOGUE 299 0 CRYSTAL 21 SYN MALLET 1100 0 ATMOSPHERE 2101 0 BRIGHTNESS 2102 0 GOBLIN 2103 0 ECHO DROPS 11 ECHO BELL 22 ECHO PAN 264 ECHO PAN 2 265 BIG PANNER 266 RESO PANNER 2104 0 STAR THEME 2ETHNIC MISC105 0 SITAR 11 SITAR 2 2106 0 BANJO 1107 0 SHAMISEN 1108 0 KOTO 18 TAISHO KOTO 2109 0 KALIMBA 1110 0 BAGPIPE 1111 0 FIDDLE 1112 0 SHANAI 1PERCUSSIVE113 0 TINKLE BELL 1114 0 AGOGO 1115 0 STEEL DRUMS 1116 0 WOODBLOCK 18 CASTANETS 1117 0 TAIKO 18 CONCERT BD 1118 0 MELO. TOM 1 18 MELO. TOM 2 1119 0 SYNTH DRUM 18 808 TOM 19 ELEC PERC. 1120 0 REVERSE CYM. 1GUITAR BASS FX121 0 GT.FRETNOISE 11 GT.CUT NOISE 164 WAH BRUSH GT 165 GT. SLIDE 166 GT. SCRATCH 167 BASS SLIDE 1SFX122 0 BREATH NOISE 11 FL.KEY CLICK 1123 0 SEASHORE 11 RAIN 12 THUNDER 13 WIND 15 BUBBLE 2124 0 BIRD 21 DOG 13 BIRD 2 1125 0 TELEPHONE 1 11 TELEPHONE 2 13 DOOR 15 WIND CHIMES 2126 0 HELICOPTER 12 CAR-STOP 19 BURST NOISE 264 SPACE TRI. 1127 0 APPLAUSE 23 PUNCH 1128 0 GUN SHOT 12 LASERGUN 13 EXPLOSION 2PC:Program number(Instrument number)CC0: Value of controlchange number 0VOICES: Number of voices used* To switch instruments from theexternal MIDI device, send “0” on theCC32# (Control Change Bank Select)from the external MIDI device to theTD-12.* The value of the CC32# (ControlChange Bank Select) that the TD-12transmits is always “0.”Appendices95
MIDI Implementation ChartPERCUSSION SOUND MODULE (SOUND GENERATOR SECTION)Model TD-12MIDI Implementation ChartDate : Dec. 17, 2004Version : 1.00Function...Transmitted Recognized RemarksBasicChannelDefaultChanged1–16, OFF1–16, OFF1–16, OFF1–16, OFFMemorizedModeDefaultMessagesAlteredMode 3X**************Mode 3X**************NoteNumber :True Voice0–127**************0–1270–127VelocityNote OnNote OffO 9nH, v = 1–127O 8nH, v = 64OO *4AfterTouchKey’sChannel’sO *3XO *3XPitch BendXO *4ControlChange0, 321246, 387101116–196491100, 101OO (Pad, Pedal) *1 *2 *3O (Pad, Pedal) *1 *2 *3O (Pad, Pedal) *1 *2 *3XXXO (Pad, Pedal) *1 *2 *3O (Pad, Pedal) *1 *2 *3XXXO *4O *1 *2 *3O *1 *2 *3O *1 *2 *3O *4OO *4O *1 *2 *3O *1 *2 *3O *4O *4O *4Bank SelectModulationBreath ControllerFoot ControllerData EntryVolumePanpotExpressionGeneral Purpose Controller 1–4Hold 1Effects 1 (Reverb Send Level)RPN LSB, MSBProgramChange: True NumberO 0–127 *5**************O 0–127 *50–127Program No. 1–128System ExclusiveOOSystemCommon: Song Position: Song Select: Tune RequestXXXXXXSystemReal Time: Clock: CommandsXXOXAuxMessagesNotes: All Sound Off: Reset All Controllers: Local On/Off: All Notes Off: Active Sensing: System ResetXXXXOXO (120, 126, 127)OXO (123–127)OX*1 One is selected as the strike position.*2 One is selected as the hi-hat control pedal.*3 Drum part only.*4 Backing part only.*5 O X is selectable.Mode 1 : OMNI ON, POLYMode 3 : OMNI OFF, POLY96Mode 2 : OMNI ON, MONOMode 4 : OMNI OFF, MONOO : YesX : No
PERCUSSION SOUND MODULE (SEQUENCER SECTION)Model TD-12MIDI Implementation ChartDate : Dec. 17, 2004Version : 1.00Function...Transmitted Recognized RemarksBasicChannelDefaultChanged1–16, OFF1–16, OFF1–16, OFF1–16, OFFMemorizedModeDefaultMessagesAlteredMode 3X**************Mode 3X**************NoteNumber :True Voice0–127**************0–1270–127VelocityNote OnNote OffO 9nH, v = 1–127O 8nH, v = 64OOAfterTouchKey’sChannel’sO *3XO *3XPitch BendO *4O *4ControlChange0, 321246, 387101116–196491100, 101O *6 *7O *1 *2 *3O *1 *2 *3O *1 *2 *3O *4 *6 *7O *6 *7 *10O *4 *6 *7O *1 *2 *3O *1 *2 *3O *4O *4 *6 *7O *4 *6 *7XO *1 *2 *3O *1 *2 *3O *1 *2 *3XXXO *1 *2 *3O *1 *2 *3O *4XXBank SelectModulationBreath ControllerFoot ControllerData EntryVolumePanpotExpressionGeneral Purpose Controller 1–4Hold 1Effects 1 (Reverb Send Level)RPN LSB, MSBProgramChange: True NumberO 0–127 *5 *6 *7**************XProgram No. 1–128System ExclusiveOOOnly reception/transmissionof Bulk Data.SystemCommon: Song Position: Song Select: Tune RequestXXXXXXSystemReal Time: Clock: CommandsOOO *8O *9AuxMessagesNotes: All Sound Off: Reset All Controllers: Local On/Off: All Notes Off: Active Sensing: System ResetMode 1 : OMNI ON, POLYMode 3 : OMNI OFF, POLYXXXXXX*1 One is selected as the strike position.*2 One is selected as the hi-hat control pedal.*3 Drum part only.*4 Backing part only.*5 O X is selectable.*6 Transmits when pattern is selected.Mode 2 : OMNI ON, MONOMode 4 : OMNI OFF, MONOOOXO (123–127)XX*7 Transmits when modified.*8 Receives when Sync Mode setting is “EXTERNAL” or “AUTO.”*9 Receives when Sync Mode setting is “EXTERNAL,” “AUTO,”or “REMOTE.”*10 Except drum part.O : YesX : NoAppendices97
SpecificationsTD-12: Percussion Sound ModuleSound GeneratorVariable Drum ModelingMaximum Polyphony64 voicesInstrumentsDrum Instruments: 560 (172,161 variations)Backing Instruments: 262Drum Kits50Drum Kit Chains16 chains (32 steps per chain)Instrument ParametersV-EDIT (KICK):Shell Depth, Head Type, Head Tuning, Muffling, Snare BuzzV-EDIT (SNARE):Shell Material, Shell Depth, Head Type, Head Tuning,Muffling, Strainer AdjustmentV-EDIT (TOM):Shell Depth, Head Type, Head Tuning, Muffling, Snare BuzzV-EDIT (HI-HAT):Cymbal Size, Fixed Hi-HatV-EDIT (CYMBAL):Cymbal Size, Sizzle Type, SustainEDIT:Pitch, DecayAmbience ParametersRoom Type, Room Size, Wall Type, Mic Position, Room ShapeMixer ParametersVolume, Pan, Minimum Volume, Output AssignEffect TypesPad Equalizer (each pad)Pad Compressor (each pad)Multi-Effects: 5 typesReverb (for backing part)Percussion Sets8SequencerUser Patterns: 100Preset Patterns: 150Parts: 6Play Type: Oneshot, Loop, TapTempo: 20–260Resolution: 192 ticks per quarter noteRecording Method: RealtimeMaximum Note Storage: approx. 20,000 NotesClick Sounds: 20 typesDisplay64 x 240 dots (backlit graphic LCD)7 segments, 3 characters (LED)Trigger Indicator (LED)ControllersFaders: 6Preview Button (velocity: 3 steps)98
SpecificationsConnectorsTrigger Input Jack x 12Hi-Hat Control Jack (for VH-11, VH-12, and FD-8)Master Output Jacks (L/MONO, R): 1/4 inch phone typeDirect Output Jacks (1, 2): 1/4 inch phone typeHeadphones Jack: Stereo 1/4 inch phone typeMix in Jack: Stereo 1/4 inch phone typeMIDI Connectors (IN, OUT/THRU)AC InletOptionsPads (PD-8, PD-85, PD-105, PD-125)Cymbals (CY-8, CY-12R/C, CY-14C, CY-15R)Kick Triggers (KD-7, KD-8, KD-85, KD-120)Hi-Hats (VH-11, VH-12)Hi-Hat Control Pedal (FD-8)Stands (MDS-12BK, MDS-20BK)Cymbal Mount (MDY-10U)Pad Mount (MDH-10U)Output Impedance1.0 k ohmsPower SupplyAC 115 V, AC 117 V, AC 220 V, AC 230 V, AC 240 V(50/60 Hz)Power Consumption13 W984* A separate publication titled “MIDI Implementation” is alsoavailable. It provi<strong>des</strong> complete details concerning the wayMIDI has been implemented on this unit. If you should requirethis publication (such as when you intend to carry out bytelevelprogramming), please contact the nearest Roland ServiceCenter or authorized Roland distributor.962a* In the interest of product improvement, the specifications and/or appearance of this unit are subject to change without priornotice.Dimensions260 (W) x 248 (D) x 108 (H) mm10-1/4 (W) x 9-13/16 (D) x 4-1/4 (H) inchesWeight2.6 kg / 5 lbs 12 ozAccessoriesOwner’s <strong>Manual</strong>Power CordAppendices99
Block Diagram1DrumsKICKHeadRimINSTINSTINSTINST/COMP/EQCOMP/EQCOMP/EQMIXER/VOLUMEVolumeVolumeKICKMIXER/KIT VOLAMBIENCEAMB SendAMB Send2SNAREHeadRimINSTINSTCOMP/EQCOMP/EQVolumeVolumeSNAREAMB SendAMB Send35678TOM1:TOM3HI-HATCRASH1CRASH2HeadRimHeadRimHeadRimINSTINSTINSTINSTINSTINSTCOMP/EQCOMP/EQCOMP/EQCOMP/EQCOMP/EQCOMP/EQVolumeVolumeVolumeVolumeVolumeVolumeTOMSHI-HATCRASHKit VolumeDrumsAMB SendAMB SendAMB SendAMB SendAMB SendAMB Send910RIDEEDGEHeadRimINSTINSTCOMP/EQCOMP/EQVolumeVolumeRIDEAMB SendAMB Send11AUX1HeadRimINSTINSTCOMP/EQCOMP/EQVolumeVolumeAUX1AMB SendAMB Send12AUX2HeadRimINSTINSTCOMP/EQCOMP/EQVolumeVolumeAUX2AMB SendAMB SendPercussion PartPERCBacking PartMELODYPATTERN/PART/PERC/INST/EDITINST Volume VolumePATTERN/PART/MIXER/VOLUMEINSTVolumePERCMIDI CC#7(Volume)VolumeVolumeBASSBACK 1INSTINSTVolumeVolumeBACKINGVolumeVolumeBACK 2INSTPATTERN/PART/BACKINGVolumeGROUPFADERSVolume100ClickTEMPO/CLICK/INSTINSTCLICKswitch with[SHIFT] + [MIXER]TD-12 Block DiagramCLICK([SHIFT] + [TEMPO])AMB Send
MULTI EFFECTS[SHIFT] + [AMBIENCE]MFX SendMFX SendMFX SendMFX SendMFX SendMFX SendMFX SendMFX SendMFX SendMFX SendMFX SendMIXER/PANSETUP/OUTPUT/PADMFX SendMFX SendMFX SendMFX SendMFX SendMASTERL/MONOMASTERRMULTIEFFECTS(MFX)AMBIENCETYPEROOMSETUP/OUTPUT/OTHERDIRECT 1REV SendPANDIRECT 2REV SendPANREV SendREV SendREV SendPARTREVERBTypeTimeSETUP/OUTPUT/OTHERPHONESPHONESPANPHONES (L)PHONES (R)MASTER (L)MASTER (R)DIRECT 1DIRECT 2MT(L) + DR1MT(R) + DR2MIX INMIX INAppendices101
IndexSymbols+/- .................................................................. 14, 24Numerics3-WAY ................................................................. 50AAcoustic Drum Kit ............................................. 34ADVANCE ......................................................... 50AMB SEND LEVEL ........................................... 39Amb Send Level ................................................. 63APPEND ............................................................. 68BBacking Instrument ........................................... 94Backing Part ........................................................ 59BANK .................................................................. 44BASIC .................................................................. 45Bell Shot ............................................................... 23Bend Range ......................................................... 56Block Diagram .................................................. 100Bow Shot ....................................................... 22–23BR MIDI .............................................................. 38BRUSH ................................................................. 32Brush .................................................................... 38Brush Note No. .................................................. 38Brush Switch ....................................................... 32BULK ................................................................... 75Bulk Dump ......................................................... 75Click Instruments .............................................. 63Connection .............................................. 17–18, 78FD series ........................................................ 48VH-11 ....................................................... 20, 47VH-12 ............................................................. 48CONTROL .................................................... 37, 76COPY ....................................................... 13, 67, 70COUNT ............................................................... 63Count In Play ..................................................... 63Count In Rec ....................................................... 63CRASH ................................................................ 36Cross Stick .............................................. 22, 32, 38crosstalk .............................................................. 49CTRL .................................................................... 74CURSOR ............................................................. 14Cursor .................................................................. 24Curve ................................................................... 45CY-12R/C ........................................................... 22Cymbal .......................................................... 22, 36DDecay Time ......................................................... 36DELETE ....................................... 32, 62, 69, 80–81Demo Song ......................................................... 27Device ID ............................................................ 73DIRECT OUT ..................................................... 15Display ................................................................ 13Display Contrast .......................................... 26, 77Drum Instrument ............................................... 88DRUM KIT .......................................................... 14Drum Kit ....................................................... 30, 32Drum Kit Chain ........................................... 80–81During Play ........................................................ 63During Rec .......................................................... 63CCC Max ................................................................ 46CC Resolution .................................................... 46CHAIN .................................................... 13, 80–81Channel ............................................................... 72CHAR ...................................................... 32, 62, 81CHINA ................................................................ 36Choke ................................................................... 23Click ................................................... 25, 62–63, 76EEdge Shot ...................................................... 22–23EDIT ......................................................... 34, 58, 67Edit ....................................................................... 34ERASE ................................................................. 68Error Message .................................................... 82EXCHNG ............................................................ 70EXIT ..................................................................... 14102
IndexFF RESET ............................................................... 79Factory Reset ................................................ 28, 79FADER ................................................................. 26FIXED .................................................................. 35Fixed Hi-Hat ....................................................... 35Foot Splash Sens ................................................. 46FUNC ................................................................... 31Function Button ................................................. 24FX SW .................................................................. 32GGate ...................................................................... 38Gate Time ............................................................ 38GLOBAL .............................................................. 72GROUP FADERS ................................... 14, 26, 39KKey Shift .............................................................. 56KICK .................................................................... 35KIT ................................................................. 14, 30Kit Parameters .................................................... 31Kit Tempo ........................................................... 31KIT VOL .............................................................. 39Kit Volume ................................................... 31, 39LLCD ...................................................................... 77LED Display ....................................................... 13LIST .......................................................... 31, 34, 57Local Control ...................................................... 73LOOP ............................................................. 61, 66HH & R ................................................. 33, 39–40, 42HEAD .................................................................. 35Head Shot ............................................................ 22Head Tuning ....................................................... 35Head Type .......................................................... 35Headphones ........................................................ 18HH MIDI ............................................................. 38HH Note# Border ............................................... 74HI-HAT ............................................................... 35Hi-Hat .......................................... 20, 23, 38, 47–48Hi-Hat Ctrl Type ................................................ 46Hit Pad Start ....................................................... 66IINSERT .............................................. 32, 62, 80–81INST ..................................................................... 33Inst ................................................................. 56, 63InstrumentDrum .............................................................. 33Instrument Name ......................................... 34, 56Instrument Number .......................................... 56Interval ................................................................ 63MMask Time .......................................................... 51MASTER ............................................................. 14MASTER OUT .................................................... 15Master Tuning .................................................... 56Material ............................................................... 35MEMORY ........................................................... 61Mesh Head .......................................................... 21Message ............................................................... 83Metronome ................................................... 25, 62MFX SEND LEVEL ............................................ 39MIDI ........................................................ 38, 72, 96MIDI CH ............................................................. 72MIDI Channel .................................................... 65MIDI IN ............................................................... 15MIDI OUT/THRU ............................................. 15MIN VOL ............................................................ 39Minimum Volume ............................................. 39MIX EDIT ............................................................ 39MIX IN .............................................. 14–15, 18, 76MIXER ........................................................... 39, 59MOUNT TYPE ................................................... 49MUFFLE .............................................................. 35Muffling .............................................................. 35103
IndexNNAME .......................................... 32, 58, 62, 80–81Noise Cancel ....................................................... 46Note No. .............................................................. 38Note Number ............................................... 38, 92OOffset ....................................................... 20, 46–48ONESHOT .......................................................... 61Open Rim Shot ................................................... 22Other Instruments ............................................. 36OUTPUT ............................................................. 76Output ................................................................. 63Output Destination ............................................ 76PPad ........................................................... 17, 21–22Pad Pattern ......................................................... 37PAD PTN ............................................................ 32PAD SW .............................................................. 76Pad Type ............................................................. 44PadPtn ................................................................. 37PadPtn Master Sw .............................................. 32PadPtn Velocity .................................................. 37Pan ................................................................. 39, 63PART .................................................................... 56Part ....................................................................... 59PART PAN .......................................................... 59PART REVERB SEND LEVEL ......................... 59PART VOLUME ................................................. 59Pattern ..................................................... 25, 54, 67PATTERN EDIT ................................................. 67Pattern Length .............................................. 60, 65PD-105 ........................................................... 21–22PD-85 ............................................................. 21–22PDLBEND ........................................................... 38Pedal .................................................................... 17Pedal Bend Range .............................................. 38Pedal CC .............................................................. 74Pedal HH Volume ....................................... 31, 39PERC .................................................................... 57Percussion Instrument ................................ 57–58Percussion Part ................................................... 57Percussion Set ............................................... 57–58PHONES ............................................................. 14Pitch ..................................................................... 36Play Type ............................................................ 61Playback Method ............................................... 61Playing Method ................................................. 22Position Ctrl ........................................................ 38Positional Sensing .............................................. 23POWER ............................................................... 15Power .................................................................. 19Preset Drum Kit ................................................. 28Preset Pattern ..................................................... 53Pressure ............................................................... 23PREVIEW .................................... 14, 25, 55, 57, 77PROG ................................................................... 74Program Change ................................................ 74QQuantize .............................................................. 66Quick Play .......................................................... 61RRealtime Recording ........................................... 64REC ...................................................................... 64Rec Mode ............................................................ 66Recording ...................................................... 64–66Recording Method ............................................. 66Rehearsal ............................................................. 66REPLACE ............................................................ 66Retrig Cancel ...................................................... 50Retrigger Cancel ................................................ 50REVERB .............................................................. 59Reverb ................................................................. 59RIDE .................................................................... 36Ride CC ............................................................... 74RIM ................................................................ 14, 50Rim Gain ............................................................. 51Rim Shot .............................................................. 22RimShot Adjust .................................................. 51SSCAN ................................................................... 50Scan Time ............................................................ 50Sensitivity ........................................................... 45SEQUENCER ..................................................... 14Sequencer ...................................................... 53, 64SETUP ..................................................... 13, 60, 72104
IndexShallow Rim Shot ............................................... 22SHELL ................................................................. 35Shell Depth ......................................................... 35SHIFT ................................................................... 14Size ................................................................. 35–36Sizzle Type .......................................................... 36SNARE ................................................................. 35Snare Buzz .......................................................... 35Snare CC .............................................................. 74Soft Thru ............................................................. 72SPACE ..................................................... 32, 62, 81SPLASH ............................................................... 36Stand .................................................................... 16stand holder ........................................................ 16step ....................................................................... 80Strainer Adj. ........................................................ 35Sustain ................................................................. 36Sync Mode .......................................................... 55TTAP ...................................................................... 61Tap Ptn Mute Grp .............................................. 37Tap Reset Time ................................................... 61TEMPO ................................................................ 31Tempo ................................................ 26, 55, 60, 65Tempo Indicator ................................................. 62Tension ................................................................ 21Threshold ............................................................ 45Time ..................................................................... 59Time Signature ....................................... 60, 63, 65TIMESIG .............................................................. 63TOM ..................................................................... 35Toms CC .............................................................. 74TRIG ..................................................................... 14TRIG LOCK .................................................. 14, 33TRIGGER ...................................................... 14, 44Trigger Bank ....................................................... 44Trigger Indicator ................................................ 13TRIGGER INPUT ............................................... 15Trigger Type ....................................................... 44Tuning ................................................................. 56Tx Channel .......................................................... 38Tx/Rx .................................................................. 72VVALUE .......................................................... 14, 24Variation ............................................................. 56V-EDIT ................................................................ 34Velocity Curve ................................................... 45VERSION ............................................................ 77VH-11 ...................................................... 20, 23, 47VH-12 ............................................................ 23, 48V-LINK .......................................................... 61, 78V-LINK Device ID ............................................. 78V-LINK MIDI Ch ............................................... 78VOLUME ............................................................ 31Volume ................................................................ 39XXSTICK ................................................................ 32XStick Note No. ................................................. 38XStick Thrshld .................................................... 51XStick Volume .............................................. 31, 39XTALK ................................................................ 49XTALK CANCEL .............................................. 49XTALK GROUP ................................................. 49UUser Pattern ........................................................ 53105
MEMO106
For EU CountriesApparatus containingLithium batteriesADVARSEL!Lithiumbatteri - Eksplosionsfare vedfejlagtig håndtering.Udskiftning må kun ske med batteri afsamme fabrikat og type.Levér det brugte batteri tilbage tilleverandøren.CAUTIONDanger of explosion if battery isincorrectly replaced.Replace only with the same orequivalent type recommended by themanufacturer.Discard used batteries according to themanufacturer’s instructions.VARNINGExplosionsfara vid felaktigt batteribyte.Använd samma batterityp eller enekvivalent typ som rekommenderas avapparattillverkaren.Kassera använt batteri enligtfabrikantens instruktion.ADVARSELEksplosjonsfare ved feilaktig skifte avbatteri.Benytt samme batteritype eller entilsvarende type anbefalt avapparatfabrikanten.Brukte batterier kasseres i henhold tilfabrikantens instruks joner.VAROITUSParisto voi räjähtää, jos se onvirheellisesti asennettu.Vaihda paristo ainoastaanlaitevalmistajan suosittelemaantyyppiin. Hävitä käytetty paristovalmistajan ohjeiden mukaisesti.For EU CountriesThis product complies with the requirements of European Directives EMC 89/336/EEC and LVD 73/23/EEC.FEDERAL COMMUNICATIONS COMMISSIONRADIO FREQUENCY INTERFERENCE STATEMENTFor the USAThis equipment has been tested and found to comply with the limits for a Class B digital device, pursuant to Part 15 of theFCC Rules. These limits are <strong>des</strong>igned to provide reasonable protection against harmful interference in a residentialinstallation. This equipment generates, uses, and can radiate radio frequency energy and, if not installed and used inaccordance with the instructions, may cause harmful interference to radio communications. However, there is no guaranteethat interference will not occur in a particular installation. If this equipment does cause harmful interference to radio ortelevision reception, which can be determined by turning the equipment off and on, the user is encouraged to try to correct theinterference by one or more of the following measures:– Reorient or relocate the receiving antenna.– Increase the separation between the equipment and receiver.– Connect the equipment into an outlet on a circuit different from that to which the receiver is connected.– Consult the dealer or an experienced radio/TV technician for help.This device complies with Part 15 of the FCC Rules. Operation is subject to the following two conditions:(1) This device may not cause harmful interference, and(2) This device must accept any interference received, including interference that may cause un<strong>des</strong>ired operation.Unauthorized changes or modification to this system can void the users authority to operate this equipment.This equipment requires shielded interface cables in order to meet FCC class B Limit.NOTICEThis Class B digital apparatus meets all requirements of the Canadian Interference-Causing Equipment Regulations.AVISFor CanadaCet appareil numérique de la classe B respecte toutes les exigences du Règlement sur le matériel brouilleur du Canada.
InformationWhen you need repair service, call your nearest Roland Service Center or authorized Rolanddistributor in your country as shown below.AFRICAEGYPTAl Fanny Trading Office9, EBN Hagar A1 AskalanyStreet,ARD E1 Golf, Heliopolis,Cairo 11341, EGYPTTEL: 20-2-417-1828REUNIONMaison FO - YAM Marcel25 Rue Jules Hermann,Chaudron - BP79 97 491Ste Clotilde Cedex,REUNION ISLANDTEL: (0262) 218-429SOUTH AFRICAThat Other Music Shop(PTY)Ltd.11 Melle St., Braamfontein,Johannesbourg,SOUTH AFRICATEL: (011) 403 4105FAX: (011) 403 1234Paul Bothner(PTY)Ltd.17 Werdmuller Centre,Main Road, Claremont 7708SOUTH AFRICATEL: (021) 674 4030ASIACHINARoland Shanghai ElectronicsCo.,Ltd.5F. No.1500 Pingliang RoadShanghai 200090, CHINATEL: (021) 5580-0800Roland Shanghai ElectronicsCo.,Ltd.(BEIJING OFFICE)10F. No.18 3 Section AnhuaxiliChaoyang District Beijing100011 CHINATEL: (010) 6426-5050Roland Shanghai ElectronicsCo.,Ltd.(GUANGZHOU OFFICE)2/F., No.30 Si You Nan Er JieYi Xiang, Wu Yang Xin Cheng,Guangzhou 510600, CHINATEL: (020) 8736-0428HONG KONGTom Lee Music Co., Ltd.Service Division22-32 Pun Shan Street, TsuenWan, New Territories,HONG KONGTEL: 2415 0911Parsons Music Ltd.8th Floor, Railway Plaza, 39Chatham Road South, T.S.T,Kowloon, HONG KONGTEL: 2333 1863INDIARivera Digitec (India) Pvt. Ltd.409, Nirman KendraMahalaxmi Flats CompoundOff. Dr. Edwin Moses Road,Mumbai-400011, INDIATEL: (022) 2493 9051INDONESIAPT Citra IntiRamaJ1. Cideng Timur No. 15J-150Jakarta PusatINDONESIATEL: (021) 6324170KOREACosmos Corporation1461-9, Seocho-Dong,Seocho Ku, Seoul, KOREATEL: (02) 3486-8855MALAYSIARoland Asia Pacific Sdn. Bhd.45-1, Block C2, Jalan PJU 1/39,Dataran Prima, 47301 PetalingJaya, Selangor, MALAYSIATEL: (03) 7805-3263PHILIPPINESG.A. Yupangco & Co. Inc.339 Gil J. Puyat AvenueMakati, Metro Manila 1200,PHILIPPINESTEL: (02) 899 9801SINGAPORESWEE LEE MUSICCOMPANY PTE. LTD.150 Sims Drive,SINGAPORE 387381TEL: 6846-3676CRISTOFORI MUSIC PTE LTDBlk 3014, Bedok Industrial Park E,#02-2148, SINGAPORE 489980TEL: 6243-9555TAIWANROLAND TAIWANENTERPRISE CO., LTD.Room 5, 9fl. No. 112 ChungShan N.Road Sec.2, Taipei,TAIWAN, R.O.C.TEL: (02) 2561 3339THAILANDTheera Music Co. , Ltd.330 Verng NakornKasem, Soi 2,Bangkok 10100, THAILANDTEL: (02) 2248821VIETNAMSaigon MusicSuite DP-840 Ba Huyen Thanh Quan StreetHochiminh City, VIETNAMTEL: (08) 930-1969AUSTRALIA/NEW ZEALANDAUSTRALIA/NEW ZEALANDRoland CorporationAustralia Pty.,Ltd.38 Campbell AvenueDee Why West. NSW 2099AUSTRALIAFor AustraliaTel: (02) 9982 8266For New ZealandTel: (09) 3098 715CENTRAL/LATINAMERICAARGENTINAInstrumentos Musicales S.A.Av.Santa Fe 2055(1123) Buenos AiresARGENTINATEL: (011) 4508-2700BARBADOSA&B Music Supplies LTD12 Webster Industrial ParkWildey, St.Michael, BarbadosTEL: (246)430-1100BRAZILRoland Brasil Ltda.Rua San Jose, 780 Sala BParque Industrial San JoseCotia - Sao Paulo - SP, BRAZILTEL: (011) 4615 5666CHILEComercial Fancy II S.A.Rut.: 96.919.420-1Nataniel Cox #739, 4th FloorSantiago - Centro, CHILETEL: (02) 688-9540COLOMBIACentro Musical Ltda.Cra 43 B No 25 A 41 Bododega 9Medellin, ColombiaTEL: (574)3812529COSTA RICAJUAN Bansbach InstrumentosMusicalesAve.1. Calle 11, Apartado 10237,San Jose, COSTA RICATEL: 258-0211CURACAOZeelandia Music Center Inc.Orionweg 30Curacao, Netherland AntillesTEL:(305)5926866DOMINICAN REPUBLICInstrumentos Fernando GiraldezCalle Proyecto Central No.3Ens.<strong>La</strong> EsperillaSanto Domingo,Dominican RepublicTEL:(809) 683 0305ECUADORMas MusikaRumichaca 822 y ZarumaGuayaquil - EcuadorTEL:(593-4)2302364EL SALVADOROMNI MUSIC75 Avenida Norte y FinalAlameda Juan Pablo II,Edificio No.4010 San Salvador,EL SALVADORTEL: 262-0788GUATEMALACasa InstrumentalCalzada Roosevelt 34-01,zona 11Ciudad de GuatemalaGuatemalaTEL:(502) 599-2888HONDURASAlmacen Pajaro Azul S.A. de C.V.BO.Paz Barahona3 Ave.11 Calle S.OSan Pedro Sula, HondurasTEL: (504) 553-2029MARTINIQUEMusique & SonZ.I.Les Mangle97232 Le <strong>La</strong>mantinMartinique F.W.I.TEL: 596 596 426860Gigamusic SARL10 Rte De <strong>La</strong> Folie97200 Fort De FranceMartinique F.W.I.TEL: 596 596 715222MEXICOCasa Veerkamp, s.a. de c.v.Av. Toluca No. 323, Col. Olivarde los Padres 01780 MexicoD.F. MEXICOTEL: (55) 5668-6699NICARAGUABansbach InstrumentosMusicales NicaraguaAltamira D'Este Calle Principalde la Farmacia 5ta.Avenida1 Cuadra al <strong>La</strong>go.#503Managua, NicaraguaTEL: (505)277-2557PANAMASUPRO MUNDIAL, S.A.Boulevard Andrews, Albrook,Panama City, REP. DEPANAMATEL: 315-0101PARAGUAYDistribuidora DeInstrumentos MusicalesJ.E. Olear y ESQ. ManduviraAsuncion PARAGUAYTEL: (595) 21 492147PERUAudionetDistribuciones Musicales SACJuan Fanning 530MirafloresLima - PeruTEL: (511) 4461388TRINIDADAMR LtdGround FloorMaritime PlazaBarataria Trinidad W.I.TEL: (868)638 6385URUGUAYTodo Musica S.A.Francisco Acuna de Figueroa1771C.P.: 11.800Montevideo, URUGUAYTEL: (02) 924-2335VENEZUELAInstrumentos MusicalesAllegro,C.A.Av.las industrias edf.Guitarimport#7 zona Industrial de TurumoCaracas, VenezuelaTEL: (212) 244-1122EUROPEAUSTRIARoland ElektronischeMusikinstrumente HmbH.Austrian OfficeEduard-Bodem-Gasse 8,A-6020 Innsbruck, AUSTRIATEL: (0512) 26 44 260BELGIUM/FRANCE/HOLLAND/LUXEMBOURGRoland Central Europe N.V.Houtstraat 3, B-2260, Oevel(Westerlo) BELGIUMTEL: (014) 575811CZECH REP.K-AUDIOKardasovska 626.CZ-198 00 Praha 9,CZECH REP.TEL: (2) 666 10529DENMARKRoland Scandinavia A/SNordhavnsvej 7, Postbox 880,DK-2100 CopenhagenDENMARKTEL: 3916 6200FINLANDRoland Scandinavia As, FilialFinlandElannontie 5FIN-01510 Vantaa, FINLANDTEL: (0)9 68 24 020GERMANYRoland ElektronischeMusikinstrumente HmbH.Oststrasse 96, 22844Norderstedt, GERMANYTEL: (040) 52 60090GREECESTOLLAS S.A.Music Sound Light155, New National RoadPatras 26442, GREECETEL: 2610 435400HUNGARYRoland East Europe Ltd.Warehouse Area ‘DEPO’ Pf.83H-2046 Torokbalint,HUNGARYTEL: (23) 511011IRELANDRoland IrelandG2 Calmount Park, CalmountAvenue, Dublin 12Republic of IRELANDTEL: (01) 4294444ITALYRoland Italy S. p. A.Viale delle Industrie 8,20020 Arese, Milano, ITALYTEL: (02) 937-78300NORWAYRoland Scandinavia Avd.Kontor NorgeLilleakerveien 2 Postboks 95Lilleaker N-0216 OsloNORWAYTEL: 2273 0074POLANDMX MUSIC SP.Z.O.O.UL. Gibraltarska 4.PL-03664 Warszawa POLANDTEL: (022) 679 44 19PORTUGALRoland Iberia, S.L.Portugal OfficeCais das Pedras, 8/9-1 Dto4050-465, Porto, PORTUGALTEL: 22 608 00 60ROMANIAFBS LINESPiata Libertatii 1,535500 Gheorgheni,ROMANIATEL: (266) 364 609RUSSIAMuTek3-Bogatyrskaya Str. 1.k.l107 564 Moscow, RUSSIATEL: (095) 169 5043SPAINRoland Iberia, S.L.Paseo García Faria, 33-3508005 Barcelona SPAINTEL: 93 493 91 00SWEDENRoland Scandinavia A/SSWEDISH SALES OFFICEDanvik Center 28, 2 tr.S-131 30 Nacka SWEDENTEL: (0)8 702 00 20SWITZERLANDRoland (Switzerland) AG<strong>La</strong>ndstrasse 5, Postfach,CH-4452 Itingen,SWITZERLANDTEL: (061) 927-8383UKRAINETIC-TACMira Str. 19/108P.O. Box 180295400 Munkachevo,UKRAINETEL: (03131) 414-40UNITED KINGDOMRoland (U.K.) Ltd.Atlantic Close, SwanseaEnterprise Park, SWANSEASA7 9FJ,UNITED KINGDOMTEL: (01792) 702701MIDDLE EASTBAHRAINMoon StoresNo.16, Bab Al Bahrain Avenue,P.O.Box 247, Manama 304,State of BAHRAINTEL: 17 211 005CYPRUSRadex Sound Equipment Ltd.17, Diagorou Street, Nicosia,CYPRUSTEL: (022) 66-9426IRANMOCO INC.No.41 Nike St., Dr.Shariyati Ave.,Roberoye Cerahe MirdamadTehran, IRANTEL: (021) 285-4169ISRAELHalilit P. Greenspoon & SonsLtd.8 Retzif Ha'aliya Hashnya St.Tel-Aviv-Yafo ISRAELTEL: (03) 6823666JORDANAMMAN Trading Agency245 Prince Mohammad St.,Amman 1118, JORDANTEL: (06) 464-1200KUWAITEASA HUSAIN AL-YOUSIFI& SONS CO.Abdullah Salem Street,Safat, KUWAITTEL: 243-6399LEBANONChahine S.A.L.Gerge Zeidan St., ChahineBldg., Achrafieh, P.O.Box: 16-5857Beirut, LEBANONTEL: (01) 20-1441OMANTALENTZ CENTRE L.L.C.P.O. BOX 37, MUSCAT,POSTAL CODE 113TEL: 931-3705QATARAl Emadi Co. (Badie Studio &Stores)P.O. Box 62, Doha, QATARTEL: 4423-554SAUDI ARABIAaDawliah UniversalElectronics APLCorniche Road, AldossaryBldg., 1st Floor, Alkhobar,SAUDI ARABIAP.O.Box 2154, Alkhobar 31952SAUDI ARABIATEL: (03) 898 2081SYRIATechnical Light & SoundCenterRawda, Abdul Qader Jazairi St.Bldg. No. 21, P.O.BOX 13520,Damascus, SYRIATEL: (011) 223-5384TURKEYAnt Muzik Aletleri Ithalat VeIhracat Ltd StiSiraselviler Cad<strong>des</strong>iSiraselviler Pasaji No:74/20Taksim - Istanbul, TURKEYTEL: (0212) 2449624U.A.E.Zak Electronics & MusicalInstruments Co. L.L.C.Zabeel Road, Al Sherooq Bldg.,No. 14, Grand Floor, Dubai,U.A.E.TEL: (04) 3360715NORTH AMERICACANADARoland Canada Music Ltd.(Head Office)5480 Parkwood WayRichmond B. C., V6V 2M4CANADATEL: (604) 270 6626Roland Canada Music Ltd.(Toronto Office)170 Admiral BoulevardMississauga On L5T 2N6CANADATEL: (905) 362 9707U. S. A.Roland Corporation U.S.5100 S. Eastern AvenueLos Angeles, CA 90040-2938,U. S. A.TEL: (323) 890 3700As of January 15, 2005 (ROLAND)Printed on 70% Recycled Paper03895178 ’05-6-2N