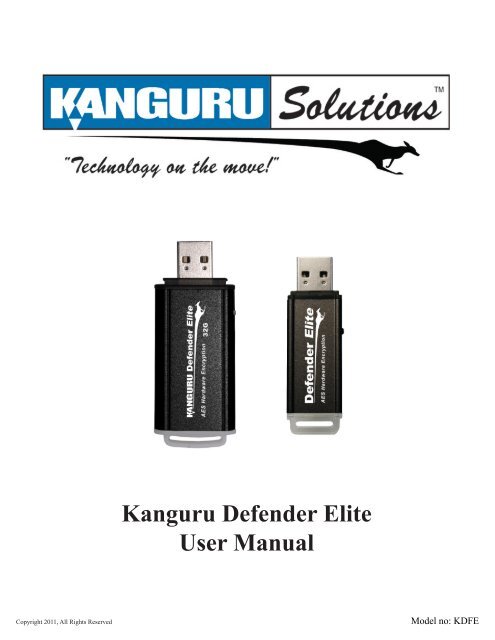
Kanguru Defender Elite User Manual - Warranty Life
Kanguru Defender Elite User Manual - Warranty Life
Kanguru Defender Elite User Manual - Warranty Life
Create successful ePaper yourself
Turn your PDF publications into a flip-book with our unique Google optimized e-Paper software.
Notices and InformationNOTICES AND INFORMATIONPlease be aware of the following points before using your <strong>Kanguru</strong> <strong>Defender</strong>Copyright © 2011 <strong>Kanguru</strong> Solutions. All rights reserved.Windows 2000®, Windows ME®, Windows XP®, Windows Vista®, and Windows 7® are registeredtrademarks of Microsoft Inc. All other brands or product names are trademarks of their respectivecompanies or organizations.<strong>Kanguru</strong> Solutions will not be held responsible for any illegal use of this product nor any losses incurredwhile using this product. The user is solely responsible for the copyright laws, and is fully responsiblefor any illegal actions taken.Customer ServiceTo obtain service or technical support for your system, please contact <strong>Kanguru</strong> Solutions TechnicalSupport Department at 508-376-4245, or visit www.<strong>Kanguru</strong>.com for web support.Legal noticeIn no event shall <strong>Kanguru</strong> Solutions’ liability exceed the price paid for the product from direct, indirect,special, incidental, or consequential software, or its documentation. <strong>Kanguru</strong> Solutions offers no refundsfor its products. <strong>Kanguru</strong> Solutions makes no warranty or representation, expressed, implied, or statutory,with respect to its products or the contents or use of this documentation and all accompanying software,and specifically disclaims its quality, performance, merchantability, or fitness for any particular purpose.<strong>Kanguru</strong> Solutions reserves the right to revise or update its products, software, or documentation withoutobligation to notify any individual or entity.Export Law ComplianceRegardless of any disclosure made to <strong>Kanguru</strong> Solutions pertaining to the ultimate destination of thespecific <strong>Kanguru</strong> product, you warrant that you will not export, directly or indirectly, any <strong>Kanguru</strong>product without first obtaining the approval of <strong>Kanguru</strong> Solutions and the appropriate export license fromthe Department of Commerce or other agency of the United States Government. <strong>Kanguru</strong> Solutions hasa wide range of products and each product family has different license requirements relative to exports.Defragmenting Flash Memory WarningDo not attempt to defragment your <strong>Kanguru</strong> <strong>Defender</strong> Flash Drive. Flash memory does not need tobe defragmented and does not gain any performance by doing so. Defragmenting your flash drive canactually degrade the flash memory which may reduce the drive’s total capacity and lifespan.2
Table of ContentsTable of Contents1. Introduction............................................................................................51.1 Package Contents............................................................................................51.2 <strong>Kanguru</strong> <strong>Defender</strong> <strong>Elite</strong> Models....................................................................51.3 System Requirements......................................................................................51.4 Features............................................................................................................61.5 Technical Specifications..................................................................................72. <strong>Kanguru</strong> <strong>Defender</strong> Manager <strong>Elite</strong>........................................................82.1 Running KDM<strong>Elite</strong> ........................................................................................82.1.1 Running KDM<strong>Elite</strong> on Windows............................................................................. 82.1.2 Running KDM<strong>Elite</strong> on Mac OS X......................................................................... 102.1.3 Running KDM<strong>Elite</strong> on Linux Ubuntu................................................................... 112.1.4 Running KDM<strong>Elite</strong> on Red Hat Enterprise Linux 5........................................... 122.2 The Setup Wizard..........................................................................................132.2.1 Selecting a Setup Language.................................................................................... 132.2.2 Activating On-board Antivirus Protection (Windows only)................................ 142.2.3 Setting a Password................................................................................................... 152.2.4 KRMC Cloud........................................................................................................... 162.2.5 Contact Info............................................................................................................. 172.2.6 Resetting the Device through the Setup Wizard................................................... 182.3 Unlocking the Security Partition..................................................................192.3.1 Resetting from the Login Screen............................................................................ 202.4 Using the Virtual Keyboard to Enter Your Password................................212.5 Encrypting Files and Folders.......................................................................222.6 On-board Antivirus (Windows only)...........................................................232.6.1 Device Scan............................................................................................................... 242.6.2 Path Scan.................................................................................................................. 252.6.3 File Scan................................................................................................................... 262.7 Changing Your Password..............................................................................272.8 KRMC Cloud Settings .................................................................................282.9 Changing Languages.....................................................................................293
Attention Windows 7 <strong>User</strong>sAttention Windows 7 <strong>User</strong>sWindows 7 users may not see the removable disk partition until you have logged into KDM<strong>Elite</strong> (seesection 2.3 Unlocking the Security Partition on page 19 for more information). This is normal.If you are running Windows 7 and for any reason need to see the removable disk before you log intoKDM<strong>Elite</strong>, you will need to configure Windows in the following manner:Note: This is user preference only. There is no need to configure Windows in order to use your <strong>Defender</strong>.1. From My Computer, click on the Organize tab and then select Folder and search options.2. The Folder Options window appears. Scroll down to the option for Hidden Files and Folders andselect Show hidden files, folders, and drives.3. Click on the OK button to finish configuring Windows. The removable disk is now visible beforeyou log into KDM<strong>Elite</strong>.9
Running KDM<strong>Elite</strong> on Mac OS X2.1.2 Running KDM<strong>Elite</strong> on Mac OS XTo run KDM<strong>Elite</strong> from Mac OS X, connect your <strong>Defender</strong> <strong>Elite</strong> to your computer through a USB port. ACD icon named ‘KDM<strong>Elite</strong>’ will appear on the desktop. Double click on the KDM<strong>Elite</strong> icon to open it.In the window that opens, double-click on the KDM<strong>Elite</strong>.app file to launch the KDM<strong>Elite</strong> application.If it is your first time running KDM<strong>Elite</strong> you will need to complete the setup wizard in order to set yoursecurity password (see section 2.2 The Setup Wizard on page 13). If you have already setup your securitypassword, you will be prompted to login (see section 2.3 Unlocking the Security Partition on page 19)Caution! The KDM<strong>Elite</strong>.app file needs to remain on your <strong>Defender</strong> <strong>Elite</strong>’s CD-ROM partition at alltimes. Always run the application from the <strong>Defender</strong> <strong>Elite</strong>’s CD-ROM partition. Do not try to copyKDM<strong>Elite</strong> or run KDM<strong>Elite</strong> from your computer’s hard drive.10
Running KDM<strong>Elite</strong> on Linux Ubuntu2.1.3 Running KDM<strong>Elite</strong> on Linux UbuntuTo run KDM<strong>Elite</strong> from a Linux Ubuntu operating system, connect your <strong>Defender</strong> <strong>Elite</strong> to your computerthrough a USB port. A ‘KDM<strong>Elite</strong>’ icon will appear on the desktop. Double click on the KDM<strong>Elite</strong> iconto open it.In the window that opens, double-click on the KDM<strong>Elite</strong> file to launch the KDM<strong>Elite</strong> application.If it is your first time running KDM<strong>Elite</strong> you will need to complete the setup wizard in order to set yoursecurity password (see section 2.2 The Setup Wizard on page 13). If you have already setup your securitypassword, you will be prompted to login (see section 2.3 Unlocking the Security Partition on page 19)Caution! The KDM<strong>Elite</strong> file needs to remain on your <strong>Defender</strong> <strong>Elite</strong>’s CD-ROM partition at all times.Always run the application from the <strong>Defender</strong> <strong>Elite</strong>’s CD-ROM partition. Do not try to copy KDM<strong>Elite</strong>or run KDM<strong>Elite</strong> from your computer’s hard drive.11
Running KDM<strong>Elite</strong> on Red Hat Enterprise Linux 52.1.4 Running KDM<strong>Elite</strong> on Red Hat Enterprise Linux 5Note: You must have Super <strong>User</strong> or Root privileges in order to run KDM<strong>Elite</strong> on Red Hat EnterpriseLinux 5.To run KDM<strong>Elite</strong> from the Red Hat Enterprise Linux 5 operating system, connect your <strong>Defender</strong> <strong>Elite</strong>to your computer through a USB port. A CD icon named ‘KDM<strong>Elite</strong>’ will appear on the desktop. If theKDM<strong>Elite</strong> window doesn’t open automatically, double click on the KDM<strong>Elite</strong> icon to open it.From the window that opens, copy the kdme_exec.sh shell script file to a location on your computer’slocal hard drive.Once the kdme_exec.sh shell script has been copied to a local hard drive, you can execute KDM<strong>Elite</strong>through the Terminal:1. Open the Terminal window by clicking on Applications → Accessories → Terminal. The Terminallocation may be different depending on which version of Red Hat you are running.2. From the Terminal, navigate to the directory where you copied the kdme_exec.sh shell script fileto.3. Type, “chmod 007 kdme_exec.sh” to allow full execute permission.4. Type, “./kdme_exec.sh” to execute the shell script.If it is your first time running KDM<strong>Elite</strong> you will need to complete the setup wizard in order to set yoursecurity password (see section 2.2 The Setup Wizard on page 13). If you have already setup your securitypassword, you will be prompted to login (see section 2.3 Unlocking the Security Partition on page 19)12
The Setup Wizard / Selecting a Setup Language2.2 The Setup WizardWhen you start KDM<strong>Elite</strong> for the first time you will be greeted by the Setup Wizard. Follow the SetupWizard instructions to create a security password for your <strong>Defender</strong> <strong>Elite</strong>’s secure, encrypted partition.Note: Before you can setup your <strong>Defender</strong> <strong>Elite</strong>’s password, the manual write protect switch must be setto the unlock position.Caution! Once the Setup Wizard has started, you should not disconnect your <strong>Defender</strong> <strong>Elite</strong> withouteither first completing the Setup Wizard or closing the Setup Wizard by clicking on the X button.2.2.1 Selecting a Setup LanguageThe default language for the Setup Wizard is set to English. To run the Setup Wizard in a differentlanguage:1. From the Welcome screen, click on the icon next to the Language Menu.2. A list of available languages will appear in a drop down menu. Select your desired language fromthe drop down menu. The Setup Wizard will switch to the new language.3. Click on the Next button to continue to the next step.13
Activating On-board Antivirus Protection2.2.2 Activating On-board Antivirus Protection (Windows only)Note: This section does not apply if you are running the Setup Wizard in Linux or Mac OS X. This sectiondoes not apply to Enterprise Edition users. Antivirus for Enterprise Edition is activated through <strong>Kanguru</strong>Remote Management Console (KRMC). Enterprise Edition users, please contact your administrator.KDM<strong>Elite</strong> will automatically check if your device has a valid antivirus license key.Note: Your <strong>Defender</strong> <strong>Elite</strong> will need to be connected to a computer with internet access in order toregister for on-board antivirus protection.If your <strong>Defender</strong> <strong>Elite</strong> does not already have a valid antivirus license key, then you must fill out thefollowing registration form with the required information and then click on the Apply button in order toactivate your one (1) year of free antivirus protection.Click on the Skip button if you do not wish to activate antivirus protection. If you decide to skip activatingyour antivirus now, you will not be able to activate it in the future without first resetting your drive tothe factory default setting.Click on the Next button to continue with setting up your <strong>Defender</strong> <strong>Elite</strong>’s security password.14
Setting a Password2.2.3 Setting a PasswordFrom the Set Password screen:1. Enter your password in the Password data field. You can enter your password using KDM<strong>Elite</strong>’sVirtual Keyboard by clicking the VK button. For more information on using the Virtual Keyboardsee section 2.4 Using the Virtual Keyboard to Enter Your Password on page 21.Note: For security reasons, it is recommended that you incorporate letters, numbers and symbolsto achieve maximum security.2. Enter the same password in the Confirm Password field for verification. If your passwords do notmatch or there is any other issue with the password which you have entered in the Set Passwordsection, an explanation will be visible in the Password Info window.Note: The Password Info window will inform you if there are any password requirements. Itupdates in real time. Disregard the messages in the Password Info box until you have finishedentering your password into both the Password and Confirm Password fields.3. Click on the Apply button to set your password. Once the password has been set you will see thefollowing message in the Password Info box:4. Click the Next button and KDM<strong>Elite</strong> will automatically configure the security parameters.Note: If you are managing your <strong>Defender</strong> <strong>Elite</strong> with an administrative program like KLA or KRMC, youcan set a Master Password which can be used to reset the user password if it is lost or forgotten.15
KRMC Cloud2.2.4 KRMC CloudNote: This section does not apply to Enterprise Edition users.<strong>Kanguru</strong> <strong>Defender</strong> drives can be remotely managed using the <strong>Kanguru</strong> Remote Management Console(KRMC). KRMC Cloud is hosted on <strong>Kanguru</strong>’s server and can be enabled on any non-Enterprise<strong>Defender</strong> drive.To Enable KRMC Cloud functionality:1. Select the Enable KRMC Cloud option and then click on the Apply button.2. A dialog box will appear asking if you want to register your device with KRMC Cloud. Click onthe Yes button.3. Your web browser will open and direct you to the KRMC Cloud login page.4. Purchase a license for your drive in order to use it with KRMC Cloud.If you choose not to remotely manage your <strong>Defender</strong> using KRMC Cloud, select the Disable KRMCCloud option and then click on the Apply button. You will not be able to enable KRMC Cloudfunctionality again, unless you reset your drive to the factory default.Click on the Next button to continue setting up your drive.16
Resetting from the Setup Wizard2.2.6 Resetting the Device through the Setup WizardIf you experience any problems during the Setup Wizard, you may have to perform a device reset beforeyou can complete the setup process.To perform a device reset while in the Setup Wizard:1. From anywhere in the Setup Wizard, click on the Prev button until you return to the WelcomeScreen.2. On the Welcome Screen you will see a Reset button in the lower-left side of the application window.Click on the Reset button.3. A dialog box appears asking you to confirm the reset. Click on Yes to reset your device to thefactory default settings.After the device has been reset to the factory default setting you will be required to restart the SetupWizard.18
Unlocking the Security Partition2.3 Unlocking the Security PartitionNote: You must complete the Setup Wizard before you can log into KDM<strong>Elite</strong>. If you have not alreadycompleted the Setup Wizard, please refer to section 2.2 The Setup Wizard on page 13 for more informationon completing the Setup Wizard.Anytime you run KDM<strong>Elite</strong>, you will be asked to login using your security password. You need toprovide the correct security password in order to access the <strong>Defender</strong> <strong>Elite</strong>’s secure partition.When the login screen appears:1. Enter your password in the Password field.2. Click on the Login button.Once you have successfully logged in to KDM<strong>Elite</strong>, the <strong>Defender</strong> <strong>Elite</strong>’s secure partition will beaccessible through My Computer or Windows Explorer. For more information on accessing the securepartition, see section 2.5 Encrypting Files and Folders on page 22.To cancel the login process, click on the Cancel button. Unplugging and then reinserting your <strong>Defender</strong><strong>Elite</strong> or manually running KDM<strong>Elite</strong>.exe will bring the login window back.Note: You can use the virtual keyboard when entering your password to prevent any key loggingapplications from recording your key strokes. For more information on the virtual keyboard, see section2.4 Using the Virtual Keyboard to Enter Your Password on page 21.Caution! If you enter your password incorrectly seven times in a row (seven is the default setting, maybe different depending on your setup), for security purposes, any data stored on the secure partition willautomatically be erased. You will be issued an on-screen warning when you have one attempt remaining,to prevent accidental erasure.Caution! Once KDM<strong>Elite</strong> has started, you should never disconnect your device without first closingKDM<strong>Elite</strong> properly by clicking the KDM<strong>Elite</strong> task bar icon and selecting Unmount <strong>Kanguru</strong> <strong>Defender</strong>as described in section 2.12 Unmounting Your <strong>Defender</strong> <strong>Elite</strong> on page 31.19
Resetting from the Login Screen2.3.1 Resetting from the Login ScreenIn the event you have forgotten your password, you can use the Reset to Factory Default function to resetyour password. This function will restore the device to the factory settings, erasing all saved passwordsand data residing on the device’s secure partition.Caution! Using the Reset to Factory Default function will format and wipe all data off the device! Alldata on the device will be lost!To reset your <strong>Defender</strong> <strong>Elite</strong> to the factory default:1. Start KDM<strong>Elite</strong>.2. When the login screen appears, click on the Reset button.3. When you are prompted to confirm the reset, click on the Yes button.4. When your password and data stored on the secure partition have been erased, the followingmessage will appear. Click on the OK button to complete the reset.The next time you run KDM<strong>Elite</strong>, you will have to complete the Setup Wizard again before you areable to access the secure partition. Please see section 2.2 The Setup Wizard on page 13 for instructions oncompleting the Setup Wizard.20
Using the Virtual Keyboard to Enter Your Password2.4 Using the Virtual Keyboard to Enter Your PasswordThe virtual keyboard feature can be accessed anytime you are required to enter your password in orderto prevent any key logging applications from recording your key strokes and potentially stealing yourpassword.To use the virtual keyboard to enter your password:1. Click on VK button which is located near the password entry field.2. The virtual keyboard will appear below the Setup Wizard window. Click on the keys on the virtualkeyboard to enter your password.3. Click on the VK button again to close the virtual keyboard.Note: You can click on the Shuffle key on the bottom right corner of the virtual keyboard to randomizethe virtual keyboard layout. Randomizing the keyboard layout protects your password from mousetracking programs designed to thwart virtual keyboards.21
Encrypting Files and Folders2.5 Encrypting Files and FoldersA key feature of the <strong>Defender</strong> <strong>Elite</strong> is drag & drop encryption; allowing you to simply drag files that youwant encrypt directly onto the drive. The <strong>Defender</strong> <strong>Elite</strong> automatically encrypts these files as they aretransferred to the secure partition, ensuring that your data stays safe and private.To open the secure partition:1. Start KDM<strong>Elite</strong>.2. Login to KDM<strong>Elite</strong> to gain access to the secure partition.3. Click on the KDM<strong>Elite</strong> icon located in the task bar and then select Explore Security Drivefrom the popup menu.Note: Linux users must right-click on the KDM<strong>Elite</strong> icon in the task bar.We recommend using either the drag & drop action, right-click copy/paste action, or the shortcut keys(Ctrl+C and Ctrl+V) to copy and paste files and folders directly to and from the secure partition.Note: Data saved on the <strong>Defender</strong> <strong>Elite</strong>’s secure partition are only accessible after you have successfullylogged into KDM<strong>Elite</strong>.22
On-board Antivirus2.6 On-board Antivirus (Windows only)You must register your device with <strong>Kanguru</strong> Solutions in order to take advantage of the <strong>Defender</strong> <strong>Elite</strong>’son-board antivirus functions (see section 2.2.2 Activating On-board Antivirus Protection (Windows only)on page 14).Once your on-board antivirus has been activated, real-time virus scanning is automatically enabledwhenever you log into your device. All files copied to the <strong>Defender</strong> are scanned for viruses andmalware.Note: Updates for the latest the virus definitions are downloaded automatically when the device isconnected to a computer with internet access. If you disconnect your <strong>Defender</strong> before the latest updatehas finished downloading, the <strong>Defender</strong> will save your place and continue the download the next timeit is connected to a computer with internet access.Virus definitions are stored in the ‘System’ folder on the secure partition. If these files are deleted, theywill be automatically re-downloaded. If the device is reset to the factory default, these files will bedeleted and will need to be re-downloaded.Caution! Do not store any data in the ‘System’ folder. Any data saved here that does not pertain to virusdefinitions will be automatically deleted.The Onboard Antivirus consoleYou can access the on-board antivirus console to scan your device, a path or a file. To open the antivirusconsole:1. Right-click on the KDM<strong>Elite</strong> icon located in the task bar.2. Select Antivirus from the popup menu and then click on Configuration from the submenu.The antivirus console appears.23
Device Scan2.6.1 Device ScanThe antivirus console allows you to scan your <strong>Defender</strong> <strong>Elite</strong> for known viruses and malware.To scan your <strong>Defender</strong> <strong>Elite</strong>:1. Click on the Scan Device tab at the top of the antivirus console.2. Click on the Start Scan button to begin scanning your <strong>Defender</strong> <strong>Elite</strong>.3. Once the scan has started:○ ○ Click on the Pause Scan button to pause the scan process. Click on the Resume Scan button toresume the scan.○○Click on the Stop Scan button to cancel the scan process.4. The scan results will appear in the Scan Results window.5. Click on the View Scan Log button to view a log of the previous scan.6. Click on the OK button to close the antivirus console.24
Path Scan2.6.2 Path ScanThe antivirus console allows you to scan any path on your computer for known viruses and malware.Note: The Scan Path feature can be disabled on Enterprise Edition drives, please contact youradministrator for more information.To scan a path on your computer:1. Click on the Scan Path tab at the top of the antivirus console.2. Click on the Start Scan button and then select a path on your computer to begin scanning.3. Once the scan has started:○ ○ Click on the Pause Scan button to pause the scan process. Click on the Resume Scan button toresume the scan.○○Click on the Stop Scan button to cancel the scan process.4. The scan results will appear in the Scan Results window.5. Click on the View Scan Log button to view a log of the previous scan.6. Click on the OK button to close the antivirus console.25
File Scan2.6.3 File ScanThe antivirus console allows you to scan any file on your computer for known viruses and malware.Note: The Scan File feature can be disabled on Enterprise Edition drives, please contact your administratorfor more information.To scan a file:1. Click on the Scan File tab at the top of the antivirus console.2. Click on the Start Scan button and then select a file to begin scanning.3. Once the scan has started:○ ○ Click on the Pause Scan button to pause the scan process. Click on the Resume Scan button toresume the scan.○○Click on the Stop Scan button to cancel the scan process.4. The scan results will appear in the Scan Results window.5. Click on the Advanced Info button to view a log of the previous scan.6. Click on the OK button to close the antivirus console.26
Changing Your Password2.7 Changing Your PasswordYou can change your security password through the Security Settings.To change your password:1. Click on the KDM<strong>Elite</strong> icon located in the task bar and then select Security Settings… fromthe popup menu.Note: Linux users must right-click on the KDM<strong>Elite</strong> icon in the task bar.2. The Password Settings window opens. Enter your current password in the Old Password field.Enter your new password in the New Password field and then enter it again in the Confirm NewPassword field.3. When you are ready to proceed, click on the Apply button to set your new password.4. Once your new password has been set, a confirmation window appears informing you that yourpassword has been successfully changed. Click on the OK button to complete setting your newpassword.27
KRMC Cloud Settings2.8 KRMC Cloud SettingsNote: This section does not apply to Enterprise Edition users.You can enable or disable KRMC Cloud functionality through the Security Settings.To change your device’s KRMC functionality:1. Click on the KDM<strong>Elite</strong> icon located in the task bar and then select Security Settings… fromthe popup menu.Note: Linux users must right-click on the KDM<strong>Elite</strong> icon in the task bar.2. The Password Settings window opens. Click on the KRMC Cloud Settings tab at the top of thewindow to enter the KRMC Cloud Settings window.3. Enable or Disable KRMC Cloud by selecting the appropriate radio button and then click on theApply button.28
Changing Languages2.9 Changing LanguagesKDM<strong>Elite</strong> supports several languages. The KDM<strong>Elite</strong> language is set to English by default.To change the language:1. Right -click on the KDM<strong>Elite</strong> icon located in the task bar and then hover your cursor over theLanguage option in the popup menu. A list of available languages appears.2. Click on the desired language from the submenu that you want KDM<strong>Elite</strong> to be displayed in.29
Online Documentation / About KDM<strong>Elite</strong>2.10 Online DocumentationYou can download digital copies of the <strong>Kanguru</strong> <strong>Defender</strong> <strong>Elite</strong>’s documentation from the internet.To download your <strong>Defender</strong> <strong>Elite</strong>’s documentation, right-click on the KDM<strong>Elite</strong> iconthe task barlocated in• Click on Quick Start Guide to download a digital copy of the <strong>Defender</strong> <strong>Elite</strong>’s Quick Start Guide.• Click on <strong>Defender</strong> <strong>User</strong> <strong>Manual</strong> to download a digital copy of the <strong>Defender</strong> <strong>Elite</strong>’s <strong>User</strong> <strong>Manual</strong>2.11 About KDM<strong>Elite</strong>To view information regarding the version of KDM<strong>Elite</strong> currently installed on your device, right-clickon the KDM<strong>Elite</strong> iconlocated in the task bar and then select About.30
Unmounting Your <strong>Defender</strong> <strong>Elite</strong>2.12 Unmounting Your <strong>Defender</strong> <strong>Elite</strong>When you unmount your <strong>Defender</strong> <strong>Elite</strong>, the KDM<strong>Elite</strong> application will close and the secure partitioncontaining your encrypted data will be inaccessible until you log into KDM<strong>Elite</strong> again.To unmount your <strong>Defender</strong> <strong>Elite</strong>, right-click on the KDM<strong>Elite</strong> iconselect Unmount <strong>Kanguru</strong> <strong>Defender</strong>.located in the task bar and thenThe KDM<strong>Elite</strong> icon in the task bar will disappear and the <strong>Defender</strong> <strong>Elite</strong>’s secure partition will no longerbe accessible.Caution! Do not disconnect the <strong>Kanguru</strong> <strong>Defender</strong> <strong>Elite</strong> without first properly unmounting your deviceas detailed in this section and then safely removing the device from your computer as described inchapter 3. Safely Removing Your <strong>Kanguru</strong> <strong>Defender</strong> <strong>Elite</strong> on page 32. Doing so may result in file damageor data corruption.31
Safely Removing Your <strong>Kanguru</strong> <strong>Defender</strong> / Safely Removing From Windows3. Safely Removing Your <strong>Kanguru</strong> <strong>Defender</strong> <strong>Elite</strong>Before unplugging the <strong>Defender</strong> <strong>Elite</strong> from the USB port, you should always make sure that you haveunmounted the secured partition (see section 2.12 Unmounting Your <strong>Defender</strong> <strong>Elite</strong> on page 31). Afterthe <strong>Defender</strong> has been unmounted, you should use you operating systems method for safely removing aUSB device.3.1 Safely Removing from WindowsCaution! Be sure that the secure partition has been unmounted before attempting to remove the <strong>Defender</strong>drive. See section 2.12 Unmounting Your <strong>Defender</strong> <strong>Elite</strong> on page 31.Please use the Windows ‘Safely Remove Hardware’ function before disconnecting your <strong>Defender</strong> drive.To safely remove your <strong>Defender</strong> <strong>Elite</strong>:1. Click on the Safely Remove Hardware icon located in the task bar.Note: The icon may look different depending on which version of Windows you are running.Windows XP / 2000 Windows Vista / 72. A popup menu appears listing all USB devices connected to your computer. Select the <strong>Defender</strong><strong>Elite</strong> from the menu (it will appear with two drive letters).A message will appear indicating that the portable storage device can be safely removed. You can nowdisconnet your <strong>Defender</strong> <strong>Elite</strong>.If a message saying “The device cannot be stopped right now” appears, please make sure that anywindows or applications accessing the <strong>Defender</strong> <strong>Elite</strong> are closed and then try again.32
Safely Removing From Mac OS X / Safely Removing From Linux3.2 Safely Removing from Mac OS XCaution! Be sure that the secure partition has been unmounted before attempting to remove the <strong>Defender</strong>drive. See section 2.12 Unmounting Your <strong>Defender</strong> <strong>Elite</strong> on page 31.To remove the <strong>Defender</strong> drive, click and drag the KDM<strong>Elite</strong> icon from the desktop into the trash canicon. When you start dragging the KDM<strong>Elite</strong> icon, the trash can icon will turn into an eject icon.Alternatively, you can right-click on the KDM<strong>Elite</strong> icon from the desktop and then select ‘Eject’ fromthe pop-up menu.Once the KDM<strong>Elite</strong> icon no longer appears on your desktop then it is safe to disconnect your <strong>Defender</strong><strong>Elite</strong>.3.3 Safely Removing from LinuxCaution! Be sure that the secure partition has been unmounted before attempting to remove the <strong>Defender</strong>drive. See section 2.12 Unmounting Your <strong>Defender</strong> <strong>Elite</strong> on page 31.To remove the <strong>Defender</strong> drive, right-click the KDM<strong>Elite</strong> icon on the desktop and then click on Ejectfrom the popup menu. Once the KDM<strong>Elite</strong> icon no longer appears on your desktop then it is safe todisconnect your <strong>Defender</strong> <strong>Elite</strong>.33
<strong>Warranty</strong> Information / Tech Support4. <strong>Warranty</strong> InformationThis product carries a 3-year warranty from the date of purchase. <strong>Kanguru</strong> Solutions is not responsiblefor any damages incurred in the shipping process. Any claims for loss or damage must be made to thecarrier directly. Claims for shipping errors should be reported to <strong>Kanguru</strong> Solutions within three (3)working days or receipt of merchandise.5. Tech SupportIf you experience any problems using your <strong>Kanguru</strong> <strong>Defender</strong> <strong>Elite</strong> or have any technical questionsregarding any of our products, please call our technical support department. Our tech support is free andavailable Monday thru Friday, 9am to 5pm EST.Call 1-508-376-4245 orVisit our website at www.<strong>Kanguru</strong>.com34
Proxy SupportAppendix A - Proxy SupportIf your computer uses a proxy server to access the internet, the correct proxy information will need to beconfigured in KDM<strong>Elite</strong>.If the KDM<strong>Elite</strong> client application cannot connect to the internet you will see the following error message:If the computer that the <strong>Defender</strong> <strong>Elite</strong> is connected to uses a proxy server to access the internet, click onthe Yes button. KDM<strong>Elite</strong> will try to read the proxy server information from the computer’s configuration.• If KDM<strong>Elite</strong> is able to determine your proxy server’s address and no authentication is required thenKDM<strong>Elite</strong> will read this information and connect to the internet as normal.• If KDM<strong>Elite</strong> is able to determine your proxy server’s address but the proxy requires authenticationthen you will need to enter your credentials in the window that appears:If KDM<strong>Elite</strong> is able to connect to the proxy server using those credentials then the authenticationinformation is saved in an encrypted proxy settings file.35
Proxy Support• If KDM<strong>Elite</strong> is unable to determine your proxy server’s address then you will need to enter theproxy server address, proxy type and credentials:Enter the proxy address and the port to connect to in the address field (e.g. 192.168.0.193:8080 orproxycomp:8080). Select your proxy type and then enter your credentials. If KDM<strong>Elite</strong> is able toconnect to the proxy server using this information then the proxy information and the authenticationinformation is saved in an encrypted proxy settings file.36
<strong>Kanguru</strong> Solutions1360 Main StreetMillis, MA 02054www.kanguru.com04.07.11 V 2.1 © 2011 <strong>Kanguru</strong> SolutionsLegal terms and conditions available at www.kanguru.com. Please review and agree before use. Thank you.


