Download
Download
Download
- No tags were found...

You also want an ePaper? Increase the reach of your titles
YUMPU automatically turns print PDFs into web optimized ePapers that Google loves.
Linksys E1550ContentsHow to control access to your wireless network 30How to improve security using the built-in firewall 31How to configure storage 32How to create shared folders 32How to manage group and user access to shared folders 33How to create a group 33How to create a new user 34How to grant group access to a share 35How to configure your router’s storage for remote access 36How to configure the FTP server 36How to share folders and set access rights 37How to access files remotely 38Port Forwarding and Port TriggeringHow to set up port forwarding 39How to set up port forwarding for a single port 39How to set up port forwarding for multiple ports 40How to set up port forwarding for a range of ports 40How to set up port range triggering for online gaming 41How to configure your Xbox for online gaming 42Maintaining and MonitoringHow to back up and restore your router configuration 43How to restore factory defaults 43How to upgrade the router’s firmware 44How to check the status of your router 45How to disable the Ethernet port status lights 47How to test your Internet connection 48How to configure and use logs 49SpecificationsLinksys E1550 50Browser-based Utility Menu StructureLinksys E1550 51ii
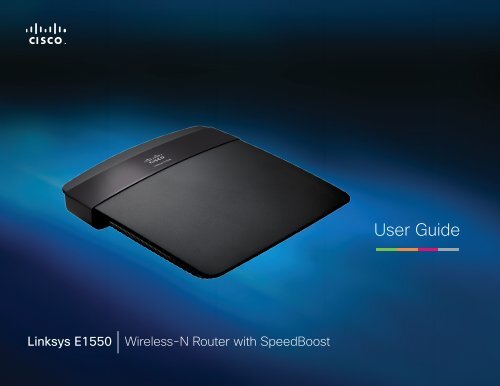
Linksys E1550Product overviewProduct overviewPackage contentsIn addition to your router, your router package includes:••Network (Ethernet) cable••AC power adapter••Setup CD containing router setup software and documentationFeaturesWireless-N technologyBuilt with leading 802.11n wireless technology, your router offers maximumspeed and range to create an ultra-powerful network designed for hometheater performance. Connect your computers, Internet-ready TVs, gameconsoles, smartphones and other Wi-Fi devices at blazingly fast transfer ratesfor an unrivaled experience.SpeedBoostHigher quality antenna technology helps maintain high speeds across greaterdistances throughout your home.State-of-the-art securityKeep Wi-Fi freeloaders and Internet threats at bay with WPA/WPA2 encryption.An SPI firewall helps keep your network protected.Benefits of Fast EthernetUse the four Fast Ethernet (10/100) ports for quick file sharing betweencomputers and servers.Built-in USB portThe USB storage port lets you add an external USB drive to your network andshare files at home or over the Internet.Home network readyConnect computers, printers, and more to your wireless network and theInternet. QoS traffic prioritization technology delivers maximum speed andperformance so you can enjoy fast downloads and reliable gaming.Easy to manageCisco Connect software helps you customize your settings and quickly addmultiple devices to your network:Separate guest networkCreate a separate, secure, password-protected network for guests.Parental controlsLimit access time and websites with parental controls.1
Linksys E1550Product overviewBack viewPort activity indicatorGreen network activity indicatorUSB portEthernet portsInternet portWi-Fi Protected Setup buttonPower portPower indicator••USB port— To easily share disk storage with other users on your networkor on the Internet, connect a USB drive to this port. For more information,see “Using an External Drive” on page 32.••Ethernet ports—Connect Ethernet cables (also called network cables)to these Fast Ethernet (10/100) ports, color coded blue, and to otherwired Ethernet network devices on your network.••Internet port—Connect an Ethernet cable (also called a network orInternet cable) to this port, color coded yellow, and to your modem.Wi-Fi Protected Setup button—Press this button to easily configurewireless security on Wi-Fi Protected Setup-enabled network devices.For more information, see “How to set up wireless security using Wi‐FiProtected Setup” on page 28.••Power indicator—Stays on steadily while power is connected andfollowing a successful Wi-Fi Protected Setup connection. Flashes slowlyduring bootup, during firmware upgrades, and during a Wi‐Fi ProtectedSetup connection. Flashes quickly when there is a Wi‐Fi Protected Setuperror.••Power—Connect the included AC power adapter to this port.CAUTIONUse only the adapter that came with your router.Network and Internet port••Green activity indicator—On Ethernet ports, stays on when a cableconnects the port to another Ethernet port. On the Internet port, stayson while connected to a modem. On both port types, it flashes whiletransferring data.Bottom view• • Reset button—Press and hold this button for 5-10 seconds (until theport lights flash at the same time) to reset the router to its factory defaults.You can also restore the defaults using the browser-based utility. Formore information, see “How to restore factory defaults” on page 43.2
Linksys E1550Setting Up: BasicsSetting Up: BasicsHow to create a home networkWhat is a network?A network is any group of devices that can communicate with each other. Ahome network can also include Internet access, which requires a router likethis one.A typical home network may include multiple computers, a printer, a modem,and a router. A large home network may also have a switch, additional routers,access points, and many Internet-capable media devices such as TVs, gameconsoles, and web cameras.••Modem—Connects a computer or a router to your ISP (Internet ServiceProvider).••Router—Connects your wireless and wired network devices to eachother and to the modem (and to your ISP).••Switch—Allows you to connect several wired network devices to yourhome network. Your router has a built-in network switch (the Ethernetports). If you have more wired network devices than available Ethernetports on your router, you will need an additional switch to consolidatethe wired connections.How to set up a home network1. Purchase the proper equipment. For a network that includes Internetaccess, you’ll need:••Computers with an Ethernet port or wireless networking capabilities••A modem for connecting to your ISP (typically supplied by your ISP)••A router to connect your computers with each other and to the modem2. Make sure that your modem is working. Your ISP can help you set up yourmodem and verify that it’s working correctly.3. Set up your router. See “How to set up your router” on page 3.4. To connect a computer or other network device to the network, see “Howto connect a computer to your network” on page 6 and “How to connectother devices” on page 8.Where to find more helpIn addition to this User Guide, you can find help at these locations:••Linksys.com/support (documentation, downloads, FAQs, technicalsupport, live chat, forums)••Setup CD (Troubleshooting Guide, legal and regulatory notices)••Cisco Connect help (run Cisco Connect, then click Learn More whereavailable)••Browser-based utility context-sensitive help (open the utility, then clickHelp in the right-side column.)How to set up your routerThe easiest and fastest way to set up your router is to run the Cisco Connectsetup software. You can find Cisco Connect on the CD that came with yourrouter or download it from the router’s support site at Linksys.com/support.Cisco Connect shows you how to connect your router to your home network,step by step. To get started, see “How to start Cisco Connect” below.If you are an advanced user, you can set up your router manually using thebrowser-based utility. To get started, see “How to open the browser-basedutility” on page 14.••Internet service to your home, provided by an ISP (Internet ServiceProvider)3
Linksys E1550Setting Up: BasicsHow to start Cisco ConnectWhen you run the setup CD, Cisco Connect (your router’s setup software) isautomatically installed onto your computer. You can then use Cisco Connectto easily manage your router. To install Cisco Connect on another computerafter your router has been set up, see “How to install Cisco Connect on anothercomputer” on page 5.NOTES:Your Cisco Connect CD works with only this router model.If you lose your setup CD, you can download the software fromLinksys.com/support.To start Cisco Connect on a Windows computer:1. Click Start, All Programs, then click Cisco Connect. The Cisco Connectmain menu opens.To start Cisco Connect on a Mac OS X computer:1. Open the Applications folder, then double-click the Cisco Connecticon. The Cisco Connect main menu opens.To start Cisco Connect for the first time:1. Insert the CD into your CD or DVD drive.2. Click Set up your Linksys Router.If you do not see this:••For Windows, click Start, Computer, then double-click the CD driveand the Setup icon.••For Mac, double-click the CD icon on your desktop, then double-clickthe Setup icon.3. Follow the on-screen instructions to complete your router setup. Whensetup has finished, Cisco Connect has also been installed onto your harddrive.After your router has been set up and Cisco Connect has been installed, youcan use Cisco Connect to easily manage many of your router’s settings.4
Linksys E1550Setting Up: BasicsHow to install Cisco Connect on another computerAlthough Cisco Connect is installed onto your computer when you run thesetup CD, you may want to manage your router from a different computer onyour network.CAUTIONAfter your router has been set up, do not run the setup CD to installCisco Connect to another computer. If you run the setup CD again,you will be prompted to enter the router’s network name (SSID)and password.To install Cisco Connect onto another computer:1. See “How to connect a computer using an Easy Setup Key” on page 6.When finished, Cisco Connect has also been installed onto the computer’shard drive.How to improve your wireless connectionspeedFollow these tips to improve your network’s wireless connection speed:••Make sure that your router is in a good location.••For the widest coverage area, install your router near the center of yourhome, and near the ceiling, if possible.••Avoid placing the router on or near metal objects (such as file cabinetsand metal furniture), reflective surfaces (such as glass or mirrors), ormasonry walls.••Any obstruction can weaken the wireless signal (even non-metallicobjects), so the fewer obstructions between the router and the wirelessdevice, the better.••Place the router in a location away from other electronics, motors, andfluorescent lighting.••Many environmental variables can affect the router’s performance, so ifyour wireless signal is weak, place the router in several locations and testthe signal strength to determine the ideal position.••If possible, upgrade wireless network interfaces (such as wirelessnetwork cards in computers) from older wireless standards to 802.11n. Ifa wirelessly networked device uses an older standard, the performanceof the entire wireless network may be slower.How to test your Internet connectionspeedTo test your Internet connection speed:1. Run Cisco Connect, then click Change under Router settings. The Routersettings screen opens.2. Click Launch Test under Internet Speed. The Internet speed test screenopens.3. Follow the on-screen instructions to complete the test.5
Linksys E1550Setting Up: BasicsHow to connect devices to your network2. Click Computer.How to connect a computer to your networkYou can connect a computer to your network using an Easy Setup Key (theeasiest way) or manually.How to connect a computer using an Easy Setup KeyTo use an Easy Setup Key, you first need to create one using any available USBdrive. After it has been created, you can use the same key to connect severalcomputers to your network.TIPThe Easy Setup Key stores network information (name, password,security type, and security key) so you don’t have to rememberthem.To create an Easy Setup Key:1. Run Cisco Connect, then click Add device under Computers and devices.The Computers and other devices screen opens.3. Select No, I don’t have an Easy Setup Key, then click Next.4. Insert a USB drive into an available USB port on your computer. This USBdrive will be your new Easy Setup Key.Cisco Connect detects the newly attached USB drive and copies therouter’s settings and a copy of Cisco Connect to it.5. When the files have finished copying, remove the Easy Setup Key fromyour computer. You can now use it to install Cisco Connect onto othercomputers and to connect them to the network.6. Click Close.6
Linksys E1550Setting Up: BasicsTo use your Easy Setup Key to connect a computer to your network:1. Run Cisco Connect, then click Add device under Computers and devices.The Computers and other devices screen opens.2. Click Computer.To manually connect a computer to your network:1. Run Cisco Connect, then click Add device under Computers and devices.The Computers and other devices screen opens.3. Select Yes, I have an Easy Setup Key, then click Next. The Connectinganother computer screen opens.4. Insert the Easy Setup Key into an available USB port on the computer thatyou want to connect to the network. The Connecting another computerscreen opens.If you do not see this, use Windows Explorer or Finder to view the EasySetup Key files, then double‐click Connect.5. Click Connect to your router, then follow the on-screen instructions.6. Return to the computer running Cisco Connect, then click Next.7. Enter a name for the newly connected computer, then click Finish.How to connect a computer manuallyTo connect a computer without using an Easy Setup Key, you will need to printor take note of some information.2. Click Computer.3. Select I want to connect manually using my wireless settings, thenclick Next. A screen opens that displays network information.4. Write down the Network name (SSID), Security Key, and Security Typeinformation, or click Print these settings if you have a printer attached.5. At the computer you want to connect, enter the network informationinto your wireless manager.6. After that computer connects to your network, return to the computerrunning Cisco Connect, then click Next.7. Click Connect to your Linksys router, then follow the on-screeninstructions.8. When you are prompted to enter a name for the newly connectedcomputer, enter the name, then click Finish.IMPORTANTWhen you manually connect a computer to the network, thecomputer will not have Cisco Connect installed on it.7
Linksys E1550Setting Up: BasicsHow to connect a printerWhen you install a printer that requires a cable, follow the printer’s instructionsfor setting it up, then follow your computer’s operating system instructions toshare the printer with your network.When you set up a wireless printer, however, it needs to communicate withyour router. Before you try to set up your wireless printer, make sure that:••Your printer has been completely set up except for being connected tothe network.••Your printer supports the WPA/WPA2 wireless encryption standard.••If your wireless printer supports WPS (Wi-Fi Protected Setup), you shoulduse WPS to connect it to your network. See “How to set up wirelesssecurity using Wi‐Fi Protected Setup” on page 28.To connect a wireless printer to your network:1. Run Cisco Connect, then click Add device under Computers and devices.The Computers and other devices screen opens.6. Return to the computer running Cisco Connect, then click Next. TheName your printer screen opens.7. Enter a name for the printer, then click Finish.8. Follow your computer operating system’s instructions for adding thenew printer to your list of available printers.How to connect other devicesMany other types of wireless network devices can connect to your homenetwork, including:••Game consoles••Internet-capable TVs and media players••Digital music players••Smart phonesBecause of the wide variety of devices and methods of connecting, you mustmanually enter network information into the devices for a successful networkconnection.To manually connect a device to your network:1. Run Cisco Connect, then click Add device under Computers and devices.The Computers and other devices screen opens.2. Click Wireless printer. A screen opens that displays network information.3. Write down the Network name (SSID), Security Key, and Security Typeinformation, or click Print these settings if you have a different printeralready connected.4. Follow your printer’s instructions for entering the wireless networkinformation into your printer.5. After the printer connects to your network, click Next in Cisco Connect.2. Click Other devices. A screen opens that displays network information.8
Linksys E1550Setting Up: Basics3. Write down the Network name (SSID), Security Key, and Security Typeinformation, or click Print these settings if you have a printer attached.How to set up parental controlsWith your router, you can use parental controls to:••Set the times that Internet access is allowed.••Block websites based on their content.••Block websites that you specify.••Set the above restrictions for specific computers.TIPWhen someone tries to open a blocked website, a window opensasking for the parental controls password. Enter the password toview the blocked content.4. Follow your device’s instructions for entering the wireless networkinformation into the device.5. After the device connects to your network, return to the computerrunning Cisco Connect, then click Next.6. Enter a name for device, then click Finish.For more instructions on connecting a game console to your network, see also:••“How to optimize your router for gaming and voice” on page 19••“How to set up port forwarding” on page 39••“How to set up port range triggering for online gaming” on page 41How to access parental controlsThe first time you try to access parental controls, you are asked to set a password.To access parental controls for the first time:1. Run Cisco Connect, then click Change under Parental controls. TheParental controls password screen opens.9
Linksys E1550Setting Up: Basics2. Enter a password (from 4 to 32 characters), then enter a secret questionand answer.••The password must contain from 4 to 32 valid characters, which areA-Z, a-z, and 0-9.To change the parental controls password:1. In the Parental controls main screen, click Change parental controlspassword, then follow the on-screen instructions.••The answer to the secret question should be something not easilyguessed by others. If you forget your password, you can reset it bycorrectly answering your secret question.3. To save your settings, click OK. The Parental controls main screen appears.To access parental controls after the first time:1. Run Cisco Connect, then click Change under Parental controls. TheEnter the parental controls password screen opens.2. Enter the parental control password, then click OK.NOTEIf you forgot the password, click I forgot my password and enterthe answer to your secret question.The Parental controls main screen appears.10
Linksys E1550Setting Up: BasicsHow to select the computers to have parentalcontrolsIt’s not necessary to set parental controls over each computer on your homenetwork. You can set the controls on only those computers that children canaccess.To select computers that will have parental controls:1. In the Parental controls main screen, click + (add) under the RestrictInternet access on box.How to set parental controls1. In the Parental controls main screen, click the computer name to setparental controls for.2. Under Block Internet access, specify when the computer’s Internet accesswill be blocked:••Never does not block Internet access.••Always blocks Internet access at all times.••Specific times blocks Internet access only during specific times. If youselect this option, set the schedule for School nights (Monday throughFriday) and Weekends (Saturday and Sunday).3. To create or change a list of specific websites to block, click Edit next toBlock specific sites. The Block these sites screen opens.2. Click the computer name, then click OK. The computer is added to thelist of computers with parental controls.3. To remove parental controls from a computer, click the computer namein the Restrict Internet access on box, then click – (remove).a. On a blank line, enter a website address that you want to block.b. Click Save to save the list and return to the Parental controls mainscreen.4. To save your changes, click Finish.5. Repeat the above steps for each computer that you want to set parentalcontrols for.11
Linksys E1550Setting Up: BasicsHow to set up guest access to yournetworkYou can use your router’s guest access feature to provide your guests withaccess to the Internet, while restricting their access to other resources onyour local network. The guest network is shown as an open, unsecure wirelessnetwork that your guests can easily connect to. To prevent unauthorized usersfrom using your Internet access, your guest network requires that a passwordbe entered for Internet access. The guest network is enabled by default.4. In the Total guests allowed drop-down box, select the number ofsimultaneous guest network users you want to allow.5. Click Finish to apply your changes.TIPThe first time your guest tries to access the Internet through a webbrowser, they will see the Guest access screen. To continue, theymust enter the password you provided in the Password field, thenclick LOGIN.To set up guest access to your network:1. Run Cisco Connect, then click Change under Guest Access. The GuestAccess screen opens.2. Under Allow guest access, click yes (default) to allow guest Internetaccess. Otherwise, click no to disable guest access.3. Take note of the Guest account’s network name and password. You willneed to provide this information to your guests.TIPSTo keep your guest network secure, click Change to change theguest password when the guest no longer needs access to theaccount.You can view the Guest account’s name and password in CiscoConnect’s main screen.12
Linksys E1550Setting Up: BasicsHow to change your router’s name andpasswordYou can change the name and password of your router, but if you do so, allwireless devices connected to your router will lose their Internet connectionuntil you reconnect them using the new router name and password.CAUTIONIf you change your router’s name and password using the browserbasedutility, you may not be able to manage your router usingCisco Connect. We recommend using the procedure below tochange your router’s login information.To change your router’s name and password:1. Run Cisco Connect, then click Change under Router settings.2. Under Personalize, click Change. A Changing router name and passwordwarning appears3. Click Yes if you want to continue.4. Enter the new router name and password, then click Change.TIPAfter you make changes, update your Easy Setup Key to make iteasier to reconnect all of the other computers on the network.13
Linksys E1550Setting Up: AdvancedSetting Up: AdvancedHow to open the browser-based utilityTo access some advanced settings, you need to open the browser-based utility.To open the browser-based utility:1. Run Cisco Connect, click Change under Router settings, click Advancedsettings, then click OK.– or –Open a web browser on a computer connected to your network, then goto 192.168.1.1.The router prompts you for a user name and password.2. Enter the user name and password, then click OK. The utility’s main menuopens.TIPIf you set up your router without using Cisco Connect, your router’sdefault password is admin. (You can leave the user name blank.)How to manually set up your routerAlthough running Cisco Connect is the easiest way to set up and maintain yourrouter, advanced users may want to manually configure their router. Be carefulwhen changing settings using this method.To manually set up your router:1. If you have started the Cisco Connect setup, exit Cisco Connect.2. Connect your router’s power adapter to a power outlet.3. Connect an Ethernet cable to the computer and to an available numberedEthernet (blue) port on the back of your router.14
Linksys E1550Setting Up: Advanced4. Open a web browser on the computer and open the address 192.168.1.1.A login window appears.3. In the Internet Connection Type drop-down list, click the type ofInternet connection provided by your ISP.TIPFor field descriptions, click Help on the right side of the screen.5. Enter the default password (admin). (You can leave the user name blank.)The browser-based utility opens to the main menu.6. After you finish changing settings, click Save Settings at the bottom ofthe screen.7. To exit the browser-based utility, close the web browser window.TIPFor field descriptions, click Help in the right side of the screen.How to manually set up your Internet connectionIn most cases, Cisco Connect automatically sets up your Internet connection(see “How to start Cisco Connect” on page 4). For some ISPs (Internet ServiceProviders), especially those outside of the United States, you may need tomanually configure your router’s Internet connection. Your router supports sixtypes of Internet connections.To manually configure your router’s Internet connection:Setup > Basic Setup1. Log into the browser-based utility (see “How to open the browser-basedutility” on page 14).2. Click the Setup tab, then click the Basic Setup page.4. Complete the fields required by your ISP.5. Complete the Optional Settings only if required by your ISP.6. Click Save Settings at the bottom of the page.How to set up the DHCP server on yourrouterYour router can be used as a DHCP (Dynamic Host Configuration Protocol)server to automatically assign an IP address to each computer or device onyour network. The DHCP server is enabled by default. If you already have aDHCP server on your network, or if you do not want to use your router as aDHCP server, you should disable this setting.To configure your router’s DHCP server settings:Setup > Basic Setup > DHCP Server Settings1. Log into the browser-based utility (see “How to open the browser-basedutility” on page 14).2. Click the Setup tab, then click the Basic Setup page.15
Linksys E1550Setting Up: Advanced3. Review the DHCP Server Setting fields (in the middle of the screen). Youcan:••Enable or disable the DHCP server.••Change the starting address for the DHCP server.••Change the number of users (253 maximum).5. Click Add Clients. The client you selected is added to the Clients AlreadyReserved table.You can also manually enter a client name, IP address, and MAC addressof a device to create a DHCP reservation.6. Click Save Settings.4. If you change any of the settings, click Save Settings at the bottom ofthe page.TIPFor field descriptions, click Help on the right side of the screen.How to set up DHCP reservationWhy would I use it? DHCP reservation allows you to assign a unique, fixed IPaddress to a specific device on your network. Assigning a fixed IP address isa good way to manage devices such as print servers, web cameras, networkprinters, and game consoles. A fixed IP address is also recommended if youwant to use port forwarding for devices that need to receive inbound trafficfrom the Internet (“How to set up port forwarding” on page 39).To configure DHCP reservation:Setup > Basic Setup > DHCP Reservation1. Log into the browser-based utility (see “How to open the browser-basedutility” on page 14).2. Click the Setup tab, then click the Basic Setup page.3. Click DHCP Reservation (in the middle of the screen).4. Click Select next to the client you want to create a DHCP reservation for.TIPFor field descriptions, click Help on the right side of the screen.How to find your network on the InternetWhy would I need to find my network on the Internet? If you want toremotely access a USB drive attached to your router or view a web camera, youneed to find your network on the Internet.Working with several DDNS service providers, your router’s DDNS feature letsyou configure a domain name for your network, which you can then use toeasily find your network on the Internet. If your ISP changes your network’s IPaddress, the DDNS service providers detect the address change and continueto route your domain name to that address.TIPBefore you configure DDNS on your router, you must sign up forDDNS service from a DDNS service provider that’s supported byyour router.16
Linksys E1550Setting Up: AdvancedTo set up DDNS:Setup > DDNS1. Sign up for DDNS service at either www.dyndns.org or www.tzo.com.2. Log into the browser-based utility (see “How to open the browser-basedutility” on page 14).3. Click the Setup tab, then click the DDNS page.4. In the DDNS Service drop-down list, click your DDNS service provider.The examples below are based on TZO.com. The settings used byDynDNS.org are slightly different.5. Complete the fields with information provided by your DDNS provider,then click Save Settings. The Status field tells you what actions havebeen taken.In this example, the domain name registered with TZO.com isBronzeEagle953.linksysnet.com. If an Internet camera had been configured(see “How to set up port forwarding for a single port” on page 39), youcould access the camera by typing the domain name into the address barof your web browser followed by the port number used for the device.For example, if the camera in the above example used port 1024, the URLwould be:BronzeEagle953.linksysnet.com:1024How to clone a MAC addressOn any home network, each network device has a unique MAC (Media AccessControl) address. Some ISPs register the MAC address of the device (usually arouter or a computer) connected directly to the modem. If your computer’sMAC address is registered with your ISP and you do not want to re-registerthe MAC address, then you can clone the address (assign the registered MACaddress of your previous device to your new router). If you want to use theMAC address from an old router that you are replacing with your new router,you should first determine the MAC address of your old router, then manuallyenter it into your new router.NOTEFor many ISPs that provide dynamic IP addresses automatically, thestored MAC address in the modem is reset each time you reset themodem. If you are installing this router for the first time, reset yourmodem before connecting the router to your modem. To reset yourmodem, disconnect power for about one minute, then reconnectpower.To clone a MAC address from your computer:Setup > MAC Address Clone1. Log into the browser-based utility (see “How to open the browser-basedutility” on page 14).2. Click the Setup tab, then click the MAC Address Clone page.3. Click Enabled.4. Click either Clone My PC’s MAC or enter the 12-digit MAC address ofyour old router.17
Linksys E1550Setting Up: AdvancedHow to optimize your router for gamingand voiceHow does my router prioritize traffic to the Internet? Your router has QoS(Quality of Service) settings that can prioritize traffic from your network out tothe Internet. Performance for demanding, real-time applications, such as onlinegaming, VoIP calls, video streaming, and videoconferencing, can be improvedby configuring Internet access priorities.QoS is applied only to traffic that is uploaded to the Internet. The router cannotcontrol the quality of the traffic after it reaches the Internet.TIPFor more information on optimizing your router for online gaming,see “Port Forwarding and Port Triggering” on page 39.To configure QOS:Applications & Gaming > QoS1. Log into the browser-based utility (see “How to open the browser-basedutility” on page 14).2. Click the Applications & Gaming tab, then click the QoS page.3. To help manage traffic priority with devices that support WMM, selectEnabled under WMM Support. Otherwise, select Disabled.TIPWMM (Wi-Fi MultiMedia) Support is a wireless QoS feature basedon the IEEE 802.11e standard. WMM improves quality for audio,video, and voice applications by prioritizing wireless traffic. Thisfeature requires that the wireless client devices in your networkalso support WMM.4. To have the router re-send data if an error occurs, select Disabled underNo Acknowledgement. Otherwise, select Enabled.5. To set access priorities for a specific device or application, select Enablednext to Internet Access Priority.6. In the Category drop-down list, select the type of item you want to set apriority for. A list of installed items fitting that description appears.TIPDo not set all priorities to High, because all items will have thesame priority, and it would be easier to disable Internet AccessPriority for the same result.••Applications and Online Games—Let you assign a priority for anapplication or online game.a) Select the application or online game that you want to add fromthe drop-down list, then select the priority.b) Click Apply, then click Save Settings.TIPIf you want to add a new application or game, you need to knowits port and protocol information (see the application or game’sdocumentation for help).TIPFor field descriptions, click Help on the right side of the screen.19
Linksys E1550Setting Up: Advanced••MAC Address and Voice Device—Let you prioritize network trafficbased on the device that is accessing the network. For example, if youwant your gaming console to have higher priority than your computerfor accessing the Internet, you can assign a higher priority to yourgame console using its MAC address. We recommend giving any voicedevices a high priority.a) Select MAC Address or Voice Device from the drop-down list,then enter the name of the device you want to add.b) Enter the device’s 12-digit MAC address, then select the priority.c) Click Apply, then click Save Settings.TIPYou can often find a device’s 12-digit MAC address on the bottomof the device. Or, if the device is connected to your network andturned on, you can click the Administration tab in the router’sbrowser-based utility, click the Local Network page, then clickDHCP Client Table.7. Configure Upstream Bandwidth.••To allow the router to detect the maximum, select Auto (default). Autosets speeds in multiples of 512 Kbps.••To specify the maximum, select Manual, then select the bandwidthyou want it to use.CAUTIONIf you specify a maximum bandwidth that is too high, the routercannot apply priorities correctly, and QoS problems may result.8. When you are done setting priorities, click Save Settings.How to remotely change your routersettingsWhy would I want to remotely change my router settings? There may betimes when you want to change parental control settings, or change settingsfor remote file access, while you are away from home.To set up remote access:Administration > Management1. Log into the browser-based utility (see “How to open the browser-basedutility” on page 14).2. Click the Administration tab, then click the Management page andlocate the Remote Management Access settings in the middle of thescreen.3. For Remote Management, select Enabled.4. For Access via, select HTTP (default) or select HTTPS to use SSL (SecureSocket Layer) to encrypt data transmitted for higher security.5. To be able to upgrade your router’s firmware remotely, select Enablednext to Remote Upgrade.6. To allow remote access from anywhere on the Internet, select Any IPAddress (default) next to Allowed Remote IP Address. Otherwise, enter arange of allowed IP addresses.7. For Remote Management Port, keep the setting of 8080 (default) unlessyou already have a device on your network that uses port 8080 (such asa web camera).8. Click Save Settings at the bottom of the screen to accept your changes.9. Click the Administration tab, then click the Management page and takenote of the Internet IP Address and the Remote Management Port settings.You will use this information to access your router remotely.20
Linksys E1550Setting Up: Advanced5. To prevent local network users from disabling your Internet connectionthrough UPnP, select Disabled (default) next to Allow Users to DisableInternet Access. Otherwise, select Enabled.How to use a router as an access pointHow can I use my old router as an access point? If you have a large area tocover with your wireless signal, or if part of your home has weak signals due tointerference, you can use your old router to extend the range of your wirelessnetwork. This is a complex process, so this procedure assumes that you havesome networking knowledge.TIPCheck the documentation for your old router. Some brands ofrouters include either a switch on the outside of the case or asoftware option to convert it to an access point. If either of theseoptions is available, follow your old router’s instructions to convertit to an access point.You need to take note of your new router’s settings, then apply some of thosesettings to the old router so it can work as an access point.To view your new router’s settings:Wireless > Basic Wireless SettingsWireless > Wireless SecurityStatus > Wireless NetworkSetup > Basic Setup1. Make sure that your new router is connected to the Internet.2. In the browser-based utility, click the Wireless tab, then click the BasicWireless Settings page and take note of the Network Name (SSID).3. Click the Wireless tab, then click the Wireless Security page and takenote of the Security Mode and the passphrase.4. Click the Status tab, then click the Wireless Network page and take noteof the Channel.5. Click the Setup tab, then click the Basic Setup page and take note ofthe DHCP server’s IP Address range (192.168.1.100 to 192.168.1.149 bydefault)To use your old router as an access point:1. With your computer connected to your old router, log into its browserbasedadministration utility.NOTESave your changes after finishing each step below.2. Open the setup page for the local network (LAN).3. In the Router IP address field, enter an unused IP address for the LANnetwork of your new router.For example, if your new router has an IP address of 192.168.1.1, youshould choose an IP address on the 192.168.1.0 network. You can chooseany address within the range of 192.168.1.2 to 192.168.1.254. You shouldexclude addresses in the range that will be used by the DHCP Server ofyour new router (192.168.1.100 to 192.168.1.149). A safe choice might be192.168.1.250. Take note of this address, because this will be the addressthat you will use to manage your old router in the future.4. In the Subnet Mask field, enter 255.255.255.0 or, if available, select thatsubnet mask from a drop-down list.5. Disable the DHCP server on your old router. (Because your old router willbe operating as an access point instead of a router, you don’t want it todistribute IP addresses. There should be only one active DHCP server onyour network, and that should be your new router.)6. To reconfigure the wireless network on your old router:a. Open the wireless network setup page.b. Change the network name (SSID) to match the name of your newnetwork. Having the same network name and security settingsenables you to seamlessly roam between your new router and yourold router.c. Change the security mode to match the security mode on your newrouter.d. Change the passphrase (sometimes called the pre-shared key) onyour old router to match the passphrase on your new router.22
Linksys E1550Setting Up: AdvancedTIPAlthough you can determine your computer’s IP address in manyways, this method is very fast.d. Take note of the IP address. In this example, the IP address is192.168.100.192.To determine the address range by using a Mac computer:a. Connect your computer into your upstream network’s router.b. From the Dock, click System preferences, click Network, then clickEthernet in the window to the left. A network status window appears.TIPSAn office network often has a wall plate with an Ethernet port thatyou can connect to.If you are doing this in a home environment (without wall ports),connect an Ethernet network cable between a LAN port on yourupstream router and the Internet port on your Linksys router.c. Take note of the IP address. In this example, the IP address is192.168.100.139.Example: The above examples show that upstream IP addresses are onthe 192.168.100.0 network. (The “0” indicates the entire network.) Yourupstream network’s address may be different. The default address ofyour new Linksys router is 192.168.1.1. In setting up one router behindanother, you must make sure that the local network on your new router isdifferent than the network of your upstream router. In the above example,because the default local network on your Linksys router 192.168.1.0 ison a different subnet than the office network’s 192.168.100.0, you will beable to place your Linksys router behind the other router.2. Connect an Ethernet network cable to a LAN/Ethernet port on yourupstream network to the yellow Internet port on your router.CAUTIONConnect the upstream network to your router’s yellow Internetport, not one of the blue Ethernet ports. If you connect to anEthernet port, you create IP addressing problems for the officenetwork.3. Run Cisco Connect on each computer that you want to connect tothe Linksys router. Each computer needs either a wired or wirelessconnection to the Linksys router. For more information, see “How toconnect a computer to your network” on page 6.The computers that are connected to the Linksys router are now on the samenetwork, and are isolated from the upstream network. However, you will stillhave access to the Internet through the upstream router (by way of your Linksysrouter). Because two routers are between your computer and the Internet,Internet traffic undergoes two network address translations. This is sometimesreferred to as Double NAT.Your computers can also use the built-in capabilities of your Linksys router,such as parental controls. If you need further control over the type of contentyour employees or family access, you can create an account with an Internetfiltering site such as www.opendns.com or www.bsecure.com. After youcreate an account with them, use their DNS in place of your ISP’s DNS.24
Linksys E1550Setting Up: AdvancedTo use their DNS:Setup > Basic Setup1. Log into the browser-based utility (see “How to open the browser-basedutility” on page 14).2. Click the Setup tab, then click the Basic Setup page.3. Complete the Static DNS fields with the information provided by yourcontent filtering provider.4. Click Save Settings.To extend your networkThis topic covers cases three and four above.NOTEThis is a complex process, so this procedure assumes that you havesome networking knowledge.To extend your network or add wireless capabilities:1. If you want to extend your network, you may also follow the instructionsabove. One example of this might be to provide a separate wirelessnetwork for your children to keep their wireless network traffic separatefrom your wireless network. You might also want to isolate one networkfrom another network so that network shares aren’t visible acrossnetworks. In this case, use an Ethernet cable to connect the Internetport of the downstream router to one of the LAN ports of the upstreamrouter. Make sure that the local network subnets on the two routers aredifferent.- OR -You can extend your network by turning the downstream router into anaccess point. (See “How to use a router as an access point” on page 22).When you use a router as an access point, computers connected to theaccess point are on the same IP subnet as all other devices connected tothe router. File, printer, and media sharing is much easier if all devices areon the same subnet.How to expose a device to the InternetWhy would I expose a device to the Internet? If you are operating a webserver, a mail server, or a web camera, you may want to expose that device tothe Internet so anybody can access it. Your router includes a DMZ (DemilitarizedZone) feature that forwards all inbound ports presented on the WAN interface,except those that are specifically forwarded, to an individual IP address orMAC address. This feature is normally not used, because it presents significantsecurity risks to the device that you designate for the DMZ. The DMZ device isnot protected by the built-in firewalls, Internet filters, or router web filters, andis open to attacks from hackers.A much better way of “exposing” devices to the Internet would be to use portforwarding. See “How to set up port forwarding” on page 39.To set up a device in the DMZ:Applications & Gaming > DMZ1. Configure your device with a static IP address. See your device’sdocumentation for help with setting a static IP address or use DHCPreservation (see “How to set up the DHCP server on your router” on page15).2. Log into the browser-based utility (see “How to open the browser-basedutility” on page 14).3. Click the Applications & Gaming tab, then click the DMZ page.4. Select Enabled.5. In the Source IP Address section, select Any IP Address to allow accessto your DMZ device from the entire Internet, or select the source rangebutton and enter a range of allowed source addresses.6. In the Destination section, enter the last three digits of the IP address ofthe device that will be in the DMZ. The rest of the IP address is alreadycompleted.25
Linksys E1550Setting Up: Advanced7. Click Save Settings to apply your changes.d. Click Select next to the device that you want to place in the DMZ. Inthis example, the first device was selected. The corresponding MACaddress was copied into the MAC Address field as shown below.e. Click Save Settings to apply your changes.TIPThe DHCP Client Table is only available if you select MAC Address.If you prefer to specify the 12-digit MAC address of the device you wantto place in the DMZ instead of setting up a DHCP address reservation,you can replace Step 6 with the following steps:a. Click Enabled.b. In the Source IP Address section, select Any IP Address (default) toallow access to your DMZ device from the entire Internet, or select thesource range button and enter a range of allowed source addresses.c. In the Destination section, select MAC Address, then click DHCPClient Table. A separate window opens showing the current DHCPclient list.26
Linksys E1550Improving SecurityImproving SecurityHow do I know if my network is secure?If you configured your router using Cisco Connect, your network is secure.During setup, Cisco Connect creates a name for your network, enables industrystandardWPA/WPA2 wireless security, and assigns a highly secure password foryour wireless network and the administrator’s account.To confirm that your network is secure:1. Run Cisco Connect.2. In the upper-right corner of the screen, check for the green light thatindicates your router is online and secure. If the green light is on, noadditional action is required to secure your network.Network security following a manualsetupIf you configured your router manually (not recommended), you must manuallyconfigure security.To manually set your router’s password:Administration > Management1. Log into the browser-based utility (see “How to open the browser-basedutility” on page 14).2. Click the Administration tab, then click the Management page.3. In the Router Access section, enter a secure password for your router,then re-enter the password to confirm it. Your password should beat least eight characters in length. The most secure type of passwordshould include a mix of uppercase and lowercase letters, numbers, andpunctuation.4. Click Save Settings at the bottom of the screen.To manually set your router’s network name (SSID):Wireless > Basic Wireless Settings1. Log into the browser-based utility (see “How to open the browser-basedutility” on page 14).2. Click the Wireless tab, then click the Basic Wireless Settings page.3. For Configuration View, select Manual.4. Enter a new network name in the Network Name (SSID) field, then clickSave Settings at the bottom of the screen.27
Linksys E1550Improving SecurityTo manually set your router’s wireless security settings:Wireless > Wireless Security1. Log into the browser-based utility (see “How to open the browser-basedutility” on page 14).2. Click the Wireless tab, then click the Wireless Security page.3. Select your preferred security type from the Security Mode drop-downlist For most home networks, we recommend WPA2/WPA Mixed Mode.4. Enter a passphrase (security key) for your wireless network in thePassphrase field. The most secure type of security key should include amix of uppercase and lowercase letters, numbers, and punctuation.5. Click Save Settings at the bottom of the screen.How to set up wireless security usingWi‐Fi Protected SetupWhy would I use Wi-Fi Protected Setup? Wi-Fi Protected Setup is a featureof your router that makes it easy to add devices to your wireless network. If youhave network devices, such as wireless printers, that support Wi-Fi ProtectedSetup, then you can use Wi-Fi Protected Setup to add the devices.Wi-Fi Protected Setup activity lightThe power indicator light on the back of the router (or on top for the E4200)indicates the status of Wi-Fi Protected Setup while you are connecting devices.••When Wi-Fi Protected Setup is connecting a network device, the lightflashes slowly.••If there is an error, the light flashes quickly for two minutes. Wait until itstops flashing, then try again.••When Wi-Fi Protected Setup has finished connecting a device, the lightis continuously lit .••Wait until the light is continuously lit before starting the next Wi-FiProtected Setup session.Connect network devices using one of the three methods below.NOTEWi-Fi Protected Setup configures one device at a time. Repeat theinstructions for each device that supports Wi-Fi Protected Setup.Connecting a device using the Wi-Fi Protected SetupbuttonUse this method if your device has a Wi-Fi Protected Setup button or promptsyou to press the Wi-Fi Protected Setup button on your router.To connect a device using the Wi-Fi Protected Setup button:Wireless > Basic Wireless Settings1. Press the Wi-Fi Protected Setup button on the network device you areconnecting to.2. Press the Wi-Fi Protected Setup button on the back of the router.- OR -a. Log into the browser-based utility (see “How to open the browserbasedutility” on page 14).b. Click the Wireless tab, then click the Basic Wireless Settings page.c. Click Wi-Fi Protected Setup.d. Click the Wi-Fi Protected Setup button in the router’s Wi-Fi ProtectedSetup screen.e. After the device has been configured, click OK.28
Linksys E1550Improving SecurityHow to connect a device using its Wi-Fi ProtectedSetup PINUse this method if your device has a Wi-Fi Protected Setup PIN (PersonalIdentification Number).4. On the client device, enter the PIN listed on the router’s Wi-Fi ProtectedSetup screen. It is also listed on the bottom of the router. In the examplebelow, the router’s PIN is 32744781.To connect a device using the device’s Wi-Fi Protected Setup PIN:Wireless > Basic Wireless Settings1. Log into the browser-based utility (see “How to open the browser-basedutility” on page 14).2. Click the Wireless tab, then click the Basic Wireless Settings page.3. Click Wi-Fi Protected Setup.4. Enter the PIN from the device into the PIN field on the router’s Wi-FiProtected Setup screen, then click Register.5. Follow the device’s instructions to complete setup.How to connect a device manuallyIf you have devices that do not support Wi-Fi Protected Setup, note the wirelesssettings in the Basic Wireless Settings screen, then manually configure thosedevices.For each wireless network, the Network Name (SSID), Security, and Passphraseare displayed at the bottom of the screen.5. After the device has been connected, click OK.How to connect a device using the router’s Wi-FiProtected Setup PINUse this method if your client device asks for the router’s PIN.To connect a device using the device’s Wi-Fi Protected Setup PIN:Wireless > Basic Wireless Settings1. Log into the browser-based utility (see “How to open the browser-basedutility” on page 14).2. Click the Wireless tab, then click the Basic Wireless Settings page.3. Click Wi-Fi Protected Setup.29
Linksys E1550Improving SecurityHow to control access to your wirelessnetworkWhy would I need to control access to my wireless network? If you usedCisco Connect to configure your router, your wireless network is already secure.By default, Cisco Connect enables industry-standard WPA (Wi-Fi ProtectedAccess) security using WPA2/WPA mixed mode. Cisco Connect configures yournetwork with a complex, 10-character password that is almost impossibleto compromise. If you set up your wireless network manually and have notenabled wireless security, your wireless network will be an “open” network thatalmost anyone nearby with a Wi-Fi-enabled device could access.What is MAC filtering? The best way to secure your wireless network is to useCisco Connect to automatically configure and secure it. However, if you choosenot to use the built-in security features of your router, you can still controlaccess to your wireless network using MAC filtering.Every network device has a unique, 12-digit MAC (Media Access Control)address. Using MAC filtering, you can allow only known MAC addresses ontoyour network. You can also exclude specific MAC addresses or deny themaccess to your wireless network.Example: Because each MAC filtering configuration is unique, the followingprocedure uses the simplified example of setting up MAC filtering to allow onewireless device access to the network.4. Select Permit.TIPYou can also use MAC filtering to prevent specific PCs fromaccessing your network by selecting Prevent. However, it’s easierto permit only known devices than to exclude unknown devices.5. Click Wireless Client List. A separate window opens and displays thecurrently connected devices. In the example below, the only devicepermitted onto the network is the MacBook. However, two other devicesare also connected to the network.To set up MAC filtering to allow one wireless device access to yournetwork:Wireless > Wireless MAC Filter1. Log into the browser-based utility (see “How to open the browser-basedutility” on page 14).2. Click the Wireless tab, then click the Wireless MAC Filter page.3. Click Enabled.6. Next to the device entry, select Save to MAC Address Filter List, thenclick Add. The Mac Address Filter List is updated with the MAC address ofthe device you added.30
Linksys E1550Improving Security7. Click Save Settings at the bottom of the page.8. Click Wireless Client List again to check the updated device list. Onlythe device you selected remains on the network.How to improve security using the built-in firewallWhy would I need to change my security settings? By default, the firewallsettings in your router have been optimized for most home environments, sono changes are needed. The SPI (Stateful Packet Inspection) firewall is enabledby default. In addition, anonymous Internet requests and IDENT requests arefiltered by default. All web filters are disabled, because enabling them maycause problems for sites that depend on ActiveX controls, Java, or cookies.To change your firewall settings:Security->Firewall1. Log into the browser-based utility (see “How to open the browser-basedutility” on page 14).2. Click the Security tab, then click the Firewall page.3. Select each setting that you want to change.••Filter Multicast—Multicasting allows a single transmission tosimultaneously reach specific recipients within your local network.Select this option to block multicasting. This option is disabled bydefault.••Filter Internet NAT Redirection—This filter prevents a local computerfrom using a URL or Internet IP address to access the local server. Selectthis option to enable the filter. This option is disabled by default.••Filter IDENT (Port 113)—This filter prevents port 113 from beingscanned by devices from the Internet. This option is enabled bydefault.••Proxy - This filter blocks the use of Internet proxy servers. To denyproxy requests, select this option. Proxy access is allowed by default.••Java - This filter blocks Java, so you may not be able to access Javacontent on websites. To deny Java requests, select this option. Javacontent is allowed by default.••ActiveX - This filter blocks ActiveX, so you may not be able to accessActiveX content on websites. To deny ActiveX requests, select thisoption. ActiveX content is allowed by default.••Cookies - This filter blocks cookies, which are data stored on yourcomputer and used by websites when you interact with them. To denycookie requests, select this option. Cookie usage is allowed by default.4. Click Save Settings to update your changes.TIPFor descriptions of the filters, click Help on the right side of thescreen. More complete descriptions are included below.••SPI Firewall Protection—This helps protect your local network fromInternet threats. This option is enabled by default.CAUTIONTo help protect your network, you should keep this option enabled.••Filter Anonymous Internet Requests—This filter blocks Internetrequests from unknown sources such as ping requests. This option isenabled by default.31
Linksys E1550Using an External DriveUsing an External DriveHow to configure storageWhy would I need to configure storage? By default, when you connect astorage device to your router, the entire contents of the device are available forread and write access to anyone on your local network (no login credentials arerequired). However, you can also create shared folders that you can configureto share only with specified groups.3. Click Create Share next to the partition you want to share. The SharedFolder screen opens.4. If you want to share the entire partition, select Share Entire Partition,then click Save Settings at the bottom of the screen.To control access to the USB drive attached to your router, you need toperform two tasks:1. Create one or more shared folders (see “How to create shared folders”below)2. Manage group and User Access to Shared Folders (see “How to sharefolders and set access rights” on page 37)How to create shared foldersTo create a shared folder:Storage > Disk1. Log into the browser-based utility (see “How to open the browser-basedutility” on page 14).2. Click the Storage tab, then click the Disk page.- OR –If you want to share a specific folder:a. Enter a unique name in the Display Name field.b. Click Select next to the folder name you want to share.••To open a subfolder, click Enter into Folder.••To navigate to a previous folder, click Return to Upper Folder.••To create a new folder, type the name into the New Folder field,then click Create.32
Linksys E1550Using an External Drivec. Click Save Settings at the bottom of the screen, then repeat theabove steps to add more folders that you want to share.How to disable anonymous disk accessBy default, no password is needed for read and write access to the drive. Beforeyou can manage group and user access to shared folders, you must disableanonymous disk access.To disable anonymous disk access:Storage > Administration1. Log into the browser-based utility (see “How to open the browser-basedutility” on page 14).2. Click the Storage tab, then click the Administration page.3. Next to Anonymous Disk Access, select Disabled.4. Click Save Settings at the bottom of the screen.How to manage group and user access to sharedfoldersTo manage access to shared folders, you need to disable Anonymous DiskAccess, then create groups and user accounts on your router. Access to therouter is controlled by user accounts, but access to shared folders is controlledby groups.1. Disable Anonymous Disk Access (see “How to disable anonymous diskaccess” on page 33).2. Create a group that you will use to assign rights to a shared folder.3. Create users and assign those users to the group.4. Add the group to the shared folder that you want to control.How to create a groupBy default, the default Admin group has read and write access to all sharedfolders. By default, the Guest group has read only access and has no accessrights to any of the shared folders.IMPORTANTMore than one group can be configured with access to a sharedfolder, but a user can be a member of only one group.To create a group:Storage > Administration1. Log into the browser-based utility (see “How to open the browser-basedutility” on page 14).2. Click the Storage tab, then click the Administration page.33
Linksys E1550Using an External Drive3. Under Group Management, click Create New Group.4. Complete the Group Name and Description fields.5. From the Access drop-down list, select read-only to grant read-onlyrights to the group, or select read-and-write to grant read and writerights to the group.6. Click Create. The group is now created, and its access rights are displayedin the Access column.7. To change a group’s name or access rights, click Edit next to the groupname.8. To delete a group, click Delete next to the group name.How to create a new userTwo user accounts (Admin and Guest) are preconfigured for router access. Thepassword for the Admin user is the same password that you use to access therouter. By default, the user Admin is a member of the group named Admin,and the user Guest is a member of the group named Guest. To keep it simple,consider creating user accounts on your router that use the same user namesand passwords that are used by your computer’s operating system.NOTEUsers can be a member of only one group.To create a new user:Storage > Administration1. Log into the browser-based utility (see “How to open the browser-basedutility” on page 14).2. Click the Storage tab, then click the Administration page.3. Under User Management, click Create New User.4. Complete the Name, Full Name, and Description fields.5. Enter and confirm a password.34
Linksys E1550Using an External Drive6. From the Group Member drop-down list, select the group to assign theuser to, then click Create. The new user is displayed in the user list.4. In the Shared Folder section, click Edit next to the shared folder you wantto change group access for.7. To change the user name, description, or group membership, or totemporarily disable the account, click Edit.5. To grant a group access the shared folder, click the group’s name in theAvailable Groups column, then click >> to move the group to the Groupswith Access column.6. To remove a group’s access to the shared folder, click the group’s namein the Groups with Access column, then click Disk1. Log into the browser-based utility (see “How to open the browser-basedutility” on page 14).2. Make sure that Anonymous Disk Access has been disabled. (See “How todisable anonymous disk access” on page 33.)3. Click the Storage tab, then click the Disk page.35
Linksys E1550Using an External DriveHow to configure your router’s storagefor remote access3. Next to FTP Server, click Enabled.Why would I need to access my router’s storage remotely? If your router’sstorage is set up for remote access, you can access your files anywhere youhave an Internet connection. To do this, you must enable the router’s built-inFTP (File Transfer Protocol) server. After your router is set up, you can accessfiles from anywhere by using either a web browser or FTP software.To set up your router for remote file access, you need to:1. Configure the FTP server2. Select folders (or the entire drive) to share and set access rights for thosefoldersHow to configure the FTP serverTo configure the FTP server:Storage > FTP Server1. Log into the browser-based utility (see “How to open the browser-basedutility” on page 14).2. Click the Storage tab, then click the FTP Server page.TIPIf you used Cisco Connect to set up your router, the FTP ServerName field is already completed with the name of your wirelessnetwork. If you set up your router manually, the default name isCisco followed by the last five digits of the router’s serial number.4. You can also:••Change the FTP Port (default is 21) for the FTP server••Change the Encoding (character set) for the transfer of files in otherlanguages. The router supports:••Unicode (UTF-8) (default)••Chinese Simplified (GB18030)••Vietnamese (CP1258)••ISO 8859_1.TIPFor field descriptions, click Help on the right side of the screen.5. To apply your changes, click Save Settings.36
Linksys E1550Using an External DriveHow to access files remotelyTo access files remotely, you must first attach a USB drive to your router and setup that storage for remote access. For instructions, see “How to configure yourrouter’s storage for remote access” on page 36. You can then access files fromanywhere on the Internet.To access files remotely:1. Make sure that your router is configured to share files. For moreinformation, see “How to configure your router’s storage for remoteaccess” on page 36.2. Make sure that your router has user accounts set up, and that you havetaken note of the user name and password you will use to access therouter’s storage. If you have enabled Anonymous FTP (not recommended),you will not need a user name and password. For more information, see“How to configure storage” on page 32.3. Take note of the IP address of your router. To view your router’s IP address,open the browser-based utility, click the Status tab, then click the Routerpage and take note of the numbers in the Internet IP Address field.– OR –If you have DDNS (Dynamic Domain Name Service), take note of thedomain name registered to your router. For more information, see “Howto find your network on the Internet” on page 16.4. At any remote location where you can access the Internet, you can:••Use FTP (File Transfer Protocol) client software to connect to yourrouter. You will need to enter your router’s IP address. If access to yourrouter requires a user name and password, you will also need to enterthose details. For more information on using the FTP client software,see its documentation or help.– OR –••Type the router’s IP address into a web browser’s Internet addressfield, press Enter, then enter your user name and password.FTP software and web browsers display FTP content in many ways,but you can usually use these common actions to navigate throughFTP folders:••Click a folder name to open it.••Click a double period (..) or Up to a higher level directory toopen a parent folder.••Click or right-click a file to download or view it.••Drag a file from another window and drop it into the FTP windowto upload it. (To upload a file, your user account must have writeaccess.)38
Linksys E1550Port Forwarding and Port TriggeringHow to set up port forwarding for multiple portsWhy would I set up port forwarding for multiple ports? Port forwarding isa feature that forwards inbound traffic from the Internet on a specific port toa single device on your local network. Unlike a web camera that typically onlyrequires a single port to be forwarded, some applications require forwardingof multiple ports. VNC (Virtual Network Computing) software that allows you tooperate your computer remotely from anywhere on the Internet is an exampleof an application that requires multiple ports to be forwarded. To forward tomultiple ports, just create additional entries to forward additional ports to thesame IP address.Example: You want to set up your computer so you can remotely access it usingVNC software. By default, VNC uses TCP ports 5800 and 5900.To set up single port forwarding for multiple ports:Applications & Gaming > Single Port Forwarding1. Make sure that the software you want to use has been installed onto anetworked computer.2. Log into the browser-based utility (see “How to open the browser-basedutility” on page 14).3. Set up DHCP reservation for the IP address of the computer on whichyou installed the software. (See “How to set up the DHCP server on yourrouter” on page 15).4. Click the Applications & Gaming tab, then click the Single PortForwarding page.5. For each entry, enter a descriptive name in the Application Name field.6. For each entry, enter in the same port number for the External Port andthe Internal Port.7. In the To IP Address field, enter the last three digits of the IP address youhave reserved for the computer you want to forward Internet traffic to.The rest of the IP address has already been completed for you.8. Select Enabled next to the IP Address field.9. Click Save Changes at the bottom of the screen.NOTEIf you want to use software such as VNC on multiple computers,you will need to reconfigure the default ports that VNC uses oneach additional computer. Then, create additional port forwardingentries for each additional computer. See your software’sdocumentation for help.How to set up port forwarding for a range of portsWhy would I set up port forwarding for a range of ports? Port forwarding isa feature that forwards inbound traffic from the Internet on a range of ports toa single device on your local network. Unlike a web camera that typically onlyrequires a single port to be forwarded, some applications require forwardingto a range of ports.Example: You want to set up your computer so you can use BitTorrent, apopular peer-to-peer file sharing application. BitTorrent uses port 6881 bydefault. If that port is busy, the requesting BitTorrent client tries the next portin sequence. The most common configuration for home routers with a singleBitTorrent computer is to set up port forwarding using a range of ports startingwith 6881 and ending with port 6889.40
Linksys E1550Port Forwarding and Port TriggeringHow to configure your Xbox for onlinegamingWhy would I set up my Xbox for online gaming? Online gaming adds anotherdimension to using your Xbox. As with other online gaming applications andgaming consoles, you need to forward multiple ports to use your Xbox foronline gaming. The procedure for setting up your Xbox is almost identical tosetting up multiple port forwarding for VNC remote control. (See “How to setup port forwarding for multiple ports” on page 40).NOTEFor more information on configuring your router for online gaming,see “How to optimize your router for gaming and voice” on page 19.Refer to your game console documentation to determine the ports used byyour device. The Xbox uses four ports:••TCP port 80••UDP port 88••TCP/UDP port 53••TCP/UDP port 30744. Enter the port and protocol information as shown in the image below.5. In the To IP Address field, enter a 1- to 3-digit number that correspondsto the last three digits of the IP Address of the Xbox 360. The rest of the IPaddress is already completed.6. Select Enabled next to the To IP Address field for each entry.7. Click Save Settings at the bottom of the page.To set up an Xbox using multiple entries of single port forwarding:Applications & Gaming > Single Port Forwarding1. Connect your Xbox 360 to your router.1. Log into the browser-based utility (see “How to open the browser-basedutility” on page 14).2. Set up a DHCP reservation for the IP address of the Xbox. (See “How to setup the DHCP server on your router” on page 15).– OR –Refer to your game console’s documentation to set a static IP address foryour device.3. Click the Applications & Gaming tab, then click the Single PortForwarding page. The Xbox uses four ports, so create four portforwarding entries on this page.42
Linksys E1550Maintaining and MonitoringMaintaining and MonitoringHow to back up and restore your routerconfigurationWhy do I need to back up my router configuration? As with any valuabledata, you should back up your router configuration. Your router might containmany customized settings. Those settings would be lost if you reset your routerto its factory defaults, and you would need to re-enter all of them manually. Ifyou back up your router configuration, restoring settings is easy.To restore your router configuration:Administration > Management1. Log into the browser-based utility (see “How to open the browser-basedutility” on page 14).2. Click the Administration tab, then click the Management page.3. Click Restore Configurations at the bottom of the screen.To back up your router configuration:Administration > Management1. Log into the browser-based utility (see “How to open the browser-basedutility” on page 14).2. Click the Administration tab, then click the Management page.3. Click Back Up Configurations at the bottom of the screen.A separate window opens.4. Click Browse to navigate to the location of your configuration file, thenselect the file and click Open.5. To restore the configuration, click Start to Restore.You are prompted to save the file.4. Click OK or Save.5. Specify a file location, then click Save.How to restore factory defaultsWhy would I need to restore to factory defaults? If you are experiencingdifficulties with the router and have exhausted all other troubleshootingmeasures, you may want to reset the router to factory defaults. Resetting therouter erases all of your settings, so you must restore the settings after. Werecommend that you back up your configuration before resetting your routerto factory defaults. See “How to back up and restore your router configuration”on page 43.You can use the Reset button or the router’s browser-based utility to restoreyour router to factory defaults.43
Linksys E1550Maintaining and MonitoringTo reset your router to factory defaults with the reset button:1. With your router connected to power and turned on, press and hold theReset button on the bottom of your router for 5-10 seconds.How to upgrade the router’s firmwareWhy would I need to upgrade my router’s firmware? Linksys may periodicallypublish a firmware upgrade either to fix a problem or to add features to yourrouter.IMPORTANTDo not interrupt the upgrade process. You should not turn off therouter or press the Reset button during the upgrade. Doing so maypermanently disable the router.If you are upgrading from a laptop computer, make sure that thelaptop is connected to a power source or that the battery is fullycharged.Disable your computer’s Sleep mode. It might interrupt theupgrade process.To reset your router to factory defaults using the browser-based utility:Administration > Factory Defaults1. Log into the browser-based utility (see “How to open the browser-basedutility” on page 14).2. Click the Administration tab, then click the Factory Defaults page.3. Click Restore Factory Defaults.If you are upgrading from a computer with a wireless networkconnection, make sure that you have strong wireless signalstrength. If not, move your computer closer to your router.TIPSEach time you run Cisco Connect, it checks for software updatesand installs them, if available. Use the following instructions only ifyou don’t run Cisco Connect.A confirmation window opens.4. Click OK.To upgrade the router’s firmware:Linksys.com/supportAdministration > Firmware Upgrade1. Log into the browser-based utility (see “How to open the browser-basedutility” on page 14).2. Click the Status tab, then click the Router page and take note of thecurrent firmware version for your router.3. Using your web browser, connect to Linksys.com/support, then findyour router model.44
Linksys E1550Maintaining and Monitoring4. Click the <strong>Download</strong>s tab, then select the hardware version for yourrouter from the Select Hardware Version drop-down list.9. Select the upgrade file, then click Start Upgrade and follow the onscreeninstructions. The upgrade process begins, and a progress barappears. When the firmware has been uploaded, a new page opens withan “Upgrade is successful” notice, and the router reboots.5. Compare the latest available firmware version on the website with yourcurrent version. If there is a newer version, click Release Notes to see ifthe newer version contains new features you want or solves a problemyou are having.6. If you want the new version, click <strong>Download</strong> and save the file to yourcomputer. Take note of the file location.How to check the status of your routerWhy would I want to check the status of my router? Your router status tellsyou whether you have a secure Internet connection and informs you about thestatus of your network-connected devices.During the upgrade process, the router may lose the settings you havechanged. Make a backup of your router configuration before startingthe upgrade process. See “How to back up and restore your routerconfiguration” on page 43.7. In the browser-based utility, click the Administration tab, then click theFirmware Upgrade page.8. Click Browse, then go to the location where you saved the upgrade file.To check your router status using Cisco Connect:1. In Windows, click Start, All Programs, then click Cisco Connect.– OR –On a Mac, open the Applications folder, then click Cisco Connect.The Cisco Connect main menu opens.2. Look in the upper-right corner of the Cisco Connect main menu. If yourrouter is online and secure, you see online secure and a green indicator.45
Linksys E1550Maintaining and MonitoringTo check your router status using the browser-based utility:Status > RouterStatus > Local NetworkStatus > Wireless NetworkStatus > Ports1. Log into the browser-based utility (see “How to open the browser-basedutility” on page 14).2. Click the Status tab, then click the Router page. Detailed informationabout your router status is displayed.4. Click DHCP Client Table to display the currently assigned IP addresses.5. Click the Status tab, then click the Wireless Network page. Your wirelessnetwork status is displayed.TIPFor field descriptions, click Help on the right side of the screen.6. Click the Status tab, then click the Ports page. The link status and speed(speed data available only for the E3200 and E4200) for each of theEthernet ports and the Internet port are displayed.3. Click the Status tab, then click the Local Network page. Your localnetwork’s IP address information and the DHCP server settings aredisplayed.46
Linksys E1550Maintaining and MonitoringHow to disable the Ethernet port status lightsWhy would I want to disable the Ethernet port status lights? Dependingon the placement of the router in a home, some users might find the lightsdistracting. You can easily disable the lights using Cisco Connect, but you canalso disable them using the browser-based utility.To disable the lights using Cisco Connect:1. In Windows, click Start, All Programs, then click Cisco Connect.– OR –On a Mac, open the Applications folder, then click Cisco Connect.The Cisco Connect main menu opens.2. Under Router Settings, click Change.3. Under Port lights, click Off, then click Finish.To disable the lights using the browser-based utility:Status > Ports1. Log into the browser-based utility (see “How to open the browser-basedutility” on page 14).2. Click the Status tab, then click the Ports page.3. In the Rear Port Lights section, click Off, then click Save Settings.47
Linksys E1550Maintaining and MonitoringHow to test your Internet connectionWhat utilities are included in my router to test my Internet connection?Your router includes two diagnostic tests, Ping and Traceroute, that let youcheck network connections, including network devices and your Internetconnection.To diagnose your Internet connection:Administration > Diagnostics1. Log into the browser-based utility (see “How to open the browser-basedutility” on page 14).2. Click the Administration tab, then click the Diagnostics page.A window opens showing the ping test results. You will see a responsefor each successful ping.NOTEIf an Internet URL fails to respond to ping, it doesn’t necessarilymean that the site is down. For security reasons, some sites areconfigured to not respond to ping requests.3. To check whether an address can be reached, enter an IP address or URL,a packet size, and number of times to ping in the Ping Test section, thenclick Start to Ping.4. To trace the route that packets take between your router and a specificaddress, enter an address in the IP or URL Address field of the TracerouteTest section, then click Start to Traceroute.48
Linksys E1550Maintaining and MonitoringA window opens with the test results.5. Select the log you want to see from the Type drop-down list.How to configure and use logsWhat kind of logging capabilities does my router have? Your router cantrack all traffic for your Internet connection. Your router supports four types oflogs:To enable and view router logs:Administration > Log1. Log into the browser-based utility (see “How to open the browser-basedutility” on page 14).2. Click the Administration tab, then click the Log page.3. To monitor traffic between the local network and the Internet, selectEnabled (default), then click Save Settings.4. To view the logs, click View Log. The Log window opens.••Incoming Log—The source IP addresses and destination portnumbers for incoming Internet traffic••Outgoing Log—Local IP addresses, destination URLs/IP addresses,and service/port numbers for outgoing Internet traffic••Security Log—Logins for the browser-based utility••DHCP Client Log—Local DHCP server status information6. To save the log, click Save the Log, then click OK or Save.49
Linksys E1550SpecificationsSpecificationsLinksys E1550Model NameDescriptionModel NumberStandardsPortsButtonsLEDsCabling TypeTransmitted PowerAntenna GainReceive SensitivityUPnPWireless SecuritySecurity Key BitsLinksys E1550Wireless-N Router with SpeedBoostE1550802.11n, 802.11g, 802.11b,802.3uPower, Internet, Ethernet (1-4), USBReset, Wi-Fi Protected SetupPower/Wi-Fi Protected Setup,Internet, Ethernet (1-4)CAT 5e802.11b: 16.5 ± 1.5 dBm802.11g: 14.5 ± 1.5 dBm802.11n:(20 MHz): 15.0 ± 1.5 dBm @Ch. 6, MCS0, 8(20 MHz): 13.5 ± 1.5 dBm @Ch. 6, MCS7, 15(40 MHz): 13.5 ± 1.5 dBm @Ch. 6, MCS0, 7, 8, 15Antenna 1: ≤ 2.5 dBiAntenna 2: ≤ 3 dBiAntenna 3 ≤ 4 dBi802.11b: -87 dBm @ 11 Mbps (Typ.)802.11g: -71 dBm @ 54 Mbps (Typ.)802.11n (20 MHz): -69 dBm @ MCS15 (Typ.)802.11n (40 MHz): -66 dBm @ MCS15 (Typ.)SupportedWEP, WPA, WPA2Up to 128-Bit EncryptionEnvironmentalDimensionsUnit Weight 9.81 oz (280 g)Power 12V, 1.5ACertificationsOperating Temp.Storage Temp.Operating HumidityStorage HumiditySpecifications are subject to change without notice.7.95” x 1.34” x 6.3” (202 x 34 x 160 mm)FCC, CE, ICES-003, Wi-Fi (802.11b/g/n),UL/cUL, Windows 732 to 104°F (0 to 40°C)-4 to 140°F (-20 to 60°C)10 to 80% Noncondensing5 to 90% Noncondensing50
Linksys E1550Browser-based Utility Menu StructureBrowser-based Utility Menu StructureLinksys E1550SetupBasic SetupLanguageInternet SetupInternet Connection TypeOptional SettingsNetwork SetupRouter AddressDHCP Server SettingTime SettingsTime ZoneRebootDDNSDDNSDDNS ServiceMAC Address CloneMAC Address CloneAdvanced RoutingNATDynamic Routing (RIP)Static RoutingWirelessBasic Wireless SettingsConfiguration ViewWireless SecurityWireless SecurityGuest AccessGuest AccessWireless MAC FilterWireless MAC FilterAccess RestrictionMAC Address Filter ListSecurityFirewallFirewallInternet FilterWeb FilterVPN PassthroughVPN PassthroughStorageDiskDisk ManagementShared FolderFormat DiskFTP ServerSetupAccessAdministrationInformationAnonymous AccessUser ManagementGroup ManagementAccess PolicyParental ControlsTarget DevicesScheduleBlock Specific SitesApplications & GamingSingle Port ForwardingSingle Port ForwardingApplication NamePort Range ForwardingPort Range ForwardingApplication NamePort Range TriggeringPort Range TriggeringDMZDMZQoSQoS (Quality of Service)WirelessInternet Access PriorityUpstream BandwidthCategorySummaryAdministrationManagementRouter AccessLocal Management AccessRemote Management AccessAdvanced featuresUPnPBack up and RestoreLogLogDiagnosticsDiagnosticsPing TestTraceroute TestFactory DefaultsFactory DefaultsFirmware UpgradeFirmware UpgradeStatusRouterRouter InformationInternet ConnectionLocal NetworkLocal NetworkDHCP ServerWireless NetworkWireless NetworkPortsRear Port LightsInternet Port LinkLocal Port Link51
Visit linksys.com/support for award-winning 24/7 technical supportCisco, the Cisco logo, and Linksys are trademarks or registered trademarks of Cisco and/or its affiliates in the United States and other countries.A listing of Cisco’s trademarks can be found at www.cisco.com/go/trademarks. All other trademarks mentioned in this document are the property of their respective owners.© 2011 Cisco and/or its affiliates. All rights reserved.3425-00977