Model PP4RO-75 Undersink Reverse Osmosis System - Pentair ...
Model PP4RO-75 Undersink Reverse Osmosis System - Pentair ...
Model PP4RO-75 Undersink Reverse Osmosis System - Pentair ...
You also want an ePaper? Increase the reach of your titles
YUMPU automatically turns print PDFs into web optimized ePapers that Google loves.
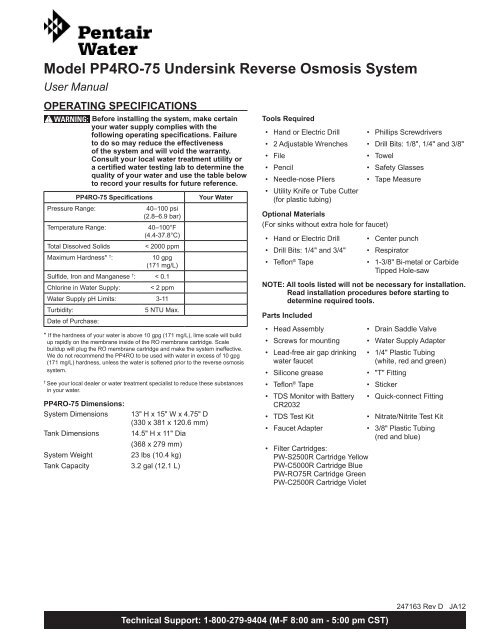
<strong>Model</strong> <strong>PP4RO</strong>-<strong>75</strong> <strong>Undersink</strong> <strong>Reverse</strong> <strong>Osmosis</strong> <strong>System</strong>User ManualOPERATING SPECIFICATIONSWARNING: Before installing the system, make certainyour water supply complies with thefollowing operating specifications. Failureto do so may reduce the effectivenessof the system and will void the warranty.Consult your local water treatment utility ora certified water testing lab to determine thequality of your water and use the table belowto record your results for future reference.Pressure Range:<strong>PP4RO</strong>-<strong>75</strong> SpecificationsTemperature Range:Total Dissolved SolidsMaximum Hardness* † :40–100 psi(2.8–6.9 bar)40–100°F(4.4-37.8°C)< 2000 ppm10 gpg(171 mg/L)Sulfide, Iron and Manganese † : < 0.1Chlorine in Water Supply:< 2 ppmWater Supply pH Limits: 3-11Turbidity:Date of Purchase:5 NTU Max.Your Water* If the hardness of your water is above 10 gpg (171 mg/L), lime scale will buildup rapidly on the membrane inside of the RO membrane cartridge. Scalebuildup will plug the RO membrane cartridge and make the system ineffective.We do not recommend the <strong>PP4RO</strong> to be used with water in excess of 10 gpg(171 mg/L) hardness, unless the water is softened prior to the reverse osmosissystem.†See your local dealer or water treatment specialist to reduce these substancesin your water.<strong>PP4RO</strong>-<strong>75</strong> Dimensions:<strong>System</strong> DimensionsTank Dimensions<strong>System</strong> Weight13" H x 15" W x 4.<strong>75</strong>" D(330 x 381 x 120.6 mm)14.5" H x 11" Dia(368 x 279 mm)23 lbs (10.4 kg)Tank Capacity 3.2 gal (12.1 L)Tools Required• Hand or Electric Drill• Phillips Screwdrivers• 2 Adjustable Wrenches • Drill Bits: 1/8", 1/4" and 3/8"• File• Pencil• Needle-nose Pliers• Utility Knife or Tube Cutter(for plastic tubing)• TowelOptional Materials(For sinks without extra hole for faucet)• Hand or Electric Drill• Drill Bits: 1/4" and 3/4"• Teflon ® Tape• Safety Glasses• Tape Measure• Center punch• Respirator• 1-3/8" Bi-metal or CarbideTipped Hole-sawNOTE: All tools listed will not be necessary for installation.Read installation procedures before starting todetermine required tools.Parts Included• Head Assembly• Screws for mounting• Lead-free air gap drinkingwater faucet• Silicone grease• Teflon ® Tape• TDS Monitor with BatteryCR2032• TDS Test Kit• Faucet Adapter• Filter Cartridges:PW-S2500R Cartridge YellowPW-C5000R Cartridge BluePW-RO<strong>75</strong>R Cartridge GreenPW-C2500R Cartridge Violet• Drain Saddle Valve• Water Supply Adapter• 1/4" Plastic Tubing(white, red and green)• "T" Fitting• Sticker• Quick-connect Fitting• Nitrate/Nitrite Test Kit• 3/8" Plastic Tubing(red and blue)Technical Support: 1-800-279-9404 (M-F 8:00 am - 5:00 pm CST)247163 Rev D JA12
GENERAL PRECAUTIONSWARNING: Do not use with water that ismicrobiologically unsafe or of unknownquality without adequate disinfection beforeor after the system. <strong>System</strong>s certified forcyst reduction may be used on disinfectedwaters that may contain filterable cysts.WARNING: The <strong>PP4RO</strong> contains a replaceable ROmembrane cartridge that is critical to theefficiency of the system. Replacement of theRO membrane cartridge should be with oneof identical specifications, as defined by themanufacturer, to assure the same efficiencyand contaminant reduction performance.WARNING: The <strong>PP4RO</strong> contains a replaceable ROmembrane cartridge, critical for the effectivereduction of total dissolved solids. Productwater should be tested periodically to verifythat the system is working properly.WARNING: The <strong>PP4RO</strong> is acceptable for treatmentof influent concentrations of no morethan 27 mg/L nitrate and 3 mg/L nitrite incombination measured as N and is certifiedfor nitrate/nitrite reduction only for watersupplies with a pressure of 40 psig (280 kPa)or greater.WARNING: The <strong>PP4RO</strong> shall only be used for arsenicreduction on chlorinated water suppliescontaining detectable residual free chlorineat the system inlet. Water systems using anin-line chlorinator should provide a oneminutechlorine contact time before the unit.WARNING: The <strong>PP4RO</strong> will not protect against diseasecausingbacteria or remove naturallyoccurringharmless bacteria.CAUTION The <strong>PP4RO</strong> must be protected against freezingwhich can cause the filter housing to crack,resulting in water leakage.CAUTION Turn off water supply to head without cartridge ifit must be left unattended for an extended periodof time.CAUTION Do not use electrical heating tape on this unit.NOTE: Substances listed as reduced are not necessarilyin your water. <strong>System</strong> must be maintainedaccording to manufacturer's instructions, includingreplacement of filter cartridges.NOTE: Your water must be within required limits forsatisfactory operation. If not, the RO membranecartridge’s life may be shortened and your warrantywill be voided (see Operating Specifications).NOTE: Install on cold water line only.NOTE: Do not install where system will be exposed todirect sunlight.NOTE: Make certain that installation complies with all stateand local laws and regulations.NOTE: The filter cartridges and RO membrane cartridgeincluded with the system have limited servicelives. Changes in taste, odor, and color of thefiltered water indicate that the cartridges and/ormembrane should be replaced. The filter cartridgeand RO membrane cartridge icons on the faucetbase will blink a GREEN color when there is waterflow through the drinking water faucet, indicatingall systems are good. If the Filter Cartridge or ROmembrane cartridge icon(s) blink RED when thedrinking water faucet is turned on, the respectivecartridge(s) need changing.NOTE: During extended periods of non-use (such asduring a vacation), remove the membrane cartridgeand the filter cartridges from the unit and placethem in a sealed plastic bag. Store the cartridgesin the refrigerator for future use. When re-startingthe unit, replace all cartridges and flush perinstructions.NOTE: If the <strong>PP4RO</strong> stands for more than 2 to 3 dayswithout being used, the storage tank should beemptied.NOTE: Use only Teflon ® tape without adhesive backingto seal joints. Do not use pipe compound (“pipedope”), sticks, or similar compounds with thisunit; they contain petroleum derivatives which cancause crazing and cracking of the plastic in thefilter housing.NOTE: Use only soap and water to clean components.NOTE: Do not use aerosol sprays (bug spray, cleaningfluids, etc.) near the <strong>PP4RO</strong>. They contain organicsolvents which will cause crazing and cracking ofthe plastic in the filter housing.NOTE: After prolonged periods of non-use, such as avacation, it is recommended that the system beflushed thoroughly. Let water run for 2 to 3 minutesbefore using.NOTE: Do not use a torch near the unit.2 • JA12 <strong>Model</strong> <strong>PP4RO</strong>-<strong>75</strong> <strong>Undersink</strong> <strong>Reverse</strong> <strong>Osmosis</strong> <strong>System</strong>
TESTING THE <strong>PP4RO</strong> continuedNitrate/Nitrite Test KitA Nitrate/Nitrite Test Kit is included with this unit and isdesigned to indicate nitrate/nitrite levels in the drinkingwater. Test the water monthly. The current EPA MaximumContaminant Level (MCL) for Nitrate as Nitrogen (N) is10 mg/L or 10 ppm. The current EPA maximum contaminantlevel (MCL) for Nitrite as Nitrogen (N) is 1mg/L or 1ppm.Results showing any nitrate breakthrough should be followedup with a laboratory analysis of the water.WARNING: Consult with your doctor to see if you oryour family should drink water with thenitrate/nitrite levels found in your water.Testing Instructions:Testing instructions are included with the Nitrate/Nitrite Test Kit.If the Nitrate/Nitrite Test Kit is missing please call800-861-8<strong>75</strong>8 for replacement.PurTest ®Figure 16Nitrate/Nitrite TestWHEN TO CHANGE THE CARTRIDGESThe life of the cartridge depends on the water volume used andthe substances in the water. Normally, cartridges should bechanged at intervals of 6 months. Replace the cartridge soonerif the water pressure at the faucet begins to drop noticeably orif you notice changes in the taste, color, or flow of the filteredwater.CHANGING THE CARTRIDGESMaterials Needed• Replacement Cartridges (color coded):PW-S2500R Cartridge YellowPW-C5000R Cartridge BluePW-RO<strong>75</strong>R Cartridge GreenPW-C2500R Cartridge VioletThe pre-filter and post-filter cartridges need to be changedwhen the water pressure at the faucet begins to dropnoticeably, or if there are changes in taste, color or flow of thefiltered water. All cartridges should be changed at the sametime. The cartridges are color coded to indicate which locationthey are installed into.1. Changing the Filter CartridgesNOTE: Only the replacement cartridges listed can be usedwith this system. Failure to use recommendedreplacement cartridges will void your warranty.A. Place a small pan or towel under the <strong>PP4RO</strong> to catchany water that may drip.B. Twist the pre-filter cartridge (on the left side of the filterhousing) counter-clockwise for a 1/4 of a turn, and pullthe cartridge out of the system. If the system has anysignificant leaks, see Troubleshooting.C. Push the new cartridge into the head until it can go nofurther.D. Twist the cartridge 1/4 turn clockwise until it snaps intoplace.E. Gently pull the cartridge straight out to ensure thecartridge is locked into place.F. Repeat for all other cartridges.G. Turn on water and check for leaks. If leaks are found,see Troubleshooting.NOTE: The post filter cartridge may contain carbonfines (very fine black powder). This will bereleased during your initial flushing.H. Flush water through filter for 5 minutes to removecarbon fines. Check for leaks again before leavinginstallation.I. Press the reset button located in the batterycompartment for five seconds. If this is not done, theicon on the faucet base will continue to blink red. Whenthe unit is reset by pressing the reset button, all of theicons in the faucet base will blink on and off three times.Doing so will reset the time and flow usage for the filtercartridges.J. Allow the tank to fill.2. Changing the RO membrane cartridgeNOTE: Only use the RO-<strong>75</strong>GP replacement RO membranecartridge. Failure to use the recommendedreplacement cartridge will void your warranty.The RO Membrane Cartridge Icon will normally blink greenwhen the drinking water faucet is turned on, indicating the ROCartridge is operating efficiently (Figure 17).The RO membrane cartridge needs to be changed when theRO Membrane Cartridge Icon on the faucet base blinks REDas water is running through the drinking faucet base. Thesymbol will continue to blink RED until it is replaced.A. Turn system faucet and tank valve off.B. Place a small pan or towel under the <strong>PP4RO</strong> to catchany water that may drip.C. Twist the RO membrane cartridge (third cartridge)counter-clockwise for a 1/4 of a turn, and pull thecartridge straight out of the system. If the system hasany significant leaks, see Troubleshooting.D. Align the alignment tab, on the top of the new cartridgewith the alignment groove, in the head assemblyE. Push the cartridge into the head until it can go no furtherF. Twist the cartridge 1/4 turn clockwise until it snaps intoplace.G. Gently pull the cartridge straight out to ensure thecartridge is locked into place.H. Turn on water, open tank and check for leaks. If leaksare found, see Troubleshooting.I. Allow the tank to fill.RO MembraneCartridge IconFigure 17Non-ROCartridge LifeIndicator10 • JA12 <strong>Model</strong> <strong>PP4RO</strong>-<strong>75</strong> <strong>Undersink</strong> <strong>Reverse</strong> <strong>Osmosis</strong> <strong>System</strong>
CHANGING THE CARTRIDGEScontinued3. Flushing the RO membraneNOTE: The <strong>PP4RO</strong> system does not produce a highvolume of water on demand as an ordinary filterdoes. Water is produced at a slow, drop-by-droprate. The system requires about 3 hours to fill thestorage tank. As water is taken from the tank, thesystem automatically starts the cycle of replacingthe water and then stops water production whenthe tank is full.A. Make sure system faucet is off.B. Make sure tank valve is in the open position.C. Slowly turn on cold water supply.D. Open the faucet to turn on flow. Let the faucet run/dripfor 12 hours then close it.E. Allow 3 hours for the tank to fill. Continue to periodicallycheck the installation for leaks. After the storage tankis filled, open the faucet to flush the post-filter cartridge(on the right side of the filter housing). Allow 4 to 5minutes for all of the water to drain from the tank. Closefaucet and allow tank to fill.CAUTION Visually check the entire system for leaks. If aleak is present, see Troubleshooting.F. Repeat step E four times.CFigure 19BatteryCR2032Reset ButtonLEDBatteryB4. Cartridge Life Indicator and changing batteryA. The cartridge life indicator features a 6-month timesignal and a low battery signal. When the 6-monthindicator lights the three filter cartridges should bechanged.B. After replacing the cartridges the reset button is pushedand held for 5 seconds. The LED on the circuit boardnext to the reset button will flash red several times.NOTE: The battery should be changed annually orwhen the low battery signal appears.C. To change battery, use a small screwdriver to push onmetal spring to release battery. Snap in new battery withnumber showing.NOTE: Use replacement battery type CR2032.Figure 20TROUBLESHOOTINGLeaks on Supply Adapter Connection1. Turn off water supply valve and turn on drinking waterfaucet to release pressure in system.2. Loosen leaking threaded fitting on supply adapter or pullout leaking tubing by pressing collar surrounding tubingwhile pulling the tubing with your other hand.3. Inspect to see if plastic tubing is scratched and supplyadapter was properly attached.4. If tubing is scratched, cut off 1/2" to 5/8" and reinstall.AFigure 18Lowbattery6 month timer complete- change cartridges andreset timerLeaks on Faucet/Tubing Connection1. Turn off water supply valve and turn on drinking waterfaucet to release pressure.2. Unscrew tubing nut at bottom of faucet. Inspect the tubing.The insert, plastic ring and tubing should not be damaged.3. Check if insert is in place and tubing is cut squarely andnot scratched, cut tubing if necessary to get square smoothend.4. If the tubing is smooth and square, reconnect tubing byinserting into faucet and tightening nut. The plastic ringshould be held tight to the faucet system when the nut istight.5. Turn on water supply valve, then close faucet and check forleaks.NOTE: If leaks persist, or if there are other leaks onsystem, turn off water supply and call TechnicalSupport 1-800-279-9404.<strong>Model</strong> <strong>PP4RO</strong>-<strong>75</strong> <strong>Undersink</strong> <strong>Reverse</strong> <strong>Osmosis</strong> <strong>System</strong> JA12 • 11
TROUBLESHOOTING continuedLeaks Between Cartridge and Filter Housing1. Turn off cold water supply to system at saddle valve. Closetank valve. Open drinking water faucet to relieve waterpressure.2. Remove the cartridge, inspecting it for damage. InspectO-rings to make sure they are seated and clean.3. Insert and twist the cartridge back into the filter housing.4. Turn on water supply at saddle valve. Open tank valve.Close drinking water faucet after water begins to flow. Ifleaks persist, call Technical Support.Leak Between Tank Valve and Storage Tank1. Turn off water supply to system at the saddle valve. Openfaucet to drain storage tank. Let faucet run for 3–5 minutesuntil it drips.2. Remove green tubing from tank valve by pressing the collararound the fitting while pulling the tubing with your otherhand.3. Unscrew the tank valve from the storage tank.4. Place three wraps of Teflon ® tape on the threads of thestorage tank.5. Thread the tank valve onto the top of the tank opening byturning it clockwise until snug.6. Cut off 1" of tubing. Tubing should be cut squarely. Internaland external burrs should be removed. Place a mark ontubing 3/4" from end of tubing.7. Wet the tubing and insert until the mark is flush with thequick-connect fitting.8. Turn water supply on at the saddle valve and close drinkingwater faucet.9. Allow system to pressurize for several hours and check forleaks.10. Check for leaks after tank is fully pressurized (6–12 hours).If leak persists, call Technical Support .Leaks at Quick-Connect FittingsCAUTION The 1/4" red tubing connected to the top of thethird cartridge has a flow restrictor installed. Thesystem will not operate correctly if the restrictoris removed.1. Close tank valve, close saddle valve, and open drinkingwater faucet.2. Press collar around the quick-connect fitting while pullingthe tubing with your other hand.3. Cut off 1" of tubing. Tubing should be cut squarely. Internaland external burrs should be removed. Place a mark ontubing 5/8" from end on 1/4" tubing or 3/4" from end on 3/8"tubing.4. Wet the end and insert tubing until the mark is flush with thequick-connect fitting.5. Open the saddle valve until it comes to a stop. Open thetank valve and close drinking water faucet. If leaks persist,call Technical Support.Leaks from Faucet1. Check to make sure white tubing leading from the drinkingwater faucet to the drain is as straight as possible (it isusually necessary to cut this line during installation). Anykinks or sags in this drain line will impede the flow of waterto the drain.2. Check to make sure the drain clamp and the drain holeare properly aligned. (Refer to Step 7. Installing the DrainClamp).3. Check to make sure there is no foreign matter clogging thedrain line or at the drain clamp hole. If leaks persist, callTechnical Support.No Flow or Slow Flow from the Brine (Reject) Line (Lessthan 6 fl. oz. or 180 milliliters per minute)NOTE: Before checking brine (or reject) flow, make surethe unit is producing water by turning the valve onthe storage tank off and opening the drinking waterfaucet. Water should drip from faucet.1. Replace the pre-filter cartridge according to the Changingthe Cartridge instructions and recheck the brine (or reject)flow rate.2. If the pre-filter cartridge is not at fault, the brine (or reject)flow controller could be clogged. Call Technical Support.High TDS in Product Water1. If high TDS (Total Dissolved Solids) is detected in theproduct water, the RO Cartridge Icon will blink red whenwater is flowing from the faucet. The RO Cartridge mayneed to be replaced or the reject flow control tubing may beclogged. If this is a new installation, call Technical Support.2. Otherwise, draw 1 gallon of water from the unit. After 10minutes, then run water from the faucet and test the wateragain.3. If the RO Cartridge Icon is still blinking red, change the ROcartridge and empty the tank.4. Determine when you last changed the RO Filter Cartridgeand call Technical Support.Limited Flow at Drinking Water Faucet1. Turn off water supply to system at saddle valve.2. Open the faucet to turn on flow.3. Unscrew the blue cap at the base of the storage tank toexpose air valve. Use a small air compressor or bicyclepump to add air to the storage tank. This will force thewater out of the storage tank through the faucet. Continueto add air until no more water comes out of the faucet.4. Turn off the drinking water faucet.5. Using an air pressure gauge, adjust the pressure in thestorage tank to 5–7psi.6. Replace the blue cap.7. Open the saddle valve until it comes to a stop. Let thesystem run 6–12 hours to fill the tank. A full tank weighsapproximately 33 pounds. If performance has not improved,call Technical Support.Sudden Return of Taste and OdorIf shortly after complete servicing, noticeable taste and odorsreturn, contact Technical Support.If you are experiencing a problem not listed in this manual,shut off the water supply at the saddle valve and close the tankvalve. Call Technical Support.12 • JA12 <strong>Model</strong> <strong>PP4RO</strong>-<strong>75</strong> <strong>Undersink</strong> <strong>Reverse</strong> <strong>Osmosis</strong> <strong>System</strong>
WARNING: Do not use with water that ismicrobiologically unsafe or of unknownquality without adequate disinfection beforeor after the system. <strong>System</strong>s certified forcyst reduction may be used on disinfectedwaters that may contain filterable cysts.NOTE: Substances that may be reduced are notnecessarily in your water. Filter must be maintainedaccording to manufacturer’s instructions, includingreplacement of filter cartridges.MAINTENANCEContact your water treatment professional for replacementcartridge pricing.SUGGESTED LIST PRICEREPLACEMENT CARTRIDGES555612-96 PW-S2500R: $8.94555586-96 PW-C500R: $18.54555613-96 PW-RO<strong>75</strong>R: $44.00555585-96 PW-C2500R: $12.16REPLACEMENT PARTSFor replacement parts contact your local retailer or callCustomer Service at 1-800-279-9404.Item#Part Number Description QTY1 244877 Storage Tank 3.2 Gal 12 357485 Head Assembly, Includes Bracket,Screws, Manifold Assemblies, Tubingand Monitor Circuit Board3 244807 Faucet Base, RO Monitor 14 555612-96 Cartridge, Sediment PW-S2500R,Yellow5 555586-96 Cartridge, Carbon Block PW-C5000R,Blue6 555676-96 Cartridge, RO Element, <strong>75</strong> GPDPW-RO<strong>75</strong>R, Green7 555585-96 Cartridge, GAC PW-C2500R, Violet 18 244883 Faucet Kit 1244835 Faucet Adapter, 7/16-24 UNS x 3/8"QC244783 Valve, RO Tank, 1/4" NPT x 1/4" QC 11-459-00 Mounting Screw 2143495 Lubricant, Silicone, Packet 1244796 Drain Clamp, 3/8" QC 1150646 TDS Test Kit 1244797 Adaptor, 1/2" FIPS x 1/2" MIPS x 1/4"QC244820 Faucet 1247117 Label, Pentek Change Reminder 19 244794 Tubing 1/4", White PE 110 244850 Tubing 1/4" O.D., Green 111 2448<strong>75</strong> Tubing 1/4" O.D., Red 112 244849 Tubing 3/8" O.D., Red Faucet Drain 113 244848 Tubing 3/8" O.D., Blue Permeate 114 144925 Nitrate/Nitrite Test Kit 1* 247163 Manual <strong>PP4RO</strong> 1*Not Shown111111123845679101114 Nitrate/Nitrite TestPurTest ®1213<strong>Model</strong> <strong>PP4RO</strong>-<strong>75</strong> <strong>Undersink</strong> <strong>Reverse</strong> <strong>Osmosis</strong> <strong>System</strong> JA12 • 13
Performance DataImportant Notice: Read this performance data and comparethe capabilities of this system with your actual water treatmentneeds. It is recommended that before installing a watertreatment system, you have your water supply tested todetermine your actual water treatment needs.This system has been tested according to NSF/ANSI 58 for thereduction of the substances listed below. The concentrationfor the indicated substances in water entering the systemwas reduced to a concentration less than or equal to thepermissible limit for water leaving the system, as specified inNSF/ANSI 58.NOTE: Substances that may be reduced are notnecessarily in your water. Filter must be maintainedaccording to manufacturer’s instructions, includingreplacement of filter cartridges.The tested efficiency rating for this system is 15.80%.Efficiency rating means the percentage of the influent waterto the system that is available to the user as reverse osmosistreated water under operating conditions that approximatetypical daily usage. The tested recovery rating is 27.40%.Recovery rating means the percentage of the influent waterto the membrane portion of the system that is available to theuser as reverse osmosis treated water when the system isoperated without a storage tank or when the storage tank isbypassed.<strong>PP4RO</strong>-<strong>75</strong>Influent ChallengeConcentrationMaximumPermissibleProduct WaterConcentrationReductionRequirementsAverageReductionSubstanceStandard 58Arsenic V 0.050 mg/L ± 10% 0.010 mg/L 97.6%Barium 10.0 mg/L ± 10% 2.0 mg/L 96.7%Cadmium 0.03 mg/L ± 10% 0.005 mg/L 98.2%Chromium III 0.3 mg/L ± 10% 0.1 mg/L 97.6%Chromium VI 0.3 mg/L ± 10% 0.1 mg/L 97.0%Copper 3.0 mg/L ± 10% 1.3 mg/L 98.8%Cysts Minimum 50,000/mL 99.95% 99.99%Fluoride 8.0 mg/L ± 10% 1.5 mg/L 96.2%Lead 0.15 mg/L ± 10% 0.010 mg/L 99.0%Nitrate 27.0 mg/L ± 10% 10.0 mg/L 87.1%Nitrite 3.0 mg/L ± 10% 1.0 mg/L 89.3%Radium226/22827pCi/L ± 10% 5pCi/L 80%Selenium 0.10 mg/L ± 10% 0.05 mg/L 98.0%Total DissolvedSolids<strong>75</strong>0 mg/L ± 40 mg/L 187 mg/L 94.9%Turbidity 11 mg/L ± 1 NTU 0.5 NTU 99.1%Standard 42Chlorine 2 mg/L >=50% 93.0%Production Rate: 24.83 gpdThe <strong>PP4RO</strong>-<strong>75</strong> is Tested and Certified by NSF Internationalagainst NSF/ANSI Standard 42 and 58 for the reduction ofsubstances listed in the table above.Testing was performed under standard laboratory conditions,actual performance may vary.State of CaliforniaDepartment of Public HealthWater Treatment DeviceCertificate Number11- 2099Date Issued: October 24, 2011Trademark/<strong>Model</strong> DesignationReplacement Elements<strong>Pentair</strong> Water <strong>PP4RO</strong>-<strong>75</strong> PW-RO<strong>75</strong>R (RO Membrane)PW-S2500R (Pre Filters)PW-C5000R (Pre Filters)PW-C2500R (Post Filter)Manufacturer: <strong>Pentair</strong> Residential Filtration, LLCThe water treatment device(s) listed on this certificate have met the testing requirements pursuant to Section116830 of the Health and Safety Code for the following health related contaminants:Microbiological Contaminants and TurbidityCystsTurbidityOrganic ContaminantsNoneInorganic/Radiological ContaminantsArsenic (pentavalent) 1BariumCadmiumChromium (hexalent)Chromium (trivalent)CopperFluorideLeadRadium 226/228SeleniumRated Service Capacity: 1250 gal service cycleRated Service Flow: 24.8 gpdConditions of Certification:Do not use where water is microbiologically unsafe or with water of unknown quality, except that systems certifiedfor cyst reduction may be used on disinfected waters that may contain filterable cysts.1Claims for arsenic reduction shall only be made on water supplies maintaining detectable residual free chlorine at thereverse osmosis (RO) system inlet. Water systems using an in-line chlorinator should provide a minimum of 1 minutechlorine contact time before the RO system.<strong>Model</strong> <strong>PP4RO</strong>-<strong>75</strong> <strong>Undersink</strong> <strong>Reverse</strong> <strong>Osmosis</strong> <strong>System</strong> JA12 • 15
<strong>Pentair</strong> Residential Filtration, LLC LIMITED WARRANTY<strong>Pentair</strong> Residential Filtration, LLC warrants to the original owner (under normal use): <strong>Reverse</strong> <strong>Osmosis</strong> <strong>System</strong> to be free from defects in material and/orworkmanship one (1) year from the date of purchase. Any replacement products furnished will be free from defects in material and/or workmanship for theremainder of the original warranty period. This warranty does not cover: (1) pre and post filter cartridges, or reverse osmosis membrane (2) defects not reportedwithin the above time period, (3) items manufactured by other companies, (4) problems arising from failure to comply with <strong>Pentair</strong> Residential Filtration, LLCinstructions, (5) problems and/or damage arising from acts of nature, abuse, misuse, negligence or accident by any party other than <strong>Pentair</strong> Residential Filtration,LLC, (6) problems and/or damage resulting in whole or in part from alteration, modification, repair or attempted alteration, modification or repair by any party otherthan <strong>Pentair</strong> Residential Filtration, LLC, (7) noncompliance with applicable codes/ordinances.If a defect in workmanship and/or material in a product or part covered by the warranty should arise, <strong>Pentair</strong> Residential Filtration, LLC, at its sole discretion, willrepair or replace the defective product or part (<strong>Pentair</strong> Residential Filtration, LLC may consider, in good faith, the customer’s preference).All claimed defective product must: (1) be authorized for return by <strong>Pentair</strong> Residential Filtration, LLC with an RGA number (2) include proof of the purchase date ofthe product or part (3) returned to <strong>Pentair</strong> Residential Filtration, LLC prior to the expiration of the warranty date, at the customer’s expense, shipment pre-paid, (4) beaccompanied by a letter detailing the <strong>Model</strong> Number, Serial Number (if any), and a brief description of the problem.TO THE MAXIMUM EXTENT PERMITTED BY APPLICABLE LAW, PENTAIR RESIDENTIAL FILTRATION, LLC DISCLAIMS ALL OTHER WARRANTIES, WHETHEREXPRESS OR IMPLIED, INCLUDING, BUT NOT LIMITED TO, THE IMPLIED WARRANTY OF MERCHANTABILITY AND FITNESS FOR A PARTICULAR PURPOSE, WITHREGARD TO THE PRODUCTS, PARTS AND ANY ACCOMPANYING WRITTEN MATERIALS.To the maximum extent permitted by applicable law, <strong>Pentair</strong> Residential Filtration, LLC shall not be liable for any damages whatsoever (including, but not limitedto, loss of time, inconvenience, expenses, labor or material charges incurred in connection with the removal or replacement of the system, special, incidental,consequential, or indirect damages for personal injury, loss of business profits, business interruption, loss of business information, or any other pecuniary loss)arising out of the use of or inability to use the defective products or parts, even if <strong>Pentair</strong> Residential Filtration, LLC has been advised of the possibility of suchdamages.<strong>Pentair</strong> Residential Filtration, LLC'S maximum liability under any provision of this Limited Warranty shall be limited to the amount actually paid for the system.NOTE: Because some states do not allow the exclusion or limitation of incidental or consequential damages, the above limitations or exclusions may not apply.THIS WARRANTY GRANTS SPECIFIC LEGAL RIGHTS, AND OTHER RIGHTS MAY APPLY. SUCH RIGHTS VARY FROM STATE TO STATE.Buyer Seller Date5730 North Glen Park Road, Milwaukee, WI 53209Technical Support: 800.279.9404www.pentairaqua.com/pro© 2012 <strong>Pentair</strong> Residential Filtration, LLC 247163 Rev D JA12


