
Create successful ePaper yourself
Turn your PDF publications into a flip-book with our unique Google optimized e-Paper software.
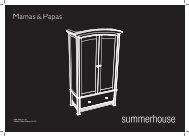
instructionslonghouse wardrobeFR023W:V1/04/06© <strong>Mamas</strong> & <strong>Papas</strong> (Holdings) Ltd. 2006IMPORTANT: Please read instructions carefullyand keep for future reference
<strong>Longhouse</strong> <strong>Wardrobe</strong>Before assembling your product...Do not discard any packaging until you are certain you have all the correct components and fittings.If any items are damaged or missing, please contact your retailer or <strong>Mamas</strong> & <strong>Papas</strong> on 0870 8307700.Allow plenty of time and space when beginning the construction of your product.Components1348910211571261813151614191720212223Item Name Part no. Qty1 Right side panel 35788---0602 12 Shelves 35788---0618 43 Middle panel 35788---0611 14 Top front rail 35788---0620 15 Bottom front rail 35788---0624 16 Top back rail 35788---0621 17 Mid-base 35788---0602 18 Left side panel 35788---0601 19 Left drawer insert 110 Right drawer insert 111 Plinth 35788---0606 112 Top 35788---0605 1Item Name Part no. Qty13 Back panels 214 H-section 35788---0706 115 Hanger rails 35788---0705 216 Storage baskets 217 Pegs 35788---0608 318 Left door 35788---0612 119 Right door 35788---0613 120 Drawer sides 35788---0614/15 221 Drawer front 35788---0619 122 Drawer base 35788---0617 123 Drawer back 35788---0616 1--
FITTINGSA x 36 B x 36Cam studC x 59CamD x 6Short screwsE x 9Hinge platesF x 1Short boltsG x 4Allen keyH x 20Short base screwsI x 6Long screwsJ x 2Hinge armsK x 2HandlesL x 2Handle screwsM x 2Wall strapN x 9WasherTOOLSLong boltsFitting code: 357800000701Cross-head screwdriverFlat-head screwdriverHammer--
STEP 3Insert twenty four cams(B) into the holes in theundersides of the fourshelves (2).Note: the arrows on thetops of the cams mustface towards the edges ofthe shelves once fitted.B22STEP 4Slot the four shelves (2)onto the top four sets ofcam studs and dowels inthe right side panel (1).Fasten the shelves inposition by turning thecams in the attachededges of the shelvesclockwise with ascrewdriver.1--
3STEP 5Screw twelve cam studs(A) into the metal insertsin the middle panel(3) using a cross-headscrewdriver.A3STEP 6Turn the middle panel (3)over and slot it onto theshelves on the assembledsections.Tighten the cams tolock the middle panelonto the shelves using ascrewdriver.--
4STEP 7Select the top (4) andbottom (5) front rails andthe back rail (6).Insert six cams (B) intothe ends of the rails.5B67STEP 8Insert six cams (B) intothe underside of the midbase(7).B--
7STEP 9Slot the mid-base (7)onto the bottom positionon the right side panel.Fasten the cams inthe mid-base using ascrewdriver.Step 10Fasten the mid-base tothe middle panel usingthree short bolts (E) andthe allen key (F).EF--
64Step 11Slot the top (4) andbottom (5) front rails andthe back rail (6) onto theassembled sections.Fasten the cams in theends of the rails using ascrewdriver.5Step 12Screw six cam studs (A)into the metal inserts inthe inside of the left sidepanel (8) using a crossheadscrewdriver.A8--
CSTEP 13Attach three of the hingeplates (D) to the leftside panel using six shortscrews (C) and a crossheadscrewdriver.D8STEP 14Slot the left side panel (8)onto the rails and midbase.Tighten all of the camsusing a screwdriver.-10-
STEP 15With the help of anotherperson lower thewardrobe onto its back.Slot the left (9) and right(10) drawer inserts ontothe underside of themid-base attached to theassembled sections of thewardrobe.109STEP 16Slot the plinth (11)onto the bottom of theassembled sections of thewardrobe.Fasten the plinth in placeusing six short bolts (E)and the allen key (F).E11F-11-
STEP 17Insert the four short basescrews (G) through theholes in the front edge ofthe plinth.Tighten the screws intothe bottom rail using theallen key (F).GF12STEP 18With the help of anotherperson turn the wardrobeover.Slot the top (12) ontothe top of the assembledsections of the wardrobe.-12-
NSTEP 19Screw nine long bolts(N) through the top andinto the middle and sidepanels using the allen key(F).FHSTEP 20Screw eight long screws(H) through the holes inthe front and back edgesof the top. Tighten thescrews through the topand into the rails using across-head screwdriver.-13-
STEP 21With the help of anotherperson turn the wardrobeover.To check that thewardrobe is square,measure from the bottomcorner of one side panelto the top corner of theopposite, see diagram.Now measure theopposite diagonal, ifthe measurementsare unequal then thewardrobe is not square.To square the wardrobe,gently push the topcorner of the longestdiagonal towards the topcorner of the shortestdiagonal and re-measure,continue until equal (a2-3mm difference isacceptable).STEP 22Slot the left hand backpanels (13) (see diagram)into the groove in theside, base and top of thewardrobe.Fasten the panel in placeusing sixteen short screws(C) and a cross-headscrewsdriver.13C-14-
14STEP 23Slot the the H-section(14) onto the edge of theattached back panel.CSTEP 24Slot the remaining backpanel (13) into the H-section.Fasten the panel in placeusing fifteen short screws(C) and a cross-headscrewsdriver.13-15-
STEP 25Attach the wall straps(L) to the top using twoshort screws (C) and thewashers (M) supplied.Move the wardrobe to itsfinal position.The other ends of thestraps can now beattached to the wall usingthe correct fittings for thetype of wall.You will decrease thepotential for the furnitureto fall If it is placed on aflat and level wooden ortiled floor, but we wouldstill strongly recommendthat the wall strap isfitted.LMCSTEP 26With the help of anotherperson lift the wardrobeupright.Slot the two hanger rails(15) into the hanger railcups inside the wardrobe.15-16-
STEP 27Place the two storagebaskets (16) onto theshelves.1617STEP 28Screw the three pegs (17)into the inserts in theright side panel.-17-
18STEP 29Insert the hinge arms (I)into the large holes in thebacks of the left (18) andright (19) doors.Fasten the hinges (J) inplace using twelve shortscrews (C) and a crossheadscrewdriver.Attach the handles (J)to the doors using thehandle screws (K) and across-head screwdriver.IC19JKSTEP 30Slot the hinge arms onthe doors onto the hingeplates and push themdown until they lock intoposition.The doors can be removedby pushing the button onthe end of the hinge arminwards.-18-
Adjusting the gapbetween the doors.Loosen screw ‘A’, turnscrew ‘B’ clockwise oranti-clockwise until thegap between the doors isequal then tighten screw‘A’.STEP 31Adjusting the height ofthe doors.Loosen screws ‘C’ thenslide the hinge plate upor down until the doorsare even then tighten thescrews.Adjusting the angle ofthe door.Loosen screw ‘A’ andslide the hinge arm eitherforwards or backwardsuntil the door is verticalthen tighten screw ‘A’.-19-
H20STEP 32Align the grooves in thebottoms of the drawerside (20) with the groovein the back of the drawerfront (21).Fasten the sides to thedrawer front using sixlong screws (H) and across-head screwdriver.2122STEP 33Slide the base (22) intothe grooves in the drawersides and the drawerfront.-20-
HSTEP 34Slot the drawer back (23)into position, ensure thatthe base has slotted intothe groove in the drawerback.Fasten the drawer backto the drawer sides usingsix long screws (H) and across-head screwdriver.STEP 35Slot the runners on thedrawer sides into thecarcass runners on thewardrobe and pushinwards.The wardrobe is now fullyassembled.-21-
WALL STRAP INFORMATIONThe wall strap is only intended to be used with the <strong>Mamas</strong> and <strong>Papas</strong> product that it issupplied with.Never attempt to modify or change the wall attachment strap in any way. Never use anyother fittings for attaching the strap to your furniture than those supplied.Never use the screw provided to attach the strap to the wall. No wall attachment fittings aresupplied. This is because the type of fittings required to attach the strap to the chosen wallis determined by the walls composition. If you are in any doubt about the correct type offittings to use, consult a professional before attempting to attach the strap to the wall.The wall strap must not be used to replace any other fitting supplied with your piece offurniture.Furniture falling over is generally due to the surface the furniture is placed on. A warpedfloor or wall-to-wall carpeting will enable the furniture to rock, so greatly increasing thepotential for the furniture to fall. If the furniture is placed on a flat level wood or tiled floorthe risk is reduced, but we still recommend the wall strap is fitted.-22-
INSTRUCTIONS FOR SAFE USE & maintenance• WARNING: DO NOT LEAVE YOUR CHILD UNATTENDED. The safety of your child is yourresponsibility.• Before use, ensure the wardrobe is on a stable, level surface.• Do not allow children to climb on the wardrobe.• Never use the wardrobe if any parts are broken or missing.• Never pivot or drag the wardrobe on its plinth, the wardrobe must always be lifted by atleast two people when moved.• Do not place the wardrobe in the near vicinity of open fires or other sources of strongheat, such as electric or gas fires.• Always leave the wardrobe clean and dry. Wipe away any spillage straight away. Thewardrobe can be cleaned with a damp cloth. Never use abrasive, bleach or strongdetergents.• Check regularly that all fittings and screws are correctly tightened and are notdamaged. Loose screws can pinch parts of the body and clothing resulting in the risk ofstrangulation.Due to constant updating and improvements, some components may occasionally differ slightly from the diagrams shown inthese instructions. We reserve the right to change the specifications of any product without prior notice.After sales Service: If you need assistance, spare parts or you are unhappy with any aspect of the goods pleasecontact Customer Services on: 0870 8307700, or e-mail us at: customer.services@mamasandpapas.com.Visit our website at www.mamasandpapas.com for the latest product information.GuaranteeTo validate this guarantee, fill in this coupon and return to: <strong>Mamas</strong> & <strong>Papas</strong>, Colne Bridge Rd, Huddersfield, HD5 0RHAlternatively, call our Guarantee Registration Line on: 0870 8307700 or visit our website: www.mamasandpapas.comTitle (Mr/Mrs/Miss/Ms) First name ....................................................... Surname..............................................................Address ......................................................................................................................................................................................................................................................................................................... Postcode..............................................Daytime Tel. No. ............................................................. e-mail..........................................................................................Baby’s due date/date of birth ............................. Product purchased <strong>Longhouse</strong> <strong>Wardrobe</strong>Purchase date................................................ Price..................................If you would like to receive further information regarding new products, promotions and special offers from <strong>Mamas</strong> & <strong>Papas</strong> please tick the boxes indicating yourpreferred method(s) of contact. Post ®; e-mail ®.If you would like to receive information from carefully selected 3rd parties please tick the boxes indicating your preferred method(s) of contact. Post ®; e-mail ®.-23-
www.mamasandpapas.com<strong>Mamas</strong> & <strong>Papas</strong>Colne Bridge RoadHuddersfield, HD5 0RHcustomer services helpline: 0870 8307700customer services email: customer.services@mamasandpapas.com-24-