Orchard Storage Chest instructions - Mamas & Papas
Orchard Storage Chest instructions - Mamas & Papas
Orchard Storage Chest instructions - Mamas & Papas

Create successful ePaper yourself
Turn your PDF publications into a flip-book with our unique Google optimized e-Paper software.
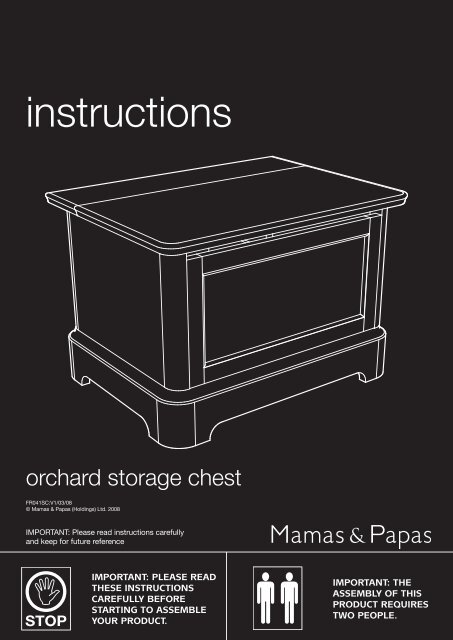
<strong>instructions</strong>orchard storage chestFR041SC:V1/03/08© <strong>Mamas</strong> & <strong>Papas</strong> (Holdings) Ltd. 2008IMPORTANT: Please read <strong>instructions</strong> carefullyand keep for future referenceImportant: Please readthese <strong>instructions</strong>carefully beforestarting to assembleyour product.Important: theassembly of thisproduct requirestwo people.
Before assembling your product...<strong>Orchard</strong> storage chestDo not discard any packaging until you are certain you have all the correct components and fittings.If any items are damaged or missing, please contact your retailer or <strong>Mamas</strong> & <strong>Papas</strong> on +44 (0)845 2682000. Allow plenty of time and space when beginning the construction of your product.Components82143576Item Name Part no. Qty1 Left side panel 0000---00000 12 Right side panel 0000---00000 13 Front panel 0000---00000 14 Back panel panel 0000---00000 1Item Name Part no. Qty5 Plinth 0000---00000 16 Short dividers 0000---00000 27 Long divider 0000---00000 18 Top 0000---00000 1-2-
FittingsA x 8 B x 8Cam studsC x 1CamsD x 12Allen keyE x 1BoltsF x 4Fall stayScrewsG x 1ScrewdriverTOOLS requiredX-head screwdriverImportant: The use of powered screwdrivers is not recommended for assembling this product.-3-
2STEP 1Screw eight cam studs (A)into the left (1) and right(2) side panels using a X-head screwdriver.1 A24STEP 2Slot the left (1) and right(2) side panels onto thefront (3) and back (4)panels.Lock the panels togetherby inserting eight cams(B) into the front andback panels.Turn the cams clockwiseas far as they will go withthe screwdriver (G) tolock.13B-4-
5STEP 3Slot the assembled sides,front and back panelsonto the plinth (5).Slot eight bolts (D)through the holes in theunderside of the plinth.Tighten the bolts into theassembled sections usingthe allen key (C).DC66STEP 4Slot the two shortdividers (6) onto the longdivider (7) as shown.Place the dividers into theassembled sections of thestorage chest.Note: The dividers do nothave to be fitted into thestorage chest, or one ofthe short dividers can beomitted if you wish.7-5-
8STEP 5Slot the top (8) onto theassembled sections asshown.Fasten the top to the sideand back panel using fourbolts (D) and the allen key(C).DCFSTEP 6Attach the fall stay (E) tothe inside of the left sidepanel using two shortscrews (F) and a x-headscrewdriver.Attach the top of thefall stay to the lid of thestorage chest’s top usingthe two remaining shortscrews (F).EF-6-
STEP 7The storage chest is nowfully assembled. Checkthat all fittings are fullytightened.STEP 8Adjusting the fall stayThe fall stay must beadjusted so that the lidwill not fall under its ownweight.Turn the black plasticknob clockwise/anticlockwiseuntil the fallstay holds the lid up atany angle.-7-
Instructions for safe use• Warning: Never leave your child unattended. The safety of your child is your responsibility.• Before use, ensure the storage chest is on a stable, level surface.• Do not allow children to climb on the storage chest.• Never use the storage chest if any parts are broken or missing.• Wood is a natural product and as such it can be subject to occasional variations in colour.This is not a defect and will not detract from the strength or performance of the storagechest.• Never pivot or drag the storage chest on its feet, the storage chest must always be liftedby at least two people when moved.• Do not place the storage chest in the near vicinity of open fires or other sources of strongheat, such as electric or gas fires.• Always leave the storage chest clean and dry. Wipe away any spillage straight away. Thestorage chest can be cleaned with a damp cloth. Never use abrasive, bleach or strongdetergents.• Check regularly that all fittings and screws are correctly tightened and are not damaged.Due to constant updating and improvements, some components may occasionally differ slightly from the diagrams shown inthese <strong>instructions</strong>. We reserve the right to change the specifications of any product without prior notice.After sales Service: If you need assistance, spare parts or you are unhappy with any aspect of the goods pleasecontact Customer Services on: +44 (0) 845 268 2000, or e-mail us at: customer.services@mamasandpapas.com. Visit our website at www.mamasandpapas.com for the latest product information.-8-