MPX Chassis instructions - Mamas & Papas
MPX Chassis instructions - Mamas & Papas
MPX Chassis instructions - Mamas & Papas

You also want an ePaper? Increase the reach of your titles
YUMPU automatically turns print PDFs into web optimized ePapers that Google loves.
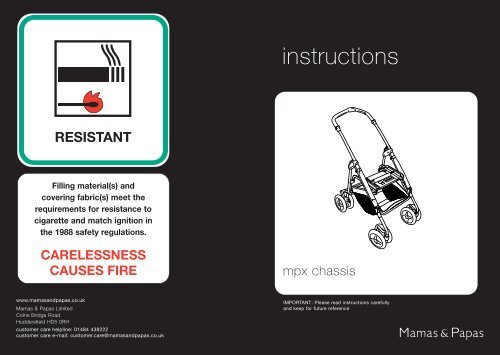
<strong>instructions</strong>RESISTANTFilling material(s) andcovering fabric(s) meet therequirements for resistance tocigarette and match ignition inthe 1988 safety regulations.CARELESSNESSCAUSES FIREmpx chassiswww.mamasandpapas.co.uk<strong>Mamas</strong> & <strong>Papas</strong> LimitedColne Bridge RoadHuddersfield HD5 0RHcustomer care helpline: 01484 438222customer care e-mail: customer.care@mamasandpapas.co.ukIMPORTANT: Please read <strong>instructions</strong> carefullyand keep for future reference
FITTING THE HANDLEOPENING THE CHASSISRemove the bolts and nuts inthe ends of the handle usinga screwdriver.Grip the centre of the handleand push the primary lock onthe right hand side of theframe inwards until it locks.Fasten the nut back onto thebolt and put in a safe placeaway from young children.Grip the centre of the handle.Push the secondary lock onthe left side of the frameinwards and holdPush the ends of the handleover the ends of the frame asshown in the diagram.Push the bolts back throughthe handle and frame. Fastenthe bolts into position usingthe screwdriver.Whilst still holding thesecondary locking button in,lift the handle upwards andthe frame will start toopen.As the frame opensrelease the secondary lockand grip the side handle. Pushthe side handle downwardsuntil the frame locks in theopen position.Check that the locks haveengaged correctly. If notsqueeze the two sectionstogether using your hands,take care not to trap yourfingers.– 4 –– 5 –
ATTACHING THE FRONT WHEELSFITTING THE PARENT TRAYPush the swivel lock on thewheels downYou can fit a food tray to thehandle bars of your freestylerpushchair.WARNING: Never place hotdrinks or food on the tray.Slot the front wheels ontothe ends of the pushchairsfront legs and slide upwards.Check that the wheels arecorrectly fitted by attemptingto pull them off again.ATTACHING THE REAR WHEELSSlot the rear legs into theplastic mouldings on the rearlegs as shown in the diagramand push up the legs as far asthey will go.Check that the locking pins onboth of the legs areprotruding through the holesin the wheel mouldingsCheck that the wheels arecorrectly attached byattempting to pull both of thewheels off the legs again.LockingpinAttaching the tray:Align the slots in the ends ofthe tray with the slots in theslots in the handle pivot,opposite side to the handleadjustment button.Push down on the ends of thetray until it locks into theslots with an audible ‘click’.Check the tray is firmlyattached by gently attemptingto lift upwards.Lockingpin– 6 –– 7 –
OPERATING THE BRAKESADJUSTING THE HAND GRIPLocking the brakes:Press down on both ends ofthe brake bar with your toes.Do not use excessive force,but check that the brakeshave engaged by rocking thepushchair backwards andforwards.With the buttons held in,rotate the hand grip to themost comfortable positionand release the buttons.Move the hand grip up ordown until it locks.Releasing the brakes:Push the brake upwards usingyour toes.OPERATING THE SWIVEL WHEELSFixed mode:If the lever is in the horizontalposition then the wheels willbe in the fixed position. Thisposition is best general useand on uneven ground.Swivel mode:If the lever is pushed downinto the vertical position thewheels will be able to rotatethrough 360º. This makesmanoeuvring in tight areassuch as shops easier.With the buttons held in,rotate the hand grip to themost comfortable positionand release the buttons.Move the hand grip up ordown until it locks.– 8 –– 9 –
ATTACHING AND DETACHING THE PRIMO VIAGGIO CAR SEATBefore attaching or detaching the car seat: Check that the brakes arecorrectly applied. Ensure your child is wearing the safety harness andthat the stabilising feet are folded into the car seat’s shell.ATTACHING AND DETACHING A CARRYCOTBefore attaching or detaching the carrycot: Check that the brakes arecorrectly applied.WARNING: The carrycot has four fold out stabilisingfeet. These feet must be folded under the carrycotbefore you can attach it to the chassisAttaching the car seat:Lift the car seat up by thefront and back.Attaching the carrycot:Lift the carrycot using the twoplastic grips on the sides.Align the attachment bars onthe attachment base of thechassis with the locking clipson the car seat.Push down on the car seatuntil the locking clips engage.Check that the car seat isfirmly attached by attemptingto pull the car seat upwards.Attachmentbar.Locking clips.Align the attachment bars onthe attachment base of thechassis with the locking clipson the carrycot. Push downon the carrycot until thelocking clips engage.Check that the carrycot isfirmly attached by attemptingto pull the carrycot upwards.AttachmentbarLocking clipDetaching the car seat:Pull the lever on the back ofthe car seat upwards.Detaching the carrycot:Place your hands on the twoplastic grips on the side of thecarrycot. Slide the levers on theunder sides of the gripstowards the foot end of thecarrycot.Hold the lever in the fullypulled out position and liftthe car seat clear of thechassis.Push the lever up into theplastic grip.The carrycot can now be liftedclear of the chassis.– 10 –– 11 –
ATTACHING AND DETACHING THE GIRO SEAT UNITBefore attaching or detaching the seat unit: Check that the brakes arecorrectly applied. Ensure your child is wearing a correctly fitted andadjusted safety harness.ATTACHING AND DETACHING THE CONVERSE SEAT UNITBefore attaching or detaching the seat unit: Check that the brakes arecorrectly applied. Ensure your child is wearing a correctly fitted andadjusted safety harness.Attaching the seat unit:Lift the seat unit by the plasticarms on the sides of the seat.Attaching the Converse seatunit:Lift the seat unit by sides ofthe seat.Align the attachment bars onthe attachment base of thechassis with the locking clipson the seat unit.Push down on the seat unituntil the locking clips engage.Check that the seat unit isfirmly attached by attemptingto pull the seat unit upwards.AttachmentbarLocking clipAlign the attachment bars onthe attachment base of thechassis with the locking clipson the base of the seat unit.Push down on the seat unituntil the locking clips engage.Check that the seat unit isfirmly attached by attemptingto pull the seat unit upwards.AttachmentbarLocking clipDetaching the seat unit:Place your fingers on the leveron the underside of thearmrests and slide it towardsthe front of the seat.Now press the lever upwardsinto the seat’s armrests. Theseat unit can now be lifted freeof the chassis.Detaching the Converse seatunit:Place your hands into the twopockets on the outside of theseat unit, see diagram.Within these pockets you willfind a slot giving access to thelocking handles.Grip the locking handles, pushthe handles sideways eitheraway from you if you arestanding behind the hood ortowards you if standing at thefoot end of the seat unit.Pull upwards on the handlesuntil the seat unit lifts clearfrom the chassis.21– 12 –– 13 –
Grip the centre of the handleand push the primary lock onthe right hand side of theframe inwards until it locks.Grip the centre of the handle.Push the secondary lock onthe left side of the frameinwards and holdWhilst still holding thesecondary locking button in,pull the handle upwards andthe frame will start to Fold.As the frame folds release thesecondary lock and grip theside handle. Pull the sidehandle upwards until theframe locks in the closedposition.Check that the locks haveengaged correctly. If notsqueeze the two sectionstogether using your hands,take care not to trap yourfingers.FOLDING THE CHASSIS– 14 –I0045: V2/02/02CARE AND MAINTENANCEYour chassis is a valuable piece of equipment and deserves careful handling.Follow the check list below at least every two weeks.• Check all moving parts especially safety locks and the brakes move freely andoperate correctly.• Clean and lubricate the wheels, safety locks (where appropriate) and sliding partsusing a light oil or silicon spray. Do not use heavy oil as this will attract dust andgrit which tend to clog and damage moving parts. If in any doubt contact ourCustomer Care Helpline on: 01484 438222.• Lack of lubrication or an accumulation of dust and dirt will reduce theperformance and safety of the chassis.• If the chassis is wet then wipe the frame dry with a cloth. Do not expose thechassis to direct heat such as electric or gas fires.• Clean the chassis regularly with an appropriate silicone polish, do not useabrasives or bleach.• We strongly recommend that you have your chassis serviced regularly, particularlyafter the first six months. To do this contact either your retailer or call ourCustomer Care Helpline on 01484 438222.• Should a fault arise with your chassis please contact either your retailer or phoneour Customer Care Helpline on 01484 438222.ALL OUR PRODUCTS ARE MADE FROM THE FINEST QUALITY MATERIALSAND ARE MANUFACTURED UNDER THE STRICTEST QUALITY CONTROLSWe guarantee all our products or part thereof, for a period of six months from the date of purchaseagainst faulty manufacture. This guarantee is not effective against damage caused as a result of incorrectusage of the product or accidental damage. This in no way affects your statutory rights.NameAFTER SALES SERVICE: If when you receive your <strong>Mamas</strong> &<strong>Papas</strong> product you need assistance, spare parts or if you areunhappy with any aspect of the goods please contact ourCustomer Care Helpline on: 01484 438222, or e-mail us oncustomer.care@mamasandpapas.co.uk where one of ourtrained advisors will be able to help you. You can also visitour website at www.mamasandpapas.co.uk for the latestproduct information.GUARANTEETo validate this guarantee, please fill in the coupon and return to:<strong>Mamas</strong> & <strong>Papas</strong> Ltd, Colne Bridge Road, Huddersfield, West Yorkshire, HD5 0RH.Or alternatively, call our Guarantee Registration Line on 01484 438225 with your details,or visit our website at: www.mamasandpapas.co.ukAddressPostcode Retailer Home Phone No.Item purchased Mpx <strong>Chassis</strong> Purchase PriceDateBy validating your guarantee, your information will be entered onto our database. If you do not wish to receive informationfrom other reputable companies, please let us know.– 15 –