


Create successful ePaper yourself
Turn your PDF publications into a flip-book with our unique Google optimized e-Paper software.
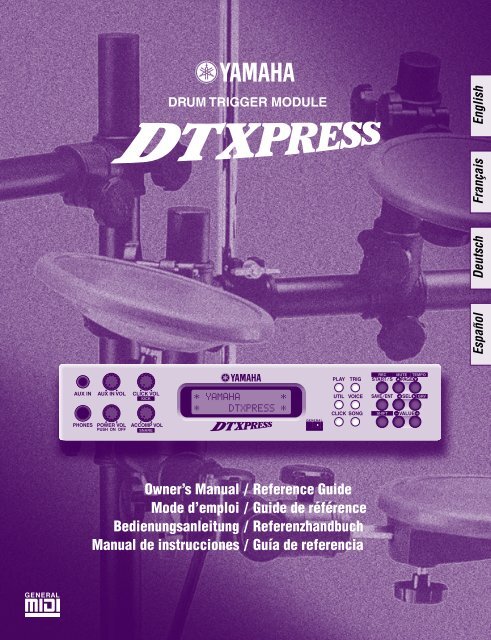
DRUM TRIGGER MODULE<br />
Owner’s Manual / Reference Guide<br />
Mode d’emploi / Guide de référence<br />
Bedienungsanleitung / Referenzhandbuch<br />
Manual de instrucciones / Guía de referencia<br />
English<br />
Français<br />
Deutsch<br />
Español
2<br />
How to use the Manual<br />
The DTXPRESS Owner’s Manual is divided into the following<br />
two books.<br />
● Basic Guide<br />
Please read this book before using the<br />
DTXPRESS.<br />
This book contains cautions that must be followed for<br />
safe and proper use of the DTXPRESS.<br />
Also, control and function names, connecting the pads<br />
and how to play the DTXPRESS, how to record and<br />
playback songs, how to create original drum kits are<br />
all described in this book.<br />
At the rear of this book you will find an appendix section<br />
with specifications and error messages.<br />
● Reference Guide (this book)<br />
This book describes in detail each of the DTXPRESS’<br />
functions.<br />
At the rear of this book you will find an appendix section<br />
with drum voice, song, MIDI data format, etc.<br />
About the descriptions<br />
This manual describes buttons and explanations using the<br />
following rules.<br />
• [PLAY], [START/S], etc.<br />
The button on the front panel is indicated with<br />
[ ]. (brackets).<br />
• [SHIFT]+[START/S], etc.<br />
Means hold the [SHIFT] button and press the [START/<br />
S] button.<br />
• [PAGEs]/[PAGEt], etc.<br />
Means use the [PAGEs] button or [PAGEt] button.<br />
• “Complete!”, etc.<br />
Words inside “ ” indicate the message shown on the<br />
display.<br />
• m P. 10, etc.<br />
Indicates the reference page where further information<br />
can be found.<br />
NOTE<br />
The illustrations and LCD screens as shown in this<br />
owner’s manual are for instructional purposes only,<br />
and may appear somewhat different from those on<br />
your instrument.<br />
CONTENTS<br />
DTXPRESS Internal Makeup ................ 4<br />
<strong>Drum</strong> Kit Play Mode .............................. 6<br />
1. <strong>Drum</strong> Kit & Song .......................................... 6<br />
2. Trigger Setup & Tempo ................................. 6<br />
3. Song & Mute ................................................. 7<br />
Groove Check Function ................................... 7<br />
About the Song ..................................... 8<br />
Song Playback .................................................. 8<br />
Song Recording ............................................. 10<br />
Trigger Setup Edit Mode ..................... 11<br />
1. INPUT Parameters ...................................... 12<br />
1-1. Pad Type ....................................................... 12<br />
1-2. Gain, Minimum Velocity ................................ 12<br />
1-3. Velocity Curve ............................................... 13<br />
1-4. Self Rejection, Rejection .............................. 13<br />
1-5. Specific Rejection ......................................... 13<br />
1-6. Trigger Setup Copy ....................................... 13<br />
2. COMMON PARAMETERS ........................... 14<br />
2-1. Increment/Decrement ................................... 14<br />
2-2. Input Exchange ............................................. 14<br />
2-3. Trigger Setup Name ...................................... 14<br />
<strong>Drum</strong> Kit <strong>Voice</strong> Edit Mode ................... 15<br />
1. <strong>Voice</strong> Parameters ........................................ 16<br />
1-1. <strong>Voice</strong> ............................................................. 17<br />
1-2. Volume, Pan .................................................. 17<br />
1-3. Tuning ........................................................... 17<br />
1-4. Layer Balance ............................................... 18<br />
1-5. Decay, Cutoff Frequency .............................. 18<br />
1-6. Note Number ................................................ 18<br />
1-7. Channel, Gate Time ...................................... 18<br />
2. Input Common Parameters ....................... 19<br />
2-1. Cross Fade ................................................... 19<br />
2-2. Reverb Send ................................................. 19<br />
2-3. Alternate Group, Key Assign Mode .............. 19<br />
2-4. Hold Mode .................................................... 20<br />
2-5. Key Off Enable .............................................. 20<br />
2-6. Function ........................................................ 20<br />
2-7. Pad Song ...................................................... 20<br />
2-8. Rim To Pad ................................................... 21
3. Reverb Parameter ....................................... 21<br />
3-1. Reverb Type, Time ........................................ 21<br />
3-2. Reverb Master Return .................................. 21<br />
4. Setup ........................................................... 22<br />
4-1. Program Change, Bank Select ..................... 22<br />
4-2. Volume, Pan .................................................. 22<br />
4-3. <strong>Drum</strong> Kit <strong>Voice</strong> Copy ..................................... 22<br />
5. <strong>Drum</strong> Kit Common Parameters ................. 23<br />
5-1. Volume .......................................................... 23<br />
5-2. <strong>Drum</strong> Reverb Send ....................................... 23<br />
5-3. Hi-hat Sensitivity ........................................... 23<br />
5-4. Song Select .................................................. 23<br />
5-5. <strong>Drum</strong> Kit Name ............................................. 23<br />
Song Job Mode ................................... 24<br />
1. Tempo, Repeat Playback ................................. 24<br />
2. Program Change, Bank Select ........................ 24<br />
3. Volume, Pan ..................................................... 25<br />
4. Song Copy ....................................................... 25<br />
5. Quantize .......................................................... 25<br />
6. Clear Track ....................................................... 26<br />
7. Merge Track ..................................................... 26<br />
8. Clear Song ....................................................... 26<br />
9. Song Name ...................................................... 26<br />
Utility Mode .......................................... 27<br />
1. SYSTEM Group ........................................... 28<br />
1-1. Learn Mode .................................................. 28<br />
1-2. Trigger Bypass .............................................. 28<br />
1-3. Volume Mode ................................................ 28<br />
1-4. Jump to Recent Page ................................... 28<br />
1-5. Hi-Hat Offset ................................................. 29<br />
1-6. Factory Set ................................................... 29<br />
2. MIDI Group .................................................. 29<br />
2-1. Bulk dump ..................................................... 29<br />
2-2. Channel 10 Program Change/Channel Event<br />
Receive ........................................................ 30<br />
2-3. Receive Program Change/System<br />
Exclusive Messages ..................................... 30<br />
2-4. Program Change Table ................................. 31<br />
2-5. MIDI Mode .................................................... 31<br />
2-6. Device Number, Local Control ...................... 31<br />
2-7. MIDI Merge ................................................... 31<br />
2-8. Dump Interval ............................................... 32<br />
2-9. Send Hi-Hat Control ..................................... 32<br />
2-10. Host Thru Port ............................................ 32<br />
CONTENTS<br />
3. Sequencer Group ....................................... 32<br />
3-1. Click <strong>Voice</strong> .................................................... 32<br />
3-2. Click Tune ..................................................... 33<br />
3-3. Click Note Number ....................................... 33<br />
3-4. MIDI Control ................................................. 33<br />
3-5. Count Switch ................................................ 33<br />
3-6. Sync Mode .................................................... 33<br />
3-7. Use Tempo .................................................... 34<br />
3-8. Click Mode .................................................... 34<br />
4. TG (Tone Generator) Group ....................... 34<br />
4-1. Equalizer (EQ) .............................................. 34<br />
4-2. Tuning ........................................................... 34<br />
4-3. Volume .......................................................... 34<br />
4-4. Reverb Bypass ............................................. 35<br />
5. MAP (<strong>Drum</strong> Map) Group............................. 35<br />
5-1. <strong>Voice</strong> ............................................................. 35<br />
5-2. Volume, Pan .................................................. 36<br />
5-3. Tuning ........................................................... 36<br />
5-4. Layer Balance ............................................... 36<br />
5-5. Decay, Cutoff Frequency ............................. 36<br />
5-6. Reverb Send ................................................. 36<br />
5-7. Alternate Group, Key Assign Mode .............. 37<br />
5-8. Key Off Enable .............................................. 37<br />
5-9. Map Copy ..................................................... 37<br />
<strong>Drum</strong> <strong>Voice</strong> <strong>List</strong> ................................... 38<br />
GM Keyboard <strong>Voice</strong> <strong>List</strong>...................... 42<br />
Preset <strong>Drum</strong> Kit <strong>List</strong>............................ 42<br />
Preset Song <strong>List</strong> .................................. 49<br />
Trigger Setup <strong>List</strong> ................................ 49<br />
MIDI Data Format................................. 50<br />
MIDI Implementation Chart................. 52<br />
Blank Chart .......................................... 53<br />
3
DTXPRESS Internal Makeup<br />
■ The DTXPRESS’ Internal Signal Flow<br />
Sequencer data<br />
from a computer<br />
or an external<br />
MIDI device. Song Data<br />
4<br />
Record<br />
Preset<br />
No. 1-95<br />
User<br />
No. 96-127<br />
Playback<br />
<strong>Drum</strong> Kit Data Buffer<br />
Transmits key on/off, program<br />
change, note number, etc.<br />
MIDI data to a computer or an<br />
external MIDI device.<br />
Input for Trigger Signals produced when the pad is struck<br />
Record<br />
Trigger Setup Data Buffer<br />
Tone Generator<br />
Audio Signal Output<br />
● Pad Data Signal Flow<br />
In order for the DTXPRESS to effectively manage trigger signals<br />
transmitted from the pads connected to the Trigger Input Jacks (1<br />
KICK, 2 SNARE, … 9/10) and the HI HAT CONTROL jack, trigger<br />
signals are adjusted to a suitable signal in the Trigger Setup<br />
Buffer using the Trigger Setup.<br />
Signals transmitted from the Trigger Setup Buffer will enter the<br />
<strong>Drum</strong> Kit Buffer.<br />
In the <strong>Drum</strong> Kit Buffer, the <strong>Drum</strong> Kit is set as to what voices will<br />
be used and how voices will be delivered for each of the Trigger<br />
Input Sources. The Tone Generator’s <strong>Voice</strong>s will be produced<br />
according to these settings and its audio signal will be transmitted<br />
to the OUTPUT jacks and PHONES jack.<br />
● Trigger Setup Data<br />
This mode is used for adjusting the trigger input, from pads and<br />
trigger sensors connected to the Trigger Input Jacks, to a suitable<br />
signal the sensitivity and velocity curve settings. (The signals characteristics<br />
will change according to the strength of the hit.) Also,<br />
cross-talk and double-trigger can be effectively eliminated with<br />
the settings available here.<br />
Copy<br />
Copy<br />
Store<br />
<strong>Drum</strong> Kit Data<br />
Preset<br />
No. 1-48<br />
User<br />
No. 49-80<br />
The Tone Generator is sounded according to the <strong>Drum</strong> Maps<br />
for each of the <strong>Drum</strong> Kits<br />
• Each Preset <strong>Drum</strong> Kit has its own <strong>Drum</strong> Map<br />
• User <strong>Drum</strong> Kits No. 49-80 use a common (one) <strong>Drum</strong> Map.<br />
Trigger Setup Data<br />
Preset<br />
No. 1-7<br />
User<br />
No. 8-11<br />
Along with 7 preset trigger setups (No. 1-7), there are another 4<br />
user trigger setups (No. 8-11) available for storing original setups.<br />
After selecting a trigger setup for use, the data will be copied to<br />
the Trigger Setup Data Buffer where the copied data will be used<br />
in performance. (Refer to the illustration above.)<br />
Setup data can be freely changed in the Trigger Setup Edit mode<br />
and saved, if necessary, to the User Trigger Setup’s memory (No.<br />
8-11).<br />
● <strong>Drum</strong> Kit Data<br />
This mode is used for setting drum kit voices, for example, assign<br />
a voice to each pad (trigger input source) used in the drum kit and<br />
perform settings such as selecting the voice, tuning, reverb level,<br />
etc.<br />
The DTXPRESS has 48 preset (No. 1-48) drum kits and another<br />
32 user (No. 49-80) drum kits that are used for saving original<br />
drum kits created by the user.<br />
As in the Trigger Setup, the selected drum kit’s data will be copied<br />
to the <strong>Drum</strong> Kit Data Buffer where the copied data will be used in<br />
performance. (Refer to the illustration above.) This <strong>Drum</strong> Kit data<br />
can be freely changed in the <strong>Drum</strong> Kit <strong>Voice</strong> Edit mode and saved,<br />
if necessary, to the User <strong>Drum</strong> Kit’s memory (No. 49-80).
● Tone Generator<br />
The DTXPRESS’ tone generator contains a total of 910 drum and<br />
percussion voices.<br />
Preset <strong>Drum</strong> Kits use an exclusive <strong>Drum</strong> Kit Map for each kit in<br />
which voices for the kit are assigned to individual MIDI note numbers.<br />
The User <strong>Drum</strong> Kit uses one drum map (User <strong>Drum</strong> Map) that is<br />
common for all drum kit numbers 49-80. The Utility mode’s [5.<br />
Map (<strong>Drum</strong> Map)] group can be used to assign voices to each<br />
MIDI note number (0-127) and edit the drum kit.<br />
Along with the DTXPRESS’ drum and percussion voices, the<br />
DTXPRESS possesses a variety of keyboard voices (128 voices)<br />
that are based on the GM System Level 1. It is possible to deliver<br />
piano and brass voices by hitting the pad and playback songs with<br />
the internal sequencer or from external sequencer data. A maximum<br />
of 32 voices can be delivered simultaneously.<br />
● Song Data<br />
The DTXPRESS contains 95 preset songs (No. 1-95) that consist<br />
of not only drum parts but also keyboard, brass, etc., accompaniment<br />
parts.<br />
You can enjoy the songs as they are or mute the song’s drums or a<br />
single drum voice (snare drum, etc.) and play along with the drum.<br />
Also, you can record your performance to the User Song memory<br />
(No. 96-127). Each song consists of two tracks and each track can<br />
include data for MIDI channels 1-16.<br />
● MIDI/TO HOST Jacks<br />
All drum kit setting data and sequencer data are managed with a<br />
MIDI data.<br />
By connecting the DTXPRESS’ MIDI OUT/IN jacks to the MIDI<br />
IN/OUT jacks on an external MIDI device, MIDI data can be exchanged.<br />
The TO/HOST jack is used to transmit and receive MIDI<br />
data from a computer.<br />
According to the MIDI data transmitted from an external MIDI<br />
device or computer connected to the DTXPRESS, drum kits can<br />
be switched, the song can be controlled and the tone generator can<br />
be sounded freely.<br />
For example, song data (sequencer data) transmitted from an external<br />
sequencer to the DTXPRESS’ MIDI IN jack can be used to<br />
play the voices produced by the DTXPRESS’ internal tone generator.<br />
You can use the DTXPRESS to play along with these songs<br />
and record both external sequencer and DTXPRESS parts.<br />
Also, MIDI data produced when the DTXPRESS can be transmitted<br />
to an external MIDI device and/or computer. Playing the<br />
DTXPRESS in this configuration allows you to trigger the external<br />
tone generator’s voices and when a drum kit is switched, have<br />
the external MIDI keyboard’s voice change as well. The<br />
DTXPRESS’ data can be stored to, as well as retrieved from an<br />
external MIDI device.<br />
DTXPRESS Internal Makeup<br />
■ Basic Operations for Data Setting<br />
● Enter the Modes<br />
Press each Mode button.<br />
Double-click a button to jump directly to the specified page the<br />
mode you want to enter.<br />
• <strong>Drum</strong> Kit Play Mode .............................. [PLAY]<br />
• Trigger Setup Edit Mode ....................... [TRIG]<br />
• Utility Mode ........................................... [UTIL]<br />
• <strong>Drum</strong> Kit <strong>Voice</strong> Edit Mode .................... [VOICE]<br />
• Song Job Mode ..................................... [SONG]<br />
● Page Navigation<br />
Press the [PAGEs] button to move to the previous page, the<br />
[PAGEt] button to move to the next page. Hold the button to<br />
scroll through the pages.<br />
● Select the Parameter<br />
The flashing parameter on the display is specified for setting.<br />
• Use the [SEL] buttons to move the cursor (the<br />
flashing character or symbol).<br />
The [SEL] moves the cursor to the right.<br />
• When there is only one parameter on the display, the [SEL] buttons will not operate.<br />
● Change the setting<br />
The setting (value) of flashing parameter on the display can be<br />
changed.<br />
• The [VALUE–] and [VALUE+] buttons are used to set parameter<br />
values.<br />
When setting values, press the [VALUE–] button to decrease<br />
(minus) the value, press the [VALUE+] button to increase (plus)<br />
the value. Holding the button will continue to decrease/increase<br />
the value.<br />
Hold the [VALUE–] and press the [VALUE+] button will decrease<br />
the value by 10. Continue to hold both buttons and the<br />
value will continue to decrease.<br />
Hold the [VALUE+] button and press the [VALUE–] button to<br />
increase the value by 10. Continue to hold both buttons and the<br />
value will continue to increase.<br />
5
<strong>Drum</strong> Kit Play Mode<br />
This mode enables you to play the DTXPRESS drum<br />
voices by hitting the pads (or drums with trigger sensors<br />
attached) connected to the DTXPRESS.<br />
The DTXPRESS automatically enters this mode when<br />
the power is switched on.<br />
You can select and play from 48 preset drum kits and 32<br />
user kits.<br />
Also, the drum kit, trigger setup and song specified in<br />
this mode will be selected and ready for editing when<br />
the <strong>Drum</strong> Kit <strong>Voice</strong> Edit, Trigger Setup Edit and Song<br />
Job modes are entered.<br />
■ Entering the <strong>Drum</strong> Kit Play Mode<br />
Press the [PLAY] button on the front panel.<br />
Once the <strong>Drum</strong> Kit Play mode is entered, the <strong>Drum</strong> Kit & Song<br />
display shown below will appear.<br />
6<br />
KIT =1 Acoustic<br />
SONG=1 Latiniq<br />
■ What’s in the <strong>Drum</strong> Kit Play Mode<br />
The <strong>Drum</strong> Kit Play mode contains the three setting displays shown<br />
below.<br />
1. <strong>Drum</strong> Kit & Song .................................... (P. 6)<br />
This display is used for selecting the drum kit and<br />
song.<br />
2. Trigger Setup & Tempo .......................... (P. 6)<br />
This display is used for selecting the trigger setup<br />
and song settings.<br />
3. Song & Mute ........................................... (P. 7)<br />
This display is used for selecting the song and<br />
specifying the drum mute during the song.<br />
Procedure<br />
1. Press the [PLAY] button to enter the drum kit play mode.<br />
2. Use the [PAGEs]/[PAGEt] buttons to select the page<br />
you want to set.<br />
3. Use the [SEL] buttons to move the cursor to<br />
the parameter you want to set. The parameter will flash.<br />
4. Use the [VALUE–]/[VALUE+] buttons to set the<br />
parameter’s value.<br />
HINT Press the [SHIFT]+[PAGEt] buttons, in any <strong>Drum</strong> Kit<br />
Play mode display, to jump to the Trigger Setup & Tempo<br />
display with the cursor moved to tempo value.<br />
1. <strong>Drum</strong> Kit & Song<br />
This display is used for selecting the drum kit and song.<br />
KIT =1 Acoustic<br />
SONG=1 Latiniq<br />
q KIT (<strong>Drum</strong> Kit)<br />
[Range] 1-80<br />
Selects the drum kit. The drum kit number and drum kit name will<br />
be displayed. Preset kits are numbered 1-48 and user kits are numbered<br />
49-80.<br />
When a pad is hit, the selected drum kit voice will be delivered.<br />
Also, this drum kit will be specified for editing when the <strong>Drum</strong><br />
Kit <strong>Voice</strong> Edit mode is entered.<br />
* Once a setting is changed in the <strong>Drum</strong> Kit <strong>Voice</strong> Edit mode, “*”<br />
will appear between “KIT” and “=” until the data is stored.<br />
* Refer to the [Preset <strong>Drum</strong> Kit <strong>List</strong>] (P. 42)<br />
w SONG<br />
[Range] 1-127<br />
Selects the song. The song number and song name will be displayed.<br />
Preset songs are numbered 1-95 and user songs are numbered<br />
96-127.<br />
The selected song will playback when the [START/S] button is<br />
pressed.<br />
* When the rhythm mute ([SHIFT]+[PAGEs] is applied, the last<br />
letter of the song name will be “˚”.<br />
* Refer to [About the Song] (P. 8).<br />
* Refer to the [Preset Song <strong>List</strong>] (P. 49).<br />
2. Trigger Setup & Tempo<br />
This display is used for selecting the trigger setup and song settings.<br />
HINT Press the [SHIFT]+[PAGEt] buttons, in any <strong>Drum</strong> Kit<br />
Play mode display, to jump to the following display with<br />
the cursor moved to tempo value.<br />
TRIG =1 Medium<br />
ƒ=110=--= 4/4=ƒ<br />
w e r t<br />
q TRIG (Trigger Setup)<br />
[Range] 1-11<br />
Selects the trigger setup to be used. The trigger number and trigger<br />
name will be displayed. Presets are numbered 1-7 and user<br />
setups are numbered 8-11.<br />
* For more information on the preset trigger setup, refer to the<br />
[Trigger Setup <strong>List</strong>] (P. 49).<br />
* Once a setting is changed in the Trigger Edit mode, “*” will appear<br />
between “TRIG” and “=” until the data is stored.<br />
w q (Tempo)<br />
[Range] 30-300, ext<br />
Sets the playback tempo for the song.<br />
q<br />
w<br />
q
When the DTXPRESS is controlled by an external sync, “ext”<br />
will be displayed.<br />
* The external sync setting is found in [3-6. Sync Mode] (P. 33).<br />
e Repeat Playback<br />
[Range] —, rp<br />
Sets the repeat playback (repeat continuously from the beginning<br />
to the end of the song) of the song.<br />
When this parameter is set to “rp”, the song will repeat playback.<br />
When this parameter is set to “--”, the song will playback normally.<br />
r Beat<br />
[Range] 1/4-8/4, 1/8-16/8, 1/16-16/16<br />
Sets the beat of the song (metronome).<br />
t Metronome Note Value<br />
[Range] When the beat r is set to 3/8, 6/8, 9/8, 12/8, 15/8, the<br />
click tempo will be set to<br />
ƒ quarter note, © eighth note, ˙ sixteenth note.<br />
When the beat r is set to any value that is not listed<br />
above, the click tempo will be set to<br />
ƒ quarter note, ƒ3 quarter note (triplet),<br />
© eighth note, ©3 eighth note (triplet),<br />
˙ sixteenth note, ˙3 sixteenth note (triplet).<br />
Use the note values to set the click tempo of the metronome.<br />
3. Song & Mute<br />
This display is used for selecting the song and specifying the drum<br />
mute during the song.<br />
SONG=1 Latiniq<br />
Ki=®Sn=mCy=®Mi=®<br />
w<br />
q SONG<br />
[Range] 1-127<br />
Selects the song. The song number and song name will be displayed.<br />
Press the [SONG] button to start playback of the selected song.<br />
* This song select operation is the same as in [1. <strong>Drum</strong> Kit and<br />
Song]. The only difference is whether the display will switch or<br />
not when the Groove Check is used.<br />
w <strong>Drum</strong> Mute<br />
[Range] m (mute; Does not produce sound), ® (Produces sound)<br />
Sets the type of drum voice to be muted. The 4 types of voices that<br />
can be muted are Ki (kick), Sn (snare), Cy (cymbal) and Mi (others).<br />
* <strong>Drum</strong> voice types<br />
<strong>Drum</strong> voices are divided into many groups (categories) in accordance<br />
with the type of sound i.e. kick, snare, etc. For more<br />
information on <strong>Drum</strong> <strong>Voice</strong> categories, refer to the [<strong>Drum</strong> <strong>Voice</strong><br />
<strong>List</strong>] (P. 38).<br />
q<br />
<strong>Drum</strong> <strong>Voice</strong> Category Mute Classification<br />
K, k Ki (kick)<br />
S, s Sn (snare)<br />
C, H Cy (cymbal)<br />
T, t, P, E, e, L, m Mi (others)<br />
HINT Since drum voices for pads (triggers) are not muted you<br />
can, for example, mute the snare voice of a song and practice<br />
the snare part along with song playback (the snare<br />
voice is delivered when the pad is hit).<br />
Groove Check Function<br />
Function<br />
As you play the pads along with a song, the DTXPRESS will<br />
compare your performance with its song clock and let you<br />
know how accurate your timing is.<br />
Display<br />
In the <strong>Drum</strong> Kit Play mode (from any display) press the<br />
[SHIFT]+[SEL>] (GRV) buttons.<br />
* The Groove Check function will quit when song playback<br />
is stopped.<br />
* The top line of the original page is displayed as is.<br />
KIT =1 Acoustic<br />
Groov= 0Ave= 0<br />
<strong>Drum</strong> Kit Play Mode<br />
q<br />
w<br />
Setting<br />
q Groov (Groove)<br />
[Range] –48 to 0 to +48<br />
The difference in the timing of each stroke on the pad is displayed.<br />
If the timing of the stroke is late compared to the just time, a<br />
minus value will be displayed. If your timing is early, a plus<br />
value will be displayed. If you timing is perfect, “0” will be<br />
displayed.<br />
w Ave (Average)<br />
[Range] –48 to 0 to +48<br />
This function displays the average value of your timing accuracy<br />
after the Groove Check function is switched ON.<br />
This function checks your performance on the entire drum<br />
set and can check your performance on one song. The information<br />
shown in the display is the same as in q Groov.<br />
* To reset the data, press the [SHIFT]+[SEL>] buttons twice.<br />
7
About the Song<br />
The DTXPRESS can internally store data for a maximum of 127<br />
songs that can be played back freely.<br />
Song numbers 1-95 are preset songs and song data in those songs<br />
cannot be changed or rewritten.<br />
Song numbers 96-127 are user songs that can be used to record<br />
new performance data and also edit song data in.<br />
■ Song Makeup<br />
The Song consists of two sequencer tracks plus header data.<br />
Header data is written at the front of the song and holds information<br />
related to the song’s tempo, beat, program numbers (voice)<br />
for each MIDI channel and volume, etc. Header data is read every<br />
time the song is played from the beginning.<br />
Both tracks possess data for MIDI channels 1-16 (except system<br />
exclusive data).<br />
Durring song playback, the sequencer data that is written in the<br />
song will be transmitted to the DTXPRESS’ tone generator to produce<br />
the song.<br />
■ Main Song and Pad Song<br />
Up to four songs can be played back simultaneously.<br />
The song that is selected in the <strong>Drum</strong> Kit Play mode (P. 6) is called<br />
the Main Song. Pressing the [START/S] button will start playback<br />
of this song.<br />
The remaining three songs are called Pad Song(s). These songs<br />
are played back according to the trigger input (hitting a pad).<br />
■ Metronome<br />
The sequencer produces the metronome.<br />
The metronome can be used either alone or with the Song.<br />
Press the [CLICK] button, in any mode, to start the metronome.<br />
The metronome’s tempo, voice, etc. are set in the Utility mode [3.<br />
Sequencer Group] (P. 32).<br />
8<br />
Song Playback<br />
■ Main Song Playback<br />
• Select a Song<br />
1. Press the [PLAY] button to enter the <strong>Drum</strong> Kit Play mode.<br />
Use the [PAGEs]/[PAGEt] buttons to display either of<br />
the displays shown below (<strong>Drum</strong> Kit & Song or Song &<br />
Mute).<br />
• <strong>Drum</strong> Kit & Song<br />
KIT =1 Acoustic<br />
SONG=1 Latiniq<br />
• Song & Mute<br />
SONG=1 Latiniq<br />
Ki=®Sn=®Cy=®Mi=®<br />
2. Use the [SEL] buttons to move the cursor to<br />
the “SONG=” position.<br />
3. Use the [VALUE–]/[VALUE+] buttons to set the song number<br />
of the song you want to playback.<br />
• Set the Tempo, Repeat Playback, Beat and Metronome<br />
1. In the <strong>Drum</strong> Kit Play mode, use the [PAGEs]/[PAGEt]<br />
buttons to display the “Trigger Setup & Tempo” display<br />
shown below.<br />
TRIG =1 Medium<br />
ƒ=120=--= 4/4=ƒ<br />
2. Use the display shown above to set the Tempo, Repeat<br />
Playback, Beat and Metronome Note Value.<br />
• Song Playback (Start/Stop)<br />
Press the [START/S] button, in any display, to start playback of<br />
the song (main song).<br />
During playback, press the [START/S] button to stop playback of<br />
the song. Press the [START/S] button again and the song will start<br />
playback from the beginning.<br />
* If the pad’s function is previously set to the “Main Song Control”<br />
function (m <strong>Drum</strong> Kit <strong>Voice</strong> Edit Mode [2-6. Function] P. 20), you<br />
can start/stop the main song by hitting the assigned pad.<br />
* During song playback, the [SONG] button’s LED will light for a<br />
moment at the beginning of each measure.<br />
* During song playback, the song cannot be changed.<br />
* If the song’s tempo or voices are irregular, re-select the song.
■ Pad Song Playback (Start/Stop)<br />
To playback a Pad Song, hit the pad that is assigned to the Pad<br />
Song you want to playback. Hit the same pad during playback will<br />
stop the song. Hit the pad again to start the song from the beginning.<br />
* Before using, set the pad’s function to “Pad Song Control” and<br />
assign a song to the pad (m <strong>Drum</strong> Kit <strong>Voice</strong> Edit mode [2-6.<br />
Function], [2-7. Pad Song] P. 20).<br />
* The song can be played one measure at a time, each measure<br />
triggered with a stroke on the pad (m <strong>Drum</strong> Kit <strong>Voice</strong> Edit mode<br />
[2-7. Pad Song] P. 20)<br />
* If the Pad Song’s tempo or voices are irregular, re-select the<br />
<strong>Drum</strong> Kit.<br />
■ Song Playback Functions<br />
During song playback, the song can be repeated and volume levels<br />
for each instrument can be changed.<br />
• Volume Control<br />
With each of the knobs on the front panel, the following volume<br />
levels can be controlled.<br />
• [ACCOMP VOL]: The volume of the song’s accompaniment.<br />
• [SHIFT]+[ACCOMP VOL]: The volume of the song’s snare<br />
drum.<br />
• [CLICK VOL]: The volume of the metronome’s click.<br />
• [SHIFT]+[CLICK VOL]: the volume of the song’s bass drum.<br />
If the Utility mode’s [1-3. Volume Mode] (P. 28) is set to “live”,<br />
the following volume levels can be controlled.<br />
• [ACCOMP VOL]: The volume of the song’s snare drum.<br />
• [SHIFT]+[ACCOMP VOL]: The volume of the song’s cymbal.<br />
• [CLICK VOL]: The volume of the song’s bass drum.<br />
• [SHIFT]+[CLICK VOL]: The volume of the song’s other instruments.<br />
• Set the Metronome<br />
The voice, pitch and MIDI note number of the metronome’s click<br />
voice can be set. ([3-1. Click <strong>Voice</strong>] (P. 32), [3-2. Click Tune] (P.<br />
33), [3-3. Click Note Number] (P. 33)<br />
• Count Function<br />
If the Utility mode’s [3-5. Count Switch] (P. 33) is set to “on”<br />
when the main song is played back, the first measure of the song<br />
will be preceded by a two measure count.<br />
• MIDI Control by an External Device<br />
• If the Utility mode’s [3-4. MIDI Control] (P. 33) is set to “on”,<br />
playback of the main song can be controlled with system realtime<br />
messages (start/continue/stop) from the MIDI IN/TO<br />
HOST jack.<br />
• If the Utility mode’s [3-6. Sync Mode] (P. 33) is set to “ext”<br />
or “auto”, the song playback can be synchronized to the clock<br />
of an external MIDI device.<br />
About the Song<br />
• Rhythm Mute Function<br />
When the [SHIFT]+[PAGEs] buttons are pressed, the MIDI channels<br />
(usually channel 10) that are assigned to track 1 of the song<br />
and the drum voice will be muted (sound will not be delivered).<br />
* When the Rhythm Mute is applied, program changes will be ignored<br />
so the drum kit cannot be changed.<br />
• Other Functions<br />
• This function can set whether the song will playback according<br />
to the tempo information in the song or according to the<br />
tempo that is set when the song is switched. (m P. 34 [3-7.<br />
Use Tempo])<br />
• This function can set whether or not the click voice will be<br />
delivered automatically when the song is played back. (m P.<br />
34 [3-8. Click Mode])<br />
• The metronome’s click voice can be switched ON/OFF by hitting<br />
the pad. (m P. 20 [2-6. Function])<br />
9
About the Song<br />
10<br />
Song Recording<br />
Song recording lets you record data, produced as the drum kit is<br />
played, to the sequencer in real-time (one track at a time). All MIDI<br />
channels (1-16) are recorded simultaneously. Also, data produced<br />
by a MIDI keyboard connected to the MIDI IN jack can be recorded<br />
as well as sequencer data received via the MIDI IN/TO<br />
HOST jacks.<br />
According to the recorded sequencer data (performance information),<br />
drum kits and voices can be changed during song playback.<br />
The songs that are recorded can be played back and edited in the<br />
same manner as preset songs (No. 1-48) with the Song Job mode.<br />
■ Song Record Settings<br />
• Select the Song<br />
1. Press the [PLAY] button to enter the <strong>Drum</strong> Kit Play mode,<br />
set the User Song number (No. 96-127) that you want to<br />
record to.<br />
* Only User Songs (No. 96-127) can be used for recording.<br />
Preset Songs (No. 1-95) cannot be used for recording.<br />
• Set the Recording Conditions (Record Standby)<br />
2. Press the [SHIFT]+[START/S] buttons, the record mode<br />
will be in standby. The following display will appear.<br />
q w e<br />
REC M= 32=Rp1†=1<br />
ƒ=120 B= 4/4Q=©<br />
r t y<br />
3. Use the display shown above to set the following recording<br />
conditions.<br />
q M (the number of measures that will be recorded)<br />
[Range] 1-999<br />
Assigns the number of measures that will be recorded. When<br />
there is data in the other track, the number of measures in that<br />
track will decide the length of the song and this length cannot<br />
be changed.<br />
w Record Mode<br />
Select the method of recording from the following.<br />
Overwrite (Ovr): The record operation will be in a repeat<br />
mode. When the song reaches the end of the last measure, it<br />
will automatically start again from the beginning and new<br />
data will be added to the track’s previous data.<br />
Replace (Rpl): When the song reaches the end of the measure<br />
number assigned in “M” or the [START/S] button is<br />
pressed, recording will stop (the song will not repeat).<br />
e TR (Specify the Track for Recording)<br />
Selects which track (“1” or “2”) will be recorded.<br />
r q (Metronome Tempo) [Range] 30-300<br />
Sets the metronome tempo for recording<br />
t B (Beat) [Range] 1/4-8/4, 1/8-16/8, 1/16-16/16<br />
Sets the beat of the song (metronome) for recording.<br />
y Q (Quantize Accuracy)<br />
[Range] ƒ quarter note, ƒ3 quarter note (triplet)<br />
© eighth note, ©3 eighth note (triplet)<br />
˙ sixteenth note, ˙3 sixteenth note (triplet), no<br />
The Quantize function* can be used when recording.<br />
When set to “no”, the Quantize function will not operate.<br />
Quantize: This function is used to correct the timing of recorded<br />
MIDI note data. The accuracy of quantization is assigned<br />
by the note value.<br />
* You can also use the Quantize function after recording is complete.<br />
(Song Job mode [5. Quantize] P. 25)<br />
• Record<br />
4. Press the [START/S] button to start recording.<br />
* If the Utility mode’s [3-4. MIDI Control] (P. 33) is set to “on”,<br />
the recording operation can be started with a system real<br />
time message (start) received via the MIDI IN/TO HOST jacks.<br />
* When the track assigned for recording contains data and the<br />
[START/S] button is pressed, the error message “Data not<br />
Empty” will appear and the recording operation will not be<br />
carried out.<br />
While the song is recording, the following display will appear<br />
(only displayed, cannot change).<br />
• When the Record Mode = Replace (“Rpl”)<br />
REC M= 5=Rp†=1<br />
Now Recording.<br />
• When the Record Mode = Overwrite (“Ovr”)<br />
REC M= 5=Ovr†=1<br />
UNDO press ENT<br />
• Next to “M=” the measure number currently being recorded is<br />
displayed.<br />
• When the Record mode is set to “Ovr”, press the [SAVE/<br />
ENT] button to “Undo” (do again) the record operation. Press<br />
the [SAVE/ENT] button while recording to start recording from<br />
the top of the song. The data previously recorded from the<br />
beginning of the song, up until the [SAVE/ENT] button was<br />
pressed, will revert to the data originally present.<br />
• Stop Recording<br />
5. When the song reaches the end of the assigned measure<br />
number, recording will automatically stop and the<br />
DTXPRESS will return to the <strong>Drum</strong> Kit Play mode (<strong>Drum</strong><br />
Kit & Song display).<br />
* Recording can also be stopped anytime by pressing the<br />
[START/S] button.<br />
* If the power is switched off while recording, all the data in the<br />
User Song may be lost. Please use caution.<br />
Data recorded in the tracks cannot be overwritten. To<br />
record new data, use the Song Job mode’s [6. Clear Track]<br />
(P. 26) or [8. Clear Song] (P. 26) operations to erase track<br />
data.
Trigger Setup Edit Mode<br />
This mode contains various settings related to trigger<br />
input from the pads and trigger sensors that are connected<br />
to the DTXPRESS.<br />
It allows you to adjust pad sensitivity and assign drum<br />
voices to each trigger input. Trigger Setup data consists<br />
of seven preset types (No. 1-7) and four original setup<br />
types (No. 8-11) for storing user setup data.<br />
■ What you can do with the Trigger Setup Edit<br />
Mode<br />
The Trigger Setup Edit Mode lets you alter a variety of settings for<br />
each of the trigger inputs jacks (1-10) of the Trigger Setup.<br />
You can edit both preset (No. 1-7) and user Trigger Setups (No. 8-<br />
11).<br />
The edited Trigger Setup can be stored in a User Trigger Setup<br />
(No. 8-11) using the Store Operation.<br />
* Selecting another Trigger Setup before storing your changes<br />
will result in the data reverting to its default settings.<br />
* Data cannot be stored to preset Trigger Setup (No. 1- 7).<br />
■ Entering the Trigger Setup Edit Mode<br />
Press the [TRIG] button on the front panel.<br />
Once the Trigger Setup Edit Mode is entered, the INPUT<br />
parameter’s main page (pad type), shown below, will be displayed.<br />
TRIG IN= 1<br />
Type= KP<br />
* Double-click the [TRIG] button to enter the Trigger Setup Edit<br />
Mode. The [1-2. Gain, Minimum Velocity] display will appear.<br />
■ What’s in the Trigger Setup Edit Mode<br />
The Trigger Setup Edit Mode is divided into two sub-groups.<br />
1. INPUT Parameters ............................... mP. 12<br />
Contains specific settings for each pad (1-10).<br />
2. COMMON Parameters ......................... mP. 14<br />
Contains common settings for all pad inputs.<br />
Procedure<br />
1. Before editing, it is necessary to select the trigger setup<br />
you want to edit in the drum kit play mode [Trigger Setup<br />
& Tempo].<br />
2. Press the [TRIG] button to enter the Trigger Setup Edit<br />
mode.<br />
3. Use the [PAGE▲], [PAGE▼] buttons to display the list<br />
you want to edit.<br />
* If the Utility mode’s [Jump to Recent Page] parameter (P. 28)<br />
is set to “on”, the DTXPRESS will display the page last edited<br />
when entering the Trigger Setup Edit mode.<br />
4. Use the [SEL] buttons to move the cursor to<br />
the list you want to edit. The list will flash.<br />
* If there is only one list, it is not necessary to move the cursor.<br />
5. Use the [VALUE–], [VALUE+] buttons to set the<br />
parameter’s value or ON/OFF setting.<br />
* Once a setting is changed, “*” will appear on the display next<br />
to “TRIG”. After data is saved, the mark will disappear.<br />
TRIG*IN= 1<br />
Type= KP<br />
6. To store changes in the User Trigger Setup, use the following<br />
procedure.<br />
* The changes you made will be lost if another trigger setup is<br />
selected before your changes have been stored.<br />
6-1. Press the [SAVE/ENT] button. The following display will<br />
appear.<br />
Store Trigger<br />
To= 8 InitTrig<br />
6-2. Use the [VALUE–], [VALUE+] buttons to assign the User<br />
Trigger Setup number (8-11) (located next to “To=”) for<br />
storing your changes. The number and setup name will<br />
appear.<br />
6-3. Press the [SAVE/ENT] button, the following display will<br />
appear asking for confirmation before the store operation<br />
is carried out.<br />
Store TRG to 8<br />
Are you sure ?<br />
6-4. Press the [SAVE/ENT] or [VALUE+] button, the store<br />
operation will be carried out.<br />
*Press the [VALUE–] button to cancel the store operation.<br />
The following display will appear after the store operation<br />
is completed.<br />
Complete !<br />
Trigger Setup Edit Mode Function <strong>List</strong><br />
1.<br />
Page<br />
INPUT Parameters .................................................. 12<br />
1-1. Pad Type .......................................................... 12<br />
1-2. Gain, Minimum Velocity ................................... 12<br />
1-3. Velocity Curve ................................................. 13<br />
1-4. Self Rejection, Rejection ................................. 13<br />
1-5. Specific Rejection ............................................ 13<br />
1-6. Copy Input ....................................................... 13<br />
2. COMMON Parameters ............................................ 14<br />
2-1. Increment/Decrement ...................................... 14<br />
2-2. Input Exchange ............................................... 14<br />
2-3. Trigger Setup Name ........................................ 14<br />
11
Trigger Setup Edit Mode<br />
12<br />
1. INPUT Parameters<br />
Contains specific settings for each of the pads (1-10).<br />
This function is divided into the following 6 pages.<br />
1-1. Pad Type .......................................................... 12<br />
1-2. Gain, Minimum Velocity ................................... 12<br />
1-3. Velocity Curve ................................................. 13<br />
1-4. Self Rejection, Rejection ................................. 13<br />
1-5. Specific Rejection ............................................ 13<br />
1-6. Trigger Setup Copy .......................................... 13<br />
1-1. Pad Type<br />
Sets the type of pad or trigger sensor that is connected to the trigger<br />
input jack q. By selecting the appropriate pad type, pad functions<br />
can be used to their full potential.<br />
TRIG IN= 1<br />
Type= KP<br />
q TRIG IN (Trigger Input Number)<br />
[Range] 1-10<br />
Assigns the trigger input jack number for the pad you want to edit.<br />
* According to the setting in the utility mode’s [1-1. Learn Mode]<br />
(P. 28) trigger input jack numbers can be assigned by hitting the<br />
pad.<br />
w Type (Pad Type)<br />
Sets the type of pad that is connected to the trigger input jack<br />
assigned in q TRIG IN.<br />
* Values set in [1-2. Gain, Minimum Velocity] (P. 12) and [1-4. Self<br />
Rejection] (P. 13) will automatically select the proper value for<br />
the pad type you set here.<br />
* The “HH contrler” can only be assigned to Input Jack 1. Connect<br />
the Hi-hat Controller HH60, HH80 or HH80A to Input Jack<br />
1 and set to “HH contrler” to use in place of a kick pedal.<br />
Use a cable with a stereo plug when connecting a Hi-hat controller.<br />
Pad types are defined as follows.<br />
TP snare TP60, TP80, TP80S used as a snare pad.<br />
TP tom TP60, TP80, TP80S used as tom pads.<br />
TP HH TP60, TP80, TP80S used as a hi-hat pad.<br />
KP KP60, KP80, KP80A used.<br />
PCY ride PCY60, PCY80, PCY80S used as ride cymbal<br />
pads.<br />
PCY crash PCY60, PCY80, PCY80S used as crash cymbal<br />
pads.<br />
PCY cup PCY10, etc. used as the cymbal cup.<br />
BP BP80 used.<br />
DT snare DT10, DT20 attach to the snare drum.<br />
DT hi tom DT10, DT20 attach to small toms<br />
DT lo tom DT10, DT20 attach to large toms<br />
DT kick 1 DT10, DT20 attach to small bass drum<br />
DT kick 2 DT10, DT20 attach to large bass drum<br />
misc 1 Extensive use1—high sensitivity type.<br />
Rim switch function is good for snare/tom use.<br />
q<br />
w<br />
misc 2 Extensive use 2—high sensitivity type.<br />
Rim switch function is good for cymbal use.<br />
misc 3 Extensive use 3—normal sensitivity type.<br />
Rim switch is good for snare/tom use.<br />
misc 4 Extensive use 4—normal sensitivity type.<br />
Rim switch function is good for cymbal use.<br />
misc 5 Extensive use 5—low sensitivity type.<br />
Rim switch is good for snare/tom use.<br />
misc 6 Extensive use 6—low sensitivity type.<br />
Rim switch function is good for cymbal use.<br />
HH contrler Connect the HH60, HH80, HH80A to Trigger Input<br />
jack 1 to use as a kick pedal.<br />
* The volume (velocity) is fixed.<br />
* The DT10, DT20 are <strong>Yamaha</strong> <strong>Drum</strong> Trigger Sensors.<br />
1-2. Gain, Minimum Velocity<br />
This function sets the input sensitivity (Gain) and velocity range<br />
(Minimum Velocity) for each input jack q.<br />
q<br />
TRIG IN= 1 ( 0%)<br />
Gain=64 MVel= 32<br />
w e<br />
Level Display<br />
q TRIG IN (Trigger Input Number)<br />
Assigns the trigger input jack number. (The same procedure as in<br />
[1-1. Pad Type]).<br />
w GAIN (Input Gain)<br />
[Range] 0-99<br />
Adjusts the input gain level (minimum sensitivity) for the trigger<br />
input jack assigned in step q TRIG IN.<br />
Entering a larger value here allows smaller input levels to sound<br />
the voice.<br />
* This value will be automatically set after the appropriate pad<br />
type is set in [1-1. Pad Type]. Some fine-tuning of the value will<br />
be necessary.<br />
e MVel (Minimum Velocity)<br />
[Range] 1-127<br />
Sets the MIDI Velocity (volume) that is transmitted when the pad<br />
is hit the weakest. Large values will produce a high volume level<br />
even if the pad is hit softly. However, this will result in a narrow<br />
volume range making it difficult to adequately produce wider dynamic<br />
levels.<br />
If “HH contrler” is set for the pad type, the value set here will<br />
be transmitted as the velocity.<br />
The trigger input level will be displayed as a % in the upper right<br />
hand corner of the display. The maximum velocity (input level<br />
99%) will be 127. The level is low when the pad is hit the weakest<br />
so a wider dynamic range will be possible.<br />
* This value will be automatically set after the appropriate pad<br />
type is set in [1-1. Pad Type]. Some fine-tuning of the value will<br />
be necessary.
1-3. Velocity Curve<br />
This function sets the MIDI Velocity Curve for the sensitivity for<br />
each input jack q.<br />
q TRIG IN (Trigger Input Number)<br />
Assigns the trigger input jack number (the same procedure as in<br />
[1-1. Pad Type]).<br />
w VelCurve (Velocity Curve)<br />
Sets the Input Velocity Curve for the trigger input jack assigned in<br />
TRIG IN q.<br />
m<br />
Velocity<br />
TRIG IN= 1<br />
q<br />
VelCurve= normal w<br />
normal loud 2 loud1 hard 1 hard 2<br />
Strength<br />
of hitm<br />
1-4. Self Rejection, Rejection<br />
This function is used to prevent double triggers* and cross talk<br />
(mixed input signals between the jacks) for each input jack q.<br />
* double trigger: When 2 sounds are played at the same time.<br />
TRIG IN= 1<br />
SelfRej=2 Rej= 3<br />
w e<br />
q TRIG IN (Trigger Input Number)<br />
Assigns the trigger input jack number (the same procedure as in<br />
[1-1. Pad Type]).<br />
w SelfRej (Self Rejection)<br />
[Range] 0-9<br />
Prevents double triggers from occuring in the input jack assigned<br />
in TRIG IN q. After an event is detected, further events will be<br />
automatically muted for a certain length of time. Larger values set<br />
longer times.<br />
e Rej (Rejection)<br />
[Range] 0-9<br />
Prevents cross talk from occuring in the input jack assigned in<br />
TRIG IN q. Events triggered by other pads (input jacks) that are<br />
of a lower input value than what is set here will not be delivered<br />
for a set length of time.<br />
q<br />
1-5. Specific Rejection<br />
This function prevents cross talk from occurring between two specified<br />
input jacks q and e.<br />
TRIG IN= 1<br />
SPCRej=0 frm= 1<br />
w<br />
q TRIG IN (Trigger Input Number)<br />
Assigns the trigger input jack number (the same procedure as in<br />
[1-1. Pad Type]).<br />
w SPCRej (Specific Rejection)<br />
[Range] 0-9<br />
After an event occurs from the pad from the input jack assigned in<br />
e, the pad of the input jack assigned in TRIG IN q will not<br />
sound for a certain length of time unless the level is greater than<br />
the value assigned here.<br />
e frm (Assigned Destination Trigger Input Number)<br />
[Range] 1-10, 6&7<br />
Sets the destination trigger input jack number of the pad that will<br />
be rejected. When “6&7” is selected, both trigger inputs 6 and 7<br />
will be assigned.<br />
1-6. Trigger Setup Copy<br />
This function copies all data settings in [1-1. Pad Type] to [1-5.<br />
Specific Rejection] from input jack q to another input jack w.<br />
When the Trigger Setup Copy operation is carried<br />
out, the trigger setup data will be replaced with the<br />
settings of the copy source.<br />
q TRIG IN (Trigger Input Number)<br />
Sets the trigger input jack number (1-10) of the pad copy source.<br />
w Copy to Input (Trigger Input Number Copy Destination)<br />
Sets the trigger input jack number (1-10) of the copy destination.<br />
Procedure<br />
1. In the display shown above, assign the copy source and<br />
copy destination, press the [SAVE/ENT] button. The following<br />
display will appear asking for confirmation before<br />
the copy operation is carried out.<br />
e<br />
TRIG IN= 1<br />
Copy to Input= 1<br />
Input Copy to 1<br />
Are you sure ?<br />
Trigger Setup Edit Mode<br />
2. Press the [SAVE/ENT] or [VALUE+] button, the copy<br />
operation will be carried out.<br />
* Press the [VALUE-] button to cancel the copy operation.<br />
When the copy operation is complete, “Complete!” will appear.<br />
q<br />
q<br />
w<br />
13
Trigger Setup Edit Mode<br />
14<br />
2. COMMON Parameters<br />
Contains common settings for all pad inputs (1-10).<br />
This group is divided into the following 3 pages.<br />
2-1. Increment/Decrement ...................................... 14<br />
2-2. Input Exchange ............................................... 14<br />
2-3. Trigger Setup Name ........................................ 14<br />
2-1. Increment/Decrement<br />
This sets the pad function that allows the currently selected drum<br />
kit number to be increased or decreased by 1 by hitting the specified<br />
pad.<br />
TRIG Common<br />
IncIn= 4DecIn= 5<br />
q w<br />
q Incin (Pad for Increment)<br />
[Range] —, 1-10<br />
Assigns the trigger input jack number that is set for the increment<br />
(+1) function. “--” will appear when this function is not assigned<br />
to the pad.<br />
w Decin (Pad for Decrement)<br />
[Range] —, 1-10<br />
Assigns the trigger input jack number that is set for the decrement<br />
(-1) function. “--” will appear when this function is not assigned<br />
to the pad.<br />
* Even when the drum kit is changed, the pads connected to the<br />
assigned trigger input jacks will retain their increment/decrement<br />
functions. To assign this function to each drum kit, refer to<br />
the <strong>Drum</strong> Kit <strong>Voice</strong> Edit mode’s [2-6. Function] (P. 20)<br />
2-2. Input Exchange<br />
Switches the trigger signal from the pads between trigger input<br />
jacks 1 and 9/10.<br />
TRIG Common<br />
In Excg= normal<br />
q In Excg (Input Exchange)<br />
normal: Normal operation.<br />
In10,1/9: The signals from Input Jacks 1 and 9/10 are switched.<br />
When the input jack 1 pad is hit.<br />
m This event will be recognized as a signal from the input jack<br />
10 pad (as if a trigger were received from input jack 10) and<br />
operate accordingly.<br />
When the input jack 1 rim is hit.<br />
m Normal operation. This event will be recognized as a signal<br />
from the input jack 1 rim.<br />
q<br />
When the input jack 9 pad is hit.<br />
m This event will be recognized as a signal from the input jack<br />
1 pad (as if a trigger were received from input jack 1) and<br />
operate accordingly.<br />
When the input jack 10 pad is hit.<br />
m This event will be recognized as a signal from the input jack<br />
9 pad (as if a trigger were received from input jack 9) and<br />
operate accordingly.<br />
2-3. Trigger Setup Name<br />
Changes the name of the currently selected (currently being edited)<br />
Trigger Setup.<br />
TRIG Common<br />
TrgName=Medium q<br />
q TrgName (Trigger Setup Name)<br />
Procedure<br />
1. In the display shown above, use the [SEL] buttons<br />
to move the cursor to the character you want to<br />
change.<br />
2. Use the [VALUE–]/[VALUE+] buttons to select the alphabet,<br />
number or symbol.<br />
3. Repeat steps 1 and 2 above to create the Trigger Setup<br />
name using a maximum of 8 characters.<br />
● The available characters to choose from are (in order):<br />
space<br />
!"#$%&'()*+,-./0123456789:;?@<br />
ABCDEFGHIJKLMNOPQRSTUVWXYZ[\]^_`<br />
abcdefghijklmnopqrstuvwxyz{|}ßå
<strong>Drum</strong> Kit <strong>Voice</strong> Edit Mode<br />
This mode lets you set which voice and how it will be<br />
triggered for each pad (trigger input source) in the currently<br />
selected drum kit.<br />
■ What you can do with the <strong>Drum</strong> Kit <strong>Voice</strong><br />
Edit Mode<br />
This mode contains various settings related to the currently selected<br />
drum kit (data in the edit buffer for the drum kit).<br />
You can edit both preset (No. 1-48) and user drum kits (No. 49-<br />
80).<br />
The edited drum kit can be stored in a User <strong>Drum</strong> Kit (No. 49-80)<br />
using the Store Operation.<br />
* Selecting another drum kit before storing your changes will result<br />
in the data reverting to its default settings.<br />
* Data cannot be stored to preset drum kits (No. 1- 48).<br />
■ Entering the <strong>Drum</strong> Kit <strong>Voice</strong> Edit Mode<br />
Press the [VOICE] button on the front panel.<br />
Once the <strong>Drum</strong> Kit <strong>Voice</strong> Edit Mode is entered, the <strong>Voice</strong> Parameter<br />
main page (<strong>Voice</strong>) shown below will be displayed.<br />
KIT IN=pad 1 V=1<br />
=K/017 BDaftty1<br />
* Double-click the [VOICE] button to enter the <strong>Drum</strong> Kit <strong>Voice</strong> Edit<br />
Mode. The [1-2. Volume, Pan] display will appear.<br />
■ What’s in the <strong>Drum</strong> Kit <strong>Voice</strong> Edit Mode<br />
The <strong>Drum</strong> Kit <strong>Voice</strong> edit Mode is divided into the following five<br />
sub-groups.<br />
1.<strong>Voice</strong> Parameters .............................. (m P. 16)<br />
Sets the voice for each input source of the pad.<br />
2. Input Common Parameters ............. (m P. 19)<br />
Common settings related to the 2 layers for each<br />
pad input source’s voice parameter.<br />
3. Reverb Parameters .......................... (m P. 21)<br />
Sets the internal reverb effect.<br />
4. Setup ................................................. (m P. 22)<br />
When the drum kit is selected, this function copies<br />
the drum kit voice settings and MIDI transmit<br />
settings.<br />
5. <strong>Drum</strong> Kit Common Parameters ...... (m P. 23)<br />
Common settings for the entire drum kit.<br />
Procedure<br />
1. Before editing, it is necessary to select the drum kit you<br />
want to edit in the <strong>Drum</strong> Kit Play Mode of the [<strong>Drum</strong> Kit &<br />
Song] display.<br />
2. Press the [VOICE] button to enter the <strong>Drum</strong> Kit <strong>Voice</strong><br />
Edit Mode.<br />
3. Use the [PAGEs], [PAGEt] buttons to display the page<br />
you want to edit.<br />
* If the Utility Mode’s [1- 4. Jump to Recent Page] (P. 28) parameter<br />
is set to “on”, the DTXPRESS will display the page<br />
last edited when entering the <strong>Drum</strong> Kit <strong>Voice</strong> Edit Mode.<br />
4. Use the [SEL] buttons to move the cursor to<br />
the parameter you want to edit. The parameter will flash.<br />
* If there is only one parameter, it is not necessary to move the<br />
cursor.<br />
5. Use the [VALUE–]/[VALUE+] buttons to set the<br />
parameter’s value or ON/OFF setting. Pressing the<br />
[VOICE] button lets you listen to the <strong>Drum</strong> Kit <strong>Voice</strong> while<br />
editing.<br />
* Once a setting is changed, “*” will appear on the display next<br />
to “KIT”. After data is stored, the mark will disappear.<br />
KIT*IN=pad 1 V=1<br />
=K/019 MapleA20<br />
6. To store your changes in a User <strong>Drum</strong> Kit, use the Store<br />
Operation described below.<br />
* The changes you made will be lost if another drum kit is selected<br />
before your changes have been stored.<br />
6-1. Press the [SAVE/ENT] button. The following display will<br />
appear.<br />
Store <strong>Drum</strong>kit<br />
To= 49 Init Kit<br />
6-2. Use the [VALUE-]/[VALUE+] buttons to assign the <strong>Drum</strong><br />
Kit number (49-80) (located next to “To=”). The number<br />
and drum kit name will appear.<br />
6-3. Press the [SAVE/ENT] button, the following display will<br />
appear asking for confirmation before the store operation<br />
is carried out.<br />
Store KIT to= 49<br />
Are you sure ?<br />
6-4. Press the [SAVE/ENT] or [VALUE+] button, the store<br />
operation will be carried out.<br />
*Press the [VALUE-] button to cancel the store operation.<br />
The following display will appear after the store operation<br />
is complete.<br />
Complete !<br />
15
<strong>Drum</strong> Kit <strong>Voice</strong> Edit Mode<br />
16<br />
<strong>Drum</strong> Kit <strong>Voice</strong> Edit Mode Function <strong>List</strong><br />
Page<br />
1. <strong>Voice</strong> Parameters .................................................... 16<br />
1-1. <strong>Voice</strong> ................................................................ 17<br />
1-2. Volume, Pan .................................................... 17<br />
1-3. Tuning .............................................................. 17<br />
1-4. Layer Balance.................................................. 18<br />
1-5. Decay, Cutoff Frequency ................................. 18<br />
1-6. Note Number ................................................... 18<br />
1-7. Channel, Gate Time ........................................ 18<br />
2. Input Common Parameters .................................... 19<br />
2-1. Cross Fade ...................................................... 19<br />
2-2. Reverb Send .................................................... 19<br />
2-3. Alternate Group, Key Assign Mode ................. 19<br />
2-4. Hold Mode ....................................................... 20<br />
2-5. Key Off Enable ................................................ 20<br />
2-6. Function ........................................................... 20<br />
2-7. Pad Song ......................................................... 20<br />
2-8. Rim to Pad ....................................................... 21<br />
3. Reverb Parameters ................................................. 21<br />
3-1. Reverb Type, Time ........................................... 21<br />
3-2. Reverb Master Return ..................................... 21<br />
4. Setup ....................................................................... 22<br />
4-1. Program Change, Bank Select ........................ 22<br />
4-2. Volume, Pan .................................................... 22<br />
4-3. <strong>Drum</strong> Kit <strong>Voice</strong> Copy ....................................... 22<br />
5. <strong>Drum</strong> Kit Common Parameters ............................. 23<br />
5-1. Volume ............................................................ 23<br />
5-2. <strong>Drum</strong> Reverb Send .......................................... 23<br />
5-3. Hi-Hat Sensitivity ............................................. 23<br />
5-4. Song Select ..................................................... 23<br />
5-5. <strong>Drum</strong> Kit Name ................................................ 23<br />
1. <strong>Voice</strong> Parameters<br />
Sets the voice for each input source of the pad.<br />
The Input Source is trigger data that is transmitted by the pads or<br />
trigger sensors connected to input jacks 1-10 of the DTXPRESS.<br />
When monaural pads TP60/80, KP60/80, PCY60/80, DT10/20,<br />
etc. are used, one Input Source will be assigned to one input jack.<br />
When stereo pads TP80S, PCY80S, etc. are used, two Input Sources<br />
(pad input and rim switch input or 2 kinds of pad input, etc.) will<br />
be assigned to one input jack.<br />
The <strong>Voice</strong> Parameter is divided into the following 7 pages.<br />
1-1. <strong>Voice</strong> ................................................................ 17<br />
1-2. Volume Pan ..................................................... 17<br />
1-3. Tuning .............................................................. 17<br />
1-4. Layer Balance.................................................. 18<br />
1-5. Decay, Cutoff Frequency ................................. 18<br />
1-6. Note Number ................................................... 18<br />
1-7. Channel, Gate Time ........................................ 18<br />
Select the Input Source for Editing<br />
In <strong>Voice</strong> Parameter edit display, first it is necessary to select the<br />
input source q for editing.<br />
Also, 2 voices/key on events/occurrences (2 voices delivered with<br />
one strike of the pad) can be assigned to one trigger input. This use<br />
is called “2 layer”. When a 2 layer is used, assign the layer number<br />
w that is used.<br />
q w<br />
KIT IN=pad 1 V=1<br />
=K/019 MapleA20<br />
q IN (Input Source)<br />
Each Input Source is defined as follows.<br />
pad 1 Pad input for Trigger Input Jack 1.<br />
rim 1 Rim switch input for Trigger Input Jack 1.<br />
pad 2 Pad input for Trigger Input Jack 2.<br />
rim 2 Rim switch input for Trigger Input Jack 2.<br />
: :<br />
rim 6 Rim switch input for Trigger Input Jack 6.<br />
pad 7 Pad input for Trigger Input Jack 7.<br />
rim 7 Rim switch input for Trigger Input Jack 7.<br />
open Pad input (when the hi-hat controller is not fully closed)<br />
for Trigger Input Jack 8.<br />
rimOpen Rim switch input (when the hi-hat controller is not fully<br />
closed) for Trigger Input Jack 8.<br />
close Pad input (when the hi-hat controller is fully closed)<br />
for Trigger Input Jack 8.<br />
rimCls Rim switch input (when the hi-hat controller is fully<br />
closed) for Trigger Input Jack 8.<br />
footCl Event when the hi-hat controller is depressed for Trigger<br />
Input Jack 8.<br />
splash Splash event for the hi-hat controller for Trigger Input<br />
Jack 8.
pad 9 Pad input for Trigger Input Jack 9.<br />
pad 10 Pad input for Trigger Input Jack 10.<br />
* According to the setting in the Utility Mode’s [1-1. Learn Mode],<br />
the input source can be assigned by hitting the pad.<br />
* Monaural pads do not have a rim switch function.<br />
w Layer Number<br />
[Range] 1, 2, -<br />
When 2 layers are used, use this setting to select which layer (“1”<br />
or “2”) will be set.<br />
When only 1 voice is set, “--” will appear and you will not be<br />
able to switch.<br />
* Use the [1-1. <strong>Voice</strong>] display to set whether 2 layer or 1 voice will<br />
be used.<br />
If the same MIDI note number is set to more than one pad<br />
within the same drum kit, the lowest numbered Trigger<br />
Input Jack will take priority. Regardless of which pad is<br />
struck, the same voice (setting) will be delivered.<br />
1-1. <strong>Voice</strong><br />
This function assigns the voice (drum voice) e for each input<br />
source q. Two voices w can be assigned for simultaneous delivery<br />
to 1 input source (when the pad is hit once).<br />
KIT IN=pad 1 V=2<br />
=K/019 MapleA20<br />
e r<br />
q<br />
w<br />
q IN (Input Source)<br />
w Layer Number<br />
Assigns the input source and layer for the setting. (Refer to P. 16)<br />
Sets whether 2 layer or 1 voice will be used in this display. Only<br />
“1” or “2” can be selected in the Layer Number.<br />
e <strong>Voice</strong> Category<br />
Selects the drum voice category that will be delivered by Layer 2<br />
of Input Source q.<br />
Each of the following characters indicates a drum voice category.<br />
K: Acoustic Kick<br />
k: Electric Kick<br />
S: Acoustic Snare<br />
s: Electric Snare<br />
T: Acoustic Tom<br />
t: Electric Tom<br />
C: Cymbal<br />
H: Hi-hat<br />
P: Percussion<br />
E: Effect 1<br />
e: Effect 2<br />
L: <strong>Drum</strong> Loop<br />
m: misc. voices<br />
<strong>Drum</strong> Kit <strong>Voice</strong> Edit Mode<br />
r <strong>Voice</strong> Number <strong>Voice</strong> Name<br />
Selects the assigned voice. The <strong>Voice</strong> Number (1-127) and <strong>Voice</strong><br />
Name will be displayed. When 2 Layer is selected, “*” will be<br />
displayed next to the <strong>Voice</strong> Name.<br />
When “0” is selected, “NoAssign” will be displayed in place of<br />
the <strong>Voice</strong> Name and no sound will be delivered.<br />
* Refer to the [<strong>Drum</strong> <strong>Voice</strong> <strong>List</strong>] (P. 38).<br />
1-2. Volume, Pan<br />
This function sets the Volume e and Pan r (the position in the<br />
stereo field) for each drum voice that is delivered by each layer w<br />
of the input source q.<br />
q IN (Input Source)<br />
w Layer Number<br />
Assigns the input source and layer for setting. (Refer to P. 16)<br />
e Vol (Volume)<br />
[Range] 0-127<br />
r Pan<br />
[Range] L64 to C to R64<br />
q w<br />
KIT IN=pad 1 V=1<br />
Vol= 120 Pan= C<br />
e r<br />
1-3. Tuning<br />
This function sets the pitch for each drum voice that is delivered<br />
by each layer w of the input source q.<br />
q w<br />
KIT IN=pad 1 V=1<br />
Tune C= 0 F= 0<br />
e r<br />
q IN (Input Source)<br />
w Layer Number<br />
Assigns the input source and layer for setting. (Refer to P. 16)<br />
e Tune C (Tune Coarse)<br />
[Range] –24 to 0 to +24<br />
Tuning can be set increments of a half step.<br />
r Tune F (Tune Fine)<br />
[Range] –64 to 0 to +63<br />
Tuning can be set increments of approximately 1.17 cents.<br />
17
<strong>Drum</strong> Kit <strong>Voice</strong> Edit Mode<br />
18<br />
1-4. Layer Balance<br />
When a drum voice is made up of 2 layers (a single voice consisting<br />
of 2 voice waves), this function sets the volume balance between<br />
the 2 layers that are delivered by each layer w of the input<br />
source q.<br />
* When only a 1 layer voice is set, this setting will be ignored.<br />
q w<br />
KIT IN=pad 1 V=1<br />
LayerBalance=+10 e<br />
q IN (Input Source)<br />
w Layer Number<br />
Assigns the input source and layer for the setting. (Refer to P. 16)<br />
e LayerBalance (Layer Balance)<br />
[Range] –64 to 0 to +63, ---<br />
Sets the volume balance between 2 layers.<br />
* When the drum voice has only 1 layer “---” will appear in the<br />
display and settings cannot be carried out.<br />
1-5. Decay, Cutoff Frequency<br />
This function sets the drum voice decay, the filter’s cutoff frequency<br />
and adjusts the tone of each voice that is delivered by each layer<br />
w of the input source q.<br />
q w<br />
KIT IN=pad 1 V=1<br />
Decay= 0 Fc= 0<br />
e r<br />
q IN (Input Source)<br />
w Layer Number<br />
Assigns the input source and layer for the setting. (Refer to P. 16)<br />
e Decay<br />
[Range] –64 to 0 to +63<br />
Positive values will produce a clearer sound.<br />
r Fc (Cutoff Frequency)<br />
[Range]) –64 to 0 to +63<br />
A positive value will produce a brighter sound, negative values<br />
will produce a rounder sound.<br />
1-6. Note Number<br />
This function sets the MIDI note number for each layer w that is<br />
transmitted when a signal is received from the input source q.<br />
KIT IN=pad 1 V=1<br />
Note#= 33(A 0)<br />
q IN (Input Source)<br />
w Layer Number<br />
Assigns the input source and layer for the setting. (Refer to P. 16)<br />
e Note# (MIDI Note Number)<br />
[Range] 0-127 (C-2 to G8)<br />
Sets the MIDI note number. The note number and voice name will<br />
be displayed.<br />
* When the selected MIDI note number has already been assigned<br />
to another input source, “*” will be displayed next to “Note#=”.<br />
1-7. Channel, Gate Time<br />
This function sets the MIDI transmit channel and gate time (the<br />
length of time from key on to key off) for the MIDI note on data of<br />
each layer w that is transmitted when a signal is received from<br />
the input source q.<br />
q IN (Input Source)<br />
w Layer Number<br />
Assigns the input source and layer for the setting. (Refer to P. 16)<br />
e Ch (MIDI Channel)<br />
[Range] 1-16<br />
r GateT (Gate Time)<br />
[Range] 0.0s – 9.9s<br />
q w<br />
e<br />
q w<br />
KIT IN=pad 1 V=1<br />
Ch=10 GateT=0.3s<br />
e r
2. Input Common Parameters<br />
This sub-mode sets the common settings between 2 layers for voice<br />
parameters of each pad’s input source.<br />
The Input Common Parameters sub-group is divided into the following<br />
8 pages.<br />
2-1. Cross Fade ...................................................... 19<br />
2-2. Reverb Send .................................................... 19<br />
2-3. Alternate Group, Key Assign Mode ................. 19<br />
2-4. Hold Mode ....................................................... 20<br />
2-5. Key Off Enable ................................................ 20<br />
2-6. Function ........................................................... 20<br />
2-7. Pad Song ......................................................... 20<br />
2-8. Rim to Pad ....................................................... 21<br />
Select the Input Source for editing<br />
In the Input Common Parameters edit display, first it is necessary<br />
to select the input source q for editing. (Refer to page 16 on how<br />
to select the input source.)<br />
KIT IN=pad 1<br />
X Fade=0 ¥¥¥¥¥¥¥<br />
However, the same as in <strong>Voice</strong> Parameters, “If the same MIDI<br />
note number is set to more than one pad within the same drum kit,<br />
the lowest numbered trigger input jack will take priority. Regardless<br />
of which pad is struck, the same voice (setting) will be delivered.”<br />
So, when the setting is invalid in edit displays [2-1. Cross<br />
Fade] – [2-5. Key Off Enable], the following display will appear<br />
and edits cannot be carried out.<br />
KIT IN=pad 1<br />
(Note# in use )<br />
2-1. Cross Fade<br />
This function sets the velocity (volume) cross fade between the 2<br />
layer voices delivered by the input source q.<br />
KIT IN=pad 1<br />
X Fade=1 ¥çœ¬æ…¥<br />
q IN (Input Source)<br />
Assigns the Input Source for setting. (Refer to the display shown<br />
above.)<br />
w j (Cross Fade Type)<br />
[Range] 0-9<br />
Selects the cross fade type (“1” to “9”). The conversion graph will<br />
appear to the right of the type number.<br />
If this parameter is set to “0”, the cross fade function will not be<br />
valid.<br />
q<br />
q<br />
w<br />
<strong>Drum</strong> Kit <strong>Voice</strong> Edit Mode<br />
2-2. Reverb Send<br />
This function sets the reverb send level w for the voice (layer 1, 2)<br />
delivered by the input source q.<br />
* The actual reverb send level will be determined by multiplying the<br />
level set here with the level set in [5-2. <strong>Drum</strong> Reverb Send] (P. 23).<br />
KIT IN=pad 1<br />
q<br />
Reverb send= 15 w<br />
q IN (Input Source)<br />
Assigns the input source for the setting. (Refer to P. 16)<br />
w Reverb send (Reverb Send Level)<br />
[Range] 0-127<br />
2-3. Alternate Group, Key Assign Mode<br />
This function sets the Alternate Group and Key Assign Mode for<br />
the voice (layer 1, 2) delivered by the input source q.<br />
Alternate Group: This is a group of voices assigned to the same<br />
group number that should not be delivered at the same time.<br />
For example, by assigning an open hi-hat with a closed hihat<br />
to the same group number, the open hi-hat sound will be<br />
canceled once the closed hi-hat sound is delivered.<br />
Key Assign Mode: This defines the sound output rules when multiple<br />
voices that are assigned to the same MIDI note number<br />
are simultaneously delivered.<br />
KIT IN=pad 1<br />
AltG= 0 Key=semi<br />
w e<br />
q<br />
q IN (Input Source)<br />
Assigns the input source for the setting. (Refer to P. 16)<br />
w AltG (Alternate Group)<br />
<strong>Voice</strong>s that are assigned to the same MIDI note number that you<br />
do not want to be delivered simultaneously. If this parameter is set<br />
to “0” there will be no truncation.<br />
* Some alternate group voices like Hi-Hat, etc., are preset in the<br />
voices.<br />
e Key (Key Assign Mode)<br />
This defines the sound output rules when multiple voices that are assigned<br />
to the same MIDI note number are simultaneously delivered.<br />
poly: There are no limits to the number of voices delivered at once.<br />
semi: Up to 2 voices for this note number can be produced at<br />
one time. When a 3 rd voice is triggered, one of the first 2<br />
voices will be truncated.<br />
mono: One voice can be delivered at one time, the previous voice<br />
will be truncated.<br />
high: One voice can be delivered at one time, the previous voice<br />
will be truncated. However, even if the maximum number<br />
of 32 notes is exceeded, the note number selected here<br />
will not be truncated.<br />
19
<strong>Drum</strong> Kit <strong>Voice</strong> Edit Mode<br />
20<br />
2-4. Hold Mode<br />
Sets the Hold Mode for the voice (layer 1, 2) delivered by input<br />
source q.<br />
KIT IN=pad 1<br />
Hold Mode= off<br />
q IN (Input Source)<br />
Assigns the input source for the setting. (Refer to P. 16)<br />
w Hold Mode<br />
on: Each time the pad is hit either a MIDI key on or MIDI key<br />
off event will be transmitted in succession.<br />
off: Normal operation. When a pad is hit, only a MIDI key on<br />
event will be transmitted (after the decay time is up, key off<br />
will be transmitted automatically).<br />
* If this function is set to “on”, it is recommended that you use the<br />
“key=high” setting in [2-3. Alternate Group, Key Assign Mode].<br />
2-5. Key Off Enable<br />
This function decides whether or not to recognize MIDI key off<br />
messages for the voice (layer1, 2) delivered by the input source<br />
q.<br />
KIT IN=pad 1<br />
q<br />
Key Off= disable w<br />
q IN (Input Source)<br />
Assigns the input source for the setting. (Refer to P. 16)<br />
w Key Off<br />
enable: Recognizes key off.<br />
disable: Does not recognize key off.<br />
* When this function is set to “disable”, some voices may sound<br />
continuously. Press the [SHIFT] plus [VOICE] buttons to stop<br />
voices sounding.<br />
2-6. Function<br />
Along with the voice, this function can be used to control other<br />
functions w according to the trigger from the input source q.<br />
KIT IN=pad 1<br />
Func= normal<br />
q IN (Input Source)<br />
Assigns the input source for the setting. (Refer to P. 16)<br />
w Func (Function)<br />
Selects the function that is controlled by the trigger input.<br />
q<br />
w<br />
q<br />
w<br />
normal: Normal operation.<br />
pad song: Controls playback of the pad song*.<br />
click onoff: Switches the click sound on/off.<br />
inc drumkit: Increases the value of the drum kit number by 1<br />
(increment).<br />
dec drumkit: Decreases the value of the drum kit number by<br />
1 (decrement).<br />
trig bypass: Switches the trigger bypass function on/off<br />
(P. 28).<br />
start/stop: Controls playback of the main song*.<br />
main song: The main song is the selected in the <strong>Drum</strong> Kit Play<br />
mode, and is controlled from the panel (of MIDI/TO HOST jack).<br />
pad song: According to this setting, playback of the pad song will<br />
be controlled by the trigger input. The pad song can be played<br />
independently of the main song. Also, up to 3 pad songs can be<br />
played along with main song simultaneously.<br />
* Refer to the [2 -7. Pad Song] for more information on setting the<br />
Pad Song.<br />
* When 3 pad songs have already been selected in another input<br />
source, the “pad song” will not be displayed (“------” is displayed).<br />
2-7. Pad Song<br />
This function contains settings for the pad song.<br />
These settings are affective when a trigger from the input source<br />
q, which is set in [2-6. Function], controls playback of the pad<br />
song.<br />
KIT IN=pad 1<br />
Song= 1=--=play<br />
w e r<br />
q<br />
q IN (Input Source)<br />
Assigns the input source for the settings (Refer to P. 16).<br />
w Song Number<br />
Assigns the song number (1-127) that is assigned to the pad song.<br />
e Repeat Playback<br />
rp: Repeats playback of the song (when the song reaches the end<br />
it will start again from the beginning, continuously).<br />
--: Normal playback.<br />
r Playback Mode<br />
play: When a pad is hit, playback of the assigned pad song will<br />
start/stop.<br />
chse: When the pad is hit, one measure of the assigned pad song<br />
will start playback then pause.<br />
ctof: When the pad is hit, playback of the assigned pad song will<br />
start/stop. However, if the pad song is set to “ctof” the<br />
pad song will stop when another pad song with the “ctof”<br />
setting is started. This function allows only one “ctof”<br />
pad song to be played at a time.
* Only data for MIDI channels 7, 8, 9, 10 is played back with the<br />
pad song.<br />
* If the Pad Song's tempo or voices are irregular, re-select the<br />
<strong>Drum</strong> Kit.<br />
* The following restrictions prevent overlapping of the main song<br />
and MIDI channels.<br />
• The first pad song in the drum kit will be transmitted on the<br />
MIDI channel number that is determined by subtracting “4”<br />
from the original MIDI channel number.<br />
• The second pad song in the drum kit will be transmitted on<br />
the MIDI channel number that is determined by adding “4”<br />
from the original MIDI channel number.<br />
• The third pad song in the drum kit will be transmitted after<br />
the MIDI channel is converted as follows.<br />
The original MIDI channel m MIDI transmit channel<br />
7 m 15, 8 m 16, 9 m 1, 10 m 2.<br />
2-8. Rim To Pad<br />
This function is only in affect when the input source q is from a<br />
rim switch.<br />
When the rim is hit, pad events triggered from the same pad (trigger<br />
input jack) can be simultaneously transmitted with rim switch<br />
events.<br />
According to this setting, the pad can be triggered at the same<br />
time as the snare’s rim shot.<br />
KIT IN=pad 1<br />
RimTopad=-------<br />
q IN (Input Source)<br />
Assigns the input source for the setting. (Refer to P. 16)<br />
* Selects the rim switch source.<br />
w RimToPad (Rim to Pad)<br />
Sets the event that is transmitted when the rim is hit.<br />
disable:Only transmits rim switch event.<br />
enable: Transmits rim switch event and pad event.<br />
* When an input other than the rim switch is selected for the input<br />
source, “-------” will be displayed and settings can not be<br />
carried out.<br />
q<br />
w<br />
<strong>Drum</strong> Kit <strong>Voice</strong> Edit Mode<br />
3. Reverb Parameters<br />
This function sets the internal reverb effect of the DTXPRESS.<br />
The reverb parameters are divided into the following 2 pages.<br />
3-1. Reverb Type, Time ........................................... 21<br />
3-2. Reverb Master Return ..................................... 21<br />
3-1. Reverb Type, Time<br />
Sets the type of reverb effect and reverb time for each drum kit.<br />
KIT Reverb<br />
Type=hall 1 T=18<br />
w e<br />
q Type (Reverb Type)<br />
Sets the reverb type.<br />
none: No reverb (the same as thru).<br />
hall 1: Simulates reverb in a small hall.<br />
hall 2: Simulates reverb in a large hall.<br />
room 1: Simulates reverb in a small room.<br />
room 2: Simulates reverb in a large room.<br />
room 3: Simulates reverb in a room with a high ceiling.<br />
stage 1: Simulates playing on a large stage.<br />
stage 2: Simulates playing on a small stage.<br />
plate: Simulates steel plate reverb.<br />
white: A special short reverb effect.<br />
tunnel: Simulates the reverb of a tunnel.<br />
bsemnt: Simulates the reverb of a basement.<br />
w T (Reverb Time)<br />
[Range] 0-69<br />
Sets the reverb time.<br />
This function can be used to change the characteristic of the reverb’s<br />
sound.<br />
3-2. Reverb Master Return<br />
This function sets the signal return level from the reverb effect for<br />
every drum kit. By setting the level, you can adjust the reverb effect<br />
of the entire DTXPRESS system.<br />
KIT Reverb<br />
MasterReturn= 64<br />
q<br />
q MasterReturn (Master Return)<br />
[Range] 0-127<br />
21
<strong>Drum</strong> Kit <strong>Voice</strong> Edit Mode<br />
22<br />
4. Setup<br />
When a drum kit is selected, this function copies MIDI transmit<br />
data settings and drum kit voice settings.<br />
The Setup sub-group is divided into the following 3 pages.<br />
4-1. Program Change, Bank Select ........................ 22<br />
4-2. Volume, Pan .................................................... 22<br />
4-3. <strong>Drum</strong> Kit <strong>Voice</strong> Copy ....................................... 22<br />
4-1. Program Change, Bank Select<br />
When a drum kit is selected, this function sets the MIDI Program<br />
Channel Number e, the Bank Select MSB r and LSB t that<br />
will be transmitted.<br />
This can be set w for each MIDI channel q.<br />
By switching the drum kit, you can change the voice in an external<br />
MIDI device.<br />
q w<br />
KIT PC Ch 1=off<br />
PC=---M=---L=---<br />
q MIDI Channel<br />
[Range] Ch1–Ch16<br />
e r t<br />
w Program Change Transmit On/Off<br />
on: Transmits.<br />
off: Does not transmit.<br />
e PC (Program Change Number)<br />
[Range] 1-128<br />
r M (Bank Select MSB)<br />
t L (Bank Select LSB)<br />
[Range] 0-127<br />
Sets the bank for when the drum kit is switched. The bank will be<br />
assigned with the 2 values set in Bank Select MSB and LSB.<br />
* Refer to the <strong>Voice</strong> <strong>List</strong> and MIDI Data Format, etc. of the external<br />
MIDI device you are using for more information on Bank<br />
Select MSB, LSB.<br />
4-2. Volume, Pan<br />
When a drum kit is selected, this function sets the MIDI Control<br />
Change Volume e and the Pan r that will be transmitted.<br />
This can be set w for each MIDI channel q.<br />
By switching the drum kit, you can change the voice volume and<br />
pan in an external MIDI device.<br />
KIT CC Ch 1=off<br />
Vol= --- Pan=---<br />
e<br />
q w<br />
r<br />
q MIDI Channel<br />
[Range] Ch1-Ch16<br />
w Control Change Transmit On/Off<br />
on: Transmits<br />
off: Does not transmit<br />
e Vol (Volume)<br />
[Range] 1-128<br />
Sets the Volume Control Change data value that will be transmitted.<br />
r Pan<br />
[Range] 0-127<br />
Sets the Pan Control Change data value that will be transmitted.<br />
4-3. <strong>Drum</strong> Kit <strong>Voice</strong> Copy<br />
This function copies all data settings in [1-1. <strong>Voice</strong>] – [2-7. Pad<br />
Song] from the Input Source q to another Input Source w.<br />
KIT IN=pad 1<br />
CopyTo IN=pad 1<br />
When the <strong>Drum</strong> Kit <strong>Voice</strong> Copy operation is carried<br />
out, the <strong>Drum</strong> Kit <strong>Voice</strong> data in the destination<br />
Input Jack will be replaced with the data of the copy<br />
source.<br />
q IN (Input Source Copy Source)<br />
Sets the input source of the copy source. (Refer to P. 16)<br />
w CopyTo IN (Input Source Copy Destination)<br />
Sets the input source of the copy destination. (Refer to P. 16)<br />
Procedure<br />
1. In the display shown above, assign the input source for<br />
the copy source and copy destination, press the [SAVE/<br />
ENT] button.<br />
The following display will appear asking for confirmation<br />
before the copy operation is carried out.<br />
InputCpyTopad 1<br />
Are you sure ?<br />
2. Press the [SAVE/ENT] or [VALUE+] button, the copy operation<br />
will be carried out.<br />
* Press the [VALUE–] button to cancel the copy operation.<br />
When the copy operation is complete, “Complete!” will appear.<br />
q<br />
w
5. <strong>Drum</strong> Kit Common Parameters<br />
This function sets the common settings for the entire drum kit.<br />
The <strong>Drum</strong> Kit Common Parameters are divided into the following<br />
5 pages.<br />
5-1. Volume ............................................................ 23<br />
5-2. <strong>Drum</strong> Reverb Send .......................................... 23<br />
5-3. Hi-Hat Sensitivity ............................................. 23<br />
5-4. Song Select ..................................................... 23<br />
5-5. <strong>Drum</strong> Kit Name ................................................ 23<br />
5-1. Volume<br />
Sets the overall volume for the drum voice.<br />
KIT Common<br />
Volume= 127 q<br />
q Volume<br />
[Range] 0-127<br />
5-2. <strong>Drum</strong> Reverb Send<br />
Sets the overall reverb send level of the drum voice.<br />
KIT Common<br />
<strong>Drum</strong>RevSend 40 q<br />
q <strong>Drum</strong>RevSend (<strong>Drum</strong> Reverb Send Level)<br />
[Range] 0-127<br />
The actual reverb send level will be determined by multiplying the<br />
reverb send level set in [2-2. Reverb Send] (P. 19) with the value<br />
set here.<br />
5-3. Hi-Hat Sensitivity<br />
Sets the foot controller sensitivity connected to HI-HAT CON-<br />
TROL jack on the rear panel.<br />
KIT Common<br />
HH Sensitivty=32 q<br />
q HH Sensitivty<br />
[Range] 0-63<br />
Larger values provide higher sensitivity.<br />
<strong>Drum</strong> Kit <strong>Voice</strong> Edit Mode<br />
5-4. Song Select<br />
This parameter allows you to switch the main song q at the same<br />
time the drum kit is switched.<br />
KIT Common<br />
SongSel=110ƒ=120<br />
q w<br />
q Song Select (Song Number)<br />
[Range] —, 1-127<br />
Assign the song number to select the song for playback. The song<br />
will not be switched if the setting is set to “---”.<br />
w q (Tempo)<br />
[Range] —, 30-300<br />
Assign the tempo that will be used. If “---” is set, the tempo will<br />
not change .<br />
5-5. <strong>Drum</strong> Kit Name<br />
Changes the drum kit name that is currently selected for editing.<br />
KIT Common<br />
KitName=Acoustic q<br />
q KitName (<strong>Drum</strong> Kit Name)<br />
Procedure<br />
1. In the display shown above, use the [SEL] buttons<br />
to move the cursor to the character you want to<br />
change.<br />
2. Use the [VALUE–]/[VALUE+] buttons to select the alphabet,<br />
number or symbol.<br />
3. Repeat steps 1 and 2 above to create the <strong>Drum</strong> Kit Name<br />
using a maximum of 8 characters.<br />
● The available characters to choose from are (in order):<br />
space<br />
!"#$%&'()*+,-./0123456789:;?@<br />
ABCDEFGHIJKLMNOPQRSTUVWXYZ[\]^_`<br />
abcdefghijklmnopqrstuvwxyz{|}ßå<br />
23
Song Job Mode<br />
This function edits the User Song (No. 97-128) that is<br />
currently selected.<br />
■ Entering the Song Job Mode<br />
Press the [SONG] button on the front panel.<br />
Once the Song Jobe Mode is entered, the main page (Tempo, Repeat<br />
Playback) shown below will be displayed.<br />
24<br />
SONG<br />
ƒ=120 Repeat=off<br />
* Double-click the [SONG] button to enter the Song Job Mode<br />
and the [8. Clear Song] display will appear.<br />
■ What’s in the Song Job Mode<br />
The Song Job Mode is divided into the following 9 pages.<br />
1. Tempo, Repeat Playback ..................................... 24<br />
2. Program Change, Bank Select ............................ 24<br />
3. Volume, Pan ......................................................... 25<br />
4. Song Copy ........................................................... 25<br />
5. Quantize............................................................... 25<br />
6. Clear Track ........................................................... 26<br />
7. Merge Track ......................................................... 26<br />
8. Clear Song ........................................................... 26<br />
9. Song Name .......................................................... 26<br />
Procedure<br />
1. Before editing, it is necessary to select the User Song<br />
(No. 97-128) you want to edit in the <strong>Drum</strong> Kit Play Mode’s<br />
[<strong>Drum</strong> Kit & Song] display or [Song & Mute] display.<br />
2. Press the [SONG] button to enter the Song Job Mode.<br />
* If the [SONG] button is pressed when a preset song is already<br />
selected, “CAN'T EDIT PRESET SONG” will appear<br />
and the Song Job Mode cannot be entered.<br />
3. Use the [PAGEs]/[PAGEt] buttons to display the page<br />
you want to edit.<br />
* If the Utility Mode’s [1-4. Jump To Recent Page] (P. 28) parameter<br />
is set to “on”, The DTXPRESS will display the page<br />
last edited when entering the Song Job Mode.<br />
4. Use the [SEL] buttons to move the cursor to<br />
the parameter you want to edit. The parameter will flash.<br />
* If there is only one parameter, it is not necessary to move the<br />
cursor.<br />
5. Use the [VALUE–]/[VALUE+] buttons to set the<br />
parameter’s value or ON/OFF setting.<br />
Any settings made in the Song Job Mode will directly<br />
change the settings in the memory of the DTXPRESS. It is<br />
not necessary to use the Store Operation.<br />
1. Tempo, Repeat Playback<br />
This function changes the tempo (rewrites the tempo information<br />
in the song’s header) and sets the repeat playback of the user song.<br />
SONG<br />
ƒ=120 Repeat=off<br />
q q (Tempo)<br />
[Range] 30-300<br />
w Repeat (Repeat Playback)<br />
[Range] off, on<br />
If this is set to “on”, the user song will repeat playback.<br />
If this is set to “off”, the user song will play normally.<br />
2. Program Change, Bank Select<br />
This function changes the voices that will be used for each MIDI<br />
channel in the user song (rewrites the voice information in the<br />
song’s header). This program change will be transmitted when a<br />
song is selected and when song playback is stopped.<br />
q MIDI Channel<br />
[Range] Ch1-Ch16<br />
q w<br />
q<br />
SONG Ch 1=off<br />
PCNo=--- V=-----<br />
w Program Change Transmit On/Off<br />
on: Transmits.<br />
off:Does not transmit.<br />
e PCNo (Program Change Number)<br />
[Range] 1-128<br />
r V (Bank Select)<br />
[Range] meldy, drumV<br />
Sets the bank that will be switched.<br />
meldy: Transmits the melody voice program change (MSB=0).<br />
drumV: Transmits the drum voice program change (MSB=127).<br />
w<br />
r
3. Volume, Pan<br />
This function changes the volume and pan settings for each MIDI<br />
channel in the user song (rewrites the <strong>Voice</strong> information in the<br />
song’s header). This control change will be transmitted when a<br />
song is selected and when song playback is stopped.<br />
q MIDI Channel<br />
[Range] Ch1-Ch16<br />
w Control Change transmit On/Off<br />
on: Transmits.<br />
off: Does not transmit.<br />
e Vol (Volume)<br />
[Range] 0-127<br />
r Pan<br />
[Range] 0-127<br />
q<br />
SONG Ch 1=off<br />
Vol= --- Pan=---<br />
e r<br />
4. Song Copy<br />
This function copies the assigned song q to the user song that is<br />
currently selected.<br />
SONG Copy<br />
from= 1Latiniq<br />
When the Song Copy operation is carried out, all<br />
data in the User Song that is currently selected will<br />
be replaced with data of the copy source.<br />
q from (Copy Source)<br />
[Range] 1-127<br />
Sets the song that is the copy source. The song number and name<br />
will be displayed. A preset song or a user song can be assigned.<br />
Procedure<br />
1. Assign the Copy Source Song on the display shown<br />
above, press the [SAVE/ENT] button. The following display<br />
will appear asking for confirmation before the copy<br />
operation is carried out.<br />
2. Press the [SAVE/ENT] or [VALUE+] button, the copy<br />
operation will be carried out.<br />
w<br />
CopySONG From 1<br />
Are you sure ?<br />
q<br />
* Press the [VALUE-] button to cancel the copy operation.<br />
* During song playback, the copy operation cannot be carried out.<br />
“ERROR SEQ is Running” will appear. Stop the song and try<br />
the copy operation again.<br />
* If memory is insufficient when in the copy operation, “ERROR<br />
Memory Full” will appear. Clear any unnecessary user songs<br />
and try the copy operation again.<br />
When the copy operation is complete, “Complete!” will appear.<br />
5. Quantize<br />
This function quantizes each track q of the user song to the accuracy<br />
w defined here.<br />
quantize: When the timing of the sequence data that was recorded<br />
is inaccurate, this function is used to correct the timing. The<br />
accuracy for correcting can be assigned using note lengths.<br />
SONG Quantize<br />
TR=1 Value=ƒ<br />
q w<br />
When the Quantize operation is carried out, all data<br />
in the assigned track of the currently selected user<br />
song will be replaced.<br />
q TR (Specified Track)<br />
Assigns the track (“1” or “2”) to be quantized.<br />
w Value (Quantize Accuracy)<br />
[Range] ƒ quarter note, ƒ3 quarter note (triplet),<br />
© eighth note, ©3 eighth note (triplet),<br />
˙ sixteenth note, ˙3 sixteenth note (triplet)<br />
Procedure<br />
1. Set the track and the quantize accuracy on the display<br />
shown above, press the [SAVE/ENT] button.<br />
The following display will appear asking for confirmation<br />
before the quantize operation is carried out.<br />
Quantize Tri ƒ<br />
Are you sure ?<br />
Song Job Mode<br />
2. Press the [SAVE/ENT] or [VALUE+] button, the quantize<br />
operation will be carried out.<br />
* Press the [VALUE-] button to cancel the quantize operation.<br />
* During song playback, the quantize operation cannot be carried<br />
out. “ERROR SEQ is Running” will appear. Stop the<br />
song and try the quantize operation again.<br />
* If memory is insufficient when in the quantize operation, “ER-<br />
ROR Memory Full” will appear. Clear any unnecessary user<br />
songs and try the quantize operation again.<br />
When the quantize operation is complete, “Complete!” will appear.<br />
25
Song Job Mode<br />
26<br />
6. Clear Track<br />
This function clears all data in the assigned track q in the user<br />
song.<br />
SONG Clear Track<br />
Track=1<br />
q TR (Specified Track)<br />
Assigns the track (“1” or “2”) to be cleared.<br />
Procedure<br />
1. Assign the track you want to clear on the display shown<br />
above, press the [SAVE/ENT] button.<br />
The following display will appear asking for confirmation<br />
before the clear track operation is carried out.<br />
Clear Track 1<br />
Are you sure ?<br />
2. Press the [SAVE/ENT] or [VALUE+] button, the clear track<br />
operation will be carried out.<br />
* Press the [VALUE–] button to cancel the clear track operation.<br />
* During song playback, the clear track operation cannot be<br />
carried out. “ERROR SEQ is Running” will appear. Stop the<br />
song and try the clear track operation again.<br />
When the Clear Track operation is complete, “Complete!” will<br />
appear.<br />
7. Merge Track<br />
This function merges (mixes) the sequence data in tracks 1 and 2<br />
of the user song to track 1.<br />
SONG Merge Track<br />
Are you sure ?<br />
Procedure<br />
1. Press the [SAVE/ENT] button on the display shown<br />
above, the merge operation will be carried out.<br />
When the Merge Track operation is complete, “Complete!”<br />
will appear.<br />
* If memory is insufficient when in the merge operation, “ER-<br />
ROR Memory Full” will appear. Clear any unnecessary user<br />
songs and try the merge operation again.<br />
* During song playback, the merge operation cannot be carried<br />
out. “ERROR SEQ is Running” will appear. Stop the<br />
song and try the merge operation again.<br />
8. Clear Song<br />
This function clears the sequence data in tracks 1 and 2 of the user<br />
song.<br />
SONG Clear Song<br />
Are you sure ?<br />
Procedure<br />
1. Press the [SAVE/ENT] button on the display shown<br />
above, the clear song operation will be carried out.<br />
When the Clear Song operation is complete, “Complete!”<br />
will appear.<br />
* During song playback, the clear song operation cannot be<br />
carried out. “ERROR SEQ is Running” will appear. Stop the<br />
song and try the clear song operation again.<br />
9. Song Name<br />
This function changes the user song name that is currently selected<br />
(for editing).<br />
SONG<br />
SngName=no name<br />
q SngName (Song Name)<br />
Procedure<br />
1. Use the [SEL] buttons to move the cursor to<br />
the character you want to change on the display shown<br />
above.<br />
2. Use the [VALUE–]/[VALUE+] buttons to select the alphabet,<br />
number or symbol.<br />
3. Repeat steps 1 and 2 above to create the User Song<br />
Name using a maximum of 8 characters.<br />
● The available characters to choose from are (in order):<br />
space<br />
!"#$%&'()*+,-./0123456789:;?@<br />
ABCDEFGHIJKLMNOPQRSTUVWXYZ[\]^_`<br />
abcdefghijklmnopqrstuvwxyz{|}ßå
Utility Mode<br />
This mode sets general parameters for the DTXPRESS<br />
system and MIDI.<br />
■ Enter the Utility Mode<br />
Press the [UTIL] button on the front panel.<br />
Once the Utility Mode is entered, the System Group main page<br />
(LearnMode) shown below will be displayed.<br />
UT SYSTEM<br />
LearnMode=allwys<br />
* Double-click the [UTIL] button to enter the Utility Mode. The [4-<br />
1. Equalizer (EQ)] display will appear.<br />
■ What’s in the Utility Mode<br />
The Utility Mode is divided into the 5 sub-groups listed below.<br />
1. SYSTEM Group ................................. (mP. 28)<br />
Contains various settings that affect the entire<br />
DTXPRESS system.<br />
2. MIDI Group ........................................ (mP. 29)<br />
Contains various settings for the DTXPRESS’<br />
MIDI and TO HOST functions.<br />
3. SEQ (Sequencer) Group .................. (mP. 32)<br />
Contains various settings that apply to the<br />
DTXPRESS’ sequencer (song).<br />
4. TG (Tone Generator) Group ............. (mP. 34)<br />
Contains various settings that apply to the<br />
DTXPRESS’ tone generator.<br />
5. MAP (<strong>Drum</strong> Map) Group ................... (mP. 35)<br />
Used to edit the User <strong>Drum</strong> Map.<br />
How to set…<br />
1. Press the [UTIL] button to enter the Utility Mode.<br />
2. Select the sub-mode.<br />
• Press the [UTIL] button to move to the next sub group’s main<br />
page.<br />
• Use the [PAGE▲], [PAGE▼] buttons to move to page by page<br />
within the selected sub group. You can use these buttons to<br />
navigate through all of the pages (from the first System Group<br />
main page to the last MAP Group page).<br />
3. Use the [SEL] buttons to move the cursor to<br />
the setting you want to change. The value will flash.<br />
* If there is only one parameter, it is not necessary to move the<br />
cursor.<br />
4. Use the [VALUE–] and [VALUE+] buttons to set the<br />
parameter’s value or ON/OFF setting.<br />
Any settings made in the Utility Mode will directly change<br />
the memory settings of the DTXPRESS. There is no store<br />
function in this mode.<br />
Utility Mode Function <strong>List</strong><br />
Page<br />
1. SYSTEM Group ......................................................... 28<br />
1-1. Learn Mode ..................................................... 28<br />
1-2. Trigger Bypass................................................. 28<br />
1-3. Volume Mode .................................................. 28<br />
1-4. Jump to Recent Page ...................................... 28<br />
1-5. Hi-Hat Offset .................................................... 29<br />
1-6. Factory Set ...................................................... 29<br />
2. MIDI Group ................................................................ 29<br />
2-1. Bulk Dump ....................................................... 29<br />
2-2. Channel 10 Program Change/<br />
Channel Event Receive ................................... 30<br />
2-3. Receive Program Change/<br />
System Exclusive Messages ........................... 30<br />
2-4. Program Change Table .................................... 31<br />
2-5. MIDI Mode ....................................................... 31<br />
2-6. Device Number, Local Control ......................... 31<br />
2-7. MIDI Merge ...................................................... 31<br />
2-8. Dump Interval .................................................. 32<br />
2-9. Send Hi-Hat Control ........................................ 32<br />
2-10. Host Thru Port ................................................. 32<br />
3. Sequencer Group ..................................................... 32<br />
3-1. Click <strong>Voice</strong> ....................................................... 32<br />
3-2. Click Tune ........................................................ 33<br />
3-3. Click Note Number .......................................... 33<br />
3-4. MIDI Control .................................................... 33<br />
3-5. Count Switch ................................................... 33<br />
3-6. Sync Mode ...................................................... 33<br />
3-7. Use Tempo ...................................................... 34<br />
3-8. Click Mode ....................................................... 34<br />
4. TG (Tone Generator) Group ..................................... 34<br />
4-1. Equalizer (EQ) ................................................. 34<br />
4-2. Tuning .............................................................. 34<br />
4-3. Volume ............................................................ 34<br />
4-4. Reverb Bypass ................................................ 35<br />
5. MAP (<strong>Drum</strong> Map) Group........................................... 35<br />
5-1. <strong>Voice</strong> ................................................................ 35<br />
5-2. Volume, Pan .................................................... 36<br />
5-3. Tuning .............................................................. 36<br />
5-4. Layer Balance.................................................. 36<br />
5-5. Decay, Cutoff Frequency ................................. 36<br />
5-6. Reverb Send .................................................... 36<br />
5-7. Alternate Group, Key Assign Mode ................. 37<br />
5-8. Key Off Enable ................................................ 37<br />
5-9. Map Copy ........................................................ 37<br />
27
Utility Mode<br />
28<br />
1. SYSTEM Group<br />
This sub-mode contains settings that relate to the overall<br />
DTXPRESS system. The group is divided into the following 6<br />
pages.<br />
1-1. Learn Mode ..................................................... 28<br />
1-2. Trigger Bypass................................................. 28<br />
1-3. Volume Mode .................................................. 28<br />
1-4. Jump to Recent Page ...................................... 28<br />
1-5. Hi-Hat Offset .................................................... 29<br />
1-6. Factory Set ...................................................... 29<br />
1-1. Learn Mode<br />
This function allows selection of the pad (trigger input) you want<br />
to edit by hitting the pad when you are editing in the Trigger Setup<br />
Edit mode or <strong>Drum</strong> Kit Edit mode. Also, MIDI key on input from<br />
the MIDI IN/TO HOST jack can be used to appoint the MIDI note<br />
number in the Utility mode’s User Map Setting.<br />
UT SYSTEM<br />
LearnMode=allwys q<br />
q LearnMode<br />
allwys:Always appoints according to pad/key on input.<br />
shift: Hitting a pad or key on input while holding the [SHIFT]<br />
button selects the pad or note.<br />
none: Can’t appoint according to pad/key on input.<br />
1-2. Trigger Bypass<br />
This function prohibits reception of pad signals from pads (the hihat<br />
controller too) connected to the DTXPRESS. You will not be<br />
able to produce voices or transmit MIDI data. The sequencer and<br />
tone generator will function normally.<br />
HINT Use this function when you are setting your drum kit with<br />
trigger pickup devices, or when you do not want to accidentally<br />
make a sound during song playback.<br />
UT SYSTEM<br />
Trig Bypass=ioff q<br />
q Trig Bypass<br />
off: Bypasses the trigger (does not receive).<br />
on: The trigger functions normally (receives trigger).<br />
1-3. Volume Mode<br />
Sets the ACCOMP. VOL knob and CLICK VOL knob on the front<br />
panel.<br />
UT SYSTEM<br />
VolMode=practice q<br />
q VolMode (Volume Mode)<br />
• practice : When set to the practice mode.<br />
[ACCOMP. VOL]<br />
Using the [ACCOMP. VOL] knob as is will adjust the volume of<br />
the song accompaniment.<br />
Holding the [SHIFT] button while turning the knob will adjust the<br />
snare drum volume.<br />
[CLICK VOL]<br />
Using the [CLICK VOL] knob as is will adjust the volume of the<br />
metronome click.<br />
Holding the [SHIFT] button while turning the knob will adjust the<br />
bass drum volume.<br />
• live: When set to the Live mode.<br />
[ACCOMP. VOL]<br />
Using the [ACCOMP. VOL] knob as is will adjust the snare drum<br />
volume.<br />
Holding the [SHIFT] button while turning the knob will adjust the<br />
cymbal volume.<br />
[CLICK VOL]<br />
Using the CLICK VOL knob as is will adjust the bass drum volume.<br />
Holding the [SHIFT] button while turning the knob will adjust the<br />
volume of the drum’s other instruments.<br />
1-4. Jump to Recent Page<br />
This function lets you display the page last selected in the previous<br />
edit of the Trigger Setup Edit mode and <strong>Drum</strong> Kit Edit mode.<br />
UT SYSTEM<br />
JumpRecentPg=off q<br />
q JumpRecentPg (Jump to Recent Page)<br />
on: The display page last selected in the previous edit will appear<br />
when you enter the Trigger Setup Edit, <strong>Drum</strong> Kit Edit,<br />
Utility and Song Job modes.<br />
off:The main page of each mode will be displayed.
1-5. Hi-Hat Offset<br />
This sets the value of the data sent by a foot controller connected<br />
to the HI HAT CONTROL jack on the rear panel. Set a + (plus) or<br />
– (minus) level.<br />
UT SYSTEM<br />
HH OffS= 0T= 32<br />
q w<br />
q HH OFFS (Hi-Hat Offset)<br />
When a low data value is received from the foot controller, the<br />
voice will sound sooner. So, slightly pressing the foot controller<br />
will result in the voice sounding. In the case of the hi-hat controller,<br />
delicate adjustment of the controller’s “closed” point is possible.<br />
w T (Foot Splash Detect Time)<br />
Sets the detect time for the foot splash. Large values make foot<br />
splashes easier to produce.<br />
* Values too large will result in splashes being produced under<br />
normal hi-hat use.<br />
1-6. Factory Set<br />
This function replaces all internal settings in the DTXPRESS to<br />
their factory-set condition.<br />
UT SYSTEM<br />
Factory Set<br />
The Factory Set function will replace all internal settings<br />
in the DTXPRESS to their factory-set condition.<br />
Take care so as not to loose important data.<br />
Make sure any settings and user songs you want to<br />
keep have been saved to an external device such as<br />
the <strong>Yamaha</strong> MIDI Data Filer MDF3, etc. (m[2-1.<br />
Bulk Dump] (P. 29)<br />
Procedure<br />
1. Enter the display shown above, press the [SAVE/ENT]<br />
button. The following display will appear asking for confirmation<br />
before the Factory Set operation is carried out.<br />
All data will be<br />
lost.AreYouSure?<br />
2. Once again, press the [SAVE/ENT] button to proceed<br />
with the operation.<br />
2. MIDI Group<br />
This sub-mode contains functions and settings for the MIDI and<br />
TO HOST jacks of the DTXPRESS. This group is divided into the<br />
following 10 pages.<br />
2-1. Bulk Dump ....................................................... 29<br />
2-2. Channel 10 Program Change/<br />
Channel Event Receive ................................... 30<br />
2-3. Receive Program Change/<br />
System Exclusive Messages ........................... 30<br />
2-4. Program Change Table .................................... 31<br />
2-5. MIDI Mode ....................................................... 31<br />
2-6. Device Number, Local Control ......................... 31<br />
2-7. MIDI Merge ...................................................... 31<br />
2-8. Dump Interval .................................................. 32<br />
2-9. Send Hi-Hat Control ........................................ 32<br />
2-10. Host Thru Port ................................................. 32<br />
* Please refer to the [MIDI Data Format] (P. 50) section for more<br />
information related to MIDI.<br />
2-1. Bulk Dump<br />
With the Bulk Dump operation, data stored in the ETXPRESS can<br />
be transmitted via the MIDI OUT or TO HOST jack.<br />
UT MIDI BULKDUMP<br />
Fmt= all data q<br />
Utility Mode<br />
q Fmt (Bulk Dump Format)<br />
Selects the type of data to be transmitted with the Bulk Dump<br />
operation.<br />
all data : All the data in the DTXPRESS<br />
system data : Data set in the Utility mode (except User<br />
Map).<br />
user map : User Map data.<br />
one drumkit : Data for the currently selected <strong>Drum</strong> Kit.<br />
all drumkit : All User <strong>Drum</strong> Kit Data.<br />
one trigger : Data for the currently selected Trigger Setup.<br />
all trigger : All User Trigger Setup data<br />
one song : Data for the currently selected User Song.<br />
all song : All User Song data.<br />
Procedure<br />
1. After reading the [Connecting a MIDI Device] (Basic<br />
Guide : P. 12) or the [Connecting a Computer] (Basic<br />
Guide : P. 26) section, connect the external MIDI device<br />
or computer to the MIDI OUT or TO HOST jack on the<br />
DTXPRESS. Set the HOST SELECT switch.<br />
29
Utility Mode<br />
2. Select the type of bulk data (that will be sent) in the display<br />
shown above and press the [SAVE/ENT] button.<br />
The display shown below will appear.<br />
30<br />
BULK all data<br />
Are you sure ?<br />
3. Press the [SAVE/ENT] or [VALUE+] button, the bulk dump<br />
will be carried out.<br />
* Press [VALUE-] to cancel the bulk dump.<br />
When the operation is complete, the LCD will display “Complete”<br />
as shown below.<br />
BULK sssssssssss<br />
Complete !<br />
* The device number must be set for bulk dumps [2-6. Device<br />
Number, Local Control] (P. 31)<br />
* Refer to the [MIDI Data Format] section (P. 50) for more information<br />
on bulk dump operations.<br />
Receiving Bulk Data<br />
DTXPRESS data stored in an external device can be sent back<br />
to the DTXPRESS’ MIDI IN/TO HOST jack using Bulk Data<br />
Receive.<br />
1. After reading the [Connecting a MIDI Device] (Basic<br />
Guide : P. 12) or the [Connecting a Computer] (Basic<br />
Guide : P. 26) section, connect the MIDI device<br />
or computer to the MIDI OUT jack/TO HOST jack on<br />
the DTXPRESS. Set the HOST SELECT switch.<br />
2. With the sequencer (song, metronome) stopped,<br />
send bulk data from the external device.<br />
3. When the DTXPRESS starts receiving data, the following<br />
screen will appear on the LCD.<br />
BULK Receiving<br />
Please wait...<br />
4. When the DTXPRESS has completed receiving all<br />
the data, the following screen will appear on the LCD<br />
for a few seconds, then the screen will return to the<br />
original display (before receiving bulk data).<br />
BULK Receiving<br />
BULK Received.<br />
* Before receiving bulk data, it is necessary to match the device<br />
numbers (P. 31 [2-6]) of the DTXPRESS and the external<br />
device. It is also necessary to enable the DTXPRESS<br />
to receive exclusive messages (P. 30 [2-3]).<br />
2-2. Channel 10 Program Change/Channel Event Receive<br />
This enables or disables the DTXPRESS to receive program change<br />
messages/channel events through MIDI channel 10. Program<br />
change messages received or transmitted through channel 10 can<br />
be used to switch DTXPRESS drum kits.<br />
It is necessary to set the receive parameter to “on” in this display<br />
in order to switch the DTXPRESS’ drum kits from a song or an<br />
external MIDI device.<br />
UT MIDI RECEIVE<br />
10PC= on 10= on<br />
q w<br />
q 10PC (Receive Program Change)<br />
This enables or disables the DTXPRESS to receive program change<br />
messages through MIDI channel 10.<br />
off: Does not receive.<br />
on: Receives.<br />
* Even if the q 10PC parameter is set to “on”, program change<br />
messages from MIDI channel 10 will not be received in the following<br />
cases.<br />
• If the w 10 (receive channel event) parameter is set to “off”<br />
• If the [2-3. Receive Program Change/System Exclusive<br />
Message’s] q PC (program change) parameter is set to “off”.<br />
w 10 (Receive Channel Event)<br />
This enables or disables the DTXPRESS to receive MIDI channel<br />
messages through MIDI channel 10.<br />
off: Does not receive.<br />
on: Receives.<br />
2-3. Receive Program Change/System<br />
Exclusive Messages<br />
This enables or disables the DTXPRESS to receive program change<br />
messages/system exclusive messages from all MIDI channels.<br />
UT MIDI RECEIVE<br />
PC= on SySEx= on<br />
q w<br />
q PC (Receive Program Change)<br />
off: Does not receive program change messages.<br />
on: Receives program change messages.<br />
w SySex (Receive System Exclusive Messages)<br />
off: Does not receive system exclusive messages.<br />
on: Receives system exclusive messages.
2-4. Program Change Table<br />
Use this function to create a program change table (a list of program<br />
change numbers that correspond to drum kits).<br />
A program change message received internally from the<br />
DTXPRESS or through channel 10 from an external MIDI device<br />
will select, according to the program change table, the drum kit<br />
corresponding to the kit number in the DTXPRESS.<br />
UT MIDI PC TABLE<br />
No= 1-> kit 56<br />
q w<br />
q No (Program Change Number)<br />
Sets the program change number (1-128).<br />
When the program change number set in this parameter is received,<br />
the corresponding drum kit number that is set in the following<br />
“kit” parameter will be selected.<br />
w kit (<strong>Drum</strong> Kit Number)<br />
Sets the drum kit number (1-80).<br />
If this parameter is set to “none” the DTXPRESS will not respond,<br />
even when a program change message is received.<br />
* When the drum kit is changed with the DTXPRESS, the program<br />
change set in this function will be transmitted through MIDI<br />
channel 10. However, when a program change number is not<br />
assigned, it will not transmit.<br />
* When the following [2-5. MIDI Mode] is set to GM, receiving<br />
program changes will be limited.<br />
2-5. MIDI Mode<br />
This sub-group contains settings related to the MIDI IN jack and<br />
TO HOST input jack that affect tone generator events.<br />
UT MIDI SETUP<br />
MIDI Mode=native q<br />
q MIDI Mode<br />
native: Recognizes all program changes for the drum voice.<br />
GM: <strong>Drum</strong> voice pan is reversed so you will hear the drums<br />
as if your are sitting in the audience, the hi-hat will be<br />
heard on the right side. The following drum voice program<br />
changes are recognized. 1, 2, 9, 17, 25, 26, 33,<br />
41, 50<br />
2-6. Device Number, Local Control<br />
Sets the MIDI device number and local control.<br />
UT MIDI SETUP<br />
DevNo=ALLocl= on<br />
q w<br />
Utility Mode<br />
q DevNo (Device Number)<br />
Sets the MIDI device number (1-16).<br />
Bulk dumps will be transmitted with this device number.<br />
Only data corresponding to this device number will be recognized<br />
when received.<br />
If this is set to “AL”, the device number will be “1” for transmitting<br />
data and data will be received from all device numbers.<br />
w Locl (Local Control)<br />
Switches Local Control ON or OFF.<br />
off: MIDI signals triggered by the connected pads is disconnected<br />
from the DTXPRESS’ tone generator, there will be no sound<br />
produced by the DTXPRESS’ tone generator. The<br />
DTXPRESS will transmit MIDI signals from the MIDI OUT<br />
jack and TO HOST jack.<br />
on: Normal operation. MIDI signals will be transmitted to the<br />
DTXPRESS’ tone generator as well as the MIDI OUT and<br />
TO HOST jacks.<br />
2-7. MIDI Merge<br />
Sets the MIDI Merge function ON or OFF. When this function is<br />
ON, data received from an external MIDI device connected to the<br />
MIDI IN jack will be mixed with internal MIDI data from the<br />
DTXPRESS and transmitted from the DTXPRESS’ MIDI OUT<br />
jack.<br />
UT MIDI SETUP<br />
Merge Output=off q<br />
q Merge Output (Merge Out)<br />
on: Sends signals to the MIDI OUT jack.<br />
off: Does not send signal to the MIDI OUT jack (internal operation<br />
only). Normal operation.<br />
Connecting the MIDI IN/OUT jacks on a single device<br />
and setting MIDI Merge to “on” will result in a<br />
signal loop that may cause notes to sound (play) continuously.<br />
31
Utility Mode<br />
32<br />
2-8. Dump Interval<br />
This sets the length of intervals between the packets of MIDI data<br />
sent by the DTXPRESS Bulk Out function. The intervals can be<br />
adjusted to the capacity of the external receiving MIDI device to<br />
prevent data overflow.<br />
UT MIDI SETUP<br />
DumpInterval=100 q<br />
q DumpInterval (Dump Interval)<br />
[Range] 50, 100, 150, 200, 250, 300 (in msec.)<br />
2-9. Send Hi-Hat Control<br />
This sets whether or not hi-hat controller events will be transmitted<br />
from the MIDI OUT jack or TO HOST jack.<br />
UT MIDI SETUP<br />
Send HH Ctrl= on<br />
q Send HH Ctrl (Send Hi-Hat Control)<br />
on: Sends data to the MIDI OUT jack and TO HOST jack.<br />
off:Does not send data to the MIDI OUT jack and TO HOST<br />
jack.<br />
* This setting does not affect internal operating data for the hi-hat<br />
controller.<br />
2-10. Host Thru Port<br />
This enables the DTXPRESS to transmit multi-port type messages<br />
received from the TO HOST jack. Only messages corresponding<br />
to the set port number will be sent via MIDI.<br />
* This setting only has affect when the TO HOST switch is set to<br />
a position other than “MIDI”.<br />
UT MIDI SETUP<br />
Host Thru Port=1 q<br />
q Host Thru Port<br />
Assigns the Port Number (1-8).<br />
q<br />
3. Sequencer Group<br />
This sub-mode contains settings that relate to the sequencer (song).<br />
This group is divided into the following 8 pages.<br />
3-1. Click <strong>Voice</strong> ....................................................... 32<br />
3-2. Click Tune ........................................................ 33<br />
3-3. Click Note Number .......................................... 33<br />
3-4. MIDI Control .................................................... 33<br />
3-5. Count Switch ................................................... 33<br />
3-6. Sync Mode ...................................................... 33<br />
3-7. Use Tempo ...................................................... 34<br />
3-8. Click Mode ....................................................... 34<br />
3-1. Click <strong>Voice</strong><br />
This function sets each of the 3 click voices used for the click<br />
sound. <strong>Drum</strong> voices are assigned.<br />
UT SEQ Click= hi<br />
=P/053 MtBel<br />
w e<br />
q<br />
q Click (Click <strong>Voice</strong>)<br />
Select and set the Click <strong>Voice</strong> for the click sound.<br />
hi: Used for the click at the beginning of the measure.<br />
mid: Used for quarter note beats.<br />
lo: Used for other clicks for notes of smaller quantization.<br />
w <strong>Voice</strong> Category<br />
[Range] K, k, S, s, T, t, C, H, P, E, e, L, m<br />
Sets the voice to be used for the Click <strong>Voice</strong> selected in step q<br />
Click, select a drum voice category.<br />
Refer to <strong>Drum</strong> Kit <strong>Voice</strong> Edit Mode’s [1-1. <strong>Voice</strong>] (P. 17).<br />
e <strong>Voice</strong> Number <strong>Voice</strong> Name<br />
[Range] 0, 1-127<br />
Selects the voice that will be assigned. The <strong>Voice</strong> Number (1-127)<br />
and <strong>Voice</strong> Name will be displayed.<br />
If this parameter is set to “0”, “NoAssign” will appear on the<br />
display and sound will not be produced.<br />
* Refer to the [<strong>Drum</strong> <strong>Voice</strong> <strong>List</strong>] (P. 38).
3-2. Click Tune<br />
This sets the pitch for each of the 3 Click <strong>Voice</strong>s.<br />
UT SEQ Click= hi<br />
Tune C= 0 F= 0<br />
w e<br />
q Click (Click <strong>Voice</strong>)<br />
Selects the Click <strong>Voice</strong>. (The same Click <strong>Voice</strong> selected in function<br />
3-1.)<br />
w Tune C (Tune Coarse)<br />
[Range] –24 to 0 to +24.<br />
The Click <strong>Voice</strong> selected in step q will be tuned in increments of<br />
a half-step.<br />
e Tune F (Tune Fine)<br />
[Range] –64 to 0 to +63.<br />
The Click <strong>Voice</strong> selected in step q will be tuned in increments of<br />
about 1.17 cents.<br />
3-3. Click Note Number<br />
Sets the MIDI Note Number for each of the 3 Click <strong>Voice</strong>s.<br />
q Click (Click <strong>Voice</strong>)<br />
Selects the Click <strong>Voice</strong>. (The same Click <strong>Voice</strong> selected in function<br />
3-1.)<br />
w Note # (MIDI Note Number)<br />
[Range] off, 1-127 (—, C#-2 to G8)<br />
Sets the MIDI note number. The note number and note name will<br />
be displayed.<br />
If this is set to “off”, the DTXPRESS will produce sound however;<br />
key on messages will not be transmitted.<br />
* Refer to the preset drum kit’s [<strong>Drum</strong> <strong>Voice</strong> <strong>List</strong>] for the voice<br />
assignment of each MIDI note number.<br />
q<br />
UT SEQ Click= hi q<br />
Note#= 22 (A#-1) w<br />
3-4. MIDI Control<br />
Utility Mode<br />
This enables or disables the DTXPRESS to transmit or receive<br />
system real-time messages (start/continue/stop).<br />
When this function is enabled, you can control an external sequencer<br />
or rhythm machine from the DTXPRESS. Control of the<br />
DTXPRESS from an external sequencer or rhythm machine is also<br />
possible.<br />
UT SEQ SETUP<br />
MIDI Control=off<br />
q MIDI Control<br />
on: Transmits and receives the following system real-time messages.<br />
• Transmits timing clock (F8) (transmit only)<br />
• Transmits and receives start, stop, and continue<br />
(FA, FB, FC)<br />
off: Does not transmit or receive system real-time messages.<br />
3-5. Count Switch<br />
This function turns the 2 bar countdown before the song starts<br />
playback, on or off.<br />
UT SEQ SETUP<br />
Count Switch=off<br />
q Count Switch<br />
on: After a 2 bar countdown, the song will start playback.<br />
off: No countdown, the song will start playback immediately.<br />
3-6. Sync Mode<br />
This function synchronizes the DTXPRESS sequencer’s clock with<br />
the clock of an external device.<br />
UT SEQ SETUP<br />
Sync Mode= auto<br />
q Sync Mode<br />
int: Movement is determined by the DTXPRESS’ internal clock.<br />
ext: Movement is determined by the clock of an external device<br />
received via the MIDI IN/TO HOST jacks.<br />
auto: If a timing clock (F8) is received via the MIDI IN/TO HOST<br />
jack the external clock will be used If a timing clock (F8) is<br />
not received the internal clock will be used.<br />
q<br />
q<br />
q<br />
33
Utility Mode<br />
34<br />
3-7. Use Tempo<br />
This function sets the tempo of a song to either change each time<br />
to its default tempo, or remain unchanged at the currently set tempo<br />
when the song is switched.<br />
UT SEQ SETUP<br />
Use Tempo= song<br />
q Use Tempo<br />
song: Changes the tempo of the song to its default tempo when<br />
the song is switched.<br />
global: The tempo remains unchanged at the currently set tempo<br />
when the song is switched.<br />
3-8. Click Mode<br />
This sets whether or not the click voice will automatically sound<br />
during song playback.<br />
UT SEQ SETUP<br />
ClickMode=manual<br />
q ClickMode (Click Mode)<br />
manual:The [CLICK] button will control on/off operation of the<br />
click sound.<br />
sync: The click will sound during song playback, but will not<br />
sound when the song is stopped. The [CLICK] button<br />
can also be used to control on/off operation of the click<br />
sound.<br />
q<br />
q<br />
4. TG (Tone Generator) Group<br />
This sub-mode contains settings for the DTXPRESS’ tone generator.<br />
This group is divided into the following 4 pages.<br />
4-1. Equalizer (EQ) ................................................. 34<br />
4-2. Tuning .............................................................. 34<br />
4-3. Volume ............................................................ 34<br />
4-4. Reverb Bypass ................................................ 35<br />
4-1. Equalizer (EQ)<br />
Sets the Master Equalizer (2-band shelving type).<br />
UT TG MASTER<br />
EQ Lo=+ 6iHi=+ 0<br />
q EQ Lo (Low Gain)<br />
[Range] +0 to +12 (dB)<br />
w EQ Hi (High Gain)<br />
[Range] +0 to +12 (dB)<br />
q w<br />
4-2. Tuning<br />
This function sets the master tuning of the tone generator.<br />
UT TG MASTER<br />
Tune C= 0 F= 0<br />
q w<br />
q Tune C (Tune Coarse)<br />
[Range] –24 to 0 to +24<br />
Tuning can be set in increments of a half step.<br />
w Tune F (Tune Fine)<br />
[Range] –64 to 0 to +63<br />
Tuning can be set in increments of about 1.17 cents.<br />
4-3. Volume<br />
This function sets the overall volume level of the tone generator.<br />
UT TG MASTER<br />
Volume= 110<br />
q Volume<br />
[Range] 0-127<br />
q
4-4. Reverb Bypass<br />
This function decides whether to bypass the system effect’s reverb<br />
or not.<br />
UT TG MASTER<br />
ReverbBypass=off q<br />
q ReverbBypass (Reverb Bypass)<br />
off: Does not bypass (functions). Normal operation.<br />
on: Bypasses. Reverb will not be applied to the voice.<br />
5. MAP (<strong>Drum</strong> Map) Group<br />
Utility Mode<br />
This sub-mode is used to edit the User <strong>Drum</strong> Map. This mode is<br />
divided into the following 9 pages.<br />
5-1. <strong>Voice</strong> ................................................................ 35<br />
5-2. Volume, Pan .................................................... 36<br />
5-3. Tuning .............................................................. 36<br />
5-4. Layer Balance.................................................. 36<br />
5-5. Decay, Cutoff Frequency ................................. 36<br />
5-6. Reverb Send .................................................... 36<br />
5-7. Alternate Group, Key Assign Mode ................. 37<br />
5-8. Key Off Enable ................................................ 37<br />
5-9. Map Copy ........................................................ 37<br />
* When a User <strong>Drum</strong> Kit (No. 49-80) is selected, the User <strong>Drum</strong><br />
Map is the data that is used to set the note number’s voice, etc.,<br />
that is not assigned to the drum kit’s pad input. Therefore, when a<br />
preset drum kit is selected the User <strong>Drum</strong> Map will not be used<br />
(the preset drum map will be used) so settings for functions [5-1]<br />
to [5-8] that appear in the display can not be carried out.<br />
UT MAP N= 0C -2<br />
( Preset Map )<br />
Also, settings cannot be carried out for the following functions [5-<br />
1] to [5-8] when the note numbers for the currently selected drum<br />
kit are already assigned/set.<br />
UT MAP N= 0C -2<br />
( <strong>Drum</strong>kit Data )<br />
5-1. <strong>Voice</strong><br />
This creates a list that assigns a drum voice for each MIDI note<br />
number. Which MIDI note number q will be received and which<br />
drum voice w will be sounded.<br />
UT MAP N= 0C -2<br />
=K/000 NoAssign<br />
w e<br />
q N (MIDI Note Number)<br />
[Range] 0-127 (C-2 to G8)<br />
Sets the MIDI note number. Displays the note number and note<br />
name.<br />
* According to the setting of the Utility mode’s [1-1. Learn Mode]<br />
(P. 28) you can appoint the MIDI note number with key on input<br />
from the MIDI IN/TO HOST jacks.<br />
w <strong>Voice</strong> Category<br />
[Range] K, k, S, s, T, t, C, H, P, E, e, L, m<br />
Selects the drum voice category.<br />
Refer to <strong>Drum</strong> Kit <strong>Voice</strong> Edit Mode’s [1-1. <strong>Voice</strong>] (P. 17).<br />
q<br />
35
Utility Mode<br />
e <strong>Voice</strong> Number <strong>Voice</strong> Name<br />
[Range] 0, 1-127<br />
Selects the assigned voice. Displays the voice number (1-127)<br />
and voice name.<br />
If this parameter is set to “0”, “NoAssign” will appear in the<br />
display and sound will not be produced.<br />
* Refer to the [<strong>Drum</strong> <strong>Voice</strong> <strong>List</strong>] (P. 38).<br />
36<br />
5-2. Volume, Pan<br />
This function sets the volume w and pan e (the position in the<br />
stereo field) for each drum voice assigned to each MIDI note number<br />
q.<br />
UT MAP N= 0C -2<br />
Vol= 127 Pan= C<br />
q N (MIDI Note Number)<br />
Selects the MIDI note number (The same procedure as in [5-1.<br />
<strong>Voice</strong>]).<br />
w Vol (Volume)<br />
[Range] 0-127<br />
w e<br />
e Pan<br />
[Range] L64 to C to R64.<br />
5-3. Tuning<br />
This function sets the pitch for each drum voice assigned to each<br />
MIDI note number q.<br />
UT MAP N= 0C -2<br />
Tune C= 0 F= 0<br />
w e<br />
q N (MIDI Note Number)<br />
Selects the MIDI note number (The same procedure as in [5-1.<br />
<strong>Voice</strong>]).<br />
w TuneC (Tune Coarse)<br />
[Range] –24 to 0 to +24<br />
Tuning can be set in increments of a half step.<br />
e TuneF (Tune Fine)<br />
[Range] –64 to 0 to +63<br />
Tuning can be set in increments of 1.17 cents.<br />
q<br />
q<br />
5-4. Layer Balance<br />
When a drum voice assigned to a MIDI note number q is made<br />
up of 2 layers (a single voice consisting of 2 voice waves), this<br />
function sets the volume balance between those 2 layers.<br />
* When the selected voice only has a 1 layer, this setting will have<br />
no affect.<br />
UT MAP N= 0C -2<br />
LayerBalance=---<br />
q N (MIDI Note Number)<br />
Selects the MIDI note number (The same procedure as in [5-1.<br />
<strong>Voice</strong>]).<br />
w LayerBalance (Layer Balance)<br />
[Range] –64 to 0 to +63, ---<br />
Sets the volume balance between the 2 layers.<br />
* When the selected drum voice only has 1 layer, “---” will appear<br />
in the display and settings can not be carried out.<br />
5-5. Decay, Cutoff Frequency<br />
This function sets the drum voice decay, the filter’s cutoff frequency<br />
and adjusts the tone of each voice assigned to each MIDI note<br />
number q.<br />
UT MAP N= 0C -2<br />
Decay= 0 Fc= 0<br />
w e<br />
q N (MIDI Note Number)<br />
Selects the MIDI note number (The same procedure as in [5-1.<br />
<strong>Voice</strong>]).<br />
w Decay<br />
[Range] –64 to 0 to +63.<br />
Negative values will produce a clearer sound.<br />
e Fc (Cutoff Frequency)<br />
[Range] –64 to 0 to +63<br />
A positive value will produce a brighter sound, negative values<br />
will produce a rounder sound.<br />
5-6. Reverb Send<br />
q<br />
w<br />
This sets the Reverb Send Level w for each drum voice assigned<br />
to each MIDI note number q.<br />
* The actual reverb send level will be determined by multiplying<br />
the Reverb Send Level set in [5-2. <strong>Drum</strong> Reverb Send] (P. 23) in<br />
the <strong>Drum</strong> Kit <strong>Voice</strong> Edit Mode.<br />
UT MAP N= 0C -2<br />
Reverb send= 127<br />
q<br />
q<br />
w
q N (MIDI Note Number)<br />
Sets the MIDI note number (The same procedure as in [5-1. <strong>Voice</strong>]).<br />
w Reverb send (Reverb Send Level)<br />
[Range] 0-127<br />
5-7. Alternate Group, Key Assign Mode<br />
This sets the Alternate Group and Key Assign Mode for each drum<br />
voice w assigned to each MIDI note number q.<br />
The function and setting of the Alternate Group, Key Assign<br />
Mode are the same functions and settings found in [2-3. Alternate<br />
Group, Key Assign Mode] (P. 19) in the <strong>Drum</strong> Kit <strong>Voice</strong> Edit<br />
Mode.<br />
UT MAP N= 0C -2<br />
AitG= 0 Key=semi<br />
w e<br />
q N (MIDI Note Number)<br />
Selects the MIDI note number (The same procedure as in [5-1.<br />
<strong>Voice</strong>]).<br />
w AltG (Alternate Group)<br />
[Range] 0-15<br />
e Key (Key Assign Mode)<br />
[Range] poly, semi, mono, high<br />
5-8. Key Off Enable<br />
This function decides whether or not to recognize key off messages<br />
for each drum voice w assigned to each MIDI note number<br />
q.<br />
UT MAP N= 0C -2<br />
Key Off= disable<br />
q N (MIDI Note Number)<br />
Selects the MIDI note number (The same procedure as in [5-1.<br />
<strong>Voice</strong>]).<br />
w Key Off<br />
enable: Recognizes key off.<br />
disable: Does not recognize key off.<br />
* When this is set to “disable”, some voices may sound continuously.<br />
Press the [SHIFT] and [VOICE] buttons to stop voices<br />
sounding.<br />
q<br />
q<br />
w<br />
5-9. Map Copy<br />
Utility Mode<br />
This function copies the preset drum map’s entire internal settings<br />
to a user drum map.<br />
UT MAP Copy<br />
from= 1Acoustic q<br />
When the Map Copy function is used, the user drum<br />
map’s internal settings will be erased and replaced<br />
with the settings of the copy source. If you want to<br />
keep important user drum map settings, use the bulk<br />
dump operation and save the settings to an external<br />
device before executing the map copy.<br />
q from (Preset <strong>Drum</strong> Map)<br />
Selects the preset drum kit number (1-48) that will be the copy<br />
source. The drum kit number and drum kit name will be displayed.<br />
Procedure<br />
1. In the display shown above, assign the copy source drum<br />
kit (drum map), press the [SAVE/ENT] button.<br />
The following display will appear asking for confirmation<br />
before the copy operation is carried out.<br />
Copy Map From 1<br />
Are you sure ?<br />
2. Press the [SAVE/ENT] or [VALUE+] button, the copy<br />
operation will be carried out.<br />
* Press the [VALUE-] button to cancel the copy operation.<br />
When the copy operation is complete, “Complete!” will<br />
appear.<br />
37
<strong>Drum</strong> <strong>Voice</strong> <strong>List</strong><br />
● <strong>Voice</strong> Category<br />
K : Acoustic Kick<br />
k : Electric Kick<br />
S : Acoustic Snare<br />
s : Electric Snare<br />
T : Acoustic Tom<br />
t : Electric Tom<br />
C : Cymbal<br />
H : Hi-Hat<br />
P : Percussion<br />
E : Effect 1<br />
e : Effect 2<br />
L : <strong>Drum</strong> Loop<br />
m : misc. voices<br />
38<br />
● : 2-layer voice<br />
K : Acoustic Kick<br />
1 2HedMed1 ●<br />
2 2HedMed2 ●<br />
3 Basic ●<br />
4 BD DRY 1<br />
5 BD DRY 2<br />
6 BD DRY 3<br />
7 BD DRY 4<br />
8 BD GMH<br />
9 BD GMM<br />
10 BD GMM2<br />
11 BD NN04C<br />
12 Bottom ●<br />
13 Pointy ●<br />
14 SoTight ●<br />
15 BDbasc1<br />
16 BD 24Dry<br />
17 BDaftty1 ●<br />
18 BDaftty2 ●<br />
19 MapleA20<br />
20 MapleV20<br />
21 BDstomp1 ●<br />
22 Bdvman ●<br />
23 BigSofty ●<br />
24 2HeadHi ●<br />
25 BD DRYB1<br />
26 BD GMJ<br />
27 BD GML<br />
28 BD ROOM2<br />
29 BD ROOM5<br />
30 MapleAmb<br />
31 BD Soft<br />
32 2HeadLo ●<br />
33 BD MONDO<br />
34 BDbasc2<br />
35 BD KONG1<br />
36 BDersko1 ●<br />
37 Bushy ●<br />
38 BD ROOM3<br />
39 BDbonzo2 ●<br />
40 BD GATE1<br />
41 BD GATE2<br />
42 BD GateM<br />
43 BD Metal ●<br />
44 BD Rock1<br />
45 BD Rock2<br />
46 BD ROOM4<br />
47 VeloRoom ●<br />
48 WudPoint ●<br />
49 BDevolvr ●<br />
50 BDpalmer ●<br />
51 Roomy ●<br />
52 GrCMute<br />
53 GrnCassa<br />
kÅFÉGÉåÉNÉgÉäÉbÉNÇ»ÉLÉbÉN<br />
k : Electric Kick<br />
1 AnaQuick<br />
2 BD ELEC2<br />
3 BD Rave6 ●<br />
4 BD Rave7 ●<br />
5 BD Rave8 ●<br />
6 BDDance1<br />
7 BDDance2<br />
8 BDDance3<br />
9 BDDance4<br />
10 BDdance5 ●<br />
11 BDDance6<br />
12 BDDance9<br />
13 BDlong1 ●<br />
14 BDRave10<br />
15 BDRave11 ●<br />
16 Sub1<br />
17 Sub2 ●<br />
18 Sub3 ●<br />
19 QuikBuzz<br />
20 BD ELEC1<br />
21 BDdigiro ●<br />
22 BDfunky1 ●<br />
23 BDindst1 ●<br />
24 BDNIN1 ●<br />
25 BDRevers<br />
26 BDudu1 ●<br />
27 BDurban1 ●<br />
28 BDurban2 ●<br />
29 BigBoy ●<br />
30 MtlPoint ●<br />
31 BDbass1 ●<br />
32 Walkik ●<br />
33 fefifofm ●<br />
S : Acoustic Snare<br />
1 Loosy ●<br />
2 LoosyRim ●<br />
3 Barypic ●<br />
4 Baryrim ●<br />
5 Binky ●<br />
6 MapleA50 ●<br />
7 MickMHS ●<br />
8 MapleV65 ●<br />
9 Blu90Rim ●<br />
10 Blue90<br />
11 BrysnH<br />
12 BrysnR<br />
13 Drygyrim ●<br />
14 Hip Hop<br />
15 OldCan ●<br />
16 SnareH<br />
17 LiteSnr1 ●<br />
18 Tosh Sn ●<br />
19 MapleRim ●<br />
20 BigWdRim ●<br />
21 BigWood<br />
22 Dry<br />
23 Wood Sn<br />
24 Wood65<br />
25 ToshL fi ●<br />
26 Looz Pic<br />
27 PhlyRiM ●<br />
28 RIMhipop ●<br />
29 LoosyP ●<br />
30 SnareH2 ●<br />
31 MickCJ8S ●<br />
32 Maple12 ●<br />
33 12Soprno<br />
34 Picket ●<br />
35 Slappy ●<br />
36 BeatyRim<br />
37 Beauty ●<br />
38 BlastX ●<br />
39 BrassRim<br />
40 BuzRgRim ●<br />
41 Buzzring ●<br />
42 Jelyrim ●<br />
43 MrcSnrH<br />
44 MrcSnrM<br />
45 RIMBrass ●<br />
46 RIMetal ●<br />
47 RIMnatrl ●<br />
48 RIMouch! ●<br />
49 RoldGold<br />
50 SnareL2 ●<br />
51 Steel ●<br />
52 Sticky ●<br />
53 VtgBras1<br />
54 VtgBras2<br />
55 MickDarS<br />
56 BETA Sn ●<br />
57 Brassy ●<br />
58 Deep&Dry ●<br />
59 MickOLD ●<br />
60 Fat looz<br />
61 RIMdry1 ●<br />
62 Rock ●<br />
63 SnareM<br />
64 SnarDeep ●<br />
65 BrassPic<br />
66 DryMetal ●<br />
67 PicloRim ●<br />
68 BluePIC ●<br />
69 Metalpic ●<br />
70 ClubOK ●<br />
71 ClubORrim<br />
72 Piclodry ●<br />
73 Fusion ●<br />
74 TrashRIM ●<br />
75 Amb 02<br />
76 Ambient1 ●<br />
77 Ambt1rim ●<br />
78 Cool Dry ●<br />
79 OpnRim ●<br />
80 Powerpic ●<br />
81 Pwrpcrim ●<br />
82 Room ●<br />
83 Amb 01<br />
84 Ambient ●<br />
85 ParadeS ●<br />
86 Amb 03<br />
87 AmbiRim ●<br />
88 Nashvill ●<br />
89 OpnRimA ●<br />
90 OpnRimB ●<br />
91 OpnRimC ●<br />
92 OpnRimD ●<br />
93 RIMrock ●<br />
94 RIMwatts ●<br />
95 Fatbrass<br />
96 Fatbrim ●<br />
97 Brass55 ●<br />
98 Steel65 ●<br />
99 Alumi55 ●<br />
100 RoldRim ●<br />
101 SAmbie1 ●<br />
102 SAmbie2 ●<br />
103 SAmbie3 ●<br />
104 Gate<br />
105 GhiGateSn ●<br />
106 RockH<br />
107 RockL<br />
108 RockM<br />
109 S SStck1<br />
110 S SStck2<br />
111 S SStck3<br />
112 S STK_HT<br />
113 SidRim ●<br />
114 SidStick ●<br />
115 Timbrim ●<br />
116 SnrGhst ●<br />
117 TambSnre ●<br />
118 SnareLes ●<br />
119 LesRim ●<br />
120 Latinrim ●<br />
121 SnRoll1*<br />
122 SnRoll2*<br />
s : Electric Snare<br />
1 AnaDaRim ●<br />
2 AnaDark<br />
3 AnaHit ●<br />
4 Analog H ●<br />
5 Analog L ●<br />
6 AnalogH1 ●<br />
7 AnalogL1 ●<br />
8 AnaTite<br />
9 AnaWide<br />
10 AnaWiRim ●<br />
11 AnHitRim ●<br />
12 AnSStick<br />
13 Dance
14 Dance01<br />
15 Dance02<br />
16 Dance03<br />
17 Dance05<br />
18 Dance06<br />
19 Electrik<br />
20 SAmbie4 ●<br />
21 SAna1 ●<br />
22 SAna2 ●<br />
23 SAna3 ●<br />
24 Brsh H<br />
25 AnAirRim ●<br />
26 CapGun ●<br />
27 CapRim ●<br />
28 Dryroom ●<br />
29 Electric<br />
30 HiFive<br />
31 RIMpopr ●<br />
32 Sambie6 ●<br />
33 AnaAir ●<br />
34 AnaBuzz ●<br />
35 AnaBzRim ●<br />
36 AnaMeRim ●<br />
37 AnaMetal ●<br />
38 AnaShh ●<br />
39 AnaShRim ●<br />
40 AnaSlegh ●<br />
41 AnaSlRim ●<br />
42 AnaVel ●<br />
43 AnaWee ●<br />
44 AnaWeRim ●<br />
45 AnVelRim ●<br />
46 ASOBI ●<br />
47 Blaaaghf ●<br />
48 Brsh2Rim ●<br />
49 BrsUpRim ●<br />
50 DanceP<br />
51 Distort ●<br />
52 Dry Guy ●<br />
53 Elem1<br />
54 Elem2<br />
55 Elem3 ●<br />
56 EltrcRIM ●<br />
57 Eno rim ●<br />
58 Enotype ●<br />
59 Fact rim ●<br />
60 Factory ●<br />
61 Fantam ●<br />
62 FantaRim ●<br />
63 Filtroll ●<br />
64 Filtrrim ●<br />
65 FX ●<br />
66 FX rim ●<br />
67 Hi5Rim ●<br />
68 JelyRoll<br />
69 Philydry ●<br />
70 RIMshort ●<br />
71 RO_S<br />
72 RockRim ●<br />
73 RollEm1 ●<br />
74 RollEm2 ●<br />
75 RollEm3<br />
76 RollRim1 ●<br />
77 RollRim2<br />
78 RollRim3<br />
79 Ruberbnd ●<br />
80 S Gate1<br />
81 S Gate2<br />
82 S Gate3<br />
83 S RuberS<br />
84 Sddark! ●<br />
85 SDdkrim ●<br />
86 SDind58 ●<br />
87 Sheetmtl<br />
88 Shmtlrim ●<br />
89 Smacker ●<br />
90 Snarf ●<br />
91 SnarfRim ●<br />
92 SteelRim ●<br />
93 Tekk1<br />
94 Tekk2<br />
95 Tekk3<br />
96 UnclAB ●<br />
97 UnclARim ●<br />
98 WackyEFX ●<br />
99 Brsh1Rim ●<br />
100 BrshAtak<br />
101 BrshHit1<br />
102 BrshHit2<br />
103 BrshOp<br />
104 BrshSc<br />
105 BrshSlp<br />
106 BrshSlpL<br />
107 BrshSw<br />
108 BrshSwep<br />
109 BrshTap1<br />
110 BrshTap2<br />
111 BrshTap3<br />
112 BrshTp<br />
113 BrSwH*<br />
114 BrSwL*<br />
115 BrSwTime<br />
116 BrSwTRim ●<br />
117 S Brsh<br />
118 Shotgun ●<br />
119 tkattak! ●<br />
120 Manycure ●<br />
T : Acoustic Tom<br />
1 Dry1 Hi<br />
2 Dry1 Mid<br />
3 Dry1 Lo<br />
4 Dry1 Flr<br />
5 DRY GM6<br />
6 DRY GM5<br />
7 DRY GM4<br />
8 DRY GM3<br />
9 DRY GM2<br />
10 DRY GM1<br />
11 Maple10<br />
12 Maple12<br />
13 Maple14<br />
14 Maple16<br />
15 Lite Hi ●<br />
16 Lite Mid ●<br />
17 Lite Lo ●<br />
18 Lite Flr ●<br />
19 Jazz Hi<br />
20 Jazz Mid<br />
21 Jazz Lo<br />
22 Jazz Flr<br />
23 BrshJzHi<br />
24 BrshJzMd<br />
25 BrshJzLo<br />
26 BrshJzFl<br />
27 BrshRkHi<br />
28 BrshRkMd<br />
29 BrshRkLo<br />
30 BrshRkFl<br />
31 TOMntrlH<br />
32 TOMntrlM<br />
33 TOMntrlL<br />
34 TOMntrlF<br />
35 Dry2 Hi<br />
36 Dry2 Mid<br />
37 Dry2 Lo<br />
38 Dry2 Flr<br />
39 Room3 Hi<br />
40 Room3Mid ●<br />
41 Room3 Lo ●<br />
42 Room3Flr ●<br />
43 RoomP H<br />
44 RoomP M<br />
45 RoomP L ●<br />
46 RoomP F<br />
47 RoomQH ●<br />
48 RoomQM ●<br />
49 RoomQL ●<br />
50 RoomQF ●<br />
51 Room 6 ●<br />
52 Room 5 ●<br />
53 Room 4 ●<br />
54 Room 3 ●<br />
55 Room 2 ●<br />
56 Room 1 ●<br />
57 Rock 6<br />
58 Rock 5<br />
59 Rock 4<br />
60 Rock 3<br />
61 Rock 2<br />
62 Rock 1<br />
63 SAmbTmH ●<br />
64 SAmbTmM ●<br />
65 SAmbTmL ●<br />
66 SAmbTmF ●<br />
67 AmbTomH<br />
68 AmbTomM<br />
69 AmbTomL<br />
70 AmbTomF<br />
71 ACTomH<br />
72 ACTomM<br />
73 ACTomL<br />
74 ACTomF<br />
75 Room1 Hi ●<br />
76 Room1Mid ●<br />
77 Room1 Lo ●<br />
<strong>Drum</strong> <strong>Voice</strong> <strong>List</strong><br />
78 Room1Flr ●<br />
79 Room2 Hi ●<br />
80 Room2Mid ●<br />
81 Room2 Lo ●<br />
82 Room2Flr ●<br />
83 Night H<br />
84 Night M<br />
85 Night L<br />
86 Night F<br />
87 TOMXfadH ●<br />
88 TOMXfadM ●<br />
89 TOMXfadL ●<br />
90 TOMXfadF ●<br />
t : Electric Tom<br />
1 Ana 1Hi<br />
2 Ana 1Mid<br />
3 Ana 1Lo<br />
4 Ana 1Flr<br />
5 Ana 2Hi ●<br />
6 Ana 2Mid ●<br />
7 Ana 2Lo ●<br />
8 Ana 2flr<br />
9 AnlgTom6<br />
10 AnlgTom5<br />
11 AnlgTom4<br />
12 AnlgTom3<br />
13 AnlgTom2<br />
14 AnlgTom1<br />
15 TEKK 1H<br />
16 TEKK 1M<br />
17 TEKK 1L<br />
18 TEKK 1F<br />
19 TEKK 2H<br />
20 TEKK 2M<br />
21 TEKK 2L<br />
22 TEKK 2F<br />
23 TEKK 3H<br />
24 TEKK 3M<br />
25 TEKK 3L<br />
26 TEKK 3F<br />
27 AnaIndsH ●<br />
28 AnaIndsM ●<br />
29 AnaIndsL ●<br />
30 AnaIndsF ●<br />
31 E Tom6<br />
32 E Tom5<br />
33 E Tom4<br />
34 E Tom3<br />
35 E Tom2<br />
36 E Tom1<br />
37 HybridH ●<br />
38 HybridM ●<br />
39 HybridL ●<br />
40 HybridF ●<br />
41 ElectrcH<br />
42 ElectrcM<br />
43 ElectrcL<br />
44 ElectrcF<br />
45 Distrt H<br />
46 Distrt M<br />
47 Distrt L<br />
39
<strong>Drum</strong> <strong>Voice</strong> <strong>List</strong><br />
48 Distrt F<br />
49 ETMooRH<br />
50 ETMooRM<br />
51 ETMooRL<br />
52 ETMooRXL<br />
53 IndTmH ●<br />
54 IndTmM ●<br />
55 IndTmL ●<br />
56 IndTmF ●<br />
57 TM Revrs<br />
58 Analog<br />
59 T GongE<br />
C : Cymbal<br />
1 CrashB<br />
2 BriteCrs<br />
3 C Crash<br />
4 C CrshAC<br />
5 CrshDRK<br />
6 DeepDRK<br />
7 FasCrash ●<br />
8 FastCras<br />
9 PaperThn<br />
10 ReverseC<br />
11 SoftRoll<br />
12 C CrshSi ●<br />
13 C FX02<br />
14 DeepCym ●<br />
15 FlatTop ●<br />
16 RideDark<br />
17 Ridedrk ●<br />
18 Ride’EM ●<br />
19 RideLite<br />
20 Rider3 ●<br />
21 RideRock<br />
22 RideRock<br />
23 RidesizA ●<br />
24 RidesizB ●<br />
25 RidesizC ●<br />
26 RideXfd ●<br />
27 Rocksizl ●<br />
28 SizzlDrk ●<br />
29 Sizzler ●<br />
30 SizzlLit ●<br />
31 SizzlRck ●<br />
32 RidB Lit<br />
33 Bell A<br />
34 BellTip<br />
35 RidB Drk<br />
36 RidB Rc<br />
37 China<br />
38 ChinaHi<br />
39 MinChina<br />
40 Clusher ●<br />
41 C Splsh1<br />
42 C Splsh2<br />
43 C FX01<br />
44 AngCym<br />
45 Ride Anl<br />
46 HCym1<br />
47 HCym2 ●<br />
48 HCymClsL<br />
40<br />
49 HCymClsM<br />
50 HCymOpnL<br />
51 HCymOpnM<br />
H : Hi-Hat<br />
1 H Cls01<br />
2 H Cls13<br />
3 H ClsA1<br />
4 H ClsA2<br />
5 H ClsMu<br />
6 H ClsNB1<br />
7 H ClsTc1<br />
8 H ClsTc3<br />
9 H QOPMu<br />
10 H QOpn13<br />
11 H TiCls1<br />
12 H TiCls2<br />
13 HHcl2Xfd ●<br />
14 HHclsXfd ●<br />
15 HHRoKcls<br />
16 HH32cls ●<br />
17 HHbrtcls ●<br />
18 H OPMu<br />
19 H Opn13<br />
20 H OpnDW ●<br />
21 H OpnDWX ●<br />
22 H OpnL1 ●<br />
23 H OpnL2 ●<br />
24 H OpnL3 ●<br />
25 H OpnLK ●<br />
26 H OpnLX1 ●<br />
27 H OpnMU ●<br />
28 H OpnNB<br />
29 HHRoKopn<br />
30 HHopen#1 ●<br />
31 H Pdl13<br />
32 H PdlDW<br />
33 H PdlLit ●<br />
34 H PdlMu<br />
35 H PdlNB<br />
36 H PdTit<br />
37 HHFTpdl1<br />
38 Hpdlcls1 ●<br />
39 Hpdlcls2 ●<br />
40 Hpdlcls3 ●<br />
41 Hpdlcls4 ●<br />
42 FTsplRK<br />
43 FTsplRK2 ●<br />
44 FTsplsh1<br />
45 FTsplsh2 ●<br />
46 H SplNB<br />
47 H Splsht<br />
48 Hpsplsh1 ●<br />
49 H OpnAMu<br />
50 H OpnAn<br />
51 H OpnLA1 ●<br />
52 H OpnLA2 ●<br />
P : Percussion<br />
1 AgogoCh<br />
2 AgogoH1<br />
3 AgogoH2<br />
4 AnCongaM<br />
5 AnCowbll<br />
6 AnMaracs ●<br />
7 ATR<br />
8 BassDr<br />
9 Bell<br />
10 Bell Tree<br />
11 Bongo Hi<br />
12 Bongo Lo<br />
13 Bongo Mu<br />
14 Cabasa1<br />
15 Cabasa2 ●<br />
16 Castanet<br />
17 Clap8<br />
18 ClapA<br />
19 Clvs<br />
20 ClvsA<br />
21 Conga<br />
22 Conga8H<br />
23 CongaC<br />
24 CongaG<br />
25 CongaH<br />
26 CongaM<br />
27 CongaMV<br />
28 CongAn<br />
29 CongaO<br />
30 CongaS<br />
31 CongBe<br />
32 CongC7<br />
33 CowB1<br />
34 CowB2<br />
35 CowBAn<br />
36 CowBM<br />
37 CuicaH<br />
38 CuicaL<br />
39 EthWB<br />
40 FSnap2<br />
41 GONG<br />
42 GranC<br />
43 Guiro<br />
44 GuiSht<br />
45 HiQ<br />
46 JingBell<br />
47 Kalmb<br />
48 Log H<br />
49 Log L<br />
50 Maracas1 ●<br />
51 Maracas2<br />
52 Maracas3<br />
53 MtBel<br />
54 Mtron<br />
55 Scrach<br />
56 Shake1<br />
57 Shake2<br />
58 ShakeA<br />
59 SlBell<br />
60 Surdo<br />
61 SurdoM<br />
62 Tabla B<br />
63 Tabla BL<br />
64 Tabla BM<br />
65 Tabla BV<br />
66 Tabla OV<br />
67 TablaH<br />
68 TablaM<br />
69 TablaN<br />
70 TablaO<br />
71 Taiko<br />
72 TalkD<br />
73 TalknDrD<br />
74 TalknDrU<br />
75 TalknDrV<br />
76 TambA<br />
77 TambHH ●<br />
78 Tambourn<br />
79 Tambrn<br />
80 Timb<br />
81 TimbH<br />
82 TimbL<br />
83 TimCas<br />
84 TimpH<br />
85 TimpL<br />
86 Triang<br />
87 TriMut<br />
88 Udo F<br />
89 Udo H<br />
90 Udo L<br />
91 Udu808H ●<br />
92 Udu808L ●<br />
93 VibrSlap<br />
94 WCHim<br />
95 Whist<br />
96 WHP<br />
97 WoodBloc<br />
98 XfadeTri ●<br />
99 SWhistH*<br />
100 SWhistL*<br />
E : Effect 1<br />
1 6AMBreth ●<br />
2 Ambush ●<br />
3 AMRhythm ●<br />
4 Applau ●<br />
5 Bird<br />
6 Bird-P<br />
7 Bottle<br />
8 BreakOut<br />
9 BrsHit<br />
10 BuzzyWak ●<br />
11 C Crash<br />
12 CarPss<br />
13 CBRadi<br />
14 ComVc<br />
15 CoolSA<br />
16 Creature ●<br />
17 Crush<br />
18 CStart<br />
19 Didger<br />
20 Dog<br />
21 DogHats<br />
22 Door<br />
23 DSqrm<br />
24 FM Met
25 FStep<br />
26 Funky<br />
27 Gargoyle ●<br />
28 Glass1<br />
29 Gun 1<br />
30 Gun 2<br />
31 Gun 3<br />
32 HaHoHee ●<br />
33 HandyDad ●<br />
34 HandySon ●<br />
35 Heli<br />
36 HipNs<br />
37 INDbells ●<br />
38 INDchina<br />
39 INDconga ●<br />
40 INDcrash<br />
41 InddogCR ●<br />
42 INDhihat ●<br />
43 INDrave ●<br />
44 INDride ●<br />
45 INDride2 ●<br />
46 INDride3<br />
47 INDshakr ●<br />
48 Indust<br />
49 InsAmb<br />
50 Laugh<br />
51 LoMo<br />
52 MetalDip ●<br />
53 MotoM<br />
54 Motor<br />
55 NoyzEB ●<br />
56 OOOWWW<br />
57 OrchSmsh ●<br />
58 OrcHt1<br />
59 OrcHt2<br />
60 PAD<br />
61 RatlBoom ●<br />
62 RaveRide ●<br />
63 RaveWave ●<br />
64 Reverse ●<br />
65 Ring<br />
66 RubbrOil<br />
67 Scream<br />
68 Seasho<br />
69 Shazam! ●<br />
70 SlikRoad ●<br />
71 SloSprkl ●<br />
72 Stream<br />
73 TablaX ●<br />
74 TakeOff ●<br />
75 TekGt<br />
76 Thundr<br />
77 TimbTimp ●<br />
78 Tine<strong>Drum</strong> ●<br />
79 Tire<br />
80 Tung<strong>Drum</strong> ●<br />
81 TV vo<br />
82 TymKeepr ●<br />
83 USS<br />
84 VoclShKR ●<br />
85 WetMetal ●<br />
86 Yadee<br />
e : Effect 2<br />
1 JNGLSN1 ●<br />
2 JNGLSN2 ●<br />
3 JNGLSN3 ●<br />
4 JNGLSN4 ●<br />
5 JNGLSN5 ●<br />
6 JNGLSN6 ●<br />
7 JNGLSN7 ●<br />
8 JNGLSN8<br />
9 JNGLSN9 ●<br />
10 JNGLSN10<br />
11 JNGBASS! ●<br />
12 JNGBASS2 ●<br />
13 JNGBASS3 ●<br />
14 JNGBASS4 ●<br />
15 JNGBASS5 ●<br />
16 JNGBASS6 ●<br />
17 JNGBASS7 ●<br />
18 JNGBASS8 ●<br />
19 GUMYBASS ●<br />
20 BDSUBSNK ●<br />
21 TENDO ●<br />
22 SPIKER ●<br />
23 PULSAR<br />
24 PULSAR2 ●<br />
25 PULSAR3 ●<br />
26 DALIBAS1 ●<br />
27 DALIBAS2 ●<br />
28 DALIBAS3<br />
29 IRONBASS ●<br />
30 SEAMNSTR ●<br />
31 D&BFRAG1<br />
32 POPPX<br />
33 WINER ●<br />
34 DOOMED ●<br />
35 ANVILISH<br />
36 TRANQUL ●<br />
37 MOSHER ●<br />
38 D&BFRAG8<br />
39 PEEPER<br />
40 WYZOG<br />
41 D&FRAG11<br />
42 SCRUNCH<br />
43 VOLTAGE ●<br />
44 D&FRAG14<br />
45 GRONKER<br />
46 SEMILOOP<br />
47 POINGER<br />
48 JNGSN11 ●<br />
49 SUKRPNCH<br />
50 D&FRAG20<br />
51 BOUNCER ●<br />
52 SHUTDOWN ●<br />
53 DOPPLER ●<br />
54 DUCKSTER ●<br />
55 TAMTAMY ●<br />
56 PANKY ●<br />
57 ANAFROGR ●<br />
58 GOWAH ●<br />
59 DEEPDIVE ●<br />
60 ASCENDER<br />
61 JURASSIC ●<br />
62 CLOUDS ●<br />
63 TRAINBRK ●<br />
64 RUNNER ●<br />
65 RADAMACU ●<br />
66 UMK 47<br />
67 FRAG23<br />
68 AmbHit10<br />
69 WAKX PAD<br />
70 AmbHit01<br />
71 QueSPACE<br />
72 AmbHit02<br />
73 FRAG13<br />
74 Vocal04 ●<br />
75 FRAG03<br />
76 FRAG14<br />
77 FRAG12<br />
78 FRAG08<br />
79 FRAG01<br />
80 FRAG18<br />
81 FRAG11<br />
82 FRAG05<br />
83 FRAG21<br />
84 FRAG20<br />
L : <strong>Drum</strong> Loop<br />
1 DigiTime ●<br />
2 Hollis L<br />
3 KillnL<br />
4 LITELOOP<br />
5 LoMLoop ●<br />
6 MachineL ●<br />
7 NYCLoop ●<br />
8 PsychoLP ●<br />
9 SNAPLOOP<br />
10 AlienSp ●<br />
11 Cymbloop ●<br />
12 DIGERDO<br />
13 Spirals<br />
14 SwingnL<br />
15 UptownL<br />
16 WE LOOP<br />
17 E NZE<br />
18 ET Loop ●<br />
19 EvlLoop<br />
20 FactryLP<br />
21 HellsBel<br />
22 LoMO LP<br />
23 LoMsolo<br />
24 LPscNoiz<br />
25 HeliLoop<br />
26 StreamLP<br />
m : misc. voices<br />
1 Brass 4<br />
2 Brass 5<br />
3 Celesta<br />
4 Chor 516<br />
5 Chor 539<br />
6 Chorus 4<br />
7 GlockenH<br />
8 GlockenL<br />
9 GlockenM<br />
10 Marimba<br />
11 MTrp 4<br />
12 ORGAN 3<br />
13 SBrass 4<br />
14 SBrass 5<br />
15 sitar599<br />
16 SteelDr3<br />
17 SynPf 3<br />
18 Trb 3<br />
19 Trp 4<br />
20 vibe 541<br />
21 Xylophon<br />
22 SStrngA4<br />
23 SStrngB4<br />
24 STRNG 3<br />
25 STRNG 4<br />
26 Syn 3<br />
27 SynSt 3<br />
28 AcBass<br />
29 BassSAWH<br />
30 BassSAWL<br />
31 BassSINH<br />
32 BassSINL<br />
33 SyBass2H<br />
34 SyBass2L<br />
<strong>Drum</strong> <strong>Voice</strong> <strong>List</strong><br />
41
GM Keyboard <strong>Voice</strong> <strong>List</strong><br />
No. Category Name<br />
1 Piano GrandPno<br />
2 BritePno<br />
3 E.Grand ●<br />
4 HnkyTonk ●<br />
5 E.Piano1 ●<br />
6 E.Piano2 ●<br />
7 Harpsi.<br />
8 Clavi.<br />
9 Chromatic Celesta<br />
10 Percussion Glocken<br />
11 MusicBox ●<br />
12 Vibes<br />
13 Marimba<br />
14 Xylophon<br />
15 TubulBel<br />
16 Dulcimer ●<br />
17 Organ DrawOrgn<br />
18 PercOrgn<br />
19 RockOrgn ●<br />
20 ChrchOrg ●<br />
21 ReedOrgn<br />
22 Acordion ●<br />
23 Harmnica<br />
24 TangoAcd ●<br />
25 Guitar NylonGtr<br />
26 SteelGtr<br />
27 Jazz Gtr<br />
28 CleanGtr ●<br />
29 Mute.Gtr<br />
30 Ovrdrive<br />
31 Dist.Gtr<br />
32 GtrHarmo<br />
42<br />
No. Category Name<br />
33 Bass Aco.Bass<br />
34 FngrBass<br />
35 PickBass<br />
36 Fretless<br />
37 SlapBas1<br />
38 SlapBas2<br />
39 SynBass1<br />
40 SynBass2<br />
41 Strings Violin<br />
42 Viola<br />
43 Cello<br />
44 ContraBs<br />
45 Trem.Str ●<br />
46 Pizz.Str ●<br />
47 Harp<br />
48 Timpani<br />
49 Ensemble Strings1<br />
50 Strings2<br />
51 Syn.Str1 ●<br />
52 Syn.Str2 ●<br />
53 ChoirAah ●<br />
54 <strong>Voice</strong>Ooh<br />
55 Syn<strong>Voice</strong><br />
56 Orch.Hit<br />
57 Brass Trumpet<br />
58 Trombone<br />
59 Tuba<br />
60 Mute.Trp<br />
61 Fr.Horn<br />
62 BrasSect<br />
63 SynBras1 ●<br />
64 SynBras2 ●<br />
Preset <strong>Drum</strong> Kit <strong>List</strong><br />
No. Name<br />
1 Acoustic<br />
2 NewBeat<br />
3 Rock kit<br />
4 RockDry1<br />
5 RockDry2<br />
6 RockDry3<br />
7 RockDry4<br />
8 BigRevrb<br />
9 Ballade<br />
10 BeBop<br />
11 Andora<br />
12 Room Kit<br />
No. Name<br />
13 (In)<br />
14 In&Out<br />
15 HipFunky<br />
16 Dance 1<br />
17 Dance 2<br />
18 SoDance<br />
19 Manh<br />
20 D@RK<br />
21 Oh!No!<br />
22 Latin/Tm<br />
23 LatinPer<br />
24 Zebulon<br />
No. Category Name<br />
65 Reed SprnoSax<br />
66 Alto Sax<br />
67 TenorSax<br />
68 Bari.Sax<br />
69 Oboe<br />
70 Eng.Horn<br />
71 Bassoon<br />
72 Clarinet<br />
73 Pipe Piccolo<br />
74 Flute<br />
75 Recorder<br />
76 PanFlute<br />
77 Bottle ●<br />
78 Shakhchi<br />
79 Whistle<br />
80 Ocalina<br />
81 Synth Lead SquareLd ●<br />
82 Saw.Lead ●<br />
83 CaliopLd ●<br />
84 Chiff Ld ●<br />
85 CharanLd ●<br />
86 <strong>Voice</strong> Ld ●<br />
87 Fifth Ld ●<br />
88 Bass &Ld ●<br />
89 Synth Pad NewAgePd ●<br />
90 Warm Pad ●<br />
91 PolySyPd ●<br />
92 ChoirPad ●<br />
93 BowedPad ●<br />
94 MetalPad ●<br />
95 Halo Pad ●<br />
96 SweepPad ●<br />
No. Name<br />
25 World<br />
26 Reggae<br />
27 Tabla<br />
28 Cocktail<br />
29 JamKit99<br />
30 GoezOn!?<br />
31 InDaHood<br />
32 GroovKit ●<br />
33 Bs.@Base ●<br />
34 JungleNY<br />
35 Snapkit<br />
36 JumpBack ●<br />
● : 2-layer voice<br />
No. Category Name<br />
97 Synth Rain ●<br />
98 Effects SoundTrk ●<br />
99 Crystal ●<br />
100 Atmosphr ●<br />
101 Bright ●<br />
102 Goblins ●<br />
103 Echoes ●<br />
104 SF ●<br />
105 Ethnic Sitar<br />
106 Banjo<br />
107 Shamisen<br />
108 Koto<br />
109 Kalimba<br />
110 Bagpipe ●<br />
111 Fiddle<br />
112 Shanai<br />
113 Percussive TnklBell ●<br />
114 Agogo<br />
115 SteelDrm ●<br />
116 WoodBlok<br />
117 TaikoDrm<br />
118 MelodTom<br />
119 Syn.<strong>Drum</strong><br />
120 RevCymbl<br />
121 Sound FretNoiz<br />
122 Effect BrthNoiz<br />
123 Seashore ●<br />
124 Tweet ●<br />
125 Telphone<br />
126 Helicptr ●<br />
127 Applause ●<br />
128 Gunshot<br />
● : Kits used with the pad songs<br />
No. Name<br />
37 MondoKit ●<br />
38 Torqkit ●<br />
39 Mystery ●<br />
40 GM std 1<br />
41 GM std 2<br />
42 GM room<br />
43 GM rock<br />
44 GM elec.<br />
45 GM anal.<br />
46 GM jazz<br />
47 GM brush<br />
48 GM class
No. 1 Accoustic<br />
Input <strong>Voice</strong>-1 <strong>Voice</strong>-2<br />
Source Cat./No./Name Cat./No./Name<br />
pad1 K 17 BDaftty1 K 0 NoAssign<br />
rim1 K 0 NoAssign K 0 NoAssign<br />
pad2 S 1 Loosy K 0 NoAssign<br />
rim2 S 79 OpnRim K 0 NoAssign<br />
pad3 T 1 Dry1 Hi K 0 NoAssign<br />
rim3 T 71 ACTomH K 0 NoAssign<br />
pad4 T 2 Dry1 Mid K 0 NoAssign<br />
rim4 T 72 ACTomM K 0 NoAssign<br />
pad5 T 3 Dry1 Lo K 0 NoAssign<br />
rim5 T 73 ACTomL K 0 NoAssign<br />
pad6 C 28 SizzlDrk K 0 NoAssign<br />
rim6 C 24 RidesizB K 0 NoAssign<br />
pad7 C 1 CrashB K 0 NoAssign<br />
rim7 C 37 China K 0 NoAssign<br />
open H 23 H OpnL2 K 0 NoAssign<br />
rimOpen H 25 H OpnLK K 0 NoAssign<br />
close H 23 H OpnL2 K 0 NoAssign<br />
rimClose H 23 H OpnL2 K 0 NoAssign<br />
footClose H 32 H PdlDW K 0 NoAssign<br />
splash H 48 Hpsplsh1 K 0 NoAssign<br />
pad9 C 33 Bell A K 0 NoAssign<br />
pad10 P 33 CowB1 K 0 NoAssign<br />
No. 2 NewBeat<br />
Input <strong>Voice</strong>-1 <strong>Voice</strong>-2<br />
Source Cat./No./Name Cat./No./Name<br />
pad1 K 43 BD Metal K 0 NoAssign<br />
rim1 K 0 NoAssign K 0 NoAssign<br />
pad2 S 46 RIMetal K 0 NoAssign<br />
rim2 S 33 12Soprno K 0 NoAssign<br />
pad3 T 58 Rock 5 K 0 NoAssign<br />
rim3 T 6 DRY GM5 K 0 NoAssign<br />
pad4 T 60 Rock 3 K 0 NoAssign<br />
rim4 T 8 DRY GM3 K 0 NoAssign<br />
pad5 T 61 Rock 2 K 0 NoAssign<br />
rim5 T 10 DRY GM1 K 0 NoAssign<br />
pad6 C 16 RideDark K 0 NoAssign<br />
rim6 C 20 Rider3 K 0 NoAssign<br />
pad7 C 1 CrashB K 0 NoAssign<br />
rim7 C 2 BriteCrs K 0 NoAssign<br />
open H 26 H OpnLX1 K 0 NoAssign<br />
rimOpen H 26 H OpnLX1 K 0 NoAssign<br />
close H 1 H Cls01 K 0 NoAssign<br />
rimClose H 34 H PdlMu K 0 NoAssign<br />
footClose H 38 Hpdlcls1 K 0 NoAssign<br />
splash H 48 Hpsplsh1 K 0 NoAssign<br />
pad9 C 33 Bell A K 0 NoAssign<br />
pad10 P 33 CowB1 K 0 NoAssign<br />
No. 3 Rock kit<br />
Input<br />
Source<br />
<strong>Voice</strong>-1<br />
Cat./No./Name<br />
<strong>Voice</strong>-2<br />
Cat./No./Name<br />
pad1 K 34 BDbasc2 K 32 2HeadLo<br />
rim1 P 34 CowB2 K 0 NoAssign<br />
pad2 s 87 Sheetmtl S 1 Loosy<br />
rim2 S 96 Fatbrim K 0 NoAssign<br />
pad3 T 75 Room1 Hi K 0 NoAssign<br />
rim3 T 83 Night H K 0 NoAssign<br />
pad4 T 76 Room1Mid K 0 NoAssign<br />
rim4 T 84 Night M K 0 NoAssign<br />
pad5 T 77 Room1 Lo K 0 NoAssign<br />
rim5 T 85 Night L K 0 NoAssign<br />
pad6 C 31 SizzlRck K 0 NoAssign<br />
rim6 C 36 RidB Rc K 0 NoAssign<br />
pad7 C 37 China K 0 NoAssign<br />
rim7 C 1 CrashB K 0 NoAssign<br />
open H 29 HHRoKopn K 0 NoAssign<br />
rimOpen H 29 HHRoKopn K 0 NoAssign<br />
close H 6 H ClsNB1 K 0 NoAssign<br />
rimClose H 5 H ClsMu K 0 NoAssign<br />
footClose H 37 HHFTpdl1 K 0 NoAssign<br />
splash H 44 FTsplsh1 K 0 NoAssign<br />
pad9 C 32 RidB Lit K 0 NoAssign<br />
pad10 P 33 CowB1 K 0 NoAssign<br />
No. 4 RockDry1<br />
Input <strong>Voice</strong>-1 <strong>Voice</strong>-2<br />
Source Cat./No./Name Cat./No./Name<br />
pad1 K 41 BD GATE2 K 35 BD KONG1<br />
rim1 K 0 NoAssign K 0 NoAssign<br />
pad2 S 97 Brass55 K 0 NoAssign<br />
rim2 S 96 Fatbrim K 0 NoAssign<br />
pad3 T 58 Rock 5 K 0 NoAssign<br />
rim3 T 83 Night H K 0 NoAssign<br />
pad4 T 59 Rock 4 K 0 NoAssign<br />
rim4 T 84 Night M K 0 NoAssign<br />
pad5 T 60 Rock 3 K 0 NoAssign<br />
rim5 T 85 Night L K 0 NoAssign<br />
pad6 C 22 RideRock K 0 NoAssign<br />
rim6 C 37 China K 0 NoAssign<br />
pad7 C 41 C Splsh1 K 0 NoAssign<br />
rim7 C 3 C Crash K 0 NoAssign<br />
open H 43 FTsplRK2 K 0 NoAssign<br />
rimOpen H 29 HHRoKopn K 0 NoAssign<br />
close H 2 H Cls13 K 0 NoAssign<br />
rimClose H 29 HHRoKopn K 0 NoAssign<br />
footClose H 37 HHFTpdl1 K 0 NoAssign<br />
splash H 48 Hpsplsh1 K 0 NoAssign<br />
pad9 C 35 RidB Drk K 0 NoAssign<br />
pad10 P 33 CowB1 K 0 NoAssign<br />
No. 5 RockDry2<br />
Input<br />
Source<br />
<strong>Voice</strong>-1<br />
Cat./No./Name<br />
<strong>Voice</strong>-2<br />
Cat./No./Name<br />
pad1 K 32 2HeadLo K 11 BD NN04C<br />
rim1 K 0 NoAssign K 0 NoAssign<br />
pad2 S 63 SnareM K 0 NoAssign<br />
rim2 S 47 RIMnatrl K 0 NoAssign<br />
pad3 T 1 Dry1 Hi K 0 NoAssign<br />
rim3 T 83 Night H K 0 NoAssign<br />
pad4 T 2 Dry1 Mid K 0 NoAssign<br />
rim4 T 84 Night M K 0 NoAssign<br />
pad5 T 3 Dry1 Lo K 0 NoAssign<br />
rim5 T 85 Night L K 0 NoAssign<br />
pad6 C 16 RideDark K 0 NoAssign<br />
rim6 C 24 RidesizB K 0 NoAssign<br />
pad7 C 37 China K 0 NoAssign<br />
rim7 C 1 CrashB K 0 NoAssign<br />
open H 26 H OpnLX1 K 0 NoAssign<br />
rimOpen H 23 H OpnL2 K 0 NoAssign<br />
close H 6 H ClsNB1 K 0 NoAssign<br />
rimClose H 23 H OpnL2 K 0 NoAssign<br />
footClose H 35 H PdlNB K 0 NoAssign<br />
splash H 46 H SplNB K 0 NoAssign<br />
pad9 C 33 Bell A K 0 NoAssign<br />
pad10 P 33 CowB1 K 0 NoAssign<br />
No. 6 RockDry3<br />
Input <strong>Voice</strong>-1 <strong>Voice</strong>-2<br />
Source Cat./No./Name Cat./No./Name<br />
pad1 K 39 BDbonzo2 K 19 MapleA20<br />
rim1 K 0 NoAssign K 0 NoAssign<br />
pad2 S 60 Fat looz K 0 NoAssign<br />
rim2 s 19 Electrik K 0 NoAssign<br />
pad3 T 75 Room1 Hi K 0 NoAssign<br />
Preset <strong>Drum</strong> Kit <strong>List</strong><br />
rim3 T 71 ACTomH K 0 NoAssign<br />
pad4 T 76 Room1Mid K 0 NoAssign<br />
rim4 T 72 ACTomM K 0 NoAssign<br />
pad5 T 77 Room1 Lo K 0 NoAssign<br />
rim5 T 73 ACTomL K 0 NoAssign<br />
pad6 C 16 RideDark K 0 NoAssign<br />
rim6 C 24 RidesizB K 0 NoAssign<br />
pad7 C 39 MinChina K 0 NoAssign<br />
rim7 C 5 CrshDRK K 0 NoAssign<br />
open H 26 H OpnLX1 K 0 NoAssign<br />
rimOpen H 23 H OpnL2 K 0 NoAssign<br />
close H 6 H ClsNB1 K 0 NoAssign<br />
rimClose H 23 H OpnL2 K 0 NoAssign<br />
footClose H 32 H PdlDW K 0 NoAssign<br />
splash H 46 H SplNB K 0 NoAssign<br />
pad9 C 33 Bell A K 0 NoAssign<br />
pad10 P 33 CowB1 K 0 NoAssign<br />
No. 7 RockDry4<br />
Input <strong>Voice</strong>-1 <strong>Voice</strong>-2<br />
Source Cat./No./Name Cat./No./Name<br />
pad1 K 49 BDevolvr K 3 Basic<br />
rim1 K 0 NoAssign K 0 NoAssign<br />
pad2 S 91 OpnRimC K 0 NoAssign<br />
rim2 S 105 GhiGateSn K 0 NoAssign<br />
pad3 T 35 Dry2 Hi K 0 NoAssign<br />
rim3 T 71 ACTomH K 0 NoAssign<br />
pad4 T 36 Dry2 Mid K 0 NoAssign<br />
rim4 T 72 ACTomM K 0 NoAssign<br />
pad5 T 37 Dry2 Lo K 0 NoAssign<br />
rim5 T 73 ACTomL K 0 NoAssign<br />
pad6 C 16 RideDark K 0 NoAssign<br />
rim6 C 24 RidesizB K 0 NoAssign<br />
pad7 C 39 MinChina K 0 NoAssign<br />
rim7 C 5 CrshDRK K 0 NoAssign<br />
open H 26 H OpnLX1 K 0 NoAssign<br />
rimOpen H 23 H OpnL2 K 0 NoAssign<br />
close H 6 H ClsNB1 K 0 NoAssign<br />
rimClose H 23 H OpnL2 K 0 NoAssign<br />
footClose H 32 H PdlDW K 0 NoAssign<br />
splash H 46 H SplNB K 0 NoAssign<br />
pad9 C 33 Bell A K 0 NoAssign<br />
pad10 P 33 CowB1 K 0 NoAssign<br />
No. 8 BigRevrb<br />
Input<br />
Source<br />
<strong>Voice</strong>-1<br />
Cat./No./Name<br />
<strong>Voice</strong>-2<br />
Cat./No./Name<br />
pad1 K 2 2HedMed2 K 1 2HedMed1<br />
rim1 K 0 NoAssign K 0 NoAssign<br />
pad2 S 23 Wood Sn K 0 NoAssign<br />
rim2 S 23 Wood Sn K 0 NoAssign<br />
pad3 T 6 DRY GM5 K 0 NoAssign<br />
rim3 P 57 Shake2 K 0 NoAssign<br />
pad4 T 7 DRY GM4 K 0 NoAssign<br />
rim4 P 76 TambA K 0 NoAssign<br />
pad5 T 9 DRY GM2 K 0 NoAssign<br />
rim5 P 97 WoodBloc K 0 NoAssign<br />
pad6 C 23 RidesizA K 0 NoAssign<br />
rim6 C 19 RideLite K 0 NoAssign<br />
pad7 C 3 C Crash K 0 NoAssign<br />
rim7 C 6 DeepDRK K 0 NoAssign<br />
open H 26 H OpnLX1 K 0 NoAssign<br />
rimOpen H 26 H OpnLX1 K 0 NoAssign<br />
close H 6 H ClsNB1 K 0 NoAssign<br />
rimClose H 34 H PdlMu K 0 NoAssign<br />
footClose H 38 Hpdlcls1 K 0 NoAssign<br />
splash H 47 H Splsht K 0 NoAssign<br />
pad9 C 34 BellTip K 0 NoAssign<br />
pad10 P 34 CowB2 K 0 NoAssign<br />
43
Preset <strong>Drum</strong> Kit <strong>List</strong><br />
44<br />
No. 9 Ballade<br />
Input <strong>Voice</strong>-1 <strong>Voice</strong>-2<br />
Source Cat./No./Name Cat./No./Name<br />
pad1 K 11 BD NN04C K 0 NoAssign<br />
rim1 K 0 NoAssign K 0 NoAssign<br />
pad2 S 110 S SStck2 K 0 NoAssign<br />
rim2 S 15 OldCan K 0 NoAssign<br />
pad3 T 1 Dry1 Hi K 0 NoAssign<br />
rim3 T 6 DRY GM5 K 0 NoAssign<br />
pad4 T 2 Dry1 Mid K 0 NoAssign<br />
rim4 T 8 DRY GM3 K 0 NoAssign<br />
pad5 T 3 Dry1 Lo K 0 NoAssign<br />
rim5 T 10 DRY GM1 K 0 NoAssign<br />
pad6 C 19 RideLite K 0 NoAssign<br />
rim6 C 20 Rider3 K 0 NoAssign<br />
pad7 C 1 CrashB K 0 NoAssign<br />
rim7 C 2 BriteCrs K 0 NoAssign<br />
open H 26 H OpnLX1 K 0 NoAssign<br />
rimOpen H 26 H OpnLX1 K 0 NoAssign<br />
close H 26 H OpnLX1 K 0 NoAssign<br />
rimClose H 34 H PdlMu K 0 NoAssign<br />
footClose H 38 Hpdlcls1 K 0 NoAssign<br />
splash H 48 Hpsplsh1 K 0 NoAssign<br />
pad9 C 33 Bell A K 0 NoAssign<br />
pad10 P 33 CowB1 K 0 NoAssign<br />
No. 10 BeBop<br />
Input <strong>Voice</strong>-1 <strong>Voice</strong>-2<br />
Source Cat./No./Name Cat./No./Name<br />
pad1 K 36 BDersko1 K 0 NoAssign<br />
rim1 K 0 NoAssign K 0 NoAssign<br />
pad2 S 78 Cool Dry S 17 LiteSnr1<br />
rim2 S 79 OpnRim K 0 NoAssign<br />
pad3 T 19 Jazz Hi K 0 NoAssign<br />
rim3 T 24 BrshJzMd K 0 NoAssign<br />
pad4 T 20 Jazz Mid K 0 NoAssign<br />
rim4 T 26 BrshJzFl K 0 NoAssign<br />
pad5 T 22 Jazz Flr K 0 NoAssign<br />
rim5 s 100 BrshAtak K 0 NoAssign<br />
pad6 C 23 RidesizA K 0 NoAssign<br />
rim6 C 24 RidesizB K 0 NoAssign<br />
pad7 C 38 ChinaHi K 0 NoAssign<br />
rim7 C 7 FasCrash K 0 NoAssign<br />
open H 20 H OpnDW K 0 NoAssign<br />
rimOpen H 21 H OpnDWX K 0 NoAssign<br />
close H 20 H OpnDW K 0 NoAssign<br />
rimClose H 21 H OpnDWX K 0 NoAssign<br />
footClose H 31 H Pdl13 K 0 NoAssign<br />
splash H 48 Hpsplsh1 K 0 NoAssign<br />
pad9 C 35 RidB Drk K 0 NoAssign<br />
pad10 P 33 CowB1 K 0 NoAssign<br />
No. 11 Andora<br />
Input <strong>Voice</strong>-1 <strong>Voice</strong>-2<br />
Source Cat./No./Name Cat./No./Name<br />
pad1 K 19 MapleA20 K 36 BDersko1<br />
rim1 P 33 CowB1 K 0 NoAssign<br />
pad2 S 17 LiteSnr1 K 0 NoAssign<br />
rim2 S 79 OpnRim K 0 NoAssign<br />
pad3 T 11 Maple10 K 0 NoAssign<br />
rim3 T 1 Dry1 Hi K 0 NoAssign<br />
pad4 T 13 Maple14 K 0 NoAssign<br />
rim4 T 2 Dry1 Mid K 0 NoAssign<br />
pad5 T 14 Maple16 K 0 NoAssign<br />
rim5 T 4 Dry1 Flr K 0 NoAssign<br />
pad6 C 16 RideDark K 0 NoAssign<br />
rim6 C 21 RideRock K 0 NoAssign<br />
pad7 C 1 CrashB K 0 NoAssign<br />
rim7 C 37 China K 0 NoAssign<br />
open H 23 H OpnL2 K 0 NoAssign<br />
rimOpen H 25 H OpnLK K 0 NoAssign<br />
close H 23 H OpnL2 K 0 NoAssign<br />
rimClose H 23 H OpnL2 K 0 NoAssign<br />
footClose H 32 H PdlDW K 0 NoAssign<br />
splash H 48 Hpsplsh1 K 0 NoAssign<br />
pad9 C 32 RidB Lit K 0 NoAssign<br />
pad10 P 33 CowB1 K 0 NoAssign<br />
No. 12 Room Kit<br />
Input<br />
Source<br />
<strong>Voice</strong>-1<br />
Cat./No./Name<br />
<strong>Voice</strong>-2<br />
Cat./No./Name<br />
pad1 K 19 MapleA20 K 0 NoAssign<br />
rim1 K 0 NoAssign K 0 NoAssign<br />
pad2 S 85 ParadeS K 0 NoAssign<br />
rim2 S 79 OpnRim K 0 NoAssign<br />
pad3 T 75 Room1 Hi K 0 NoAssign<br />
rim3 T 71 ACTomH K 0 NoAssign<br />
pad4 T 76 Room1Mid K 0 NoAssign<br />
rim4 T 72 ACTomM K 0 NoAssign<br />
pad5 T 78 Room1Flr K 0 NoAssign<br />
rim5 T 73 ACTomL K 0 NoAssign<br />
pad6 C 28 SizzlDrk K 0 NoAssign<br />
rim6 C 24 RidesizB K 0 NoAssign<br />
pad7 C 1 CrashB K 0 NoAssign<br />
rim7 C 37 China K 0 NoAssign<br />
open H 23 H OpnL2 K 0 NoAssign<br />
rimOpen H 25 H OpnLK K 0 NoAssign<br />
close H 23 H OpnL2 K 0 NoAssign<br />
rimClose H 23 H OpnL2 K 0 NoAssign<br />
footClose H 32 H PdlDW K 0 NoAssign<br />
splash H 48 Hpsplsh1 K 0 NoAssign<br />
pad9 C 33 Bell A K 0 NoAssign<br />
pad10 P 33 CowB1 K 0 NoAssign<br />
No. 13 (In)<br />
Input <strong>Voice</strong>-1 <strong>Voice</strong>-2<br />
Source Cat./No./Name Cat./No./Name<br />
pad1 K 11 BD NN04C K 0 NoAssign<br />
rim1 K 0 NoAssign K 0 NoAssign<br />
pad2 S 37 Beauty K 0 NoAssign<br />
rim2 S 36 BeatyRim K 0 NoAssign<br />
pad3 T 31 TOMntrlH K 0 NoAssign<br />
rim3 K 0 NoAssign K 0 NoAssign<br />
pad4 T 32 TOMntrlM K 0 NoAssign<br />
rim4 K 0 NoAssign K 0 NoAssign<br />
pad5 T 33 TOMntrlL K 0 NoAssign<br />
rim5 K 0 NoAssign K 0 NoAssign<br />
pad6 C 17 Ridedrk K 0 NoAssign<br />
rim6 C 19 RideLite K 0 NoAssign<br />
pad7 C 6 DeepDRK K 0 NoAssign<br />
rim7 C 41 C Splsh1 K 0 NoAssign<br />
open H 26 H OpnLX1 K 0 NoAssign<br />
rimOpen H 26 H OpnLX1 K 0 NoAssign<br />
close H 11 H TiCls1 K 0 NoAssign<br />
rimClose H 34 H PdlMu K 0 NoAssign<br />
footClose H 38 Hpdlcls1 K 0 NoAssign<br />
splash H 48 Hpsplsh1 K 0 NoAssign<br />
pad9 C 33 Bell A K 0 NoAssign<br />
pad10 P 34 CowB2 K 0 NoAssign<br />
No. 14 In&Out<br />
Input <strong>Voice</strong>-1 <strong>Voice</strong>-2<br />
Source Cat./No./Name Cat./No./Name<br />
pad1 k 1 AnaQuick K 0 NoAssign<br />
rim1 K 0 NoAssign K 0 NoAssign<br />
pad2 s 82 S Gate3 K 0 NoAssign<br />
rim2 s 31 RIMpopr K 0 NoAssign<br />
pad3 e 43 VOLTAGE K 0 NoAssign<br />
rim3 T 1 Dry1 Hi K 0 NoAssign<br />
pad4 e 50 D&FRAG20 K 0 NoAssign<br />
rim4 T 1 Dry1 Hi K 0 NoAssign<br />
pad5 e 33 WINER K 0 NoAssign<br />
rim5 T 1 Dry1 Hi K 0 NoAssign<br />
pad6 L 1 DigiTime K 0 NoAssign<br />
rim6 C 19 RideLite K 0 NoAssign<br />
pad7 E 11 C Crash K 0 NoAssign<br />
rim7 C 41 C Splsh1 K 0 NoAssign<br />
open P 31 CongBe K 0 NoAssign<br />
rimOpen H 26 H OpnLX1 K 0 NoAssign<br />
close P 11 Bongo Hi K 0 NoAssign<br />
rimClose H 34 H PdlMu K 0 NoAssign<br />
footClose P 39 EthWB K 0 NoAssign<br />
splash H 48 Hpsplsh1 K 0 NoAssign<br />
pad9 C 33 Bell A K 0 NoAssign<br />
pad10 P 34 CowB2 K 0 NoAssign<br />
No. 15 HipFunky<br />
Input <strong>Voice</strong>-1 <strong>Voice</strong>-2<br />
Source Cat./No./Name Cat./No./Name<br />
pad1 K 8 BD GMH K 0 NoAssign<br />
rim1 K 0 NoAssign K 0 NoAssign<br />
pad2 S 14 Hip Hop K 0 NoAssign<br />
rim2 S 33 12Soprno K 0 NoAssign<br />
pad3 T 36 Dry2 Mid K 0 NoAssign<br />
rim3 P 6 AnMaracs K 0 NoAssign<br />
pad4 T 37 Dry2 Lo K 0 NoAssign<br />
rim4 P 12 Bongo Lo K 0 NoAssign<br />
pad5 T 38 Dry2 Flr K 0 NoAssign<br />
rim5 P 30 CongaS K 0 NoAssign<br />
pad6 C 23 RidesizA K 0 NoAssign<br />
rim6 C 16 RideDark K 0 NoAssign<br />
pad7 C 9 PaperThn K 0 NoAssign<br />
rim7 C 3 C Crash K 0 NoAssign<br />
open H 26 H OpnLX1 K 0 NoAssign<br />
rimOpen H 26 H OpnLX1 K 0 NoAssign<br />
close H 1 H Cls01 K 0 NoAssign<br />
rimClose H 18 H OPMu K 0 NoAssign<br />
footClose H 38 Hpdlcls1 K 0 NoAssign<br />
splash H 48 Hpsplsh1 K 0 NoAssign<br />
pad9 C 36 RidB Rc K 0 NoAssign<br />
pad10 P 34 CowB2 K 0 NoAssign<br />
No. 16 Dance 1<br />
Input<br />
Source<br />
<strong>Voice</strong>-1<br />
Cat./No./Name<br />
<strong>Voice</strong>-2<br />
Cat./No./Name<br />
pad1 k 7 BDDance2 K 0 NoAssign<br />
rim1 P 35 CowBAn K 0 NoAssign<br />
pad2 s 95 Tekk3 K 0 NoAssign<br />
rim2 s 30 HiFive K 0 NoAssign<br />
pad3 t 21 TEKK 2L K 0 NoAssign<br />
rim3 P 6 AnMaracs K 0 NoAssign<br />
pad4 t 23 TEKK 3H K 0 NoAssign<br />
rim4 P 55 Scrach K 0 NoAssign<br />
pad5 t 24 TEKK 3M K 0 NoAssign<br />
rim5 P 55 Scrach K 0 NoAssign<br />
pad6 C 45 Ride Anl K 0 NoAssign<br />
rim6 C 32 RidB Lit K 0 NoAssign<br />
pad7 C 44 AngCym K 0 NoAssign<br />
rim7 C 41 C Splsh1 K 0 NoAssign<br />
open H 50 H OpnAn K 0 NoAssign<br />
rimOpen P 78 Tambourn K 0 NoAssign<br />
close H 3 H ClsA1 K 0 NoAssign<br />
rimClose H 5 H ClsMu K 0 NoAssign<br />
footClose H 4 H ClsA2 K 0 NoAssign<br />
splash H 48 Hpsplsh1 K 0 NoAssign<br />
pad9 C 32 RidB Lit K 0 NoAssign<br />
pad10 P 33 CowB1 K 0 NoAssign
No. 17 Dance2<br />
Input <strong>Voice</strong>-1 <strong>Voice</strong>-2<br />
Source Cat./No./Name Cat./No./Name<br />
pad1 k 12 BDDance9 K 0 NoAssign<br />
rim1 s 12 AnSStick K 0 NoAssign<br />
pad2 s 17 Dance05 K 0 NoAssign<br />
rim2 s 19 Electrik K 0 NoAssign<br />
pad3 t 41 ElectrcH K 0 NoAssign<br />
rim3 P 56 Shake1 K 0 NoAssign<br />
pad4 t 42 ElectrcM K 0 NoAssign<br />
rim4 P 52 Maracas3 K 0 NoAssign<br />
pad5 t 43 ElectrcL K 0 NoAssign<br />
rim5 P 55 Scrach K 0 NoAssign<br />
pad6 C 45 Ride Anl K 0 NoAssign<br />
rim6 C 32 RidB Lit K 0 NoAssign<br />
pad7 C 44 AngCym K 0 NoAssign<br />
rim7 C 42 C Splsh2 K 0 NoAssign<br />
open H 50 H OpnAn K 0 NoAssign<br />
rimOpen P 78 Tambourn K 0 NoAssign<br />
close H 3 H ClsA1 K 0 NoAssign<br />
rimClose H 5 H ClsMu K 0 NoAssign<br />
footClose H 4 H ClsA2 K 0 NoAssign<br />
splash H 48 Hpsplsh1 K 0 NoAssign<br />
pad9 C 32 RidB Lit K 0 NoAssign<br />
pad10 P 33 CowB1 K 0 NoAssign<br />
No. 18 SoDance<br />
Input <strong>Voice</strong>-1 <strong>Voice</strong>-2<br />
Source Cat./No./Name Cat./No./Name<br />
pad1 k 13 BDlong1 K 19 MapleA20<br />
rim1 K 0 NoAssign K 0 NoAssign<br />
pad2 s 4 Analog H K 0 NoAssign<br />
rim2 s 19 Electrik K 0 NoAssign<br />
pad3 E 15 CoolSA K 0 NoAssign<br />
rim3 T 71 ACTomH K 0 NoAssign<br />
pad4 E 15 CoolSA K 0 NoAssign<br />
rim4 T 72 ACTomM K 0 NoAssign<br />
pad5 E 83 USS t 44 ElectrcF<br />
rim5 T 73 ACTomL K 0 NoAssign<br />
pad6 C 18 Ride’EM K 0 NoAssign<br />
rim6 C 13 C FX02 K 0 NoAssign<br />
pad7 E 2 Ambush K 0 NoAssign<br />
rim7 C 47 HCym2 K 0 NoAssign<br />
open H 49 H OpnAMu K 0 NoAssign<br />
rimOpen H 50 H OpnAn K 0 NoAssign<br />
close H 12 H TiCls2 K 0 NoAssign<br />
rimClose H 51 H OpnLA1 K 0 NoAssign<br />
footClose t 51 ETMooRL K 0 NoAssign<br />
splash H 46 H SplNB K 0 NoAssign<br />
pad9 P 35 CowBAn K 0 NoAssign<br />
pad10 P 33 CowB1 K 0 NoAssign<br />
No. 19 Manh<br />
Input<br />
Source<br />
<strong>Voice</strong>-1<br />
Cat./No./Name<br />
<strong>Voice</strong>-2<br />
Cat./No./Name<br />
pad1 K 6 BD DRY 3 e 39 PEEPER<br />
rim1 K 0 NoAssign K 0 NoAssign<br />
pad2 S 1 Loosy K 0 NoAssign<br />
rim2 S 1 Loosy K 0 NoAssign<br />
pad3 E 36 HipNs K 0 NoAssign<br />
rim3 T 6 DRY GM5 K 0 NoAssign<br />
pad4 e 64 RUNNER K 0 NoAssign<br />
rim4 T 8 DRY GM3 K 0 NoAssign<br />
pad5 e 74 Vocal04 K 0 NoAssign<br />
rim5 T 10 DRY GM1 K 0 NoAssign<br />
pad6 C 45 Ride Anl K 0 NoAssign<br />
rim6 C 20 Rider3 K 0 NoAssign<br />
pad7 C 44 AngCym K 0 NoAssign<br />
rim7 C 43 C FX01 K 0 NoAssign<br />
open H 26 H OpnLX1 K 0 NoAssign<br />
rimOpen H 26 H OpnLX1 K 0 NoAssign<br />
close H 1 H Cls01 K 0 NoAssign<br />
rimClose H 34 H PdlMu K 0 NoAssign<br />
footClose H 38 Hpdlcls1 K 0 NoAssign<br />
splash H 48 Hpsplsh1 K 0 NoAssign<br />
pad9 C 33 Bell A K 0 NoAssign<br />
pad10 P 33 CowB1 K 0 NoAssign<br />
No. 20 D@RK<br />
Input<br />
Source<br />
<strong>Voice</strong>-1<br />
Cat./No./Name<br />
<strong>Voice</strong>-2<br />
Cat./No./Name<br />
pad1 k 12 BDDance9 k 17 Sub2<br />
rim1 K 0 NoAssign K 0 NoAssign<br />
pad2 s 7 AnalogL1 K 0 NoAssign<br />
rim2 s 43 AnaWee K 0 NoAssign<br />
pad3 t 24 TEKK 3M K 0 NoAssign<br />
rim3 T 6 DRY GM5 K 0 NoAssign<br />
pad4 t 25 TEKK 3L K 0 NoAssign<br />
rim4 T 8 DRY GM3 K 0 NoAssign<br />
pad5 e 64 RUNNER K 0 NoAssign<br />
rim5 T 10 DRY GM1 K 0 NoAssign<br />
pad6 C 45 Ride Anl K 0 NoAssign<br />
rim6 C 20 Rider3 K 0 NoAssign<br />
pad7 C 1 CrashB K 0 NoAssign<br />
rim7 C 2 BriteCrs K 0 NoAssign<br />
open H 50 H OpnAn K 0 NoAssign<br />
rimOpen H 26 H OpnLX1 K 0 NoAssign<br />
close H 50 H OpnAn K 0 NoAssign<br />
rimClose H 34 H PdlMu K 0 NoAssign<br />
footClose H 50 H OpnAn K 0 NoAssign<br />
splash H 49 H OpnAMu K 0 NoAssign<br />
pad9 C 33 Bell A K 0 NoAssign<br />
pad10 P 33 CowB1 K 0 NoAssign<br />
No. 21 Oh!No!<br />
Input <strong>Voice</strong>-1 <strong>Voice</strong>-2<br />
Source Cat./No./Name Cat./No./Name<br />
pad1 k 6 BDDance1 K 0 NoAssign<br />
rim1 K 0 NoAssign K 0 NoAssign<br />
pad2 s 57 Eno rim K 0 NoAssign<br />
rim2 s 58 Enotype K 0 NoAssign<br />
pad3 E 58 OrcHt1 K 0 NoAssign<br />
rim3 T 6 DRY GM5 K 0 NoAssign<br />
pad4 E 58 OrcHt1 K 0 NoAssign<br />
rim4 T 8 DRY GM3 K 0 NoAssign<br />
pad5 L 14 SwingnL L 20 FactryLP<br />
rim5 T 10 DRY GM1 K 0 NoAssign<br />
pad6 E 58 OrcHt1 K 0 NoAssign<br />
rim6 C 20 Rider3 K 0 NoAssign<br />
pad7 C 13 C FX02 C 10 ReverseC<br />
rim7 C 13 C FX02 K 0 NoAssign<br />
open E 57 OrchSmsh K 0 NoAssign<br />
rimOpen H 26 H OpnLX1 K 0 NoAssign<br />
close E 10 BuzzyWak K 0 NoAssign<br />
rimClose E 10 BuzzyWak K 0 NoAssign<br />
footClose P 59 SlBell K 0 NoAssign<br />
splash C 48 HCymClsL K 0 NoAssign<br />
pad9 P 55 Scrach K 0 NoAssign<br />
pad10 P 45 HiQ K 0 NoAssign<br />
No. 22 Latin/Tm<br />
Input <strong>Voice</strong>-1 <strong>Voice</strong>-2<br />
Source Cat./No./Name Cat./No./Name<br />
pad1 K 29 BD ROOM5 K0 NoAssign<br />
rim1 K 0 NoAssign K 0 NoAssign<br />
pad2 S 31 MickCJ8S K 0 NoAssign<br />
rim2 S 120 Latinrim K 0 NoAssign<br />
pad3 P 81 TimbH K 0 NoAssign<br />
Preset <strong>Drum</strong> Kit <strong>List</strong><br />
rim3 P 27 CongaMV K 0 NoAssign<br />
pad4 P 82 TimbL K 0 NoAssign<br />
rim4 P 80 Timb K 0 NoAssign<br />
pad5 P 29 CongaO K 0 NoAssign<br />
rim5 P 51 Maracas2 K 0 NoAssign<br />
pad6 C 19 RideLite K 0 NoAssign<br />
rim6 C 20 Rider3 K 0 NoAssign<br />
pad7 C 1 CrashB K 0 NoAssign<br />
rim7 C 2 BriteCrs K 0 NoAssign<br />
open P 2 AgogoH1 K 0 NoAssign<br />
rimOpen H 26 H OpnLX1 K 0 NoAssign<br />
close P 1 XfadeTri K 0 NoAssign<br />
rimClose H 34 H PdlMu K 0 NoAssign<br />
footClose P 33 CowB1 K 0 NoAssign<br />
splash H 1 H Cls01 K 0 NoAssign<br />
pad9 C 33 Bell A K 0 NoAssign<br />
pad10 P 34 CowB2 K 0 NoAssign<br />
No. 23 LatinPer<br />
Input <strong>Voice</strong>-1 <strong>Voice</strong>-2<br />
Source Cat./No./Name Cat./No./Name<br />
pad1 K 1 2HedMed1 K 0 NoAssign<br />
rim1 P 12 Bongo Lo K 0 NoAssign<br />
pad2 P 21 Conga K 0 NoAssign<br />
rim2 P 25 CongaH K 0 NoAssign<br />
pad3 P 81 TimbH K 0 NoAssign<br />
rim3 P 33 CowB1 K 0 NoAssign<br />
pad4 P 82 TimbL K 0 NoAssign<br />
rim4 P 83 TimCas K 0 NoAssign<br />
pad5 P 89 Udo H K 0 NoAssign<br />
rim5 P 70 TablaO K 0 NoAssign<br />
pad6 P 3 AgogoH2 K 0 NoAssign<br />
rim6 P 3 AgogoH2 K 0 NoAssign<br />
pad7 P 38 CuicaL K 0 NoAssign<br />
rim7 C 3 C Crash K 0 NoAssign<br />
open P 21 Conga K 0 NoAssign<br />
rimOpen P 26 CongaM K 0 NoAssign<br />
close P 49 Log L K 0 NoAssign<br />
rimClose P 19 Clvs K 0 NoAssign<br />
footClose P 90 Udo L K 0 NoAssign<br />
splash P 79 Tambrn K 0 NoAssign<br />
pad9 P 86 Triang K 0 NoAssign<br />
pad10 P 11 Bongo Hi K 0 NoAssign<br />
No. 24 Zebulon<br />
Input<br />
Source<br />
<strong>Voice</strong>-1<br />
Cat./No./Name<br />
<strong>Voice</strong>-2<br />
Cat./No./Name<br />
pad1 K 14 SoTight K 0 NoAssign<br />
rim1 K 0 NoAssign K 0 NoAssign<br />
pad2 S 1 Loosy K 0 NoAssign<br />
rim2 S 40 BuzRgRim K 0 NoAssign<br />
pad3 T 79 Room2 Hi K 0 NoAssign<br />
rim3 K 0 NoAssign K 0 NoAssign<br />
pad4 T 80 Room2Mid K 0 NoAssign<br />
rim4 K 0 NoAssign K 0 NoAssign<br />
pad5 T 82 Room2Flr K 0 NoAssign<br />
rim5 K 0 NoAssign K 0 NoAssign<br />
pad6 C 24 RidesizB K 0 NoAssign<br />
rim6 C 33 Bell A K 0 NoAssign<br />
pad7 C 3 C Crash K 0 NoAssign<br />
rim7 C 1 CrashB K 0 NoAssign<br />
open H 29 HHRoKopn K 0 NoAssign<br />
rimOpen H 18 H OPMu K 0 NoAssign<br />
close H 10 H QOpn13 K 0 NoAssign<br />
rimClose H 5 H ClsMu K 0 NoAssign<br />
footClose H 31 H Pdl13 K 0 NoAssign<br />
splash H 48 Hpsplsh1 K 0 NoAssign<br />
pad9 C 32 RidB Lit K 0 NoAssign<br />
pad10 P 33 CowB1 K 0 NoAssign<br />
45
Preset <strong>Drum</strong> Kit <strong>List</strong><br />
46<br />
No. 25 World<br />
Input <strong>Voice</strong>-1 <strong>Voice</strong>-2<br />
Source Cat./No./Name Cat./No./Name<br />
pad1 P 13 Bongo Mu K 0 NoAssign<br />
rim1 P 80 Timb K 0 NoAssign<br />
pad2 P 48 Log H K 0 NoAssign<br />
rim2 P 39 EthWB K 0 NoAssign<br />
pad3 P 29 CongaO K 0 NoAssign<br />
rim3 P 11 Bongo Hi K 0 NoAssign<br />
pad4 P 29 CongaO K 0 NoAssign<br />
rim4 K 0 NoAssign K 0 NoAssign<br />
pad5 P 29 CongaO K 0 NoAssign<br />
rim5 P 48 Log H K 0 NoAssign<br />
pad6 P 80 Timb K 0 NoAssign<br />
rim6 P 80 Timb K 0 NoAssign<br />
pad7 P 25 CongaH K 0 NoAssign<br />
rim7 P 82 TimbL K 0 NoAssign<br />
open P 25 CongaH K 0 NoAssign<br />
rimOpen H 18 H OPMu K 0 NoAssign<br />
close P 30 CongaS K 0 NoAssign<br />
rimClose H 5 H ClsMu K 0 NoAssign<br />
footClose P 30 CongaS K 0 NoAssign<br />
splash H 48 Hpsplsh1 K 0 NoAssign<br />
pad9 P 11 Bongo Hi K 0 NoAssign<br />
pad10 P 24 CongaG K 0 NoAssign<br />
No. 26 Reggae<br />
Input<br />
Source<br />
<strong>Voice</strong>-1<br />
Cat./No./Name<br />
<strong>Voice</strong>-2<br />
Cat./No./Name<br />
pad1 K 7 BD DRY 4 K 0 NoAssign<br />
rim1 P 33 CowB1 K 0 NoAssign<br />
pad2 S 33 12Soprno K 0 NoAssign<br />
rim2 S 110 S SStck2 K 0 NoAssign<br />
pad3 P 81 TimbH K 0 NoAssign<br />
rim3 C 38 ChinaHi K 0 NoAssign<br />
pad4 P 82 TimbL K 0 NoAssign<br />
rim4 P 19 Clvs K 0 NoAssign<br />
pad5 t 32 E Tom5 K 0 NoAssign<br />
rim5 P 90 Udo L K 0 NoAssign<br />
pad6 C 30 SizzlLit K 0 NoAssign<br />
rim6 C 19 RideLite K 0 NoAssign<br />
pad7 C 3 C Crash K 0 NoAssign<br />
rim7 C 41 C Splsh1 K 0 NoAssign<br />
open H 10 H QOpn13 K 0 NoAssign<br />
rimOpen H 26 H OpnLX1 K 0 NoAssign<br />
close H 2 H Cls13 K 0 NoAssign<br />
rimClose H 34 H PdlMu K 0 NoAssign<br />
footClose H 31 H Pdl13 K 0 NoAssign<br />
splash H 47 H Splsht K 0 NoAssign<br />
pad9 C 32 RidB Lit K 0 NoAssign<br />
pad10 P 26 CongaM K 0 NoAssign<br />
No. 27 Tabla<br />
Input <strong>Voice</strong>-1 <strong>Voice</strong>-2<br />
Source Cat./No./Name Cat./No./Name<br />
pad1 P 90 Udo L K 0 NoAssign<br />
rim1 P 2 AgogoH1 K 0 NoAssign<br />
pad2 P 68 TablaM K 0 NoAssign<br />
rim2 P 26 CongaM K 0 NoAssign<br />
pad3 P 69 TablaN K 0 NoAssign<br />
rim3 P 62 Tabla B K 0 NoAssign<br />
pad4 P 70 TablaO K 0 NoAssign<br />
rim4 P 63 Tabla BL K 0 NoAssign<br />
pad5 P 67 TablaH K 0 NoAssign<br />
rim5 P 65 Tabla BV K 0 NoAssign<br />
pad6 P 66 Tabla OV K 0 NoAssign<br />
rim6 C 33 Bell A K 0 NoAssign<br />
pad7 P 89 Udo H K 0 NoAssign<br />
rim7 P 88 Udo F K 0 NoAssign<br />
open P 29 CongaO K 0 NoAssign<br />
rimOpen H 23 H OpnL2 K 0 NoAssign<br />
close P 30 CongaS K 0 NoAssign<br />
rimClose H 1 H Cls01 K 0 NoAssign<br />
footClose P 46 JingBell K 0 NoAssign<br />
splash H 46 H SplNB K 0 NoAssign<br />
pad9 C 33 Bell A K 0 NoAssign<br />
pad10 P 3 AgogoH2 K 0 NoAssign<br />
No. 28 Cocktail<br />
Input<br />
Source<br />
<strong>Voice</strong>-1<br />
Cat./No./Name<br />
<strong>Voice</strong>-2<br />
Cat./No./Name<br />
pad1 T 32 TOMntrlM K 0 NoAssign<br />
rim1 K 0 NoAssign K 0 NoAssign<br />
pad2 S 31 MickCJ8S K 0 NoAssign<br />
rim2 S 74 TrashRIM K 0 NoAssign<br />
pad3 T 19 Jazz Hi K 0 NoAssign<br />
rim3 P 81 TimbH K 0 NoAssign<br />
pad4 T 19 Jazz Hi K 0 NoAssign<br />
rim4 P 81 TimbH K 0 NoAssign<br />
pad5 P 33 CowB1 K 0 NoAssign<br />
rim5 C 39 MinChina K 0 NoAssign<br />
pad6 C 19 RideLite K 0 NoAssign<br />
rim6 C 19 RideLite K 0 NoAssign<br />
pad7 C 41 C Splsh1 K 0 NoAssign<br />
rim7 C 9 PaperThn K 0 NoAssign<br />
open H 27 H OpnMU K 0 NoAssign<br />
rimOpen H 18 H OPMu K 0 NoAssign<br />
close H 8 H ClsTc3 K 0 NoAssign<br />
rimClose H 5 H ClsMu K 0 NoAssign<br />
footClose H 34 H PdlMu K 0 NoAssign<br />
splash P 79 Tambrn K 0 NoAssign<br />
pad9 C 32 RidB Lit K 0 NoAssign<br />
pad10 P 33 CowB1 K 0 NoAssign<br />
No. 29 JamKit99<br />
Input <strong>Voice</strong>-1 <strong>Voice</strong>-2<br />
Source Cat./No./Name Cat./No./Name<br />
pad1 k 17 Sub2 k 30 MtlPoint<br />
rim1 K 0 NoAssign K 0 NoAssign<br />
pad2 S 18 Tosh Sn k 30 MtlPoint<br />
rim2 e 54 DUCKSTER K0 NoAssign<br />
pad3 e 41 D&FRAG11 K 0 NoAssign<br />
rim3 t 28 AnaIndsM K 0 NoAssign<br />
pad4 e 65 RADAMACU K0 NoAssign<br />
rim4 t 27 AnaIndsH K 0 NoAssign<br />
pad5 e 18 JNGBASS8 e 30 SEAMNSTR<br />
rim5 t 30 AnaIndsF K 0 NoAssign<br />
pad6 e 69 WAKX PAD C 10 ReverseC<br />
rim6 C 45 Ride Anl K 0 NoAssign<br />
pad7 e 58 GOWAH K 0 NoAssign<br />
rim7 C 44 AngCym K 0 NoAssign<br />
open H 23 H OpnL2 K 0 NoAssign<br />
rimOpen H 25 H OpnLK K 0 NoAssign<br />
close H 24 H OpnL3 K 0 NoAssign<br />
rimClose H 23 H OpnL2 K 0 NoAssign<br />
footClose H 32 H PdlDW K 0 NoAssign<br />
splash H 48 Hpsplsh1 K 0 NoAssign<br />
pad9 C 33 Bell A K 0 NoAssign<br />
pad10 P 33 CowB1 K 0 NoAssign<br />
No. 30 GoezOn!?<br />
Input <strong>Voice</strong>-1 <strong>Voice</strong>-2<br />
Source Cat./No./Name Cat./No./Name<br />
pad1 k 12 BDDance9 e 20 BDSUBSNK<br />
rim1 K 0 NoAssign K 0 NoAssign<br />
pad2 s 24 Brsh H s 18 Dance06<br />
rim2 s 6 AnalogH1 K 0 NoAssign<br />
pad3 s 3 AnaHit e 22 SPIKER<br />
rim3 T 0 NoAssign K 0 NoAssign<br />
pad4 H 17 HHbrtcls K 0 NoAssign<br />
rim4 T 0 NoAssign K 0 NoAssign<br />
pad5 L 9 SNAPLOOP K0 NoAssign<br />
rim5 T 0 NoAssign K 0 NoAssign<br />
pad6 e 74 Vocal04 K 0 NoAssign<br />
rim6 C 0 NoAssign K 0 NoAssign<br />
pad7 e 53 DOPPLER K 0 NoAssign<br />
rim7 E 33 HandyDad K 0 NoAssign<br />
open H 23 H OpnL2 K 0 NoAssign<br />
rimOpen H 25 H OpnLK K 0 NoAssign<br />
close H 24 H OpnL3 K 0 NoAssign<br />
rimClose H 23 H OpnL2 K 0 NoAssign<br />
footClose H 31 H Pdl13 K 0 NoAssign<br />
splash H 48 Hpsplsh1 K 0 NoAssign<br />
pad9 E 13 CBRadi K 0 NoAssign<br />
pad10 P 33 CowB1 K 0 NoAssign<br />
No. 31 InDaHood<br />
Input <strong>Voice</strong>-1 <strong>Voice</strong>-2<br />
Source Cat./No./Name Cat./No./Name<br />
pad1 K 2 2HedMed2 K 28 BD ROOM2<br />
rim1 K 0 NoAssign K 0 NoAssign<br />
pad2 S 5 Binky s 120 Manycure<br />
rim2 S 28 RIMhipop K 0 NoAssign<br />
pad3 T 1 Dry1 Hi K 0 NoAssign<br />
rim3 T 11 Maple10 K 0 NoAssign<br />
pad4 C 16 RideDark C 29 Sizzler<br />
rim4 C 6 DeepDRK C 18 Ride’EM<br />
pad5 T 3 Dry1 Lo K 0 NoAssign<br />
rim5 T 13 Maple14 K 0 NoAssign<br />
pad6 C 39 MinChina K 0 NoAssign<br />
rim6 C 33 Bell A K 0 NoAssign<br />
pad7 P 41 GONG K 0 NoAssign<br />
rim7 C 11 SoftRoll K 0 NoAssign<br />
open H 24 H OpnL3 K 0 NoAssign<br />
rimOpen H 25 H OpnLK K 0 NoAssign<br />
close H 17 HHbrtcls K 0 NoAssign<br />
rimClose H 23 H OpnL2 K 0 NoAssign<br />
footClose H 31 H Pdl13 K 0 NoAssign<br />
splash H 48 Hpsplsh1 K 0 NoAssign<br />
pad9 C 40 Clusher K 0 NoAssign<br />
pad10 P 33 CowB1 K 0 NoAssign<br />
No. 32 GroovKit<br />
Input<br />
Source<br />
<strong>Voice</strong>-1<br />
Cat./No./Name<br />
<strong>Voice</strong>-2<br />
Cat./No./Name<br />
pad1 K 4 BD DRY 1 K 30 MapleAmb<br />
rim1 K 0 NoAssign K 0 NoAssign<br />
pad2 s 120 Manycure S 8 MapleV65<br />
rim2 S 28 RIMhipop K 0 NoAssign<br />
pad3 T 1 Dry1 Hi K 0 NoAssign<br />
rim3 T 11 Maple10 K 0 NoAssign<br />
pad4 C 16 RideDark C 29 Sizzler<br />
rim4 C 8 FastCras C 38 ChinaHi<br />
pad5 T 3 Dry1 Lo K 0 NoAssign<br />
rim5 T 13 Maple14 K 0 NoAssign<br />
pad6 ● pad song : 90 BsGroov<br />
rim6 C 33 Bell A K 0 NoAssign<br />
pad7 ● pad song : 91 D&B07<br />
rim7 C 11 SoftRoll K 0 NoAssign<br />
open H 24 H OpnL3 K 0 NoAssign<br />
rimOpen H 25 H OpnLK K 0 NoAssign<br />
close H 17 HHbrtcls K 0 NoAssign<br />
rimClose H 23 H OpnL2 K 0 NoAssign<br />
footClose H 31 H Pdl13 K 0 NoAssign<br />
splash H 48 Hpsplsh1 K 0 NoAssign<br />
pad9 C 40 Clusher K 0 NoAssign<br />
pad10 P 33 CowB1 K 0 NoAssign
No. 33 Bs.@Base<br />
Input<br />
Source<br />
<strong>Voice</strong>-1<br />
Cat./No./Name<br />
<strong>Voice</strong>-2<br />
Cat./No./Name<br />
pad1 k 32 Walkik k 18 Sub3<br />
rim1 K 0 NoAssign K 0 NoAssign<br />
pad2 s 118 Shotgun e 8 JNGLSN8<br />
rim2 s 80 S Gate1 K 0 NoAssign<br />
pad3 ● pad song : 89 HornGrv<br />
rim3 K 0 NoAssign K 0 NoAssign<br />
pad4 L 4 LITELOOP K 0 NoAssign<br />
rim4 K 0 NoAssign K 0 NoAssign<br />
pad5 ● pad song : 88 Jko?Naa<br />
rim5 K 0 NoAssign K 0 NoAssign<br />
pad6 e 34 DOOMED K 0 NoAssign<br />
rim6 e 37 MOSHER K 0 NoAssign<br />
pad7 e 45 GRONKER K 0 NoAssign<br />
rim7 e 66 UMK 47 K 0 NoAssign<br />
open H 18 H OPMu K 0 NoAssign<br />
rimOpen H 18 H OPMu K 0 NoAssign<br />
close H 5 H ClsMu K 0 NoAssign<br />
rimClose H 5 H ClsMu K 0 NoAssign<br />
footClose H 34 H PdlMu K 0 NoAssign<br />
splash H 48 Hpsplsh1 K 0 NoAssign<br />
pad9 C 32 RidB Lit K 0 NoAssign<br />
pad10 P 33 CowB1 K 0 NoAssign<br />
No. 34 JungleNY<br />
Input <strong>Voice</strong>-1 <strong>Voice</strong>-2<br />
Source Cat./No./Name Cat./No./Name<br />
pad1 k 10 BDdance5 K 0 NoAssign<br />
rim1 K 0 NoAssign K 0 NoAssign<br />
pad2 e 82 FRAG05 K 0 NoAssign<br />
rim2 e 38 D&BFRAG8 K0 NoAssign<br />
pad3 e 12 JNGBASS2 K0 NoAssign<br />
rim3 K 0 NoAssign K 0 NoAssign<br />
pad4 e 81 FRAG11 K 0 NoAssign<br />
rim4 K 0 NoAssign K 0 NoAssign<br />
pad5 e 41 D&FRAG11 K0 NoAssign<br />
rim5 K 0 NoAssign K 0 NoAssign<br />
pad6 C 24 RidesizB K 0 NoAssign<br />
rim6 e 36 TRANQUL K 0 NoAssign<br />
pad7 e 36 TRANQUL K 0 NoAssign<br />
rim7 e 36 TRANQUL K 0 NoAssign<br />
open H 30 HHopen#1 K 0 NoAssign<br />
rimOpen H 18 H OPMu K 0 NoAssign<br />
close H 17 HHbrtcls K 0 NoAssign<br />
rimClose H 5 H ClsMu K 0 NoAssign<br />
footClose H 36 H PdTit K 0 NoAssign<br />
splash H 43 FTsplRK2 K 0 NoAssign<br />
pad9 C 32 RidB Lit K 0 NoAssign<br />
pad10 P 33 CowB1 K 0 NoAssign<br />
No. 35 Snapkit<br />
Input <strong>Voice</strong>-1 <strong>Voice</strong>-2<br />
Source Cat./No./Name Cat./No./Name<br />
pad1 e 16 JNGBASS6 K0 NoAssign<br />
rim1 K 0 NoAssign K 0 NoAssign<br />
pad2 e 56 PANKY K 0 NoAssign<br />
rim2 e 84 FRAG20 K 0 NoAssign<br />
pad3 e 24 PULSAR2 K 0 NoAssign<br />
rim3 K 0 NoAssign K 0 NoAssign<br />
pad4 e 40 WYZOG K 0 NoAssign<br />
rim4 K 0 NoAssign K 0 NoAssign<br />
pad5 L 9 SNAPLOOP K0 NoAssign<br />
rim5 K 0 NoAssign K 0 NoAssign<br />
pad6 E 44 INDride K 0 NoAssign<br />
rim6 e 64 RUNNER K 0 NoAssign<br />
pad7 e 39 PEEPER K 0 NoAssign<br />
rim7 e 55 TAMTAMY K 0 NoAssign<br />
open H 50 H OpnAn K 0 NoAssign<br />
rimOpen H 18 H OPMu K 0 NoAssign<br />
close H 3 H ClsA1 K 0 NoAssign<br />
rimClose H 5 H ClsMu K 0 NoAssign<br />
footClose H 36 H PdTit K 0 NoAssign<br />
splash H 43 FTsplRK2 K 0 NoAssign<br />
pad9 C 32 RidB Lit K 0 NoAssign<br />
pad10 P 33 CowB1 K 0 NoAssign<br />
No. 36 JumpBack<br />
Input <strong>Voice</strong>-1 <strong>Voice</strong>-2<br />
Source Cat./No./Name Cat./No./Name<br />
pad1 K 30 MapleAmb K 0 NoAssign<br />
rim1 K 0 NoAssign K 0 NoAssign<br />
pad2 e 3 JNGLSN3 K 0 NoAssign<br />
rim2 S 28 RIMhipop K 0 NoAssign<br />
pad3 E 80 Tung<strong>Drum</strong> K 0 NoAssign<br />
rim3 K 0 NoAssign K 0 NoAssign<br />
pad4 ● pad song : 83 Photon<br />
rim4 K 0 NoAssign K 0 NoAssign<br />
pad5 ● pad song : 84 Ganoosh<br />
rim5 K 0 NoAssign K 0 NoAssign<br />
pad6 E 45 INDride2 K 0 NoAssign<br />
rim6 e 42 SCRUNCH K0 NoAssign<br />
pad7 C 4 C CrshAC K 0 NoAssign<br />
rim7 C 3 C Crash K 0 NoAssign<br />
open H 29 HHRoKopn K0 NoAssign<br />
rimOpen H 18 H OPMu K 0 NoAssign<br />
close H 2 H Cls13 K 0 NoAssign<br />
rimClose H 5 H ClsMu K 0 NoAssign<br />
footClose H 36 H PdTit K 0 NoAssign<br />
splash H 43 FTsplRK2 K 0 NoAssign<br />
pad9 C 32 RidB Lit K 0 NoAssign<br />
pad10 P 33 CowB1 K 0 NoAssign<br />
No. 37 MondoKit<br />
Input<br />
Source<br />
<strong>Voice</strong>-1<br />
Cat./No./Name<br />
<strong>Voice</strong>-2<br />
Cat./No./Name<br />
pad1 K 33 BD MONDO K0 NoAssign<br />
rim1 K 0 NoAssign K 0 NoAssign<br />
pad2 e 5 JNGLSN5 K 0 NoAssign<br />
rim2 S 118 SnareLes K 0 NoAssign<br />
pad3 t 8 Ana 2flr K 0 NoAssign<br />
rim3 K 0 NoAssign K 0 NoAssign<br />
pad4 ● pad song : 79 Peaceout<br />
rim4 K 0 NoAssign K 0 NoAssign<br />
pad5 ● pad song : 80 Kinetic<br />
rim5 K 0 NoAssign K 0 NoAssign<br />
pad6 C 36 RidB Rc K 0 NoAssign<br />
rim6 e 37 MOSHER K 0 NoAssign<br />
pad7 C 5 CrshDRK K 0 NoAssign<br />
rim7 E 40 INDcrash K 0 NoAssign<br />
open H 25 H OpnLK K 0 NoAssign<br />
rimOpen H 18 H OPMu K 0 NoAssign<br />
close H 7 H ClsTc1 K 0 NoAssign<br />
rimClose H 5 H ClsMu K 0 NoAssign<br />
footClose H 41 Hpdlcls4 K 0 NoAssign<br />
splash H 43 FTsplRK2 K 0 NoAssign<br />
pad9 C 32 RidB Lit K 0 NoAssign<br />
pad10 P 33 CowB1 K 0 NoAssign<br />
No. 38 Torqkit<br />
Input<br />
Source<br />
<strong>Voice</strong>-1<br />
Cat./No./Name<br />
<strong>Voice</strong>-2<br />
Cat./No./Name<br />
pad1 K 24 2HeadHi K 0 NoAssign<br />
rim1 K 0 NoAssign K 0 NoAssign<br />
pad2 e 48 JNGSN11 K 0 NoAssign<br />
rim2 e 8 JNGLSN8 K 0 NoAssign<br />
pad3 T 19 Jazz Hi K 0 NoAssign<br />
Preset <strong>Drum</strong> Kit <strong>List</strong><br />
rim3 K 0 NoAssign K 0 NoAssign<br />
pad4 ● pad song : 85 Babaj<br />
rim4 K 0 NoAssign K 0 NoAssign<br />
pad5 ● pad song : 86 NxtGene.<br />
rim5 K 0 NoAssign K 0 NoAssign<br />
pad6 C 18 Ride’EM K 0 NoAssign<br />
rim6 e 59 DEEPDIVE K 0 NoAssign<br />
pad7 P 21 Conga K 0 NoAssign<br />
rim7 C 40 Clusher K 0 NoAssign<br />
open H 50 H OpnAn K 0 NoAssign<br />
rimOpen H 18 H OPMu K 0 NoAssign<br />
close H 3 H ClsA1 K 0 NoAssign<br />
rimClose H 5 H ClsMu K 0 NoAssign<br />
footClose H 36 H PdTit K 0 NoAssign<br />
splash H 43 FTsplRK2 K 0 NoAssign<br />
pad9 C 32 RidB Lit K 0 NoAssign<br />
pad10 P 33 CowB1 K 0 NoAssign<br />
No. 38 Mystery<br />
Input <strong>Voice</strong>-1 <strong>Voice</strong>-2<br />
Source Cat./No./Name Cat./No./Name<br />
pad1 k 24 BDNIN1 K 0 NoAssign<br />
rim1 K 0 NoAssign K 0 NoAssign<br />
pad2 e 76 FRAG14 e 82 FRAG05<br />
rim2 e 1 JNGLSN1 K 0 NoAssign<br />
pad3 ● pad song : 93 Suspens2<br />
rim3 K 0 NoAssign K 0 NoAssign<br />
pad4 ● pad song : 95 0<br />
rim4 K 0 NoAssign K 0 NoAssign<br />
pad5 ● pad song : 94 Suspens3<br />
rim5 K 0 NoAssign K 0 NoAssign<br />
pad6 C 30 SizzlLit K 0 NoAssign<br />
rim6 C 19 RideLite K 0 NoAssign<br />
pad7 C 3 C Crash C 37 China<br />
rim7 C 1 CrashB C 37 China<br />
open H 18 H OPMu K 0 NoAssign<br />
rimOpen H 18 H OPMu K 0 NoAssign<br />
close H 5 H ClsMu K 0 NoAssign<br />
rimClose H 5 H ClsMu K 0 NoAssign<br />
footClose H 34 H PdlMu K 0 NoAssign<br />
splash H 48 Hpsplsh1 K 0 NoAssign<br />
pad9 C 32 RidB Lit K 0 NoAssign<br />
pad10 e 46 SEMILOOP K0 NoAssign<br />
No. 40 GM std 1<br />
Input<br />
Source<br />
<strong>Voice</strong>-1<br />
Cat./No./Name<br />
<strong>Voice</strong>-2<br />
Cat./No./Name<br />
pad1 K 17 BDaftty1 K 0 NoAssign<br />
rim1 K 0 NoAssign K 0 NoAssign<br />
pad2 S 1 Loosy K 0 NoAssign<br />
rim2 S 79 OpnRim K 0 NoAssign<br />
pad3 T 6 DRY GM5 K 0 NoAssign<br />
rim3 T 6 DRY GM5 K 0 NoAssign<br />
pad4 T 7 DRY GM4 K 0 NoAssign<br />
rim4 T 7 DRY GM4 K 0 NoAssign<br />
pad5 T 9 DRY GM2 K 0 NoAssign<br />
rim5 T 9 DRY GM2 K 0 NoAssign<br />
pad6 C 30 SizzlLit K 0 NoAssign<br />
rim6 C 19 RideLite K 0 NoAssign<br />
pad7 C 3 C Crash K 0 NoAssign<br />
rim7 C 1 CrashB K 0 NoAssign<br />
open H 18 H OPMu K 0 NoAssign<br />
rimOpen H 18 H OPMu K 0 NoAssign<br />
close H 5 H ClsMu K 0 NoAssign<br />
rimClose H 5 H ClsMu K 0 NoAssign<br />
footClose H 34 H PdlMu K 0 NoAssign<br />
splash H 48 Hpsplsh1 K 0 NoAssign<br />
pad9 C 32 RidB Lit K 0 NoAssign<br />
pad10 P 33 CowB1 K 0 NoAssign<br />
47
Preset <strong>Drum</strong> Kit <strong>List</strong><br />
No. 41 GM std 2<br />
Input <strong>Voice</strong>-1 <strong>Voice</strong>-2<br />
Source Cat./No./Name Cat./No./Name<br />
pad1 K 19 MapleA20 K 0 NoAssign<br />
rim1 K 0 NoAssign K 0 NoAssign<br />
pad2 S 98 Steel65 K 0 NoAssign<br />
rim2 S 91 OpnRimC K 0 NoAssign<br />
pad3 T 6 DRY GM5 K 0 NoAssign<br />
rim3 T 6 DRY GM5 K 0 NoAssign<br />
pad4 T 7 DRY GM4 K 0 NoAssign<br />
rim4 T 7 DRY GM4 K 0 NoAssign<br />
pad5 T 9 DRY GM2 K 0 NoAssign<br />
rim5 T 9 DRY GM2 K 0 NoAssign<br />
pad6 C 30 SizzlLit K 0 NoAssign<br />
rim6 C 19 RideLite K 0 NoAssign<br />
pad7 C 3 C Crash K 0 NoAssign<br />
rim7 C 1 CrashB K 0 NoAssign<br />
open H 18 H OPMu K 0 NoAssign<br />
rimOpen H 18 H OPMu K 0 NoAssign<br />
close H 5 H ClsMu K 0 NoAssign<br />
rimClose H 5 H ClsMu K 0 NoAssign<br />
footClose H 34 H PdlMu K 0 NoAssign<br />
splash H 48 Hpsplsh1 K 0 NoAssign<br />
pad9 C 32 RidB Lit K 0 NoAssign<br />
pad10 P 33 CowB1 K 0 NoAssign<br />
No. 42 GM room<br />
Input <strong>Voice</strong>-1 <strong>Voice</strong>-2<br />
Source Cat./No./Name Cat./No./Name<br />
pad1 K 34 BDbasc2 K 0 NoAssign<br />
rim1 K 0 NoAssign K 0 NoAssign<br />
pad2 S 1 Loosy K 0 NoAssign<br />
rim2 S 79 OpnRim K 0 NoAssign<br />
pad3 T 52 Room 5 K 0 NoAssign<br />
rim3 T 52 Room 5 K 0 NoAssign<br />
pad4 T 53 Room 4 K 0 NoAssign<br />
rim4 T 53 Room 4 K 0 NoAssign<br />
pad5 T 55 Room 2 K 0 NoAssign<br />
rim5 T 55 Room 2 K 0 NoAssign<br />
pad6 C 30 SizzlLit K 0 NoAssign<br />
rim6 C 19 RideLite K 0 NoAssign<br />
pad7 C 3 C Crash K 0 NoAssign<br />
rim7 C 1 CrashB K 0 NoAssign<br />
open H 18 H OPMu K 0 NoAssign<br />
rimOpen H 18 H OPMu K 0 NoAssign<br />
close H 5 H ClsMu K 0 NoAssign<br />
rimClose H 5 H ClsMu K 0 NoAssign<br />
footClose H 34 H PdlMu K 0 NoAssign<br />
splash H 48 Hpsplsh1 K 0 NoAssign<br />
pad9 C 32 RidB Lit K 0 NoAssign<br />
pad10 P 33 CowB1 K 0 NoAssign<br />
No. 43 GM rock<br />
Input <strong>Voice</strong>-1 <strong>Voice</strong>-2<br />
Source Cat./No./Name Cat./No./Name<br />
pad1 K 22 Bdvman K 0 NoAssign<br />
rim1 K 0 NoAssign K 0 NoAssign<br />
pad2 S 97 Brass55 S 47 RIMnatrl<br />
rim2 S 79 OpnRim K 0 NoAssign<br />
pad3 T 58 Rock 5 K 0 NoAssign<br />
rim3 T 58 Rock 5 K 0 NoAssign<br />
pad4 T 59 Rock 4 K 0 NoAssign<br />
rim4 T 59 Rock 4 K 0 NoAssign<br />
pad5 T 61 Rock 2 K 0 NoAssign<br />
rim5 T 61 Rock 2 K 0 NoAssign<br />
pad6 C 30 SizzlLit K 0 NoAssign<br />
rim6 C 19 RideLite K 0 NoAssign<br />
pad7 C 3 C Crash K 0 NoAssign<br />
rim7 C 1 CrashB K 0 NoAssign<br />
48<br />
open H 18 H OPMu K 0 NoAssign<br />
rimOpen H 18 H OPMu K 0 NoAssign<br />
close H 5 H ClsMu K 0 NoAssign<br />
rimClose H 5 H ClsMu K 0 NoAssign<br />
footClose H 34 H PdlMu K 0 NoAssign<br />
splash H 48 Hpsplsh1 K 0 NoAssign<br />
pad9 C 32 RidB Lit K 0 NoAssign<br />
pad10 P 33 CowB1 K 0 NoAssign<br />
No. 44 GM elec.<br />
Input<br />
Source<br />
<strong>Voice</strong>-1<br />
Cat./No./Name<br />
<strong>Voice</strong>-2<br />
Cat./No./Name<br />
pad1 K 42 BD GateM K 0 NoAssign<br />
rim1 K 0 NoAssign K 0 NoAssign<br />
pad2 S 104 Gate K 0 NoAssign<br />
rim2 S 79 OpnRim K 0 NoAssign<br />
pad3 t 32 E Tom5 K 0 NoAssign<br />
rim3 t 32 E Tom5 K 0 NoAssign<br />
pad4 t 33 E Tom4 K 0 NoAssign<br />
rim4 t 33 E Tom4 K 0 NoAssign<br />
pad5 t 35 E Tom2 K 0 NoAssign<br />
rim5 t 35 E Tom2 K 0 NoAssign<br />
pad6 C 30 SizzlLit K 0 NoAssign<br />
rim6 C 19 RideLite K 0 NoAssign<br />
pad7 C 3 C Crash K 0 NoAssign<br />
rim7 C 1 CrashB K 0 NoAssign<br />
open H 18 H OPMu K 0 NoAssign<br />
rimOpen H 18 H OPMu K 0 NoAssign<br />
close H 5 H ClsMu K 0 NoAssign<br />
rimClose H 5 H ClsMu K 0 NoAssign<br />
footClose H 34 H PdlMu K 0 NoAssign<br />
splash H 48 Hpsplsh1 K 0 NoAssign<br />
pad9 C 32 RidB Lit K 0 NoAssign<br />
pad10 P 33 CowB1 K 0 NoAssign<br />
No. 45 GM anal.<br />
Input <strong>Voice</strong>-1 <strong>Voice</strong>-2<br />
Source Cat./No./Name Cat./No./Name<br />
pad1 k 1 AnaQuick K 0 NoAssign<br />
rim1 K 0 NoAssign K 0 NoAssign<br />
pad2 s 13 Dance K 0 NoAssign<br />
rim2 S 79 OpnRim K 0 NoAssign<br />
pad3 t 10 AnlgTom5 K 0 NoAssign<br />
rim3 t 10 AnlgTom5 K 0 NoAssign<br />
pad4 t 11 AnlgTom4 K 0 NoAssign<br />
rim4 t 11 AnlgTom4 K 0 NoAssign<br />
pad5 t 13 AnlgTom2 K 0 NoAssign<br />
rim5 t 13 AnlgTom2 K 0 NoAssign<br />
pad6 C 30 SizzlLit K 0 NoAssign<br />
rim6 C 19 RideLite K 0 NoAssign<br />
pad7 C 44 AngCym K 0 NoAssign<br />
rim7 C 1 CrashB K 0 NoAssign<br />
open H 49 H OpnAMu K 0 NoAssign<br />
rimOpen H 49 H OpnAMu K 0 NoAssign<br />
close H 3 H ClsA1 K 0 NoAssign<br />
rimClose H 3 H ClsA1 K 0 NoAssign<br />
footClose H 4 H ClsA2 K 0 NoAssign<br />
splash H 48 Hpsplsh1 K 0 NoAssign<br />
pad9 C 32 RidB Lit K 0 NoAssign<br />
pad10 P 35 CowBAn K 0 NoAssign<br />
No. 46 GM jazz<br />
Input <strong>Voice</strong>-1 <strong>Voice</strong>-2<br />
Source Cat./No./Name Cat./No./Name<br />
pad1 K 2 2HedMed2 K 0 NoAssign<br />
rim1 K 0 NoAssign K 0 NoAssign<br />
pad2 S 17 LiteSnr1 K 0 NoAssign<br />
rim2 S 79 OpnRim K 0 NoAssign<br />
pad3 T 19 Jazz Hi K 0 NoAssign<br />
rim3 T 19 Jazz Hi K 0 NoAssign<br />
pad4 T 20 Jazz Mid K 0 NoAssign<br />
rim4 T 20 Jazz Mid K 0 NoAssign<br />
pad5 T 22 Jazz Flr K 0 NoAssign<br />
rim5 T 22 Jazz Flr K 0 NoAssign<br />
pad6 C 30 SizzlLit K 0 NoAssign<br />
rim6 C 19 RideLite K 0 NoAssign<br />
pad7 C 3 C Crash K 0 NoAssign<br />
rim7 C 1 CrashB K 0 NoAssign<br />
open H 18 H OPMu K 0 NoAssign<br />
rimOpen H 18 H OPMu K 0 NoAssign<br />
close H 5 H ClsMu K 0 NoAssign<br />
rimClose H 5 H ClsMu K 0 NoAssign<br />
footClose H 34 H PdlMu K 0 NoAssign<br />
splash H 48 Hpsplsh1 K 0 NoAssign<br />
pad9 C 32 RidB Lit K 0 NoAssign<br />
pad10 P 33 CowB1 K 0 NoAssign<br />
No. 47 GM brush<br />
Input <strong>Voice</strong>-1 <strong>Voice</strong>-2<br />
Source Cat./No./Name Cat./No./Name<br />
pad1 K 2 2HedMed2 K 0 NoAssign<br />
rim1 K 0 NoAssign K 0 NoAssign<br />
pad2 s 113 BrSwH* K 0 NoAssign<br />
rim2 S 79 OpnRim K 0 NoAssign<br />
pad3 T 23 BrshJzHi K 0 NoAssign<br />
rim3 T 23 BrshJzHi K 0 NoAssign<br />
pad4 T 24 BrshJzMd K 0 NoAssign<br />
rim4 T 24 BrshJzMd K 0 NoAssign<br />
pad5 T 26 BrshJzFl K 0 NoAssign<br />
rim5 T 26 BrshJzFl K 0 NoAssign<br />
pad6 C 30 SizzlLit K 0 NoAssign<br />
rim6 C 19 RideLite K 0 NoAssign<br />
pad7 C 3 C Crash K 0 NoAssign<br />
rim7 C 1 CrashB K 0 NoAssign<br />
open H 18 H OPMu K 0 NoAssign<br />
rimOpen H 18 H OPMu K 0 NoAssign<br />
close H 5 H ClsMu K 0 NoAssign<br />
rimClose H 5 H ClsMu K 0 NoAssign<br />
footClose H 34 H PdlMu K 0 NoAssign<br />
splash H 48 Hpsplsh1 K 0 NoAssign<br />
pad9 C 32 RidB Lit K 0 NoAssign<br />
pad10 P 33 CowB1 K 0 NoAssign<br />
No. 48 GM class<br />
Input<br />
Source<br />
<strong>Voice</strong>-1<br />
Cat./No./Name<br />
<strong>Voice</strong>-2<br />
Cat./No./Name<br />
pad1 K 7 BD DRY 4 K 0 NoAssign<br />
rim1 K 0 NoAssign K 0 NoAssign<br />
pad2 S 85 ParadeS K 0 NoAssign<br />
rim2 S 79 OpnRim K 0 NoAssign<br />
pad3 T 15 Lite Hi K 0 NoAssign<br />
rim3 T 15 Lite Hi K 0 NoAssign<br />
pad4 T 16 Lite Mid K 0 NoAssign<br />
rim4 T 16 Lite Mid K 0 NoAssign<br />
pad5 T 18 Lite Flr K 0 NoAssign<br />
rim5 T 18 Lite Flr K 0 NoAssign<br />
pad6 C 48 HCymClsL K 0 NoAssign<br />
rim6 C 47 HCym2 K 0 NoAssign<br />
pad7 C 50 HCymOpnL K0 NoAssign<br />
rim7 C 51 HCymOpnM K0 NoAssign<br />
open H 18 H OPMu K 0 NoAssign<br />
rimOpen H 18 H OPMu K 0 NoAssign<br />
close H 5 H ClsMu K 0 NoAssign<br />
rimClose H 5 H ClsMu K 0 NoAssign<br />
footClose H 34 H PdlMu K 0 NoAssign<br />
splash H 48 Hpsplsh1 K 0 NoAssign<br />
pad9 C 32 RidB Lit K 0 NoAssign<br />
pad10 P 33 CowB1 K 0 NoAssign
Preset Song <strong>List</strong><br />
Song <strong>Drum</strong> Kit<br />
No. Song Name No. Kit Name<br />
1 Latiniq 1 Acoustic<br />
2 ZEBULON 24 Zebulon<br />
3 JungleNY 34 JungleNY<br />
4 BigDadd 40 GM std 1<br />
5 Metizo 40 GM std 1<br />
6 Muses 40 GM std 1<br />
7 Vee Bop 10 BeBop<br />
8 FeelNite 41 GM std 2<br />
9 Straight 40 GM std 1<br />
10 Samba 1 40 GM std 1<br />
11 Samba 2 40 GM std 1<br />
12 8beat 1 40 GM std 1<br />
13 8beat 2 40 GM std 1<br />
14 16 beat 40 GM std 1<br />
15 HdRck 1 43 GM rock<br />
16 HdRck 2 43 GM rock<br />
17 HdRck 3 43 GM rock<br />
18 HdRck 4 43 GM rock<br />
19 SlowRock 40 GM std 1<br />
20 Ballad1 40 GM std 1<br />
21 Ballad2 40 GM std 1<br />
22 Ballad3 40 GM std 1<br />
23 Ballad4 46 GM jazz<br />
24 Ballad5 45 GM anal.<br />
25 Ballad6 40 GM std 1<br />
26 Ballad7 45 GM anal.<br />
27 Ballad8 40 GM std 1<br />
28 RckPop1 40 GM std 1<br />
29 RckPop2 46 GM jazz<br />
30 RckPop3 43 GM rock<br />
31 RckPop4 46 GM jazz<br />
32 RckPop5 42 GM room<br />
33 RckPop6 46 GM jazz<br />
34 Dance 1 17 Dance 2<br />
35 Dance 2 45 GM anal.<br />
Trigger Setup <strong>List</strong><br />
No. Name Description<br />
Song <strong>Drum</strong> Kit<br />
No. Song Name No. Kit Name<br />
36 Dance 3 45 GM anla.<br />
37 Dance 4 44 GM elec.<br />
38 Latin 1 40 GM std 1<br />
39 Latin 2 23 LatinPer<br />
40 Latin 3 23 LatinPer<br />
41 Latin 4 40 GM std 1<br />
42 Latin 5 40 GM std 1<br />
43 Latin 6 40 GM std 1<br />
44 Latin 7 40 GM std 1<br />
45 Latin 8 46 GM jazz<br />
46 Latin 9 40 GM std 1<br />
47 Latin10 46 GM jazz<br />
48 Jazz 1 46 GM jazz<br />
49 Jazz 2 46 GM jazz<br />
50 Jazz 3 40 GM std 1<br />
51 Jazz 4 1 Acoustic<br />
52 Jazz 5 52 GM brush<br />
53 Jazz 6 1 Acoustic<br />
54 Jazz 7 47 GM brush<br />
55 R&B 1 40 GM std 1<br />
56 R&B 2 46 GM jazz<br />
57 R&B 3 42 GM room<br />
58 R&B 4 44 GM elec.<br />
59 R&B 5 46 GM jazz<br />
60 R&B 6 46 GM jazz<br />
61 R&B 7 40 GM std 1<br />
62 R’n’R 1 40 GM std 1<br />
63 R’n’R 2 40 GM std 1<br />
64 Funk 1 40 GM std 1<br />
65 Funk 2 40 GM std 1<br />
66 Funk 3 40 GM std 1<br />
67 Funk 4 40 GM std 1<br />
68 Funk 5 40 GM std 1<br />
69 Reggae1 42 GM room<br />
70 Reggae2 45 GM anal.<br />
1 Medium Normal Setting<br />
2 Dynamic Wide Dynamic Range however, sensitive to vibration.<br />
3 Easy Averages irregular trigger levels, produces smoother sound<br />
4 HH->BD A hi-hat controller connected to the trigger input jack “1 KICK” can be used as a kick pedal.<br />
5 DT10/20 Use with DT10/20 drum triggers attached to acoustic drums.<br />
6 LatinSet Setting for Latin Set<br />
7 Exp Set Setting for Expansion Set<br />
● : Kits used with the pad songs<br />
Song <strong>Drum</strong> Kit<br />
No. Song Name No. Kit Name<br />
71 World 1 42 GM room<br />
72 World 2 40 GM std 1<br />
73 Shuffle1 40 GM std 1<br />
74 Shuffle2 40 GM std 1<br />
75 Fusion 1 40 GM std 1<br />
76 Fusion 2 40 GM std 1<br />
77 ShamanX 37 MondoKit ●<br />
78 Stepoff 37 MondoKit ●<br />
79 TriTown 37 MondoKit ●<br />
80 Peaceout 37 MondoKit ●<br />
81 Kinetic 36 JumpBack ●<br />
82 Thwak! 36 JumpBack ●<br />
83 Pulsar 36 JumpBack ●<br />
84 Photon 36 JumpBack ●<br />
85 Ganoosh 38 TorqKit ●<br />
86 Babaj 38 TorqKit ●<br />
87 NxtGene. 31 InDaHood<br />
88 PadBass 33 Bs.@Base ●<br />
89 Jko?Naa 33 Bs.@Base ●<br />
90 HornGrv 32 GroovKit ●<br />
91 BsGroov 32 GroovKit ●<br />
92 D&B07 39 Mistery ●<br />
93 Suspens1 39 Mistery ●<br />
94 Suspens2 39 Mistery ●<br />
95 Suspens3 39 Mistery ●<br />
49
MIDI Data Format<br />
1. Channel Message<br />
When the [2-2. Channel 10 Propgram Change/Channel Event Receive] (P. 30)<br />
in the utility mode is set to “10=off”, the DTXPRESS will not receive channel<br />
message for MIDI channel 10.<br />
1.1 Key On Key Off<br />
Sends and receives data.<br />
Receive note range: C-2 to G8<br />
Velocity range: 1 to 127 (note on only)<br />
1.2 Control Change<br />
All control change data for sequencer functions can be received and transmitted.<br />
The following lists the tone generator functions and drum trigger functions.<br />
50<br />
1.2.1 bank select MSB-0<br />
Sends and receives data.<br />
data=0:normal voice<br />
data=127:drum voice<br />
The data will not be processed unless program change data is received.<br />
1.2.2 modulation (No. 1)<br />
Receives only.<br />
1.2.3 foot controller (No. 4)<br />
Sends and receives data.<br />
1.2.3 data entry (No. 6)<br />
Receives only. Used to specify RPN data.<br />
1.2.5 main volume (No. 7)<br />
Sends and receives data.<br />
1.2.6 pan (No. 10)<br />
Sends and receives data.<br />
0 is the far left of a stereo image and 127 is the far right of a stereo image.<br />
1.2.7 expression (No. 11)<br />
Receives only.<br />
1.2.8 hold1 (No. 64)<br />
Receives only.<br />
1.2.9 harmonic content (No. 71)<br />
Receives only.<br />
1.2.10 release time (No. 72)<br />
Receives only.<br />
1.2.11 attack time (No. 73)<br />
Receives only.<br />
1.2.12 brightness (No. 74)<br />
Receives only.<br />
1.2.13 portamento control (No. 84)<br />
Receives only.<br />
1.2.14 effect 1 depth (No. 91)<br />
Receives only. Only effects the reverb send level.<br />
1.2.15 data increment/decrement (No. 100/101)<br />
Receives only.<br />
1.2.16 RPN<br />
00/00 pitch bend sensitivity: Receive only.<br />
00/01 fine tuning: Receive only.<br />
00/02 coarse tuning: Receive only.<br />
7F/7F NULL: Receive only.<br />
1.3 Channel Mode Message<br />
All channel mode messages are received only.<br />
1.3.1 all sound off (No. 120)<br />
Mutes all the sounds currently playing through the specified channel.<br />
1.3.2 reset all controllers (No. 121)<br />
Sets the following controller values back to its initial value:<br />
pitch bend, modulation, expression, hold1, portament control,<br />
RPN number<br />
1.3.3 all note off (No. 123)<br />
Turns off all the notes of the specified channel currently on.<br />
They will however, not be muted unless “hold 1” is turned off.<br />
1.3.4 omni off (No. 124)<br />
Executes the same process as “all note off”.<br />
1.3.5 omni on (No. 125)<br />
Executes the same process as “all note off”.<br />
1.3.6 mono (No. 126)<br />
Executes the same process as “all sound off”.<br />
1.3.7 poly (No. 127)<br />
Executes the same process as “all sound off”.<br />
1.4 Program Change<br />
When the [2-3. Receive Propgram Change/System Exclusive Messages] (P. 30)<br />
in the utility mode is set to “PC=off”, the DTXPRESS will not receive program<br />
change data.<br />
When the [2-2. Channel 10 Propgram Change/Channel Event Receive] (P. 30)<br />
in the utility mode is set to “10PC=off”, the DTXPRESS will not receive MIDI<br />
channel 10 program change data.<br />
1.5 Pitch Bend<br />
Sends and receives data.<br />
1.6 Channel Aftertouch<br />
Does not sends or receive data.<br />
1.7 Polyphonic Aftertouch<br />
Does not sends or receive data.<br />
2. System Exclusive Message<br />
When the [2-3. Receive Propgram Change/System Exclusive Messages] (P. 30)<br />
in the utility mode is set to “SySex=off”, the DTXPRESS will not receive system<br />
exclusive messages.<br />
The DTXPRESS will not receive system exclusive messages that do not match<br />
the device number set in the “DevNo=” of the [2-6. Device Number, Local Control]<br />
(P. 31) in the utility mode.
2.1 Parameter Change<br />
2.1.1 GM system ON<br />
F0 7E 7F 09 01 F7<br />
Sets all the data except the MIDI master tuning data to its initial value.<br />
Sends and receives data.<br />
2.1.2 XG system ON<br />
F0 43 1n 4C 00 00 7E 00 F7<br />
“n” stands for device number.<br />
Executes the same process as GM system ON.<br />
Receives only.<br />
2.1.3 identify request<br />
F0 7E 0n 06 01 F7<br />
“n” stands for device number.<br />
After receiving, the identify reply is transmitted.<br />
Receives only.<br />
2.1.4 MIDI master volume<br />
F0 7F 7F 04 01 XX mm F7<br />
Ignores “XX”. “mm” is the volume.<br />
Receives only.<br />
2.1.5 MIDI master tune<br />
F0 43 1n 27 30 00 00 mm ll cc F7<br />
“n” stands for device number.<br />
The values of “mm(MSnible)” and “II(LSnible)”—128 is used for 1 cent unit<br />
when tuning.<br />
Receives only.<br />
2.2 Bulk Dump<br />
Sends and receives data. All the data except the system data is converted into<br />
1 or 2 byte ASCII characters and transmitted.<br />
• DTXPRESS bulk dump common message.<br />
F0 43 7D Xn ss ss 44 54 58 4C(“DTXL”) tt tt tt tt ii ii jj jj dataBytes<br />
csum F7<br />
tt tt tt tt This displays the ID of the bulk type. 4 characters of ASCII<br />
code.<br />
ss ss data bytes (from model ID to data) MS7bit, LS7bit<br />
ii ii data packet index number MS7bit, LS7bit<br />
If the data size exceeds 4096, the total is divided into F0-F7<br />
packets, the packet index number will start at 00 01 (0001)<br />
increasing by 1 for each successive packet. The last packet<br />
is 7F 7F (3FFF).<br />
When the data size is less than 4096, it will be 00 00 (0000).<br />
jj jj object number MS7bit, LS7bit<br />
Object number. In the DTXPRESS system only 1 article exists,<br />
that will become 7F 7F (3FFF).<br />
csum indicates the 7bit of the 2’s complement of the sum of the<br />
data from the model ID (ss ss) to data Bytes.<br />
2.2.1 system<br />
F0 43 7D 0n ss ss 44 54 58 4C(“DTXL”) 53 59 53 54(“SYST”)<br />
00 00 7F 7F data csum F7<br />
2.2.2 map<br />
F0 43 7D 0n ss ss 44 54 58 4C(“DTXL”) 55 4D 41 50(“UMAP”)<br />
00 00 7F 7F data csum F7<br />
2.2.3 drumkit<br />
F0 43 7D 0n ss ss 44 54 58 4C(“DTXL”) 44 4B 49 54(“DKIT”)<br />
00 00 jj jj data csum F7<br />
jj jj Indicated by MS7bit, LS7bit. This number derived from the<br />
user drum kit number by counting from “0”. In the case of the<br />
edit buffer, it is 7F 7F (3FFF).<br />
2.2.4 trigger<br />
F0 43 7D 0n ss ss 44 54 58 4C(“DTXL”) 54 52 49 47(“TRIG”)<br />
00 00 jj jj data csum F7<br />
jj jj The user trigger’s number MS7bit, LS7bit.<br />
7F 7F specifies the edit buffer<br />
2.2.5 song<br />
F0 43 7D 0n ss ss 44 54 58 4C(“DTXL”) 53 4F 4E 47(“SONG”)<br />
ii ii jj jj data2 csum F7<br />
jj jj The user song number’s MS7bit, LS7bit.<br />
7F 7F specifies the current song.<br />
data 2 Divides the original data into the 4 bits MSnibble, LSnibble,<br />
and converts 1 byte data to 2 bytes.<br />
2.3 Dump Request<br />
Receives only.<br />
Transmits the corresponding bulk dump.<br />
F0 43 7D 2n 44 54 58 4C(“DTXL”) tt tt tt tt jj jj F7<br />
jj jj object number MS7bit, LS7bit<br />
Object number. In the DTXPRESS system only 1 article exists,<br />
that will become 7F 7F (3FFF).<br />
The object number contains the number that specifies the<br />
drum kit number, etc.<br />
Only one article exists, system data or edit buffer data, etc.,<br />
that appoints 7F 7F (3FFF).<br />
However, 7F 7F does not correspond in the case of song<br />
data.<br />
3. System common message<br />
3.1 Select a song<br />
f3 nn<br />
“nn” stands for song number.<br />
Receives only.<br />
4. Realtime message<br />
Sends and receives data.<br />
MIDI Data Format<br />
4.1 timing clock<br />
Synchronizes with the timing clock received when the Sync mode in the utility<br />
mode’s [3-6. Sync Mode] (P. 33) is set to “ext” or “auto”.<br />
4.2 start, continue, stop<br />
When the [3-4. MIDI Control] (P. 33) in the utility mode is set to “MIDI Control=off”,<br />
the DTXPRESS will not receive start, continue and stop.<br />
4.3 active sensing<br />
Once active sensing data has been received, if no MIDI data is subsequently<br />
received for longer than an interval of approximately 300 msec, the DTXPRESS<br />
will mute all the sounds.<br />
Send the messages within an interval of approximately 300 msec.<br />
51
YAMAHA [ <strong>Drum</strong> Trigger Module ] Date:5-Mar-1999<br />
Model DTXPRESS MIDI Implementation Chart Version : 1.0<br />
Function ...<br />
Transmitted Recognized Remarks<br />
Basic Default 1 - 16 1 - 16 memorized<br />
Channel Changed 1 - 16 1 - 16<br />
Default x 3<br />
Mode Messages x 3<br />
Altered ************** x<br />
Note 0 - 127 0 - 127<br />
Number : True voice 0 - 127 0 - 127<br />
Velocity Note ON o 9nH,v=1-127 o v=1-127<br />
Note OFF x 9nH,v=0 x<br />
After Key's x x<br />
Touch Ch's x x<br />
Pitch Bender x o 7 bit resolution<br />
0,4,7,10,32 o o<br />
1,6,11,64 x o<br />
71,72,73 x o<br />
74,84,91 x o<br />
100,101 x o<br />
Control<br />
Change<br />
Prog o 0 - 127 o 0 - 127<br />
Change : True # **************<br />
System Exclusive o o<br />
System : Song Pos. x x<br />
: Song Sel. x o<br />
Common : Tune x x<br />
System :Clock o o<br />
Real Time :Commands o o<br />
Aux :All Sound Off x o<br />
:Reset All Cntrls x o<br />
:Local ON/OFF o o<br />
:All Notes OFF x o(123-127)<br />
Mes- :Active Sense o o<br />
sages:Reset x x<br />
Mode 1 : OMNI ON, POLY Mode 2 : OMNI ON, MONO o : Yes<br />
Mode 3 : OMNI OFF, POLY Mode 4 : OMNI OFF, MONO x : No
DRUMKIT BLANK CHART<br />
Rev Type Rev Time Rev Master Return Volume Rev Send HH Sens Song Sel Tempo Sel<br />
<strong>Drum</strong>kit Name<br />
<strong>Voice</strong> No. Volume Pan Tune C Tune F Layer Balance Decay Filter Note No. Channel Gate Time X Fade Rev Send Alt Group Key Assign Hold Mode Keyoff Function Song No. Song Repeat Song Mode Rim to Pad<br />
Category<br />
pad1<br />
rim1<br />
pad2<br />
rim2<br />
pad3<br />
rim3<br />
pad4<br />
rim4<br />
pad5<br />
rim5<br />
pad6<br />
rim6<br />
pad7<br />
rim7<br />
open<br />
rimOpen<br />
close<br />
rimClose<br />
footClose<br />
splash<br />
pad9<br />
pad10<br />
TRIGGER SETUP BLANK CHART<br />
Inc Dec Input Excng<br />
Setup Name<br />
Type Gain Min Vel VelCurve SelfRej Rejection Spec.Rej In SPec.Rej Level<br />
IN 1<br />
IN 2<br />
IN 3<br />
IN 4<br />
IN 5<br />
IN 6<br />
IN 7<br />
IN 8<br />
IN 9<br />
IN 10<br />
Channel sw pc msb lsb vol pan<br />
1<br />
2<br />
3<br />
4<br />
5<br />
6<br />
7<br />
8<br />
9<br />
10<br />
11<br />
12<br />
13<br />
14<br />
15<br />
16
V372430 Printed in Japan<br />
DTX Information http://www.yamaha.co.jp/english/product/drum/dtx/index.html


![Premere il pulsante [SONG] - Yamaha](https://img.yumpu.com/50419553/1/184x260/premere-il-pulsante-song-yamaha.jpg?quality=85)

