Manage My Time tab - UCLA - Payroll Services
Manage My Time tab - UCLA - Payroll Services
Manage My Time tab - UCLA - Payroll Services

You also want an ePaper? Increase the reach of your titles
YUMPU automatically turns print PDFs into web optimized ePapers that Google loves.
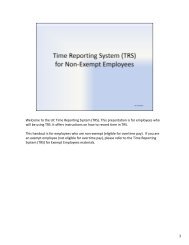
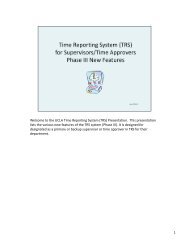
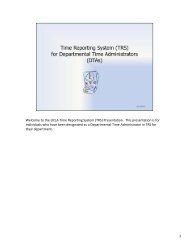
Welcome to the UC <strong>Time</strong> Reporting System (TRS). This presentation is for employees who<br />
will be using TRS. It offers instructions on how to record work hours and leave usage in<br />
TRS.<br />
1
TRS is an online web‐based time reporting system approved by the Office of the President.<br />
Some benefits of TRS:<br />
• Eliminates paper timesheets –itcan never be lost or destroyed<br />
• Easier for you to record work time<br />
• Easier for you to record non‐productive leave time (vacation, sick, jury duty, etc.)<br />
• Easier for your supervisor to review and approve your timesheet<br />
• Automatically computes additional work time based upon UC <strong>Time</strong> and Attendance<br />
rules, such as overtime, shift differential and holiday pay<br />
• You can use any internet accessible device to logon (computer, smartphone, <strong>tab</strong>let,<br />
etc.)<br />
• Since TRS is a web‐based timesheet, you can access TRS anywhere, 24 hours a day,<br />
7 days a week<br />
Note: If you have any questions regarding TRS, please contact your supervisor or<br />
departmental personnel for assistance.<br />
3
There are 3 main identified user roles in the <strong>Time</strong> Reporting System (TRS)<br />
1. Employee –you must complete a timesheet for all time worked and leave usage<br />
taken. You have the option to save, edit or submit a timesheet.<br />
2. Supervisor/<strong>Time</strong> Approver (Primary and Backup) –are responsible to review,<br />
submit, return, or edit timesheets.<br />
3. Departmental <strong>Time</strong> Administrator (DTA) – responsibilities include: assigning<br />
primary and backup supervisors or time approvers for all job assignments.<br />
Submit timesheet data to the IDTC roster via TRS. Lastly they have the<br />
responsibility of returning a timesheet (as applicable) back to the<br />
supervisor/time approver for correction or changes, if needed.<br />
4
TRS Deadlines for Employees<br />
All employees should refer to the TRS Payday Calendar. The calendar lists the TRS<br />
deadlines. It is extremely important that you are aware of the timesheet submission<br />
deadlines to ensure that you are paid in a timely manner.<br />
The calendar can be found on the TRS Resources page at www.payroll.ucla.edu.<br />
How to interpret the calendar:<br />
1. Pay Period –The begin and end of the period that you are being paid for. This column<br />
also includes University Holidays and the W‐2 address update deadline date.<br />
2. Pay Day –the date on which payment is received.<br />
3. TRS Employee Deadline –the last date and time for you to submit your timesheet to<br />
your supervisor/time approver for that pay period.<br />
4. Last day to update by noon… ‐ the last date and time you can log into At Your <strong>Services</strong><br />
Online (AYSO) or Fidelity (for 403B only) to make changes/updates that will be reflected<br />
in that paycheck.<br />
Example: Joe wants to change his tax exemptions for the 08/15 /12 paycheck. He must<br />
make the change in AYSO by noon on 08/08/12 in order for the change to appear on the<br />
08/15 paycheck.<br />
5
There are several ways to access the <strong>Time</strong> Reporting System (TRS) link and information.<br />
Go to www.payroll.ucla.edu and select one of the following:<br />
1. TRS Resources page<br />
2. Quick Links – links directly to the TRS logon page<br />
6
3. On the left navigation, select “Web Applications”. On the Web Applications page, scroll<br />
to Employee Web Applications, select the <strong>Time</strong> Reporting System “GO” button to link<br />
directly to the TRS logon page.<br />
7
<strong>Time</strong> Reporting System Resources Page<br />
To access the resource page, select the TRS graphic icon from the main <strong>Payroll</strong> <strong>Services</strong><br />
page.<br />
The TRS Resources page offers you helpful information regarding TRS such as:<br />
• TRS logon page<br />
• TRS deadline calendars<br />
• On‐demand demos of TRS<br />
• General information on TRS<br />
8
• <strong>UCLA</strong> Employees ‐ Login using your <strong>UCLA</strong> logon (aka BOL) and password. See Getting a<br />
<strong>UCLA</strong> Logon ID at http://map.ais.ucla.edu/go/1000813 for information on how to create<br />
a login or reset your <strong>UCLA</strong> password.<br />
• UCOP Employees –Login using the Single Sign On logon (same logon to access Outlook)<br />
and password.<br />
Note: If you cannot logon to TRS, please contact your Departmental <strong>Time</strong> Administrator<br />
(DTA) for assistance.<br />
9
Once on the TRS main page select the “Employees” link. This link will take you to the online<br />
timesheet.<br />
You can also choose to select the “TRS Resources” link to find information such as:<br />
• On‐demand demos of TRS<br />
• TRS deadline calendars<br />
• General TRS information<br />
10
<strong>Manage</strong> <strong>My</strong> <strong>Time</strong> <strong>tab</strong><br />
Upon logging in you will be on the “<strong>Manage</strong> <strong>My</strong> <strong>Time</strong>” <strong>tab</strong>.<br />
The “<strong>Manage</strong> <strong>My</strong> <strong>Time</strong>” <strong>tab</strong> is split into two sub <strong>tab</strong>s:<br />
1. Enter Current <strong>Time</strong>sheet (Default View)<br />
2. Review Past <strong>Time</strong>sheets<br />
11
Enter Current <strong>Time</strong>sheet sub <strong>tab</strong><br />
The “Enter Current <strong>Time</strong>sheet” sub <strong>tab</strong> layout is divided into 6 sections:<br />
Section 1: <strong>Time</strong>sheet Modifications – displays any timesheets that your<br />
supervisor/time approver may have modified (edited) for you. See slide 35 for more<br />
details on <strong>Time</strong>sheet Modifications.<br />
Section 2: Past Unsubmitted <strong>Time</strong>sheets – displays any prior pay period timesheets<br />
that you have created and are awaiting your final submission.<br />
Note: You will receive alerts reminding you of overdue timesheets, if any, displayed in a<br />
highlighted yellow text box.<br />
Section 3: Open <strong>Time</strong>sheets ‐ This section displays your timesheets for the current pay<br />
period. If you have multiple job assignments, TRS will display multiple timesheets for<br />
each job assignment.<br />
Section 2 and 3 displays:<br />
1. View <strong>Time</strong>sheet icon<br />
2. Pay period begin and end dates<br />
3. Basic job assignment information (department/ job assignment title/<br />
timesheet identifier (job nickname)*<br />
4. <strong>Time</strong>sheet status –the current status of your timesheet. See slide 15 for<br />
details on the <strong>Time</strong>sheet status codes<br />
*<strong>Time</strong>sheet Identifier –this is a description or nickname the DTA can assign to<br />
help you identify which timesheet to log hours onto. See slide 16 for more<br />
details.<br />
12
The “Enter Current <strong>Time</strong>sheet” sub <strong>tab</strong> layout continued:<br />
Section 4: Create Past Pay Periods <strong>Time</strong>sheet –Use when you need to create a<br />
timesheet for a past pay period, select a date range from the drop‐down list or<br />
enter a pay period begin date or end date. Once a date has been selected, click<br />
on “Create” to generate a new timesheet for a past pay period. See slide 36 for<br />
more details on how to create a past timesheet.<br />
Section 5: Leave Balances‐ Vacation, Vacation Max, Sick, Comp and PTO<br />
balances are displayed. Balances are pulled from the Personnel <strong>Payroll</strong> System<br />
(PPS) and may not reflect late time adjustments, usage or accumulation since<br />
the last pay period.<br />
Section 6: Current Overtime Compensation Method (Non‐Exempt Employees<br />
only) –this section indicates if you will received payment or accrue<br />
compensation time for overtime hours worked.<br />
Available methods:<br />
Payment –all overtime hours worked will be paid<br />
Compensation <strong>Time</strong> Off –all overtime hours worked will be accrued and<br />
recorded as Comp hours<br />
13
TRS Icons<br />
TRS has several icons that will help you navigate the system:<br />
• View <strong>Time</strong>sheet (<strong>Time</strong>sheet Function) – select this icon when you want to open and<br />
view a timesheet<br />
• Delete – select this icon when you need to delete an entry<br />
• Tracking Function (Workflow) – select this icon when you want to track the *status of<br />
the timesheet. The workflow will include the date and time of each status. See slide<br />
38 for more details on the workflow.<br />
• Recall <strong>Time</strong>sheet – select this icon to have TRS return the timesheet back to you in<br />
order to make adjustments or corrections. See slide 34 for more details on the recall<br />
function.<br />
*See slide 15 for a complete list of TRS status codes.<br />
14
<strong>Time</strong>sheet Status Codes<br />
You can track the status of your timesheet once you have created and entered time on it. The<br />
timesheet status can be found in several sections of TRS:<br />
• On the “<strong>Manage</strong> <strong>My</strong> <strong>Time</strong>” <strong>tab</strong>.<br />
• <strong>Time</strong>sheet ‐ see slides 18 or 24 for an example.<br />
• Review Past <strong>Time</strong>sheets <strong>tab</strong> –see slide 37 for an example.<br />
• <strong>Time</strong>sheet Workflow –see slide 38 for an example.<br />
<strong>Time</strong>sheet Status Codes:<br />
• COMPLETED –TRS processed the timesheet successfully without errors<br />
• NONE –you have not opened, saved time on, or submitted the timesheet<br />
• PPS ERROR –one or more of the entries submitted to TRS failed with an error response<br />
• SAVED –you have entered time and saved the timesheet<br />
• RECALLED BY EMPLOYEE – you have requested that TRS return the timesheet<br />
back to you<br />
• RETURNED BY SUPERVISOR –your supervisor has returned the timesheet back to you to<br />
edit<br />
• SUBMITTED TO SUPERVISOR –you have submitted the timesheet to your supervisor for<br />
approval<br />
• SUBMITTED TO DTA –your supervisor has approved the timesheet and submitted it to the<br />
DTA<br />
• SUBMITTED TO PPS –the DTA has reviewed the timesheet and submitted it to the IDTC<br />
roster for processing<br />
• SUBMITTED TO PPS (LX) –the DTA indicated that the time was processed via EDLR (LX)<br />
transaction<br />
15
Multiple <strong>Time</strong>sheets<br />
TRS will recognize if you have multiple job assignments and will automatically create<br />
timesheets for each job assignment.<br />
The <strong>Time</strong>sheet Identifier (job assignment nickname) is a description or nickname the DTA<br />
can assign (if requested) to help you identify which timesheet to log hours onto.<br />
It is important for you to communicate with your supervisor or Departmental <strong>Time</strong><br />
Administrator (DTA) to understand which timesheet to log hours onto.<br />
In the example above, the employee has two job assignments.<br />
Amy Paycheck works for Dept. A, as an Admin Specialist in PC Support. She also<br />
works in Dept. B, as an Assistant III, on the Front Desk. She splits her 8 hour day<br />
equally (4 hours on each job). Amy will report 4 hours per day on the timesheet for<br />
the Front Desk and will report 4 hours per day on the PC Support timesheet.<br />
16
To access a timesheet click on the “View <strong>Time</strong>sheet” icon.<br />
17
Bi‐weekly <strong>Time</strong>sheet View<br />
If you are paid biweekly, a biweekly timesheet calendar is displayed:<br />
<strong>Time</strong>sheet Layout:<br />
1. Reminder notification: Reminder of when the timesheet should be submitted to your<br />
supervisor.<br />
2. Your Personal Information:<br />
• Name and ID number<br />
• Pay Period –the begin and end dates of the pay period for the timesheet<br />
• Basic job assignment information – department/title code name/timesheet identifier<br />
3. Status – current status of the timesheet. See slide 15 for a list of the status codes.<br />
4. <strong>Time</strong>sheet Calendar –the timesheet will display a work calendar for the two week pay period.<br />
Weekends and university holidays are shaded a different color.<br />
5. Leave Balances – Leave balances as indicated in the Personnel <strong>Payroll</strong> System (PPS).<br />
6. <strong>Time</strong>sheet Totals – displays productive (work hours) and non‐productive hours (e.g. vacation,<br />
sick, etc.).<br />
7. <strong>Time</strong>sheet Work Schedule –if setup by the DTA, unique work schedules are displayed. Work<br />
schedules are only es<strong>tab</strong>lished for employees who work an 9/80 or 4/40 Alternate Work<br />
Schedule or for Patient Care Technical Unit (EX) employees. See slides 29‐32 for more details.<br />
8. <strong>Time</strong>sheet Comments (optional) –You can enter comments. Comments entered will be<br />
viewed by your supervisor and DTA.<br />
9. Error/Warning –this area displays any errors and warning messages that may occur when<br />
saving or submitting the timesheet.<br />
10. Save/Submit buttons. See slide 33 for more details.<br />
18
Biweekly Employees ‐ How to Add Work Hours to <strong>Time</strong>sheet<br />
1. To enter work time onto the timesheet, select the day you want to add time to.<br />
2. Click on “Add”.<br />
A drop‐down box will display a list of available entries.<br />
TRS Entries:<br />
Repeated Hours –use this entry to repeat hours across a selected range of dates. See<br />
slide 27 and 28 for more details.<br />
Work Hrs. –use this entry to record actual time worked.<br />
Vacation –use this entry to record vacation time taken.<br />
Sick –use this entry to record sick time taken.<br />
PTO (paid time off) –use this entry to record PTO taken.<br />
Comp<strong>Time</strong> (used) –use this entry to record comp time taken.<br />
Jury –use this entry to record time off for jury duty.<br />
Voting –use this entry to record time off for voting.<br />
LWOP –use this entry to record Leave Without Pay time off.<br />
See slide 25 for details on how to report time off.<br />
19
Bi‐weekly Employees –How to Add Work Hours to <strong>Time</strong>sheet continued:<br />
3. A pop‐up screen will appear requesting the following information:<br />
Clock In: <strong>Time</strong> you started your work shift<br />
Lunch Out: <strong>Time</strong> you initiated a lunch break (leave blank if you did not take a lunch break)<br />
Lunch In: <strong>Time</strong> you returned to work from the lunch break (leave blank if you did not take<br />
a lunch break)<br />
Clock Out: <strong>Time</strong> your work shift ended<br />
When you enter hours be sure to enter in the format hh:mm (ex. 11:27) and change the<br />
am/pm text as applicable.<br />
4. Select “Add to <strong>Time</strong> Sheet” to add the reported time to the timesheet.<br />
5. Save the timesheet.<br />
You may also click on the “Delete” icon to remove any information that might have been entered in<br />
error.<br />
Using the UC <strong>Time</strong> and Attendance policy, TRS will compute the total hours for the day to the<br />
nearest quarter of the hour.<br />
Example: <strong>Time</strong> In: 8:08 am<br />
Lunch Out: 12:00 pm Lunch In: 1:00 pm<br />
<strong>Time</strong> Out: 5:00 pm<br />
TRS will calculate the total work hours as 7.75 hours.<br />
* Refer to slides 27‐28 for instructions on how to report work time for consecutive days.<br />
20
How to Add a New Shift (additional shifts):<br />
You can include additional shifts to a timesheet if you work multiple shifts on the same day for the<br />
same department and job assignment*.<br />
For example: Your first shift is from 8 am to 11 am (1 st shift). You return to work for a second<br />
shift of 2:30 pm to 5:00 pm (2 nd shift).<br />
To add an additional shift(s):<br />
1. Record the 1 st shift as normal and add to the time sheet. See slides 19 and 20 for details.<br />
2. Select “Add” again on the same day.<br />
3. A drop down box with the available TRS entries will appear. Select “Work Hrs”.<br />
4. To add a new <strong>Time</strong> In/Out Hours row, select “New Shift”.<br />
5. Enter the new shift time. When you enter hours be sure to enter in the format hh:mm and<br />
change the am/pm text as applicable.<br />
6. Click “Add to <strong>Time</strong> Sheet” to add the new shift time to the timesheet.<br />
7. Save the timesheet.<br />
8. The total hours for all shifts for the day will appear on the timesheet. You should review<br />
the<strong>Time</strong> In/Out Details to ensure that all shifts are recorded properly.<br />
* Do not use the “ New Shift” feature if you have multiple job assignments. You will have a separate<br />
timesheet for each department/job assignment and should record the time accordingly. The “ New<br />
Shift” feature should only be used if you work an additional shift(s) in the same department with<br />
the same job assignment.<br />
You may also click on the “Delete” icon to remove any information that might have been entered in<br />
error.<br />
21
Monthly <strong>Time</strong>sheet – How to Add Work Hours to <strong>Time</strong>sheet:<br />
Amonthly timesheet will not immediately go to the timesheet view upon selecting the<br />
“View <strong>Time</strong>sheet” icon. Instead, you will be asked if you have any exception hours to<br />
report for the period.<br />
Exception hours (aka non‐productive time) includes:<br />
• Vacation<br />
• Sick<br />
• Jury duty<br />
• Leave Without Pay (LWOP)<br />
If you have no exception hours to report for the month, select “No” and continue on to the<br />
next screen.<br />
22
Monthly <strong>Time</strong>sheet (No Leave to Report)<br />
When you select “No” on the previous screen TRS will take you to this screen and you will<br />
be asked to finalize the selection by saving or submitting the timesheet.<br />
Layout:<br />
<strong>Time</strong>sheet Layout:<br />
1. Reminder notification: Reminder of when the timesheet should be submitted to your<br />
supervisor.<br />
2. Your Personal Information:<br />
• Name and ID number<br />
• Pay Period –the begin and end dates of the pay period for the timesheet<br />
• Basic job assignment information – department/title code name/timesheet<br />
identifier (job assignment nickname)<br />
3. Status –current status of the timesheet. See slide 15 for a list of the status codes.<br />
4. Leave Balances –Leave balances as indicated in the Personnel <strong>Payroll</strong> System (PPS).<br />
5. <strong>Time</strong>sheet Work Schedule –if setup by the DTA, unique work schedules are displayed.<br />
Works schedules are only es<strong>tab</strong>lished for employees who work an 9/80 or 4/40<br />
Alternate Work Schedule. See slides 29 and 30 for more details.<br />
6. <strong>Time</strong>sheet Comments (optional) –You can enter comments. Comments entered will<br />
be viewed by your supervisor and DTA.<br />
7. Save/Submit buttons. See slide 33 for more details.<br />
8. If at anytime you wish to change your selection and change the answer to the<br />
question, you can click on the “Reset” button to reset the response. Clicking on the<br />
reset button will take you back to the previous screen.<br />
23
Monthly <strong>Time</strong>sheet (Leave to Report)<br />
Answering “Yes” will open the timesheet view and allow you to enter the exception hours you wish<br />
to report for the period.<br />
<strong>Time</strong>sheet Layout:<br />
1. Reminder notification: Reminder of when the timesheet should be submitted to your<br />
supervisor.<br />
2. Your Personal Information:<br />
• Name and ID number<br />
• Pay Period –the begin and end dates of the pay period for the timesheet<br />
• Basic job assignment information – department/title code name/timesheet identifier<br />
(job assignment nickname)<br />
3. Status – current status of the timesheet. See slide 15 for a list of the status codes.<br />
4. <strong>Time</strong>sheet Calendar –the timesheet will display a work calendar for the monthly pay period.<br />
Weekends and university holidays are shaded a different color.<br />
5. Leave Balances – Leave balances as indicated in the Personnel <strong>Payroll</strong> System (PPS).<br />
6. <strong>Time</strong>sheet Totals – displays any non‐productive hours reported (e.g. vacation, sick,).<br />
7. <strong>Time</strong>sheet Work Schedule –if setup by the DTA, unique work schedules are displayed. Works<br />
schedules are only es<strong>tab</strong>lished for employees who work an 9/80 or 4/40 Alternate Work<br />
Schedule. See slides 29 and 30 for more details.<br />
8. <strong>Time</strong>sheet Comments (optional) –You can enter comments. Comments entered will be<br />
viewed by your supervisor and DTA.<br />
9. Error/Warning –this area displays any errors and warning messages that may occur when<br />
saving or submitting the timesheet.<br />
10. Save/Submit buttons. See slide 33 for more details.<br />
24
How to Report Non‐Productive <strong>Time</strong> (<strong>Time</strong> Off)<br />
You can report TRS to report non‐productive time off on the timesheet. Non‐productive<br />
time includes: vacation, sick, comp time used, paid time off, jury duty, voting time off, and<br />
Leave Without Pay (LWOP).<br />
To report non‐productive time off:<br />
1. Click on “Add…” for the day you where out<br />
2. Select the desired leave type from the drop‐down list<br />
3. The leave type selected will then be displayed on the selected date. Enter the number<br />
of hours you wish to report for the leave type. <strong>Time</strong> off should be entered to the<br />
nearest quarter hour (i.e. 8.0,7.75,6.5, etc.).<br />
4. Save the timesheet.<br />
The <strong>Time</strong>sheet Totals ‐ will display a running totals of all hours worked (bi‐weekly only)<br />
and time off types and totals.<br />
Refer to slides 27‐28 for instructions on how to repeat time off for consecutive days.<br />
You may also click on the “Delete” icon to remove any information that might have been<br />
entered in error.<br />
25
Other Administrative Leave <strong>Time</strong><br />
Sometimes you may take departmental approved administrative leave time away from the<br />
job to:<br />
• donate blood* (Blood <strong>Time</strong> administrative leave is only available at <strong>UCLA</strong>)<br />
• telecommute<br />
• attend a seminar, conference, or class<br />
TRS does not have entry codes for these types of administrative leave time however,<br />
approved leave should be indicated in the comments.<br />
To report approved time away do the following:<br />
1. Add regular work time as normal. See slides 19 and 20 for more details.<br />
2. In the comments section indicate the date and time away as applicable.<br />
Example: Joe took 2 hours away to donate blood on 06/14/12. He also attended an<br />
approved seminar on 06/19/12. He would indicate in the comments section these dates<br />
and times.<br />
* When you donate blood at the <strong>UCLA</strong> Blood and Platelet Center, do not forget to turn in<br />
the “Certificate of Donation“ form to your supervisor or departmental personnel office to<br />
ensure that you receive the 4 hours of administrative leave credit.<br />
26
How to Repeat Hours for a Selected Date Range<br />
You may work the same shift everyday and would like to copy these hours across a selected<br />
date range. “Repeat Hours” is a copy function that allows you to record repeated time for a<br />
selected date range. You can use the “Report Hours” feature to record work hours (bi‐<br />
weekly employee only) and non‐productive time off. For example, you need to report two<br />
consecutive weeks (80 hours) of vacation used in the pay period.<br />
To use the “Repeat Hours” function:<br />
1. Click “Add” on the first date in the date range you want to repeat.<br />
2. Select “Repeat Hours” from the drop‐down list.<br />
3. A pop‐up box will appear.<br />
27
How to Repeat Hours for a Selected Date Range continued<br />
1. Click on “Add” and select from the drop‐down list the type of hours to be reported<br />
(work hours, vacation, sick, etc.).<br />
2. Click inside of the “From Date” box to generate a calendar for the pay period. Select<br />
the first date in the date range.<br />
3. Click inside of the “To Date” box to generate a calendar for the pay period. Select the<br />
end date in the date range.<br />
4. Skip the “Hour” field if you are reporting work hours. If reporting non‐productive time<br />
enter the amount of hours to record each day. Note: By default TRS will exclude<br />
weekends and holidays in the date range selected. To include weekends and/or<br />
holidays in the date range indicated, simply remove the check mark by clicking on it.<br />
5. If reporting work hours apop‐up screen will appear requesting the following<br />
information:<br />
Clock In: <strong>Time</strong> your work shift started<br />
Lunch Out: <strong>Time</strong> you initiated a lunch break, if taken<br />
Lunch In: <strong>Time</strong> you returned to work from lunch break, if taken<br />
Clock Out: <strong>Time</strong> the work shift ended<br />
6. Click on “Add to <strong>Time</strong> Sheet”.<br />
7. Save the timesheet.<br />
8. TRS will populate the total hours per day for the selected date range to the timesheet.<br />
28
9/80 Alternate Work Schedule (AWS)<br />
If you have been approved to work a 9/80 Alternate Work Schedule (aka flexible work<br />
schedule or AWS) your timesheet calendar view will display additional information below<br />
the timesheet. The 9/80 schedule is setup in TRS by your DTA.<br />
Employees designated to work a 9/80 AWS, usually work 44 hours in Week 1 and 36 hours<br />
with one day off in Week 2.<br />
To help you identify which work week you are in for the 9/80 schedule, the date fields are<br />
color coded:<br />
Week 1 – green<br />
Week 2 –blue<br />
Important: It is crucial that you enter time worked on the first and second week as<br />
displayed on the timesheet in order to ensure that your timesheet is calculated properly.<br />
29
4/40 Alternate Work Schedule (AWS)<br />
If you have been approved to work a 4/40 Alternate Work Schedule (aka flexible work<br />
schedule or AWS) your timesheet calendar view will display additional information below<br />
the timesheet. The 4/40 schedule is setup in TRS by your DTA.<br />
Employees designated to work a 4/40 AWS, normally works 10 hours per day, 4 days a<br />
week.<br />
30
Fixed Schedule<br />
If your title belongs to the Patient Care Technical Unit (EX)* you are subject to daily<br />
overtime rules. If you are subject to daily overtime and normally work a fixed<br />
weekly work schedule, your timesheet calendar view will display additional information<br />
below the timesheet. The fixed schedule is setup in TRS by your DTA.<br />
*Currently, daily overtime rules are only for EX represented employees. Service Unit (SX)<br />
employees are scheduled to change to daily overtime in October 2012.<br />
31
Variable Schedule<br />
If your title belongs to the Patient Care Technical Unit (EX)* you are subject to daily<br />
overtime rules. If you are subject to daily overtime and normally work a fixed<br />
weekly work schedule, your timesheet calendar view will display additional information<br />
below the timesheet. The fixed schedule is setup in TRS by your DTA.<br />
*Currently, daily overtime rules are only for EX represented employees. Service Unit (SX)<br />
employees are scheduled to change to daily overtime in October 2012.<br />
32
How to Save or Submit a <strong>Time</strong>sheet<br />
Once you have completed a timesheet entry you can perform one of the following actions:<br />
• <strong>Time</strong>sheet Comments –enter comments in the “<strong>Time</strong>sheet Comments” section.<br />
Comments will be viewed by your supervisor and DTA. All final comments will<br />
become a permanent part of the timesheet record.<br />
• Save ‐ This allows you to save the entries. You can log back into TRS at a later time in<br />
order to update and or make edits to the saved timesheet.<br />
• Submit ‐ This function submits the timesheet to your supervisor for review and<br />
approval.<br />
Before submitting a timesheet:<br />
1. Verify that the timesheet clock in/out details are accurate.<br />
2. Provide comments, if needed, in the timesheet comments box.<br />
3. Note that this is your official timesheet. Please read the disclaimer before<br />
submitting the timesheet to your supervisor.<br />
After you have submitted your final timesheet to your supervisor, you will have an<br />
opportunity to print a PDF copy of your timesheet if needed. To print the PDF timesheet,<br />
select the “View PDF” (located in the top right corner) to view and or print the timesheet.<br />
33
Recall <strong>Time</strong>sheets<br />
Once you have submitted your timesheet to your supervisor, you may discover that you need to<br />
update or make an adjustment to the timesheet. You can request TRS to return the timesheet back<br />
to you in order to make adjustments.<br />
Important: You can only use the recall function if the timesheet has the status of “Submitted to<br />
Supervisor”. If the timesheet has been edited or approved by your supervisor (status of “Submitted<br />
to DTA”), you must contact your supervisor or the DTA to have the timesheet returned to you.<br />
There are 2 methods to recalling a timesheet:<br />
• From the timesheet calendar view by selecting the “Recall <strong>Time</strong>sheet” button, which will<br />
appear once the timesheet has been submitted to the supervisor.<br />
• From the Enter Current <strong>Time</strong>sheet <strong>tab</strong>, select the recall timesheet icon*.<br />
Recall <strong>Time</strong>sheet:<br />
1. Select the recall button or icon.<br />
2. The recall timesheet pop up window appears ‐ in the comments section (required), enter<br />
in why you would like the timesheet returned.<br />
3. Select Recall <strong>Time</strong>sheet –to have the timesheet returned. The timesheet will be returned<br />
immediately.<br />
4. Or select “Cancel” to close the pop up box window.<br />
* See slide 14 for an example of the recall timesheet icon.<br />
34
<strong>Time</strong>sheet Modifications<br />
Your supervisor/time approver may modify or edit the timesheet on your behalf. If a<br />
timesheet has been modified or edited by your supervisor, an *email notice will be sent to<br />
your email address on file, requesting that you review and acknowledge the change(s).<br />
Modified timesheets (if any) will appear under the “<strong>Time</strong>sheet Modifications”, on the Enter<br />
Current <strong>Time</strong>sheet sub <strong>tab</strong> (see slide 12 for an example).<br />
To review and acknowledge the modified timesheet data:<br />
1. Select the “View <strong>Time</strong>sheet” icon.<br />
2. A pop‐up window will display the modified timesheet. Displayed in the bottom<br />
right of the timesheet calendar view will be the changes indicated by your<br />
supervisor/time approver.<br />
3. Close the window.<br />
4. On the “Enter Current <strong>Time</strong>sheet” <strong>tab</strong>, select the Acknowledge icon (green check<br />
mark).<br />
5. The timesheet will remove from the <strong>tab</strong> and will change the timesheet status code<br />
to “Completed”.<br />
*See slide 39 for details on TRS email notifications.<br />
35
Create Past Pay Periods <strong>Time</strong>sheets<br />
You may discover that you did not submit a timesheet for a past period and need to create<br />
the timesheet.<br />
To create a timesheet you need to enter the begin or end date of the pay period you need<br />
to create the timesheet for. You can determine the pay period dates by referring to column<br />
1 of the TRS Payday Calendar.<br />
To create and submit a past pay period time sheet, do the following:<br />
1. On the “<strong>Manage</strong> <strong>My</strong> <strong>Time</strong>” <strong>tab</strong> go to “Create Past Pay Period <strong>Time</strong>sheets”.<br />
2. You can choose to select the begin or the end date of the pay period by using<br />
the calendar in the drop down box<br />
OR enter the begin or end date of the pay period by entering the date in the “Or<br />
enter a date” field.<br />
3. Select “Create”.<br />
4. The timesheet is created and you can enter and submit time as normal.<br />
36
Review Past <strong>Time</strong>sheet<br />
The second sub <strong>tab</strong> available on the “<strong>Manage</strong> <strong>My</strong> <strong>Time</strong>” <strong>tab</strong> is “Review Past <strong>Time</strong>sheet” You can<br />
refer to the Review Past <strong>Time</strong>sheet to track the status of past created timesheets.<br />
Navigation: TRS will automatically display the 15 most recent timesheets in pay period order.<br />
You can change the display results to either 15, 50 or 100 timesheets displayed by changing the<br />
number in the drop down list selection.<br />
This section displays 4 sor<strong>tab</strong>le columns<br />
1. Action –may display up to two icons ‐<br />
a. The first is the “View <strong>Time</strong>sheet” icon. Select this icon to open and review the<br />
timesheet details.<br />
b. The second is the “View Workflow” icon. Select this icon to see the tracking<br />
details of the timesheet. See the next slide for details on the Workflow.<br />
2. Pay Period –Pay period begin and end dates.<br />
3. Assignment Name – Department/Title code name/<strong>Time</strong>sheet identifier(job assignment<br />
nickname).<br />
4. *<strong>Time</strong>sheet Status – Identifies the current status of the timesheet.<br />
Note: If you need to edit or correct a previously completed timesheet, contact your<br />
supervisor/time approver so that the timesheet can be returned to you for editing<br />
purposes.<br />
* Refer to slide 15 for a completed description of the <strong>Time</strong>sheet Status codes.<br />
37
<strong>Time</strong>sheet Workflow<br />
When you select the workflow icon the “<strong>Time</strong>sheet Workflow” pop‐up box will appear. The<br />
<strong>Time</strong>sheet Workflow includes information such as the date and time stamp from the date<br />
you submitted the timesheet to the date and time the timesheet was submitted to the<br />
Personnel <strong>Payroll</strong> System (PPS) for processing.<br />
The following information will be displayed:<br />
1. Name/ Employee ID Number<br />
2. Pay Period/Title/Job Assignment<br />
3. Status Code –location of timesheet (see slide 15 for more details)<br />
4. Completed by – individual that performed the action on the timesheet<br />
5. Completion date –the date and time the action was performed<br />
6. Comments –all comments (if any) will be listed for review<br />
7. Total turnaround time –the total time it took to process the timesheet from the<br />
date and time you submitted it to your supervisor to the date and time it was<br />
COMPLETED. This field will only be displayed if the timesheet has reached the<br />
COMPLETED status.<br />
38
Email Notifications<br />
When certain transactions occur TRS will generate an email notification to notify you of the<br />
event. The email notice is sent to the email address your department has on file in TRS<br />
(usually uploaded from the Enterprise Messaging directory). You should read all email<br />
notices carefully to ensure that any actions required by you are completed properly.<br />
• Notification of Returned <strong>Time</strong>sheet From Supervisor ‐ your supervisor has<br />
reviewed the timesheet and has returned the timesheet to you to update or<br />
correct. The email notice will indicate the reason(s) why the timesheet is being<br />
returned.<br />
• Notification of Modification of <strong>Time</strong>sheet By Supervisor ‐ you will receive this<br />
notice if your supervisor has made a change to your submitted timesheet. You will<br />
be prompted to login to TRS to review and acknowledge the change(s). See slide 35<br />
for more details.<br />
TRS emails are generated from: UC <strong>Time</strong> Reporting System [TRS@IT.<strong>UCLA</strong>.EDU]. Please<br />
ensure that these notices are not setup as spam or junk mail.<br />
39
Contacts<br />
For general questions (e.g. pay, work schedule, time off, etc.), contact your direct<br />
supervisor or your departmental DTA.<br />
Questions regarding system issues (i.e. logon issues, system errors) may be resolved by<br />
referring to the TRS Resources page or by contacting the TRS Help Desk:<br />
• By email ‐ payroll@finance.ucla.edu include in the subject heading “TRS”<br />
• By phone – (310) 794‐8708<br />
40