Note - UCLA - Payroll Services
Note - UCLA - Payroll Services
Note - UCLA - Payroll Services

You also want an ePaper? Increase the reach of your titles
YUMPU automatically turns print PDFs into web optimized ePapers that Google loves.
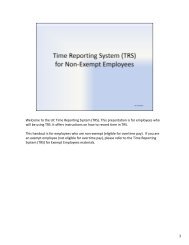
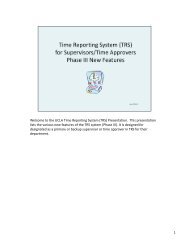
Welcome to the <strong>UCLA</strong> Time Reporting System (TRS) Presentation. This presentation is for<br />
individuals who have been designated as a Departmental Time Administrator in TRS for<br />
their department.<br />
1
TRS was designed by UCI and approved for use by the Office of the President.<br />
Some benefits of TRS:<br />
• Eliminates paper timesheet<br />
• Improves payroll accuracy<br />
• Easier for employee to record work and leave time (vacation, sick, jury duty, etc.)<br />
• Easier for supervisor to review and approve timesheet data<br />
• Automatically computes additional work time based upon UC time and attendance<br />
rules, such as overtime, shift differential and holiday pay<br />
• Includes time and attendance policies for CX, EX, HX, NX, RX, SX, and TX bargaining<br />
agreements<br />
• Time reported in TRS is uploaded onto the roster, saving PTR Preparers time<br />
• Users can use any internet accessible devise to login (computer, smartphone, tablet,<br />
etc.)<br />
• Users can access TRS anywhere, 24 hours a day, 7 days a week<br />
3
Appointments and Distributions<br />
• TRS interfaces and uploads EDB appointment data nightly. New hires or appointment<br />
and distribution changes/updates that affect TRS will appear in TRS the next business<br />
day.<br />
• Employees who have multiple appointments with the DOS code REG, will have a<br />
timesheet for each appointment.<br />
• TRS splits and allocates timesheet hours based upon the distribution percentages as<br />
indicated in EDB.<br />
Example: Donald Duck has 1 appointment (appt 10) and 3 distributions ‐<br />
11 –X‐ XXXXXX –AA – XXXXX –X =.5000<br />
12 –X‐ XXXXXX –BB – XXXXX –X =.3000<br />
11 –X‐ XXXXXX –CC – XXXXX –X =.2000<br />
• Only establish one work study distribution with the WSP code. PPS will automatically<br />
stop splitting earnings once the student has reached their WSP limit for the school year.<br />
• TRS employees with by‐agreement DOS codes (SAS, BYA, etc.) or *ERIT should be<br />
established as a separate appointment and distribution with the Time Code of R<br />
(Exception).<br />
*Refer to the TRS Job Aid 101 –ERIT for Employees for more details.<br />
4
• Using the UC Time and Attendance policy, TRS will compute the total hours for non‐<br />
exempt employees to the nearest quarter of the hour.<br />
• TRS is not a leave accrual system. Accruals are managed in PPS, based upon UC Leave<br />
Accrual policy. TRS only collects and reports usage data.<br />
• TRS does not track work study funding. To review the amount/balance of the WS<br />
award a student may have, please refer to the IFNW screen.<br />
5
Wave II, April 2012 TRS criteria<br />
Non‐represented titles (99):<br />
• MO, Exempt, Exception Paid (R)<br />
• BW, Non‐Exempt, Positive Paid (Z)<br />
Wave III, July 2012 TRS Criteria<br />
The following groups are scheduled to come into TRS on July 30 th :<br />
• Represented titles CX, EX, HX, NX, RX, SX, and TX<br />
• Wave II monthly, non‐exempt employees who did not come into TRS in April<br />
(converted to BW NE Z)<br />
• Employees who have an Appt Type 5 (Academic) will be excluded from TRS.<br />
• Employees who have a combination non‐academic appointment with an Appt Type<br />
5 appointment will be brought into TRS<br />
6
There are 4 identified user roles in the Time Reporting System (TRS)<br />
1. Employee –must complete a timesheet for all time worked. They have the<br />
option to save, edit or submit a timesheet<br />
2. Supervisor/Time Approver (Primary and Backup) –charged to review, submit,<br />
return, or edit timesheets<br />
3. Departmental Time Administrator (DTA) – responsibilities include: assigning a<br />
primary and backup supervisors for all job assignments. Submit time to the<br />
IDTC roster via TRS. Lastly they have the responsibility of returning a timesheet<br />
(as applicable) back to a supervisor/time approver for correction or changes<br />
4. Central Time Reporting Office (Central <strong>Payroll</strong> Office) – responsible for training,<br />
troubleshooting and controlling access to TRS<br />
8
There are several ways to access the Time Reporting System (TRS) link and information.<br />
Go to www.payroll.ucla.edu and select one of the following:<br />
1. TRS Resources page<br />
2. Quick Links – links directly to the TRS logon page<br />
10
3. On the left navigation, select “Web Applications”. On the Web Applications page, scroll<br />
to Employee Web Applications, select the Time Reporting System “GO” button to link<br />
directly to the TRS logon page.<br />
11
The Time Reporting System Resources page. To access the resource page, select the TRS<br />
graphic icon from the main <strong>Payroll</strong> <strong>Services</strong> page.<br />
The TRS Resources page offers you helpful information regarding TRS such as:<br />
• TRS logon page<br />
• On‐demand demos of TRS<br />
• TRS deadline calendars<br />
• General information on TRS<br />
12
An additional PPS Schedule has been created to include the TRS deadline dates and time.<br />
The DTA should refer to the TRS PPS Schedule which can be found on the TRS Resources<br />
page. It is extremely important that TRS users be aware of the deadlines to ensure that<br />
employees are paid in a timely manner.<br />
It is also suggested that the DTA be familiar with the supervisors timesheet deadline dates<br />
and times. The TRS Supervisors Schedule is also available on the TRS Resources page.<br />
13
• <strong>UCLA</strong> Employees ‐ Login using the <strong>UCLA</strong> logon (aka BOL) and password. See Getting a<br />
<strong>UCLA</strong> Logon ID at http://map.ais.ucla.edu/go/1000813 for information on how to create<br />
a login or reset your <strong>UCLA</strong> password.<br />
• UCOP Employees –Login using the Single Sign On logon (same logon to access Outlook)<br />
and password.<br />
14
Once on the TRS main page select the “Departmental Time Administrator (DTA)” link.<br />
15
Upon first logging on to TRS, the DTA may be prompted to select a department.<br />
In Current department is field click on the drop‐down list and select a department to view.<br />
The drop‐down list will only display the department code(s) the DTA is authorized to<br />
process timesheets for.<br />
<strong>Note</strong>: These materials are arranged in the order the DTA may access employees records.<br />
16
The 3main tabs for the DTA are:<br />
1. Review/Submit <strong>Payroll</strong><br />
2. Manage Employee<br />
3. Generate Reports<br />
<strong>Note</strong>: The DTA may also have two additional tabs:<br />
• Manage My Time –the DTA’s own timesheet<br />
• Manage My Staff –the DTA may have this tab if he/she is also assigned as a “Primary or<br />
Backup Supervisor”<br />
17
DTA Tabs<br />
Manage Employee tabs is where the DTA can ‐<br />
• Assign supervisors<br />
• Set up the employee’s overtime compensation election<br />
• View the employee’s timesheet profile (i.e. non‐exempt, title code name, work week,<br />
etc.)<br />
• Assign a job nickname to the employee’s timesheet<br />
Review/Submit <strong>Payroll</strong> tab is where the DTA can ‐<br />
• Submit monthly or bi‐weekly timesheet data to the PPS IDTC Time Input Roster or as<br />
LX transaction<br />
• View Manual Transactions that are special and may require an EDLR transaction<br />
• Search Timesheets –where the DTA can search for timesheets and their status<br />
Generate Reports tab is where the DTA can generate ‐<br />
• DTA <strong>Payroll</strong> Report –a report can run an Excel or PDF report to reconcile against the<br />
PPP5302<br />
• Employee Assignment Report –a report that lists active employees supervisor<br />
assignment<br />
• Work Schedule Report –a report that lists employees who have a set work schedule<br />
18
Manage Employee Tab<br />
Under the Manage Employee tab are two sub tabs<br />
• Search Employee Profile – (default view) to view the employee’s current profile. The<br />
profile includes the employee’s currently assigned primary and backup supervisors.<br />
• Search/Replace Supervisor –use this tab to search for and/or replace a supervisor from<br />
a group of employees.<br />
19
Assigning a Primary and Backup Supervisor<br />
One of the main duties of the DTA is to assign each employee a Primary and Backup<br />
Supervisor.<br />
To assign supervisor(s) go to the “Manage Employee” tab then to the “Search Employee<br />
Profile” sub tab<br />
20
Search Employee Profile<br />
Under the Search Employee Profile the DTA can access the employee’s profile to:<br />
• Assign supervisors<br />
• Enter the employee’s overtime compensation election<br />
• Add a job nickname<br />
• Update Work Schedule<br />
To access an Employee’s Profile:<br />
1. Select the “Manage Employee” tab to locate an *employee. To include inactive<br />
employees and assignments in the search, uncheck “Employees with Active<br />
Assignments Only”<br />
2. Verify that you are viewing the correct department<br />
3. Can locate an employee based on one of the four search criteria fields<br />
•Employee ID –enter the employee’s UID number<br />
•Employee First Name –first name as it appears in the <strong>Payroll</strong> Personnel System. Ex.<br />
Dixie<br />
•Employee Last Name –last name as it appears in the <strong>Payroll</strong> Personnel System. Ex. Land<br />
•Or combination of first name last name/last name first name. Ex. Dixie Land or Land<br />
Dixie<br />
21
Search Employee Profile ‐ Global Search<br />
A global search (displays all employees in the department) can be performed by leaving the<br />
search fields blank and clicking “Search”.<br />
If a global search is performed select the employee by selecting their UID or the view<br />
employee *icon in the action field.<br />
*A list of icons is provided with this presentation.<br />
22
Search Employee Profile –Sections<br />
TRS will display 3 sections once an employee is selected:<br />
• General –displays the employee’s general appointment data (IAPP). See slide 24 for<br />
more details.<br />
• Assignments –displays the employee’s supervisors assignments. See slides 28‐30 for<br />
more details.<br />
• Work Schedule –displays the work schedule for employees who require a unique work<br />
schedule such as 9/80 or 4/40 work week schedule. See slides 36‐44 for more details.<br />
23
Search Employee Profile – General<br />
The General section has 4 sub sections:<br />
General Information<br />
• Employee First Name –as indicated in PPS<br />
• Employee Last Name –as indicated in PPS<br />
• Department Name ‐ name for currently selected department<br />
• Campus ID – employee 12 ID number. Employee UID with 3 leading zeroes. System derived<br />
• Employee ID – employee UID<br />
Current Policy – indicates the employee’s current timesheet policy<br />
• Week Start –the date the timesheet work week begins per collective bargaining agreement<br />
• Overtime – indicates if overtime will be calculated on a daily (per collective bargaining<br />
agreement) or weekly basis<br />
• Premium Holidays‐ based upon Personnel Policy, displays which holidays will be paid at a<br />
premium rate if worked<br />
• Effective –the begin and end date (if any) of the employee’s policy profile<br />
Timesheet Profile – displays basic appointment data (IAPP)<br />
• Current Pay Cycle –Monthly or Biweekly (TRS can generate only one pay cycle profile per<br />
employee)<br />
• Time Code –Exception (R) or Positive (Z)<br />
• FLSA –if title is Exempt or Non Exempt<br />
• Effective –the begin and end date (if any) of the employee’s policy profile<br />
Overtime Compensation –where the DTA enters the employee’s overtime election. See slides 25‐<br />
26 for more details.<br />
24
Assigning Overtime Compensation ‐<br />
It is the DTA’s responsibility to indicate in TRS whether the employee has elected to receive<br />
overtime as a payment or as *compensation time accrued (CTA).<br />
TRS will also maintain a history of the employee’s overtime election (if any).<br />
Overtime Compensation section:<br />
1. Compensation Type ‐ Payment (default view) –all overtime hours worked will be<br />
paid to the employee (OTS/OTP)<br />
2. Effective –The begin and end date (if any) of the overtime compensation as selected<br />
by the DTA<br />
*Per Personnel policy, a non‐exempt employee can make this election once a year. See<br />
Personnel policy for more details.<br />
25
Assigning Overtime Compensation ‐<br />
It is the DTA’s responsibility to indicate in TRS whether the employee has elected to receive<br />
overtime as a payment or as *compensation time accrued (CTA).<br />
TRS maintains a history of the employee’s overtime election, if any.<br />
Overtime Compensation section:<br />
1. Compensation Type ‐ Payment (default view) –all overtime hours worked will be<br />
paid to the employee (OTS/OTP)<br />
2. Effective –The begin and end date (if any) of the overtime compensation as selected<br />
by the DTA<br />
*Per Personnel policy, a non‐exempt employee can make this election once a year. See<br />
Personnel policy or the appropriate Labor Contract for more details.<br />
26
To change the employee’s Overtime Compensation election:<br />
• Select the View/Add/Edit icon<br />
• A drop down box will show the History and the Effective date of the overtime election<br />
• To Edit the current overtime election select the “Edit” icon for the current timesheet.<br />
The current timesheet will include the last overtime compensation election begin date<br />
and until –Now. Example: 03/01/12 –Now.<br />
• If the employee has created and/or submitted a timesheet within this period an error<br />
message will appear. The DTA must use the “Add” function<br />
• To Add to a future election select the “Add” icon<br />
• A pop‐up box will appear. Change the selection to the desired type and tab to the next<br />
box and enter the begin and end date (if any) of the election<br />
27
Under the “Assignments” section, the DTA can:<br />
• Add or Edit Primary and Back‐up Supervisors<br />
• Add a job assignment nickname<br />
Assignments:<br />
1. Assignment Name – Appointment Department Name/Title Code Name/Job<br />
Assignment Nickname, if applicable<br />
2. Appointment – appointment number for the profile<br />
3. Start Date – appointment start date<br />
4. End Date – appointment end date<br />
5. Primary Supervisor Name –displays currently assigned primary supervisor’s name.<br />
If none is assigned will display “Assign”<br />
6. Backup Supervisor Name –displays currently assigned backup supervisor’s name. If<br />
none is assigned will display “Assign”<br />
28
Assigning Supervisors<br />
To assign supervisor click on the “Assign Supervisor” icon:<br />
1. When the DTA selects the Supervisor assignment icon the system will generate a<br />
pop‐up window<br />
2. The DTA can locate a Supervisor by entering their Employee ID (UID) or Name (first<br />
and last or last and first) then click “search”<br />
3. Results will be displayed for the DTA to select from. Click on the “Use this User” icon<br />
in the Action field to assign a Primary Supervisor<br />
4. Follow these same steps to assign a Back‐up Supervisor<br />
DTAs can be assigned either as Primary or Backup Supervisor with approval from the<br />
department head<br />
Important: All Employees must have a Primary and Back‐up Supervisor assigned before<br />
they can submit their timesheet<br />
29
Take a moment to review the information selected and click on “Save Supervisor<br />
Assignment” to save to TRS.<br />
30
Editing Supervisor’s Assignment<br />
The DTA can edit (change) or delete supervisors as needed.<br />
To Edit supervisor:<br />
1. Go to the Assignment section on the Employee’s Profile<br />
2. Select the “Edit Supervisor” icon<br />
3. The system will generate a pop‐up window<br />
4. Locate a Supervisor by entering their Employee ID (UID) or Name (first and last or last<br />
and first) then click “search”<br />
5. Results will be displayed for the DTA to select from. Click on the “Use this User” icon<br />
in the Action field to assign the supervisor<br />
<strong>Note</strong>: Removing supervisors will remove both the Primary and Backup Supervisor.<br />
31
Deleting Supervisor’s Assignment<br />
The DTA can delete supervisors as needed.<br />
To Delete supervisors:<br />
1. The DTA can delete supervisors per job assignment (appointment number). <strong>Note</strong>:<br />
Removing supervisors will remove both the Primary and Backup Supervisor for that<br />
assignment<br />
2. Select the “Remove Supervisor” icon<br />
3. The system will generate a pop‐up window, confirming the request to delete all<br />
supervisors for the assignment<br />
4. Select “Remove All Supervisors” to delete the supervisors or “Cancel” to cancel the<br />
transaction<br />
32
Adding a Job Assignment (Nickname)<br />
If requested by the supervisor the DTA can add a job nickname to the appointment<br />
timesheet to be used in conjunction with the title code. This is helpful if an employee<br />
works on multiple assignments. Adding a job nickname may assist the employee and the<br />
supervisor with allocating time to the proper job assignment.<br />
1. To add a job assignment nickname go to “Manage Employee” and find the employee<br />
under the Search Employee Profile → Assignments.<br />
2. Under the Assignment Name column, select the “Update Timesheet Identifier” icon. A<br />
pop‐up window will appear.<br />
33
Update Timesheet Identifier<br />
To add a job nickname:<br />
1. Enter job identifier name in the “Timesheet Identifier” field. The job nickname can be<br />
up to 15 characters only.<br />
2. Save the update.<br />
3. The job nickname will appear immediately on the employee’s timesheet for the<br />
employee, supervisor and DTA to view.<br />
34
Search Employee Profile ‐ Work Schedule<br />
The TRS Work Schedule can track the days of the week an employee is scheduled to work<br />
and the number of scheduled work hours for each day.<br />
TRS supports the following work schedules only:<br />
• 9/80 Alternate Work Schedule<br />
• 4/40 Alternate Work Schedule<br />
• Fixed Schedule ‐ EX represented employees only<br />
• Variable Schedule –EX represented employees only<br />
To establish a work schedule select “Add New Work Schedule”.<br />
36
Work Schedule Selection<br />
After selecting “Add New Work Schedule” a pop‐up box will be available for the DTA to<br />
select the appropriate schedule the employee works on.<br />
For Alternate Work Schedule* employees, the DTA must update the “Employee Profile”<br />
with the appropriate Alternate Work Schedule (AWS) to ensure that the work hours are<br />
calculated properly.<br />
<strong>Note</strong>: Retroactive changes to a work schedule cannot be made once timesheets for the<br />
affected pay period have been submitted.<br />
* Refer to Personnel Policy for details regarding Alternate Work Schedules.<br />
37
Work Schedule –4/40 Set‐Up<br />
Employees designated to work a 4/40 AWS, normally works 10 hours per day, 4 days a<br />
week.<br />
To add a 4/40 Work Schedule:<br />
1. Begin Effective Date – click inside the field and select the begin date of the 4/40<br />
schedule.<br />
2. End Effective Date – click inside the field and select the end date the 4/40 schedule.<br />
Leave blank if indefinite.<br />
3. Select the days of the week the employee is scheduled to work. (Default view Monday<br />
– Thursday, 10 hours per day, Friday –Off). <strong>Note</strong>: Weekly Schedule must equal 40<br />
hours.<br />
4. Select “Add This Schedule” to add the changes, or “Cancel” to start over or to remove<br />
the entries.<br />
5. A summary of the newly added schedule information will be displayed. The DTA can<br />
edit or delete the schedule, prior to timesheets being submitted for the time period<br />
affected.<br />
6. The work schedule days and hours will display on the employee’s timesheet.<br />
Important: It’s crucial that 4/40 employees enter their time according to the 4/40<br />
timesheet layout in order to ensure that work hours are calculated properly (overtime may<br />
be computed).<br />
38
EX Employees<br />
The *EX bargaining agreement states that employees who work more than 8 hours in a day<br />
are entitled to daily overtime. In order for TRS to properly calculate daily overtime, each<br />
EX employee profile must include a work schedule.<br />
TRS utilizes two DOS codes in addition to OTS and OTP for EX employees:<br />
• OTH – Overtime Half. Indicates the half portion (1/2) of the overtime hours.<br />
This DOS code is used for daily overtime hours. OTH is paid to employees who<br />
work less than 40 hours in a work week but have more than 8 working hours in<br />
one day.<br />
• ODH – Overtime Double. Indicates the double time portion (2x) of the overtime<br />
for hours. This DOS code is used for daily overtime hours. ODH is paid to<br />
employees who work less than 40 hours in a work week but have more than 12<br />
working hours in one day.<br />
* Please refer the Personnel Policy for full details on EX overtime policy. Service Unit (SX)<br />
employees are scheduled to change to daily overtime in October 2012.<br />
39
Work Schedule –9/80 Set‐Up<br />
Employees designated to work a 9/80 AWS, normally work 44 hours in the Week 1 and 36 hours in<br />
Week 2. 9/80 schedules must follow a two week cycle and the 2 nd week must be completed prior to<br />
the 9/80 end date.<br />
To add a 9/80 Work Schedule:<br />
1. Begin Effective Date – click inside the field and select the begin date of the 9/80 schedule.<br />
2. End Effective Date – click inside the field and select the end date the 9/80 schedule. Leave<br />
blank if indefinite.<br />
3. Week 1 –enter the working hours for each work day. (Default view Monday – Thursday, 9<br />
hours per day, Friday –8 hours). <strong>Note</strong>: Week 1 must total 44 hours.<br />
4. Week 2 –enter the working hours for each work day. (Default view Monday – Thursday 9<br />
hours per day, Friday off). The employee’s day off must entered in the 2 nd week. <strong>Note</strong>: Week<br />
2 must equal 36 hours.<br />
5. Select “Add This Schedule” to add the changes, or “Cancel” to start over or to remove the<br />
entries.<br />
6. A summary of the newly added schedule information will be displayed. The DTA can edit or<br />
delete the schedule, prior to timesheets being submitted for the time period affected.<br />
7. The work schedule days and hours will display on the employee’s timesheet.<br />
Important: It’s crucial that 9/80 employees enter their time according to the 9/80 timesheet layout<br />
in order to ensure that work hours are calculated properly. Overtime may be computed in error<br />
if time is not entered according to the work schedule.<br />
40
Work Schedule –4/40 Set‐Up<br />
Employees designated to work a 4/40 AWS, normally works 10 hours per day, 4 days a<br />
week.<br />
To add a 4/40 Work Schedule:<br />
1. Begin Effective Date – click inside the field and select the begin date of the 4/40<br />
schedule.<br />
2. End Effective Date – click inside the field and select the end date the 4/40 schedule.<br />
Leave blank if indefinite.<br />
3. Select the days of the week the employee is scheduled to work. (Default view Monday<br />
– Thursday, 10 hours per day, Friday –Off). <strong>Note</strong>: Weekly Schedule must equal 40<br />
hours.<br />
4. Select “Add This Schedule” to add the changes, or “Cancel” to start over or to remove<br />
the entries.<br />
5. A summary of the newly added schedule information will be displayed. The DTA can<br />
edit or delete the schedule, prior to timesheets being submitted for the time period<br />
affected.<br />
6. The work schedule days and hours will display on the employee’s timesheet.<br />
41
Work Schedule ‐ Fixed Schedule<br />
If the employee works a fixed schedule each pay period, select the Fixed Schedule option.<br />
<strong>Note</strong>: EX employees only.<br />
Fixed Schedule:<br />
1. Begin Effective Date ‐ click inside the field and select the begin date of the schedule.<br />
2. End Effective Date ‐ click inside the field and select the end date of the schedule.<br />
Leave blank if indefinite.<br />
3. Select days the employee normally work. (Default view is Monday‐ Friday).<br />
4. Scheduled Hours/Day –from the drop down list, select the number of hours the<br />
employee normally works each work day (0‐18) and if any, the corresponding minutes<br />
– 00, 15, 30, 45. (Default view is 8 hours and 00 minutes). Cannot exceed 40 hours per<br />
week.<br />
5. Select “Add This Schedule” to add the changes, or “Cancel” to start over or to remove<br />
the entries.<br />
6. A summary of the newly added schedule information will be displayed. The DTA can<br />
edit or delete the schedule, prior to timesheets being submitted for the time period<br />
affected.<br />
7. The work schedule days and hours will display on the employee’s timesheet.<br />
42
Work Schedule ‐ Variable Schedule<br />
If the employee works various days and hours in a pay period, select the Variable Schedule<br />
option. <strong>Note</strong>: EX employees only.<br />
Variable Scheduled ‐<br />
1. Begin Effective Date ‐ click inside the field and select the begin date of the schedule.<br />
2. End Effective Date ‐ click inside the field and select the end date of the schedule.<br />
Leave blank if indefinite.<br />
3. Select days the employee normally work.<br />
4. From the drop down list, select the number of hours the employee normally work<br />
each work day (0‐18) and if any the corresponding minutes – 00, 15, 30, 45. (Default<br />
view is 0 hours and 00 minutes). Cannot exceed 40 hour per week.<br />
5. Select “Add This Schedule” to add the changes, or “Cancel” to start over or to remove<br />
the entries.<br />
6. A summary of the newly added schedule information will be displayed. The DTA can<br />
edit or delete the schedule, prior to timesheets being submitted for the time period<br />
affected.<br />
7. The work schedule days and hours will appear on the employee’s timesheet.<br />
43
If a work schedule is updated to an employee’s profile the work schedule details will<br />
appear under the employee’s timesheet calendar view. The employee, supervisor and DTA<br />
will be able to see the work schedule view on the timesheet.<br />
See slide for 36 for the various TRS work schedules.<br />
44
Review/Submit Timesheet Tab<br />
The DTA can review and submit timesheets to PPS by selecting the “Review/Submit <strong>Payroll</strong>”<br />
Tab.<br />
The Review/Submit Timesheet tab is divided into four sections:<br />
• View Current Bi‐Weekly –Bi‐Weekly Timesheets<br />
• View Current Monthly –Monthly Timesheets<br />
• View Manual Transactions –Timesheets that may require manual processing.<br />
• Search Timesheets –Locate a Timesheet(s) using the search fields as appropriate<br />
*Once on the “Review/Submit <strong>Payroll</strong>” Tab, TRS will automatically default to “View Current<br />
Monthly”<br />
The screen will display the hours worked as it will be loaded by the TRS system onto the<br />
IDTC Roster.<br />
45
View Current Monthly or Bi‐Weekly Timesheets<br />
TRS will automatically default to the “Supervisor Approved” section displaying all<br />
timesheets to be reviewed<br />
Screen displays the data as follows:<br />
o View Current Monthly tab ‐ displays Exempt employees, then Non‐Exempt employees, if<br />
any.<br />
o View Current Biweekly tab ‐ displays Non‐Exempt employees<br />
The DTA should review the information provided and perform one of the following actions:<br />
• Return –Return a timesheet to a Supervisor providing detailed comments<br />
• EDLR – select this box if an EDLR/EDAP will be processed to report the hours worked.<br />
By selecting the EDLR function, the DTA indicates that the hours reported for the<br />
selected pay period will NOT be processed by TRS.<br />
• Check Box –Check mark the timesheets that have been reviewed and click “Submit to<br />
PPS”. See the next slide for more details.<br />
46
To submit the timesheet(s) data indicated to the PPS IDTC roster, do the following:<br />
1. Select the timesheets by marking the check box<br />
2. To select and submit all timesheets displayed, mark the check box in the column<br />
heading<br />
3. Select “Submit to PPS”<br />
<strong>Note</strong>: Timesheet submission is only available from 7:00 am to<br />
5:00 pm during the roster submission period.<br />
47
Final Submit to <strong>Payroll</strong><br />
TRS will ask for confirmation of submission to <strong>Payroll</strong>. Proceed by selecting the “Final<br />
Submit to <strong>Payroll</strong>” link to send the information to PPS. Time will be uploaded to the IDTC<br />
roster.<br />
For record keeping and auditing purposes users may choose to export the information by<br />
using the PDF/Excel options and saving the report. Saving or printing the roster file must<br />
be completed prior to selecting “Final Submit to PPS”.<br />
48
PPS Submission –Monthly Timesheets<br />
TRS reports monthly timesheet data one month in arrears; that is, monthly employees<br />
already received their regular earnings for the above pay period.<br />
TRS will process timesheets for monthly employees as follows:<br />
• If the employee does not report any exception time (i.e. vacation usage, sick usage) the<br />
timesheet status code will be set to “COMPLETED” when the timesheet is submitted to<br />
PPS.<br />
• If the employee reports exception time, the timesheet status code will be set to<br />
“SUBMITTED_TO_PPS(LX)” when the timesheet is submitted to PPS. TRS will process<br />
EDLR (LX) transactions in PPS to report the exception time. The LX transactions will<br />
process in the current month’s pay compute.<br />
Important: TRS does not process EDLR (RX) transactions. Any timesheet adjustment that<br />
require an RX transaction (reversal or reduction) must be done manually by the DTA/PTR<br />
Preparer in PPS.<br />
49
Timesheet Status Codes<br />
The DTA can track the status of an employee’s timesheet once the employee has created and<br />
entered time (initiated) on it. The timesheet status code can be found in several areas of TRS:<br />
• Timesheet (top left corner)<br />
• Review Past Timesheets tab<br />
• Timesheet Workflow<br />
• Timesheet Roster<br />
Timesheet Status Codes:<br />
• COMPLETED – TRS processed the timesheet successfully without errors.<br />
• NONE – the employee has not saved or submitted the timesheet to the supervisor.<br />
• PPS ERROR –one or more of the entries submitted to TRS failed with an error response.<br />
• RECALLED BY EMPLOYEE –the employee has requested that the timesheet be returned<br />
• RETURNED BY SUPERVISOR –the supervisor has returned the timesheet back to the<br />
employee to edit.<br />
• SAVED –the employee entered time and saved the timesheet.<br />
• SUBMITTED TO SUPERVISOR –the employee submitted the timesheet to the supervisor for<br />
approval.<br />
• SUBMITTED TO DTA –the supervisor has approved the timesheet and submitted it to the<br />
DTA.<br />
• SUBMITTED TO PPS –the DTA has reviewed the timesheet and submitted it to the IDTC<br />
roster for processing.<br />
• SUBMITTED TO PPS (LX) –the DTA processed the timesheet data via the web EDLR (LX)<br />
transaction.<br />
50
Open Timesheets<br />
The Open Timesheets sub tab displays a list of active employees for that pay period.<br />
• Action – Timesheets that have been at least saved or submitted to the supervisor/DTA, will<br />
have the View Timesheet icon listed. If the timesheet has been submitted the Workflow icon is<br />
displayed.<br />
• Job ID –N/A<br />
• Name –The employee’s name as indicated in PPS. Sortable column.<br />
• Emp ID –The employee’s UID. Sortable column.<br />
• Timesheet Hrs –Total hours for submitted timesheet, if any.<br />
• Timesheet Status –The status of the timesheet. Sortable column. See slide 52 for a list of<br />
status codes.<br />
• Primary Supervisor –The assigned primary supervisor as per the employee’s profile. Sortable<br />
column.<br />
• Backup Supervisor –The assigned backup supervisor as per the employee’s profile. Sortable<br />
column.<br />
Click on the column name to sort into ascending or descending order.<br />
To view open timesheets select the Review/Submit <strong>Payroll</strong> tab then the pay cycle (current monthly<br />
or biweekly) you wish to view. To view timesheets and their status code select “Open Timesheets”.<br />
*<strong>Note</strong>: TRS will default to the “Supervisor Approved” view of the Review/Submit <strong>Payroll</strong> sub tab.<br />
51
The View Manual Transactions tab (VMT) can display up to 9 sections for review:<br />
1. PPS Update Error Records<br />
2. Biweekly Past Approved Timesheets<br />
3. Monthly Past Approved Timesheets<br />
4. Early Biweekly Timesheets<br />
5. Early Monthly Timesheets<br />
6. B1 Holiday Adjustments<br />
7. Adjustments to Multiple Assignments<br />
8. Adjustments to Completed Timesheets<br />
9. Distribution Missing or Shift Differential Due<br />
The DTA must take some type of action on transactions on the VMT roster in order for the<br />
transactions to clear.<br />
<strong>Note</strong>: A section(s) will only appear if timesheets meets the criteria.<br />
52
VMT ‐ PPS Update Errors<br />
This section contains entries that failed to be automatically updated to the IDTC roster<br />
during the submission process. Entries could fail due to various reasons such as the<br />
employee having an invalid time reporting code, employee being separated, inactive or on<br />
leave without pay.<br />
Refer to tracking (Workflow) feature under the Action column to view the exact error<br />
message.<br />
Because each transaction is processed per employee/distribution, for any timesheets with<br />
multiple distributions, one or more distributions could fail while other distributions are<br />
updated successfully. Therefore only the distributions that failed are displayed in this<br />
section.<br />
Due to the payroll error, timesheets in this section cannot be returned.<br />
Perform one of the following actions:<br />
EDLR ‐ To indicate that a manual transaction will be processed in PPS. See slide 63 for<br />
more details.<br />
Submit to PPS – To have TRS process a web EDLR (LX) if applicable. See slide 62 for<br />
more details.<br />
53
VMT ‐ Bi‐weekly & Monthly Past Approved Timesheets<br />
This section contains approved timesheets that were not submitted to PPS by the DTA<br />
roster deadline for the identified pay period entry period.<br />
Perform one of the following actions:<br />
Return – Send the timesheet back to the Supervisor for editing.<br />
EDLR ‐ To indicate that a manual transaction will be processed in PPS. See slide 63 for<br />
more details.<br />
Submit to PPS – To have TRS process aweb EDLR (LX) if applicable. See slide 62 for<br />
more details.<br />
Create –Tocreate an Excel or PDF report of the timesheet(s) click in the check box .<br />
To select all the timesheets in the section, click on the check box in the column title.<br />
54
VMT –Early Biweekly/Monthly Timesheets<br />
TRS can now process early submitted timesheets from the employee and the supervisor.<br />
Early submitted timesheets are usually for employees separating prior to the pay period<br />
end date.<br />
Example: A monthly employee is separating on 06/22/12. The employee can create and submit the 06/01/12<br />
– 06/30/12 timesheet on the 16 h for the final work days of 06/01‐06/22. Once approved by the supervisor the<br />
timesheet will appear on the VMT.<br />
To process the timesheet:<br />
• Print the timesheet.<br />
• Select the “EDLR” icon, then “Final Pay”.<br />
• Submit the transaction to TRS. The timesheet data will remove from the VMT.<br />
• Go into PPS and process a separating check request in EDAP or EDLR.<br />
See slide 63 for more details regarding the EDLR icon.<br />
55
VMT ‐ B1 Holiday Adjustments<br />
This section contains accrued B1 holiday time. Records displayed here reflect required<br />
correction to entries that were submitted electronically to PPS.<br />
B1 Holiday Adjustments:<br />
The Biweekly holiday is calculated based on a quadri‐weekly payroll cycle. Employees<br />
appointed at less than 50% will not accrue holiday hours on the B1 holiday until the B2<br />
timesheet has been submitted. The resulting earned holiday hours are applied against the<br />
B1 pay period. If the employee does not have a B1 timesheet at the time the B2 timesheet<br />
is approved, the B1 holiday is not calculated.<br />
This section will lists employees who have earned holiday time based upon the combined<br />
B1 and B2 timesheets.<br />
Perform one of the following actions:<br />
Return – Send the timesheet back to the Supervisor for editing.<br />
EDLR ‐ To indicate that a manual transaction will be processed in PPS. See slide 63 for<br />
more details.<br />
Submit to PPS – To have TRS process aweb EDLR (LX) if applicable. See slide 62 for<br />
more details.<br />
56
VMT ‐ Adjustments to Multiple Assignments<br />
For employees with multiple assignments, adjustments entries could be generated if the<br />
approval of additional assignments on the same timesheet creates required changes to a<br />
timesheet already submit to PPS (roster) or when a prior completed timesheet has been<br />
adjusted.<br />
Perform one of the following actions:<br />
Return – Send the timesheet back to the Supervisor for editing.<br />
EDLR ‐ To indicate that a manual transaction will be processed in PPS. See slide 63 for<br />
more details.<br />
Submit to PPS – To have TRS process aweb EDLR (LX) if applicable. See slide 62 for<br />
more details.<br />
57
VMT‐ Adjustments to Completed Timesheets<br />
This section will display timesheets that were unlocked and released back to the supervisor<br />
for adjustments. When unlocked timesheets are adjusted and re‐approved, prior<br />
completed timesheets may or might not generate correcting entries when re‐submitted. All<br />
prior completed timesheets are listed in this section once re‐approved.<br />
Perform one of the following actions:<br />
*EDLR ‐ To indicate that a manual transaction will be processed in PPS. See slide 63 for<br />
more details.<br />
Submit to PPS – To have TRS process aweb EDLR (LX) if applicable. See slide 62 for<br />
more details.<br />
*<strong>Note</strong>: If the adjusting entries are negative, an EDLR (RX) must be processed by the DTA in<br />
PPS.<br />
58
VMT ‐ Distribution Missing or Shift Differential Due<br />
1. This section contains approved timesheets where the employee reported shift<br />
differential hours but does not have a shift differential distribution established in EDB.<br />
AND/OR<br />
1. This section may include approved timesheets were the employee’s EDB distribution<br />
data has been deleted, typed over, or if their TRS profile has been removed from TRS.<br />
Perform one of the following actions:<br />
Return – Send the timesheet back to the Supervisor for editing.<br />
EDLR ‐ To indicate that a manual transaction will be processed in PPS. See slide 63 for<br />
more details.<br />
N/A* ‐ Timesheet must be submitted to PPS before SDF hours can be processed. Once<br />
processed can select EDLR function.<br />
59
VMT – Submit to PPS<br />
In addition to submitting timesheet data to the PPS roster, the DTA can also submit EDLR<br />
(LX) transitions to the Transaction Holding File (THF), saving considerable time.<br />
On the View Manual Transaction page, the DTA can choose to submit the displayed<br />
transaction as a PPS_LX, if applicable.<br />
Issues to keep in mind when submitting to PPS_LX):<br />
• TRS will generate a web‐based EDLR (LX) transaction. Submitted transactions can be<br />
viewed on the IDTL screen since its a web file. See slide 64 for more details.<br />
• The DTA must verify the date the transaction will appear on the web‐based THF.<br />
PPS_LX transactions are scheduled to be processed on the employee’s next pay day. A<br />
pop‐up box will display the PPS submission date.<br />
• If the transaction must be processed prior to the TRS submission date, the DTA should<br />
select the EDLR function and manually process the transaction in PPS.<br />
60
EDLR Function<br />
There are occasions when the DTA may not want a timesheet to be processed directly to the<br />
IDTC Roster, but prefer another method of processing the timesheet data.<br />
For example:<br />
• An employee is separating prior to the pay day and a separation rush check is needed.<br />
• A timesheet was submitted late and the DTA prefers to process a rush check instead of<br />
submitting the timesheet for the employee’s next available pay day.<br />
When an *EDLR (or EDAP) transaction is processed on a timesheet, the DTA should record the<br />
transaction in TRS:<br />
1. Click on the EDLR button.<br />
2. A pop‐up window will appear. If an EDLR transaction is to be completed, select “EDLR<br />
Yes”. If the transaction is for a final paycheck, select “Final Pay”.<br />
3. Enter the date the EDLR transaction will be entered into PPS.<br />
4. Enter any comments.<br />
5. Select Submit.<br />
6. The transaction will remove from the PPS Roster or VMT.<br />
7. Go into PPS and process the EDLR or EDAP transaction.<br />
8. If “EDLR No” is selected, comments must be entered as to why the timesheet will not be<br />
processed in PPS. Select Submit. TRS will remove the transaction from the VMT.<br />
*Important: The DTA/PTR Preparer must process the EDLR/EDAP in PPS when the “EDLR Yes”<br />
or “Final Pay” function is selected.<br />
61
Web Service –IDTL<br />
All timesheet data submitted to PPS via TRS can be viewed immediately in the Transaction<br />
Holding File, IDTL screen.<br />
Transactions include:<br />
• Work hours<br />
• Leave hours<br />
• PPS(LX) transactions<br />
The DTA can view the scheduled transactions by going to PPS:<br />
1. In the “Next Function” enter “EDAT”, select “Enter”<br />
2. Once on the Depts. Adj Trans screen, enter the following:<br />
a. Next Function –IDTL<br />
b. ID or Name –Enter the employee's UID or name<br />
c. Seq. No –Leave blank<br />
d. Pay Cycle –the pay cycle the transactions are scheduled for (i.e. B1, B2, MO)<br />
e. Pay End –the pay period end date of the transactions (ex. 070712)<br />
For complete details on the IDTL screen, see Section D11 ‐Transaction List in the PTR<br />
Manual.<br />
62
In order to search for a timesheet – select “Search Timesheets”.<br />
63
This section allows the DTA to search for timesheets based upon one or more of the<br />
following criteria:<br />
1. Employee ID – employee’s UID<br />
2. Employee name – First name last name or last name, first name<br />
3. Begin Date ‐ Pay period begin date<br />
4. End Date ‐ Pay period end date<br />
5. Department Code –six digit FS number, must add two zeros at the end. Example: 3525<br />
becomes 352500.<br />
6. Tracking (Work Flow) Status – select from one of the available status codes listed in the<br />
dropdown menu (see slide 52 for a list of status codes)<br />
7. Timesheet Identifier ‐ Job assignment (job nickname if assigned)<br />
8. Job IDs –N/A<br />
9. Pay Schedule –enterif biweekly or monthly<br />
64
Releasing a Prior Completed Timesheet<br />
Sometimes a DTA may be notified that a timesheet that was previously completed in TRS is<br />
incorrect or requires an adjustment. The employee will not be able to re‐create a new timesheet<br />
that has already been completed. The DTA must unlock and release the timesheet back to the<br />
supervisor, who must return it back to the employee to add the adjusting entries.<br />
How to unlock and release a completed timesheet:<br />
1. Under Search Timesheets find the employee. See slides 66 for details on how to search<br />
timesheets.<br />
2. Find the pay period for the timesheet that must be released.<br />
3. Click on the Lock icon (Release timesheet). A Comment window will appear. Comments are<br />
required when a timesheet is unlocked and released back to the supervisor for adjustments.<br />
4. Select “Release Timesheet”. The timesheet is sent back to the supervisor.<br />
5. The Supervisor must review and return the timesheet back to the employee.<br />
6. The employee makes the necessary adjustment(s) to the timesheet and re‐submits it to the<br />
supervisor.<br />
7. The supervisor reviews, approves and submits the timesheet back to the DTA.<br />
8. The DTA should review “View Manual Transactions”. Re‐submitted timesheet will appear in<br />
the Adjustments to Completed Timesheets and/or the Adjustment to Multiple Assignments<br />
section based upon the type of adjustment(s) that was made. See slide 59 and 60 for more<br />
details.<br />
65
Search Timesheets – Weekly Hours Estimator<br />
To assist DTAs with the hours TRS has computed and will report to PPS a “Weekly Hours<br />
Estimator” feature has been added.<br />
The estimator breaksdown the details of the hours per each week in the pay period. It<br />
displays the DOS Codes and leave (if any) reported for that timesheet.<br />
See Weekly Hours Estimator handout for more details.<br />
66
Timesheet Workflow<br />
The DTA can select the workflow icon to see details of the timesheet. The Timesheet<br />
Workflow lists information such as the date and time stamp from the date the employee<br />
submitted the timesheet to the date and time the timesheet was submitted to PPS.<br />
The following information is displayed:<br />
1. Name/ Employee ID Number<br />
2. Pay Period/Title/Job Assignment/Job nick name, if any<br />
3. Status Code –location of timesheet<br />
4. Completed by – individual that performed the action on the timesheet<br />
5. Completion date –the date and time the action was performed<br />
6. Comments –all comments will be listed for review<br />
7. Total turnaround time –the total time it took to process the timesheet from the<br />
date and time the employee submitted the timesheet to his/her supervisor to the<br />
date and time it was COMPLETED. This field will only be displayed if the timesheet<br />
has reached the COMPLETED status<br />
67
Generate Reports<br />
TRS offers the DTA three reports that can be generated and exported to Excel or PDF.<br />
There are three sub tabs under Generate Reports:<br />
1. DTA <strong>Payroll</strong> Report –a report that shows all timesheets submitted by the DTA.<br />
2. Employee Assignment Report –a report that shows employee (supervisors)<br />
assignment.<br />
3. Work Schedule Report –a report that shows the various work schedules entered in<br />
TRS.<br />
68
DTA <strong>Payroll</strong> Report<br />
The DTA may generate this report to see the status of timesheets submitted by the DTA. The<br />
DTA can generate a report based upon one or more of the following fields:<br />
1. Employee ID –enter the employee’s UID<br />
2. Employee Name –enter first name last name or last name first name format<br />
3. Period End Date –to see all timesheets with the entered pay period end date<br />
4. Department Code ‐ six digit FS number, need to add two zeros at the end Example: 3525<br />
becomes 352500.<br />
5. Tracking Status –the final status in TRS of the submitted timesheet by the DTA ‐<br />
• SUBMITTED_TO_PPS –time submitted to PPS, awaiting pay compute.<br />
• SUBMITTED_TO_PPS(LX) –time submitted to PPS as an EDLR transaction (coded as<br />
such in TRS)<br />
• PPS_ERROR – timesheet could not be processed due to error. See slide 55 for more<br />
details<br />
• COMPLETED – timesheet was successfully submitted to PPS (via IDTC roster or LX<br />
transaction)<br />
6. Pay schedule – select if searching for biweekly or monthly timesheets<br />
7. Report Type –chose if the report should be generated in the Excel or PDF format<br />
8. Select “View Report”. A printable report id displayed which can be used to reconcile<br />
against the PPP5302.<br />
* The DTA must indicate a “Tracking Status” when generating this report.<br />
69
Employee Assignment Report<br />
This report is to search for assignment of supervisors to employees. One use is to see if all<br />
employees have been assigned a primary and backup supervisor.<br />
The DTA can generate a report based upon one or more of the following fields are:<br />
1. Employee ID* –employee UID<br />
2. Employee name – First name last name or last name, first name<br />
3. Primary Supervisor Name ‐ enter supervisor's name, first name last name or last name,<br />
first name<br />
4. Backup Supervisor Name ‐ enter supervisor's name, first name last name or last name,<br />
first name<br />
5. Department Code –six digit FS number, need to add two zeros at the end<br />
Example: 3525 becomes 352500.<br />
6. Timesheet Identifier ‐ Job assignment (job nickname if assigned)<br />
* Can perform a blanket search by leaving all fields blank and selecting “Generate Report”.<br />
70
Work Schedule Report<br />
The DTA may generate this report to see the various assigned work schedules entered in<br />
TRS.<br />
The DTA can generate a report based upon one or more of the following fields:<br />
1. Employee ID –enter the employee’s UID<br />
2. Employee Name –enter first name last name or last name first name format<br />
3. Department Code ‐ six digit FS number, need to add two zeros at the end. Example:<br />
3525 becomes 352500.<br />
4. Active Schedule only –check this box, to include history work schedule data<br />
5. Schedule Type – select from the list: All, Fixed Schedule, Variable Schedule, 9/80<br />
Alternate Schedule, 4/40 Alternate Schedule<br />
6. Select ‘Search” to run the report<br />
7. Can choose view the report in the Excel (XLS) or PDF format<br />
See slides 36‐44 for more details on the various work schedules.<br />
71
Email Notifications<br />
When certain transactions occur, TRS will generate email notifications to alert the DTA that<br />
special attention may be required:<br />
• Notification of Adjustment Entries Affecting TRS Timesheet ‐ the employee has<br />
multiple appointments or when retroactive changes are made to an unlocked and<br />
released prior completed timesheet. This notice is sent to all DTAs (even in various<br />
departments) for the employee.<br />
• Notification of Blocked TRS entry to EDB update –When a retroactive appointment<br />
change in PPS (IAPP) applies to a past appointment end date and any hours entered on<br />
an already created timesheet beyond this date are removed by the TRS profile loading<br />
process.<br />
• Notification of Timesheet Approval passed DTA Deadline –when a supervisor submits<br />
an approved timesheet past the DTA deadline date and time. This notice is usually<br />
generated when a supervisor approves a timesheet from a prior pay period.<br />
TRS emails are generated from: UC Time Reporting System [TRS@IT.<strong>UCLA</strong>.EDU]. Please<br />
ensure that these notices are not setup as spam or junk mail.<br />
72
It is the department’s responsibility to train eligible new employees and supervisors on TRS.<br />
To accommodate all employees and supervisors who may be unable to attend the<br />
instructor‐led training sessions, departmental personnel can refer to the TRS Resources<br />
page for:<br />
• PDF documents of the Employee and Supervisors training<br />
• TRS Submission Deadline schedules<br />
• Additional TRS information<br />
Newly assigned DTAs must attend a instructor‐led class. Please contact the TRS Help Desk<br />
if a new DTA requires training.<br />
73
Questions or issues regarding TRS may be resolved by referring to the TRS Resources page<br />
or by contacting the TRS Help Desk:<br />
By email ‐ payroll@finance.ucla.edu include in the subject heading “TRS”<br />
By phone – (310) 794‐8708<br />
74