Configuring NowSMS as an MMSC
Configuring NowSMS as an MMSC
Configuring NowSMS as an MMSC
- No tags were found...
Create successful ePaper yourself
Turn your PDF publications into a flip-book with our unique Google optimized e-Paper software.
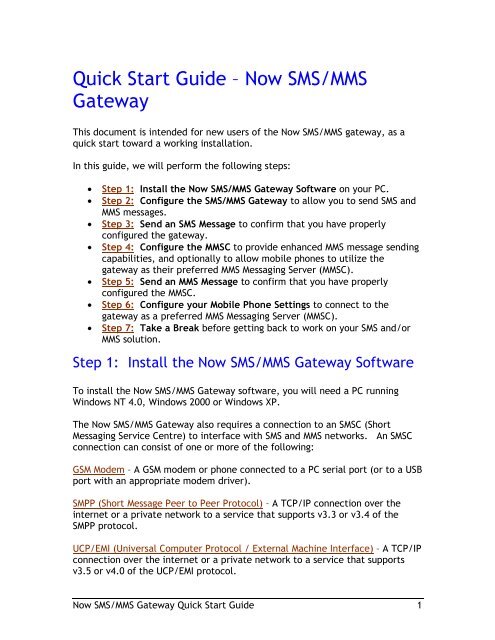
Quick Start Guide – Now SMS/MMSGatewayThis document is intended for new users of the Now SMS/MMS gateway, <strong>as</strong> aquick start toward a working installation.In this guide, we will perform the following steps:• Step 1: Install the Now SMS/MMS Gateway Software on your PC.• Step 2: Configure the SMS/MMS Gateway to allow you to send SMS <strong>an</strong>dMMS messages.• Step 3: Send <strong>an</strong> SMS Message to confirm that you have properlyconfigured the gateway.• Step 4: Configure the <strong>MMSC</strong> to provide enh<strong>an</strong>ced MMS message sendingcapabilities, <strong>an</strong>d optionally to allow mobile phones to utilize thegateway <strong>as</strong> their preferred MMS Messaging Server (<strong>MMSC</strong>).• Step 5: Send <strong>an</strong> MMS Message to confirm that you have properlyconfigured the <strong>MMSC</strong>.• Step 6: Configure your Mobile Phone Settings to connect to thegateway <strong>as</strong> a preferred MMS Messaging Server (<strong>MMSC</strong>).• Step 7: Take a Break before getting back to work on your SMS <strong>an</strong>d/orMMS solution.Step 1: Install the Now SMS/MMS Gateway SoftwareTo install the Now SMS/MMS Gateway software, you will need a PC runningWindows NT 4.0, Windows 2000 or Windows XP.The Now SMS/MMS Gateway also requires a connection to <strong>an</strong> SMSC (ShortMessaging Service Centre) to interface with SMS <strong>an</strong>d MMS networks. An SMSCconnection c<strong>an</strong> consist of one or more of the following:GSM Modem – A GSM modem or phone connected to a PC serial port (or to a USBport with <strong>an</strong> appropriate modem driver).SMPP (Short Message Peer to Peer Protocol) – A TCP/IP connection over theinternet or a private network to a service that supports v3.3 or v3.4 of theSMPP protocol.UCP/EMI (Universal Computer Protocol / External Machine Interface) – A TCP/IPconnection over the internet or a private network to a service that supportsv3.5 or v4.0 of the UCP/EMI protocol.Now SMS/MMS Gateway Quick Start Guide 1
CIMD2 (Computer Interface to Message Distribution, version 2) – A TCP/IPconnection over the internet to a service that supports the CIMD2 protocol.CIMD2 is implemented by Nokia SMSCs.HTTP (Hyper Text Tr<strong>an</strong>sport Protocol, e.g., the st<strong>an</strong>dard protocol for the“web”) – A TCP/IP connection over the internet or private network to a servicethat accepts SMS messages via <strong>an</strong> HTTP “GET” b<strong>as</strong>ed protocol. (This protocolallows you to chain multiple Now SMS/MMS Gateways together.)The installation program for the Now SMS/MMS gateway software is selfexpl<strong>an</strong>atory.It will prompt for a directory in which to install the software, <strong>an</strong>dwill then proceed to install the software into the specified directory.The installation will create a program group named “<strong>NowSMS</strong>”, which contains4 entries:Now SMS Gateway – Runs the configuration program for the Now SMS/MMSGateway.Now SMS Gateway Help – Loads the help file for the Now SMS/MMS Gatewayinto your web browser. (The file is stored locally on your hard drive, howeverit is a collection of pages in a web format.)Now SMS Web Interface – Connects to the “web menu interface” of the <strong>NowSMS</strong>/MMS Gateway via your web browser, allowing you to quickly send test SMS<strong>an</strong>d MMS messages.Now SMS Web Site – Connects to the home page of the Now SMS Web Site(http://www.nowsms.com), where you c<strong>an</strong> access discussion boards,frequently <strong>as</strong>ked questions, <strong>an</strong>d other information resources about thesoftware.When the installation program is complete, the Now SMS/MMS gatewayconfiguration program will load automatically.Now SMS/MMS Gateway Quick Start Guide 2
Step 2: Configure the SMS/MMS GatewayThe first step in configuring the SMS/MMS gateway is to configure SMSC (ShortMessaging Service Centre) settings, which tell the gateway how it connects tothe GSM network to send SMS messages.Step 2a: Configure SMSC SettingsWhen the Now SMS/MMS Gateway configuration program is first loaded, youwill see a setup screen similar to the following:If you do not see this particular screen, select the “SMSC” page from thegateway configuration dialog.Now SMS/MMS Gateway Quick Start Guide 3
For <strong>an</strong> initial installation, no SMSC connections will have been defined. Youwill need to define <strong>an</strong> SMSC connection to tell the gateway how to send SMSmessages.This quick start guide will focus on GSM Modem connections. For moreinformation on other types of SMSC connections, follow the highlighted link toopen a page that explains the configuration settings for the type of SMSCconnection that you will be establishing: SMPP, UCP/EMI, CIMD2, or HTTP.When you have completed SMSC configuration, you c<strong>an</strong> continue with thesection titled “Step 2b: Configure Web Settings for SMS/MMS Gateway”.When no SMSC have yet been defined, only the “Add” button will be availableon this dialog. Select “Add”, <strong>an</strong>d then “GSM Phone or Modem” to display alist of available modem drivers on your computer.Now SMS/MMS Gateway Quick Start Guide 4
Select <strong>an</strong> available modem <strong>an</strong>d press the “Test <strong>an</strong>d Add Modem” button. Thegateway will then attempt to initialize the modem, <strong>an</strong>d confirm that themodem supports the necessary interfaces to send <strong>an</strong>d receive SMS messages.The modem will only be added to the configuration if the gateway confirmsthat it c<strong>an</strong> properly communicate with the modem.What if the gateway says it c<strong>an</strong>not initialize my modem?! It is possible to define a modem connection by either selecting thename of the Windows modem driver, or selecting the name of theCOM port to which the modem is connected. If you are attempting toconnect to a modem by specifying a COM port <strong>an</strong>d are experiencingproblems, the best way to troubleshoot this problem is to ensure thatyou are connecting to the phone or modem using a Windows modemdriver supplied by the phone or modem m<strong>an</strong>ufacturer, instead ofgoing directly to a COM port. When you configure a GSM modemconnection for the gateway, you are presented with a list of modemdrivers installed on your system, <strong>as</strong> well <strong>as</strong> a list of COM ports. Youwill achieve better results going through the modem driver. If youhave not installed a Windows modem driver for your device, visit them<strong>an</strong>ufacturer web site, or use the CD supplied by the m<strong>an</strong>ufacturer,<strong>an</strong>d install the appropriate modem driver.! Assuming <strong>an</strong> appropriate modem driver is installed, go into theWindows Control P<strong>an</strong>el, <strong>an</strong>d select the “Modems” or “Phone <strong>an</strong>dModem Options” applet. In the diagnostics section, ensure that youare able to use “Query Modem” to interface with your modem, whichwill ensure that Windows is able to properly communicate with themodem. The Now SMS/MMS gateway will not be able to access themodem if it is not accessible to Windows. Follow the instructionsfrom the device m<strong>an</strong>ufacturer if you encounter problems accessingthe modem in the Windows Control P<strong>an</strong>el.! One common problem is <strong>an</strong> incorrect cable. Some phonem<strong>an</strong>ufacturers have different cables for different purposes. Youw<strong>an</strong>t to the type of cable that allows your PC to use the phone <strong>as</strong> amodem (sometimes referred to <strong>as</strong> a “data/fax cable”). For example,most Nokia phones have DLR-3 <strong>an</strong>d DAU-9 types of cables. The DLR-3type is for data/fax applications, <strong>an</strong>d the DAU-9 is for use with LogoM<strong>an</strong>ager. The Now SMS/MMS gateway requires the DLR-3 type(data/fax).Now SMS/MMS Gateway Quick Start Guide 5
Once the modem h<strong>as</strong> been added to the SMSC list, <strong>as</strong> shown below, continuewith the next step of the configuration process.Step 2b: Configure Web Settings for SMS/MMS GatewayWhen you wish to submit <strong>an</strong>y type of SMS message, including MMS notificationsor WAP push messages, you will submit the request via the gateway’s webinterface. The “Web” page of the configuration dialog contains settingsrelev<strong>an</strong>t to this web interface.Now SMS/MMS Gateway Quick Start Guide 6
When you wish to submit <strong>an</strong>y type of SMS message, including MMS notificationsor WAP push messages, you must submit the request via the gateway’s webinterface. The “Web” page of the configuration dialog contains settingsrelev<strong>an</strong>t to this web interface.You configure the gateway to listen for web/HTTP requests on a particularTCP/IP port number. The st<strong>an</strong>dard web port on the internet is 80, however youwill most likely w<strong>an</strong>t to use a non-st<strong>an</strong>dard port for this service. The servicedefaults to the non-st<strong>an</strong>dard port 8800.The PC that is running the gateway might have other web services installed.For this re<strong>as</strong>on, the gateway allows you to specify which of the available IPaddresses on the current PC should be used by the gateway. The “IP Addressfor web interface” prompt displays the available IP addresses on the currentPC. To make the gateway service available via <strong>an</strong>y address on the current PC,select “(all available)”, otherwise select a specific IP address.“Enable menu driven web interface” specifies whether or not <strong>an</strong> HTML menuwill be displayed when a user connects to the gateway via the web interface.Now SMS/MMS Gateway Quick Start Guide 7
This menu interface c<strong>an</strong> be helpful when you are first exploring the features ofthe gateway. If this menu setting is disabled, then the gateway will requirethe appropriate URL parameters to perform <strong>an</strong>y t<strong>as</strong>ks. For the purpose of this“Quick Start Guide”, we recommend enabling this option. You may decide todisable this option after you become more familiar with the product.Import<strong>an</strong>t: Click the “Apply” button at the bottom of the dialog to save theconfiguration settings that you have entered thus far.Step 2c: Install the SMS/MMS Gateway ServiceThe next step in configuring the SMS/MMS Gateway is to install the service.The Now SMS/MMS Gateway installs <strong>as</strong> a Windows service, which me<strong>an</strong>s that itis automatically loaded <strong>an</strong>d run when the computer is restarted. The servicec<strong>an</strong> also be m<strong>an</strong>ually started <strong>an</strong>d stopped via the Services option in theWindows control p<strong>an</strong>el.To install the Now SMS/MMS Gateway <strong>as</strong> a service, select the “Service” page ofthe configuration dialog.Now SMS/MMS Gateway Quick Start Guide 8
Click the “Run <strong>as</strong> a Service” check boxes. After several seconds, the text ofthe “Start” button should be grayed out, while the text of the “Stop” button isenabled. This indicates that the Now SMS/MMS Gateway service is nowrunning.If <strong>an</strong> error occurs when installing the service, ensure that you are logged intoWindows with <strong>an</strong> account that h<strong>as</strong> administrator privileges which is allowed toinstall <strong>an</strong>d remove services.It is also possible for <strong>an</strong> error message to be displayed indicating: “Gateway isnot active. Port number for web interface already in use by <strong>an</strong>otherapplication. Ple<strong>as</strong>e ch<strong>an</strong>ge the port number on the Web page of this dialog.”This error message indicates that the “Port Number for Web Interface”configured on the “Web” page of the dialog in Step 2b, is in use by <strong>an</strong>otherNow SMS/MMS Gateway Quick Start Guide 9
application. Return to Step 2b, <strong>an</strong>d select <strong>an</strong>other port, or ch<strong>an</strong>ge the portsetting in the other application.Now SMS/MMS Gateway Quick Start Guide 10
Step 3: Send <strong>an</strong> SMS MessageOnce the SMS/MMS gateway is installed, the next step is to test your SMSconnectivity to verify that you are able to properly send SMS messages.The e<strong>as</strong>iest way to send <strong>an</strong> SMS message through the gateway is to connect tothe “web menu interface”. To connect to this interface, load a web browseron the same PC on which the gateway is installed, <strong>an</strong>d connect to the address:http://127.0.0.1:8800Note: If you configured <strong>an</strong> HTTP port number other th<strong>an</strong> “8800” on the “Web”page of the dialog in Step 2b, then substitute that number for “8800”.Note: 127.0.0.1 is <strong>an</strong> internal TCP/IP loopback address which tells your webbrowser to connect to a service that is running locally on your PC. If in Step2b, you selected a specific address for “IP Address for Web interface”, then the127.0.0.1 address will not work, <strong>an</strong>d you must replace “127.0.0.1” with theaddress entered on the “Web” page of the configuration dialog.The web browser should display a web page similar to the following:This web page provides a menu driven interface for sending various types ofSMS <strong>an</strong>d MMS messages.Now SMS/MMS Gateway Quick Start Guide 11
To test that you c<strong>an</strong> send SMS messages, begin by sending a simple SMSmessage. Enter the phone number of the message recipient <strong>an</strong>d some text forthe message, then click “Submit”.Wait up to several minutes, <strong>an</strong>d verify that the recipient h<strong>as</strong> received the SMSmessage.What if the recipient did not receive the SMS message?! If you are using a GSM phone <strong>as</strong> your modem, verify that you c<strong>an</strong>send <strong>an</strong> SMS message to that same recipient using the menus on themobile phone. If you c<strong>an</strong>not send the SMS message directly via thephone, then the gateway software will not be able to send themessage.! If you are using a dedicated GSM modem, try placing the SIM card in aGSM phone, <strong>an</strong>d verify that you c<strong>an</strong> send <strong>an</strong> SMS message to thatsame recipient using the menus on the mobile phone. If you c<strong>an</strong>notsend the SMS message directly via the phone, then the gatewaysoftware will not be able to send the message.! If you <strong>an</strong> SMSC connection via HTTP, UCP/EMI or SMPP, try alternateformats for the phone number of the recipient. Some services preferto only process messages where the phone number format isexpressed in international notation (e.g., +447778001210 instead of07778001210).! Go into the “Event Viewer” under the Administrative Tools of yourWindows system. Select the “Application” log, <strong>an</strong>d look to see ifthere are <strong>an</strong>y recent entries from a source of “<strong>NowSMS</strong>”. If there are<strong>an</strong>y entries for “<strong>NowSMS</strong>”, they are likely to be error messagesregarding <strong>an</strong> inability to make a particular SMSC connection. If this isthe c<strong>as</strong>e, go to the “Services” page of the configuration dialog, click“Remove Service”, <strong>an</strong>d return to Step 2a (“SMSC” page) to test yourSMSC connection.! You may need to contact <strong>NowSMS</strong> technical support. Go to the“Services” page of the configuration dialog, click “Remove Service”.M<strong>an</strong>ually edit the SMSGW.INI file in the gateway directory, <strong>an</strong>d underthe [SMSGW] section header, add the setting Debug=Yes. Return tothe “Services” page of the configuration dialog, click “InstallService”, then repeat your test. If you continue to experienceservice failures, e-mail all files with a “.log” file extension in thegateway directory to nowsms@now.co.uk, along with <strong>an</strong>y relev<strong>an</strong>tinformation to describe your problem.Now SMS/MMS Gateway Quick Start Guide 12
Next, you may w<strong>an</strong>t to verify that you are able to correctly send binaryformatted SMS messages. All of the other types of messages that the Now SMSgateway supports are different binary SMS message formats.The simplest binary SMS message to send is a WAP Push message. A WAP Pushmessage displays a text prompt on the mobile phone, <strong>an</strong>d gives the user <strong>an</strong>option to connect to a specific link via the WAP browser. You will, of course,need a recipient with a mobile phone that supports WAP push. As MMStechnology is built on top of WAP Push, <strong>an</strong>y phone with MMS capabilities c<strong>an</strong> beused for this test.To send a WAP push message, from the “web menu interface”, select “SendWAP Push Message”. A web page similar to the following will be displayed:It h<strong>as</strong> never been simpler to send a WAP Push message. Simply enter a phonenumber, a WAP URL (if the “http://” prefix is not included it will be addedautomatically), <strong>an</strong>d some text to be included in the informational messagedisplayed to the user. The gateway will automatically generate <strong>an</strong>d send aWAP Push “Service Indication” (SI) message to the specified phone number.If you are unsure what information to enter, simply enter:WAP URL: http://www.now.co.uk/index.wmlText: This is a test WAP PushNow SMS/MMS Gateway Quick Start Guide 13
The user interface for receiving a WAP push message will vary between phones,but there should be a visual indication on the display of the mobile phone whena push message is received.If the push is not received, but text messages are, you should first verify thatpush is enabled on the recipient mobile phone. Push is normally enabled bydefault, but c<strong>an</strong> be disabled via settings on the mobile phone. Refer to yourmobile phone documentation for more information. Assuming that youeventually w<strong>an</strong>t to send MMS messages to the mobile phone, WAP Push willneed to be enabled on the phone <strong>as</strong> MMS is built on top of WAP Push services.If you are having problems receiving the WAP push message <strong>an</strong>d w<strong>an</strong>t to verifythe ability to send binary messages, then if your h<strong>an</strong>dset supports EMS, select“Send Binary Message” from the “web menu interface”. Specify “MessageType” <strong>as</strong> “Other”, “User Data Header” <strong>as</strong> “080D0200040B020007”, <strong>an</strong>d “BinaryData” <strong>as</strong> “00”. “PID” <strong>an</strong>d “DCS” c<strong>an</strong> be left <strong>as</strong> 0. The recipient should receive<strong>an</strong> SMS/EMS message with a simple <strong>an</strong>imation <strong>an</strong>d sound effect.If you continue to have problems, try sending messages to other devices. It ispossible that the SMSC you are using may have problems sending binarymessages. You may w<strong>an</strong>t to e-mail technical support at nowsms@now.co.uk,providing details about your configuration, <strong>an</strong>d <strong>as</strong>king for suggestions on how toproceed.Now SMS/MMS Gateway Quick Start Guide 14
Step 4: Configure the <strong>MMSC</strong>You will need to configure the <strong>MMSC</strong> in order to take adv<strong>an</strong>tage of the moreadv<strong>an</strong>ced MMS functionality of the Now SMS/MMS gateway. Without the <strong>MMSC</strong>,you will still be able to “Send MMS Notifications” where the MMS content isstored on a separate web server, but you won’t be able to use the “Send MMSMessage” feature of the “web menu interface”, or make use of the “E-Mail toMMS” gateway.The gateway includes a powerful <strong>MMSC</strong> Messaging Server, integrated into theNow SMS/MMS gateway.The <strong>MMSC</strong> supports sending MMS messages between mobile phones, <strong>an</strong>d alsosupports sending <strong>an</strong>d receiving MMS messages between mobile phones <strong>an</strong>dst<strong>an</strong>dard internet e-mail systems.Import<strong>an</strong>t: The gateway PC must be accessible via the internet in order to useits <strong>MMSC</strong>. Mobile phones will need to connect to <strong>an</strong> HTTP port on the <strong>MMSC</strong> inorder to retrieve MMS messages. If your gateway PC is not accessible via theinternet, you will not be able to use the <strong>MMSC</strong> functionality.Step 4a: General <strong>MMSC</strong> ConfigurationConfiguration for the <strong>MMSC</strong> c<strong>an</strong> be found under the “<strong>MMSC</strong>” <strong>an</strong>d “<strong>MMSC</strong> Users”configuration pages of the gateway.The “<strong>MMSC</strong>” configuration page specifies general configuration information forthe <strong>MMSC</strong>:Now SMS/MMS Gateway Quick Start Guide 15
The <strong>MMSC</strong> runs <strong>as</strong> a separate service process from the gateway. As you areconfiguring the <strong>MMSC</strong> service with the intent of using it, check the box next tothe prompt “Activate <strong>MMSC</strong> Service”.When a mobile phone sends or receives <strong>an</strong> MMS message, it makes <strong>an</strong> HTTPconnection to <strong>an</strong> <strong>MMSC</strong> (usually through a WAP gateway). The <strong>MMSC</strong> contains<strong>an</strong> integrated HTTP server to process these connections. Ple<strong>as</strong>e specify <strong>an</strong>available “HTTP Port Number” on the local computer for the HTTP server toaccept connections from mobile phones.Import<strong>an</strong>t: Some mobile operator WAP gateways have firewalls which preventthem from connecting to content servers that are installed on ports other th<strong>an</strong>the default HTTP port of 80. Use caution when configuring the <strong>MMSC</strong> for a portother th<strong>an</strong> 80, <strong>as</strong> this may prevent MMS messages from being received via someservices.MMS messages c<strong>an</strong> be sent to <strong>an</strong>d received from, st<strong>an</strong>dard internet e-mailaccounts. To support this functionality, the <strong>MMSC</strong> provides message formatNow SMS/MMS Gateway Quick Start Guide 16
conversions between MMS <strong>an</strong>d SMTP. To accept messages from internet e-mailaccounts, the <strong>MMSC</strong> contains <strong>an</strong> integrated SMTP server. Ple<strong>as</strong>e specify <strong>an</strong>available “SMTP Port Number” on the local computer for the SMTP server toaccept e-mail messages from internet e-mail recipients. Note that thest<strong>an</strong>dard SMTP port number is 25, <strong>an</strong>d you will require special configuration of<strong>an</strong>other SMTP mail server in your network to support relaying to a port otherth<strong>an</strong> 25.The PC that is running the gateway might have other web <strong>an</strong>d mail servicesinstalled. For this re<strong>as</strong>on, the gateway allows you to specify which of theavailable IP addresses on the current PC should be used by the gateway. The“IP Address” prompt displays the available IP addresses on the current PC. Tomake the gateway service available via <strong>an</strong>y address on the current PC, select“(all available)”, otherwise select a specific IP address.“Local Host Name or IP Address” specifies the local host name or IP address ofthe computer that is running the <strong>MMSC</strong> service. The name or address specifiedhere will be used to construct URLs when sending MMS messages to mobilephones. If a host name is used, this host name must be defined in DNS <strong>an</strong>dresolve back to the computer running the <strong>MMSC</strong> service.“Domain Name for MMS E-Mail” specifies the SMTP domain name that is<strong>as</strong>sociated with users defined to the <strong>MMSC</strong>. When MMS users exch<strong>an</strong>ge e-mailmessages with internet recipients, this is the SMTP domain name <strong>as</strong>sociatedwith the <strong>MMSC</strong> users. Note that the <strong>MMSC</strong> acts <strong>as</strong> <strong>an</strong> e-mail server, <strong>an</strong>d youwill need to configure DNS for this domain name so that internet mail sent tothis domain name is properly routed to the PC running the gateway.When <strong>an</strong> MMS user sends a message to <strong>an</strong> SMTP recipient, the <strong>MMSC</strong> requires <strong>an</strong>“SMTP Relay Host” to tr<strong>an</strong>sfer the message to the correct internet mail serverfor the intended recipient. Ple<strong>as</strong>e define <strong>an</strong> appropriate SMTP mail server inyour network that will perform this SMTP message relay capability.Import<strong>an</strong>t: Enabling the MMS E-mail gateway requires coordination with othersystems to enable the ability to send <strong>an</strong>d receive e-mail. It is possible tooperate the <strong>MMSC</strong> without the e-mail link, leaving the “Domain Name for MMSE-Mail” <strong>an</strong>d “SMTP Relay Host” fields bl<strong>an</strong>k. You c<strong>an</strong> always return to the<strong>MMSC</strong> configuration dialog pages later to complete these settings aftercoordinating settings with your e-mail administrator.Checking “Enable Dynamic Image <strong>an</strong>d Audio Conversion” enables the dynamiccontent adaptation <strong>an</strong>d conversion services of the <strong>MMSC</strong>. The <strong>MMSC</strong> usesWAP/MMS “User Agent Profile” capabilities to determine the MIME formats thata device supports, <strong>as</strong> well <strong>as</strong> the maximum size of images supported by thedevice. Where required, the <strong>MMSC</strong> converts between common image formats(including, but not limited to GIF, JPG, PNG, BMP <strong>an</strong>d WBMP) to deliver <strong>an</strong>image supported by the device. For images larger th<strong>an</strong> the maximum sizeNow SMS/MMS Gateway Quick Start Guide 17
supported by the device, the <strong>MMSC</strong> will automatically scale the image to fit thedevice, speeding up download times. For audio formats, conversion betweenWAV <strong>an</strong>d AMR is provided in the e-mail gateway interface. MIME types notsupported by the receiving device, which c<strong>an</strong>not be supported, will be removedprior to delivery to the receiving device to prevent compatibility issues <strong>an</strong>dunnecessary download delays.Checking “Enable E-Mail WAV to AMR Conversion” enables conversionbetween WAV (audio/wav) <strong>an</strong>d AMR (audio/AMR) formats when messages areexch<strong>an</strong>ged between e-mail <strong>an</strong>d MMS recipients. For audio recordings, the WAVformat is more commonly supported for e-mail recipients, while the AMRformat is more commonly supported for MMS recipients. When this setting isenabled, AMR sound files going from MMS to e-mail are converted to WAVformat, <strong>an</strong>d WAV sound files going from e-mail to MMS are converted to AMRformat.Checking “Enable E-Mail BMP to JPEG Conversion” enables conversion of filesfrom BMP (image/bmp) to JPEG (image/jpeg) format when messages are sentfrom <strong>an</strong> e-mail sender to <strong>an</strong> MMS recipient. The BMP format is somewhatcommon in PC environment, but is not frequently supported in MMSenvironments. Even when supported in MMS environments, BMP files are verylarge, which makes them awkward <strong>an</strong>d inconvenient to tr<strong>an</strong>smit to MMSdevices.The “Enable E-Mail to SMS Support” checkbox enables the SMTP interface tobe used to send SMS messages. For more information on this setting, refer tothe help file.An administrative interface for adding, deleting <strong>an</strong>d modifying users isavailable via the HTTP port of the <strong>MMSC</strong> if <strong>an</strong> “Admin User” is defined on the<strong>MMSC</strong> dialog. If <strong>an</strong> administrative user is defined, then the administrativeinterface is available by connecting via a web browser to “/ADMIN” on the<strong>MMSC</strong> HTTP port (e.g., http://127.0.0.1/ADMIN), <strong>an</strong>d supplying the definedadministrative user name <strong>an</strong>d p<strong>as</strong>sword. The administrative interfaceprovides functionality similar to that described for the “<strong>MMSC</strong> Users” tabdialog, which is defined next, however it provides it remotely over a webinterface.Click the “Apply” button at the bottom of the dialog to activate the <strong>MMSC</strong>service. Make note of <strong>an</strong>y error messages that are displayed. In particular, <strong>an</strong>error message will be displayed if the “HTTP Port Number” conflicts with<strong>an</strong>other installed service.Step 4b: Define <strong>an</strong> <strong>MMSC</strong> UserNow SMS/MMS Gateway Quick Start Guide 18
The “<strong>MMSC</strong> Users” tab defines users that are allowed to utilize the <strong>MMSC</strong> tosend MMS messages from their mobile phone.To define a user to use the <strong>MMSC</strong>, you must define a phone number usinginternational format (e.g., +447778001210 instead of 07778001210), <strong>an</strong>d <strong>an</strong>ali<strong>as</strong> name for the user account. (The ali<strong>as</strong> name will be used <strong>as</strong> the user namewhen sending <strong>an</strong>d receiving SMTP e-mail, <strong>an</strong>d when the mobile phone logs on tothe <strong>MMSC</strong> to send messages.)Note that for a mobile phone user to use the simple <strong>MMSC</strong> integrated with thisgateway, the mobile phone user must configure their <strong>MMSC</strong> (MMS MessagingServer) to point to the address of the <strong>MMSC</strong>, <strong>an</strong>d include their user name <strong>an</strong>dp<strong>as</strong>sword in the <strong>MMSC</strong> URL. Example:http://x.x.x.x/username=p<strong>as</strong>swordorNow SMS/MMS Gateway Quick Start Guide 19
http://host.domain:81/username=p<strong>as</strong>swordInclude a port number (e.g., “:81”) in the URL if you have configured the <strong>MMSC</strong>HTTP port for a port other th<strong>an</strong> “80”.The username c<strong>an</strong> be either the user’s ali<strong>as</strong> name or phone number.As you become more familiar with the Now SMS/MMS gateway, you will w<strong>an</strong>t tonote that the gateway includes a WAP OTA (“Over The Air”) configurationcapability, which enables you to send WAP configuration settings to Nokia <strong>an</strong>dEricsson mobile phones via special SMS messages, which c<strong>an</strong> greatly simplifythe process of configuring these settings on mobile phones.Now SMS/MMS Gateway Quick Start Guide 20
Step 5: Send <strong>an</strong> MMS MessageThis step focuses on sending <strong>an</strong> MMS message from the gateway to a mobilephone. Sending MMS messages from the mobile phone will be covered in Step6.The e<strong>as</strong>iest way to send <strong>an</strong> MMS message through the gateway is to connect tothe “web menu interface”. If you do not recall how to connect to the “webmenu interface” with your web browser, refer to Step 3 to refresh yourmemory.Select “Send MMS Message” from the “web menu interface”, <strong>an</strong>d you will seea web page similar to the following:The web menu interface provides two methods for sending <strong>an</strong> MMS message.The “Send MMS Message” option allows you to define a subject, message text,<strong>an</strong>d optionally include multiple content files (uploaded via the browser).Content files may include text files, audio files, image files, SMIL files, <strong>an</strong>d/orother supported MMS content types. The gateway automatically compiles theMMS message file <strong>an</strong>d uses the gateway’s built-in <strong>MMSC</strong> to send the message.Now SMS/MMS Gateway Quick Start Guide 21
The “Send MMS Notification” option is for sending notifications for precompiledcontent residing on other content services, <strong>an</strong>d is <strong>an</strong> adv<strong>an</strong>ced topicbeyond the scope of this “Quick Start Guide”.To send your first MMS message, enter the “Phone Number” for the recipient,supply some text for the “Subject” of the message, <strong>an</strong>d enter some text forthe “Text” of the message. For your first test, you may w<strong>an</strong>t to leave the“Content File” fields bl<strong>an</strong>k, but if you’re ambitions, you could try specifyingthe filename of a small “jpeg” or “gif” file <strong>as</strong> one of the “Content File”entries. Click “Submit” to send your message.Does your browser return <strong>an</strong> error message?Your browser might return <strong>an</strong> error message when you submit the MMSmessage. Here’s what happens behind the scenes when you click “Submit”:The SMS/MMS gateway creates a compiled MMS message file, <strong>an</strong>d submits itto the local <strong>MMSC</strong>. The <strong>MMSC</strong> provides the SMS/MMS gateway with a URL forretrieving the message, b<strong>as</strong>ed upon the <strong>MMSC</strong> configuration informationdefined in Step 4. In particular, the <strong>MMSC</strong> tells the SMS/MMS gateway thatto retrieve the message that w<strong>as</strong> just submitted, it should connect to“Local Host Name or IP Address” on the “HTTP Port Number”. If the<strong>MMSC</strong> is configured incorrectly, the SMS/MMS gateway will not be able toretrieve the URL from the <strong>MMSC</strong> <strong>an</strong>d <strong>an</strong> error will occur. Of course, it ispreferable that the error occur here rather th<strong>an</strong> occurring when a mobilephone attempts to retrieve the MMS content, so you’ll w<strong>an</strong>t to correct <strong>an</strong>yconfiguration errors from Step 4 before continuing.Do you receive <strong>an</strong> MMS notification message, but are unable to access themessage content?! Re-configure your <strong>MMSC</strong> to use HTTP port 80. Some operator WAPgateways have firewalls that prevent access to <strong>an</strong>y content that is ona port other th<strong>an</strong> port 80. If you are sending <strong>an</strong> MMS notificationmessage where the content server resides on a port other th<strong>an</strong> 80,ch<strong>an</strong>ge the content server to use HTTP port 80. Repeat your attemptto send <strong>an</strong> MMS message. Note that ch<strong>an</strong>ging these settings will onlyaffect messages that are sent after the ch<strong>an</strong>ge is made, they will notch<strong>an</strong>ge attributes of messages that were already sent.! Check the WAP profile that is <strong>as</strong>sociated with the MMS setup in yourphone, <strong>an</strong>d verify that this is the same WAP profile that you use forregular WAP browsing activities. It h<strong>as</strong> been noticed that someoperators are setting up restrictive MMS profiles, where the MMSprofile connects to a separate GPRS APN, <strong>an</strong>d a separate WAPgateway, which only allow access to the operator <strong>MMSC</strong>. Afterch<strong>an</strong>ging the MMS setup to use the WAP profile that you use forNow SMS/MMS Gateway Quick Start Guide 22
egular WAP browsing activities, repeat your test. You should notneed to resend <strong>an</strong>y messages, but c<strong>an</strong> retry accessing messages forwhich notification w<strong>as</strong> already received.! It is possible that your operator h<strong>as</strong> constructed a “walled garden” inattempts to lock users to their content services. To leave the walledgarden, check with your operator to determine what GPRS APN(access point name) should be used for PDA/PC type connections, <strong>an</strong>dif a username or p<strong>as</strong>sword is required, what those values should be.Create a WAP profile on your phone that connects to that GPRS APN.Specify <strong>an</strong> IP address for the WAP gateway of 213.48.20.10 (this is agateway at the Now Wireless offices, if you have your own WAPgateway, substitute that gateway IP address). Try using that WAPprofile to browse to a site, such <strong>as</strong>http://mms.now.co.uk/index.wml. Switch back to your normal WAPsettings for browsing, but configure the MMS services on your phoneto use the WAP profile that you just created.! Are you using your own WAP gateway instead of the operator WAPgateway, or does your operator not yet support MMS? MMS requiresthat WAP gateways support “SAR” (segmentation <strong>an</strong>d re-<strong>as</strong>sembly).Some early WAP gateways did not provide this support. If you areunsure about your WAP gateway, you may w<strong>an</strong>t to try using thepublic WAP gateway referenced in the previous item.Now SMS/MMS Gateway Quick Start Guide 23
Step 6: Configure your Mobile Phone SettingsThe final step in this “Quick Start Guide” configuration is to configure yourmobile phone settings to enable the mobile phone to send MMS messages viathe <strong>MMSC</strong>.Refer to your mobile phone documentation for information on wherespecifically to define your MMS settings. Generally speaking, the menus on themobile phone where MMS settings are defined will allow you to specify a WAPprofile that is used for MMS connectivity, together with a URL for <strong>an</strong> <strong>MMSC</strong>Message Server (some Nokia phones refer to this setting <strong>as</strong> <strong>an</strong> MMS Home Page).In Step 4b, you defined one or more users to the <strong>MMSC</strong>. B<strong>as</strong>ed on those userdefinitions, define the <strong>MMSC</strong> Message Server on your phone using the followingformat:http://host.domain:81/username=p<strong>as</strong>swordorhttp://ip.address/username=p<strong>as</strong>swordInclude a port number (e.g., “:81”) in the URL only if you have configured the<strong>MMSC</strong> HTTP port for a port other th<strong>an</strong> “80”.The username c<strong>an</strong> be either the user’s ali<strong>as</strong> name or phone number.As you become more familiar with the Now SMS/MMS gateway, you will w<strong>an</strong>t tonote that the gateway includes a WAP OTA (“Over The Air”) configurationcapability, which enables you to send WAP configuration settings to Nokia <strong>an</strong>dEricsson mobile phones via special SMS messages, which c<strong>an</strong> greatly simplifythe process of configuring these settings on mobile phones. A menu driveninterface to the send “WAP OTA” messages c<strong>an</strong> be found in the “web menuinterface”.Assuming that you are successfully receiving messages per Step 5, once the<strong>MMSC</strong> Message Server is defined in your phone, you should now be able to sendmessages.Initially, we’d suggest you try sending <strong>an</strong> MMS message to your own phonenumber <strong>as</strong> a loopback test to make sure that the b<strong>as</strong>ic configuration is workingproperly.Now SMS/MMS Gateway Quick Start Guide 24
Note that you will only be able to send MMS messages to e-mail addresses if youcompleted the <strong>MMSC</strong> e-mail configuration in Step 4b.If you receive <strong>an</strong> error when sending a message, verify that the <strong>MMSC</strong> messageserver URL is configured properly in your phone. Next you c<strong>an</strong> check the<strong>MMSC</strong>-yyyymmdd.log (yyyy is the current year, mm is the current month, dd isthe current day) in your gateway directory, to see if there is <strong>an</strong> entry thatcorresponds to your sending attempts. If there is <strong>an</strong> entry in this log, then youmay need to contact <strong>NowSMS</strong> technical support at nowsms@now.co.uk forfurther troubleshooting suggestions. If there is not <strong>an</strong> entry in this log thatcorresponds to your sending attempt, then either the <strong>MMSC</strong> message server URLis not configured properly, or the path to the <strong>MMSC</strong> message server via the WAPgateway is not clear, <strong>an</strong>d you should refer to the troubleshooting steps in Step5.Now SMS/MMS Gateway Quick Start Guide 25
Step 7: Take a BreakYou earned it. For a “Quick Start Guide”, this one is a little on the long side,but we hope it helped guide you through the process!Now SMS/MMS Gateway Quick Start Guide 26
Appendix A: GSM Modem ConfigurationA GSM modem c<strong>an</strong> be <strong>an</strong> external modem device, such <strong>as</strong> the Siemens MC35 orWavecom FASTRACK external modems. Insert a GSM SIM card into this modem,<strong>an</strong>d connect the modem to <strong>an</strong> available serial port on your computer.A GSM modem c<strong>an</strong> be a PC Card installed in a notebook computer, such <strong>as</strong> theSierra Wireless Aircard 750.A GSM modem could also be a st<strong>an</strong>dard GSM mobile phone with the appropriatecable <strong>an</strong>d software driver to connect to a serial port or USB port on yourcomputer. Any phone that supports the “extended AT comm<strong>an</strong>d set” forsending/receiving SMS messages, <strong>as</strong> defined in the ETSI GSM 07.05 Specificationc<strong>an</strong> be supported by the Now SMS/MMS Gateway.A dedicated GSM modem (external or PC Card) is usually preferable to a GSMmobile phone. This is because of some compatibility issues that c<strong>an</strong> exist withmobile phones. For example, if you wish to be able to receive inbound MMSmessages with your gateway, most GSM phones will only allow you to send MMSmessgaes. This is because the mobile phone automatically processes receivedMMS message notifications these messages, without forwarding them via themodem interface. Similarly some mobile phones will not allow you to correctlyreceive SMS text messages longer th<strong>an</strong> 160 bytes (known <strong>as</strong> “concatenatedSMS” or “long SMS”). This is because these long messages are actually sent <strong>as</strong>separate SMS messages, <strong>an</strong>d the phone attempts to re<strong>as</strong>semble the messagebefore forwarding via the modem interface. (We’ve observed this latterproblem utilizing the Ericsson R380, while it does not appear to be a problemwith m<strong>an</strong>y other Ericsson models.)When you install your GSM modem, or connect your GSM mobile phone to thecomputer, be sure to install the appropriate Windows modem driver from thedevice m<strong>an</strong>ufacturer. To simplify configuration, the Now SMS/MMS Gatewaywill communicate with the device via this driver. If a Windows driver is notavailable for your modem, you c<strong>an</strong> use either the “St<strong>an</strong>dard” or “Generic”19200 bps modem driver that is built into windows. A benefit of utilizing aWindows modem driver is that you c<strong>an</strong> use Windows diagnostics to ensure thatthe modem is communicating properly with the computer.The Now SMS/MMS gateway c<strong>an</strong> simult<strong>an</strong>eously support multiple modems,provided that your computer hardware h<strong>as</strong> the available communications portresources.To define which modems are to be utilized by the gateway, select the “SMSC”tab from the gateway configuration dialog:Now SMS/MMS Gateway Quick Start Guide 27
If no modems are yet to be defined, only the “Add” button will be available onthis dialog. Select “Add”, <strong>an</strong>d then “GSM Phone or Modem” to display a listof available modem drivers on your computer.Now SMS/MMS Gateway Quick Start Guide 28
Select <strong>an</strong> available modem <strong>an</strong>d press the “Test <strong>an</strong>d Add Modem” button. Thegateway will then attempt to initialize the modem, <strong>an</strong>d confirm that themodem supports the necessary interfaces to send <strong>an</strong>d receive SMS messages.The modem will only be added to the configuration if the gateway confirmsthat it c<strong>an</strong> properly communicate with the modem. If the SIM card for themodem requires a 4-digit PIN, ple<strong>as</strong>e supply it in the field provided.Now SMS/MMS Gateway Quick Start Guide 29
Appendix B: SMPP SMSC ConfigurationThe gateway supports the SMPP (Short Message Peer to Peer) protocol, version3.3 or 3.4, to connect to <strong>an</strong> SMSC over the internet or other private TCP/IPnetwork. Some mobile operators provide SMPP connections for higher volumesof SMS traffic.To add <strong>an</strong> SMPP connection, select “Add” from the “SMSC” tab of the gatewaydialog. Then select “SMPP over TCP/IP”.Now SMS/MMS Gateway Quick Start Guide 30
“SMPP Version” specifies the version of the SMPP protocol to use. Thegateway supports “v3.3” <strong>an</strong>d “v3.4”.“Server Host Name” specifies the TCP/IP address or host name of the SMPPserver.“Port” specifies the TCP/IP port on the SMPP server to which the gatewayshould connect.“User Name” specifies the user name (sometimes called System ID) for thegateway to use when connecting to the SMPP server.“P<strong>as</strong>sword” specifies the p<strong>as</strong>sword for the gateway to use when connecting tothe SMPP server.Now SMS/MMS Gateway Quick Start Guide 31
“Address R<strong>an</strong>ge” is a parameter used primarily when receiving messages. Setthis field only if instructed to do so by your SMPP service provider.“System Type” is <strong>an</strong> optional login parameter that should be set only ifrequired by the SMPP server. The SMPP system administrator will provide thisvalue, which when required, is usually a short text string.“Sender Address” specifies the default sender address (phone number) toapply to outbound SMS messages. The SMPP server may override this setting.Check “Allow Sender Address Override” if you w<strong>an</strong>t to allow messagessubmitted to the gateway to be able to specify a sender address. If this box ischecked, <strong>an</strong>d a sender address is present in a message being submitted to <strong>an</strong>SMPP b<strong>as</strong>ed SMSC, the sender address in the message will be submitted to theSMSC. The SMPP server may override this setting.Check the “Receive SMS Messages” box if you wish to receive messages fromthe SMPP server. When this box is checked, the gateway will connect to theSMPP server with two separate connections, one bound <strong>as</strong> a tr<strong>an</strong>smitter <strong>an</strong>d theother bound <strong>as</strong> a receiver.Check the “Receive MMS Messages” box if you will be receiving MMSNotification messages via the SMSC. Note that not all service providers supportthe routing of MMS notification messages via <strong>an</strong> SMSC connection. If MMSmessages will be received via the SMSC connection, it is necessary to alsoconfigure additional MMS settings. The “MMS Settings” dialog will display adialog with additional configuration settings that are required for enabling thegateway to be able to receive MMS messages from the operator network. Foradditional configuration information on processing received MMS messages,ple<strong>as</strong>e refer to the product documentation.The “Routing” group of options is used when multiple SMSC connections aredefined to the gateway. These options define what messages should be routedto this connection. The Routing options are common to SMPP, GSM Modem,UCP/EMI <strong>an</strong>d HTTP connections, <strong>an</strong>d are described in the productdocumentation.When the “OK” button is selected, the gateway will attempt to connect to theSMPP server to verify the configuration information provided. Diagnosticinformation will be displayed if the connection fails. The connection will onlybe added to the configuration after a successful connection to the SMPP server.M<strong>an</strong>y SMPP SMSC providers will also tell you to that you need to configurecertain additional parameters in your SMPP software. You might be told tospecify particular Source TON, Source NPI, Destination TON or Destination NPIvalues.Now SMS/MMS Gateway Quick Start Guide 32
The Now SMS/MMS Gateway uses intelligent defaults for the TON <strong>an</strong>d NPI valueswhich are sufficient for 99.9% of SMPP connections.The Source TON <strong>an</strong>d NPI are settings that apply to the sender address that is<strong>as</strong>sociated with messages that are submitted by the Now SMS/MMS Gateway tothe SMSC. <strong>NowSMS</strong> automatically sets the Source TON to “1” if the senderaddress is in international format (starts with a “+” character). If the senderaddress is not in international format, <strong>NowSMS</strong> automatically sets the SourceTON to “0”. In both c<strong>as</strong>es, the Source NPI is set to “1”. If the sender addressis contains alphabetic characters <strong>an</strong>d is not a valid phone number, the SourceTON is set to “5”, <strong>an</strong>d the Source NPI is set to “0”.The Destination TON <strong>an</strong>d NPI are settings that apply to the recipient addressesfor messages that are submitted by the Now SMS/MMS Gateway to the SMSC.<strong>NowSMS</strong> automatically sets the Source TON to “1” if the sender address is ininternational format (starts with a “+” character). If the sender address is notin international format, <strong>NowSMS</strong> automatically sets the Source TON to “0”. Inboth c<strong>as</strong>es, the Source NPI is set to “1”.If it is necessary to adjust these TON <strong>an</strong>d NPI settings, they c<strong>an</strong> be adjusted viaconfiguration settings in the SMSGW.INI file. Create or modify a section of theSMSGW.INI file with a [SMPP] section header, <strong>an</strong>d the following settings aresupported under this header:SourceTON=SourceNPI=DestTON=DestNPI=If a TON or NPI value is explicitly set in the SMSGW.INI file, this value will beused in place of the automatic determination described above.Now SMS/MMS Gateway Quick Start Guide 33
Appendix C: UCP/EMI SMSC ConfigurationThe gateway supports the UCP/EMI (Universal Computer Protocol / ExternalMachine Interface) protocol, version 3.5 or 4.0, to connect to <strong>an</strong> SMSC over theinternet or other private TCP/IP network. Some mobile operators provide UCPconnections for higher volumes of SMS traffic.To add a UCP/EMI connection, select “Add” from the “SMSC” tab of thegateway dialog. Then select “UCP/EMI over TCP/IP”.Now SMS/MMS Gateway Quick Start Guide 34
“Server Host Name” specifies the TCP/IP address or host name of the UCP/EMIserver.“Server Port” specifies the TCP/IP port on the UCP/EMI server to which thegateway should connect.“User Name” specifies the user name for the gateway to use when connectingto the UCP/EMI server.“P<strong>as</strong>sword” specifies the p<strong>as</strong>sword for the gateway to use when connecting tothe UCP/EMI server.Note: Some UCP/EMI systems may not require a username <strong>an</strong>d p<strong>as</strong>sword, <strong>an</strong>dvalidate your account b<strong>as</strong>ed only on the TCP/IP address of your system. If theusername <strong>an</strong>d p<strong>as</strong>sword fields are left bl<strong>an</strong>k, the gateway will not send a UCP-60 bind message to the server to login.Now SMS/MMS Gateway Quick Start Guide 35
“Local Port”, if set, should be set to the value of a TCP/IP port number on thegateway PC. If set, the gateway will initiate all connections to the UCP/EMIserver from this port.“Sender Address” specifies the default sender address (phone number) toapply to outbound SMS messages. The UCP/EMI server may override thissetting.Check “Allow Sender Address Override” if you w<strong>an</strong>t to allow messagessubmitted to the gateway to be able to specify a sender address. If this box ischecked, <strong>an</strong>d a sender address is present in a message being submitted to <strong>an</strong>UCP/EMI b<strong>as</strong>ed SMSC, the sender address in the message will be submitted tothe SMSC. The UCP/EMI server may override this setting.Some UCP/EMI servers may require that clients submit keep-alive messages tothe server every so m<strong>an</strong>y seconds or minutes, or the server will time out theconnection. To enable keep-alive messages, specify a value in seconds for the“Keep-Alive” setting. (Note: The gateway uses a UCP-31 message for thekeep-alive message.)Check the “Enable Receive Messages” box if you wish to receive messagesfrom the UCP/EMI server. When this box is checked, the gateway c<strong>an</strong> eitherreceive messages using a single connection to the UCP/EMI server, or the“Receive Port” setting c<strong>an</strong> specify a TCP/IP port number on the gateway PCthat will listen for connections from the UCP/EMI server, <strong>an</strong>d receive messages.(Note: The “Receive Port” should be left bl<strong>an</strong>k for most configurations. Thissetting should only be specified if the UCP/EMI service provider will initiateconnections to your server when it h<strong>as</strong> a message to deliver, which is a rareconfiguration. Most service connections require that your server initiate allconnections to the service provider, <strong>an</strong>d the “Receive Port” setting is not usedin those configurations.)Check the “Receive MMS Messages” box if you will be receiving MMSNotification messages via the SMSC. Note that not all service providers supportthe routing of MMS notification messages via <strong>an</strong> SMSC connection. If MMSmessages will be received via the SMSC connection, it is necessary to alsoconfigure additional MMS settings. The “MMS Settings” dialog will display adialog with additional configuration settings that are required for enabling thegateway to be able to receive MMS messages from the operator network. Foradditional configuration information on processing received MMS messages,ple<strong>as</strong>e refer to the product documentation.The “Routing” group of options is used when multiple SMSC connections aredefined to the gateway. These options define what messages should be routedto this connection. The Routing options are common to SMPP, GSM Modem,Now SMS/MMS Gateway Quick Start Guide 36
UCP/EMI <strong>an</strong>d HTTP connections, <strong>an</strong>d are described in the productdocumentation.When the “OK” button is selected, the gateway will attempt to connect to theUCP/EMI server to verify the configuration information provided. Diagnosticinformation will be displayed if the connection fails. The connection will onlybe added to the configuration after a successful connection to the UCP/EMIserver.Now SMS/MMS Gateway Quick Start Guide 37
Appendix D: CIMD2 SMSC ConfigurationThe gateway supports the CIMD2 (Computer Interface to Machine Distribution,version 2) protocol to connect to <strong>an</strong> SMSC over the internet or other privateTCP/IP network. This protocol is implemented by Nokia SMSCs.To add a CIMD2 connection, select “Add” from the “SMSC” tab of the gatewaydialog. Then select “CIMD2 over TCP/IP”.Now SMS/MMS Gateway Quick Start Guide 38
“Server Host Name” specifies the TCP/IP address or host name of the CIMD2server.“Server Port” specifies the TCP/IP port on the CIMD2 server to which thegateway should connect.“User Name” specifies the user name for the gateway to use when connectingto the CIMD2 server.“P<strong>as</strong>sword” specifies the p<strong>as</strong>sword for the gateway to use when connecting tothe CIMD2 server.“Sender Address” specifies the default sender address (phone number) toapply to outbound SMS messages. The CIMD2 server may override this setting.M<strong>an</strong>y CIMD2 connections allocate multiple phone numbers to <strong>an</strong> individual SMSCaccount. The “Sender Address Prefix” setting specifies the prefix <strong>as</strong>sociatedwith all phone numbers allocated to the SMSC account.Now SMS/MMS Gateway Quick Start Guide 39
Check “Allow Sender Address Override” if you w<strong>an</strong>t to allow messagessubmitted to the gateway to be able to specify a sender address. If this box ischecked, <strong>an</strong>d a sender address is present in a message being submitted to aCIMD2 b<strong>as</strong>ed SMSC, the sender address in the message will be submitted to theSMSC. The CIMD2 server may override this setting.Some CIMD2 servers may require that clients submit keep-alive messages to theserver every so m<strong>an</strong>y seconds or minutes, or the server will time out theconnection. To enable keep-alive messages, specify a value in seconds for the“Keep-Alive” setting.Check the “Enable Receive Messages” box if you wish to receive messagesfrom the CIMD2 server.Check the “Receive MMS Messages” box if you will be receiving MMSNotification messages via the SMSC. Note that not all service providers supportthe routing of MMS notification messages via <strong>an</strong> SMSC connection. If MMSmessages will be received via the SMSC connection, it is necessary to alsoconfigure additional MMS settings. The “MMS Settings” dialog will display adialog with additional configuration settings that are required for enabling thegateway to be able to receive MMS messages from the operator network. Foradditional configuration information on processing received MMS messages,ple<strong>as</strong>e refer to the product documentation.The “Routing” group of options is used when multiple SMSC connections aredefined to the gateway. These options define what messages should be routedto this connection. The Routing options are common to SMPP, GSM Modem,UCP/EMI <strong>an</strong>d HTTP connections, <strong>an</strong>d are described in the productdocumentation.When the “OK” button is selected, the gateway will attempt to connect to theUCP/EMI server to verify the configuration information provided. Diagnosticinformation will be displayed if the connection fails. The connection will onlybe added to the configuration after a successful connection to the UCP/EMIserver.Now SMS/MMS Gateway Quick Start Guide 40
Appendix E: HTTP SMSC ConfigurationThe gateway supports the HTTP (Hyper Text Tr<strong>an</strong>sport Protocol) protocol toconnect to <strong>an</strong> SMSC over the internet or other private TCP/IP network. Inaddition to connecting to other services, this allows you to make connectionsto <strong>an</strong>other Now SMS/MMS gateway, which c<strong>an</strong> be useful for “le<strong>as</strong>t cost routing”of SMS messages between gateways over TCP/IP.To add <strong>an</strong> HTTP connection, select “Add” from the “SMSC” tab of the gatewaydialog. Then select “HTTP over TCP/IP”.Now SMS/MMS Gateway Quick Start Guide 41
“Host Name” specifies a DNS host name or TCP/IP address for connecting tothe service.“Port Number” specifies the HTTP port number to use when connecting to theservice.Check “Use HTTP Proxy” if the gateway must connect to the HTTP server via aproxy server, <strong>an</strong>d supply the host name or TCP/IP address <strong>an</strong>d port number ofthe proxy server in the “Proxy Server” field using a format of“host.name:9999”, where “host.name” is the DNS host name or TCP/IP addressof the proxy server, <strong>an</strong>d “9999” is the port number of the proxy server.Now SMS/MMS Gateway Quick Start Guide 42
“User name” <strong>an</strong>d “P<strong>as</strong>sword” specify a user account <strong>an</strong>d p<strong>as</strong>sword to usewhen connecting to the service.“Send login credentials using HTTP Authorization headers” refers to how theuser name <strong>an</strong>d p<strong>as</strong>sword information is sent to the HTTP server. The logininformation c<strong>an</strong> either be sent <strong>as</strong> replaceable parameters in the URL request,or using the “HTTP Authorization” header. Check this box to use the “HTTPAuthorization” header. This box should be checked when connecting with<strong>an</strong>other Now SMS/MMS gateway.“Server Type” provides pre-defined templates for connections to commongateway interfaces. If you are connecting to one of the servers with a predefinedtemplate, such <strong>as</strong> <strong>an</strong>other Now SMS/MMS gateway, select its servertype here. Otherwise, select “Custom” to define a custom template.“URL Template Text” is a URL template that is used when sending text SMSmessages. When the gateway h<strong>as</strong> a text SMS message to send, it connects tothe HTTP server <strong>an</strong>d issues the URL request specified in this field, replacing the“replaceable parameters” with values for the message to be sent. A completelist of “replaceable parameters” is provided below.“URL Template Binary” is a URL template that is used when sending binarySMS messages. When the gateway h<strong>as</strong> a text SMS message to send, it connectsto the HTTP server <strong>an</strong>d issues the URL request specified in this field, replacingthe “replaceable parameters” with values for the message to be sent. Acomplete list of “replaceable parameters” is provided below.URL Template Replaceable Parameters:@@UserName@@@@P<strong>as</strong>sword@@@@PhoneNumber@@@@Text@@@@Data@@@@DataBin@@@@UDH@@The user name configured for this connection(optional)The p<strong>as</strong>sword configured for this connection(optional)The phone number of the recipient to receive thisSMS message (required)The text of the SMS message (required for textmessages)The data of the SMS message in binary format <strong>as</strong> <strong>as</strong>tring of hexadecimal characters (either this or@@DataBin@@ required for binary messages)The data of the SMS message in binary format <strong>as</strong> theactual binary data in URL escaped format (eitherthis or @@Data@@ required for binary messages)The “User Data Header” of a binary message <strong>as</strong> <strong>as</strong>tring of hexadecimal characters (either this or@@UDHBin@@ required for binary messages)Now SMS/MMS Gateway Quick Start Guide 43
@@UDHBin@@@@PID@@@@PIDdecimal@@@@DCS@@@@DCSdecimal@@@@Sender@@The “User Data Header” of a binary message inbinary format <strong>as</strong> the actual binary data in URLescaped format (either this or @@UDH@@ requiredfor binary messages)SMS “Protocol ID” field <strong>as</strong> a hexadecimal valueSMS “Protocol ID” field <strong>as</strong> a decimal valueSMS “Data Coding Scheme” field <strong>as</strong> a hexadecimalvalueSMS “Data Coding Scheme” field <strong>as</strong> a decimal value.Phone number to be included <strong>as</strong> the sender of thismessage.“Sender Address” specifies the default sender address (phone number) toapply to outbound SMS messages. The SMSC to which you are connecting mayoverride this setting. (Note: The sender number is only tr<strong>an</strong>smitted if the@@Sender@@ variable is included in your URL template string.)Check “Allow Sender Address Override” if you w<strong>an</strong>t to allow messagessubmitted to the gateway to be able to specify a sender address. If this box ischecked, <strong>an</strong>d a sender address is present in a message being submitted to <strong>an</strong>HTTP b<strong>as</strong>ed SMSC, the sender address in the message will be submitted to theSMSC. The SMSC may override this setting.Check “Remove ‘+’ from Recipient Phone Number” if the gateway shouldremove the “+” character from international phone numbers before submittingthe message to the HTTP SMSC. HTTP SMSC interfaces b<strong>as</strong>ed upon the K<strong>an</strong>nelproduct expect the “+” character to be removed.Some types of messages processed by the Now SMS/MMS Gateway may requiremultiple SMS messages to tr<strong>an</strong>smit a single logical message. This is because themaximum size of <strong>an</strong> SMS message is 160 text characters or 140 binary bytes ofdata. The Now SMS/MMS Gateway automatically segments larger messages <strong>an</strong>dsubmits them <strong>as</strong> multiple SMS messages that c<strong>an</strong> be re<strong>as</strong>sembled by thereceiving client. Some HTTP b<strong>as</strong>ed SMSCs prefer to split larger messagesthemselves. Check “Send long messages without segmentation” if you w<strong>an</strong>tthe SMSC to split larger messages into multiple SMS messages, or leave thissetting unchecked to allow the Now SMS/MMS Gateway to perform necessarysegmentation of large messages.The “Routing” group of options is used when multiple SMSC connections aredefined to the gateway. These options define what messages should be routedto this connection. The Routing options are common to SMPP, GSM Modem,UCP/EMI <strong>an</strong>d HTTP connections, <strong>an</strong>d are described in the productdocumentation.Now SMS/MMS Gateway Quick Start Guide 44
When the “OK” button is selected, the gateway will attempt to connect to theHTPP server to verify the configuration information provided. Diagnosticinformation will be displayed if the connection fails. The connection will onlybe added to the configuration after a successful connection to the HTTP server.Note that although a connection attempt w<strong>as</strong> successful, you should attempt tosend a message through the interface to verify that the URL templates aredefined correctly.Now SMS/MMS Gateway Quick Start Guide 45


