Operating the 8500 Printer - Kodak.ca
Operating the 8500 Printer - Kodak.ca
Operating the 8500 Printer - Kodak.ca
- No tags were found...

You also want an ePaper? Increase the reach of your titles
YUMPU automatically turns print PDFs into web optimized ePapers that Google loves.
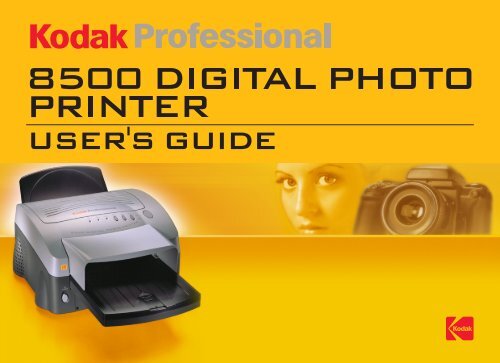
USER'S GUIDE
ContentsUser’s GuideIntroductionAbout <strong>the</strong> <strong>8500</strong> printerAbout <strong>the</strong> online documentationSafety Pre<strong>ca</strong>utionsPaper and Image Sizes<strong>Printer</strong> DriverInterfacesSetting up <strong>the</strong> <strong>8500</strong> <strong>Printer</strong>Finding a Lo<strong>ca</strong>tion for <strong>the</strong> <strong>8500</strong> <strong>Printer</strong>Unpacking <strong>the</strong> <strong>8500</strong> <strong>Printer</strong>Loading <strong>the</strong> Ribbon CartridgeConnecting <strong>the</strong> CablesHandling PaperStoring PaperLoading <strong>the</strong> Paper TrayInstalling <strong>the</strong> Dust CoversAbout <strong>Printer</strong> InitializationMaking a Test PrintIntroductionSetting up <strong>the</strong> <strong>8500</strong><strong>Printer</strong><strong>Operating</strong> <strong>the</strong> <strong>8500</strong><strong>Printer</strong>TroubleshootingSite Specifi<strong>ca</strong>tionsAccessories andSuppliesCONTENTS PRINTER DRIVER GUIDE SEARCH HELP
<strong>Operating</strong> <strong>the</strong> <strong>8500</strong> <strong>Printer</strong>Looking at <strong>the</strong> Buttons and LightsWorking with PaperCanceling <strong>the</strong> continuous printingHandling and Storing PrintsKeeping <strong>the</strong> <strong>8500</strong> <strong>Printer</strong> in Good Working ConditionCleaning <strong>the</strong> <strong>8500</strong> <strong>Printer</strong>TroubleshootingLight Indi<strong>ca</strong>tions and How to Resolve ThemIf <strong>the</strong> <strong>Printer</strong> Does Not Operate CorrectlyClearing a Paper JamRepairing a Torn RibbonCleaning <strong>the</strong> Thermal HeadRepacking <strong>the</strong> <strong>Printer</strong>Getting Additional HelpERROR light off, MEDIA light redERROR light red, MEDIA light offERROR light red, MEDIA light red<strong>8500</strong> <strong>Printer</strong> does not turn onPrinting takes much longer than usualNothing happens when a job is sentWhite or colored lines and scratchesIntroductionSetting up <strong>the</strong> <strong>8500</strong><strong>Printer</strong><strong>Operating</strong> <strong>the</strong> <strong>8500</strong><strong>Printer</strong>TroubleshootingSite Specifi<strong>ca</strong>tionsAccessories andSuppliesCONTENTS PRINTER DRIVER GUIDE SEARCH HELP
Troubleshooting (cont.)White or multicolored spots appear on <strong>the</strong> printsSmudges, smears and fingerprintsPaper does not feed<strong>8500</strong> <strong>Printer</strong> does not respond when you press buttonsSite Specifi<strong>ca</strong>tions<strong>Printer</strong> Specifi<strong>ca</strong>tionsSpace Requirements<strong>Operating</strong> EnvironmentPower RequirementsAccessories and SuppliesAccessoriesRibbonsPaperIntroductionSetting up <strong>the</strong> <strong>8500</strong><strong>Printer</strong><strong>Operating</strong> <strong>the</strong> <strong>8500</strong><strong>Printer</strong>TroubleshootingSite Specifi<strong>ca</strong>tionsAccessories andSuppliesCONTENTS PRINTER DRIVER GUIDE SEARCH HELP
IntroductionIntroductionThank you for purchasing <strong>the</strong> <strong>Kodak</strong> Professional <strong>8500</strong> digital photoprinter 120V (<strong>8500</strong> printer). The <strong>8500</strong> printer is a <strong>the</strong>rmal dye diffusiondevice with superior printing speed. It has a resolution of 314 pixels perinch (ppi), and prints a three-color page in about 75 seconds. Printedimages are high-contrast and long lasting. <strong>Kodak</strong> Ekta<strong>the</strong>rm XtraLiferibbon applies a coating that protects images from fingerprints.Setting up <strong>the</strong> <strong>8500</strong><strong>Printer</strong><strong>Operating</strong> <strong>the</strong> <strong>8500</strong><strong>Printer</strong>TroubleshootingSite Specifi<strong>ca</strong>tionsAccessories andSuppliesCONTENTS PRINTER DRIVER GUIDE SEARCH HELP
About <strong>the</strong> <strong>8500</strong> printerThe <strong>8500</strong> printer is <strong>the</strong> latest model of <strong>Kodak</strong> Professional’s page size<strong>the</strong>rmal dye printers. <strong>Kodak</strong>’s dye-sublimination printers produce superbphotographic prints and proofs. The <strong>8500</strong> printer is easy to install andset up, and its interface is compatible with virtually all computerenvironments.<strong>Printer</strong> FeaturesThe <strong>8500</strong> printer includes <strong>the</strong> following features:Wide Range of Paper SizesThe <strong>8500</strong> printer prints on a variety of paper sizes. 3-color YMCribbons <strong>ca</strong>n be used in <strong>the</strong> <strong>8500</strong> printer.<strong>Printer</strong> DriverThe printer driver supports Macintosh operating system 9.0 andabove and Windows 98, Windows Me, Windows NT 4.0 (SP6.0 orlater), Windows 2000 and Windows XP.IntroductionSetting up <strong>the</strong> <strong>8500</strong><strong>Printer</strong><strong>Operating</strong> <strong>the</strong> <strong>8500</strong><strong>Printer</strong>TroubleshootingSite Specifi<strong>ca</strong>tionsAccessories andSuppliesCONTENTS PRINTER DRIVER GUIDE SEARCH HELP
About <strong>the</strong> online documentationThis manual is comprised of <strong>the</strong> six sections listed at <strong>the</strong> right:● Introduction—describes <strong>the</strong> <strong>8500</strong> printer, available papers, printerdrivers and interfaces.● Setting up <strong>the</strong> <strong>8500</strong> <strong>Printer</strong>—describes how to set up <strong>the</strong> <strong>8500</strong>printer.● <strong>Operating</strong> <strong>the</strong> <strong>8500</strong> printer—contains information on maintaining <strong>the</strong><strong>8500</strong> printer and working with <strong>the</strong> paper and ribbon.● Troubleshooting—describes <strong>the</strong> problems and how to resolve <strong>the</strong>m.● Site Specifi<strong>ca</strong>tions—describes <strong>the</strong> <strong>8500</strong> printer specfi<strong>ca</strong>tions, spacerequirements and operating conditions.● Accessories and Supplies—lists <strong>the</strong> accessories and supplies for <strong>the</strong><strong>8500</strong> printer.IntroductionSetting up <strong>the</strong> <strong>8500</strong><strong>Printer</strong><strong>Operating</strong> <strong>the</strong> <strong>8500</strong><strong>Printer</strong>TroubleshootingSite Specifi<strong>ca</strong>tionsAccessories andSuppliesCONTENTS PRINTER DRIVER GUIDE SEARCH HELP
Safety Pre<strong>ca</strong>utionsInformationThis class A digital apparatus complies with Canadian ICES-003.Cet appareil numérique de la classe A est conforme à la norme NMB-003 du Canada.WARNING:TO PREVENT FIRE OR SHOCK HAZARD, DO NOT EXPOSE THIS APPLIANCE TO RAIN ORMOISTURE.WARNING:USE THE INCLUDED AC POWER CORD SO AS NOT TO INTERFERE WITH RADIO ANDTELEVISION RECEPTION.WARNING:THIS THERMAL PRINTER CONTAINS LEAD. DISPOSAL OF LEAD MAY BE REGULATED DUE TOENVIRONMENTAL CONSIDERATIONS. FOR DISPOSAL OR RECYCLING INFORMATION,PLEASE CONTACT YOUR LOCAL AUTHORITIES OR THE ELECTRONICS INDUSTRY ALLIANCE:WWW.EIAE.ORG.IntroductionSetting up <strong>the</strong> <strong>8500</strong><strong>Printer</strong><strong>Operating</strong> <strong>the</strong> <strong>8500</strong><strong>Printer</strong>TroubleshootingSite Specifi<strong>ca</strong>tionsAccessories andSuppliesCONTENTS PRINTER DRIVER GUIDE SEARCH HELP
CAUTION:RISK OF ELECTRIC SHOCK, DO NOT OPENTO REDUCE THE RISK OF ELECTRIC SHOCK, DO NOT REMOVE COVER (ORBACK). NO USER-SERVICEABLE PARTS INSIDE. REFER SERVICING TOQUALIFIED SERVICE PERSONNEL.The lightning flash with arrowhead symbol, within an equilateral triangle, is intended to alert<strong>the</strong> user to <strong>the</strong> presence of uninsulated “dangerous voltage” within <strong>the</strong> product’s enclosurethat may be of sufficient magnitude to constitute <strong>the</strong> risk of electric shock.The exclamation point within an equilateral triangle is intended to alert <strong>the</strong> user to <strong>the</strong> presenceof important operating and maintenance (servicing) instructions in <strong>the</strong> literature accompanying<strong>the</strong> appliance.NOTE: This equipment has been tested and found to comply with <strong>the</strong> limits for a Class A digitaldevice, pursuant to Part 15 of <strong>the</strong> FCC Rules. These limits are designed to providereasonable protection against harmful interference when <strong>the</strong> equipment is operated in acommercial environment. This equipment generates, uses, and <strong>ca</strong>n radiate radio frequencyenergy and, interference to radio communi<strong>ca</strong>tions. Operation of this equipment in aresidential area is likely to <strong>ca</strong>use harmful interference in which <strong>ca</strong>se <strong>the</strong> user will be requiredto correct <strong>the</strong> interference at his or her own expense.IntroductionSetting up <strong>the</strong> <strong>8500</strong><strong>Printer</strong><strong>Operating</strong> <strong>the</strong> <strong>8500</strong><strong>Printer</strong>TroubleshootingSite Specifi<strong>ca</strong>tionsAccessories andSuppliesCONTENTS PRINTER DRIVER GUIDE SEARCH HELP
In <strong>the</strong> interest of safety, please observe <strong>the</strong> following pre<strong>ca</strong>utions:POWER REQUIREMENTThis product is designed for operation on 120V AC 60Hz. Never connect to any outlet or powersupply having a different voltage or frequency.WARNING: THIS APPARATUS MUST BE GROUNDED.AVERTISSEMENT: CET APPAREIL DOIT ETRE MIS A LA TERRE.PROTECTIVE MEASURESIF ABNORMALITIES ARISE, ....If <strong>the</strong> printer emits smoke or abnormal sounds, immediately unplug <strong>the</strong> power cord from <strong>the</strong>printer or power outlet. Continued use is dangerous. Contact your dealer about having <strong>the</strong> printerchecked and serviced.NEVER INSERT ANY OBJECT INTO THE UNITNothing o<strong>the</strong>r than supplies for this printer should ever be inserted into <strong>the</strong> printer. O<strong>the</strong>r items<strong>ca</strong>n <strong>ca</strong>use a safety hazard and extensive damage to <strong>the</strong> mechanism and electronics.IntroductionSetting up <strong>the</strong> <strong>8500</strong><strong>Printer</strong><strong>Operating</strong> <strong>the</strong> <strong>8500</strong><strong>Printer</strong>TroubleshootingSite Specifi<strong>ca</strong>tionsAccessories andSuppliesDO NOT SET HEAVY OBJECTS ON TOP OF THE UNITHeavy objects <strong>ca</strong>n damage <strong>the</strong> unit and/or <strong>ca</strong>use misoperation.AVOID DAMAGING THE POWER CORDDo not set anything heavy on <strong>the</strong> power cord or allow it to become pinched, or cut. If <strong>the</strong> powercord becomes damaged, replace it immediately to avoid shock hazard or electri<strong>ca</strong>l fire.When <strong>the</strong> power cord is replaced, use <strong>the</strong> same type as originally supplied; it is designed toreduce interference to radio & TV reception.When unplugging <strong>the</strong> power cord, hold <strong>the</strong> plug, and remove it <strong>ca</strong>refully.CONTENTS PRINTER DRIVER GUIDE SEARCH HELP
KEEP THE UNIT DRY - DO NOT PLACE WATER OR OTHER LIQUID CONTAINERS,FLOWER VASES/POTS ON TOP OF THE UNIT.Liquids that get into <strong>the</strong> unit <strong>ca</strong>n <strong>ca</strong>use serious damage to <strong>the</strong> unit and potential shock or firedanger. If liquid is spilled into or seeps into <strong>the</strong> unit, unplug <strong>the</strong> Power Cord immediately andseek service as soon as possible to avoid additional or possible damage due to corrosion.Avoid handling liquids near <strong>the</strong> unit.DO NOT REMOVE THE CABINET. THERE ARE NO USER SERVICEABLE PARTSINSIDE AND YOU WILL EXPOSE YOURSELF TO HAZARDOUS VOLTAGES AND/ORYOU MAY CAUSE DAMAGE TO THE UNIT.Touching internal parts is dangerous, and may <strong>ca</strong>use a malfunction. Contact your dealer to <strong>ca</strong>rryout internal checks and adjustments. Disconnect <strong>the</strong> power cord before opening <strong>the</strong> cover toclear a paper jam, etc.UNPLUG THE POWER CORD DURING A LONG ABSENCE OR DURING ANELECTRICAL STORMTurn off <strong>the</strong> Main Power switch and unplug <strong>the</strong> power cord during a long absence or during anelectri<strong>ca</strong>l storm.WHEN TRANSPORTING THE UNITWhen transporting <strong>the</strong> unit, remove <strong>the</strong> sheet <strong>ca</strong>rtridge and paper.DO NOT INSERT YOUR FINGERS OR ANY OBJECT INTO THE PAPER OUTLETDURING PRINTINGInside <strong>the</strong> paper outlet is a roller for taking out <strong>the</strong> print paper. If you insert your fingers, you mayget injured.IntroductionSetting up <strong>the</strong> <strong>8500</strong><strong>Printer</strong><strong>Operating</strong> <strong>the</strong> <strong>8500</strong><strong>Printer</strong>TroubleshootingSite Specifi<strong>ca</strong>tionsAccessories andSuppliesCONTENTS PRINTER DRIVER GUIDE SEARCH HELP
DO NOT TOUCH THE THERMAL HEADIt becomes hot during printing and may remain hot for a time, <strong>ca</strong>using injury. Oils, salts andmoisture from your hands will contaminate <strong>the</strong> head and may spoil <strong>the</strong> prints.BE CAREFUL WITH THE PRINTING MECHANISMDo not move <strong>the</strong> printer while <strong>the</strong> top cover is open. This may <strong>ca</strong>use injury.Be <strong>ca</strong>reful not to <strong>ca</strong>tch your fingers in <strong>the</strong> printing mechanism.IntroductionSetting up <strong>the</strong> <strong>8500</strong><strong>Printer</strong><strong>Operating</strong> <strong>the</strong> <strong>8500</strong><strong>Printer</strong>TroubleshootingSite Specifi<strong>ca</strong>tionsAccessories andSuppliesCONTENTS PRINTER DRIVER GUIDE SEARCH HELP
CONNECTING CABLESUse <strong>the</strong> power cord supplied with <strong>the</strong> printer.INSTALLATION LOCATIONSMAINTAIN GOOD VENTILATIONVentilation slots and holes are provided on <strong>the</strong> top, rear and sides of this unit. Place <strong>the</strong> unit on ahard and level surface and lo<strong>ca</strong>te at least 15.8 inches (40 cm) (top) and 2 inches (5 cm) (sides),from walls to insure proper ventilation. When installing <strong>the</strong> unit in a system rack, leave spacebetween <strong>the</strong> unit and <strong>the</strong> back of <strong>the</strong> rack.UNSUITABLE LOCATIONSAvoid installing <strong>the</strong> printer in unstable lo<strong>ca</strong>tions with high vibration or in hot-springs areas wherehydrogen sulfide and acidic ions are likely to be generated.PLACES WITH HIGH HUMIDITY AND DUSTDo not place <strong>the</strong> unit in lo<strong>ca</strong>tions with high humidity and dust. They <strong>ca</strong>n <strong>ca</strong>useextensive damage. Avoid places where <strong>the</strong> unit is likely to be exposed to oily fumesand vapours.PLACES LIKELY TO BE EXTREMELY HOTPlaces exposed to direct sunlight, or near heating appliances <strong>ca</strong>n attain extremelyhigh temperatures which may deform <strong>the</strong> <strong>ca</strong>binet, or <strong>ca</strong>use o<strong>the</strong>r damage.IntroductionSetting up <strong>the</strong> <strong>8500</strong><strong>Printer</strong><strong>Operating</strong> <strong>the</strong> <strong>8500</strong><strong>Printer</strong>TroubleshootingSite Specifi<strong>ca</strong>tionsAccessories andSuppliesPLACE THE UNIT ON A HORIZONTAL SURFACEThe unit is likely to be affected if it is operated when tilted, inclined or in unstable places.PROTECT AGAINST DEW FORMATIONWhen <strong>the</strong> unit is moved from a cold area into a warm area, moisture <strong>ca</strong>n condense inside <strong>the</strong>unit and prevent operation. Allow <strong>the</strong> temperature to stabilize before use.OPERATING AMBIENT TEMPERATURE RANGEThe operating temperature range is 59 - 86 o F (15 to 30 o C) and humidity of 30 - 85%. Whenusing <strong>the</strong> unit in a system rack, make sure that <strong>the</strong> temperature inside <strong>the</strong> rack does not exceedthis range.CONTENTS PRINTER DRIVER GUIDE SEARCH HELP
Paper and Image SizesThe <strong>8500</strong> printer <strong>ca</strong>n print on <strong>the</strong> following sizes and types of <strong>Kodak</strong>Professional Ekta<strong>the</strong>rm XLS print paper. Refer to “<strong>Kodak</strong> ThermalPaper Types, Sizes, and Image Sizes” for illustrations of <strong>the</strong> maximumimage size for each.Paper and Image SizesIntroductionSetting up <strong>the</strong> <strong>8500</strong><strong>Printer</strong><strong>Operating</strong> <strong>the</strong> <strong>8500</strong><strong>Printer</strong>TroubleshootingPaper SizeMaximum ImageSizeCatalogNumbersSite Specifi<strong>ca</strong>tions8.27” x 11.69” (210 x 297 mm) - Standard A4paper8.5” x 11” (216 x 279 mm) - Standard A paper8.5” x 12” (216 x 305 mm) - A (long) paper8.0” x 10.0”(203 x 254 mm)8.0” x 9.4”(203 x 239 mm)8.0” x 10.0”(203 x 254 mm)830 8728874 7032825 4989Accessories andSuppliesCONTENTS PRINTER DRIVER GUIDE SEARCH HELP
Loading <strong>the</strong> Ribbon CartridgeThe ribbon provides dyes for printing images. The three-color XtraLiferibbon contains enough dye to make 50 prints. The XtraLife ribbonscontain additional patches that protect images from fingerprints.Handling <strong>the</strong> Ribbon● Do not expose <strong>the</strong> ribbon to direct sunlight, extreme heat, dust, orliquids.● Leave <strong>the</strong> top cover closed except when you need to access <strong>the</strong>inside of <strong>the</strong> <strong>8500</strong> printer.Storing RibbonsFor <strong>the</strong> highest image quality, store ribbons as follows:● Store unopened ribbons at temperatures below 77 o F (25 o C). Avoidexposure to temperatures higher than 100 o F (38 o C).● Keep partially used ribbons in <strong>the</strong>ir original wrappers to protect <strong>the</strong>mfrom dust and dirt when <strong>the</strong>y are not loaded in <strong>the</strong> <strong>8500</strong> printer. Dustand dirt specks on <strong>the</strong> ribbon show up as much larger spots onprints.IntroductionSetting up <strong>the</strong> <strong>8500</strong><strong>Printer</strong><strong>Operating</strong> <strong>the</strong> <strong>8500</strong><strong>Printer</strong>TroubleshootingSite Specifi<strong>ca</strong>tionsAccessories andSuppliesCONTENTS PRINTER DRIVER GUIDE SEARCH HELP
Loading <strong>the</strong> Ribbon Cartridge in <strong>the</strong> <strong>8500</strong> <strong>Printer</strong>The ribbon <strong>ca</strong>rtridge fits easily in <strong>the</strong> <strong>8500</strong> printer. There is only oneway to correctly load <strong>the</strong> ribbon <strong>ca</strong>rtridge.Follow <strong>the</strong>se steps to load a ribbon <strong>ca</strong>rtridge:1. Press <strong>the</strong> OPEN button to open <strong>the</strong> top cover.IntroductionSetting up <strong>the</strong> <strong>8500</strong><strong>Printer</strong><strong>Operating</strong> <strong>the</strong> <strong>8500</strong><strong>Printer</strong>TroubleshootingSite Specifi<strong>ca</strong>tionsAccessories andSupplies2. If necessary, push <strong>the</strong> old ribbon <strong>ca</strong>rtridge to <strong>the</strong> left and lift it up toremove it.CONTENTS PRINTER DRIVER GUIDE SEARCH HELP
NOTE: Images remain on <strong>the</strong> ribbon after printing. If you are workingwith confidential documents, you may need to consideralternate ways of disposing of <strong>the</strong> ribbon to maintain security.3. Remove <strong>the</strong> old ribbon from <strong>the</strong> ribbon <strong>ca</strong>rrier.NOTE: Do not dis<strong>ca</strong>rd <strong>the</strong> ribbon <strong>ca</strong>rrier.4. Remove <strong>the</strong> new ribbon from its packaging.IMPORTANT: Touching <strong>the</strong> dye patches could contaminate <strong>the</strong> ribbon,resulting in scratches on your prints.5. Set <strong>the</strong> new ribbon on <strong>the</strong> ribbon <strong>ca</strong>rrier as shown below.spoolIntroductionSetting up <strong>the</strong> <strong>8500</strong><strong>Printer</strong><strong>Operating</strong> <strong>the</strong> <strong>8500</strong><strong>Printer</strong>TroubleshootingSite Specifi<strong>ca</strong>tionsAccessories andSuppliesribbonhandleribbon <strong>ca</strong>rrierCONTENTS PRINTER DRIVER GUIDE SEARCH HELP
6. Grasp <strong>the</strong> ribbon <strong>ca</strong>rtridge by <strong>the</strong> handle, and slide <strong>the</strong> spool onto<strong>the</strong> 2 hubs on <strong>the</strong> left side.HubsIntroductionSetting up <strong>the</strong> <strong>8500</strong><strong>Printer</strong><strong>Operating</strong> <strong>the</strong> <strong>8500</strong><strong>Printer</strong>TroubleshootingSite Specifi<strong>ca</strong>tions7. Push <strong>the</strong> ribbon <strong>ca</strong>rtridge against <strong>the</strong> hubs on <strong>the</strong> left until it <strong>ca</strong>nengage <strong>the</strong> 2 holders on <strong>the</strong> right.HolderAccessories andSupplies8. Turn <strong>the</strong> thick spool in <strong>the</strong> direction shown by <strong>the</strong> arrow, until <strong>the</strong>ribbon is taut.9. Close <strong>the</strong> top cover.CONTENTS PRINTER DRIVER GUIDE SEARCH HELP
Connecting <strong>the</strong> CablesYou must provide <strong>the</strong> necessary interface <strong>ca</strong>bles, ei<strong>the</strong>r parallel or USB.The <strong>8500</strong> printer has standard communi<strong>ca</strong>tion ports.USB portIntroductionSetting up <strong>the</strong> <strong>8500</strong><strong>Printer</strong><strong>Operating</strong> <strong>the</strong> <strong>8500</strong><strong>Printer</strong>TroubleshootingParallel portPower cordinletSite Specifi<strong>ca</strong>tionsAccessories andSuppliesCONTENTS PRINTER DRIVER GUIDE SEARCH HELP
Connecting a Parallel CableTo connect a parallel (Centronics) <strong>ca</strong>ble:1. Make sure that your computer is turned off.2. Connect <strong>the</strong> female end (no pins) of <strong>the</strong> <strong>ca</strong>ble to <strong>the</strong> <strong>8500</strong> printerparallel port.IntroductionSetting up <strong>the</strong> <strong>8500</strong><strong>Printer</strong><strong>Operating</strong> <strong>the</strong> <strong>8500</strong><strong>Printer</strong>TroubleshootingParallel portPower cordinletSite Specifi<strong>ca</strong>tionsAccessories andSupplies3. Connect <strong>the</strong> 25-pin end of <strong>the</strong> <strong>ca</strong>ble to <strong>the</strong> computer’s parallel port.4. Connect <strong>the</strong> power cord.5. Press <strong>the</strong> POWER button to turn on <strong>the</strong> <strong>8500</strong> printer.6. Press <strong>the</strong> ONLINE button to set <strong>the</strong> <strong>8500</strong> printer to offline mode.7. Press <strong>the</strong> INTERFACE button so that <strong>the</strong> PARALLEL light blinks.8. Press <strong>the</strong> ONLINE button to set <strong>the</strong> <strong>8500</strong> printer to online mode.The PARALLEL light becomes steady.CONTENTS PRINTER DRIVER GUIDE SEARCH HELP
Connecting a USB CableTo connect a USB <strong>ca</strong>ble:1. Make sure that your computer is turned off.2. Connect and secure <strong>the</strong> USB <strong>ca</strong>ble to <strong>the</strong> USB port.USB portPower cordinletIntroductionSetting up <strong>the</strong> <strong>8500</strong><strong>Printer</strong><strong>Operating</strong> <strong>the</strong> <strong>8500</strong><strong>Printer</strong>TroubleshootingSite Specifi<strong>ca</strong>tionsAccessories andSupplies3. Connect <strong>the</strong> power cord.4. Press <strong>the</strong> POWER button on <strong>the</strong> front of <strong>the</strong> <strong>8500</strong> printer. When <strong>the</strong>POWER light turns green, turn on your computer.5. Press <strong>the</strong> ONLINE button to set <strong>the</strong> <strong>8500</strong> printer to offline mode.6. Press <strong>the</strong> INTERFACE button so that <strong>the</strong> USB light blinks.7. Press <strong>the</strong> ONLINE button to set <strong>the</strong> <strong>8500</strong> printer to online mode.The USB light becomes steady.CONTENTS PRINTER DRIVER GUIDE SEARCH HELP
Handling PaperFollow <strong>the</strong>se guidelines when you handle <strong>the</strong> paper:● Hold <strong>the</strong> paper by <strong>the</strong> edges to avoid fingerprints.● Do not load more than 50 sheets of paper in <strong>the</strong> paper tray.● Do not use wet or damaged paper.Storing PaperFollow <strong>the</strong>se storage instructions to ensure <strong>the</strong> highest image quality:● Store opened paper at temperatures below 77 o F (25 o C). Avoidexposure to temperatures higher than 100 o F (38 o C).● Avoid storing a loose stack of paper out of its wrapper.IntroductionSetting up <strong>the</strong> <strong>8500</strong><strong>Printer</strong><strong>Operating</strong> <strong>the</strong> <strong>8500</strong><strong>Printer</strong>TroubleshootingSite Specifi<strong>ca</strong>tionsAccessories andSuppliesCONTENTS PRINTER DRIVER GUIDE SEARCH HELP
Loading <strong>the</strong> Paper TrayRefer to "Working with Paper" for complete information about <strong>the</strong>various types.The paper tray adjusts to <strong>the</strong> size of <strong>the</strong> paper you are loading. Do notforce paper that is too long or too wide into <strong>the</strong> tray.IMPORTANT: Use only <strong>the</strong> tray designed for <strong>the</strong> <strong>8500</strong> printer.CAUTION: A SPACER FOR PROTECTION DURING TRANSPORTIS ATTACHED INSIDE THE PAPER TRAY WHEN THEPRINTER IS SHIPPED FROM THE FACTORY.REMOVE THIS SPACER WHEN USING THE PRINTER.1. Pull down <strong>the</strong> plate lever of <strong>the</strong> paper tray until you hear a click.IntroductionSetting up <strong>the</strong> <strong>8500</strong><strong>Printer</strong><strong>Operating</strong> <strong>the</strong> <strong>8500</strong><strong>Printer</strong>TroubleshootingSite Specifi<strong>ca</strong>tionsAccessories andSuppliesCONTENTS PRINTER DRIVER GUIDE SEARCH HELP
2. If necessary, adjust <strong>the</strong> paper tray to fit <strong>the</strong> paper you are loading:⎯ Move <strong>the</strong> paper width adjuster to <strong>the</strong> correct position for ei<strong>the</strong>r 11”,12” or A4 size paper.⎯ Slide <strong>the</strong> paper length adjuster to <strong>the</strong> correct position for <strong>the</strong> lengthof <strong>the</strong> paper you are loading. Make sure that <strong>the</strong> paper lengthadjuster is locked into position.Paper widthadjustorPaper lengthadjustorIntroductionSetting up <strong>the</strong> <strong>8500</strong><strong>Printer</strong><strong>Operating</strong> <strong>the</strong> <strong>8500</strong><strong>Printer</strong>TroubleshootingSite Specifi<strong>ca</strong>tionsAccessories andSupplies3. Remove <strong>the</strong> paper from <strong>the</strong> package.Loosen <strong>the</strong> paper beforeunpacking.IMPORTANT: The paper may be stuck toge<strong>the</strong>r. Loosen <strong>the</strong> pages wellbefore unpacking. Handle <strong>the</strong> paper by <strong>the</strong> edges toavoid fingerprints on <strong>the</strong> top sheet.CONTENTS PRINTER DRIVER GUIDE SEARCH HELP
4. Place <strong>the</strong> paper in <strong>the</strong> traywith <strong>the</strong> logo side down (asshown in <strong>the</strong> label on <strong>the</strong> tray)making sure that <strong>the</strong> front cornersof <strong>the</strong> stack are under <strong>the</strong> metaltabs.NOTE: One package includes 100sheets of paper, which aredivided at 50 sheets by blue<strong>ca</strong>rdboard for yourconvenience.Remove <strong>the</strong> blue <strong>ca</strong>rdboardwhen using <strong>the</strong> print paper.You <strong>ca</strong>n load up to 50sheets of paper in <strong>the</strong> papertray.When adding <strong>the</strong> paper,take <strong>ca</strong>re not to exceed <strong>the</strong>red line on <strong>the</strong> paper lengthadjuster.printing side50 sheetsblue<strong>ca</strong>rdboardreverse side (logo side)IntroductionSetting up <strong>the</strong> <strong>8500</strong><strong>Printer</strong><strong>Operating</strong> <strong>the</strong> <strong>8500</strong><strong>Printer</strong>TroubleshootingSite Specifi<strong>ca</strong>tionsAccessories andSuppliesCONTENTS PRINTER DRIVER GUIDE SEARCH HELP
5. Set <strong>the</strong> clear cover onto <strong>the</strong> paper tray.6. Install <strong>the</strong> paper tray in <strong>the</strong> <strong>8500</strong> printer.7. Raise <strong>the</strong> stopper.IntroductionSetting up <strong>the</strong> <strong>8500</strong><strong>Printer</strong><strong>Operating</strong> <strong>the</strong> <strong>8500</strong><strong>Printer</strong>TroubleshootingSite Specifi<strong>ca</strong>tionsAccessories andSuppliesCONTENTS PRINTER DRIVER GUIDE SEARCH HELP
Installing <strong>the</strong> Dust CoversInstall <strong>the</strong> dust covers on <strong>the</strong> front and back of <strong>the</strong> <strong>8500</strong> printer.Front: Install <strong>the</strong> cover as shown below. (Insert <strong>the</strong> cover into <strong>the</strong>groove.)IntroductionSetting up <strong>the</strong> <strong>8500</strong><strong>Printer</strong><strong>Operating</strong> <strong>the</strong> <strong>8500</strong><strong>Printer</strong>TroubleshootinggrooveBack: 1. Insert <strong>the</strong> bottom of<strong>the</strong> dust cover on<strong>the</strong> back slit of <strong>the</strong><strong>8500</strong> printer.Site Specifi<strong>ca</strong>tionsAccessories andSupplies2. Hook <strong>the</strong> dust coveron <strong>the</strong> <strong>8500</strong> printer.CONTENTS PRINTER DRIVER GUIDE SEARCH HELP
About <strong>Printer</strong> InitializationWhen you turn <strong>the</strong> <strong>8500</strong> printer on, it initializes (starts up and performsa self-check) in a few seconds. During this time, <strong>the</strong> POWER, MEDIA,and PARALLEL and USB lights blink.If <strong>the</strong> <strong>8500</strong> <strong>Printer</strong> Does Not InitializeIf <strong>the</strong> <strong>8500</strong> printer fails to initialize, no light illuminates on <strong>the</strong> displaypanel. Turn <strong>the</strong> <strong>8500</strong> printer off and <strong>the</strong>n back on.If a light still does not illuminate, turn off both <strong>the</strong> <strong>8500</strong> printer and <strong>the</strong>computer. Disconnect all <strong>ca</strong>bles from <strong>the</strong> <strong>8500</strong> printer except <strong>the</strong> power<strong>ca</strong>ble. Turn on <strong>the</strong> <strong>8500</strong> printer. If no light illuminates, <strong>ca</strong>ll for service.IntroductionSetting up <strong>the</strong> <strong>8500</strong><strong>Printer</strong><strong>Operating</strong> <strong>the</strong> <strong>8500</strong><strong>Printer</strong>TroubleshootingSite Specifi<strong>ca</strong>tionsAccessories andSuppliesCONTENTS PRINTER DRIVER GUIDE SEARCH HELP
Making a Test PrintMaking a test print verifies proper <strong>8500</strong> printer setup and operation, andconfirms print quality.To make a test print:1. Press <strong>the</strong> POWER button while holding <strong>the</strong> ONLINE button.2. Press <strong>the</strong> PRINT button.Example of <strong>the</strong> test printIntroductionSetting up <strong>the</strong> <strong>8500</strong><strong>Printer</strong><strong>Operating</strong> <strong>the</strong> <strong>8500</strong><strong>Printer</strong>TroubleshootingSite Specifi<strong>ca</strong>tionsAccessories andSuppliesCONTENTS PRINTER DRIVER GUIDE SEARCH HELP
<strong>Operating</strong> <strong>the</strong> <strong>8500</strong> <strong>Printer</strong>This chapter provides <strong>the</strong> information you need to operate <strong>the</strong> <strong>8500</strong>printer. It includes:Looking at <strong>the</strong> buttons and lightsWorking with paperCanceling <strong>the</strong> continuous printingHandling and storing printsKeeping <strong>the</strong> <strong>8500</strong> printer in good working conditionCleaning <strong>the</strong> <strong>8500</strong> printerNOTE: Before operating <strong>the</strong> <strong>8500</strong> printer you must install <strong>the</strong>appropriate printer driver. Refer to <strong>the</strong> printer driver manualfor <strong>the</strong> details.IntroductionSetting up <strong>the</strong> <strong>8500</strong><strong>Printer</strong><strong>Operating</strong> <strong>the</strong> <strong>8500</strong><strong>Printer</strong>TroubleshootingSite Specifi<strong>ca</strong>tionsAccessories andSuppliesCONTENTS PRINTER DRIVER GUIDE SEARCH HELP
Looking at <strong>the</strong> Buttons and LightsThe <strong>8500</strong> printer display panel is shown below.MEDIA lightERROR lightPOWER lightONLINE buttonPRINT buttonINTERFACE select buttonOPEN buttonPARALLEL lightUSB lightIntroductionSetting up <strong>the</strong> <strong>8500</strong><strong>Printer</strong><strong>Operating</strong> <strong>the</strong> <strong>8500</strong><strong>Printer</strong>TroubleshootingSite Specifi<strong>ca</strong>tionsPOWER buttonThe following indi<strong>ca</strong>tor lights show <strong>the</strong> status of <strong>the</strong> <strong>8500</strong> printer:● POWER light—illuminates in green when <strong>the</strong> <strong>8500</strong> printer is turnedOn.● ERROR light—illuminates in red when an error occurs. The lightremains on until all <strong>the</strong> errors are resolved.● MEDIA light—illuminates in red when an error concerning print paperoccurs.● PARALLEL—illuminates in green when Parallel is selected.● USB—illuminates in green when USB is selected.CONTENTS PRINTER DRIVER GUIDE SEARCH HELPAccessories andSupplies
When <strong>the</strong> ERROR light glows steadily, you may be able to correct <strong>the</strong>problem yourself.Use <strong>the</strong> buttons:● POWER button—Press to turn <strong>the</strong> power on or off. When <strong>the</strong> poweris turned on, <strong>the</strong> POWER light illuminates.● ONLINE button—Press to take <strong>the</strong> printer online or offline. In onlinemode, you <strong>ca</strong>n control <strong>the</strong> <strong>8500</strong> printer through <strong>the</strong> computer.● PRINT button—Press to reprint a valid job that is still in <strong>the</strong> imagebuffer. This button is not available when image data has not beensent or <strong>the</strong> <strong>8500</strong> printer is online.● INTERFACE select button—Press to select ei<strong>the</strong>r Parallel and USB.The light of <strong>the</strong> selected interface blinks. This button is not availablewhen <strong>the</strong> <strong>8500</strong> printer is online.● OPEN button—Press to open <strong>the</strong> top cover. Open <strong>the</strong> top coverwhen loading <strong>the</strong> ink ribbon or clearing a paper jam.NOTE: Do not open <strong>the</strong> top cover during printing. Doing so may<strong>ca</strong>use a print error and malfunction of <strong>the</strong> printer.IntroductionSetting up <strong>the</strong> <strong>8500</strong><strong>Printer</strong><strong>Operating</strong> <strong>the</strong> <strong>8500</strong><strong>Printer</strong>TroubleshootingSite Specifi<strong>ca</strong>tionsAccessories andSuppliesCONTENTS PRINTER DRIVER GUIDE SEARCH HELP
Working with PaperThis section describes <strong>the</strong> paper used with <strong>the</strong> <strong>8500</strong> printer. It also listshandling and storage guidelines.Thermal paper looks and feels like photographic paper, but it is not lightsensitive. The back is imprinted with <strong>the</strong> <strong>Kodak</strong> logo. The paper isshipped as two 50-sheet packages; but only 50 sheets <strong>ca</strong>n be loaded in<strong>the</strong> printer at one time.CAUTION: Use only paper designed for <strong>the</strong> <strong>8500</strong> printer. Usingo<strong>the</strong>r materials may <strong>ca</strong>use problems.<strong>Kodak</strong> Professional Ekta<strong>the</strong>rm print paper is available. The followingtable identifies each paper type and size, <strong>the</strong> ribbon <strong>ca</strong>rtridgescompatible with each type, and <strong>the</strong> maximum image size for eachpaper type.IntroductionSetting up <strong>the</strong> <strong>8500</strong><strong>Printer</strong><strong>Operating</strong> <strong>the</strong> <strong>8500</strong><strong>Printer</strong>TroubleshootingSite Specifi<strong>ca</strong>tionsAccessories andSuppliesCONTENTS PRINTER DRIVER GUIDE SEARCH HELP
<strong>Kodak</strong> Thermal Paper Types, Sizes, and Image SizesType of paper<strong>Kodak</strong> ProfessionalEkta<strong>the</strong>rm <strong>8500</strong>A4 paperCAT No. 830 8728Paper Size8.27 x 11.69”(210 x 297 mm)Type of Ribbon<strong>Kodak</strong> ProfessionalEkta<strong>the</strong>rm XtraLife<strong>8500</strong> glossy ribbonCAT No. 132 8459<strong>Kodak</strong> ProfessionalEkta<strong>the</strong>rm XtraLife<strong>8500</strong> matte ribbonCAT No. 801 0761Maximum ImageSize8.0 x 10.0203 x 254 mmIntroductionSetting up <strong>the</strong> <strong>8500</strong><strong>Printer</strong><strong>Operating</strong> <strong>the</strong> <strong>8500</strong><strong>Printer</strong>TroubleshootingSite Specifi<strong>ca</strong>tionsAccessories andSupplies<strong>Kodak</strong> ProfessionalEkta<strong>the</strong>rm paperCAT No. 874 70328.5 x 11”(216 x 279 mm)<strong>Kodak</strong> ProfessionalEkta<strong>the</strong>rm XtraLife<strong>8500</strong> glossy ribbonCAT No. 132 84598.0 x 9.4203 x 239 mm<strong>Kodak</strong> ProfessionalEkta<strong>the</strong>rm XtraLife<strong>8500</strong> matte ribbonCAT No. 801 0761CONTENTS PRINTER DRIVER GUIDE SEARCH HELP
<strong>Kodak</strong> Thermal Paper Types, Sizes, and Image Sizes (Cont.)Type of paper<strong>Kodak</strong> ProfessionalEkta<strong>the</strong>rm paperCAT No. 825 4989Paper Size8.5 x 12”(216 x 305 mm)Type of Ribbon<strong>Kodak</strong> ProfessionalEkta<strong>the</strong>rm XtraLife<strong>8500</strong> glossy ribbonCAT No. 132 8459<strong>Kodak</strong> ProfessionalEkta<strong>the</strong>rm XtraLife<strong>8500</strong> matte ribbonCAT No. 801 0761Maximum ImageSize8.0 x 10.0203 x 254 mmIntroductionSetting up <strong>the</strong> <strong>8500</strong><strong>Printer</strong><strong>Operating</strong> <strong>the</strong> <strong>8500</strong><strong>Printer</strong>TroubleshootingSite Specifi<strong>ca</strong>tionsAccessories andSuppliesCONTENTS PRINTER DRIVER GUIDE SEARCH HELP
Canceling <strong>the</strong> continuous printingWhen printing two or more copies of one image, you <strong>ca</strong>n usecontinuous printing. The number of <strong>the</strong> copies <strong>ca</strong>n be set by <strong>the</strong> printerdriver.To <strong>ca</strong>ncel continuous printing, press <strong>the</strong> PRINT button for a fewseconds until <strong>the</strong> ERROR (in green), Parallel and USB lights blink.After completing <strong>the</strong> current printing, continuous printing is <strong>ca</strong>nceled.Handling and Storing PrintsThe image stability of <strong>the</strong>rmal prints depends upon factors such astemperature, relative humidity, and exposure to light or to biologi<strong>ca</strong>l orchemi<strong>ca</strong>l contaminates. Using XtraLife ribbon increases <strong>the</strong> stabilityand durability of your prints.Your <strong>the</strong>rmal images will last a long time if you use <strong>the</strong>se guidelines forhandling and storing <strong>the</strong>m:● Remove prints from <strong>the</strong> exit area ONLY AFTER <strong>the</strong> <strong>8500</strong> printerejects <strong>the</strong>m.● Do NOT put a print back into <strong>the</strong> paper tray. Doing so <strong>ca</strong>n <strong>ca</strong>usejams and loss of completed prints.● Handle prints as little as possible. When handling prints, make sureyour hands are clean and free of food, oil, and grease. Wear cleangloves when possible, and hold prints by <strong>the</strong> edges.CONTENTS PRINTER DRIVER GUIDE SEARCH HELPIntroductionSetting up <strong>the</strong> <strong>8500</strong><strong>Printer</strong><strong>Operating</strong> <strong>the</strong> <strong>8500</strong><strong>Printer</strong>TroubleshootingSite Specifi<strong>ca</strong>tionsAccessories andSupplies
● Store <strong>the</strong>rmal prints in a cool, dry environment free of chemi<strong>ca</strong>lcontamination.● Avoid storing prints at temperatures higher than 72 o F (25 o C) forextended periods.● A relative humidity between 30% and 50% is ideal.● Avoid exposure to high intensity light sources, particularly fluorescentlight and sunlight, which are rich in ultraviolet radiation.● Avoid exposure to vinyl items (those made of polyvinyl chloride) orany plastic which contains plasticizer. These items usually have adistinct plastic odor.● Do not place objects on top of <strong>the</strong> <strong>8500</strong> printer.IntroductionSetting up <strong>the</strong> <strong>8500</strong><strong>Printer</strong><strong>Operating</strong> <strong>the</strong> <strong>8500</strong><strong>Printer</strong>TroubleshootingSite Specifi<strong>ca</strong>tionsAccessories andSuppliesCONTENTS PRINTER DRIVER GUIDE SEARCH HELP
Keeping <strong>the</strong> <strong>8500</strong> <strong>Printer</strong> in Good WorkingConditionTo keep <strong>the</strong> <strong>8500</strong> printer in good working condition:● Keep <strong>the</strong> <strong>8500</strong> printer clean. Keep <strong>the</strong> surrounding area vacuumedand litter-free.● Protect <strong>the</strong> <strong>8500</strong> printer from tobacco smoke, dust, sand, and liquidspills.IntroductionSetting up <strong>the</strong> <strong>8500</strong><strong>Printer</strong><strong>Operating</strong> <strong>the</strong> <strong>8500</strong><strong>Printer</strong>TroubleshootingSite Specifi<strong>ca</strong>tionsAccessories andSuppliesCONTENTS PRINTER DRIVER GUIDE SEARCH HELP
Cleaning <strong>the</strong> <strong>8500</strong> <strong>Printer</strong>To help ensure good performance and high-quality output, make sure<strong>the</strong> operating environment is clean and dust free.Clean <strong>the</strong> <strong>8500</strong> printer regularly as described below. Before you begin,turn off <strong>the</strong> <strong>8500</strong> printer and unplug it.● Wipe <strong>the</strong> covers, <strong>the</strong> paper tray area, and <strong>the</strong> paper tray with waterand a damp, lint-free cloth. This eliminates dust build-up andprevents dirt from getting into <strong>the</strong> <strong>8500</strong> printer.CAUTION: NEVER USE ABRASIVES OR HARSH CHEMICALS TOCLEAN ANY PART OF THE <strong>8500</strong> PRINTER. DO NOTUSE ALCOHOL CLEANING PADS TO CLEAN THECABINET.● Clean <strong>the</strong> area around and under <strong>the</strong> printer to prevent dirt fromgetting into <strong>the</strong> <strong>8500</strong> printer.IntroductionSetting up <strong>the</strong> <strong>8500</strong><strong>Printer</strong><strong>Operating</strong> <strong>the</strong> <strong>8500</strong><strong>Printer</strong>TroubleshootingSite Specifi<strong>ca</strong>tionsAccessories andSuppliesCONTENTS PRINTER DRIVER GUIDE SEARCH HELP
TroubleshootingThis chapter describes <strong>the</strong> problems that you may oc<strong>ca</strong>sionally havewith <strong>the</strong> <strong>8500</strong> printer. It also tells how to resolve <strong>the</strong>se problems.This chapter contains <strong>the</strong> following sections:● Light indi<strong>ca</strong>tions and how to resolve <strong>the</strong>m● What to do if <strong>the</strong> <strong>8500</strong> printer does not operate correctly● Clearing a paper jam● Repairing a torn ribbon● Cleaning <strong>the</strong> <strong>the</strong>rmal head● Repacking <strong>the</strong> <strong>8500</strong> printer● Getting additional helpIntroductionSetting up <strong>the</strong> <strong>8500</strong><strong>Printer</strong><strong>Operating</strong> <strong>the</strong> <strong>8500</strong><strong>Printer</strong>TroubleshootingSite Specifi<strong>ca</strong>tionsAccessories andSuppliesCONTENTS PRINTER DRIVER GUIDE SEARCH HELP
Light Indi<strong>ca</strong>tions and How to Resolve ThemThe indi<strong>ca</strong>tor lights become red when a problem has occurred.You must resolve any problems before you <strong>ca</strong>n print.Click <strong>the</strong> following light indi<strong>ca</strong>tion links to learn more.ERROR light off, MEDIA light redERROR light red, MEDIA light offERROR light red, MEDIA light redIntroductionSetting up <strong>the</strong> <strong>8500</strong><strong>Printer</strong><strong>Operating</strong> <strong>the</strong> <strong>8500</strong><strong>Printer</strong>TroubleshootingNormal statusError statusStatusPower OFFInitializingOnline (USB)Online (Parallel)Offline (USB)Offline (Parallel)Transferring dataPrintingCancel continuous printingOverheat ConditionDoor openOut of media (paper)Out of media (Ink sheet)Paper illegalPaper jam or mechani<strong>ca</strong>l errorPaper size mismatch to image size: LED onLight indi<strong>ca</strong>tionsPOWER ERROR MEDIA PARALLEL USBGreenGreenGreenGreenGreenGreenGreenGreenGreenGreenGreenGreenGreenGreenGreenGreenGreenGreenRedRedRedRed: LED blinkingGreenGreenGreenGreenGreenGreenRedRedRedRedRed: LED offGreenGreenGreenGreenGreenGreenGreenGreenGreenGreenGreenGreenSite Specifi<strong>ca</strong>tionsAccessories andSuppliesCONTENTS PRINTER DRIVER GUIDE SEARCH HELP
If <strong>the</strong> <strong>Printer</strong> Does Not Operate CorrectlyYou may be able to identify or correct problems yourself. Follow <strong>the</strong>instructions for <strong>the</strong> problem you have, and make a test print to see if <strong>the</strong>problem is resolved. Use <strong>the</strong> following list to correct <strong>the</strong> problem. If <strong>the</strong>problem persists, service is required. Refer to “Getting Additional Help”.The following is a list of common problems. Click <strong>the</strong> problem to learnabout <strong>the</strong> possible <strong>ca</strong>use for <strong>the</strong> problem and a solution.<strong>8500</strong> <strong>Printer</strong> does not turn onPrinting takes much longer than usualNothing happens when a job is sentWhite or colored lines and scratchesWhite or multicolored spots appear on <strong>the</strong> printsSmudges, smears and fingerprintsPaper does not feed<strong>8500</strong> <strong>Printer</strong> does not respond when you press buttonsIntroductionSetting up <strong>the</strong> <strong>8500</strong><strong>Printer</strong><strong>Operating</strong> <strong>the</strong> <strong>8500</strong><strong>Printer</strong>TroubleshootingSite Specifi<strong>ca</strong>tionsAccessories andSuppliesCONTENTS PRINTER DRIVER GUIDE SEARCH HELP
Clearing a Paper JamPaper and ribbon may oc<strong>ca</strong>sionally jam in <strong>the</strong> <strong>8500</strong> printer. Jams aretypi<strong>ca</strong>lly identified when <strong>the</strong> Error light becomes red. Jams may occur in<strong>the</strong> following lo<strong>ca</strong>tions:IntroductionSetting up <strong>the</strong> <strong>8500</strong><strong>Printer</strong><strong>Operating</strong> <strong>the</strong> <strong>8500</strong><strong>Printer</strong>Ribbon <strong>ca</strong>rtridgeareaBack areaTroubleshootingSite Specifi<strong>ca</strong>tionsFront areaAccessories andSuppliesCONTENTS PRINTER DRIVER GUIDE SEARCH HELP
Clearing a Paper Jam from <strong>the</strong> Ribbon Cartridge Area1. Turn off <strong>the</strong> <strong>8500</strong> printer.2. Open <strong>the</strong> top cover, and remove <strong>the</strong> ribbon <strong>ca</strong>rtridge.IntroductionSetting up <strong>the</strong> <strong>8500</strong><strong>Printer</strong><strong>Operating</strong> <strong>the</strong> <strong>8500</strong><strong>Printer</strong>TroubleshootingSite Specifi<strong>ca</strong>tionsAccessories andSuppliesPush <strong>the</strong> ribbon <strong>ca</strong>rtridge to <strong>the</strong>left and lift it up to remove it.CONTENTS PRINTER DRIVER GUIDE SEARCH HELP
3. Pull out <strong>the</strong> jammed paper.NOTE: Be <strong>ca</strong>reful not to damage <strong>the</strong> <strong>the</strong>rmal head at this timIntroductionSetting up <strong>the</strong> <strong>8500</strong><strong>Printer</strong><strong>Operating</strong> <strong>the</strong> <strong>8500</strong><strong>Printer</strong>TroubleshootingSite Specifi<strong>ca</strong>tionsAccessories andSupplies4. Install <strong>the</strong> ribbon <strong>ca</strong>rtridge, and close <strong>the</strong> top cover.IMPORTANT: Do not put partially-fed paper back into <strong>the</strong> paper tray.5. Dis<strong>ca</strong>rd any partially-fed paper from <strong>the</strong> paper tray.CONTENTS PRINTER DRIVER GUIDE SEARCH HELP
Clearing a Paper Jam from <strong>the</strong> Front Area1. Turn off <strong>the</strong> <strong>8500</strong> printer power.2. Completely remove <strong>the</strong> paper tray and <strong>the</strong> front dust cover.IntroductionSetting up <strong>the</strong> <strong>8500</strong><strong>Printer</strong><strong>Operating</strong> <strong>the</strong> <strong>8500</strong><strong>Printer</strong>TroubleshootingSite Specifi<strong>ca</strong>tionsAccessories andSupplies3. Reach in, and pull out <strong>the</strong> partially-fed paper.4. Install <strong>the</strong> tray and <strong>the</strong> front dust cover in <strong>the</strong> printer.IMPORTANT: Do not put partially-fed paper back into <strong>the</strong> paper tray.5. Dis<strong>ca</strong>rd any partially-fed paper from <strong>the</strong> paper tray.CONTENTS PRINTER DRIVER GUIDE SEARCH HELP
Clearing a Paper Jam from <strong>the</strong> Back Area1. Turn off <strong>the</strong> <strong>8500</strong> printer power.2. Remove <strong>the</strong> back dust cover.IntroductionSetting up <strong>the</strong> <strong>8500</strong><strong>Printer</strong><strong>Operating</strong> <strong>the</strong> <strong>8500</strong><strong>Printer</strong>TroubleshootingSite Specifi<strong>ca</strong>tionsAccessories andSupplies3. Remove <strong>the</strong> paper.4. Install <strong>the</strong> back dust cover.CONTENTS PRINTER DRIVER GUIDE SEARCH HELP
Repairing a Torn Ribbon1. Position <strong>the</strong> ribbon <strong>ca</strong>rtridge with <strong>the</strong> torn ribbon on a cleanplace as shown below.Office tapeSupply spoolIntroductionSetting up <strong>the</strong> <strong>8500</strong><strong>Printer</strong><strong>Operating</strong> <strong>the</strong> <strong>8500</strong><strong>Printer</strong>TroubleshootingSite Specifi<strong>ca</strong>tionsTakeup spoolAccessories andSupplies2. Place a piece of office tape on <strong>the</strong> center of <strong>the</strong> ribbon.3. Wind <strong>the</strong> takeup spool counterclockwise so that <strong>the</strong> office tape isnot seen and <strong>the</strong> ribbon is straight.4. Install <strong>the</strong> repaired ribbon <strong>ca</strong>rtridge in <strong>the</strong> <strong>8500</strong> printer.CONTENTS PRINTER DRIVER GUIDE SEARCH HELP
Cleaning <strong>the</strong> Thermal HeadCleaning <strong>the</strong> <strong>the</strong>rmal head helps to eliminate lines and streaks on yourprints.CAUTION: Never rub or wipe anything across <strong>the</strong> <strong>the</strong>rmal headexcept when cleaning it.To clean <strong>the</strong> <strong>the</strong>rmal head:1. Turn off <strong>the</strong> <strong>8500</strong> printer, and open <strong>the</strong> top cover.IntroductionSetting up <strong>the</strong> <strong>8500</strong><strong>Printer</strong><strong>Operating</strong> <strong>the</strong> <strong>8500</strong><strong>Printer</strong>TroubleshootingSite Specifi<strong>ca</strong>tionsAccessories andSuppliesCONTENTS PRINTER DRIVER GUIDE SEARCH HELP
2. Use a cloth moistened with alcohol to clean <strong>the</strong> print head,and wipe along <strong>the</strong> heater line four times:⎯ Wipe <strong>the</strong> full length of <strong>the</strong> area (always in one direction).⎯ Use a clean part of <strong>the</strong> cloth for each wipe.⎯ Apply firm, even pressure.⎯ Wipe only <strong>the</strong> following areas.Guide barHeater lineCover headIntroductionSetting up <strong>the</strong> <strong>8500</strong><strong>Printer</strong><strong>Operating</strong> <strong>the</strong> <strong>8500</strong><strong>Printer</strong>TroubleshootingSite Specifi<strong>ca</strong>tionsAccessories andSupplies3. Allow <strong>the</strong> wiped area to dry for about two minutes.4. Close <strong>the</strong> top cover, and turn on <strong>the</strong> printer.5. Make a test print. If image quality artifacts are visible on <strong>the</strong> testprint, repeat Steps 1- 4.NOTE: It may be necessary to repeat Steps 1- 4 several times toremove any artifacts. If you <strong>ca</strong>nnot remove <strong>the</strong> artifacts, <strong>ca</strong>llfor service.CONTENTS PRINTER DRIVER GUIDE SEARCH HELP
Repacking <strong>the</strong> <strong>Printer</strong>If you need to ship <strong>the</strong> printer, pack it as follows:1. Remove <strong>the</strong> paper from <strong>the</strong> paper tray.2. Open <strong>the</strong> top cover. Then remove <strong>the</strong> ribbon <strong>ca</strong>rtridge. Dis<strong>ca</strong>rd<strong>the</strong> ribbon, or store it in its original box. Put <strong>the</strong> ink <strong>ca</strong>rrier in itsoriginal packing.3. Close <strong>the</strong> top cover.4. Attach <strong>the</strong> shipping inserts on both sides of <strong>the</strong> paper trayinserting slot.5. Put <strong>the</strong> <strong>8500</strong> printer in its original plastic sheet to keep it cleanduring shipping.6. Pack <strong>the</strong> printer in its original box.7. Replace <strong>the</strong> top foam <strong>ca</strong>p.IntroductionSetting up <strong>the</strong> <strong>8500</strong><strong>Printer</strong><strong>Operating</strong> <strong>the</strong> <strong>8500</strong><strong>Printer</strong>TroubleshootingSite Specifi<strong>ca</strong>tionsAccessories andSuppliesCONTENTS PRINTER DRIVER GUIDE SEARCH HELP
Getting Additional HelpYour dealer of <strong>Kodak</strong> products is <strong>the</strong> best source for information aboutyour printer and about purchasing supplies and accessories.In addition, techni<strong>ca</strong>l support is also available on <strong>Kodak</strong>’s Web site atwww.kodak.com. Call 1-800-23kodak (1-800-235-6325) from 9:00 a.m.to 8:00 p.m., Eastern Standard Time, on regular business days.IntroductionSetting up <strong>the</strong> <strong>8500</strong><strong>Printer</strong><strong>Operating</strong> <strong>the</strong> <strong>8500</strong><strong>Printer</strong>TroubleshootingSite Specifi<strong>ca</strong>tionsAccessories andSuppliesCONTENTS PRINTER DRIVER GUIDE SEARCH HELP
ERROR light off, MEDIA light redPOWER ERROR MEDIAIntroductionSetting up <strong>the</strong> <strong>8500</strong><strong>Printer</strong><strong>Operating</strong> <strong>the</strong> <strong>8500</strong><strong>Printer</strong>Possible CauseThe supply spool in <strong>the</strong> ribbon is empty.The ink ribbon is not set.The ink ribbon is used up.The paper tray is empty or <strong>the</strong> papertray is not set.Possible SolutionInstall a new ribbon in <strong>the</strong> ribbon <strong>ca</strong>rrier.Refer to Loading <strong>the</strong> Ribbon Cartridge.Install a new ribbon in <strong>the</strong> ribbon <strong>ca</strong>rrier.Refer to Loading <strong>the</strong> Ribbon Cartridge.Load paper. Refer to Loading <strong>the</strong> PaperTray.TroubleshootingSite Specifi<strong>ca</strong>tionsAccessories andSuppliesCONTENTS PRINTER DRIVER GUIDE SEARCH HELP
ERROR light red, MEDIA light offPOWER ERROR MEDIAIntroductionSetting up <strong>the</strong> <strong>8500</strong><strong>Printer</strong><strong>Operating</strong> <strong>the</strong> <strong>8500</strong><strong>Printer</strong>Possible CauseA paper jam occurred.A mechani<strong>ca</strong>l error occurred.Possible SolutionClear <strong>the</strong> paper path. Refer to Clearing aPaper Jam.Remove <strong>the</strong> paper tray and ribbon<strong>ca</strong>rtridge. Turn off <strong>the</strong> <strong>8500</strong> printer powerand turn it on again.TroubleshootingSite Specifi<strong>ca</strong>tionsAccessories andSuppliesCONTENTS PRINTER DRIVER GUIDE SEARCH HELP
ERROR light red, MEDIA light redPOWER ERROR MEDIAIntroductionSetting up <strong>the</strong> <strong>8500</strong><strong>Printer</strong><strong>Operating</strong> <strong>the</strong> <strong>8500</strong><strong>Printer</strong>Possible CauseThe paper is not loaded properly.The top cover is open.The paper size in <strong>the</strong> tray is not <strong>the</strong>same as <strong>the</strong> size specified by <strong>the</strong>printer driver.Possible SolutionLoad <strong>the</strong> proper paper into <strong>the</strong> tray.Close <strong>the</strong> top cover.Set <strong>the</strong> printer driver setting to <strong>the</strong> papersize in <strong>the</strong> tray.TroubleshootingSite Specifi<strong>ca</strong>tionsAccessories andSuppliesCONTENTS PRINTER DRIVER GUIDE SEARCH HELP
<strong>8500</strong> <strong>Printer</strong> does not turn onPossible CauseThe power is not on.The <strong>ca</strong>bles and <strong>the</strong> power cord are notconnected securely.Possible SolutionCheck that <strong>the</strong> power switch is pressedsecurely.Check that <strong>the</strong> <strong>ca</strong>bles and <strong>the</strong> powercord are connected securely.IntroductionSetting up <strong>the</strong> <strong>8500</strong><strong>Printer</strong><strong>Operating</strong> <strong>the</strong> <strong>8500</strong><strong>Printer</strong>TroubleshootingPrinting takes much longer than usualPossible CauseThe image file size may be larger thanusual and, <strong>the</strong>refore, takes longer toprocess.The <strong>8500</strong> printer is too warm.(The Error light blinks in green.)Possible SolutionWait a few minutes.1. Wait for a while until <strong>the</strong> temperatureinside <strong>the</strong> <strong>8500</strong> printer falls.2. If <strong>the</strong> temperature does not fall, turn<strong>the</strong> <strong>8500</strong> printer off. Consider moving<strong>the</strong> <strong>8500</strong> printer to a lo<strong>ca</strong>tion where<strong>the</strong> temperature is lower.Site Specifi<strong>ca</strong>tionsAccessories andSuppliesCONTENTS PRINTER DRIVER GUIDE SEARCH HELP
Nothing happens when a job is sentJob is processing<strong>Printer</strong> settings<strong>Printer</strong> connectionsPossible CausePossible SolutionWait to see if <strong>the</strong> job is still processing.During data transfer, <strong>the</strong> PARALLEL andUSB lights blink.During printing, <strong>the</strong> PARALLEL and USBlights are on steady.1. Print a file that you printed previously.2. Check <strong>the</strong> communi<strong>ca</strong>tion settings forcompatibility between <strong>the</strong> <strong>8500</strong> printerand <strong>the</strong> host computer.1. Disconnect <strong>the</strong> <strong>ca</strong>ble, and make a testprint.2. If <strong>the</strong> problem persists, service isrequired.IntroductionSetting up <strong>the</strong> <strong>8500</strong><strong>Printer</strong><strong>Operating</strong> <strong>the</strong> <strong>8500</strong><strong>Printer</strong>TroubleshootingSite Specifi<strong>ca</strong>tionsAccessories andSuppliesCONTENTS PRINTER DRIVER GUIDE SEARCH HELP
White or colored lines and scratchesPossible CauseDust or dirt has <strong>ca</strong>used contamination.Possible Solution1.Check that <strong>the</strong> paper in <strong>the</strong> paper trayis clean and streak free.2. Check that <strong>the</strong> ribbon is clean.3. Clean <strong>the</strong> print head. Refer toCleaning <strong>the</strong> Thermal Head.If <strong>the</strong> problem persists, service isrequired.White or multicolored spots appear on <strong>the</strong>printsIntroductionSetting up <strong>the</strong> <strong>8500</strong><strong>Printer</strong><strong>Operating</strong> <strong>the</strong> <strong>8500</strong><strong>Printer</strong>TroubleshootingSite Specifi<strong>ca</strong>tionsAccessories andSuppliesPossible CauseDirt or dust has <strong>ca</strong>used contamination.Possible Solution1. Clean <strong>the</strong> <strong>8500</strong> printer and <strong>the</strong>surrounding area.2. Move <strong>the</strong> <strong>8500</strong> printer away fromroom ventilation ducts or open doors.CONTENTS PRINTER DRIVER GUIDE SEARCH HELP
Smudges, smears and fingerprintsIrregular shaped and colored areas appear on <strong>the</strong> prints.Possible CauseFingerprints or o<strong>the</strong>r oils havecontaminated <strong>the</strong> paper or ribbon.Possible SolutionReplace <strong>the</strong> contaminated paper orribbon with <strong>the</strong> new clean one.Handle paper and ribbon <strong>ca</strong>refully.Refer to Handling <strong>the</strong> Ribbon andWorking with Paper.Use only <strong>Kodak</strong> Professional Ekta<strong>the</strong>rmXtraLife ribbon.IntroductionSetting up <strong>the</strong> <strong>8500</strong><strong>Printer</strong><strong>Operating</strong> <strong>the</strong> <strong>8500</strong><strong>Printer</strong>TroubleshootingSite Specifi<strong>ca</strong>tionsAccessories andSuppliesPaper does not feedPaper load or tray.Possible CausePossible Solution1. Remove sheets with irregularities.2. Check that <strong>the</strong> tray is correctlyadjusted for <strong>the</strong> size paper installed.3. Reduce <strong>the</strong> size of <strong>the</strong> stack of paperin <strong>the</strong> paper tray.CONTENTS PRINTER DRIVER GUIDE SEARCH HELP
<strong>8500</strong> <strong>Printer</strong> does not respond when you pressbuttons<strong>Printer</strong> conditions.Possible CausePossible Solution1. Make sure that <strong>the</strong> top cover isclosed.2. Remove and reinstall <strong>the</strong> paper tray.3. Restart <strong>the</strong> <strong>8500</strong> printer.4. Check that <strong>the</strong> POWER lightilluminates.IntroductionSetting up <strong>the</strong> <strong>8500</strong><strong>Printer</strong><strong>Operating</strong> <strong>the</strong> <strong>8500</strong><strong>Printer</strong>TroubleshootingSite Specifi<strong>ca</strong>tionsAccessories andSuppliesCONTENTS PRINTER DRIVER GUIDE SEARCH HELP
Site Specifi<strong>ca</strong>tions<strong>Printer</strong> Specifi<strong>ca</strong>tions<strong>Printer</strong> dimensionsWidth: 17.1 inches (43.4 cm)Depth: 14.1 inches (35.8 cm) excluding paper tray and front dust coverHeight: 9.0 inches (22.8 cm) excluding back dust cover<strong>Printer</strong> weightApprox. 28.7 lbs (Approx. 13 kg)Space RequirementsMinimum space required with <strong>the</strong> paper tray inserted:Width: 21 inches (53.4 cm)Depth: 29.5 inches (75.0 cm)Height: 10.8 inches (27.3 cm)Minimum space for removing <strong>the</strong> paper tray and opening <strong>the</strong> top cover:Width: 21 inches (53.4 cm)Depth: 32.3 inches (82.0 cm)Height: 15.8 inches (40.0 cm)IntroductionSetting up <strong>the</strong> <strong>8500</strong><strong>Printer</strong><strong>Operating</strong> <strong>the</strong> <strong>8500</strong><strong>Printer</strong>TroubleshootingSite Specifi<strong>ca</strong>tionsAccessories andSuppliesCONTENTS PRINTER DRIVER GUIDE SEARCH HELP
<strong>Operating</strong> EnvironmentAmbient operating temperature: 59 to 86 o F (15 to 30 o C)Relative humidity: 30 to 85%Power RequirementsVoltage/frequencyAC120V / 60HzPower consumption2.7 A, 210 wattsIntroductionSetting up <strong>the</strong> <strong>8500</strong><strong>Printer</strong><strong>Operating</strong> <strong>the</strong> <strong>8500</strong><strong>Printer</strong>TroubleshootingSite Specifi<strong>ca</strong>tionsAccessories andSuppliesCONTENTS PRINTER DRIVER GUIDE SEARCH HELP
Accessories and SuppliesThis chapter lists <strong>the</strong> accessories and supplies available for <strong>the</strong> <strong>Kodak</strong>Professional <strong>8500</strong> <strong>the</strong>rmal printer and tells how to order <strong>the</strong>m.AccessoriesPurchase <strong>the</strong>se items through your dealer or distributor.AccessoryCatalog NumberIntroductionSetting up <strong>the</strong> <strong>8500</strong><strong>Printer</strong><strong>Operating</strong> <strong>the</strong> <strong>8500</strong><strong>Printer</strong>Troubleshooting<strong>Kodak</strong> Professional <strong>8500</strong> paper tray<strong>Kodak</strong> Professional <strong>8500</strong> ribbon <strong>ca</strong>rrierRibbonsThe following ribbons are available for <strong>the</strong> <strong>8500</strong> printer.Purchase ribbons from your printer dealer or distributor.146 5913129 8777Site Specifi<strong>ca</strong>tionsAccessories andSuppliesRibbon Type<strong>Kodak</strong> Professional Ekta<strong>the</strong>rm XtraLife<strong>8500</strong> glossy ribbon<strong>Kodak</strong> Professional Ekta<strong>the</strong>rm Xtralife<strong>8500</strong> matte ribbonCatalog Number132 8459801 0761CONTENTS PRINTER DRIVER GUIDE SEARCH HELP
PaperThe following paper sizes are available for <strong>the</strong> <strong>8500</strong> printer. Purchasepaper from your printer dealer or distributor. Paper is shipped as two50-sheet packages.NOTE: Refer to “Working with Paper” for illustrations of <strong>the</strong> maximumimage size for each paper size.IntroductionSetting up <strong>the</strong> <strong>8500</strong><strong>Printer</strong><strong>Operating</strong> <strong>the</strong> <strong>8500</strong><strong>Printer</strong><strong>Kodak</strong> Professional Ekta<strong>the</strong>rmprint paper8.27 x 11.69 in. (210 x 297 mm)8.5 x 11 in. (216 x 279 mm)8.5 x 12 in. (216 x 305 mm)Catalog Number830 8728874 7032825 4989TroubleshootingSite Specifi<strong>ca</strong>tionsAccessories andSuppliesCONTENTS PRINTER DRIVER GUIDE SEARCH HELP
EASTMAN KODAK COMPANY<strong>Kodak</strong> Professional DivisionRochester, New York 14650www.kodak.com/go/professional© Eastman <strong>Kodak</strong> Company, 2002.TM: <strong>Kodak</strong>, <strong>Kodak</strong> ProfessionalP/N 2E6444