CZ-20 Quicksilver - Fisher
CZ-20 Quicksilver - Fisher
CZ-20 Quicksilver - Fisher
- No tags were found...

Create successful ePaper yourself
Turn your PDF publications into a flip-book with our unique Google optimized e-Paper software.
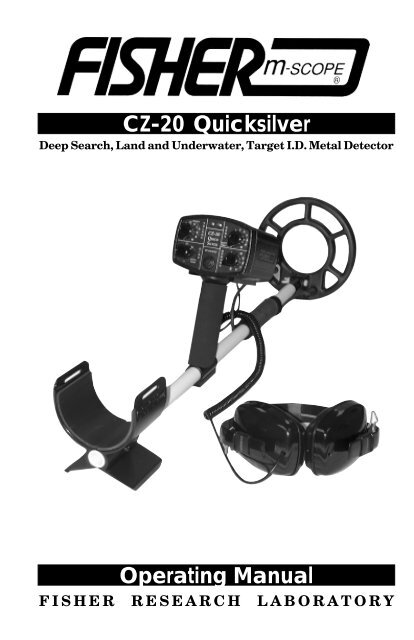
<strong>CZ</strong>-<strong>20</strong> <strong>Quicksilver</strong>Deep Search, Land and Underwater, Target I.D. Metal DetectorOperating ManualFISHER RESEARCH LABORATORY
CONTENTSAbout Your <strong>CZ</strong>-<strong>20</strong> ....................................................................pg. 1Condensed Operating Instructions .......................................pg. 3Assembly ..................................................................................pg. 5Setting Up..................................................................................pg. 6For Land or Shallow Water..................................................pg. 6For Diving ..............................................................................pg. 7For Hipmounting...................................................................pg. 8Control Panel ...........................................................................pg. 9Turn on Procedure .................................................................. pg. 10Ground Balancing.................................................................. pg. 10Pushbutton ........................................................................... pg. 11Bobbing ............................................................................... pg. 12Search Modes......................................................................... pg. 14Auto Tune ............................................................................. pg. 14Target-I.D. ............................................................................ pg. 15Searching on Land or in Shallow Water .............................. pg. 17Searching Underwater .......................................................... pg. 19Pinpointing............................................................................... pg. <strong>20</strong>Target Identification ............................................................... pg. 21Target Recovery ..................................................................... pg. 23Recovery Tools ....................................................................... pg. 24False Signals ............................................................................ pg. 25Operating Tips ......................................................................... pg. 28Battery Replacement ............................................................. pg. 30Maintenance .......................................................................... pg. 32Five Ways to Preserve Treasure Hunting .............................. pg. 32Treasure Hunters Code of Ethics ........................................... pg. 34Where To Use Your Metal Detector In the U.S. .................... pg. 35Specifications ......................................................................... pg. 36Service ..................................................................................... pg. 39
ABOUT YOUR DETECTORYour <strong>CZ</strong>-<strong>20</strong> QuickSilver is truly an all-purpose metal detectorengineered for land, beach, salt and fresh-water treasurehunters. Here are some important built-in features:1. Leakproof: Submersible to 250 feet, headphonesand all.2. 3-Tone Target I.D.: A low tone for iron; a mid-tonefor pull tabs, foil and most gold rings; and a hightone for U.S. coins, silver rings and some gold rings.3. Visual Target Response: Two bright, red LED’s flashover targets, varying in intensity according totarget signal strength.4. Depth: Patented Fourier domain signal analysis.Two deep-seeking, ground-compensating VLFsignals (one at 5 KHz and one at 15 KHz) providetwice as much target information for accurateanalysis and identification.5. Two Search Modes: A silent-running, slow-motiontarget-I.D. mode and a hot, wide-scan autotunemode for all-metal searching.6. VCO No-Motion Pinpointing: Just push thepinpoint button and the signal tone increases inpitch and volume as the center of the coilapproaches the target.7. Big-Target Alert: Ordinary detector circuitsoverload on large, shallow targets, identifying themas good targets. But not the <strong>CZ</strong>-<strong>20</strong>. A distinctive belltone immediately warns you that the target is toolarge to identify.8. Faint-Target Audio Boost: The lower range of thevolume control is like any other that you’ve used.But as you increase it above mid-range, strongtarget sounds remain at a fixed volume while faint,deep-target sounds continue to get louder.9. Pushbutton Ground Balance: Just push thepinpoint button and lower the coil to the ground.Then set the ground control just below the audiotone and you are precisely tuned for on-siteconditions.1
CONDENSED OPERATING INSTRUCTIONSFactory Pre-Set ‘Turn-On-and-Go’ MarksYour <strong>CZ</strong>-<strong>20</strong> QuickSilver is fairly simple to operate, especiallywhen compared to other target-I.D. machines. Even so, westrongly recommend that your read this entire manual. You’llbe able to tune your <strong>CZ</strong>-<strong>20</strong> to your specific needs andconditions. And if you have a good understanding of how todo it and why, you’ll find more.But if you just can’t wait any longer, and you’re anexperienced detector user, here’s some quick instructions toget you going.Factory pre-setturn-on-andgomarks(circled in redon your <strong>CZ</strong>-<strong>20</strong>control panel)can get youup andrunning withyour <strong>CZ</strong>-<strong>20</strong>immediately.Pre-setAudioBoostmark at“5”Pre-setDISCRIMINATIONmark at “4”Pre-setSENSITIVITYmark at “3”Pre-setGROUNDmark at “5”1. Set all the controls to the red “Turn-On-and-Go”marks:GROUND = 5DISC = 4SENSITIVITY = 3VOLUME = 5This puts you in a “coins-only” mode, and you’reready to start searching. Keep in mind that theGROUND setting of “5” is probably not the3
CONDENSED OPERATING INSTRUCTIONSoptimum setting for the ground you’re searching,and that’s why the sensitivity level is lowtoreduce false signals caused by groundmineralization.2. Adjust the volume control for a comfortablevolume when the coil is passed over a large,shallow target.3. Travel slowly, overlap your sweeps and keepthe search coil moving. Remember, you’re in a“motion” search mode, and the coil must bemoving at least slightly to detect a target.4. When you get a good, repeatable signal,pinpoint the target by placing the coil on theground away from the target, pushing andholding the pinpoint button and then bringing thecoil back over the target.5. Good hunting!4
ASSEMBLYYour <strong>Fisher</strong> <strong>CZ</strong>-<strong>20</strong> QuickSilver is built to last for years. However,it’s a sophisticated electronic instrument containing state-of-theartcomponents. Handle it carefully, care for it regularly, and itwill give you years of dependable service. The <strong>CZ</strong>-<strong>20</strong> requireslittle assembly. Unpack it carefully and save the carton; it comesin handy if you ever have to return the instrument for service.1. Remove the headphone, handle and search coilassemblies from the carrying case. Be careful notto damage the foam-rubber inserts or put any strainon the cable connections.2. Adjust the lower stem to the approximate lengthyou will be using: extended for stand-up use or asshort as possible for diving. To extend the lowerstem, push in the spring lock, pull out the lower stemand let the spring lock snap into another hole.3. Unwind just enough cable to attach the searchcoil to the lower stem.4. Remove the bolt and wing nut from the searchcoil. Line up the hole in the lower stem betweenthe two holes in the search coil “ears.” Attach theControl HousingControl PanelTarget I.D. DecalFoam handAdjustable arm restBattery access8-inch SpidercoilNylon WingnutFiberglassreinforcednylon lowerstem7-foot Search CoilHeadphoneArm-rest screwsFiberglass upper stemSubmersibleheadphones5
ASSEMBLYcoil to the stem with the bolt and wing nut andfinger tighten.5. The arm rest may be repositioned for maximumcomfort by removing the arm-rest screws, slidingthe arm rest to the next screw hole and re-installingthe arm-rest screws.Adjustable Arm RestScewsScrew HoleSETTING UPUpper StemWhen searching on land orin shallow water, keepyour arm straight and yoursearch coil no more than 2inches above the ground.SETTING UP FOR LAND OR SHALLOW WATERPut the headphones around your neck to keep them out of theway while making the following adjustments:6
SETTING UP1. Adjust the stem length and coil angle so thesearch coil rests flat on the ground about 6 inchesin front and slightly to the right of your foot (to theleft of your left foot if you’re left handed).2. Leave enough slack in the coil cable to allowthe coil to swivel as far as it can in either direction.The coil wing nut should be tight enough to preventthe coil from moving.3. You should now be able to move into your“search” position by leaning slightly forward andraising the search coil no more than 2 inches abovethe ground. Your arm should still be straight, andthe coil should be parallel to the ground, about 12inches in front of your foot. The coil angle may haveto be slightly readjusted at this point.SETTING UP FOR DIVINGUnlike most VLF metal detectors, the <strong>CZ</strong>-<strong>20</strong> works well in saltwater. This capability, along with its deep-seeking sensitivity,makes it ideal for underwater treasure hunting and wreck diving.The <strong>CZ</strong>-<strong>20</strong> is waterproof to a depth of 250 feet. Remember, alwayspractice safe diving methods.When diving with your <strong>CZ</strong>-<strong>20</strong>, use the shortest stem lengthpossible, with the extra cable wrapped tightly around the stem,as closely as possible to the control housing.Control housing (Never hipmount yourcontrol housing while diving.)Shortened Stem lengthExtra, coiledcable7
SETTING UP1. Adjust the stem length as short as you can withouthaving the search coil detect your diving gear.2. Adjust the search coil parallel to the sea bed,river or lake bottom.3. Make sure extra cable is coiled tightly on theupper stem as closely as possible to the controlhousing, with just enough slack near the search coilto allow it to swivel as far as it can in either direction.Too much loose cable near the search coil maygenerate false signals.4. Remove the tethered earphone plugs for rapidpressure equalization as you dive and return to thesurface.Caution: Hipmounting the <strong>CZ</strong>-<strong>20</strong> control housing is notrecommended for underwater use. The search coil cable maybecome entangled with a submerged object, making it difficultfor the diver to resurface quickly in case of emergency.SETTING UP FOR HIPMOUNTINGFor almost-effortless treasure hunting, the control housing iseasily removed from the handle and attached to a belt clip.You can hipmount your <strong>CZ</strong>-<strong>20</strong> by sliding the control housing from thehandle and attaching it to your belt. This reduces the weight of thestem, creating nearly effortless hunting.8
SETTING UP“Hipmounting” the <strong>CZ</strong>-<strong>20</strong> in this manner takes about half theweight off the handle and allows the land or shallow-waterTreasure Hunter to search much longer without arm fatigue.1. Grasp the handle grip firmly with one hand andthe control housing with the other.2. Slide the control housing off the mountingbracket by pulling it toward you.3. Slide the belt clip into grooves on the bottom ofthe control housing. This is a snug fit, and you’ll haveto bend the clip slightly.4. Unwrap just enough of the coil cable to allowfor searching.5. Slip the control housing onto your belt, left sidefor right handers, right side for left handers.NOTE: Because of the extreme sensitivity of the <strong>CZ</strong>-<strong>20</strong> searchcoil, hipmounting the control housing may produce a falsesignal when the search coil reaches the end of its arc (on theside that the control box is attached to your belt). Dependingon your stem length and how high you have the housinghipmounted, the search coil may actually detect the housing.9
CONTROL PANEL1. VOLUME/OFF: Power on-off and volume control.Volume is gradually increased from 1-5 settings. From5-10, loud-target response is held constant while fainttargets continue to get louder.2. DISC: In the 0-6 positions, the <strong>CZ</strong>-<strong>20</strong> is in the targetmode, which is a silent, no-threshold, motiondiscriminationmode of operation with the ability toidentify and then ignore (“reject”) or accept manykinds of small metal targets. In the AUTOTUNE position,the <strong>CZ</strong>-<strong>20</strong> is in an all-metal mode. In this mode, the<strong>CZ</strong>-<strong>20</strong> has a slightly wider and deeper search pattern;however, it lacks the ability to discriminate or identifyand reject targets.3. PINPOINT: A two-purpose, spring-loaded pushbutton.When pushed and held, the <strong>CZ</strong>-<strong>20</strong> goes into a nomotion,all-metal mode for precise pinpointing. Thisbutton is also used in conjunction with the GROUNDcontrol during the ground-balancing procedure.4. GROUND: Used to electronically cancel the effectsof wet salt and ground mineralization. Proper use ofthis control will minimize false ground signals andensure that the <strong>CZ</strong>-<strong>20</strong> is operating at its maximumpotential in just about any ground condition includingwet, ocean sand.5. SENS (Sensitivity)/BATT TEST: In the extremecounterclockwise position, the battery condition ischecked as indicated by a strong or weak tone andthe red LED’s.6. LIGHT EMITTING DIODES (LED’s): Used to indicate65142310
CONTROL PANELtarget signal strength. When the SENSITIVITY control isin the “BATT TEST” position and both LED’s are fully litup, the batteries are fully charged. When both LED’sare out, it’s time to replace the batteries.TURN ON PROCEDURE1. Set your controls as follows:GROUND = “10”DISC = “0” for normal use in target I.D. mode. (SetDISC to “Autotune” for deep search, all-metalAUTOTUNE mode.SENS = “10”VOLUME = OFF2. Hold the search coil waist high, away from anynearby metal.3. Turn the VOLUME control to “1” (a brief bell tone isnormal when you turn the VOLUME control on).4. Then increase the volume to a comfortable levelwhen the search coil passes over a large, shallowtarget.GROUND BALANCINGWhen your <strong>CZ</strong>-<strong>20</strong> QuickSilver is properly “ground balanced,” itwill have only a minimum response to ground mineralization. Preciseadjustment of the GROUND control is critical for optimumperformance. The higher the degree of ground mineralization or thehigher the sensitivity setting,the more critical it is to have yourmachine properly ground balanced. Once you adjust it in eitherthe Autotune mode or Target-I.D. mode, you can switch back andforth between the two modes without resetting, unless you increasethe sensitivity level or go from dry sand to wet sand or vice versa.You should also recheck your setting occasionally as you searchbecause ground conditions often change rapidly.If you have difficulty ground balancing, try reducing your sensitivitylevel or moving to another spot just in case you are over a buriedpiece of metal. In some areas of high ground mineralization youmay not be able to use the pushbutton method.11
GROUND BALANCINGPUSHBUTTONThis will probably be your method of choice in all but the mostdifficult of ground conditions. It’s fast, easy and accurate. Youcan use this method in either the Autotune or Target-I.D. mode.1. With your controls set as in the “Turn-On”procedure (GROUND control at “10”), hold yoursearch coil parallel to and 6 to12 inches off theground. Press the PINPOINT button and hold it untilyou’ve completed step 2. Make sure you’re atleast 3 feet away from any metal objects.2. Continue pressing the PINPOINT button as youlower the coil to the ground. Keep your thumb onthe PINPOINT button, and starting at “10,” rotatethe GROUND control clockwise until you hear anaudio tone. Then back off to the exact point wherethe tone disappears. Release the PINPOINT buttonand you’re ready to search.3. Always ground balance your <strong>CZ</strong>-<strong>20</strong> in the areasyou intend to search, whether it’s on land orunderwater.NOTES:1. If you get an audio response as you first lower the coil withthe GROUND control at “10,” you’re probably over a pieceof metal. Move and try again.2. If you get a sudden bell tone that is not preceded by anincreasing audio response as you lower the coil, you’reprobably in some very highly mineralized soil or sand. In thiscase, it’s best to use the “bobbing” method, paying particularattention to the notes under paragraph 7.3. If you don’t get any audio response, or just a very faint oneas you rotate the GROUND control from “10” all the way to“0,” you’re probably in an area where there’s very little groundmineralization. Just leave the GROUND control at “10” andbegin searching.12
GROUND BALANCINGBOBBING1. AUTOTUNE and the SENSITIVITY control is set soyou can just barely hear a threshold hum. Hold thesearch coil parallel to and 6 to 12 inches over theground and at least 3 feet away from any metalobjects. Do not use the PINPOINT button during anypart of this procedure.2. Lower the coil to an inch or two above theground and then quickly raise it. Note that as youlower the coil, the tone disappears then gets louderas you raise it and finally returns to normal whenyou stop it 6 to12 inches above the ground.Conversely, if you set the GROUND control to “1,”the threshold hum will get louder as you lower thecoil and disappear when you raise it.3. Your objective now is to adjust the GROUNDcontrol so that there is no change, or only aminimum change in the threshold hum, as you movethe coil up and down. Start by lowering theGROUND control to “9.” Lower the coil and raise itagain. One of three things will happen to yourtheshold hum:1) It will fade again as you lower the coil andincrease as you raise it.2) lt will get louder as you lower the coil and gosilent as you raise it.3) The hum will remain the same, or if it changesslightly, the change is the same whether youlower or raise the coil.4. If the hum remains the same or changes onlyslightly (as in step 3 above), your <strong>CZ</strong>-<strong>20</strong> is properlyground balanced, and you are ready to begin yoursearch.5. If the tone fades as you lower the coil (as in step1), continue to lower the ground balance settingin small increments until the threshold hum remainsthe same (or changes very little) as the coil islowered and raised.13
SEARCH MODESunderstand just how your <strong>CZ</strong>-<strong>20</strong> responds to different targets, trythe following:1. Scatter some sample targets such as coins, rings,pull tabs, nails and foil on the ground at least 18inches apart. Include some large targets as well: jarlids, soda cans, etc.2. Set the DISC control at “0,” SENS at “5.” Adjustthe VOLUME control for a comfortable level whenyou are over a large target.3. Ground balance the <strong>CZ</strong>-<strong>20</strong> as in the “GroundBalance” procedure.4. Hold the search coil about 2 inches above andparallel to the ground and move it slowly back andforth across each sample. Remember, the coil mustbe in motion to get a response. Keep in mind thatfor accurate target I.D., the coil center must passdirectly over the target.5. Note the different audio responses over thevarious targets. Your <strong>CZ</strong>-<strong>20</strong> will respond with a lowtone over most iron or steel targets. Pull tabs andfoil will give a medium-tone response and U.S. coinswill give a high-tone response.6. Note that an elongated ferrous object such as anail will give you a double “beep” as you cross itfrom end to end or a single “beep,” if you cross itscenter.7. When you go over a large, shallow target the<strong>CZ</strong>-<strong>20</strong> will respond with a distinctive bell tone. Thisis due to the fact that metal detectors can onlyidentify small targets. What usually happens is thatthe detector circuits will overload and identify atarget as “good” (silver, coins, etc.). Your <strong>CZ</strong>-<strong>20</strong>,however, will alert you to the fact that the targetis big and shallow, and cannot be accuratelyidentified. (Big deep targets, however, will usuallybe classified as a coin. Also be aware that coinson the surface may set off the bell tone if you gettoo close. And the smaller 5-inch coil is more likelyto overload than the 8- or 10 1/2-inch coils.16
SEARCH MODES8. Most silver rings will give a high tone. Most goldrings will fall into the pull tab/foil mid-tone category.This is due to the unavoidable fact that most goldrings are conductively similar to aluminum foil andpull tabs. Some are more closely identical to theU.S. 5-cent piece; however, the <strong>CZ</strong>-<strong>20</strong> does havethe unique ability to separate those signals from thealuminum trash signals.9. Now increase the DISC control to “1.” You willfind that the <strong>CZ</strong>-<strong>20</strong> rejects the small, iron targets andno longer responds with an audio tone.10. Continue to increase your DISC control, notingthat with each successive step up you reject moreand more targets. At DISC = “4” for example, youare in a “coins-only’ mode, ignoring iron, tabs andfoil while accepting U.S. coins.11. Use the target I.D. decal on the left underside ofyour control housing graphically displays which itemsare rejected and accepted at each DISC level. Forexample, “foil” is placed between DISC = “2” andTypical <strong>CZ</strong>-<strong>20</strong> Audio Responses17
SEARCH MODESDISC = “ 3.” This means that foil is accepted at “2”and rejected at “3.”12. You may expect varying signals over differenttargets and at different levels of discrimination.Note that as you progressively increase thediscrimination level you eliminate more and moretargets.13. Now switch the DISC control to the AUTOTUNEposition and note the completely different kind ofresponse. No tone, just a smoother, solid responseover every target.NOTE: Be aware that due to the virtually infinite variety of sizes,shapes and alloys of many “good” targets (relics, jewelry,foreign coins, etc.), they may be identified as just aboutanything. For example, a Civil War mini ball may be identifiedas foil, or a new Canadian coin as a rectangular pull tab.SEARCHING ON LAND OR SHALLOW WATERGood search techniques are every bit as important as having agood detector.1. Make sure your <strong>CZ</strong>-<strong>20</strong> is properly ground balanced.2. Decide which search mode you’re going to use:Target I.D. or Autotune. Recommended starting point:Target I.D. mode with the DISC control set at “4.”3. Set your SENSITIVITY control. Only experience will tellyou how to set it in every situation, but you’ll probablywant to run it as high as you can. Recommendedstarting point: SENSITIVITY = “5.” If you’re in the Autotunemode, set it so that you can just barely hear a slightaudio hum.4. Adjust your VOLUME control. Remember that asetting above “5” will amplify the response of fainttargets so that they sound like a shallow or large target.Some searchers prefer not to use it above “5” so thatthe audio response will give them some ideas as tothe depth and/or size of the target. Recommended18
SEARCHING ON LAND OR SHALLOW WATERstarting point: VOLUME = “5,” then adjust the volumecontrol for a comfortable, not-too-loud response overloud targets.5. Once you’ve got your controls properly set, beginyour search by walking slowly and sweeping thesearch coil in a tight semicircle as shown.6. Keep the coil parallel to the ground and as close tothe ground as practical. This is extremely importantfor maximum coverage and depth. If you’re searchingon a lawn, you may set the coil right on the grass andlightly “scrub” it.7. Overlap your sweeps by at least 50 percent.Remember, your coil’s search pattern is conical, andif you don’t overlap each sweep you’ll miss the deepertargets.8. Search in a methodical manner. Pay close attentionto where you’re going and where you’ve been.9. Keep the search coil moving at a comfortable rate.Remember that the <strong>CZ</strong>-<strong>20</strong> is a motion detector andresponds only when the coil (or the target) is moving(except when in the Pinpoint mode.)10. Take your time. If you walk too fast you can’toverlap your sweeps and you’ll miss a lot of ground. Ifyou swing your coil too fast you’ll lose some sensitivityto deep and/or small targets.11. The illustration on page <strong>20</strong> shows the <strong>CZ</strong>-<strong>20</strong> searchcoil pattern and how it is affected by sweep speed,ground mineralization and search mode.When the stem length is properlyadjusted, the <strong>CZ</strong>-<strong>20</strong> is balanced forsweeping a tight semicircle aroundthe operator: wide to the right forright handers, wide to the left for lefthanders. Be sure to overlap yoursweeps.19
SEARCHING ON LAND OR SHALLOW WATER123 4The effects of sweep speed,ground mineralization andsearch mode.1. Minimum deptha. Very slow or very fast sweep speedb. Highly mineralized soilc. Target I.D. search mode2. Good deptha. Moderate sweep speedb. Moderately mineralized soilc. Target I.D. search mode3. Maximum deptha. Moderate sweep speedb. Non-mineralized soilc. Autotune search mode4. Missed targetMany targets well within the range of your<strong>CZ</strong>-<strong>20</strong> will not be detected unless you overlapyour sweeps.Unlike other metal detectors, the discrimination level has littleif any effect on the depth capability of the <strong>CZ</strong>-<strong>20</strong>. Note, however,that the all-metal Autotune mode has a wider search patternand may detect a little deeper. Depth is also determined by thesize, shape and conductivity of the target as well as the sensitivitysetting of the <strong>CZ</strong>-<strong>20</strong>.<strong>20</strong>
SEARCHING UNDERWATERThe <strong>CZ</strong>-<strong>20</strong> is waterproof to 250 feet, and it operates the sameunderwater as on land. However, some differences in searchtechnique should be noted.1. Tune your <strong>CZ</strong>-<strong>20</strong> underwater on the bottom asinstructed on page 6. Many divers prefer to usethe Autotune mode, in which case you may wantto run your threshold tone slightly higher than youwould on land. If you’re wearing a hood, you’llprobably have to turn the volume control tomaximum.2. Keep the coil as far away from you (and yourdive gear) as possible. Sweep the search coilback and forth in a wide semicircle in front ofyou to cover the bottom in a methodicalmanner.3. Keep the coil parallel and as close to thebottom as possible. Overlap your sweeps at least50 percent.4. Recheck your ground balance every 5 to 10minutes.5. Remember, observe all the rules of safe diving.Move slowly, keeping thesearch coil away from yourdive gear and as close tothe bottome as possibleNOTE: Keep the search coil away from your metal dive gear.Search slowly, overlapping your sweeps with your coil as closeto the bottom as possible.21
PINPOINTINGTarget location is quick and easy using the pushbutton Pinpointmode. You do not have to keep the coil moving to get a responsein this mode.1. Once the presence of a target is indicated bythe “beep-beep” of your <strong>CZ</strong>-<strong>20</strong>, simply move thecoil away from the target area, and with the coillightly on the ground or very close to it, press andhold the PINPOINT button. (It doesn’t matter whichmode you’re searching in, Autotune or Target I.D.)2. As you bring the coil back into the target area,still pressing the PINPOINT button, the audio volumeand pitch will increase.3. When the pitch and volume are at their highestpoints, stop the coil and move it forward andbackward a couple of times, again stopping overthe strongest response.4. Repeat one more time, side to side and then frontto back, keeping the PINPOINT button pushed in,stopping over the spot where you get the maximumvolume and pitch.NOTE: Large or shallow targets can give a wide signal when thepinpoint button is pushed. This can make pinpointing difficult.To pinpoint these large or shallow targets, find the edge of thewide signal with the pinpoint button pushed. While over the edgeof the signal, release the pinpoint button and re-push it. Thisautomatically decreases the sensitivity and narrows the widthof the pinpoint signal. By repeating this procedure a few timesover the edge of the wide signal, you can narrow the pinpointsignal and pinpoint your target.Target I.D. Mode and Autotune ModePinpointing in either of the search modes is more difficult, butwith practice you should be able to get the hang of it. (Many<strong>CZ</strong>-<strong>20</strong> operators don’t even bother with the Pinpoint mode.)Simply use the same basic procedure as you would using thePinpoint mode, moving the coil side to side and front to back22
PINPOINTINGover the target area, stopping over the strongest audioresponse. The only difference will be that you should use asshort of stroke as possible (4-6 inches is plenty) and when youstop the coil you will lose the audio signal. You MUST keep thecoil moving at least slightly to determine the location of thestrongest signal before you stop it.TARGET IDENTIFICATIONTarget I.D. with the <strong>CZ</strong>-<strong>20</strong> is quick and simple. Just keep in mindthese two rules:1) You must be in the Target-I.D. mode.2) The center of the search coil must pass directly overthe target.1. Once you’ve located a target, pinpoint its exactlocation as in the “Pinpointing” procedure. Sinceaccurate I.D. is dependent on accuratepinpointing, it is recommended that you press thePINPOINT button rather than try to pinpoint yourtarget in either the Autotune or Target I.D. mode.2. Once you’ve pinpointed your target, release thePINPOINT button. If you’re searching in theAutotune mode, switch over to DISC = “0.” If youare already in the Target I.D. mode, just leave theDISC control where it is.3. Move the coil just enough, left-right-left, acrossthe target to get a good, solid signal. If you nolonger get a signal after you’ve pinpointed yourtarget, then you’re over something that falls belowthe DISC setting you’ve chosen, and your <strong>CZ</strong>-<strong>20</strong> isrejecting it.4. Once you’ve pinpointed your target and you’regetting a good, consistent signal, you’ve identifiedor at least classified your target. A low tone meansyour target is probably ferrous. A mid tone indicatesa pull tab or foil, and the high tone indicates a U.S.coin.23
TARGET IDENTIFICATION5. The DISC control provides increments of rejectionand identification within the mid- and high-tonetarget classifications. Take a look at the target I.D.decal on your control housing to see what getsrejected at which DISC point.6. If you’re getting a high-tone response forexample, you may well be over a U.S. coin. If youwant to know what kind of coin it is, advance theDISC control to “5.” You know from the I.D. decalthat if you lose the signal your target is probably anickel (or something conductive and very similar).If you don’t lose it, go up to “6.” If you lose it at “6,”your target may well be a U.S. zinc penny. If youstill get a signal, your target, if it is indeed a coin,will probably be a copper penny, an older silvercoin or a clad coin. Most other small targets will beignored.7. The same is true of the mid-tone targets: Roundpull tabs are rejected at “2,” foil at “3” andrectangular tabs at “4.” If, for example, you’relooking for gold rings in an extremely trashy area,you have the ability to reject at least some of thetrash -say iron, round tabs and foil- and still getthose rings falling into the rectangular tab and allcoin categories. (Of course you’ll have to digrectangular tabs as well.)8. Your <strong>CZ</strong>-<strong>20</strong> will correctly identify most of thetargets on your I.D. decal most of the time, but itcan be fooled. Large targets, uneven groundmineralization, good targets lying next to badtargets, deep targets, all of these and more aresources of error. Remember, the <strong>CZ</strong>-<strong>20</strong> is designedto I.D. small, coin-sized targets only, and even someof these may be deep enough, bent, damaged,or corroded enough to give a false signal.9. You should also realize that there are many goodtargets which are not classified by the <strong>CZ</strong>-<strong>20</strong>. Asmentioned earlier, gold rings, for example, may fallinto any category except iron. Many foreign coins,24
TARGET IDENTIFICATIONespecially the new ones, may I.D. as foil or pull tab.Gold nuggets, depending on their size and shape,may fall into just about any category, the smallernuggets falling on the lower half of the scale. So ifyou’re not just looking for U.S. coins, you should testsome sample targets to determine what level ofdiscrimination you want to work at and what targetsyou want to dig.TARGET RECOVERYOnce you’ve identified and pinpointed a target, yourobjective is to recover it quickly and neatly, leaving virtually notrace of your excavation. There are almost as many ways to dothis as there are treasure hunters. Whatever works for you is goodenough as long as you don’t break any laws, leave uncoveredholes or damage the environment either on land or underwater.Generally speaking, divers and beachcombers do little, if any,damage to the environment while recovering small targets.However, if you plan to use your <strong>CZ</strong>-<strong>20</strong> on lawns or in parks, yourtarget-recovery method can be very important. Two of the mostsuccessful methods are illustrated in a separate booklet enclosedwith your <strong>CZ</strong>-<strong>20</strong>.Reminder: Whichever method you choose, remember thatresponsible treasure hunters take pride in their ability to leavesoil and vegetation intact and undamaged. If you don’t wantto see your right to treasure hunt restricted or even eliminatedby government legislation -fill those holes! And leave yourhunting areas in better shape than when you arrived.25
RECOVERY TOOLS1. Sand scoops designed especially forbeachcombers and shallow-water treasurehunters are available at metal detector outlets.2. Divers use a variety of recovery tools, dependingon the condition of the sea bed or lake bottom. Asturdy dive knife will suffice in packed mud or smallrocks. Most divers prefer to use their hands in loosesand. Professional treasure hunters often use an airhose fed by a surface compressor to blow awayloose sand, gravel or mud.3. For land recovery, a sturdy hunting knife with a5-inch blade will suffice in most soils. A high quality,double edged “survival” knife is an even betterchoice (and more expensive) because it will bealmost impossible to bend or break.CAUTION: Using a jack knife without a lockingblade is a good way to lose a finger.4. A heavy duty, blunt screwdriver is commonlyused for shallow targets where digging or“plugging” is objectionable.26
FALSE SIGNALSA “false signal” occurs when a target is incorrectlyidentified. For example , a small, broken-off piece of pull tabmay be identified as a nickel. Or a small, deep coin, especiallyin mineralized soil, may read “IRON.” The more sensitive themetal detector, the harder it is not to have false signals. Your<strong>CZ</strong>-<strong>20</strong> is an extremely sensitive machine, so you’re bound toencounter them. Here are some of the most frequent sourcesof false signals and what to do about them:1. Trash: The most common source of false signals.Large or irregular pieces of trash may give good,consistent, high-tone signals. In this case you’llusually have to dig the target, but withexperience you’ll be able to eliminate many ofthe large targets whose size will be obviouswhen you go into the pinpoint mode. Anotherfalse signal response may be a “one-way” ordisappearing signal. You’ll sweep over the targetand get a good signal but nothing on the returnsweep. When this happens you’re over a targetthat the <strong>CZ</strong>-<strong>20</strong> can’t positively identify due to itssize, shape, depth or alloy. The <strong>CZ</strong>-<strong>20</strong> may I.D. it asa coin when swept from one direction and ironon the return sweep. If your DISC control is set at“0” you’ll hear first a high tone (coin) and then alow tone (iron). Or if your DISC control is sethigher, to reject iron, you’ll hear the high tonesweeping one way and nothing the other way.Quite often the signal will just disappear and youwon’t be able to find it no matter which directionyou sweep. These one-way and disappearingsignals are usually trash, and as a general ruleyou should ignore them. If you have any doubts,press the PINPOINT button to get an accuratelocation, and then I.D. the target. If you get agood repeatable tone, dig it. If you still get aone-way signal or it disappears, move on. Also, ifyour pinpointing location is different than yourI.D. location, your target is probably a piece ofiron. Reducing your sensitivity level, taking27
FALSE SIGNALSshorter, slower sweeps, or increasing thediscrimination level may reduce the number offalse signals caused by trash.2. Deep Targets: Deep targets, just barely within therange of the <strong>CZ</strong>-<strong>20</strong>, may be misidentified. Forexample, a deep coin may I.D. as iron, or a deeppiece of iron may I.D. as a coin. There’s not muchyou can do to avoid this other than to use yourpinpoint mode to ensure that you are exactlycentered over the target. Or you may reduce yoursensitivity level so you just ignore the very deepesttargets.3. Electrical Interference: Constant chatter causedby radio/TV stations, power lines or nearbydetectors operating at one of the <strong>CZ</strong>-<strong>20</strong> searchfrequencies. The best solution is to move away fromthe source of the interference. You may also try oneof the following: switch to the Autotune mode;reduce your sensitivity level; slow down yoursweep speed. If the interference is only minimaland you wish to continue searching anyway, testyour <strong>CZ</strong>-<strong>20</strong> over a known target to make sure it’soperating properly. Inside some buildings, electricalinterference may be so bad that you’ll have to gooutside just to bench test your <strong>CZ</strong>-<strong>20</strong>.4. Highly Mineralized Soil: May cause a bell toneresponse or constant false signals. Check yourground balance (see the “Ground Balance”section referring to mineralized soil). Try loweringthe sensitivity and/or increasing the discriminationlevel. Search in the AUTOTUNE mode. Re-groundbalance using the “bobbing” method. If all elsefails, raise the search coil just high enough for thefalse signals to disappear and then sweep at thatconstant height.5. Black Sand: Same as Highly Mineralized Soil.6. Wet Salt-Water Sand: Your <strong>CZ</strong>-<strong>20</strong> should be ableto handle most wet sand easily unless it’s black (seeBlack Sand above). You should able to reduce the28
FALSE SIGNALSnumber of false signals caused by salt water bylowering your sensitivity and making sure you areground balanced properly.7. Hot Rocks: Some rocks, by virtue of their highmineral content, will be seen by metal detectors asa metal target. In the Autotune mode, the <strong>CZ</strong>-<strong>20</strong> willrespond to most hot rocks. Prospectors (who will mostlikely be using the Autotune mode in an area wherehot rocks abound), however, will learn to distinguishbetween many hot rock and nugget sounds. In thetarget-I.D. mode, certain types of hot rocks will beautomatically rejected at DISC = “0” and virtuallyall other hot rocks will be identified as iron or rejectedat DISC = “1.”8. “End of Swing:” Silent search motion detectorsoften give false signals at the edges of the searchpattern -just as the coil stops and beginsaccelerating back toward the operator. If this is aproblem, try one or more of the following: Keepyour sweep smooth, slow and low to the ground.Check your ground balance. Lower yoursensitivity. Make sure your search coil is properlysecured and the cable connector is firmlytightened.9. Digging Tool: If you’re carrying a metal sandscoop, digging knife, or screwdriver, hold it behindyour back or keep it above your waist. Your <strong>CZ</strong>-<strong>20</strong>is sensitive enough to sound off each time yousweep the coil beneath it.10. Elongated Ferrous Objects: If you get two beepsclose together and can’t find either target, you maybe near a nail or some other long, ferrous object.Fortunately, in most cases your <strong>CZ</strong>-<strong>20</strong> will identifythese objects correctly; they just won’t be whereyou think they are. In all cases, the target will bebetween the beeps, or if you sweep at right anglesto your original direction, you’ll receive a singlebeep directly over the target.29
FALSE SIGNALSa) Shallow coins (at or near the surface) or coins on edgewill give a double beep: one on either side of the coin,just like a nail. Like the nail, the coin on edge will give asingle beep directly over the target if you sweep at rightangles to your original position.b) A coin lying in the ground at an angle (as shown) maygive a single target response but may pinpoint severalinches away from its true location. Check around theinside edges of the hole. If you still don’t find it, enlargethe hole by a couple of inches.c) A large, deep target, like a buried pipe or a manholecover at 2 feet, will often give a good, strong coin signal.If you’ve dug down a foot and widened your hole severaltimes, give up.Targets that aren’t there.Coin lying at an angle or on edge.?Long, ferrous object. Large, deep object.Large, deep targetWater PipeOPERATING TIPS1. It’s always a good idea to walk slowly andoverlap your sweeps. But if you’re searching alarge expanse of new territory, you may want towalk a little faster and not overlap your sweeps asmuch until you start making a few good finds. Then,slow down, overlap your sweeps and cover everyinch of ground.2. In trashy areas, to reduce the “masking” effectsof trash on nearby good targets, use a shorter andslower sweep pattern. If you’re going to be huntingexclusively in this type of ground, you may be better30
OPERATING TIPSoff equipping your <strong>CZ</strong>-<strong>20</strong> with the smaller, 5-inchcoil at time of purchase. It will zero in on goodtargets closer to trash.3. Recheck your ground balance occasionally.4. Here’s a quick and easy way to tell the differencebetween a small, shallow piece of foil and a goldring (or other possibly good target) without digging:If you get a good solid “FOIL” I.D., set the searchcoil down close to the target and then whip itrapidly across the target just once with what canbest be described as a flick of the wrist. lf the targetdisappears, it’s probably a small, shallow piece offoil. If not dig it up it could be that gold ring you’relooking for. Practice this over some foil until youget the hang of it.5. Don’t be afraid to turn your sensitivity down. True,the higher the sensitivity, the deeper your <strong>CZ</strong>-<strong>20</strong> willgo, and the more you’ll find. But that’s only underoptimum conditions. If you’re getting a lot of falsesignals caused by electrical interference, groundmineralization or dense trash, lower your sensitivity.If you have to back it down to “4,” “3” or even “2”to eliminate the falsing, do it. That’s what yourSENSITIVITY control is for. You’ll be surprised at howmuch you might find in an area that wouldotherwise be unsearchable at high sensitivity levels.6. Set your discrimination at an appropriate level.If there’s very little trash in the area, set it low, sayat iron discrimination, and dig every good signal. Ifthere is a lot of trash present and you’re mainlyinterested in coins, set the discrimination level highyou may even want to sacrifice nickels and zincpennies in extremely trashy areas. If you’re lookingfor gold rings, relics, artifacts, or small ancient coins,you’ll have to set your discrimination level low. Thebest way to find out how low is to bury some sampletargets or just dig everything for awhile until youget a feel for which target classifications will bethe most productive.31
OPERATING TIPS7. Look for repeatable signals and don’t waste timeon disappearing or one-way signals. If you hear agood beep but can’t repeat it when you go backover the target area, or if it beeps in only onesweep direction, it’s probably a piece of trash -something below your discrimination setting.8. If you’re in a relatively non-trashy area, trysearching in the Autotune mode and thenidentifying your targets by switching to DISC = “0.”You’ll find more and deeper targets this way. Andyou’ll eliminate almost all false signals.9. If you’re having any difficulty pinpointing oridentifying a target in the I.D. mode, don’t wasteany more time. Push the pinpoint button for quickpinpointing, then release it for accurate I.D.10. If your target disappears when you go into thePinpoint mode, you’ve probably tuned it out bypressing the button too close to the target or overanother piece of metal. Try again, this time pushingthe PINPOINT button over another piece of ground.11. Don’t waste a lot of time digging holes for targetsyou can’t find. If your hole keeps getting deeperand wider, cover it up and go on. You may be overa buried pipe or some other large deep target.12. When in doubt, dig. If your <strong>CZ</strong>-<strong>20</strong> can’t quitedecide whether a target is good or bad, dig it up.13. Good things often come in two’s. Or eventhree’s. Once you’ve recovered a good target,always recheck the hole for a second signal andcarefully search the immediate area by walkingslowly around the hole two or three times,overlapping your sweeps in an ever-wideningcircle. Always dig every suspicious sound in thevicinity of a good find.14. Recheck your hole even if your find was trash.Good targets are often found beneath bad ones.15. Keep the search coil cable wound snuglyaround the stem when diving around coral orjagged rocks to keep it from snagging.32
OPERATING TIPS16. Divers should make sure the drain holes in theheadset are unobstructed. Better yet, wait untilyou’re on the bottom before putting your headseton, and take it off before surfacing.17. Divers should also keep the search coil at least2 feet away from their bodies. Metal gear (weights,gauges, tanks, etc.) will be detected by the <strong>CZ</strong>-<strong>20</strong>if held too close.18. Practice. Practice over known targets. Practiceground balancing. Practice pinpointing. Rereadthe appropriate part of this manual if you’re havingproblems.For even more “how-to” information, see your <strong>Fisher</strong> dealer for“Advanced Treasure Hunting with the <strong>Fisher</strong> QuickSilver Series MetalDetectors” an 88-page, illustrated book by <strong>CZ</strong> expert Andy Sabisch.BATTERY REPLACEMENTCheck your batteries frequently. Remove your headset (leavethem around your neck or close by). Set the volume control at“10” and click the SENS control counterclockwise into the BATTTEST position. The condition of the batteries will be indicated intwo ways:1. An Audio Tone: The stronger, the better. A loud,high pitched tone indicates good batteries. Aweak, low pitched tone or “ticking” soundindicates weak batteries. No tone means it’s timeto change the batteries.2. Light Emitting Diodes: When both LED’s arebrightly lit, your batteries are fully charged or nearlyfully charged. One brightly lit LED means yourbatteries are about half gone. When both LED’s areout it’s time to replace the batteries.The <strong>CZ</strong>-<strong>20</strong> is powered by four, 9-volt transistor batteries locatedin the rear section of the control housing. The batteries are sealed33
BATTERY REPLACEMENToff from the electronics so that accidental water leakage intothe battery compartment will not damage the circuitry. Toreplace the batteries, remove the battery access door:1. Remove the battery door by partially unscrewingthe two knurled thumb screws with a coin orscrewdriver. (The knurled knobs are “captivescrews” and do not have to be completelyremoved from the battery door.)2. Remove the battery pack from the ControlHousing. It’s not necessary to disconnect thebattery lead connector. Be very careful not to putany undue strain on the battery leads.3. Remove the batteries from the battery pack, andinstall fresh alkaline batteries. You may also userechargeable Nicads, but expect about half thebattery life.4. Insert the battery pack into the Control Housing.With your finger, push the top of the battery pack(with the leads) into the Control Housing first, thenlet the bottom follow.5. Make sure the O-ring and both sealing surfacesare clear before reinstalling the battery cover. THISIS EXTREMELY IMPORTANT!6. Finger tighten the thumb screws, then carefullytighten again 1/4 turn with a coin or screwdriver.34
MAINTENANCEYour <strong>CZ</strong>-<strong>20</strong> doesn’t require a lot of care. It’s built with highqualitymaterials, and it’s waterproof to a depth of 250 feet. Butthere are a few things you should do to keep it in peak operatingcondition.StorageCleaning1. If you’re not going to be using it for awhile, takethe batteries out. Acid damage caused by leakingbatteries can be severe.2. Avoid extreme temperatures. Don’t leave it insidea closed car sitting in the sun or even worse, in thetrunk of a car.1. Sand and dirt between the coil “ears” and lowerstem will literally grind away the ears and stem.2. The headphone ear pads may be removed,rinsed and squeezed out to remove any seawatersalt build up.3. Sand, silt or fine dirt between the upper andlower stems will cause the lower stem to freezeup. Rinse frequently.4. Rinse the lower area under the two knobs on thecontrol panel thoroughly after use in salt water.5. Always clean and dry the area around thebattery-cover seal before opening.Battery Compartment1. Remove the battery cover and check forwater after each use in water.2. Keep the sealing surfaces of the battery coverand control housing clean and free of scratchesand nicks. Remove and clean the neoprenegasket frequently. Lubricating the gasket is notrequired or recommended unless it is nickedand/or cut, in which case use only a very thincoating of petroleum jelley. Do not use siliconegrease.35
TREASURE HUNTER’S CODE OF ETHICSLETS PRESERVE OUR TREASURED SPORT!Laws governing the use of metal detectors are becomingmore and more common. In many countries, the use of metaldetectors is illegal or severely restricted. Don’t let this happenin your area.ALWAYS get permission to hunt on private property.ALWAYS leave a site cleaner than you found it. Take at leastsome trash with you or, if you can, take it all.ALWAYS fill in your holes neatly whether you’re in a city park orremote wildernessness. Leave the land as it was before youdisturbed it.ALWAYS obey all laws relating to Treasure Hunting.ALWAYS return valuable property if you can locate the originalowner.ALWAYS do whatever you can to give the hobby of TreasureHunting the good image it needs and deserves.36
Where To Use Your Metal Detector In The U.S.National Forest and Federal Lands—Metal detecting isallowed only by special permit acquired from the federalgovernment. Each area has a district office.Corps of Engineers, Lakes, Shorelines and Lands—Permissionhas been granted only on predisturbed sites, such as beachesand attached swimming areas. New Corps lakes and landsmust be okayed by the main office of the Army Corps ofEngineers. Each area has a district office.State Parks and Lands—Some state parks are open to metaldetecting, but some are not. Always check with the parkranger before attempting to use your detector.Bureau of Land Management (BLM) Lands—Some areas areopen for metal detecting, and some are not. Always checkwith the district office.City or County Park Lands—Most are open to metal detectingunless notice is given by a sign or city ordinance. When indoubt, always check with the city’s Parks and RecreationDepartment.Public School Grounds—Most are open to metal detectingunless notice is given by a sign, city ordinance, lawenforcement official, or school employee. You should alwayscheck with the school office first.Privately Owned Lands (Private Property)—Permission required.And it is always best to have the permission in writing.Historically Marked Lands or Sites—Metal detecting is notallowed. Don’t even think about it.37
SPECIFICATIONSLength Extended ............................................................................. 50"Collapsed ......................................................................................... 30"8" Coil .............................................................................................. 10.5"Coil 5" ............................................................................................... CoilWeight Complete (with headset) ....5 lb., 11 oz. 6 lb., 1 oz. 5.4 lb.Handle and Search Coil ............. 2 lb., 6.9 oz. 2 lb., 12.9 oz. 2.1 lb.Control Housing ........................................................................ 2.8 lbs.Frequency ........................... 1. Dual, VLF Search 5 KHz and 15 KHz............................................................... 2. Audio Target ResponseIron I.D................................................................ <strong>20</strong>0 Hz (Low tone)Foil and Tab I.D. .................................................450 Hz (Mid tone)Coin I.D. 1 KHz (High tone)Autotune ....................................................... 500 Hz - 1 KHz (VCO)Pinpoint ......................................................... 500 Hz - 1 KHz (VCO)Operating Modes1. Autotune ................. VLF-Motion, all-metal with threshold tone2. Target I.D.......... VLF-Slow Motion, Silent Search Discrimination3. Pinpoint ................................................VLF, All-Metal, No MotionSearch Coil Type ......................................... Concentric, Co-PlanarDiameter ......................................................................... 8", 10.5" or 5"Shielding .................................................................................. 100% ESIInterchangeable ............................................................................ NoVisual Target Response ................................................. Dual L.E.D.’sHeadset Waterproof, Piezo ElectricInterchangeable ............................................................................ NoGround Balance Pushbutton Manual or “Preset” ControlMarkingsHipmountable Control Housing ................................................... YesSalt Water/Fresh Water Operation ............................................. YesLand Operation .............................................................................. YesSubmersible ........................................................................to 250 feetBatteries Separately Sealed Compartment .............................. Yes38
SPECIFICATIONSType ............................................................................... (4) 9V AlkalineLife Alkaline ...........................................................................35-55 hrs.Nicads ....................................................................................10-<strong>20</strong> hrs.Operating Temperature ................................................... 32° - 110° FFaint Target Audio Boost ............................................................... YesManual Threshold Tuning .................................. In Autotune ModeTarget I.D. Three Tones plus Bell Tone for large, shallow targets,plus 7 preset DISC.Control SettingsNotes:1. Subject to improvement or modification without notice.2. Approximate.3. Pulsegate Unipolar Audio Processing. Advanced <strong>Fisher</strong> circuitry which allowssilent operation below “audio threshold tone” with no loss in sensitivity.4. The 1212-X is a “motion” detector while in the search mode. The search coilmust be moving at least slightly to detect a target.5. Electro-Static-Insulated to eliminate certain types of false signals.6. Use of headphones may increase battery life up to 100%.39
QUALITY<strong>Fisher</strong> detectors are renowned for their quality.Each detector is hand crafted in the USA with pridePERFORMANCETreasure Hunters worldwide rely on <strong>Fisher</strong>.Our detectors are durable, dependable, and search deeper..REPUTATION<strong>Fisher</strong> produced the first patented metal detector in 1931. Forover 70 years, the <strong>Fisher</strong> logo has been a mark of excellence.LIFETIME WARRANTY<strong>Fisher</strong> believes in the products we produce and backs thisbelief with a lifetime warranty, the best in the industry, on all ofour consumer detectors. Warranty may vary outside of theUnited States. See your dealer for detailsSERVICE<strong>Fisher</strong> is committed to providing you, our valued customer, withsuperior service. Each and every instrument is rigidly tested andcarefully inspected during assembly and before shipment.Should you have any questions or problems, contact:FISHER RESEARCH LABORATORY<strong>20</strong>0 West Willmott Road.,Los Banos, California 93635Tel <strong>20</strong>9.826.3292 Fax <strong>20</strong>9.826.0416www.fisherlab.com email:info@fisherlab.comEXPORT DEPARTMENT280 state Street, Suite <strong>20</strong>2North Haven, CT 06473 USATel <strong>20</strong>3.230.4130 Fax <strong>20</strong>3.248.8093email: fisher@exportdept.com