

1964-65 chevrolet chevelle/ el camino - Classic Auto Air
1964-65 chevrolet chevelle/ el camino - Classic Auto Air
1964-65 chevrolet chevelle/ el camino - Classic Auto Air

Create successful ePaper yourself
Turn your PDF publications into a flip-book with our unique Google optimized e-Paper software.
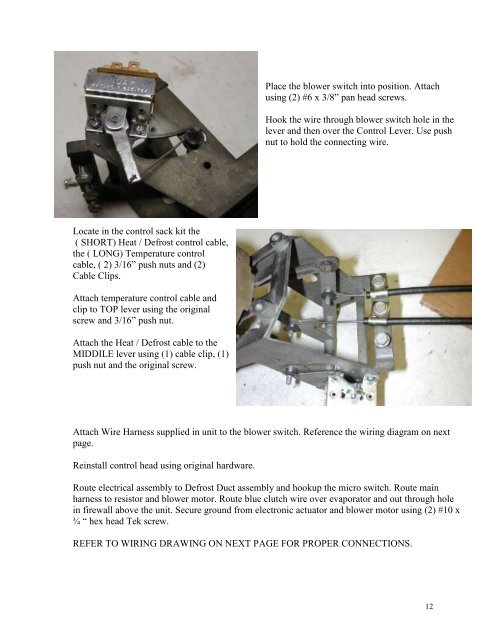
Locate in the control sack kit the<br />
( SHORT) Heat / Defrost control cable,<br />
the ( LONG) Temperature control<br />
cable, ( 2) 3/16” push nuts and (2)<br />
Cable Clips.<br />
Attach temperature control cable and<br />
clip to TOP lever using the original<br />
screw and 3/16” push nut.<br />
Attach the Heat / Defrost cable to the<br />
MIDDILE lever using (1) cable clip, (1)<br />
push nut and the original screw.<br />
Place the blower switch into position. Attach<br />
using (2) #6 x 3/8” pan head screws.<br />
Hook the wire through blower switch hole in the<br />
lever and then over the Control Lever. Use push<br />
nut to hold the connecting wire.<br />
Attach Wire Harness supplied in unit to the blower switch. Reference the wiring diagram on next<br />
page.<br />
Reinstall control head using original hardware.<br />
Route <strong>el</strong>ectrical assembly to Defrost Duct assembly and hookup the micro switch. Route main<br />
harness to resistor and blower motor. Route blue clutch wire over evaporator and out through hole<br />
in firewall above the unit. Secure ground from <strong>el</strong>ectronic actuator and blower motor using (2) #10 x<br />
¾ “ hex head Tek screw.<br />
REFER TO WIRING DRAWING ON NEXT PAGE FOR PROPER CONNECTIONS.<br />
12


