XLR130 â XLR170 - Copyright Arctica Oy
XLR130 â XLR170 - Copyright Arctica Oy
XLR130 â XLR170 - Copyright Arctica Oy
- No tags were found...

Create successful ePaper yourself
Turn your PDF publications into a flip-book with our unique Google optimized e-Paper software.
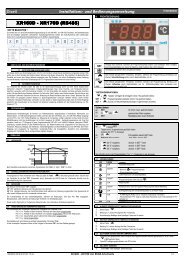
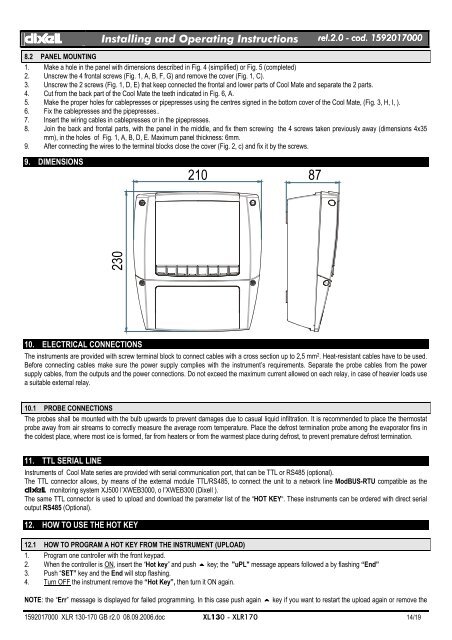
dIXELdIXEL Installing and Operating Instructions rel.2.0.0 - cod. 15920170008.2 PANEL MOUNTING1. Make a hole in the panel with dimensions described in Fig. 4 (simplified) or Fig. 5 (completed)2. Unscrew the 4 frontal screws (Fig. 1, A, B, F, G) and remove the cover (Fig. 1, C).3. Unscrew the 2 screws (Fig. 1, D, E) that keep connected the frontal and lower parts of Cool Mate and separate the 2 parts.4. Cut from the back part of the Cool Mate the teeth indicated in Fig. 6, A.5. Make the proper holes for cablepresses or pipepresses using the centres signed in the bottom cover of the Cool Mate, (Fig. 3, H, I, ).6. Fix the cablepresses and the pipepresses..7. Insert the wiring cables in cablepresses or in the pipepresses.8. Join the back and frontal parts, with the panel in the middle, and fix them screwing the 4 screws taken previously away (dimensions 4x35mm), in the holes of Fig. 1, A, B, D, E. Maximum panel thickness: 6mm.9. After connecting the wires to the terminal blocks close the cover (Fig. 2, c) and fix it by the screws.9. DIMENSIONS210 8723010. ELECTRICAL CONNECTIONSThe instruments are provided with screw terminal block to connect cables with a cross section up to 2,5 mm 2 . Heat-resistant cables have to be used.Before connecting cables make sure the power supply complies with the instrument’s requirements. Separate the probe cables from the powersupply cables, from the outputs and the power connections. Do not exceed the maximum current allowed on each relay, in case of heavier loads usea suitable external relay.10.1 PROBE CONNECTIONSThe probes shall be mounted with the bulb upwards to prevent damages due to casual liquid infiltration. It is recommended to place the thermostatprobe away from air streams to correctly measure the average room temperature. Place the defrost termination probe among the evaporator fins inthe coldest place, where most ice is formed, far from heaters or from the warmest place during defrost, to prevent premature defrost termination.11. TTL SERIAL LINEInstruments of Cool Mate series are provided with serial communication port, that can be TTL or RS485 (optional).The TTL connector allows, by means of the external module TTL/RS485, to connect the unit to a network line ModBUS-RTU compatible as thedIXEL monitoring system XJ500 l’XWEB3000, o l’XWEB300 (Dixell ).The same TTL connector is used to upload and download the parameter list of the “HOT KEY“. These instruments can be ordered with direct serialoutput RS485 (Optional).12. HOW TO USE THE HOT KEY12.1 HOW TO PROGRAM A HOT KEY FROM THE INSTRUMENT (UPLOAD)1. Program one controller with the front keypad.2. When the controller is ON, insert the “Hot key” and push o key; the "uPL" message appears followed a by flashing “End”3. Push “SET” key and the End will stop flashing.4. Turn OFF the instrument remove the “Hot Key”, then turn it ON again.NOTE: the “Err” message is displayed for failed programming. In this case push again o key if you want to restart the upload again or remove the1592017000 XLR 130-170 GB r2.0 08.09.2006.doc XL130 - <strong>XLR170</strong> 14/19