


You also want an ePaper? Increase the reach of your titles
YUMPU automatically turns print PDFs into web optimized ePapers that Google loves.
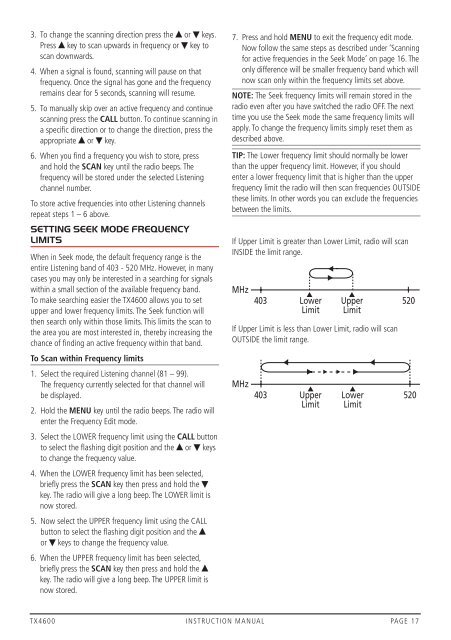
3. To change the scanning direction press the or keys.press key to scan upwards in frequency or key toscan downwards.4. When a signal is found, scanning will pause on thatfrequency. Once the signal has gone and the frequencyremains clear for 5 seconds, scanning will resume.5. To manually skip over an active frequency and continuescanning press the CALL button. To continue scanning ina specific direction or to change the direction, press theappropriate or key.6. When you find a frequency you wish to store, pressand hold the SCAN key until the radio beeps. Thefrequency will be stored under the selected Listeningchannel number.To store active frequencies into other Listening channelsrepeat steps 1 – 6 above.SETTING SEEK MODE FREqUENCYLIMITSWhen in Seek mode, the default frequency range is theentire Listening band of 403 - 520 MHz. However, in manycases you may only be interested in a searching for signalswithin a small section of the available frequency band.To make searching easier the <strong>TX4600</strong> allows you to setupper and lower frequency limits. The Seek function willthen search only within those limits. This limits the scan tothe area you are most interested in, thereby increasing thechance of finding an active frequency within that band.To Scan within Frequency limits1. Select the required Listening channel (81 – 99).The frequency currently selected for that channel willbe displayed.2. Hold the MENU key until the radio beeps. The radio willenter the Frequency edit mode.3. Select the LOWer frequency limit using the CALL buttonto select the flashing digit position and the or keysto change the frequency value.4. When the LOWer frequency limit has been selected,briefly press the SCAN key then press and hold thekey. The radio will give a long beep. The LOWer limit isnow stored.5. now select the upper frequency limit using the caLLbutton to select the flashing digit position and theor keys to change the frequency value.6. When the upper frequency limit has been selected,briefly press the SCAN key then press and hold thekey. The radio will give a long beep. The upper limit isnow stored.7. press and hold MENU to exit the frequency edit mode.now follow the same steps as described under ‘Scanningfor active frequencies in the Seek Mode’ on page 16. Theonly difference will be smaller frequency band which willnow scan only within the frequency limits set above.NoTe: The Seek frequency limits will remain stored in theradio even after you have switched the radio OFF. The nexttime you use the Seek mode the same frequency limits willapply. To change the frequency limits simply reset them asdescribed above.TIP: The Lower frequency limit should normally be lowerthan the upper frequency limit. However, if you shouldenter a lower frequency limit that is higher than the upperfrequency limit the radio will then scan frequencies OuTSIDethese limits. In other words you can exclude the frequenciesbetween the limits.If upper Limit is greater than Lower Limit, radio will scanInSIDe the limit range.MHzIf upper Limit is less than Lower Limit, radio will scanOuTSIDe the limit range.MHz403403LowerLimitUpperLimitUpperLimitLowerLimit520520<strong>TX4600</strong> INSTRUCTION MANUAL PAGE 17


