
Create successful ePaper yourself
Turn your PDF publications into a flip-book with our unique Google optimized e-Paper software.
7. ADJUSTMENT<br />
Check to make sure that the boot meets international<br />
standards and is not damaged.<br />
pict 19<br />
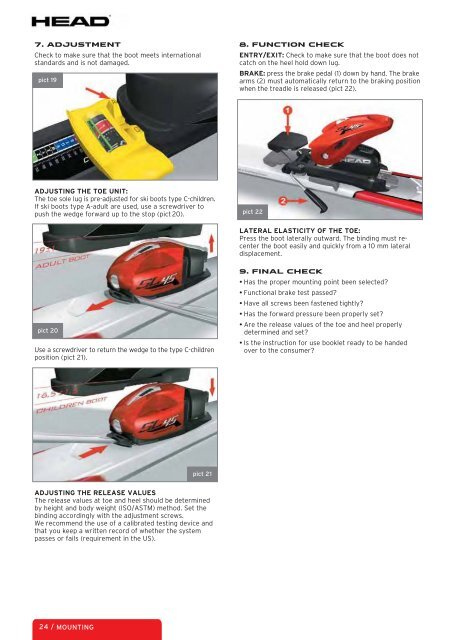
ADJUSTING THE TOE UNIT:<br />
The toe sole lug is pre-adjusted for ski boots type C-children.<br />
If ski boots type A-adult are used, use a screwdriver to<br />
push the wedge forward up to the stop (pict 20).<br />
pict 20<br />
Use a screwdriver to return the wedge to the type C-children<br />
position (pict 21).<br />
ADJUSTING THE RELEASE VALUES<br />
The release values at toe and heel should be determined<br />
by height and body weight (ISO/ASTM) method. Set the<br />
binding accordingly with the adjustment screws.<br />
We recommend the use of a calibrated testing device and<br />
that you keep a written record of whether the system<br />
passes or fails (requirement in the US).<br />
24 / MOUNTING<br />
pict 21<br />
8. FUNCTION CHECK<br />
ENTRY/EXIT: Check to make sure that the boot does not<br />
catch on the heel hold down lug.<br />
BRAKE: press the brake pedal (1) down by hand. The brake<br />
arms (2) must automatically return to the braking position<br />
when the treadle is released (pict 22).<br />
pict 22<br />
LATERAL ELASTICITY OF THE TOE:<br />
Press the boot laterally outward. The binding must recenter<br />
the boot easily and quickly from a 10 mm lateral<br />
displacement.<br />
9. FINAL CHECK<br />
• Has the proper mounting point been selected?<br />
• Functional brake test passed?<br />
• Have all screws been fastened tightly?<br />
• Has the forward pressure been properly set?<br />
• Are the release values of the toe and heel properly<br />
determined and set?<br />
• Is the instruction for use booklet ready to be handed<br />
over to the consumer?