View User Manual - Life Fitness
View User Manual - Life Fitness
View User Manual - Life Fitness

You also want an ePaper? Increase the reach of your titles
YUMPU automatically turns print PDFs into web optimized ePapers that Google loves.
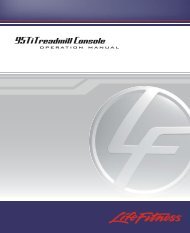
97C, 95C, 95R <strong>Life</strong>cycle ® Exercise BikeInspire Consoleoperation manual
...Before using this product, it is essential to readthis ENTIRE operation manual and ALL installation instructions.It describes equipment setup and instructsmembers on how to use it correctly and safely.Avant d'utiliser ce produit, il est indispensable de lire ce manuel d'utilisation dans son INTÉGRALITÉ, ainsi que TOUTESles instructions d'installations.Ce manuel explique comment installer l'équipement et commentl'utiliser correctement et sans danger.FCC Warning - Possible Radio / Television InterferenceNOTE: This equipment has been tested and found to comply with the limits for a Class A digital device, pursuant to part15 of the FCC rules. These limits are designed to provide reasonable protection against harmful interference when theequipment is operated in a commercial environment. This equipment generates, uses and can radiate radio frequencyenergy, and if not installed and used in accordance with the instruction manual, may cause harmful interference to radiocommunications. Operation of this equipment in a residential area is likely to cause harmful interference in which casethe user will be required to correct the interference at his own expense.Class SB (Studio): Professional and / or commercial use.CAUTION: Any changes or modifications to this equipment could void theproduct warranty.Mise en garde : tout changement ou toute modification de ce matériel peut annuler la garantie du produit.Any service, other than cleaning or user maintenance, must be performed by an authorized service representative.There are no user serviceable parts.2
TABLE OF CONTENTSSection Description Page1. Getting Started . . . . . . . . . . . . . . . . . . . . . . . . . . . . . . . . . . . . . . . . . . . . . . . . . . . . . . . . . . . . . . . . .51.1 Important Safety Instructions . . . . . . . . . . . . . . . . . . . . . . . . . . . . . . . . . . . . . . . . . . . . . . . . . . . . . . .52. The Inspire LCD Console . . . . . . . . . . . . . . . . . . . . . . . . . . . . . . . . . . . . . . . . . . . . . . . . . . . . . . . . .72.1 Inspire LCD Console Overview . . . . . . . . . . . . . . . . . . . . . . . . . . . . . . . . . . . . . . . . . . . . . . . . . . . . .72.2 Inspire LCD Console Description . . . . . . . . . . . . . . . . . . . . . . . . . . . . . . . . . . . . . . . . . . . . . . . . . . . .82.3 At-Your-Fingertips Resistance Controls . . . . . . . . . . . . . . . . . . . . . . . . . . . . . . . . . . . . . . . . . . . . . . .142.4 Reading Rack and Accessory Trays . . . . . . . . . . . . . . . . . . . . . . . . . . . . . . . . . . . . . . . . . . . . . . . . .153. Heart Rate Zone Training ® Exercise . . . . . . . . . . . . . . . . . . . . . . . . . . . . . . . . . . . . . . . . . . . . . . . . .163.1 Why Heart Rate Zone Training Exercise? . . . . . . . . . . . . . . . . . . . . . . . . . . . . . . . . . . . . . . . . . . . . .163.2 Heart Rate Monitoring . . . . . . . . . . . . . . . . . . . . . . . . . . . . . . . . . . . . . . . . . . . . . . . . . . . . . . . . . . .17The <strong>Life</strong>pulse TM Digital Heart Rate Monitoring System // The Optional Heart Rate Chest Strap4. The Workouts . . . . . . . . . . . . . . . . . . . . . . . . . . . . . . . . . . . . . . . . . . . . . . . . . . . . . . . . . . . . . . . . . .194.1 Workout Overviews . . . . . . . . . . . . . . . . . . . . . . . . . . . . . . . . . . . . . . . . . . . . . . . . . . . . . . . . . . . . .194.2 Using the Workouts . . . . . . . . . . . . . . . . . . . . . . . . . . . . . . . . . . . . . . . . . . . . . . . . . . . . . . . . . . . . .21Beginning a Workout // Selecting a Workout // Entering Workout Goals // EnteringWorkout Values // Selecting a Workout Mode // Changing/Ending A Workout4.3 Workout Hierarchy . . . . . . . . . . . . . . . . . . . . . . . . . . . . . . . . . . . . . . . . . . . . . . . . . . . . . . . . . . . . . .25Workout Descriptions . . . . . . . . . . . . . . . . . . . . . . . . . . . . . . . . . . . . . . . . . . . . . . . . . . . . . . . . . . . .26Quick Start // Classic: <strong>Manual</strong>, Random, Hill, Aerobics // Heart Rate +: Fat Burn, Cardio, Heart RateHill TM, Heart Rate Interval TM , Extreme Heart Rate TM // Hill +: Around the World, Cascades, Foothills,Kilimanjaro // Advanced Workouts: Fit Tests (<strong>Life</strong> <strong>Fitness</strong>, Navy PRT, Air Force PRT) // Create Your Own:Create Your Own (Level Interval and Heart Rate Interval) // Custom (Level Interval and Heart RateInterval) // Watts and METsWorkout Landscape TM Perspectives . . . . . . . . . . . . . . . . . . . . . . . . . . . . . . . . . . . . . . . . . . . . . . . . .334.4 Maximizing Workouts on a <strong>Life</strong> <strong>Fitness</strong> <strong>Life</strong>cycle ® Exercise Bike . . . . . . . . . . . . . . . . . . . . . . . . . . . .34Selecting a Level // Cool Down4.5 Additional Features . . . . . . . . . . . . . . . . . . . . . . . . . . . . . . . . . . . . . . . . . . . . . . . . . . . . . . . . . . . . .34Audio Cues // iPod ® Compatibility// Virtual Trainer // USB Connectivity // Zoom Feature // Media Center5. Systems Options Menu . . . . . . . . . . . . . . . . . . . . . . . . . . . . . . . . . . . . . . . . . . . . . . . . . . . . . . . . . .355.1 Using the System Options Menu . . . . . . . . . . . . . . . . . . . . . . . . . . . . . . . . . . . . . . . . . . . . . . . . . . .355.2 Configuration Menu . . . . . . . . . . . . . . . . . . . . . . . . . . . . . . . . . . . . . . . . . . . . . . . . . . . . . . . . . . . . .36Manager’s Configuration 1Language // Units // Workout Duration Configuration // Standby ConfigurationManager’s Configuration 2Custom Message // Create Your Own // Program Timeout // Fit Test // Marathon Mode //System Beeps // Pause Time // Telemetry // Virtual Trainer // NetworkAudio Cues Manager ConfigurationTouch Screen ConfigurationExport / Import Settings5.3 Configuration Settings . . . . . . . . . . . . . . . . . . . . . . . . . . . . . . . . . . . . . . . . . . . . . . . . . . . . . . . . . . .385.4 97C, 95C, 95R Inspire Console Specifications . . . . . . . . . . . . . . . . . . . . . . . . . . . . . . . . . . . . . . . . .395.5 Warranty Information . . . . . . . . . . . . . . . . . . . . . . . . . . . . . . . . . . . . . . . . . . . . . . . . . . . . . . . . . . . .40Inspire Console for 97C, 95C, 95R© 2008 <strong>Life</strong> <strong>Fitness</strong>, a division of Brunswick Corporation. All rights reserved. <strong>Life</strong> <strong>Fitness</strong>, FlexDeck, and Heart Rate Zone Training are registered trademarks,and Go System, Sport Training, Heart Rate Hill, Heart Rate Interval, Extreme Heart Rate, <strong>Life</strong>pulse and <strong>Life</strong>spring are trademarks of BrunswickCorporation. Polar is a registered trademark of Polar Electro, Inc. Fitlinxx is a registered trademark of the Integrated <strong>Fitness</strong> Corp. Any use of these trademarks,without the express written consent of <strong>Life</strong> <strong>Fitness</strong> or the corresponding companies is forbidden.3
This Operation <strong>Manual</strong> describes the functions of the following products:97C, 95C, 95R <strong>Life</strong>cycle ® Exercise Bike Inspire ConsoleSee "Specifications" in this manual for product specific features.Health-related injuries may result from incorrect or excessive use of exercise equipment. <strong>Life</strong> <strong>Fitness</strong> STRONG-LY recommends seeing a physician for a complete medical exam before undertaking an exercise program, particularlyif the user has a family history of high blood pressure or heart disease, or is over the age of 45, orsmokes, has high cholesterol, is obese, or has not exercised regularly in the past year.If, at any time while exercising, the user experiences faintness, dizziness, pain, or shortness of breath, he or shemust stop immediately.Des problèmes de santé peuvent être causés par une utilisation incorrecte ou excessive de l'équipement. <strong>Life</strong><strong>Fitness</strong> recommande FORTEMENT de consulter un médecin pour subir un examen médical complet avant decommencer tout programme d'exercice, et tout particulièrement si l'utilisateur a des antécédents familiaux d'hypertensionou de troubles cardiaques, s'il a plus de 45 ans, s'il fume, s'il a du cholestérol, s'il est obèse ou n'apas fait d'exercice régulièrement depuis un an.Si, pendant l'utilisation de l'appareil, l'utilisateur ressent un malaise, des vertiges, des douleurs ou des difficultésà respirer, il doit s'arrêter immédiatement.4
1 GETTING STARTED1.1 IMPORTANT SAFETY INSTRUCTIONSRead all instructions before using this product.• If this <strong>Life</strong> <strong>Fitness</strong> product does not function properly after it has been dropped, damaged, or even partiallyimmersed in water, contact <strong>Life</strong> <strong>Fitness</strong> Customer Support Services for assistance.• Always follow the console instructions for proper operation.• Close supervision is necessary when used by children, invalids or disabled persons.• Never place liquids of any type directly on the unit, except in the accessory tray water bottle holder. Containers withlids are recommended.SAVE THESE INSTRUCTIONSFOR FUTURE REFERENCE.5
1 DÉMARRAGE1.1 CONSIGNES DE SÉCURITÉ IMPORTANTESLisez toutes les instructions avant le fait d'utiliser ce produit.• Si l'appareil <strong>Life</strong> <strong>Fitness</strong> ne fonctionne pas correctement après avoir subi une chute, des dommages ou une immersionmême partielle dans l'eau, contactez le service d'assistance clientèle de <strong>Life</strong> <strong>Fitness</strong>.• Pour un fonctionnement correct, suivez toujours les instructions de la console.• Une surveillance étroite est nécessaire en cas d'utilisation par des enfants, des personnes invalides ou handicapées.• Ne placez jamais de liquides d'aucune sorte directement sur l'appareil, sauf si vous disposez d'un support ou d'unplateau pour accessoires. Il est recommandé d'utiliser des conteneurs munis d'un couvercle.CONSERVER CES INSTRUCTIONS POUR LECONSULTER À L'AVENIR.6
2.2 INSPIRE LCD CONSOLE DESCRIPTIONThis section lists and describes the functions for the buttons on the Touchscreen Display for the Inspire LCD console onthe <strong>Life</strong>cycle Exercise Bikes. See Section 4 titled The Workouts for detailed information on using the console to set upworkouts.TOUCHSCREEN DISPLAYThe Touchscreen Display, in combination with the illuminated Control Panel keys, allows the user to move from screento screen by simply touching buttons to access other screens. Among many features, the Touchscreen Display enablesusers to access:1) QUICK START — begin a manual workout.2) SELECT WORKOUT— choose a workout.3) VIRTUAL TRAINER SETUP — choose a Virtual Trainer for workout motivation.4) USB PRESET SELECTION/VIVO/NETWORK — select a saved preset from a USB stick and allows users toaccess a club’s fitness networking system if available.5) WORKOUT SETUP — enter workout values and goals.6) WORKOUT PROGRESS — monitor progress, edit workout goals, and accessTV viewing.7) WORKOUT SUMMARY INFORMATION — view and save workout summary information.8) MEDIA CENTER — setup media options.9) LANGUAGE SELECT — choose from available languages.2) HOME SCREENA. QUICK START: Press this button to begin a manual workout immediately, bypassing any setup or goal setting. Oncestarted, the user can then make adjustments to the workout. Once the workout is in progress choose LEVEL todetermine the resistance level. After the workout has been in progress for one minute, the touchscreen displays “ENTERWEIGHT FOR METS DISPLAY”. Press this button and use the numeric keypad or the UP and DOWN ARROW KEYSto enter weight. Weight must be entered for METs to be computed and displayed. Select the COOL DOWN buttonon the bottom of the screen to enter a cool down phase when ready.B. SELECT WORKOUT: Allows the user to choose from a variety of workout programs.See Section 4.1 titled Workout Overviews for a description of each workout.C. VIRTUAL TRAINER: Allows the user to select a male or female trainer to assist during workout setup and provideaudible feedback during a workout.D. USB / VIVO / NETWORK: Allows the user to access previously saved workout setup data, bypassing the workoutsetup procedure and immediately entering a workout. <strong>User</strong>s can also access a club’s fitness networking system ifavailable.8
E. SCREEN LOCK/UNLOCK: (Cannot be used during a workout.) Freezes the screen for the purpose of routine maintenance/screencleaning. The screen automatically unlocks after ten seconds. Pressing SCREEN LOCK a secondtime will unlock it as well.F. LANGUAGE SELECTION: Allows users to change the language of the interface to one of thirteen possible languages.Select the appropriate language flag from the bottom of the screen.G. MORE LANGUAGES: Select this button to see additional language flags.See Section 5.2 Configuration Menu, Manager’s Configuration 1, Language for language setup details.NOPMLK2) CONTROL PANELHJIThe Control Panel allows the user to control workout and media parameters without leaving the Workout Progressscreen.H. ARROW KEYS: When in the workout phase, the illuminated UP and DOWN ARROW KEYS are used in combinationwith the Touchscreen Display. These keys allow the user to make changes to a workout goal during the workoutsetup. Each set of arrow keys controls the goal located directly above it on the Touchscreen Display.Changeable information (i.e. a workout goal) either appears as a button (Time, Level, and Target Heart Rate*) or isaccessible through CHANGE WORKOUT, CHANGE GOAL (Calories, Distance, and for heart rate programs, Time inZone). Workout statistics are not changeable.For example, use the illuminated arrow keys under ELAPSED TIME (a workout goal) to change the goal time for theworkout session.I. COOL DOWN: Workout programs automatically end in a cool down phase, which lowers the resistance level. In thisphase of a workout the body begins to remove lactic acid and other accumulated by-products of exercise, whichbuild up in muscles during a workout and contribute to muscle soreness.Press the illuminated key under COOL DOWN to enter the cool down stage at any point during the workout. Eachworkout’s cool down level is automatically adjusted according to the individual user’s performance. (Cool down timesare preset in proportion to the duration of a workout.) The cool down time can be changed by using the correspondingarrow keys on the control panel. At the end of cool down, or after pressing the END WORKOUT key, a workoutsummary box appears.J. PAUSE: Press the illuminated key under PAUSE. A RESUME WORKOUT button and EXIT button appear on theTouchscreen. Continue the workout by selecting RESUME WORKOUT or end the workout by selecting EXIT. Thepause duration lasts 60 seconds, after which the console automatically shuts down. (<strong>User</strong>s can also pause a workoutif they stop pedaling. To continue the workout, resume pedaling.)* Target Heart Rate (THR) is a percentage of the theoretical maximum. For example, a 40-year-old user's THR for the FAT BURN workout is 117. This workouttargets 65 percent of the maximum, so the equation would be (220-40)*.65=117.9
K. MEDIA: Press the illuminated key next to MEDIA to access the following options: <strong>Life</strong> <strong>Fitness</strong> Attachable Televisionand iPod.L. VOLUME: Volume control for the optional <strong>Life</strong> <strong>Fitness</strong> Attachable TV and iPod. Press the illuminated UP and DOWNarrow keys next to the volume icon to adjust the volume.M. CH: Channel control for the optional <strong>Life</strong> <strong>Fitness</strong> Attachable TV and iPod. Press the illuminated UP and DOWNarrow keys next to the channel icon (ch) to change the channel.N. CHANGE VIEW: Press the illuminated key next to CHANGE VIEW to toggle between four landscapes: CLASSICPROFILE, MOUNTAIN, 400-METER TRACK and 5K NATURE TRAIL.O. CHANGE WORKOUT: Press the illuminated key next to CHANGE WORKOUT to switch between four categories ofworkouts.P. VIRTUAL TRAINER: Press the illuminated key next to VIRTUAL TRAINER to turn the trainer off.NOTE: Headphones are necessary to access the sound for the optional <strong>Life</strong> <strong>Fitness</strong> Attachable TV and iPod. Theheadphone jack is located on the bottom of the Options Panel. If the jack is faulty, the Options Panel needs to bereplaced. Contact <strong>Life</strong> <strong>Fitness</strong> Customer Support Services for more information (see page 1 for contact information).3) WORKOUT SETUPWorkouts are accessed through the SELECT WORKOUT button. Workouts are located under one of four workout categories:CLASSIC, HEART RATE +, HILL + and ADVANCED. Workout options are listed to the right of each categorylabel. Advancing through the categories will show individual workout descriptions.WORKOUT SETUP screens are accessed upon selection of a workout program button. They allow the user to enter valuesor to choose a goal for the workout selected. These depend on the workout, but might include goal type (time, distance,calories, and pace), level, age, weight, distance, and target heart rate* (for heart rate programs).A1. DATA DISPLAY: Displays the data input and value.B1. ARROW BUTTONS: Use the UP and DOWN arrows to adjust workout values/goals such as length of workout,weight, age, distance, target heart rate, and resistance level. Press ENTER (E1) to record the selection.C1. NUMERIC KEYPAD: Another way for the user to enter workout parameters. Key in the desired number on the keypadand press ENTER (E1).D1. CLEAR: Clears any entry and returns to the default setting.E1. ENTER: Press this button after entering a value to register the value and move to the next screen.* Target Heart Rate (THR) is a percentage of the theoretical maximum. For example, a 40-year-old user's THR for the FAT BURN workout is 117. This workouttargets 65 percent of the maximum, so the equation would be (220-40)*.65=117.10
F1. GOAL TYPE: Select a desired workout goal type. Choose from Time, Distance, Calories, Pace, Time in Zone orMarathon Mode (if enabled).G1. BACK: Returns to the previous screen.H1. START OVER: Exits workout setup and returns to the Home Screen.TYPES OF WORKOUT SETUP SCREENSGOAL SETUP SCREENS• Goal Type: The default setting of Goal Type is TIME (length of workout) allowing the user to set a predeterminedlength of time for the workout.<strong>User</strong>s may also choose a more advanced Goal Type such as DISTANCE, CALORIES, PACE, or TIME IN ZONE(only available for heart rate programs).For Distance, Calories, Pace, and Time in Zone, the length of the workout depends on how long it takes to reachthe goal. The workout continues until the goal is met. To exit early, either choose COOL DOWN from the bottomof the display to go immediately into the cool down phase, or choose CHANGE WORKOUT to access a differentprogram. For more information, see Section 4.2 titled Using the Workouts.For information on how to set, and get maximum benefit from, these type of workout goals consult a PersonalTrainer. For further information on Zone Training, see Section 3.1 titled Why Heart Rate Zone Training Exercise?• Level: Choose the programmed resistance level of the workout. Levels range from 1 to 25 (0 to 25 with optionalexternal power supply).• Target Heart Rate*: (heart rate workouts only) Gives a recommended heart rate according to age. For FatBurn, the target heart rate is computed at 65% of the theoretical maximum † heart rate. For Cardio, the targetheart rate is computed at 80%. For more information on Target Heart Rate, see Section 3 titled Heart Rate ZoneTraining Exercise.VALUE SETUP SCREENS• Weight: Entering an accurate weight allows METs to appear on the Workout Screen.• Age: Allows heart rate programs to accurately determine target heart rate.• Gender: Used in the Fit Test prediction equation and associated fitness rating.†Defined by the American College of Sports Medicine's "Guidelines for Exercise Testing and Prescription" as equal to 220 minus an individual’s age.* Target Heart Rate (THR) is a percentage of the theoretical maximum. For example, a 40-year-old user's THR for the FAT BURN workout is 117. This workout targets 65 percentof the maximum, so the equation would be (220-40)*.65=117.11
H2. SPEED DISPLAY: The Speed Display shows the pedaling speed in revolutions per minute (RPM) and miles per hour(MPH). Every 3 seconds, the speed toggles between RPM and MPH.I2. WORKOUT STATISTICS: Continually updates workout progress by showing Distance, Distance Climbed, Pace inminutes per mile/kilometer, Calories Expended/Calories per Hour, Target Heart Rate (for heart rate programs), HeartRate (on any workout if the user is grasping the <strong>Life</strong>pulse sensors or wearing a telemetry strap), Time in Zone (ifselected as a workout goal) and METs/Watts (toggles between the two if weight has been entered, otherwise onlyshows Watts).The following data can be toggled: Calories, Calories per Hour, Watts, and METs. To customize the toggled information,press the data display button to access a separate menu. All four choices, along with check boxes, will appear.Checkmarks indicate which choices will be toggled. For example, if Calories is the only display desired, uncheck theother three choices. If both Calories and Calories per Hour are desired, uncheck the other two choices. When finishedmaking the selection, hit CLOSE. Select HIDE ALL to hide all choices.J2. ZOOM: Select this button to view Level, Time and Speed in a large, easy-to-read display. The workout profile is notviewable while ZOOM mode is active.K2. TIME DISPLAY/ELAPSED TIME: Select this button to view the time of day, change the length of the workout, or tochoose a different view for time. To change workout length, select ELAPSED TIME, use the arrow buttons or thenumerical keypad to adjust the time, and then select ENTER. To change the time view, select ELAPSED TIME,choose a different time view (REMAINING TIME or HIDDEN TIME) and press ENTER.To change the length of a workout without leaving the Workout Progress Screen, use the illuminated ARROW KEYSon the Control Panel directly underneath ELAPSED TIME.NOTE: Changing the length of a workout by using the TIME ELAPSED button has no effect on the time elapsed,which is an ongoing measurement of the time already spent in a workout.L2. CHANNEL (ch): Channel icon for the optional <strong>Life</strong> <strong>Fitness</strong> Attachable TV and iPod. Press the illuminated ARROWKEYS next to the channel icon (ch) to change the channel.M2. VOLUME: Volume icon for the optional <strong>Life</strong> <strong>Fitness</strong> TV and iPod. Press the illuminated ARROW KEYS next to thisicon to adjust the volume.N2. COOL DOWN: Workout programs end automatically in a cool down phase, which lowers the resistance level. In thisphase of a workout the body begins to remove lactic acid and other accumulated by-products of exercise, whichbuild up in muscles during a workout and contribute to muscle soreness.Press the COOL DOWN key to enter the cool down stage at any point during the workout. Each workout’s cooldown level is automatically adjusted according to the individual user’s performance. (Cool down times are preset inproportion to the duration of a workout.) The cool down time can be changed by using the corresponding arrow keyson the Control Panel. At the end of cool down, a workout summary box appears.O2. PAUSE: Press this key to pause the current workout. A RESUME WORKOUT button and EXIT button appear on theTouchscreen. Continue the workout by selecting RESUME WORKOUT or end the workout by selecting EXIT.NOTE: The workout will also pause if the user stops pedaling. To continue the workout, resume pedaling. The pauseduration lasts 60 seconds, after which the workout automatically ends.P2. MEDIA: Press the MEDIA button to access the following options: <strong>Life</strong> <strong>Fitness</strong> Attachable TV and iPod.<strong>User</strong>s can access the following TV viewing options:CHANNEL CONTROLS: Use the illuminated UP and DOWN ARROW KEYS on the control panel that are next tothe channel select icon (ch) on the control panel to change channels.NUMERIC KEYPAD: Use to enter a new channel selection.PREVIOUS CHANNEL: Select this button to change the channel to the immediately previous channel viewed.CC (CLOSED CAPTIONING): Press to activate Closed Captioning.SAP (SECONDARY AUDIO PROGRAMMING): Press to activate Secondary Audio Programming.MUTE: Press to silence the audio of the TV.CHANNEL SELECT: Accesses the Channel Select keypad.VOLUME: Use the UP and DOWN ARROW KEYS on the control panel that are next to the volume icon on the controlpanel to adjust volume.13
<strong>User</strong>s can access the following iPod options:iPod CONTROLS: If detected, use to access iPod data. Use the controls next to the menu item to navigate categories,songs, movies, etc. Press SELECT to accept the highlighted list item.HIDE PLAYLIST: Press this button to hide the iPod playlist to view the workout profile. Hiding the playlist does notturn off the iPod.Additional information appearing in the Workout Progress Screen for different workouts:ENTER WEIGHT: Appears in the Quick Start workout. Choose ENTER WEIGHT FOR METS DISPLAY so that METscan be computed and displayed.TIME IN ZONE: Displays the accumulated time that the heart rate stays within the selected target zone for a HeartRate Zone Training workout. See Section 3 titled Heart Rate Zone Training Exercise for more information.PACE DISPLAY: Allows the user to track whether his or her pace is ahead, behind or on target with his or herdesired pace. A visual representation of the user’s pace is shown with any of the four workout landscapes.2.3 AT-YOUR-FINGERTIPS RESISTANCE CONTROLSAt-Your-Fingertips Resistance Controls (A) are featured on <strong>Life</strong>fitness <strong>Life</strong>cycle Exercise Bikes. These controls offer aconvenient way for users to increase or decrease their workout resistance levels.AAt-Your-Fingertips Resistance Controls are located in the middle of the handlebars on the Upright <strong>Life</strong>cycle ExerciseBike.AAAt-Your-Fingertips Resistance Controls are located on the right armrest and right side handlebar on the Recumbent<strong>Life</strong>cycle Exercise Bike.14
2.4 READING RACK AND ACCESSORY TRAYSA built-in reading rack (A) allows a book or magazine to be supported during the workout. A built-in accessory tray (B)provides storage for items such as water bottles, personal media devices, and cell phones.NOTE: Since reading materials will be in front of the Touchscreen Display, use care when placing reading materials onthe rack, and when turning pages, to ensure that buttons aren’t accidentally toggled.ABUpright <strong>Life</strong>cycle Exercise Bike Reading Rack and Accessory TraysABBBRecumbent <strong>Life</strong>cycle Exercise Bike Reading Rack and Accessory Trays15
3 HEART RATE ZONE TRAINING EXERCISE3.1 WHY HEART RATE ZONE TRAINING EXERCISE?Research shows that maintaining a specific heart rate while exercising is the optimal way to monitor the intensity of aworkout and to achieve maximum results. That is the idea behind the <strong>Life</strong> <strong>Fitness</strong> Heart Rate Zone Training approach toexercise.Zone Training identifies an exerciser's ideal heart rate range, or zone, for burning a higher percentage of calories fromfat or increasing cardiovascular fitness. The zone is a percentage of the theoretical maximum † (HRmax), and its valuedepends on the workout. The <strong>Life</strong> <strong>Fitness</strong> <strong>Life</strong>cycle Exercise Bike features five exclusive workouts designed to take fulladvantage of the benefits of Heart Rate Zone Training exercise:• FAT BURN • HEART RATE HILL • EXTREME HEART RATE• CARDIO • HEART RATE INTERVALEach workout offers different benefits, as discussed in Section 4, The Workouts.NOTE: Consulting a fitness trainer is recommended for defining specific fitness goals and designing a workout program.The Heart Rate Zone Training workout programs measure heart rate. Wear the optional telemetry chest strap, or grip the<strong>Life</strong>pulse sensors, to enable the bike’s on-board computer to monitor the heart rate during a workout. The computerautomatically adjusts the resistance level to maintain the target heart rate* based on the actual heart rate.To change the target heart rate* during a workout, simply enter a new target heart rate by typing in the desired numberon the numeric keypad or by pressing the Heart Rate button on the Touchscreen.To switch between programs during a workout, use the CHANGE WORKOUT button.†Defined by the American College of Sports Medicine's "Guidelines for Exercise Testing and Prescription" as equal to 220 minus an individual’s age.* Target Heart Rate (THR) is a percentage of the theoretical maximum. For example, a 40-year-old user's THR for the FAT BURN workout is 117. This workout targets 65 percentof the maximum, so the equation would be (220-40)*.65=117.16
3.2 HEART RATE MONITORINGTHE LIFEPULSE TM DIGITAL HEART RATE MONITORING SYSTEMThe patented <strong>Life</strong>pulse system sensors are the built-in heart rate monitoring system. For the most accurate reading possible,during a workout:• Grasp the sensors (A) on the armrests or handlebars firmly.• Hold each sensor at the horizontal or vertical midpoint.• Keep hands steady and in place.The console displays the heart rate within 10 to 40 seconds after the user grasps the sensors. The following factors mayaffect a <strong>Life</strong>pulse reading: incorrect hand placement on the sensors, upper body activity, lotion or dirt on hands, andexcessive or insufficient pressure used when gripping the sensorsAAGrasp the sensors that are located on either the armrests or the side handlebars of the Recumbent <strong>Life</strong>cycle ExerciseBike.AAAGrasp two of the four sensors (A), on opposing sides, that are set into the handlebars of the Upright <strong>Life</strong>cycle ExerciseBike.17
4 THE WORKOUTS4.1 WORKOUT OVERVIEWSThe following workouts are preprogrammed for the Inspire LCD console on the 95C and 95R <strong>Life</strong>cycle Exercise Bikes.QUICK START is the fastest way to begin exercising and it bypasses the steps involved in selecting a specific workoutprogram. After the QUICK START key is pressed, a constant level workout begins. The intensity level does not changeautomatically. To change the level, use the LEVEL ARROW keys or the NUMERIC KEYPAD to enter a higher or lowerlevel number. After the workout has been in progress for one minute, the touchscreen displays “ENTER WEIGHT FORMETS DISPLAY”. Press this button and use the numeric keypad or the UP and DOWN arrows to enter weight. Weightmust be entered for METs to be computed and displayed.CLASSIC WORKOUTSCLASSIC workouts are workouts in which intensity levels increase and decrease in set patterns. The following workoutsmay be accessed with this button:MANUAL is a constant effort workout in which the user can change resistance level or speed at any time.RANDOM is an interval training workout of constantly changing intensity levels that occur in no regular pattern orprogression.HILL is an interval training workout. Intervals are periods of intense aerobic exercise separated by regular periods oflower-intensity exercise.AEROBICS is a workout that prompts the user to switch continuously between high and low pedaling speeds. Thespeed intervals alternate in a pattern that promotes a build-up in the intensity of the workout, followed by a builddownin intensity.HEART RATE + WORKOUTSHEART RATE + workouts are workouts in which intensity levels increase and decrease in set patterns. The followingworkouts may be accessed with this button:FAT BURN is a low-intensity workout for burning a higher percentage of calories from fat. The user must wear aheart rate chest strap or grasp the <strong>Life</strong>pulse system sensors continuously. The workout program automaticallyadjusts the intensity level, based on the actual heart rate, to maintain the rate at 65 percent of the theoreticalmaximum † .CARDIO is a higher intensity workout for more fit users, maximizing cardiovascular benefits and total caloriesburned. The user must wear a heart rate chest strap or grasp the <strong>Life</strong>pulse system sensors continuously. Theworkout program automatically adjusts the intensity level, based on the actual heart rate, to maintain the rate at80 percent of the theoretical maximum † .HEART RATE HILL takes the user through three different hills based on the target heart rate*. The user wears aheart rate chest strap, or grasps the <strong>Life</strong>pulse sensors continuously.HEART RATE INTERVAL alternates between a hill and a valley based on the target heart rate*. The user wearsa heart rate chest strap, or grasps the <strong>Life</strong>pulse sensors continuously.EXTREME HEART RATE is an intense workout for more experienced users. It is designed to get the heart rateup and down as quickly as possible. The user wears a heart rate chest strap, or grasps the <strong>Life</strong>pulse sensorscontinuously.†Defined by the American College of Sports Medicine's "Guidelines for Exercise Testing and Prescription" as equal to 220 minus an individual’s age.* Target Heart Rate (THR) is a percentage of the theoretical maximum (HRmax). A 40-year-old user’s recommended THR for the HEART RATE HILL and HEART RATE INTER-VAL workouts is 144, or 80 percent of the maximum; so the equation would be (220-40)*.80=144.19
HILL +WORKOUTSHILL + are workouts in which intensity levels increase and decrease in set patterns. The following workouts may beaccessed with this button:AROUND THE WORLD is an interval-training workout in which the hills resemble scenes of various geographicalareas.FOOTHILLS is a rolling hill workout with low intensity levels.KILIMANJARO is a hill workout in which the intensity levels gradually incline toward one ultimate peak and thengradually decline.CASCADES is a two-peak workout in which intensity levels gradually increase and decrease.ADVANCED WORKOUTSADVANCED WORKOUTS are customized workouts designed for the advanced user not used in connection with a personaltrainer. These workouts include:LIFE FITNESS FIT TEST estimates cardiovascular fitness compared to other people of the same age and gender.MILITARYMILITARY FIT TESTSNAVY PHYSICAL READINESS TEST (PRT) is a 12-minute test that can be used as a low impact alternative tothe Navy 1.5 mile (2.4 km) run. This program is designed to use caloric expenditure and body weight to output acorresponding 1.5 mile run time to the workout selected. Ratings are then provided using age, gender, and elevationof the test site.AIR FORCE PHYSICAL READINESS TEST (PRT) is a 1.5 mile (2.4 km) physical performance test used toassess muscular endurance and cardiorespiratory fitness.CREATE YOUR OWNCREATE YOUR OWN workouts enable the user to design personalized workouts based on LEVEL INTERVAL oron HEART RATE INTERVAL. <strong>User</strong>s enter a total workout time and select the number of intervals in their workout(30 interval maximum). The time of each interval is determined by dividing the total workout time by the numberof intervals. Heart rate or level (depending on workout type) can also be selected for each interval. <strong>User</strong>s cannotname or save Create Your Own Workouts. CREATE YOUR OWN WORKOUTS may be disabled through themanager’s configuration screen (See Section 5.2 Configuration Menu, Manager’s Configuration 2, Create YourOwn Configuration, for details). <strong>User</strong>s cannot name and save their workout.CUSTOMThese training programs are preset custom workouts created by the facility training professional. The workoutsmay be LEVEL INTERVAL or HEART RATE INTERVAL workouts created for specific results. Each CustomWorkout can have up to four different setups. The training professional can create customized workout names foreach setup. Consult the facility training professional for details on individual Custom Workouts.WATTS/METS allows the user to select the equivalent of the work rate to be shown in Watts or METs.20
4.2 USING THE WORKOUTSSelect a workout. See the chart at the beginning of Section 4.3 for an overview of the steps required to set up eachworkout.1) BEGINNING A WORKOUTThere are three ways to begin a workout: Quick Start, Select Workout (see Section 4.2) and Virtual Trainer (see Section4.5).SELECTING AND USING QUICK STARTQUICK START is the fastest way to begin exercising. It bypasses the steps of selecting a specific workout program. Onthe home screen, press the QUICK START button. The workout begins at an intensity level that remains the sameunless manually changed. To change the level, use the LEVEL ARROW keys or the NUMERIC KEYPAD to enter a higher orlower level number. After the workout has been in progress for one minute, the touchscreen displays “ENTER WEIGHT FORMETS DISPLAY”. Press this button and use the numeric keypad or the UP and DOWN arrows to enter weight. Weightmust be entered for METs to be computed and displayed.2) SELECTING A WORKOUTPress the SELECT WORKOUT button to begin the workout selection process. The touchscreen will bring up the toplevel workout categories which include CLASSIC, HEART RATE+, HILL +, and ADVANCED. Each workout buttonincludes a listing of workout programs or an easy to understand description of the workout. Once a workout is selected,the corresponding Workout Setup Screens which include goal type (time, distance, calories, and pace), level, age,weight, distance, and target heart rate* will appear. Press ENTER after each selection to record it. After values are set,the Workout Progress Screen appears and the workout begins.See Section 4.3 for detailed information on available workouts.3) ENTERING WORKOUT GOALSSELECTING A GOAL TYPEGoal Type defaults to TIME (length of workout). When prompted to enter a Goal Time, use the illuminated ARROWKEYS to increase or decrease the displayed time to the desired value, or key in the desired value with the NUMERICKEYPAD, and press ENTER.Workouts can be programmed to target advanced goals other than the default time goal:• DISTANCE• CALORIES• PACE• TIME IN ZONE (for heart rate workouts only)The Distance Goal feature is designed to build endurance. The user sets a distance goal during the workout setup.Once the goal is met, the workout automatically goes into a cool down phase and ends afterward. To use this feature:1. Select a workout.2. In the Goal Type setup screen, choose DISTANCE, enter the desired distance goal, and select ENTER.3. Finish the setup steps for the selected workout.4. Begin the workout.The Calories Goal feature is designed to promote weight loss and weight control. The user sets a calorie goal duringthe workout setup. Once the goal is met, the workout automatically goes into a cool down phase and ends afterward. Touse this feature:1. Select a workout.2. In the Goal Time setup screen, choose CALORIES, enter the desired calorie goal, and select ENTER.3. Finish the setup steps for the selected workout.4. Begin the workout.* Target Heart Rate (THR) is a percentage of the theoretical maximum. For example, a 40-year-old user's THR for the FAT BURN workout is 117. This workout targets 65 percentof the maximum, so the equation would be (220-40)*.65=11721
The Pace Goal feature is designed to allow the user to set the pace of a workout. The user sets a pace goal during theworkout setup. Once the goal is met, the workout automatically goes into a cool down phase and ends afterward. A pacereadout is displayed at the left of the screen showing numeric feedback regarding the user’s progress relating to theselected pace. To use this feature:1. Select a workout.2. In the Goal Time setup screen, choose MORE, select PACE, enter the desired pace goal, and select ENTER.3. For Units, choose either ENGLISH (to set a pace speed in miles/time) or METRIC (to set a pace speed inkilometers/time).4. Enter the distance and time of the workout.5. The console will calculate the pace the user must maintain to finish the workout in the desired time.6. Select ENTER to approve the displayed pace or reenter the chosen time and distance.7. Begin the workout.The Time in Zone Goal program enhances a workout by setting a certain duration within the target heart rate* as aworkout goal. The program automatically alters the resistance to maintain a pace that will meet that objective within thatduration. Once the objective is met, the workout automatically goes into a cool down phase. To use the Time In ZoneGoal feature:1. Select a workout.2. In the Goal Time setup screen, choose TIME IN ZONE (some workouts require the user to choose the MORE optionfirst), enter the desired amount of time, and select ENTER.3. Finish the setup steps for the selected workout.4. Begin the workout.NOTE: Time in Zone is directly correlated to fitness level. Since the program will continue to increase resistance until thegoal is met, it may be wise to start low and work towards a higher goal. Choose COOL DOWN at any time, to exit theworkout and immediately enter a cool down phase. For help setting TIME IN ZONE goals, consult a personal trainer. Formore information on Heart Rate Zone Training, see Section 3.1 titled Why Heart Rate Zone Training?INTENSITY LEVELThe <strong>Life</strong> <strong>Fitness</strong> <strong>Life</strong>cycle Exercise Bike provides several different ways to adjust the resistance level of a workout. Whenprompted, use the ARROW keys to increase or decrease the displayed resistance level or target heart rate* to thedesired value, or choose the desired value with the NUMERIC KEYPAD, and press ENTER. Adjust the level as neededor desired during the workout.• Resistance level: The <strong>Life</strong> <strong>Fitness</strong> <strong>Life</strong>cycle Exercise Bike provides a selection of 25 resistance levels (26 levelswith optional external power supply). The resistance level appears in the WORKOUT PROFILE window as rowsof lights arranged in columns. Selecting a low intensity level at first is recommended. As physical conditioningimproves, the levels can increase.TARGET HEART RATE• Target heart rate: Programs that calculate a target heart rate* base this number on the age of the user and thetype of workout. The user accepts or adjusts the rate when setting up the workout. During the workout itself, theprogram reads the heart rate, which is transmitted via the Polar heart rate chest strap or the <strong>Life</strong>pulse systemsensors; and it uses this data to adjust the resistance. <strong>Manual</strong>ly raising the rate, by pressing the HEART RATEbutton on the CONTROL PANEL and typing the desired number with the NUMERIC KEYPAD, increases theintensity of the cardiovascular exercise.* Target Heart Rate (THR) is a percentage of the theoretical maximum. For example, a 40-year-old user's THR for the FAT BURN workout is 117. This workout targets 65 percentof the maximum, so the equation would be (220-40)*.65=11722
4) ENTERING WORKOUT VALUESAGE: When prompted to enter Age, use the illuminated ARROW KEYS to increase or decrease the displayed age to thecorrect value, or key in the correct value with the NUMERIC KEYPAD, and press ENTER.<strong>Life</strong> <strong>Fitness</strong> <strong>Life</strong>cycle Exercise Bike workout programs that set a target heart rate* zone first calculate the user’s theoreticalmaximum heart rate † by subtracting the user’s age from the number 220. The programs then calculate the targetzone as a percentage of the theoretical maximum.WEIGHT: In order for METs to be displayed, an accurate weight must be entered.GENDER: Select gender and press ENTER. (Used for the Fit Test.)5) SELECTING A WORKOUT MODETo change modes, press the CHANGE WORKOUT key and then press CHANGE MODE.• Bike Mode: This workout mode simulates the experience of riding a real bicycle. The rate of calories burnedand total distance travelled increase as the user increases the pedaling speed. This mode can be used with allworkouts, except for FAT BURN, CARDIO, HEART RATE HILL, HEART RATE INTERVAL, and EXTREMEHEART RATE.• Constant-Calories-Per-Hour Mode: This workout mode enables a user to maintain a consistent rate of caloriesburned per hour. As the pedaling speed increases, the resistance level automatically decreases. As the pedalingspeed decreases, the resistance level automatically increases. This mode can be used with all workouts.If the user selects a FAT BURN, CARDIO, HEART RATE HILL, HEART RATE INTERVAL, or EXTREME HEART RATEworkout during the setup, the default mode is Constant-Calories-Per-Hour. For all other workouts, the default mode isBike. The user may select or change a mode during a workout setup or during a workout.• Marathon Mode. A Marathon Mode button will appear in the time entry screen when configuring a workout.Selecting Marathon Mode sets the workout to an unlimited time workout. The workout can then be ended onlyby the user.6) CHANGING/ENDING A WORKOUTSWITCHING WORKOUTS “ON-THE-FLY”It is possible during a workout, to switch to another workout program. After a switch, the console retains all the progressinformation about the workout since its beginning. To change workouts “on the fly,” simply press CHANGE WORKOUTand then choose a new workout. To switch to a new workout, and restart the progress information, choose CHANGEWORKOUT and then RESET.PAUSING WORKOUTSThere are two ways a user can pause a workout: press the PAUSE key or stop pedaling. If a user presses the PAUSEkey, a RESUME WORKOUT button and EXIT button appear on the Touchscreen. Continue the workout by selectingRESUME. The pause duration is set to one minute. After one minute in pause mode, the paused workout exits to theworkout summary screen. From pause mode, the user can end the workout by selecting EXIT. The user may stop pedalingto pause a workout. To continue a workout, the user must resume pedaling within the one minute pause duration.†Defined by the American College of Sports Medicine's "Guidelines for Exercise Testing and Prescription" as equal to 220 minus an individual’s age.* Target Heart Rate (THR) is a percentage of the theoretical maximum. For example, a 40-year-old user's THR for the FAT BURN workout is 117. This workout targets 65 percentof the maximum, so the equation would be (220-40)*.65=11723
ENDING WORKOUTS EARLYTo end a workout early, press COOL DOWN on the Control Panel. The COOL DOWN button changes into an ENDWORKOUT button. A user can stop a workout by pushing the END WORKOUT button; otherwise the cool down phasewill automatically begin. The program will designate a cool down time period in proportion to the amount of time spent inthe workout. Upon completion of cool down, a workout summary will appear, which includes the distance traveled, thetotal calories burned, average heart rate, average pace, and elapsed time. To exit the workout without a cool down,press the STOP button or select CHANGE WORKOUT, and then RESET.WORKOUT SUMMARYUpon ending a workout, a workout summary will appear. The workout summary information displayed depends on theworkout selected. Information may include: Average Level, Distance, Distance Climbed, Calories Burned, Average HeartRate and Elapsed Time. The duration of the Workout Summary screen defaults to 1 minute. To extend the screen time,press the MORE TIME button to reset the counter to 1 minute. Workout summary data can be saved to a USB stick foruse in future review and tracking.24
4.3 WORKOUT DESCRIPTIONSWORKOUT HIERARCHYSelect WorkoutClassic Heart Rate + Hill + Advanced<strong>Manual</strong>Fat Burn andCardioAround the WorldFit Test<strong>Life</strong> <strong>Fitness</strong>Fit TestRandomHeart Rate HillCascadesCreate Your OwnMilitaryHillHeart Rate IntervalFoothillsCYO -Level IntervalAir Force PRTAerobicsExtreme HeartRateKilimanjaroCYO -Heart Rate IntervalNavy PRTCustomCustom - -Level IntervalCustom - -Heart Rate IntervalWatts & METsWattsMETS25
WORKOUT DESCRIPTIONSQUICK STARTQUICK START is the fastest way to begin exercising. It bypasses the steps of selecting a specific workout program. Onthe home screen, press the QUICK START button. The workout begins at an intensity level that remains the sameunless manually changed. To change the level, use the LEVEL ARROW keys or the NUMERIC KEYPAD to enter a higheror lower level number. After the workout has been in progress for one minute, the touchscreen displays “ENTERWEIGHT FOR METS DISPLAY”. Press this button and use the numeric keypad or the UP and DOWN arrows to enterweight. Weight must be entered for METs to be computed and displayed.The resistance level is set by default. To change the level and stay in the Workout Progress Screen, press the illuminatedARROW KEYS on the Control Panel, corresponding to the LEVEL button. The Intensity Level can also be changedby touching the LEVEL button on the Touchscreen Display which accesses the NUMERIC KEYPAD.CLASSIC WORKOUTSMANUALThe MANUAL program is a constant effort workout in which the user can change resistance level at any time.RANDOMThe RANDOM program creates a terrain of hills and valleys that varies with each workout. More than one million differentpatterns are possible.HILLThe <strong>Life</strong> <strong>Fitness</strong>-patented HILL workout offers a variety of configurations for interval training. Intervals are periods ofintense cardiovascular exercise separated by regular periods of lower-intensity exercise. The CLASSIC PROFILE WIN-DOW represents these high and low intervals as columns of light, which together have the appearance of hills and valleys.The computerized interval training workout has been scientifically demonstrated to promote greater cardiorespiratoryimprovement than steady-pace training.The HILL workout goes through four phases, each marked by different intensity levels. The CLASSIC PROFILE WIN-DOW displays the progress of these phases. As noted in the descriptions below, the heart rate should be measured attwo stages in the workout to gauge its effectiveness. Wear the chest strap or continuously grip the <strong>Life</strong>pulse handles.The Message Area does not display a request for a heart rate measurement, as it does with CARDIO, FAT BURN andthe HEART RATE ZONE TRAINING programs.1 Warm-up is a phase of low, gradually rising resistance, which brings the heart rate into the lower end of the targetzone and increases respiration and blood flow to working muscles.2 Plateau increases the intensity slightly, and keeps it steady, to bring the heart rate to the low end of the target zone.Check the heart rate at the end of this phase.3 Interval Training is a series of increasingly steeper hills, alternating with valleys, or stints of recovery. The heart rateshould rise to the high end of the target zone. Check the heart rate at the end of this phase.3 Cool-down is a low-intensity phase that allows the body to begin removing lactic acid, and other exercise by-products,which build up in muscles and contribute to soreness.Each column, as seen in the CLASSIC PROFILE WINDOW and the chart above, represents one interval. The overallduration of the workout determines the length of each interval. Each workout is made up of 20 intervals, so the durationof each interval is equal to the duration of the entire workout divided by 20.26
1 to 9 minutes: A workout with a duration of less than 10 minutes is insufficient for the HILL program to complete allfour phases adequately. The program, therefore, condenses a workout of this duration at various stages.10 to 19 minutes: The interval durations initially are set at 30 seconds for a 10-minute workout. For every minute over10, each interval increases by three seconds. A 15-minute workout consists of 20 intervals at 45 seconds each.20 to 99 minutes: All intervals last 60 seconds. If the user adds minutes to the pre-set duration while the workout is inprogress, the program adds hills and valleys that are identical to the first eight intervals of the Interval Training phase.This pattern repeats until the workout is completed.AEROBICSIn this workout, the user is prompted to switch between a high pedaling speed and a low pedaling speed. These speedintervals alternate in a pattern that promotes a “build-up” in the intensity of the workout, followed by a “build-down” inintensity.The workout consists of 32 intervals, which are divided into groups of four. In the first group, the user encounters onefast interval followed by three slow intervals. The second group features two fast intervals followed by two slow intervals.The third group features three fast intervals followed by one slow interval. The fourth group, which is the most intensepoint of the workout, features four fast intervals. Afterward, the workout decreases in intensity, concluding with a group offour, consecutive, slow intervals. See the chart below:Workout BeginInterval 4Interval 3Interval 2Interval 1Group 1 Group 2 Group 3 Group 4 Group 5 Group 6 Group 7 Group 8Build-UpBuild-DownFastSlowThe length of the intervals depends on the workout duration selected by the user.27
HEART RATE +WORKOUTSFAT BURNFAT BURN is a low-intensity workout for burning a higher percentage of calories from fat. The user must wear a heartrate chest strap or grasp the <strong>Life</strong>pulse system sensors continuously. The workout program automatically adjusts theintensity level, based on the actual heart rate, to maintain the rate at 65 percent of the theoretical maximum † .CARDIOCARDIO is a higher intensity workout for more fit users, maximizing cardiovascular benefits and total calories burned.The user must wear a heart rate chest strap or grasp the <strong>Life</strong>pulse system sensors continuously. The workout programautomatically adjusts the intensity level, based on the actual heart rate, to maintain the rate at 80 percent of the theoreticalmaximum † .HEART RATE HILLThis program combines the standard HILL workout profile with the concept of Heart Rate Zone Training. The default targetheart rate* is calculated as 80 percent of the theoretical maximum † (HRmax), but the user can adjust the target rateduring the workout setup. All hills and valleys are percentages of HRmax. The workout consists of three hills that targetthree heart rate goals: The first hill brings the heart rate to 70 percent of HRmax. The second hill increases the rate to75 percent of HRmax. The third hill matches the Target Heart Rate bringing the heart rate to 80 percent of HRmax. Thevalley always is defined as 65 percent of HRmax.After a standard three-minute warm-up, the workout progresses toward the first hill and heart rate goal. Once the userreaches 70 percent of HRmax, the hill continues for one minute. When the minute expires, the level decreases into avalley. Once the user's heart rate falls to 65 percent of HRmax, the valley continues for one minute. Then the next hillbegins with its corresponding heart rate goal. After the user completes the third hill/valley pair, the program returns to thefirst hill and repeats the cycle as long as the duration allows. At the end of the duration, the workout goes into a cooldown phase. If the heart rate goes above the theoretical maximum for more than 45 seconds, the bike automaticallygoes into pause mode. The program does not proceed to a new heart rate goal until the user reaches the current goal.The user must wear a heart rate chest strap or grip the <strong>Life</strong>pulse sensors throughout the workout.75% HRmax80% HRmaxHill70% HRmaxHillHillValley Valley Valley65% HRmax65% 85% HRmax THR65% HRmax 65% HRmaxHEART RATE HILL Workout Profile144 BPM135 BPM127 BPM117 BPM117 BPM 117 BPM 117 BPM<strong>User</strong> Example: 80percent of theoretical maximum (HR max)(40 year old / 144 recommended BPM)† Defined by the American College of Sports Medicine's "Guidelines for Exercise Testing and Prescription" as equal to 220 minus an individual’s age.* Target Heart Rate (THR) is a percentage of the theoretical maximum. For example, a 40-year-old user's THR for the FAT BURN workout is 117. This workout targets 65 percentof the maximum, so the equation would be (220-40)*.65=11728
HEART RATE INTERVALThis program also combines the standard HILL workout profile with the concept of Heart Rate Zone Training. Thedefault target heart rate* is calculated as 80 percent of the theoretical maximum † (HRmax), but the user can adjust thetarget rate during the workout setup. The workout alternates between a hill, which brings the heart rate up to the targetrate of 80 percent of HRmax, and a valley, which brings the heart rate down to 65 percent of HRmax. After a standardthree-minute warm-up, the workout progresses toward the first hill and heart rate goal. Once the goal is reached, the hillcontinues for three minutes, after which the level decreases into a valley. Once the 65 percent of HRmax goal isreached, the valley continues for three minutes, after which the next hill begins. The user's fitness level determines thenumber of hills and valleys encountered within the duration. At the end of the duration, the workout goes into a cooldown phase. If the heart rate goes above the theoretical maximum † for more than 45 seconds, the bike automaticallygoes into pause mode. The program does not proceed to a new heart rate goal until the user reaches the current goal.The user must wear a heart rate chest strap or grip the <strong>Life</strong>pulse sensors throughout the workout.Hill80% HRmaxHill80% HRmaxHill80% HRmaxValley Valley ValleyWarm-up65% HRmax65% HRmax65% HRmaxHEART RATE INTERVAL Workout Profile144 BPM144 BPM144 BPM117 BPM117 BPM 117 BPM 117 BPMEXTREME HEART RATE<strong>User</strong> Example: 80percent of theoretical maximum (HR max)(40 year old / 144 recommended BPM)This intense, varied workout is designed to help more experienced users break through fitness improvement plateaus.The workout alternates between two target heart rates* as quickly as possible. The effect is similar to that of runningsprints. The user must wear a chest strap or grip the <strong>Life</strong>pulse TM sensors throughout the workout.When setting up the workout, the user enters a target heart rate. After a standard three-minute warm-up, the intensityincreases, until the user reaches the target heart rate goal of 85 percent of the theoretical maximum † (HRmax). That targetrate is maintained for a stabilizing period. Then, the intensity decreases. When the heart rate falls to the 65 percentof HRmax goal, it is maintained there for a stabilizing period. The program repeats the alternating of intensity levels, continuingthis pattern throughout the duration. The program does not proceed to a new heart rate goal until the user reachesthe current goal.85% HRmaxStabilizing Period85% HRmaxStabilizing Period85% HRmaxStabilizing PeriodJog SpeedWalk SpeedJog SpeedWalk SpeedJog SpeedWalk SpeedWarm-upCool Down65% HRmax65% HRmaxEXTREME HEART RATE Workout Profile153 BPMStabilizing PeriodJog SpeedWalk Speed153 BPMStabilizing PeriodJog SpeedWalk Speed153 BPMStabilizing PeriodJog SpeedWalk Speed118 BPM118 BPM<strong>User</strong> Example118 BPM85 percent of theoretical maximum (HR max)118 BPM(40 year old / 153 recommended BPM)†Defined by the American College of Sports Medicine's "Guidelines for Exercise Testing and Prescription" as equal to 220 minus an individual’s age.* Target Heart Rate (THR) is a percentage of the theoretical maximum. For example, a 40-year-old user's THR for the CARDIO workout is 144. This workouttargets 80 percent of the maximum, so the equation would be (220-40)*.80=144.29
HILL + WORKOUTSThe <strong>Life</strong> <strong>Fitness</strong> patented HILL + workouts give even more ways to vary interval training. Based on the same principlesas the CLASSIC HILL workout, Hill + workouts are customized to resemble different locations/training scenarios to addvariety and challenge to Hill workouts.The AROUND THE WORLD workout is an interval-training workout in which the hills resemble scenes of variousgeographical areas.The CASCADES workout is a two-peak workout in which intensity levels gradually increase and decrease.The FOOTHILLS workout is a rolling hill workout with low intensity levels.The KILIMINAJARO workout is a hill workout in which the intensity levels gradually incline toward one ultimate peakand then gradually decline.ADVANCED WORKOUTSLIFE FITNESS FIT TESTThe <strong>Life</strong> <strong>Fitness</strong> <strong>Life</strong>cycle Exercise Bike Fit Test program is another exclusive feature. The Fit Test workout estimatescardiovascular fitness and can be used to monitor improvements in endurance every four to six weeks. The user mustgrasp the hand sensors when prompted or wear a heart rate chest strap, as the test score calculation is based on aheart rate reading. The workout duration will be five minutes at the chosen resistance level. Immediately afterward, theconsole will take the user's heart rate reading, calculate a fitness score, and display the score in the Message Area.The Fit Test is considered to be a submax VO2 (volume of oxygen) test. It gauges how well the heart supplies oxygenatedblood to the exercising muscles, and how efficiently those muscles receive oxygen from the blood. Physicians andexercise physiologists generally regard this test as a good measure of aerobic capacity.To set up the Fit Test:• Begin pedaling.• Choose ADVANCED, FIT TEST.• Go through the setup screens for the Fit Test, including weight, age and gender. Press ENTER after each selectionto record the entry. (Gender does not require selecting ENTER afterwards.)• The setup screen for a workout level will appear. (ENTER LEVEL). Consult the following recommended fit testlevel chart for an appropriate effort level based on age, gender and activity level. Press ENTER after the selection.• As the test continues, a message will prompt the user to maintain a pedaling rate between 60-80 rpm. The usermust maintain this rate throughout the 5-minute test duration. After 16 seconds, if 60-80 rpm is not maintained, thefit test will automatically terminate.After the five-minute FIT TEST is completed, a FIT TEST score will be displayed.FIT TEST PROGRAM SUGGESTED EXERTION LEVELSInactive Active Very ActiveExercise Bike L 4-6 men L 5-10 men L 8-14 menFit Test Level L 2-4 women L 3-7 women L 6-10 womenSuggested exertion levels should be used as a guideline for setting up the Fit Test program. The goal is to elevate theuser's heart rate to a level that is between 60%-85% of their theoretical maximum heart rate (220-age). Within each suggestedrange, these additional guidelines can be used:30
Lower Half of Rangehigher agelower weightshorterUpper Half of Rangelower agehigher weight*taller* In cases of excessive weight, use lower half of range.The computer will not accept:• heart rates less than 52 or greater than 200 beats per minute• body weights less than 75 pounds (34 kg) or greater than 400 pounds (181 kg)• ages below 10 or over 99 years• data input that exceeds human potentialIf an error is made when entering any Fit Test data, correct it by pressing CLEAR, inputting the correct information, andpressing ENTER.It is important to take the Fit Test under similar circumstances each time. Heart rate is dependent on many factors,including:• amount of sleep the previous night (at least seven hours is recommended)• time of day• time of last meal (two to four hours after the last meal is recommended)• time since last beverage containing caffeine or alcohol, or cigarette (at least four hours is recommended)• time since last exercised (at least six hours is recommended)For the most accurate Fit Test results, perform the Fit Test on three consecutive days and average the three scores.NOTE: To receive a proper Fit Test score, the work done must be within a training heart rate zone that is 60 percent to85 percent of the theoretical maximum heart rate (HRmax). This rate is defined by the American College of SportsMedicine's "Guidelines for Exercise Testing and Prescription" as equal to 220 minus an individual's age.The tables below list fit test results.RELATIVE FITNESS CLASSIFICATION FOR MENMenEstimated VO2 Max (ml O 2 /kg/min) Per Age CategoryRating 20-29 30-39 40-49 50-59 60+Elite 55+ 52+ 51+ 47+ 43+Excellent 53-54 50-51 49-50 45-46 41-42Very Good 50-52 48-49 46-48 43-44 39-40Above Average 45-49 43-47 42-45 39-42 35-38Average 40-44 38-42 37-41 34-38 31-34Below Average 38-39 36-37 34-36 32-33 29-30Low 35-37 34-35 32-33 29-31 26-28Very Low
RELATIVE FITNESS CLASSIFICATION FOR WOMENWomenEstimated VO2 Max (ml O 2 /kg/min) Per Age CategoryRating 20-29 30-39 40-49 50-59 60+Elite 47+ 44+ 42+ 37+ 35+Excellent 45-46 42-43 40-41 35-36 33-34Very Good 43-44 40-41 38-39 33-34 31-32Above Average 38-42 36-39 34-37 30-32 27-30Average 33-37 31-35 30-33 26-29 24-26Below Average 31-32 29-30 28-29 24-25 22-23Low 28-30 27-28 25-27 22-23 20-21Very Low
WORKOUT LANDSCAPE PERSPECTIVESWorkout Landscapes provide users with four ways to visualize progress through a workout. <strong>User</strong>s can switch views bypressing the CHANGE VIEW key while in the Workout Progress Screen or by pressing the corresponding illuminatedkey on the Control Panel.1) CLASSIC PROFILESwitch to the Classic Profile by touching the CHANGE VIEW button on theWorkout Progress screen and selecting Classic Profile. This view shows thelevel of intensity in a workout-in-progress as proportional columns. Theheight of the 6th column from the left is proportional to the current level ofintensity.2) MOUNTAINSwitch to the Mountain Landscape by touching the CHANGE VIEW buttonon the Workout Progress Screen and selecting Mountain Landscape. ThisLandscape shows the current workout as an indicator line that traces a pathup the face of a 2,000 foot / 610 meter high mountain. Every time the userclimbs the equivalent of 2,000 feet / 610 meters, taking the indicator line tothe top of the mountain, the mountain counter in the lower left of the profilescreen increases by one and the indicator line starts over at the base of themountain.3) 400-METER TRACK (DEFAULT)The 400-Meter Track appears whenever a workout begins. This Landscapeshows the current workout as an indicator line that traces a path around a400-meter track, marking off 100-meter intervals. Every time the user travels400 meters, taking the indicator line all the way around the track, the lapcounter in the lower left of the profile screen increases by one and the indicatorline starts over at the beginning of the track. To return to the 400-Meter Track after selecting a Workout Landscape, touch the CHANGEVIEW button on the Workout Progress Screen and select 400-Meter Track.4) 5K NATURE TRAILSwitch to the 5K Nature Trail Landscape by touching the CHANGE VIEWbutton on the Workout Progress Screen and selecting 5K Nature Trail. ThisLandscape shows the current workout as an indicator line that traces a patharound a 5-kilometer trail, marking off 1-kilometer intervals. Every time theuser travels 5 kilometers, taking the indicator line all the way around thetrail, the lap counter in the lower left of the profile screen increases by oneand the indicator line starts over at the beginning of the trail.33
4.4 MAXIMIZING WORKOUTS ON A LIFE FITNESS LIFECYCLE EXERCISE BIKE34SELECTING A LEVELThe <strong>Life</strong> <strong>Fitness</strong> <strong>Life</strong>cycle Exercise Bikes provide a selection of 25 intensity levels (26 levels with optional external powersupply). Each level represents a range of resistance percentages. Selecting a low intensity level at first is recommended. Asphysical conditioning improves, the levels can increase.COOL DOWN<strong>Life</strong> <strong>Fitness</strong>' unique cool down protocol automatically customizes every cool down based on each user's workout performance.Workout performance factors, such level, duration, and heart rate, determine the duration and intensity of thecool-down. Press the COOL DOWN key to enter the cool down stage at any point during the workout. The cool downtime can be changed by using the corresponding arrow keys on the Touchscreen Display. At the end of cool down, aworkout summary box appears. The chart below shows the cool down time for basic workouts. If the user chooses aheart rate workout, then the cool down lasts 10 minutes or until the heart rate drops to 60%.Workout Time Cool Down Time1-4 minutes 1 minute5-15 minutes 3 minutes4.5 ADDITIONAL FEATURESAUDIO CUES16-99 minutes 5 minutesAudio Cues alert users to stages of their workout. Note that audio events are disabled while the TV or FM radio featuresare in operation. The manager may also disable Audio Cues through the Manager's Configuration screen (See Section5.2, Manager’s Configuration 2, Audio Cues, for details).• Startup Sound: Plays when a workout begins, such as when the Quick Start key is pushed or the workout timerstarts running on any other workout.• Pause Sound: Plays when a workout is paused and when a paused workout resumes.• Finish Sound: Plays when a workout enters the cool down phase, when a workout is complete, and when theWorkout Summary is displayed.• Heartbeat Sound: Plays to prompt the user to grasp the contact heart rate sensors.iPod COMPATIBILITYThis compatibility makes it possible for iPod users to plug in and charge their iPods, control their iPod playlists from theconsole and watch iPod-delivered video on the optional Attachable TV. <strong>User</strong>s can plug their headphones directly into theequipment console while safely storing their player in the iPod holding tray.VIRTUAL TRAINERCreated for beginners as well as the frequent fitness equipment user, the Virtual Trainer takes the intimidation out ofbeginning a new workout and provides ongoing encouragement. With the push of a button, a male or female faceappears on the integrated LCD screen and advises the user on every aspect of the workout, from describing workoutprograms and general product usage to updates on workout statistics including distance, calories and time.USB CONNECTIVITY<strong>User</strong>s can create and save workouts and personal settings, such as weight, goals and speed on any USB stick so thatthey don’t have to enter the data again the next time they work out. This feature also enables users to track workout performanceby allowing them to save their workout results to the USB stick at the end of the workout.ZOOM FEATUREThis feature enlarges the speed, level and time displays for easier viewing of data.MEDIA CENTERTwo entertainment options are available through the Media Center: <strong>Life</strong> <strong>Fitness</strong> Attachable TV and iPod. <strong>User</strong>s can controlthe channels and volume on the <strong>Life</strong> <strong>Fitness</strong> Attachable TV as well as access iPod data.
5 SYSTEM OPTIONS MENU5.1 USING THE SYSTEM OPTIONS MENU<strong>Fitness</strong> facility managers and other authorized personnel can use the Systems Options feature to change default settings,or to enable or disable certain programs or displays on the Inspire LCD console, and to run systems checks. Toenter the Systems Options, press SELECT WORKOUT and then touch the <strong>Life</strong> <strong>Fitness</strong> logo in the upper left hand cornerof the screen three consecutive times.SYSTEM OPTIONS OVERVIEWSYSTEM TESTAllows technicians to run systems diagnostics.NOTE: These tests should only be used by (or with the express instruction of) a trained <strong>Life</strong> <strong>Fitness</strong> service technician.SYSTEM TEST MENU 1 SYSTEM TEST MENU 2System Comm TestSystem DiagnosticsKey Pad TestExternal Serial EE TestCSafe Network Test/StatusCSafe Loopback TestHeart Rate TestiPod TestINFORMATIONAllows authorized personnel to access statistics on machine usage (Statistics and Usage Log). All other information isdesigned for use by trained <strong>Life</strong> <strong>Fitness</strong> service technicians.StatisticsSoftware VersionsDate and Time InformationSystem ErrorsMaintenance InformationUsage LogCONFIGURATIONAllows access to all of the configurable settings of the unit. Configurations which should only be changed by qualifiedtechnicians are password protected.ManagerManufacturer (password protected)TVCreate Your OwnExport/Import SettingsClockMAINTENANCEAllows service technicians to submit part replacements. Only for use by qualified service technicians.Replacing Console35
5.2 CONFIGURATION MENUMANAGERAllows the manager to set unit defaults, configure workout duration, set stand by, and program custom messages.Choosing Manager accesses Manager’s Configuration 1. The forward button on the bottom right of the screen opensManager’s Configuration 2.Manager’s Configuration 1 accesses defaults for Language, Units (English or Metric), Workout Duration Configuration,and Stand By Configuration.Manager’s Configuration 2 accesses defaults for Custom Message, Create Your Own, Program Timeout, Fit Test,Marathon Mode, System Beeps, Pause Time, Telemetry, Virtual Trainer, Network, and Audio Cues.TO SET DEFAULTSSelect appropriate radio buttons to select toggle settings. Use the arrow keys to modify variable default values. SelectDEFAULTS to return all values to original factory settings. See chart 5.3 for an overview of adjustable configurations andfactory defaults of the <strong>Life</strong> <strong>Fitness</strong> <strong>Life</strong>cycle Exercise Bike.1) MANAGERS CONFIGURATION 1LANGUAGE (DEFAULT: ENGLISH)To enable the Language option, select the Language button to enter the Language Setup screen. Toggle the modefrom DISABLED to ENABLED. The following can be configured:1. Default language.2. Which of 13 languages are available to the user.3. What order the language flags appear on the Home Screen.4. Which flag will appear to represent those languages that may have multiple options.The available language flags appear on the Home Screen. The user must select a language change before beginning aworkout. If more than six languages are configured available, a More Flags button will appear which will open a languageselection screen for the user. Upon selecting a language flag, the language will immediately become active andthe selection screen will close.The following languages are available:English, German, French, Italian, Japanese, Dutch, Spanish, Portuguese, Korean, Russian, Turkish, Traditional Chinese,and Simplified Chinese.UNITS (DEFAULT: ENGLISH)Toggle the default units displayed between ENGLISH and METRIC. Choose “<strong>User</strong> Selectable” to allow users to choosedesired units on-screen during a workout.WORKOUT DURATION CONFIGURATION (DEFAULT: 60 MINUTES)Workout Duration Configuration: Allows the manager to set a maximum workout limit. The default Max WorkoutDuration is 60 minutes. The time can be modified using the up or down arrow keys.STANDBY CONFIGURATION (DEFAULT: ENABLED)Inactivity Timer: Under Standby Configuration choose INACTIVITY TIMER, then select ENABLED. Set the desiredamount of time of inactivity before the system automatically turns the LCD screen backlight off. The LCD screen will illuminatethe next time activity is detected. To turn off the Inactivity Timer, choose DISABLED. This value is only used withthe optional External Power Supply.2) MANAGERS CONFIGURATION 2CUSTOM MESSAGE (DEFAULT: ENABLED)This configuration allows for a custom message (maximum 256 characters) to be displayed across the Home Screen.Creating/Changing a Custom Message — Upon entering the Custom Message Setup screen, a message can beentered using the on-screen keyboard. Use the Shift button to input special characters and capital letters. The messagewill scroll across the top of the screen as the message is being input, giving real-time feedback.Accepting a Custom Message — To accept the Custom Message, simply select the Main Menu button.Erasing a Custom Message — To erase a Custom Message, enter the Custom Message Setup screen. Select the ClearMessage button and then select Main Menu.36
CREATE YOUR OWN (DEFAULT: ENABLED)The manager can enable or disable the Create Your Own workout feature.PROGRAM TIMEOUT (DEFAULT: 60 SECONDS)Sets the amount of time the user can go without touching the Touchscreen while setting up their workout, before theconsole resets back to the Home Screen. Program Timeout is set to 60 seconds.FIT TEST (DEFAULT: ENABLED)Choose OFF to disable the <strong>Life</strong> <strong>Fitness</strong> Fit Test.MARATHON MODE (DEFAULT: ENABLED)Marathon Mode has no preset or settable goal. It allows the user to workout indefinitely. If enabled, a workout inMarathon Mode ends only if the user chooses to end it.SYSTEM BEEPS (DEFAULT: ON)The System Beeps Configuration allows the manager to disable the beeping sound.PAUSE TIME (DEFAULT: ONE MINUTE)Managers can adjust the Pause Time from 1 to 99 minutes. The value is only used when the optional External PowerSupply is plugged in.TELEMETRY (DEFAULT: ENABLED)The telemetry feature makes it possible to use the Polar®-compatible Heart Rate Zone Training exercise chest strap formonitoring the heart rate.VIRTUAL TRAINER (DEFAULT: ON)The Virtual Trainer feature makes it possible for a male or female face to appear on the integrated LCD screen andadvise the user on every aspect of the workout.NETWORK (DEFAULT: VIVO)Managers can select from the following options: Vivo, Other (network), and None.AUDIO CUES MANAGER CONFIGURATIONThe Audio Cues Manager Configuration allows the manager to enable or disable the Audio Cues feature.3) TOUCH SCREEN CONFIGURATIONFollow the instructions on the screen to recalibrate the Touch Screen. If calibration was successful, a prompt will appearalong with a 30 second countdown. Touch the screen anywhere to save the calibration data. If calibration was unsuccessful,a “+” will appear in the center of the screen and the calibration will have to be redone. Contact <strong>Life</strong> <strong>Fitness</strong> ifrepeated attempts at calibration were unsuccessful (see page 1 for contact information).4) EXPORT/IMPORT SETTINGSBrings up the Export / Import Settings screen which is used to import or export manager and manufacturer configurablesettings. This can be advantageous when many or all optional features are enabled and configured.To Import or Export Settings: Insert a USB stick into the USB port. Enter the Import/Export Settings through theConfiguration Menu. Select “Import Settings to USB” or “Export Settings To USB”. Upon notification, remove theUSB stick from the USB port.NOTE: Exported setting information is product specific. Bike settings can only be imported into other, same model bikes.Bike settings cannot be used to update settings of any other product.37
5.3 CONFIGURATION SETTINGSMANAGER’S CONFIGURATION 1SETTING DEFAULT DESCRIPTIONLANGUAGE ENGLISH The language of the Message Area display. Choices include English, German, French,Italian, Japanese, Dutch, Spanish, Portuguese, Korean, Russian, Turkish, Traditional Chineseand Simplified Chinese. For additional details on selecting a language, refer to Section 5.2Configuration Menu, Manager’s Configuration 1.ENGLISH/METRIC UNITS ENGLISH The measurement unit type for weight, distance, and speed.WORKOUT DURATION 60 MINUTES This feature enables fitness facility managers to set workout duration limits during peak and nonpeakhours of club traffic. If the setup is off, no duration limits are set. See Section 5.2Configuration Menu, Manager’s Configuration 1, Workout Duration Configuration. Theallowed range is 1 to 99 minutes.STANDBY CONFIGURATION ENABLED Inactivity Timer: Enables the LCD screen backlight to be turned off due to inactivity. See Section5.2 Configuration Menu, Manager’s Configuration 1, Standby Configuration. This value is onlyused when the optional External Power Supply is plugged in.MANAGER’S CONFIGURATION 2SETTING DEFAULT DESCRIPTIONCUSTOM MESSAGE SETUP ENABLED See Using the Custom Message Setup in this section.CREATE YOUR OWN ENABLED This feature allows the manager to enable or disable the Create Your Own Workout feature.PROGRAM TIMEOUT 60 SECONDS The amount of time the user can go without touching the Touchscreen during workout setup,before the unit returns to the Home Screen. Program timeout is set to 60 seconds.FIT TEST ENABLED Enable/Disable Fit Test.MARATHON MODE ENABLED Enable/Disable Marathon Mode.SYSTEM BEEPS ON Enable/Disable System Beeps.PAUSE TIME 1 MINUTE The amount of time the unit can be inactive before it reverts back to the Home Screen. Theallowed range is 1 to 99 minutes. This value is only used when the optional External PowerSupply is plugged in.TELEMETRY ENABLED Switching on the telemetry feature makes it possible to use the Polar®-compatible Heart RateZone Training exercise chest strap for monitoring the heart rate.VIRTUAL TRAINER ON Enable/Disable the Virtual Trainer feature.NETWORK VIVO Choose from the following three network options: Vivo, Other (network), and None.AUDIO CUES ENABLED Enable/Disable Audio Cues.38
5.4 SPECIFICATIONSLIFE FITNESS 97C, 95C, 95R INSPIRE CONSOLE SPECIFICATIONSConsole Option:Resolution:Headphone Jack:Control Panel:Touch Screen:Touch Screen Display:Integrated 7” LCD with Touch Screen Technology800x480300 milliwatt, 3.5mm StereoArrow Keys, Cool Down, Pause, Level, Speed, Media, Volume, Channel, Change <strong>View</strong>, Change Workout,Virtual Trainer4-Wire Resistive Touch ScreenQuick Start, Select Workout, Virtual Trainer, USB Preset Selection, Workout Setup, Workout Progress,Workout Summary Information, Media Center, Language Select, Screen Lock/UnlockWorkouts:Modes:Quick Start // Classic: <strong>Manual</strong>, Random, Aerobics// Hill // Heart Rate +: Fat Burn, Cardio, Heart Rate Hill TM,Heart Rate Interval TM , Extreme Heart Rate TM // Hill +: Around the World, Foothills, Kilimanjaro, Cascades //Advanced Workouts: Fit Tests (<strong>Life</strong> <strong>Fitness</strong>, Navy PRT, Air Force PRT) // Create Your Own: Create Your Own(Level Interval and Heart Rate Interval) // Custom (Level Interval and Heart Rate Interval) // Watts and METsBike Mode, Constant-Calories-Per-Hour-ModeResistance Levels: 2526 levels with optional external power supplyManager-Defined/<strong>User</strong>-Selected Languages:Display Readout:iPod Compatibility:Optional Special Features:PHYSICAL DIMENSIONS:English, Spanish, Portuguese, Italian, French, German, Dutch, Russian, Chinese (traditional and simplified),Japanese, Turkish, and KoreanSpeed, Resistance Level, Heart Rate, Pace, Elapsed Time, Time Remaining, Time in Zone, Time of Day,Distance, Distance Climbed, Distance Remaining, Calories, Calories per Hours, Watts, METsiPod video capability on optional Attachable TViPod playlist management on LCD screeniPod power and chargingOptional Attachable TV Controls include: Channel Controls, Previous Channel, Closed Captioning, SecondaryAudio Programming, Mute, Volume, Channel Select97C, 95C, 95R Inspire ConsoleLength:Width:Height:Weight:16.5 inches / 41.9 centimeters15.5 inches / 39.4 centimeters4.5 inches / 11.4 centimeters10.75 pounds / 4.9 kilogramsSHIPPING DIMENSIONS:97C, 95C, 95R Inspire ConsoleLength:Width:Height:Weight:20 inches / 50.8 centimeters18.5 inches / 47 centimeters7.625 inches / 19.37 centimeters13.6 pounds / 6.2 kilograms39
5.5 WARRANTY INFORMATIONWARRANTY COVERAGE: INSPIRE CONSOLE FOR 97C, 95C, 95RWHAT IS COVERED:This <strong>Life</strong> <strong>Fitness</strong> commercial exercise equipment (“Product”) is warranted to befree of all defects in material and workmanship.WHO IS COVERED:The original purchaser or any person receiving the Product as a gift from theoriginal purchaser.HOW LONG IS IT COVERED:All coverage is provided by specific Product according to the guidelines listedon the chart accompanying this warranty card.WHO PAYS TRANSPORTATION & INSURANCE FOR SERVICE:If the Product or any covered part must be returned to a service facility forrepairs, We, <strong>Life</strong> <strong>Fitness</strong>, will pay all transportation and insurance charges forthe first year. You are responsible for transportation and insurance charges duringthe second and third years (if applicable).WHAT WE WILL DO TO CORRECT COVERED DEFECTS:We will ship to you any new or rebuilt replacement part or component, or, at ouroption, replace the Product. Such replacement parts are warranted for theremaining portion of the originalwarranty period.WHAT IS NOT COVERED:Any failures or damage caused by unauthorized service, misuse, accident, negligence,improper assembly or installation, debris resulting from any constructionactivities in the Product’s environment, rust or corrosion as a result of theProduct’s location, alterations or modifications without our written authorizationor by failure on your part to use, operate and maintain the Product as set out inyour Operation <strong>Manual</strong> (“<strong>Manual</strong>”). All terms of this warranty are void if thisproduct is moved beyond the continental borders of the United States ofAmerica (excluding Alaska, Hawaii and Canada) and are then subject tothe terms provided by that country’s local authorized <strong>Life</strong> <strong>Fitness</strong> representative.WHAT YOU MUST DO:Retain proof of purchase (our receipt of the attached registration card assuresregistration of purchase information but is not required); use, operate andmaintain the Product as specified in the <strong>Manual</strong>; notify Customer SupportServices of any defect within 10 days after discovery of the defect; if instructed,return any defective part for replacement or, if necessary, the entire Product forrepair.OPERATION MANUAL:It is VERY IMPORTANT THAT YOU READ THE MANUAL before operating theProduct. Remember to perform the periodic maintenance requirements specifiedin the <strong>Manual</strong> to assure proper operation and your continued satisfaction.WARRANTY REGISTRATION:Please COMPLETE and MAIL the attached registration card IMMEDIATELY.Our receipt assures that your name, address and date of purchase are on fileas a registered owner of the Product. Failure to return the card will not affectyour rights under this warranty. Being a registered owner assures coverage inthe event you lose your proof of purchase. In any event, always retain proof ofpurchase, such as your bill of sale.HOW TO GET REPLACEMENT CONSOLE & SERVICE:Simply call Customer Support Services at (800) 351–3737 or (847) 451–0036,Monday through Friday from 8:00 a.m. to 6:00 p.m. Central Standard Time, andtell them your name, address and the serial number of your console (refer topage 1 for Customer Services contact information).They will tell you how to geta replacement console or, if necessary, arrange for service where your consoleis located or advise you on how and where to ship the console for service.Before shipping:1. obtain a Return Authorization Number (RA#) from Customer SupportServices2. securely pack your console (use the original shipping carton, if possible)3. write the RA# on the outside of the carton4. insure the console, and5. include a letter explaining the defect or problem and a copy of your proof ofpurchase if you believe the service is covered by warrantyEXCLUSIVE WARRANTY:THIS LIMITED WARRANTY IS IN LIEU OF ALL OTHER WARRANTIES OFANY KIND EITHER EXPRESSED OR IMPLIED, INCLUDING BUT NOT LIMIT-ED TO THE IMPLIED WARRANTIES OF MERCHANTABILITY AND FITNESSFOR A PARTICULAR PURPOSE, AND ALL OTHER OBLIGATIONS OR LIABIL-ITIES ON OUR PART. We neither assume nor authorize any person to assurefor us any other obligation or liability concerning the sale of this Product. Underno circumstances shall we be liable under this warranty, or otherwise, of anydamage to any person or property, including any lost profits or lost savings, forany special, indirect, secondary, incidental or consequential damages of anynature arising out of the use of or inability to use this Product. Some states donot allow the exclusion or limitation of implied warranties or of liability for incidentalor consequential damages, so the above limitations or exclusions maynot apply to you.CHANGES IN WARRANTY NOT AUTHORIZED:No one is authorized to change, modify or extend the terms of this limited warranty.EFFECT OF STATE LAWS:This warranty gives you specific legal rights and you may have other rightswhich vary from state to state.OUR PLEDGE TO YOU:Our Products are designed and manufactured to the highest standards.We want you completely satisfied with our Products and will do everythingpossible under the terms of this warranty to keep you secure in knowing youhave bought the best!Model 2 Years 1 Year97C, 95C, 95R Mechanical and LaborElectrical components*NOTE - Once any commercial product is placed in a private residence (home), it automatically becomes covered under that product category's consumer warranty.Warranty coverage begins at the original date of sale.40
<strong>Life</strong> <strong>Fitness</strong> World Headquarters5100 North River RoadSchiller Park, IL 60176 USAM051-00K66-A101