

Tne Onrcrrunl WooDWoRKtNG AND Home ... - Wood Tools
Tne Onrcrrunl WooDWoRKtNG AND Home ... - Wood Tools
Tne Onrcrrunl WooDWoRKtNG AND Home ... - Wood Tools

Create successful ePaper yourself
Turn your PDF publications into a flip-book with our unique Google optimized e-Paper software.
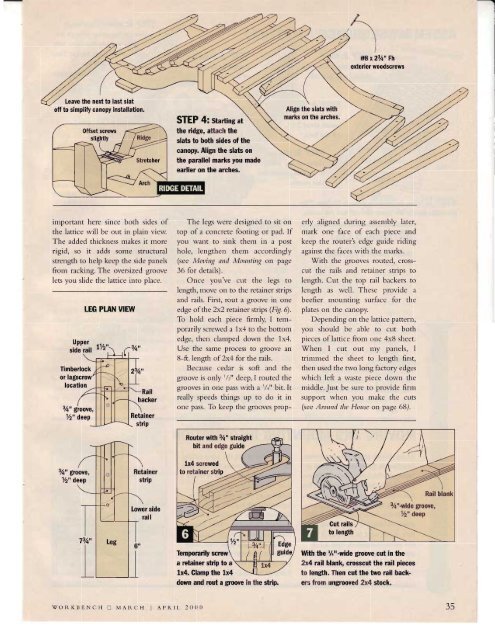
#8x23/a" Fhexterior woodscrewsLeave the nexto last slatoff to simplify canopy installation.STEP 4: sta*tne atthe ridge, attach theslats to both sides of thecanopy. Align the slats onthe parallel marks you madeearlier on the arches.important here since both sides ofthe lattice will be out in plair.r view.The added thickr-ress nrakes it morerigid, so it adds some structuralstrength to help keep the side plnelsfrom racking. The oversized groovelets you slide the lattice into place.Upperside rallTimberlock0rlocation3/t" gtoove,Vz" deepLEG PLAN VIEWLy2"RailbackerRetainersttipRouter with 3/q" straightThe legs were designed to sit ontop of a concrete footing or: p:rd. Ifyou wsnt to sirrk tlrcrn irr a posthole, lengthen thenr accordingly(see Mouirg artd M


![Til]tl](https://img.yumpu.com/45878240/1/190x245/tiltl.jpg?quality=85)


