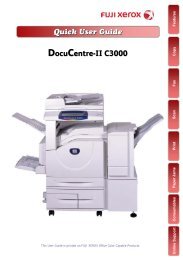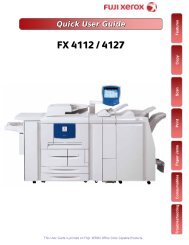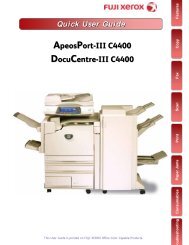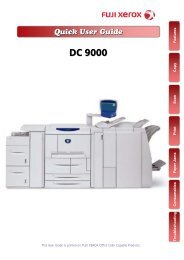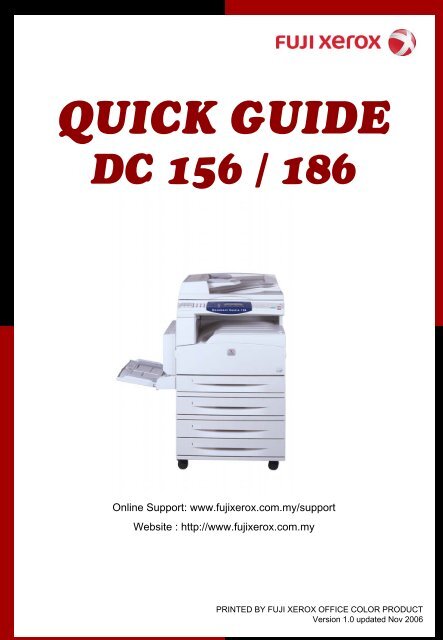
Document Centre 156/186 - Fuji Xerox Malaysia
Document Centre 156/186 - Fuji Xerox Malaysia
Document Centre 156/186 - Fuji Xerox Malaysia
- No tags were found...

Create successful ePaper yourself
Turn your PDF publications into a flip-book with our unique Google optimized e-Paper software.
Section A: CopyTABLE OF CONTENTS1. Paper Supply2. Reduce/Enlarge3. Lighten/Darken4. Original Type5. Multiple-Up6. 2 Sided7. Output (Collated/Uncollated)8. Mixed Size OriginalSection B : Fax FeatureSection C : Scan to EmailSection D : PrintSection E : Maintenance1. Checking Billing Meter2. Checking Consumables Status3. Replacing Toner & Drum Cartridge4. Clearing Paper JamsOnline Service & Support RequestOnline Support Assistant
Machine Overview
KeypadJob StatusMachine StatusBilling Meter: to check on Meter Reading
Section A : COPY1. Select the paper size on the[Paper Size] screen2. Press Enter button to display the [Paper Type] screen.3. Select the required option.4. Press Enter.1. Press the arrow key to display [Reduce/Enlarge] on the Copyscreen.2. Select [Reduce/Enlarge] using the button.3. Select the required option.4. Press the Enter
1. Press the arrow key to display [Lighten/Darken] on the Copyscreen.2. Select [Lighten/Darken] using the arrow key.3. Select the density level required.4. Press Enter1. Press the arrow key to display [Original Type] on the Copy screen.2. Select [Original Type]3. Select the required option.4. Press Enter.1. Press the arrow key to display [Multiple-Up] on the Copy screen.2. Select [Multiple-Up]3. Select the required option.(2 Up /4 Up)4. Press the Enter.
1. Press the arrow key to display [2 Sided] on the Copy screen.2. Select [2 Sided] : (1-2 , 2-2 , 2-1)3. Press Enter1. Press the arrow key to display [Output] on the Copy screen.2. Select [Output].3. Select the required option – Uncollated / Collated4. Press Enter1. Press the arrow key to display [Mixed Size Orig.] on the Copyscreen.2. Select [Mixed Size Orig.]3. Select [On] to enable the feature.
Section B : FACSIMILE1. Press the button on the control panel.2. Ensure that the Fax screen is displayed.1. Press the button on the control panel once tocancel any previous selections.2. Select an option for the required feature.
Specify DestinationYou can use the following ways to fax out:-Address Enter/NextAddress BookSpeed DialOne Touch DialAddress Enter/NextEnter the first number1. Press Address Enter/Next button2. Enter the next destination3. Repeat as required4. Press StartAddress Book1. Press Address Book button on the panel2. Select the required address book3. Press StartSpeed Dial1. Press The Speed Dial button on the panel2. Enter the 3 digit code3. Press StartOne Touch Dial1. Use the flip card on the panel to change the page if required2. Press Start
You may select the various features available for faxing:-Resolution Quality of fax received by the other partyLighten / Darken Adjust the density of the fax documentScan Size Specify the scanning areaReduce / Enlarge Allows you to reduce / enlarge a specific ratioSend Header To add sender name, start time, date of transmission and numberof pagesTransmission Report Report for each transmission sentOverseas Communication Minimize errors on telephone linesDelayed Start Set the start time for transmissionMultiple Up Send two pages in one pagePriority Send Urgent document to be send as top priorityRecipients Sets Specify number of copies remote to printDirect Send Start sending a fax immediately after scanning the first page ofdocument2 Sided Original To send a 2sided document without making copy of 2 nd pageChain Dial Specify a destination combining the Speed Dial, One Touch Dial andnormal numeric keypadOn Hook To check the transmission line for transmitting
1. Press the arrow key to display [Resolution] on the Fax screen.2. Select [Resolution] .3. Select the required option : (text/fine/superfine/superfinehalftone/super halftone/halftone)4. Press the Start button1. Press the arrow key to display [Lighten/Darken] on the Fax screen.2. Select [Lighten/Darken]3. Select the density level : Darken / Normal / Lighten4. Press the Start button.1. Press the arrow button to display [Scan Size] on the Fax screen.2. Select [Scan Size].3. Select the required option.4. Press the Start button.
1. Press the arrow button to display [Reduce/Enlarge] on the Fax screen.2. Select [Reduce/Enlarge]3. Select the required option.4. Press the Start Button1. Press the arrow to display [Send Header] on the Fax screen.2. Select [Send Header]3. Select the required option.4. Press Enter1. Press the arrow button to display [Trans. Report] on the Fax screen.2. Select [Trans. Report]3. Select the required option.4. Press the button.
Section C : EMAIL1. Press the button on the control panel.2. Enter addresses using the alphanumeric keypad on the control panelor from Address Book.3. Press the Start button on the control panel to scan and send thedocuments.1. Press the [← ] or [→] button to display [File Format] on the Emailscreen.2. Select [File Format] using the button3. Select the required option4. Press button
Section D : PRINTBasic Printing• Go to File – choose PrintNormal Print : select this for normal printingFax : select this to send faxes from your PC via themachine. You can specify the destination2. Click OK2 Sided Print1. Click 2 Sided Print2. Choose Long Edge or Short Edge3. Click OK
Multi-UpPrint 2, 4 or eight (up to 32) independent documents onto one sheets ofpaper. The machine will automatically reduces/enlarge the images as neededto print them on one page.• Choose Tray / Layout• Click Multi-Up – Choose ( x Up) – then click OKPosterDivide & enlarge a document then print each divided part onto multiplesheets of paper. Paste together to make one large poster.Booklet CreationCreate a document with the pages in correct order to make a booklet whenthe document is folded.Transparency SeparatorInsert a divider page after each printed transparency.
Watermarks/Form• Go to Watermarks/Forms• Choose your desire text• Click OK
Section E : MAINTENANCEChecking Billing Meter1. Press Machine Status button on the Control Panel2. Select Billing MeterNotesSerial NumberDisplays the Serial Number of the machinePrint JobsIndicates the total number of pages used for print jobsNon-Print jobsIndicates the total number of pages used for all jobs exceptPrint jobsConsumables/Maintenance PartsProduct CodeLife SpanToner Cartridge CT200401 9,000 pagesDrum Cartridge CT350285 60,000 pages
Checking Consumables1. Press Machine Status button on the Control Panel2. Select ConsumablesNotesReadyIndicates the status is fineReplace SOONIndicates the toner/drum is getting low and the cartridgeshould be replaced soon Please order new cartridgesReplace NOWIndicates the cartridge needs to be replaced immediately
Replacing Toner & Drum CartridgeReplacing new drum cartridge:1. Place the cartridge in position and slide itinto the machine until it clicks2. Pull out the tape and close all the coversuntil it latchesReplacing the toner cartridge:1. Shake the new cartridge before placing itin position2. Slide until it clicks3. Close the front cover
Clearing Paper JamsCover A• Open the Cover A while lifting upthe release lever.• If the jammed paper is inside thefuser unit, press the lever towardyou to remove the jammed paper.• If the edge of the jammed paperdoes not reach the fuser unit,remove the paper in the direction ofthe arrow.Cover B• Open the left center cover whilelifting up the release lever.• Remove the jammed paperCover C• Open the Cover C while lifting upthe release lever.• Remove the jammed paper
Clearing Paper JamsCover D• Open the bypass tray.• Open the Cover D while lifting upthe release lever.• Remove the jammed paper insidethe duplex unit.Paper Jam in “Exit”• Open the bypass tray if necessary• Open the Cover A while lifting upthe release lever.• Remove the jammed paper
1Log onto www.fujixerox.com.my& Select Service & Support RequestOnline Service & Support RequestAnother service to bring us closer to you2 Input the machine’s infoUpon receiving your request byFXM Call Center, the request willbe logged into our system and youwill be notified through e-mail witha report number.Benefits :1. No phone call isrequire2. No morewaiting/holding onthe phone line3. Your call will belogged into ourservice system ontime3Submit your request-You’ve done it !!<strong>Fuji</strong> <strong>Xerox</strong> Asia Pacific Pte. Ltd.Call Center Manager33
1Log onto www.fujixerox.com.my& Select Online Support Assistant2Select product3Type a problem & search4You’ve got the solution !5Feedback from you !Select ‘Contact <strong>Xerox</strong> Support’ ifyou can’t find a solution - youcan report your problem online34