Document Centre 1055/1085 - Fuji Xerox Malaysia
Document Centre 1055/1085 - Fuji Xerox Malaysia
Document Centre 1055/1085 - Fuji Xerox Malaysia
- No tags were found...
You also want an ePaper? Increase the reach of your titles
YUMPU automatically turns print PDFs into web optimized ePapers that Google loves.
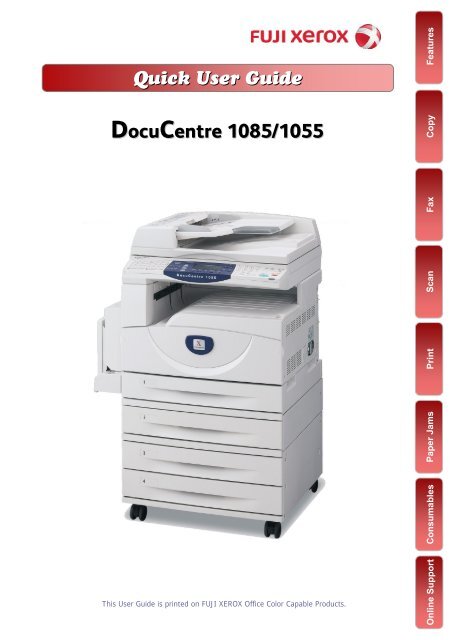
Quick User GuideFeaturesDocu<strong>Centre</strong><strong>1085</strong>/<strong>1055</strong>ConsumablesPaper JamsCopyPrintScanFaxThis User Guide is printed on FUJI XEROX Office Color Capable Products.Online Support
01Features ContentThank you for selecting the <strong>Fuji</strong> <strong>Xerox</strong> Docu<strong>Centre</strong> <strong>1085</strong>/<strong>1055</strong>.This quick user guide provides the fundamental Copy / Fax / Scan / Print operatingprocedures for ease use of the machine.Quick User Guide Organization♣ Features Content ……………………………………………… Page 01 - 02Describes the content of this guide and overview of the machine.♣ Copy ……………………………………………………………. Page 03 - 09Describes the copy features and operations.♣ Fax ………….……………………………………………….….. Page 10 - 15Describes the fax features and operations.♣ Scan …………………………….………….…………………… Page 16 - 17Describes the scan features and operations.♣ Print …………………………….………………………………. Page 18 - 24Describes the print features and operations from computer.♣ Paper Jams …………………………….…….….……………… Page 25 - 26Describes procedures to clear paper jams when error message displays.♣ Consumables …………………………….…….….…………… Page 27 - 28Describes procedures to replace consumables(Toners/Drum/Staples)♣ Online Support Assistance ………….…….….……………… Page 29 - 30Describes measures to acquire online help solutionsand / or submit a Service & Support Request online.IMPORTANT :The screen images in this guide solely used for illustration and are based on the standard machineconfigurations. Some features mentioned may not be used depending on the machineconfigurations. Unsupported features will not be displayed on the screen. Abnormal features willbe grayed out on the screen.This Quick User Guide may not be copied or modified without the written consent of thepublisher.Parts of this user guide are subject to change without prior notice.We welcome any comments on ambiguities, errors, omissions or missing pages.Contact <strong>Fuji</strong> <strong>Xerox</strong> Customer Training Department for more information.
Overview02Powering On / Off the machinePower Saver button-Press to exit powersaver mode.Power SwitchTurn ONMachineTurn OFFmachine
03COPY FEATURESReduce/Enlarge Page 04To make a reduced or an enlarge outputsize.Lighten / Darken Page 04To adjust the density of scanned image infive levels.Copy2-Sided Copying Page 05To make copies single or double sided output.Multiple-Up Page 06To copy multiple documents onto a singlesheet of paperMixed Sized Originals Page 07Copy Output Page 08To scan different size documentssimultaneously and copies onto matchingpaper size.A5A4A3A5A4A3To make copies collated[Collated]1,2,3…1,2.3…[Uncollated]1,1...2,2...3,3...ID Card Copying* Page 09To copy both sides of ID card onto one sideof paper
Making reduced or enlarged copies from the original04You can make copies with scaling by selecting desired copy size ratio.Original A4Output A3Copy1 Select [Copy]2 Select [Reduce/Enlarge]using the [Select] button.3 Select the required option;Press button.4 Select [Lighter/Darker]using the [Select] button.5 Enter number of copies(1 to 99) using numerickeypad.6 Press buttonNoteUser Guide P.56 & 57
05Making copies Single Sided / Double SidedYou can make copies and output as single-sided / double-sided.Copy1 Select [Copy]2 Press or buttonto display [2 Sided] feature.3 Select [2 Sided] featureusing the [Select] button.4 Select the required option;Press the button.5 Press button.NoteRotate Side 2 Off – both sides of thepaper are at the same orientation.Rotate Side 2 On – one side of thepaper are at rotated orientationNoteUser Guide P.58
Making copy of multiple sheets onto 1 sheet paper06You can make copies from multiple sheets of documents onto singlesheet of paper using Multiple-Up.Copy1 Select [Copy]2 Press or buttonto display [Multiple-Up]feature.3 Select [Multiple-Up] usingthe [Select] button.4 Select the required option;Press the button.5 Press button.Note[Auto %] is automaticallyselected to make copies fitinto paper selection.NoteUser Guide P.58
07Making copy of different sized document (Mixed Size)You can make copy of different sizes documents and copies ontomatching paper size.A5A4A3A5A4A3Copy1 Select [Copy]2 Press or buttonto display [Mixed SizeOriginal]3 Select [Mixed Size Orig]using the Select] button.4 Select [ON] to enable thefeature. Press the button.5 Press buttonNoteUser Guide P.61
Making multiple copies from the original [sorting]08To make copies output collated.[Collated] 1,2,3…1,2.3…[Uncollated] 1,1...2,2...3,3...Copy1 Select [Copy]2 Press or buttonto display [Output]feature.3 Select [Output] using the[Select] button4 Select the requiredoption e.g. Auto, Collated,Uncollated; Press the button.5 Press buttonNoteCollated - arranged in pageorder per sets.Uncollated - arranged in totalcopies and sort sheets by pageNoteUser Guide P.60
09Making copies of ID CardTo make copy of ID card both sides on the same page of paperCopy1 Select [Copy]2 Select [Paper Supply];choose required paper (e.g.A4 paper)3 Select [Multiple-Up] feature.Choose - 2 UP. Press the button.4 Load ID Card at the top leftcorner on the platen glass.Press button5 Turn over ID Card on place itat the same position; Press button. The ID Cardwill then be printed.
FAX FEATURES10Numeric Keypads Page 11To fax document using numeric keypads to aspecific locationSpeed Dial Page 11To fax document using Speed DialBroadcast Send Page 11To fax document to multiple locations.Address Book / Index Page 12To fax documents using pre-registerednumbers from the address bookFax2-Sided Originals Page 13To enable scan both sides of a documentthen transmits automatically1-Sided: Scans 1-sided documents totransmit.2-Sided (H to T): Scans 2-sided (head totoe) documents to transmit.2-Sided (H to H): Scans 2-sided (head tohead) documents to transmit.Transmission Report Page 14To print a transmission report automaticallyafter each fax complete successfully /unsuccessfullyTransmission Report–ASDFGEWTEtdfrewtry01 78822984 12:45 CPOn-Hook DialingUse this feature to send or receive faxmanually.Cancel Fax JobTo cancel a fax job, press [Job Status] button.Select fax job and press [Stop] / [cancel].
11Fax transmission to a single / multiple location(s)You can select fax feature on [Fax] screen to send document to singleor multiple recipient(s).1 Select [Fax]Fax2 Enter recipient(s) faxnumber using numerickeypad.3 Select [AddressEnter/Next] button toenter multiple recipients’fax number.4 If multiple location faxis programmed, selectthe recipient from theregistered entries.5 Press the buttonNoteUser Guide P.68
Making a fax transmission using Address Book Entries12You can specify fax recipients from pre-registered Address Book1 Select [Fax]Fax2 Select [Address Book]button to selectrecipients from theregistered entries byusing < ▼ >or < ▲ >button.3 Select [Search by Index]to search Recipients byIndex Search.4 Press the buttonNoteUser Guide P.68
13Making a 2-sided fax transmissionYou can scan a 2 sided document and send in a single operation.1 Select [Fax]Fax2 Select [Address Book]button to select recipientsor enter Fax number usingNumeric Keypad3 Press the or button to display[2 Sided Originals] on theFax screen.4 Select [2 Sided] using the button.5 Press the buttonthen press NoteRecipients’ fax number will bedisplayed on the Address listNoteUser Guide P.79
Making a fax with a transmission report printed14Fax transmission results can be printed automatically after each faxtransmission.1 Select [Fax]2 Select [Address Book]button to select recipientsor enter Fax number usingNumeric KeypadFax3 Press the or button to display[Trans. Report4 Select [Trans. Report];Select the required option.NoteUndeliveredPrints a report only whentransmission fails.OffNever prints a report.OnAlways prints a report nomatter how the transmissionends.5 Press the buttonthen press NoteUser Guide P.75
15To register Fax Address and Group SendTo store Fax addresses in the address bookTo Register FaxAddressTo create FaxProgramFax1 Select [Log In/Out] button – on the[System Settings] screen, select[Create/Delete]2 Select [Speed Dial] - Press button.1 Select [Log In/Out] button – on the[System Settings] screen, select[Create/Delete]2 Select [Fax Program] -Press button.3 Select an address number (001 to200) , or select [Enter No.] using the button. Enter the addressnumber e.g. 001 (not in use).Press & select .4 Enter Recipient Name - Select [Edit]to display entry field screen, enterthe name using the alphanumerickeypad on the control panel.Press twice.5 Enter Index – Enter the index usedto search the recipient name inAddress Book. (E.g. <strong>Fuji</strong> <strong>Xerox</strong> = F).Press .6 Enter Fax No: – Enter the recipient’sfax number. Press twice.7 Select 3 Select a program number (p01 top30) using the button, orselect to search a program numberusing [By Program No.].Also you can use One Touch Dialbutton to select the fax program p01to p18. Press the button.4 Perform the necessary option.Program Name – Enter the programname.Select [Edit] to display the ProgramName entry field screen, select [EntryMode] to switch the character type andenter the progran name using thealphanumeric keypad on the control panel.Press twice.Index – Enter the index used to search theprogram name in Address Book. Press.Program Type – Select the type of theprogram e.g. – to set thenecessary fax features. Press twice.NoteUser Guide P.166NoteUser Guide P.168
SCAN FEATURES 16Scan to Email Page 17To scan documents and send the scanneddata as an e-mail attachmentFile Format Page 17<strong>Document</strong> can be scanned to the supportedformat. [TIFF, PDF, DW]2 Sided OriginalsTo specify whether the documents aresingle-sided or double-sided,Resolution Page 17To scan documents and send the scanneddata as an e-mail attachmentScan
17To Scan document and transfer via EmailYou can scan & send the scanned data to selected recipients as e-mailattachment(s).1 Select [Email]2 Select [Address Book] oruse numeric keypad toenter email address(s)ScanNumeric KeypadAddress Book3 Select required fileformat if necessary.Press the or button to display[File Format] feature.4 Select scan resolution ifnecessary. Press the or button to display[Scan Resolution]5 Press and press to scan.NoteUser Guide P.92 & 95
PRINTING FEATURES18Printing Job Types Page 19Normal Print – prints as normal print jobFax - send faxes from a computer via machinePaper Tray Selection Page 19To specify paper tray for printing.Default Paper Tray - Auto Tray SelectIf Tray 5 [Bypass] is selected, paper typecan be specified according to paper loadedon Tray 5.2 Sided Printing Page 20 Booklet Printing Page 21You can send file and prints on both sides ofpaper.To print multi-page file into a booklet formatand double sided.Multiple Up Printing Page 22 Watermarks Page 23To print multi-page files onto single sheet ofpaper [from 2 Up and up to 32 Up]To print files with a pre-fixed text such as‘Urgent’ or ‘Confidential’ over the printout.PrintPC Faxing Page 24To send files and fax directly from computerwithout printing out hardcopies.
19Making a direct print from computerFrom your application, you can print directly from computer.1 From application, SelectPrinter – [Properties]2 On the [Tray/Layout] tab,select toselect required paper tray.Click [OK]Print3 Select [OK] on all openwindows to print.
Making a 2-sided print20Files can be printed into 2 sided format with 2 sided flip on long edge orflip on short edge.1 From application, SelectPrinter – [Properties]2 On the [Paper/Output] tab,select - Flip on long edge- Flip on Short Edge3 Select [OK] on all openwindows to print.Print
21Making a booklet print from computerBooklet printing enables multi-page files printed 2-sided booklet formatarranged in ascending order, and fold to form a booklet.1 From application, SelectPrinter – [Properties]2 On the [Tray/Layout] tab,select toselect required paper tray.Print3 Select Select Booklet Creation4 A popup window displaysthe changes. Select [OK]5 Select [OK] on all openwindows to print.
Prints multi pages in single sheet of paper22You can print a multi-page files into a single print using Multiple-Up(from 2 Up to 32 Ups)1 From application, SelectPrinter – [Properties]2 On the [Tray/Layout]tab, select Choose from 1 Page Up to 32Pages Up.Select ‘Image Order’ ifrequiredSelect ‘Draw Outlines’ toinsert borders after eachpage.Print3 Select [OK] on all openwindows to print.
23Making a printout with WatermarksFrom your application, you can insert watermark.1 From application, SelectPrinter – [Properties]2 On the [Watermarks /Forms] tab, selectwatermark (e.g. Confidential,Urgent, etc.) orSelect [New Text] tocreate Select [EditWatermark] to edit anywatermark.Print3 Select [OK] on all openwindows to print.
Making direct fax from computer24You can perform PC Faxing from your application.1 From application, SelectPrinter – [Properties]2 On the [Paper/Output] tab,select [Job Type] list –Select ‘FAX’ and Click‘OK’ on all open windows.3 The ‘Fax Recipient’window displayed. Enterrecipient name and faxnumber on the text boxand click [To>>] button.(Repeat step to add more thanone recipient)Print4 Select [OK] on all openwindows to proceed.NoteTo cancel Fax, go to [Job Status]on the machine panel, select thefax job – Press [Cancel]
25MAINTENANCEClearing Paper JamsPaper Jams in the <strong>Document</strong> Feeder1 2 31: Open <strong>Document</strong> Feeder Cover and remove the jammed document.2: If necessary, lift green lever to clear jammed document out of the Inner Cover.Close Inner Cover.3: If necessary, lift document feeder tray to clear jammed documents in thedocument exit. Close <strong>Document</strong> Feeder Tray, then close <strong>Document</strong> Feeder Cover.If necessary, lift the entire <strong>Document</strong> Feeder to inspect underneath.Paper Jam in Cover A1 23BypassTrayPaper Jams1: Open Tray 5 (Bypass Tray).2: Open Cover A by lifting up on the release lever.3: Remove any paper below the Fuser Unit by carefully pulling the paper up and out.4 54: If the jammed paper is inside the Fuser Unit, lower the green lever A2 in thedirection of the arrow to open the Fuser Unit Cover.5: Push down and rotate the green lever A1 in the direction of the arrow to feed thepaper from the top of the Fuser Unit. Do not pull paper downward during removal.Close Cover A until it latches. Close Tray 5.WARNING: The Fuser Unit may behot! Be careful not to touch the unit.NoteIf paper is torn, make sure toremove any torn pieces of paperinside the machine.
Clearing Paper Jams26Paper Jams in Cover B1 21: Open Cover B by lifting up the release lever located on the upper, right side ofthe cover.2: Remove the jammed paper. Close Cover B and make sure it latches properly.Paper Jams in Cover C1 21: Open Cover C by lifting up the release lever located on the upper, right side ofthe cover.2: Remove the jammed paper. Close Cover C and make sure it latches properly.Paper Jams in Duplex Module Cover D1 2 3Paper Jams1: Open the Bypass Tray.2: Open the Duplex Module Cover D while lifting up the release lever located on theupper, right side of the door.3: Remove the jammed paper inside the Duplex Module. Close the Duplex ModuleCover D until it latches.NoteIf paper is torn, make sure to remove anytorn pieces of paper inside the machine.
27Replacing ConsumablesReplacing Toner Cartridge1 2 31: Ensure machine is idle before opening the Front Cover. Open the Front Cover.2: Pull the Toner Cartridge out until the handle is visible on top of the cartridge.Grasp the handle and remove the cartridge from the machine.NOTE: Remove new Toner Cartridge from the box. Gently shake new cartridgefrom side to side 4 or 5 times.3: Hold the handle and place the Toner Cartridge in position. Slide it into themachine until it clicks into place. Close the Front Cover.NOTE: Follow the disposal instructions for the old cartridge that are includedwith the new cartridge.Replacing Drum Cartridge1 2 31: Ensure machine is idle before opening the Front Cover. Open the Front Cover.2: Open Tray 5 (Bypass Tray). Lift up release lever to open Cover A.3: Lift up the colored lever, and slide the Drum Cartridge out until the handle isvisible on top of the cartridge. Grasp handle and remove the cartridge from machine.Consumables4 5NOTE: Remove new Drum Cartridge and carefully remove the protective sheet.4: Place the cartridge into position and slide it into the machine until it clicks intoplace. Pull the cartridge tape straight out.5: Close Cover A until it latches. Close the Front Cover.
Checking Billing Meter / Supplies Status (Consumables)28BILLING METEROn the Machine Panel, press button.Select [Billing Meter] using the Button. Press the button.Serial No. : Displays Machine’s Serial No.Total Impression : Total jobs made.PRINT JOBS : Total number of pages used for print jobs.NON-PRINT JOBS : Total number of pages used for all jobs except print jobs.SUPPLIES / CONSUMABLESOn the Machine Panel, press button.Select [Consumables] on the [Machine Status] screen using the Button.The status of consumables is shown as:“Ready”, “Replace Soon (Order Now)”, or “Replace Now”Consumables
29Logon towww.fujixerox.com.my/support1 Click on [Online Support Assistant]2 Select Product / Model3 Select FAQ or enter keyword to Search4 You’ve got the Solution!5 Problem Solved? We need yourFeedback!Click Yes > I Found My AnswerOr report your problem to us Online!
Logon toOnline Service &www.fujixerox.com.my/support30Support Request1 Click on [Service & Support Request]30Another service to bring uscloser to youUpon receiving your request byFXM Call Center, the requestwill be logged into our systemand you will be notified throughe-mail with a report number.2 Select [Technical Support &Consumables]Complete the form & Click on [Submit]Benefits :1. No phone call isrequire2. No more waiting /holding on the phoneline3. Your call will belogged into our servicesystem on time<strong>Fuji</strong> <strong>Xerox</strong> Asia Pacific Pte. Ltd.3 Request submitted!
This Quick User Guide is printed on FUJI XEROX Office Color Products.Copyright Reserved © 2010 by Customer Training, <strong>Fuji</strong> <strong>Xerox</strong> <strong>Malaysia</strong>Printed in <strong>Malaysia</strong>For Service & Supplies Enquiries (Nationwide)Toll Free : 1-300-88-1163Online support: http://onlinesupport.fujixerox.comThe contents described herein are correct as of August, 2010.Edition 2.1 Chihiro ME User Guide


