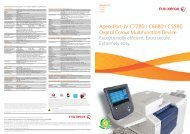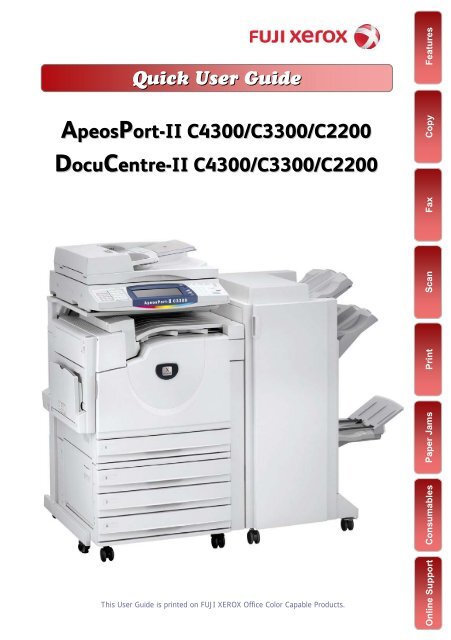
ApeosPort/ DocuCentre - II C4300/3300/2200 - Fuji Xerox Malaysia
ApeosPort/ DocuCentre - II C4300/3300/2200 - Fuji Xerox Malaysia
ApeosPort/ DocuCentre - II C4300/3300/2200 - Fuji Xerox Malaysia
- No tags were found...

Create successful ePaper yourself
Turn your PDF publications into a flip-book with our unique Google optimized e-Paper software.
03COPY FEATURESReduce/Enlarge Page 04To make a reduced or an enlarge outputsize.2-Sided Copying Page 05To make copies single or double sided output.CopyBook Copying Page 06To copy bound documents using platenglass on to 2 separate sheetsMixed Sized Originals Page 07To scan different size documentssimultaneously and copies onto matchingpaper size.A5A4A3A5A4A3Multiple-Up Page 08To copy multiple documents onto a singlesheet of paperCopy Output / Sorting Page 09To make copies collated (stapled & punched)[Collated]1,2,3…1,2.3…[Uncollated]1,1...2,2...3,3...Edge Erase / Image Shift Page 10To erase unwanted marks along the edges /To shift image copy position [Before] Booklet Creation Page 11To copy multiple sheets of documents inpage order to make a booklet654321 [After] Repeat Image Page 12Image to be print repeatedly on one sheet ofpaperID Card Copying* Page 13To copy both sides of ID card onto one sideof paper
Making reduced or enlarged copies from the original04You can make copies with scaling by selecting desired copy size ratio.Original A4Output A3Copy1 Select [Copy]2 Select [Reduce /Enlarge] for desiredratio; select [More] forother presets.3 Select [Paper Supply] fortray selection.4 Enter number of copies(1 to 999) using numerickeypad.5 Press buttonNoteUser Guide P.56
05Making copies Single Sided / Double SidedYou can make copies and output as single-sided / double-sided.Copy1 Select [Copy]2 Select [LayoutAdjustment]Select [2-Sided Copying]3 Select an option andselect [Save]1 1 Sided copy 1-sideddocument onto 1 side of paper1 2 Sided copy 1-sideddocument onto 2 sides of paper2 2 Sided copy 2-sideddocument onto 2 sides of paper2 1Sided copy 2-sideddocument on 1 side of the paper4 Enter number of copies(1 to 999) using numerickeypad.5 Press buttonNoteHead to Head – both sides of thepaper are at the same orientation.Head to Toe – one side of the paperare at rotated orientationNoteUser Guide P.69
Making a copy from a bound document (Book Copying)06You can make copies from bound document into separate sheets ofpaper using platen glass.Copy1 Select [Copy]2 Select [LayoutAdjustment] tab – Choose[Book Copying]3 Select an option andSelect [Save];Left Page then RightRight Page then LeftTop Page then BottomSelect Both Pages (forscanning left & right page)4 Press buttonNoteBoth Pages – to copy bothpages of the bookLeft Only/Right Only – copyselected side of the bookNoteUser Guide P.70
07Making copy of different sized document (Mixed Size)You can make copy of different sizes documents and copies ontomatching paper size.A5A4A3A5A4A3Copy1 Select [Copy]2 Select [LayoutAdjustment] tab Select[Mixed Sized Originals]and Select [ON]3 Select “Auto%” on[General Settings] andSelect Paper Size required.[Auto Paper Tray]4 Select [Save] and Press buttonNoteUser Guide P.73
Making copy of multiple sheets onto 1 sheet paper08You can make copies from multiple sheets of documents onto singlesheet of paper using Multiple-Up.Copy1 Select [Copy]2 Select [Output Format]tab3 Select [Multiple-Up]1 Page Up - Multiple Up isnot applied.2 Pages Up – 2 documentscopied into 1 sheet of paper4 Pages Up – 4 documentscopied into 1 sheet of paper8 Pages Up – 8 documentscopied into 1 sheet of paper4 Select ‘Reading Order’for document layout andPress buttonNote[Auto %] is automaticallyselected to make copies fitinto paper selection.NoteUser Guide P.85
09Making multiple copies from the original [sorting]To make copies output collated. Output can be stapled / hole punched.[Collated] 1,2,3…1,2.3…[Uncollated] 1,1...2,2...3,3...[Finishing]Stapled / Hole PunchCopy1 Select [Copy]2 Select [Copy Output] onGeneral Settings tab; orselect [Output Format]tab, select [Finishing].3 Select [Collated], andselect Finishing (ifavailable). Select Staple/ Punch Positions,Select [Save]4 Enter number of setsusing numeric keypadand press buttonNoteCollated - arranged in pageorder per sets.Uncollated - arranged in totalcopies and sort sheets by pageNoteUser Guide P.79
Making copies with edge erased / image shifted10To make copies with edge erased / image shiftedCopy1 Select [Copy]2 Select [LayoutAdjustment] tab; SelectEdge Erase or ImageShift (where applicable)3 Edge Erase – set area toerase using arrow keys at1mm increments each.Image Shift – set marginto shift using arrow keysat 1mm increments each.Select [Save]4 Enter number of setsusing numeric keypadand Press buttonNoteUser Guide P.74
11Making a copy into a booklet format (Booklet Creation)You can make copies from multiple sheets of documents onto bothsides of the paper in page order to make a booklet12345Optional feature:Folding & StapleCopy1 Select [Copy]2 Select [Output Format]tab3 Select [BookletCreation] and chooseoption “Left Bind/TopBind” or “Right Bind”and Select [Save]Optional:Finishing (Folding + Stapling)4 Select [Save] andPress buttonNotePrinted Covers The firstpage of the document iscopied on the coverNoteUser Guide P.81
Making an image printed repeatedly (Repeat Image)12Make copy of a document / image onto 1 sheet of paper repeatedly.Copy1 Select [Copy]2 Select [Output Format]tab. Select [RepeatImage]1 Page Up – Image notrepeatedAuto Repeat – Auto repeataccording to originaldocument size, paper sizeand copy ratio.Variable Repeat – Userdefined number of times torepeat copy imageSelect [Save]3 Select [Layout Adjustment]tab – Select Original Size toenter width (X) & height (Y) at1mm increments -Select [Save]4 Press buttonNoteUser Guide P.87 Repeat ImageUser Guide P.72 Original Size
13Making copies of ID CardTo make copy of ID card both sides on the same page of paperCopy1 Select [Copy]2 Select [Output Format] [2]ID Card Copying. SelectON – Select [Save]3 Load ID Card on the topleft of the platen glass.Close document coverand press 4 Open document coverand turn to the 2 nd side.Place it on the same placeand press 5 The ID Card will then beprinted.
FAX FEATURES14Numeric Keypads Page 15To fax document using numeric keypads to aspecific locationOn-Hook Dialing Page 15Use this feature to send or receive faxmanually. Select {Manual Send} to send or[Exit (Line Cut)] to exit on-hookSpeed Dial/One Touch Page 15To fax document using Speed Dial/OneTouch DialBroadcast Send Page 15To fax document to multiple locations.FaxAddress Book/Index Page 16To fax documents using pre-registerednumbers from the address book2-Sided Originals Page 17To enable scan both sides of a documentthen transmits automatically1-Sided: Scans 1-sided documents totransmit.2-Sided (H to T): Scans 2-sided (head totoe) documents to transmit.2-Sided (H to H): Scans 2-sided (head tohead) documents to transmit.Transmission Report Page 18To print a transmission report automaticallyafter each fax complete successfully /unsuccessfullyTransmission Report–Cancel Fax JobTo cancel a fax job, press [Job Status] button.Select fax job and press [Stop] / [cancel].ASDFGEWTEtdfrewtry01 78822984 12:45 CP
15Fax transmission to a single / multiple location(s)You can select fax feature on [Fax] screen to send document to singleor multiple recipient(s).1 Select [Fax]Fax2 Enter recipient(s) faxnumber using numerickeypad.3 Select [Next Recipient]button to enter multiplerecipients’ fax number.4 If multiple location faxis programmed, select[Yes] on confirmationscreen to start faxtransmission5 Press the buttonNoteUser Guide P.121
Making a fax transmission using Address Book Entries16You can specify fax recipients from pre-registered Address Book1 Select [Fax]Fax2 Select [Address Book]button to selectrecipients from theregistered entries.3 Select [ABC] [DEF]button to searchRecipients by IndexSearch.4 Or select recipients’ faxnumber from the OneTouch Dial (001 – 070)or using NumericKeypad5 Press the buttonNoteUser Guide P.122
17Making a 2-sided fax transmissionYou can scan a 2 sided document and send in a single operation.1 Select [Fax]Fax2 Select [Address Book]button to select recipientsor enter Fax number usingNumeric Keypad3 Or select recipients’ faxnumber from the OneTouch Dial (001 – 070).4 Select 2 Sided Originals- 2 Sided (Head to Head) or- 2 Sided (Head to Toe)5 Press the button.NoteRecipients’ fax number will bedisplayed on the Address listNoteUser Guide P.126
Making a fax with a transmission report printed18Fax transmission results can be printed automatically after each faxtransmission.Transmission Report–ASDFGEWTEt1 Select [Fax]Fax2 Select [TransmissionOptions] tab – SelectTransmission Report3 On the TransmissionReport Screen, Select“ON”4 Select [Address Book]button to select recipientsor enter Fax number usingNumeric Keypad5 Press the button.NoteUser Guide P.133
19To register Fax Address and Group SendTo store Fax addresses in the address book [up to 500 entries]To Register FaxAddressTo Group Pre-Registered FaxAddress1 All Services screen1 All Services screenFax2 Select [Setup Menu] - Select[Address Book]2 Select [Setup Menu] – Select[Group Send]3 Select an address e.g. 001 (notin use) - Press [Create/Delete]3 Select any group no. (e.g #01)and press [Create/Delete]4 Address Type: Select [ChangeSettings] Select - FAX – Save -5 Fax Number: Select [ChangeSettings] enter recipient fax no.6 Recipient Name: Select [ChangeSettings] Enter Recipient’sName / Company Name7 Index: Select [Change Settings]Enter 1 alphanumeric character(e.g. <strong>Fuji</strong> <strong>Xerox</strong> = F)8 Save and Close; Repeat steps 3-7 to continue or Press [Close] toExit Setup Menu.4 Enter the pre-registeredaddress no. by using numerickeypads (e.g. 001) Press [ADD]5 Repeat step 4 to continueregistering fax no. to the samegroup6 Select [Save] and Close to Exit[Setup Menu].NoteMax 50 Groups can be createdMax 20 Fax Addresses per groupNoteUser Guide P.334NoteUser Guide P.340
SCAN FEATURES20Scan to Mailbox Page 21To scan documents and save the scanneddata to a mailbox located at the machine.Importing Mailbox data Page 22You can import scanned data to yourcomputer using Mailbox Viewer program.MailboxMailboxScan to Email Page 23To scan documents and send the scanneddata as an e-mail attachmentScan to PC [SMB] Page 24To scan documents and send the data to acomputer on the network.ScanOutput Color/dpi Page 24Set scanning color & output resolution for thedocuments (up to 600dpi).Output Format * Page 25Document can be scanned to the supportedformat. [JPEG, TIFF, PDF, DW]Book Scanning Page 25The feature scans a bounded documents ontoseparate sheets of paper using platen glass.File Name Page 25The default file name is "img-xxx-yyy.zzz"(where xxx is the date and time, yyy is thepage number, and zzz is the extension).
21To Scan document to MailboxYou can scan and save the scanned data to a pre-registered mailboxand import to the computer using Mailbox Viewer application.Mailbox1 Select [Scan to Mailbox]2 Select required mailbox.* Enter password if anyScan3 Select ‘Scanning color’Select ‘2 Sided Original’if necessary.4 On the [LayoutAdjustment] tab, select‘Scan Resolution’ ifnecessary.5 Press the button.Documents are scannedand stored at the selectedmailbox.NoteUser Guide P.180 / 194
To Import Mailbox data into personal computer22You can import scanned documents / data from mailbox to thecomputer using mailbox viewer program.Mailbox1 From computer, Select[Start] > All Programs ><strong>Fuji</strong> <strong>Xerox</strong> > NetworkScanner Utility2 > MailboxViewer22 Select required scanner;* e.g. <strong>ApeosPort</strong>-<strong>II</strong> <strong>C4300</strong>(192.168.0.14) – Click[Select Scanner] buttonScan3 Enter Mailbox No andPassword - Click [OpenMailbox] button4 Select required file andclick [Import] to computer.Default file location atC:\My Document\<strong>Fuji</strong><strong>Xerox</strong>\Network Scan\NoteUser Guide P.233
23To Scan document and transfer via EmailYou can scan & send the scanned data to selected recipients as e-mailattachment(s).1 Select [Email]Scan2 Select [Address Book] oruse [Keyboard] to enteremail address(s)3 Select ‘Scanning Color’,select required file format ifnecessary.4 Select [Layout Adjustment]tab - ‘Scan Resolution’ ifnecessary.5 On the [Output Format] tab,select ‘File Name’ or ‘SplitSend’ if necessary.Press the button.NoteUser Guide P.174
To Scan document and transfer to PC (SMB)24You can scan and transfer the scanned documents to a computeron the network.1 Select [Scan to PC]2 Select [Address Book] orselect [Browse] to searchlocationScan3 Select ‘Scanning color’, 2Sided Original’ and ‘fileformat’ if necessary.4 Select [Layout Adjustment]tab - ‘Scan Resolution’ ifnecessary.5 On the [Output Format] tab,select ‘File Name’.Press the button.NoteUser Guide P.181
25To scan a bound document (Book Scanning)Book Scanning allows you to scan a book onto separate sheets of paperin page order and transfer via any scanning method [Mailbox/Email/SMB]1 Select preferred scanmethod e.g. Scan to PCScan2 Select File Format (e.g. PDF)[Layout Adjustment] tab –Choose [Book Scanning]3 Select an option and Select[Save];Left Page then RightRight Page then LeftTop Page then BottomSelect Both Pages (for scanningleft & right page)4 Select [Original Size] toenter document size orselect from the Presets.5 On the [Output Format] tab,select ‘File Name’. Press the button.NoteUser Guide P.195
PRINTING FEATURES26Printing Job Types Page 27Normal Print – prints as normal printSecure Print – stores print jobs on themachine and prints when UserID & passwordenteredSample Set – prints a trial copyDelayed Print – Temporarily stores printjobs on the machine to print it at specifiedtime.Save to Mailbox – stores print job atregistered mailbox and print upon required.Fax – PC Faxing.Paper Tray Selection Page 27To specify paper tray for printing. Optional:Finishing Stapled / Hole Punched.Default Paper Tray - Auto Tray SelectIf Tray 5 [Bypass] is selected, paper typecan be specified according to paper loadedon Tray 5.Default Finishing Output – CollatedIf Finishing is selected, hole punching andstapling can be applied to the printed copies.Secure Print Page 28Temporarily stores print jobs on the machineand prints when UserID & password entered.2 Sided Printing Page 29You can send file and prints on both sides ofpaper.Booklet Printing Page 30Multiple Up Printing Page 31To print multi-page file into a booklet formatand double sided.To print multi-page files onto single sheet ofpaper [from 2 Up and up to 32 Up]PrintWatermarks Page 32To print files with a pre-fixed text such as‘Urgent’ or ‘Confidential’ over the printout.PC Faxing Page 33To send files and fax directly from computerwithout printing out hardcopies.
27Making a Direct Print from computerFrom your application, you can print directly from computer.1 From application, SelectPrinter – [Properties]2 On the [Paper/Output] tab,select toselect required paper tray.Click [OK]Print3 Select asCOLOR or BLACK4 Select [OK] on all openwindows to print.
Making a Secure Printing from computer 28Allows to set a password to a print job and temporarily stores printmemory on the machine, and print upon entering password.1 From application, SelectPrinter – [Properties]2 On the [Paper/Output] tab,select SecurePrint - click to enterUser ID & Passcode. Click[OK] on all open window.3 From machine, Press [JobStatus] button - Select tab.Select [Secure Print]Print4 Select UserID - [DocumentList] button. Enter Passcodeand press Confirm.5 Select file and select [Print]A message displayed –Select your preference – thejob will be printed.
29Making a 2-sided print (optional - Finishing)Files can be printed into 2 sided format with 2 sided flip on long edge orflip on short edge.1 From application, SelectPrinter – [Properties]2 On the [Paper/Output] tab,select - 2 Sided Print- 2 Sided Flip on ShortEdgePrint3 Select asCOLOR or BLACK4 *Optional FeatureSelect toenable Stapling / Holepunch. Set required staplingand hole punching position.5 Select [OK] on all openwindows to print.
Making a booklet print from computer30Booklet printing enables multi-page files printed 2-sided booklet formatarranged in ascending order, and fold to form a booklet.1 From application, SelectPrinter – [Properties]2 On the [Layout] tab, select SelectBooklet CreationChoose Binding [Left / Right]* Optional: Fold & StapleSelect [OK]3 A popup window displaysthe changes. Select [OK]Print4 Select ‘Fit to New PaperSize’ – Set any preferredpaper size or select A4(210mm x 297mm)5 Select [OK] on all openwindows to print.
31Prints multi pages in single sheet of paperYou can print a multi-page files into a single print using Multiple-Up(from 2 Up to 32 Ups)1 From application, SelectPrinter – [Properties]2 On the [Layout] tab, selectChoose from 1 Page Up to 32Pages Up.Select ‘Image Order’ if requiredSelect ‘Draw Outlines’ to insertborders after each page.Print3 Select ‘Fit to New PaperSize’ - Set any preferredpaper size or select A4(210mm x 297mm)4 Select [OK] on all openwindows to print.
Making a printout with Watermarks32From your application, you can insert watermark.1 From application, SelectPrinter – [Properties]2 Select asCOLOR or BLACK3 On the [Watermarks] tab,select watermark (e.g.Confidential, Urgent, etc.) orSelect [New Text] to createSelect [Edit Watermark] toedit any watermark.Print4 Select [Print on Page 1Only] to print watermarkon first page, if necessary.5 Select [OK] on all openwindows to print.
33Making direct fax from computerYou can perform PC Faxing from your application.1 From application, SelectPrinter – [Properties]2 On the [Paper/Output] tab,select [Job Type List] –Select ‘FAX’ and Click‘OK’ on all open windows.Print3 The ‘Fax Recipient’window displayed. Enterrecipient name and faxnumber on the text boxand click [To>>] button.(Repeat step to add more thanone recipient)4 Select [OK] on all openwindows to proceed.NoteTo cancel Fax, go to [Job Status]on the machine panel, select thefax job – Press [Cancel]
MAINTENANCE34Clearing Paper JamsPaper Jams in the Document Feeder1 2 31: Open Document Feeder Cover and remove the jammed document.2-3: If necessary, turn green wheel to feed out jammed document.4: If a document is jammed underneath the inner guide, open inner guide.5-6: Turn green wheel to remove the document. Gently close the cover.4 5 6Paper Jam in Area 21 2Paper Jams1: Gently open the cover in area 2.2: Pull both edge of the jammed paper to remove & Gently close the cover.NoteIf paper is torn, make sure toremove any torn pieces of paperinside the machine.
35Clearing Paper JamsPaper Jams in Area 31 21: Gently open the cover in area 3.2: Pull both edge of the jammed paper to remove. Gently close the cover.Paper Jams in Area 41 21: Gently open the cover in area 4.2: Pull both edge of the jammed paper to remove. Gently close the cover.Paper Jams / Misfeed From Paper Tray 5 (Bypass Tray)Paper Jams1 21: Inspect the paper feed entrance in Tray 5 (Bypass Tray)2: Remove any jammed paper.NOTE: When two or more sheets of paper are loaded in thetray, remove all of the sheets.NoteIf paper is torn, make sure to remove anytorn pieces of paper inside the machine.
Clearing Paper Jams 36Paper Jam in Fuser Area1 21: Gently open the top left cover & Pull both edge of the jammedpaper to remove. Gently close the cover.2: If paper jammed inside the fuser area, lift green lever to removepaper. Reposition green lever once done. Gently close the cover.CAUTION! Fuser Cartridge may be very hot, Handle with care.Paper Jam in Paper Tray 1, 2, 3, or 4Gently pull out paper tray andremove any jammed paper.If paper torn, try to remove anytorn pieces inside the machine.Gently push in the tray.Paper Jam in Finisher Unit* Optional FeatureGently open the finisher door.Remove any jammed paper atselected area displayed on thescreen.If paper torn, try to remove anytorn pieces inside the machine.If the edge of the jammed papercan be reached, pull the jammedpaper to remove the jammedpaper.Gently close the cover.Paper Jams
37Replacing ConsumablesReplacing Toner Cartridge1 2 31-2: Ensure machine is idle before opening Front Cover. Select required toner and turnthe cartridge to the ‘open padlock’ symbol. Gently pull the cartridge out of the machine.Info: Remove new Toner Cartridge from the box. Gently shake cartridge 3 - 4 timesfrom side to side. Insert cartridge with the arrow on the cartridge facing up and slidecartridge into the machine.3: Turn cartridge to the right to the ‘closed padlock’ symbol. Gently close Front Cover.Replacing Waste Toner Bottle1 2Paper JamsInfo: Ensure machine is idle before opening Front Cover. Remove new Waste TonerContainer, orange vinyl cap, and cleaning rod from the box.1-2: Pull down on the orange colored tabs. Hold the center section of the container, pullcontainer out. Place it on black cover and cover the used container with vinyl capprovided. Place the used cleaning rod in the box as well.3: Gently insert cleaning rod into cleaning slots (D1, D2, D3, D4) with the pad facingdown and glide in & out to clean laser window. Store new cleaning rod inside Front Doorpanel.3454: Align new Waste Toner container to the center section and push into the machine.5: Close black cover by holding the colored tabs. Close the Front Cover.
Replacing Consumables 38Replacing Drum Cartridge1 2 3Info: Ensure machine is idle before opening the Front Cover.1-2: Lift up lever marked 'A’ and pull down release handle.3: Gently remove the cartridge as indicated on the screen. Place used cartridge in thebag supplied in the package.Place new Drum Cartridge (with protective shield) in the cartridge slot resting on therelease handle. Load cartridge in direction of the arrow.Peel off the seal from the top of the cartridge shield.Hold the Drum Cartridge firmly and slide cartridge into the machine using the lightorange tab.Remove protective shield.4 54: Lift up the release handle in the middle to lock the Drum Cartridge.5: Push the lever marked 'A' handle latch down until it locks. Close the Front Door.WARNING! Do not expose the Drum Cartridge to the direct sunlight or strongindoor fluorescent lighting. Do not touch or scratch the surface of the Drum.Consumables
39Replacing ConsumablesReplacing Staple Cartridge (Finisher)1 2 31: Open the Finisher Front Door.2-3: Rotate Stapling Unit to the right and pull out on the Staple Cartridge handle andremove the used cartridge.4 5 64-5: Unpack and install the new cartridge. The cartridge will click into place when it isinstalled correctly.6: Insert the cartridge into the machine. Close the Finisher Front Door.Replacing Staple Cartridge (Booklet Finisher)Consumables1 23 41: Open the Finisher FrontDoor.2: Pull Booklet Maker accesshandles and pull out theStapling Unit.3: Squeeze the handles andpull to remove the usedcartridge. Unpack and installthe new cartridge.4: The cartridge will click intoplace when it is installedcorrectly. Return the StaplingUnit to its original position.Close the Finisher Front Door.
Checking Billing Meter / Supplies Status (Consumables)40BILLING METEROn the Machine Panel, press button.Select [Billing Meter / Print Report] tab - Select Billing MeterMETER 1 : Number of full color (Copies + Prints)METER 2 : Number of B/W (Copies + Prints + Faxes)METER 3 : Number of large-size full color (Copies + Prints)METER 4 : Total of Meter 1 + Meter 2SUPPLIES / CONSUMABLESOn the Machine Panel, press button.Select [Supplies] tabThe status of consumables is shown as:“OK”, “Replace Soon (Order Now)”, or “Replace Now”For toner, the amount is shown in percentage (0 to 100%).Consumables
41Logon towww.fujixerox.com.my/support1 Click on [Online Support Assistant]2 Select Product / Model3 Select FAQ or enter keyword to Search4 You’ve got the Solution!5 Problem Solved? We need yourFeedback!Click Yes > I Found My AnswerOr report your problem to us Online!
Logon toOnline Service &www.fujixerox.com.my/support42Support Request1 Click on [Service & Support Request]42Another service to bring uscloser to youUpon receiving your request byFXM Call Center, the requestwill be logged into our systemand you will be notified throughe-mail with a report number.2 Select [Technical Support &Consumables]Complete the form & Click on [Submit]Benefits :1. No phone call isrequire2. No more waiting /holding on the phoneline3. Your call will belogged into our servicesystem on time<strong>Fuji</strong> <strong>Xerox</strong> Asia Pacific Pte. Ltd.3 Request submitted!
This Quick User Guide is printed on FUJI XEROX Office Color Products.Copyright Reserved © 2008 by Customer Training DepartmentPrinted in <strong>Malaysia</strong>Contact <strong>Fuji</strong> <strong>Xerox</strong> Customer Training Department for more information.tel : +603 7882 2888e-mail: mysallcto@mys.fujixerox.comJune 2008 Edition 2.0 San Remo User Guide