xtp103 raivaussaha röjsåg brush cutter - IKH Service
xtp103 raivaussaha röjsåg brush cutter - IKH Service
xtp103 raivaussaha röjsåg brush cutter - IKH Service
- No tags were found...

You also want an ePaper? Increase the reach of your titles
YUMPU automatically turns print PDFs into web optimized ePapers that Google loves.
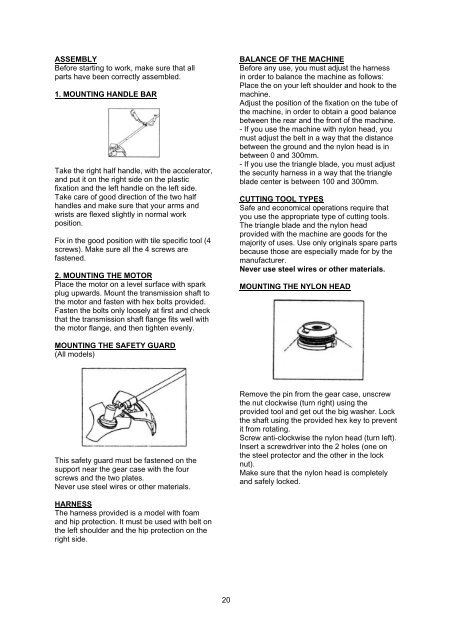
ASSEMBLYBefore starting to work, make sure that allparts have been correctly assembled.1. MOUNTING HANDLE BARTake the right half handle, with the accelerator,and put it on the right side on the plasticfixation and the left handle on the left side.Take care of good direction of the two halfhandles and make sure that your arms andwrists are flexed slightly in normal workposition.Fix in the good position with tile specific tool (4screws). Make sure all the 4 screws arefastened.2. MOUNTING THE MOTORPlace the motor on a level surface with sparkplug upwards. Mount the transmission shaft tothe motor and fasten with hex bolts provided.Fasten the bolts only loosely at first and checkthat the transmission shaft flange fits well withthe motor flange, and then tighten evenly.BALANCE OF THE MACHINEBefore any use, you must adjust the harnessin order to balance the machine as follows:Place the on your left shoulder and hook to themachine.Adjust the position of the fixation on the tube ofthe machine, in order to obtain a good balancebetween the rear and the front of the machine.- If you use the machine with nylon head, youmust adjust the belt in a way that the distancebetween the ground and the nylon head is inbetween 0 and 300mm.- If you use the triangle blade, you must adjustthe security harness in a way that the triangleblade center is between 100 and 300mm.CUTTING TOOL TYPESSafe and economical operations require thatyou use the appropriate type of cutting tools.The triangle blade and the nylon headprovided with the machine are goods for themajority of uses. Use only originals spare partsbecause those are especially made for by themanufacturer.Never use steel wires or other materials.MOUNTING THE NYLON HEADMOUNTING THE SAFETY GUARD(All models)This safety guard must be fastened on thesupport near the gear case with the fourscrews and the two plates.Never use steel wires or other materials.Remove the pin from the gear case, unscrewthe nut clockwise (turn right) using theprovided tool and get out the big washer. Lockthe shaft using the provided hex key to preventit from rotating.Screw anti-clockwise the nylon head (turn left).Insert a screwdriver into the 2 holes (one onthe steel protector and the other in the locknut).Make sure that the nylon head is completelyand safely locked.HARNESSThe harness provided is a model with foamand hip protection. It must be used with belt onthe left shoulder and the hip protection on theright side.20