
You also want an ePaper? Increase the reach of your titles
YUMPU automatically turns print PDFs into web optimized ePapers that Google loves.
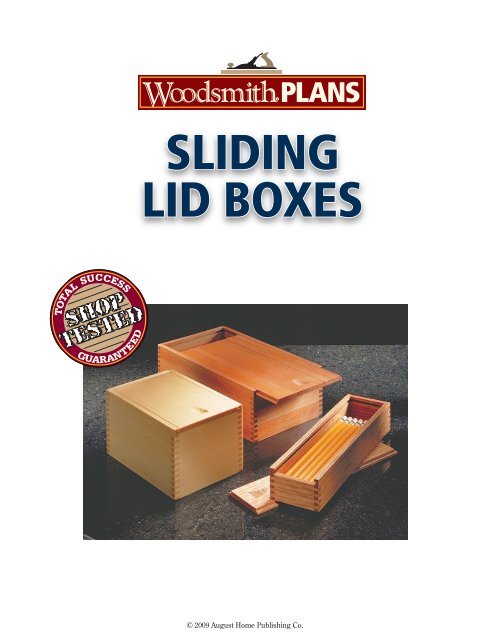
slidinglid boxes© 2009 August Home Publishing Co.
WeekendProjectSliding Lid BoxesFinger joint boxes aren’tall that common anymore.But they’re stillattractive, strong, andeasy-to-build.{ The lid on thisbox slides intoshallow groovescut in the sidesand back.Before plastic and cardboard,people stored and carriedthings in wooden boxes. The smallerof these boxes were often joined withfinger joints. It’s a quick joint that’seasy to mass produce, and with a littleglue, it’s quite strong.I use finger joints for the same reason.I can build a box quickly with atable saw and a simple jig. In fact, Ican build a lot of boxes quickly, asyou can see in the photo at right.<strong>LID</strong>. The other thing I like about theseboxes are the lids. They’re irresistible.As soon as you pick up a box, you justhave to slide it open and shut.Because the lid fits inside ratherthan on top of the box, the fingersare cut a little different than explainedin the article beginning on page 3.Basically, you just cut fewer fingers onthe front corners (margin photo).Note: The step-by-step drawingshere feature the short pine box inthe photo above. Overall dimensionsfor the other boxes in the photo areincluded in the box on the next page.SIDES & ENDS. The boxes start out as1 / 4"-thick front, back, and sides cutabout 1 / 8" oversized in width. Afterthe finger joints are cut, the box canbe assembled, as shown on pages 3 to6 — except for a few differences.FRONT ENDS. When laying out andmarking the pieces, I also labeled thefront end of each side piece so I wouldremember to cut them differently.The fingers on these pieces aren’t cutall the way to the top edge, see photoin margin and detail ‘a’ below.What I do is start with the back endof these pieces and count the numberof passes I make over the blade(thirteen for the box shown below).Then when cutting the front end, Isimply make two fewer passes overthe blade (eleven, in this case).Note: The thirteen slots on theback end will become twelve after thewaste is trimmed off the top edge.BSIDEABACKNOTE:Cut piecesto final widthafter cuttingfinger jointsa.!/8"-deepgroovefor lid3!/8"CBOTTOM(3!!/16" x 5 !!/16")BSIDEb.AFRONTWaste3!/8"6"4"NOTE:All pieces!/4"-thick stock!/4"1 www.<strong>Woodsmith</strong>.com © 2009 August Home Publishing Co. All Rights Reserved.
key to the blade has to match thethickness of the blade (and the key).Otherwise, the fit of the fingers willeither be too tight or loose, see box.I start by positioning the key with asecond, identical key (Step 3). Then Icheck the setup by cutting a series offinger joints on two test pieces, (Step4). But I don’t just use any scraps thathappen to be lying around. Instead,I make my test pieces identical tomy final pieces in width and thickness(but not necessarily length). Ieven use the same type of wood. Thisway, I can use these test pieces laterwhen plugging the holes left by thegrooves for the bottom.Using a second key to set the firstwill get you close. But you’ll probablystill need to “tweak” the fence oneway or the other, see box and tip inmargin at right. It’s important to bepatient; it will probably take severaladjustments (and test cuts) beforethe fit is perfect.I like to end up with a snug fit sothat when dry assembling the pieces,I have to work the pieces a bit to pressthe fingers together and pull themapart. This way, I can usually avoidusing clamps when gluing the boxestogether. But more on that later.SETTING THE BLADE. After the key is setand the fence has been screwed tofinger joint jig: step-by-step1After setting the blade heightso it’s slightly below the thicknessof the stock, cut a notch inthe fence (and the ledge).3Now, using a spacer the samewidth as the key, move thefence so the spacer fits betweenthe key and the blade.the miter gauge, I set the heightof the saw blade. Of course, whenyou’re done, you want the fingersperfectly flush with the matingpieces. But here, when setting theblade, I let the fingers protrude justslightly — less than 1 ⁄ 64 ". (I’ll sandthem flush later.)fine adjustments2Next, you’ll need to size a keythat will fit tight in the notchthat was just cut in the fence.Then glue it in place.4Test the setup and makeneeded adjustments to thefence and the blade. Then screwthe fence to the miter gauge.To set the blade height, I positionthe workpiece next to the blade. I startwith the blade below the height of theworkpiece and sneak up on the finalheight as I test the fit (box below).This way, the fence will back up thecut, and there will be less chance forchipout when cutting the fingers.{ When setting upa finger joint jig,I make anymicro-adjustments“visible” by drawinga line acrossthe jig and table.Loose fit. If there’s a gap betweeneach finger, simply slide the keyand fence away from the blade.Tight fit. If the fingers won’t fitinto the slots at all, then slide thekey and fence towards the blade.Short fingers. If the blade is settoo low, the fingers will be short,so raise the saw blade slightly.Long fingers. If the fingers extendtoo far, the saw blade is too highand needs to be lowered.4 www.<strong>Woodsmith</strong>.com © 2009 August Home Publishing Co. All Rights Reserved.
Building the BoxWith the jig set up, the hard part isover, and the fun really begins. Withthis simple jig, you can build anynumber of boxes quickly. Plus,about the only adjustment you’llneed to make is to raise or lowerthe blade to accommodate differentthicknesses of stock.WIDE PIECES. When building a box,I start with all four sides of the boxplaned to finished thickness and cutto final length. But I leave them slightlyoversized in width. I don’t worryabout the final height (width) untilafter the fingers are cut, see Step 10.LABEL PIECES. With the pieces ready,the next step is to label them, seedrawing at right. I mark the bottomedge of each piece as the good edgethat I reference my cuts from. I alsonumber the corners to keep themtogether as the fingers are cut.CUTTING THE JOINTS. With the jig toguide you, cutting finger joints is justabout automatic. But you do need tokeep some things in mind.I found that it’s good to be extracareful with the very first slot that’scut in each piece, see Step 5 below.Check that there’s nothing on the jig(like sawdust) to throw off this cut;the piece should rest squarely on theledge and against the key.Then when cutting the rest of thefingers and slots, you need to be asconsistent as possible, see Steps 6-9.a.Even shifting the pressure slightlycan affect the final fit of the corner.So I hold the piece against the jigwith both hands and try to make eachpass exactly the same.CHIPOUT. I should also mentionsomething about chipout. Chipoutcan be a problem any time you cutfinger joints, but two things will help.First, make sure your blade is sharp.finger jointS: step-by-step5To begin, set the bottomedge of the piece againstthe key and hold it tight as youpass it over the blade.6Now, straddle the first slotover the key and cut a secondslot. Repeat this processacross the piece.7Next, flip the piece end-forend,keeping the bottomedge against the key. Then cutthe slots on this end.8Now, rotate the piece so thefirst slot straddles the key.Set the mating piece in place andcut its first slot.9To cut the next slot, slidethe slot just cut up tightagainst the key. Then continueas before.10After all four corners arecomplete, trim the topedge of each piece to leave a fullfinger or slot.5 www.<strong>Woodsmith</strong>.com © 2009 August Home Publishing Co. All Rights Reserved.
And second, make sure the notch inyour jig matches the height of theslots you’re cutting. This way, theworkpiece is backed up completely.FINAL HEIGHT. After the fingers arecut, I trim the top edge of the piecesso there’s a full finger (and slot) left,see Step 10. Because my blade is ahair over 1 ⁄ 8 "-thick, I usually find thisdimension ends up a little more thanthe one I’m shooting for, but for mostboxes, the final height is not critical.Of course, there are times whenthe finished height can’t be ignored.A drawer, for instance, often has tobe sized to fit a specific opening.When that’s the case, I still makethe pieces oversized and then trimthem from both the top and bottomso the fingers here are identical.BOTTOM PANEL. The next step is to addthe bottom panel, see Steps 11 and12. To cut the grooves for this panel,I use the same saw blade and set therip fence with a side piece, refer tothe drawing on page 5 and Step 11below. Set the bottom edge againstthe fence and align the blade withthe first finger. Then double checkthe setup with the end piece.ASSEMBLY. When the bottom is cutand rabbeted to fit the grooves (Step12), I dry assemble the box. Thenwhen satisfied with the fit, it’s time toglue it together, see Steps 13-16.GLUE. Dry assembling a box can bedone at a leisurely pace, but when it’stime to apply the glue, there’s no timeto dawdle. You have to get glue in allthe fingers and get the joints togetherbefore the glue sets up.To help, I apply glue to the ends ofthe pieces (margin photo). And I usea slow setting glue, like white glue orliquid hide glue. Of the two, I preferhide glue because it cleans up wellwith water and if any glue is left onthe inside corners, it doesn’t stand outmuch after an oil finish is applied.And speaking of glue on the insidecorners, I scrape it out and wipe offas much as possible with a damp ragbefore it sets up. It’s just too hard toremove after it’s dried.SEATING THE JOINT. Once the glueis applied, I drive the fingers intothe slots with oneof the test pieces thatI used earlier to set upthe finger joint jig, refer toStep 13. I’ve found that oncethe joint is seated, there’s oftenenough friction to hold the cornertogether, so I don’t even have to useany clamps.ADDING CLAMPS. However, once in awhile, I’ll have a cupped piece thatneeds to be clamped, see Step 14.In this case, I apply the clamps justinside the fingers and add a smallspacer in the middle to keep the sidesof the box from bowing in.PLUGS. When the glue is dry, thereare still a couple “clean-up” steps.First, I plug the holes left by thegrooves for the box bottom, see Step15. Then I trim them and sand thesides of the box smooth.FLATTEN BOTTOM. Finally, you maynotice the corners of the bottom ofthe box aren’t perfectly flush. But thisis an easy fix. Just attach sandpaperto a flat surface and sand the bottomof the box lightly, see Step 16.ASSEMBLING THE BOX: STEP-BY-STEP11 12Next, to hold a bottom panel,cut a groove on each piece,using a workpiece to set the fence.With the bottom panel cut tosize, rabbet its bottom edgesto create a tongue to fit the grooves.13To seat the joints after applyingglue (see margin), use amallet and one of the test pieces.{ To assemblea finger jointquickly, I runthe glue acrossthe ends ofthe fingers.14Apply clamps to the corners,if necessary. A spacer willkeep the sides from bowing in.15With the glue dry, plug theexposed grooves at the bottomof the box and trim them flush.16If necessary, apply adhesivebackedsandpaper to a flatsurface and sand the bottom flat.6 www.<strong>Woodsmith</strong>.com © 2009 August Home Publishing Co. All Rights Reserved.