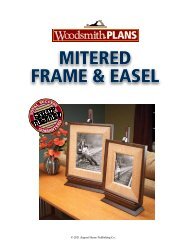
Create successful ePaper yourself
Turn your PDF publications into a flip-book with our unique Google optimized e-Paper software.
ROUTINGSMALL PARTS© 2010 August Home Publishing Co.
Tips FromOur <strong>Shop</strong><strong>Routing</strong> <strong>Small</strong> <strong>Parts</strong>These router table accessories make it easy to get safe, accurate cuts.The router table in my shopis the go-to tool for all kindsof profile and joinery work. With alarge table and a flat fence, it canhandle just about any size workpiece.However, one place wheremost router tables have trouble isrouting small workpieces.The problem is that large openingsin the tabletop and fence can causea small part to catch or dip in. Thiscan spoil the cut and be unsafe. Butthat doesn’t mean you need to giveup on routing small parts. Makingtop-notch cuts safely just requiresa little different strategy and somesimple, shop-built helpers.The Right Approach. One of the keysto routing small parts safely is toavoid it as much as possible. Nowthat doesn’t mean you can’t usesmall parts. Instead, the strategy isto do the routing on a larger blank.Then cut the part to final size at thetable saw (left margin photo).It’s a great solution, but there aretimes when it just isn’t an option.C LBDFHJLNPRTVXZ{ Rout then Rip.If possible, routthe profile on awide blank, andthen cut the partto final size at thePART NAME w/LETTERtable saw.PART NAME?%/16" THREADEDSTAR KNOB(REID SUPPLY #DK-82)SMALL-PIECESLED%/16" HEXNUTADJUSTABLESTOP(2#/4" x 6" - #/4" Ply.) CLAMP FOOT(#/4" x 1" - 2")?!/4"-20 x 3#/4"TAPEREDKNOBw/WASHER(REID SUPPLY#BTH-13)SELF-ADHESIVESANDPAPER1#/8#10 x #/4"Ph WOODSCREWTOGGLE CLAMP(REID SUPPLY #TC-227-6)BCLEATC L(#/4" x 1#/4" - 18")DFHJL!/4"FLAT WASHER NPRT%/16" x 3!/2"-LONG SLOTCENTERED V ON STOPXBASE(4!/2" x 18" - !/4" Ply.)4C LZ%/16" HOLE,CENTEREDCLAMP FOOT(HOLE SIZE)%/16" x 3"CARRIAGEBOLT!/2"ROUNDOVER#/4"-DIA.COUNTERBORE,!/4" DEEPGLUE FOOTTO BOLTWITH EPOXYSELF-ADHESIVESANDPAPERXXXXXXX!/4" -20 x 1!/2" FhMACHINE SCREW1 TOP VIEW<strong>Woodsmith</strong><strong>Shop</strong>.com PART NAME w/LETTER© 2010 August Home Publishing Co. All Rights Reserved.
When you do need to rout a detailor joint on a small part, try one ofthese shop-built accessories.<strong>Small</strong>-Piece SledI mentioned earlier that small partscan be hard to feed safely past a bit.That’s where the sled you see in theupper photos on the previous pagecomes in handy.Basically, the sled holds the workpieceso that it acts like a largerworkpiece. The larger size of thesled makes it easier to push theworkpiece past the bit. Best of all,the sled keeps your fingers wellclear of the bit.Stops. The workpiece is capturedbetween stops and then clampedsecurely to a long base. The stopsare adjustable to accommodate awide range of parts (drawing on theprevious page). This way, you canrout the edge of the part or the end.The tapered knobs that lock thestops in position serve as handlesto keep your hands clear. I alsoadded some sandpaper to the baseto provide extra grip.Toggle Clamp. To hold the workpieceagainst the base, I used atoggle clamp. I replaced the smallrubber end of the clamp with a widewood “foot,” as in the detail drawingon page 1. This added surface areagives the clamp a firmer grip. I alsoreplaced the upper nut with a starknob to make adjusting the height ofthe foot a quick and easy process.No Gaps. A piece ofhardboard forms asmooth, gap-free fenceface around the bit.Router Table Add-onsBesides building the sled, there area couple of other ways to modifyyour router table to better deal withsmall parts. Here, you have a coupleof goals. The first is to minimize anyopenings where a piece can shift.The second is to create a smoothsurface for the workpiece to ridealong without catching.Auxiliary Fence. I start with therouter table fence. If your fence hasadjustable faces, the simplest solutionis to position them as close tothe bit as possible.However, for fences with afixed bit opening, you need to findanother solution. I attached anauxiliary hardboard face withdouble-sided tape, as shown above.The fence hasa pre-cut notch toaccommodate thebearing on the bit. Then to create azero-clearance opening, simply pivotthe fence into the spinning bit (insetphotos above). Since only a smallpart of the bit is exposed, the workpiecewill always be fully supported.Smooth Tabletop. Many times, addingan auxiliary fence is enough.But you can also create a smooth,seamless tabletop and eliminate anygaps here as well.After positioning the fence, Iclamp a larger piece of hardboard tothe tabletop tight against the fence.The spinning bit will create a small,perfect-fitting notch, as you can seein the photo and inset below. Nowyou have a customized setup that’ssafe and accurate.Finally, it’s a good idea to use apush pad to guide the workpiece, asshown in the photos.These solutions take the hassleout of routing small parts, so youcan concentrate on getting smooth,crisp profiles and tight-fitting joints.{ Custom Face.Pivot the fence intothe bit to createa zero-clearancefence face.{ Seamless Surface. An auxiliary tabletop made from 1 ⁄ 4 "hardboard creates a smooth, zero-clearance worksurfacearound the router bit (inset photo).2 <strong>Woodsmith</strong><strong>Shop</strong>.com © 2010 August Home Publishing Co. All Rights Reserved.