
Create successful ePaper yourself
Turn your PDF publications into a flip-book with our unique Google optimized e-Paper software.
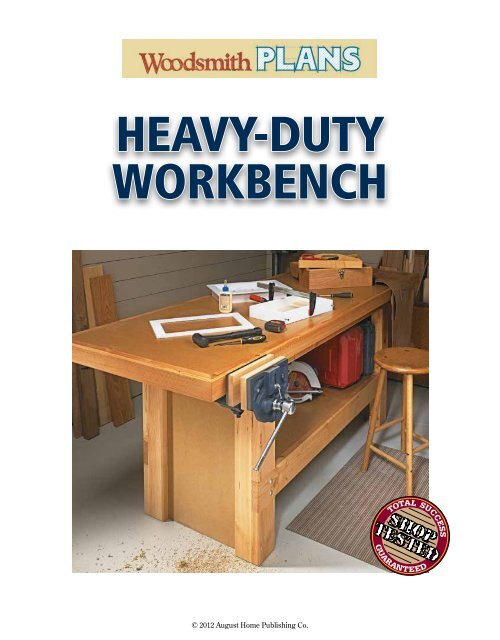
Heavy-dutyworkbench© 2012 August Home Publishing Co.
weekendworkshopheavy-dutyWorkbenchWith basic homecenter materialsand a weekend,you can build aworkbench that willlast a lifetime.What makes a great workbench?Most of us would agree it has tohave a number of key features.For starters, the base must besturdy — no wobbling allowed.And it must have a large, flat worksurfacethat’s rugged enough tostand up to years of hard use.Storage would be helpful. Andto keep the cost down, it should bebuilt out of materials that you canget anywhere. Finally, it would begreat if you could put it together ina short time, like a weekend.Sound too good to be true? Ithought so, too — but all thesemust-have features are built into theworkbench pictured above.The secret to the strength of theworkbench is selecting the rightmaterials. The base is built from“two-by” stock, and the top, shelf,and end panels are made fromMDF. I chose these materials fortheir sturdiness, low cost, and readyavailability. This means you can geteverything you need in just one tripto your local home center.The joinery is about as simple asit gets — glue and screws. But eachpiece builds on the previous one tocreate a rock-solid bench that willstand up to heavy use. This constructionalso means that buildingthe bench won’t take a lot of time.Finally, as good as this bench is,you can make it even more versatileby adding a bolt-on woodworkingvise that’s easy to installas well. This is one workbenchthat’s sure to give you years ofhard-working service.1 <strong>Woodsmith</strong>Plans.com SN08930 ©2012 August Home Publishing Co. All Rights Reserved.
ExplodedView DetailsOVERALL DIMENSIONS:32" D x 88" W x 36" Hbenchtop is builtup from fourlayers of mdffor strengthCHAMFER ONTOP AND BOTTOMSOFTENs EDGESTO PREVENTSPLINTERINGCUT-TO-FIT endfillerS BEEFUP ENDS OFBENCHTOPlOWER layersare assembledbefore attachingto topEND ASSEMBLIESARE BUILT BY"WRAPPING" LEGSAROUND MDFPANELSCARRIAGE BOLTSLOCK RAILSTO BASEbenchtop isattached to basewith screwsmdf shelfadds rigidity andprovides easyaccessstorageBASE FRAME ISCONSTRUCTED OF"TWO-BY" LUMBERvise bolts tounderside ofbenchtopmdf SHELF restson cleatsattached tolower railFACE FRAMEOVERLAPS ENDASSEMBLIES TOSTRENGTHENBASEMDF PANELSreinforce Legsto preventrackingEND SECTION viewedgingstriptO INCREASERIGIDITY,BLOCKS FORM"SHOULDERSFOR RAILStop SECTION viewWOODSCREWSand glue HOLDCLEATTO RAILfaceframecleatFor assemblingtop, see shopshort cuts onpage 7faceframelegCHAMFERSOFTENSCORNERS ANDEDGES OFFRAMESWOODSCREWSand glue ATTACHMDF PANEL TO ENDLEG ASSEMBLYCARRIAGE BOLTS ATTACHface frame RAILS TO ENDLEG ASSEMBLIES2 2 <strong>Woodsmith</strong>Plans.com SN08930 SN08216 ©2012 August Home Publishing Co. Co. All All Rights Reserved.
a.1 FIGURE a.b.building theBaseAs you can see in Figure 1 above,the base consists of two end assembliesconnected by four rails. And tokeep things simple, the base is builtin sections. I started with the endassemblies first.End Assemblies. Unlike a traditionalworkbench with four legs, the twoend assemblies act as the bench’slegs. This does two things: First, itgives the bench a rigid base, and second,the joinery is simple.Each end assembly is made up ofa pair of corner posts connected byan MDF panel, as shown in Figure 2.Each post consists of two identicalpieces that wrap around the MDFpanel. To make the posts, all youhave to do is line up the parts alongthe edge and glue them together.When the glue is dry, the cornerposts will then be ready for theMDF panels (Figure 2a). Addingthe panels is a good way toensure the assemblies stay squareand stable. The panels run the fulllength of the corner posts and areglued and screwed in place. With that rails flush with the edges of the enddone, you’re ready to attach the rails. assemblies. Some glue and a pair ofRails. The rails connect the end carriage bolts hold each end of theassemblies to create a sturdy base. rail to the end assemblies (FiguresAfter cutting them to size, line up the 1 and 1a). To provide a flat, solid2 FIGURE3 <strong>Woodsmith</strong>Plans.com SN08930 ©2012 August Home Publishing Co. All Rights Reserved.
surface for the benchtop, the upperrails are even with the tops of thecorner posts (Figure 1b).Face Blocks. Carriage bolts reinforcethe joints pretty well, but for evenmore stability, I added face blocksbetween the rails. The blocks actlike the shoulders of a mortise andtenon joint to give the frameworkmore stability and prevent it fromrocking side to side.With the base assembled, you cansoften the outside edges by routinga 1 ⁄ 4 " chamfer along the edges,as shown in the lower right photo.When you get near the carriage boltswith the router, you should take thebolts out temporarily so they won’tinterfere with your router.Cleats. At this point, the base isalmost complete. So now’s the timeto add the cleats that will hold thebenchtop and lower shelf in place.After cutting the cleats to size, Idrilled and countersunk two setsof holes in them (Figure 3). Thefirst set of holes is for the screwsthat hold the cleats to the rails.And the second set is used for thescrews that attach the benchtop andshelf to the cleats.The top cleats align flush with therail’s top edges. But the lower pairof cleats is set below the top edge of3 FIGURE a.Materials & Hardwarethe lower rails. This allows the shelfto sit flush with the lower rails andhelps protect the edges of the MDFshelf. You can see this illustrated inFigure 3b. To get the cleats positionedcorrectly along the rail, I used a scrappiece of MDF as a spacer.b.Bottom Shelf. There’s a couple offinal details to complete beforemoving on to the benchtop. Thebottom shelf has to be cut to size,and the corners need to be notchedto fit around the posts, as shown inFigure 3a. Then, you can attach theshelf by installing screws throughthe cleats into the shelf.BASEA End Posts (4) 1 1 / 2 x 3 1 / 2 - 33B End Post Faces (4) 1 1 / 2 x 3 1 / 2 - 33C End Panels (2) 20 x 33 - 3 / 4 MDFD Upper Rails (2) 1 1 / 2 x 3 - 58E Lower Rails (2) 1 1 / 2 x 5 - 58F Upper Face Blocks (4) 1 1 / 2 x 5 - 16G Lower Face Blocks (4) 1 1 / 2 x 5 - 9H Cleats (4) 1 1 / 2 x 1 1 / 2 - 48I Shelf (1) 23 x 53 1 / 2 - 3 / 4 MDFTOPJ Top Layers (2) 29 x 85 - 3 / 4 MDFK Top Edge Fillers (4) 6 x 85 - 3 / 4 MDFL Top End Fillers (4) 17 x 17 1 / 4 - 3 / 4 MDFM Front/Back Edging (2) 1 1 / 2 x 3 - 88N End Edging (2) 1 1 / 2 x 3 - 32VISEO Vise Spacer (1) 4 1 / 4 x 9 - 1 / 4 Hdbd.P Vise Faces (2) 3 / 4 x 4 1 / 4 - 9• (16) #8 x 1 1 / 2" Fh Woodscrews• (45) #8 x 1 1 / 4" Fh Woodscrews• (40) #8 x 2 1 / 2" Fh Woodscrews• (16) 3 / 8" x 3 1 / 2" Carriage Bolts• (1) 9" Bolt-on Vise• (4) 3 ⁄ 8 " x 3" Lag Screws• (2) 1 / 4" x 1" Lag Screws• (2) Machine Screws (For Vise Face)• (20) 3 ⁄ 8 " Flat Washers• (16) 3 ⁄ 8 " Hex NutsChamfer the Edges.You can temporarily remove thecarriage bolts when you’re routingthe chamfer along the edges of the base.4 <strong>Woodsmith</strong>Plans.com SN08930 ©2012 August Home Publishing Co. All Rights Reserved.
adding theTopAll the effort put into building astrong base for the workbenchwould be wasted if it didn’t have asturdy, flat benchtop to match.The first thing to note is that thetop is made from “two-by” stockand MDF. Why MDF? For starters,it provides a smooth, flat surface.Second, it’s heavy, which adds tothe stability of the workbench. Andfinally, MDF is affordable.Layers. Four layers of MDF areused to create a thick top (Figure 4).But not all the layers are full piecesof MDF. Only the two top layers arefull size. The bottom two layers aremade from pieces of MDF.By using pieces, I was able to getthese extra “layers” from a singlesheet of MDF. Installing thesepieces just along the edges of thebenchtop provides the extra thicknessright where it’s needed theFlat Top. The benchtop has fourlayers of MDF, keeping the top flatand giving it strength.most for clamping workpieces oradding accessories.Benchtop Assembly. Just like I builtthe base in sections, I also assembledthe benchtop in sections. Thetop two layers were cut to size andthen glued and screwed together.In the same way, the bottom twolayers (assembled from pieces)were completed. Once that’sdone, you can assemble the entirebenchtop. The only trick here iskeeping all the edges flush. To seehow I did this, turn to <strong>Shop</strong> ShortCuts on page 7.Edging. MDF edges aren’t all thatdurable. So to protect the edgesof the benchtop and to give theworkbench a more finished look, Iattached edging made from “twoby”stock, as in Figures 4 and 4a.And to provide a clean, finishedlook, this edging is wrapped aroundthe top with mitered corners.4 FIGURE a.5 <strong>Woodsmith</strong>Plans.com SN08930 ©2012 August Home Publishing Co. All Rights Reserved.
The challenge here is clamping theedging in place across the long top.<strong>Shop</strong> Short Cuts on page 7 shows ahandy way of doing this if you don’thave long clamps available.Installing a Vise. The workbenchis ready to use at this point. But tomake it even more versatile, youcan add a bolt-on vise like the oneshown on page 5.This type of vise only requiresfour lag screws to attach it to thebenchtop (Figure 5a). Depending onthe size of the vise, you may have toinstall a spacer between the rear jawand the benchtop.The spacer keeps the metal edgeof the vise lower than the benchtop(Figure 5a), preventing any interferencewith a workpiece or possibledamage to a tool. My spacer wassimply a piece of 1 ⁄ 4 " hardboard.I also added a set of wood faces tothe metal jaws. These faces providea more secure grip without damagingthe workpiece.For a cleaner vise installation,there’s another mounting optionthat buries the rear jaw of the visebehind the front edging strip of5 FIGURE a.the benchtop. To learn more abouthow to do this, see the box below.And that’s it. Your new workbenchis ready for many years ofserious woodworking.Optional Vise Mountinga.Another way to mount a woodworkingvise is to bury the rear jawbehind the edging, like you see inthe above photo. This allows youto clamp long pieces flat againstthe front of the workbench.Installing the vise this wayrequires a little planning. Beforeyou attach the edging, you’ll needto rout a “pocket” inthe edging that willhouse the rear jaw, asshow in detail ‘a.’Once the edging isinstalled, you can slipthe rear jaw of the viseinto the pocket andbolt it securely to thebenchtop from underneathwith lag screws.Here again, you’llneed to place a spacerbetween the vise andbenchtop (detail ‘a’).The final detail is to add a woodface to the front jaw. To matchthe look of the edging, the thicknessof the wood face is the samethickness as the edging. The faceis also longer in order to providemore clamping surface againstthe edge of the bench.6 <strong>Woodsmith</strong>Plans.com SN08930 ©2012 August Home Publishing Co. All Rights Reserved.
<strong>Shop</strong> Short CutsBuilding a Large BenchtopA large, heavy-duty workbench canpresent a couple big challenges —building the layered top and thenadding the edging.Layering the Top. The trick with thetop is keeping all the layers flushwith each other as you glue themup. To do this, I used screws tokeep everything aligned and act as“clamps.” Plus, working in stagesmakes things less hectic.I started by cutting the top twolayers to final size. Then, afterclamping them together with theedges flush, I pre-drilled all ofthe holes for the screws.With the screw holes complete,you can separate thetwo layers and spread onsome glue. A slow-set glue worksbest here. Then it’s just a matter of“clamping” the two layers togetherusing the screws.To build up the other layers, Ifollowed a similar process. First, Iglued up and installed the two longstrips along the outside edges of thetop. Then, I sized a filler block to fitin between, gluing and screwingthem in place. Be sure to stagger thescrews to avoid interfering with thescrews in the top.Add the Edging. At this point, you’reready to add the edging. My problemwas none of the clamps I hadspanned the length of the top. If youhave pipe couplers, you can simply“make” longer clamps.For my top, I tried somethingdifferent (above photo). Instead, Iconnected the clamps in a series tocreate “longer” clamps that reachedfrom one end to the other.7 <strong>Woodsmith</strong>Plans.com SN08930 ©2012 August Home Publishing Co. All Rights Reserved.
Cutting DiagramHeavy-Duty Workbench11/2 x 71/2 - 96 DOUGLAS FIR11/2 x 71/2 - 96 DOUGLAS FIR11/2 x 71/2 - 96 DOUGLAS FIR11/2 x 71/2 - 96 DOUGLAS FIR11/2 x 71/2 - 96 DOUGLAS FIR11/2 x 71/2 - 96 DOUGLAS FIR11/2 x 71/2 - 96 DOUGLAS FIR11/2 x 71/2 - 48 DOUGLAS FIR8 <strong>Woodsmith</strong>Plans.com SN08930 ©2012 August Home Publishing Co. All Rights Reserved.
49 x 97 - 3⁄4 MDF49 x 97 - 3⁄4 MDF49 x 97 - 3⁄4 MDF9 <strong>Woodsmith</strong>Plans.com SN08930 ©2012 August Home Publishing Co. All Rights Reserved.
MAILORDERSOURCES<strong>Woodsmith</strong> Store800-444-7527Rockler800-279-4441rockler.comGeneral Finishes800-783-6050generalfinishes.comProject SourcesYou can find almost all of the materialsneeded to build the heavy-duty workbenchat your local hardware storeor lumberyard. But the vise I used tocomplete the project is a 9" quick-releasewood vise (27838) from Rockler.For the finish, I used a stain mixtureof 8 oz. of boiled linseed oil, 1 tsp. ofRaw Sienna, 1 tsp. of Burnt Sienna, 1tsp. of Van Dyke Brown, 3 tsp. of YellowOchre and the finish was GeneralFinishes One-Step. The project wasbuilt using Douglas fir and MDF.10 <strong>Woodsmith</strong>Plans.com SN08930 ©2012 August Home Publishing Co. All Rights Reserved.