INSTALLATION INSTRUCTIONS Fan Coils FEM4P ... - PROFLO
INSTALLATION INSTRUCTIONS Fan Coils FEM4P ... - PROFLO
INSTALLATION INSTRUCTIONS Fan Coils FEM4P ... - PROFLO

You also want an ePaper? Increase the reach of your titles
YUMPU automatically turns print PDFs into web optimized ePapers that Google loves.
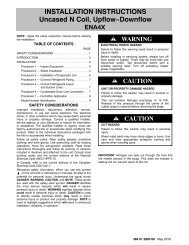
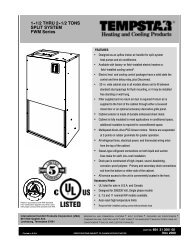
<strong>INSTALLATION</strong> <strong>INSTRUCTIONS</strong>A. LINE VOLTAGE CONNECTIONS<strong>Fan</strong> <strong>Coils</strong> installed without electric heat require the use ofa factory--authorized Power Plug Kit (accessory partnumber EBAC01PLG). This kit provides the electricalconnections necessary to supply the unit with 208/230Vpower when electric heat is not present. For units withoutelectric heat:1. Connect 208/230V power leads from fielddisconnect to yellow and black stripped leads onPower Plug (accessory part numberEBAC01PLG).2. Connect ground wire to unit ground lug.3. When installing an electric heater, remove anddiscard power plug (if equipped) from fan coil andconnect male plug from heater to female plug fromunit wiring harness. (See Electric HeaterInstallation Instructions.)<strong>Fan</strong> <strong>Coils</strong>: <strong>FEM4P</strong>, FSM4P, FSU4PB. 24V CONTROL SYSTEMConnection to UnitWire low voltage in accordance with wiring label on theblower (also refer to Figure 11 through Figure 16). Use 18AWG color--coded, insulated (35 ° C minimum) wire tomake the low--voltage connections between thethermostat, the unit, and the outdoor equipment. If thethermostat is located more than 100 feet from the unit (asmeasured along the low voltage wire), use 16 AWGcolor--coded, insulated (35 ° C minimum) wire. All wiringmust be NEC Class 1 and must be separated fromincoming power leads. Refer to outdoor unit wiringinstructions for additional wiring recommendations.Heater StagingThe controls are factory circuited for single--stageoperation (refer to Figure 12). When 2 stages aredesired, cut W3 at the W2 wire nut, strip, and reconnectaccording to the thermostat kit instruction (refer toFigure 14 -- outdoor thermostat optional). When 3 stagesare desired, cut the W2 wire nut off and discard. Strip W2,W3, and E, and reconnect according to the thermostat kitinstructions (refer to Figure 15 outdoor thermostatsoptional).! CAUTIONUNIT OPERATION HAZARDFailure to follow this caution may result inimproper product operation.If W2, W3, and E on any 3 stage heater (18, 20, 24,or 30kW) are individually connected - as withoutdoor thermostats or any other situation -emergency heat relay must be used. If relay is notused, blower may not operate when heaters areenergized.Manufactured HousingIn manufactured housing applications, the Code ofFederal Regulations, Title 24, Chapter XX, Part 3280.714requires that supplemental electric heat be locked out atoutdoor temperatures above 40_F (4_C), except for aheat pump defrost cycle. Refer to Figure 16 for typical lowvoltage wiring with outdoor thermostat.496 01 5501 00 11