Installation and Operating Instructions - Altronic Inc.
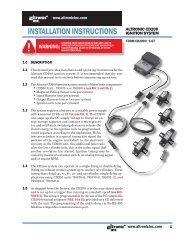
Installation and Operating Instructions - Altronic Inc.
Installation and Operating Instructions - Altronic Inc.

You also want an ePaper? Increase the reach of your titles
YUMPU automatically turns print PDFs into web optimized ePapers that Google loves.
4.0 WIRING4.1 POWERConnect the supply power wires to the 12-24Vdc input power terminals on theboard, plus to terminal (+) <strong>and</strong> minus to terminal (−); power requirement is12 to 24Vdc (10 watts max.). The DC− terminal must be connected to panelground, which should be the same as engine ground.This is the return path for normally-open sensors <strong>and</strong> must be connected forproper operation. DO NOT ground this device directly to the ignition systemcommon coil ground.4.2 SENSOR WIRING DISCRETE INPUTSThe sensor leads connect to the removable terminal strips on the terminalboard. Any discrete sensor point can be wired for normally-open or normallyclosedoperation.■■Normally-open (N/O) sensor switches are wired with one wire to the bottomterminal strip of the respective sensor number <strong>and</strong> the other to engineground which should be the same as power minus (−). A short jumperfrom the bottom terminal to the top terminal must be connected fornormally-open sensors. (see wiring diagrams)Normally-closed (N/C) sensor switches are wired with one wire to the bottomterminal strip <strong>and</strong> the other to the top terminal strip of the respectivesensor number. Note that the short jumper wire must be removed.Use a wire size between 16 AWG (max.) <strong>and</strong> 24 AWG (min.) to connect thesensor switches to the terminal strip connector. Strip the insulation back 3/8";twist the exposed wires tightly together. Insert the exposed wire completelyinto the terminal strip <strong>and</strong> securely tighten the clamping screw. Wires runningto sensor switches must be in good condition or replaced with new wires.When running wires, take care not to damage the insulation <strong>and</strong> take precautionsagainst later damage from vibration, abrasion, or liquids in conduits. Anexplosion-proof conduit is not required. However; wires should be protectedfrom damage by running them in a protective conduit or in sheaths where appropriate.In addition, it is essential that the following practices be adhered to:A. Never run sensor wires in the same conduit with ignition wiring or otherhigh energy wiring such as the AC line power.B. Keep secondary wires to spark plugs <strong>and</strong> other high voltage wiring at leasteight inches (200mm) away from sensor <strong>and</strong> sensor wiring.C. Sensor switches may be connected to any passive device using contactssuch as st<strong>and</strong>ard switch gauges, pressure or level switches. DO NOT connectsensor leads to any voltage producing element.D. If it becomes necessary to check sensor switch to panel wiring with anohmmeter or other checker, first DISCONNECT the plug-in terminal stripsfrom the Terminal Module. Applying voltage to the Modbus terminal boardthrough the sensor leads may damage the device. The area should betested as non-hazardous before such testing commences.ANALOG SENSOR WIRINGFor each analog monitored point, select a transducer—either an <strong>Altronic</strong>pressure or temperature transducer listed above or one that outputs a signalin the range of 0 to 5Vdc or 0 to 25mA. Mount as described above. Use cableassembly 693008-x or similar to wire transducer to the Modbus terminalboard. An internal 5 volt sensor supply (500mA max.) is available to power the<strong>Altronic</strong> transducers; see wiring diagrams. If the 5 volt sensor supply exits thepanel, it must be fused with a 0.5 ampere fuse. If 24Vdc powered sensors areused, the 24 volt supply to them must be fused appropriately. Take care not todamage the insulation when installing <strong>and</strong> take precautions against later damagefrom vibration, abrasion, or liquids in conduits.MTB IOI 4-12 All rights reserved © ALTRONIC, LLC 2012 4