Final Cut Pro X - Training and Certification - Apple
Final Cut Pro X - Training and Certification - Apple
Final Cut Pro X - Training and Certification - Apple

You also want an ePaper? Increase the reach of your titles
YUMPU automatically turns print PDFs into web optimized ePapers that Google loves.
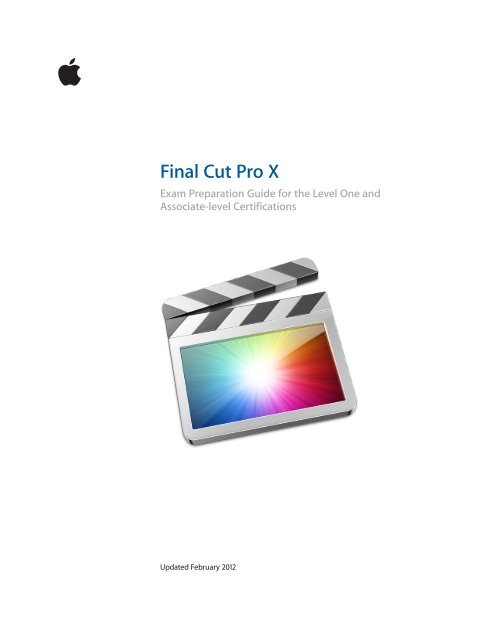
<strong>Final</strong> <strong>Cut</strong> <strong>Pro</strong> X Level One <strong>and</strong> Associate-Level Exam Preparation Guide<br />
<strong>Final</strong> <strong>Cut</strong> <strong>Pro</strong> X<br />
Exam Preparation Guide for the Level One <strong>and</strong><br />
Associate-level <strong>Certification</strong>s<br />
Updated February 2012<br />
1
<strong>Final</strong> <strong>Cut</strong> <strong>Pro</strong> X Level One <strong>and</strong> Associate-Level Exam Preparation Guide<br />
Contents<br />
About this Guide ............................................................................................................... 3<br />
Becoming an <strong>Apple</strong> Certified Associate or <strong>Apple</strong> Certified <strong>Pro</strong> .................... 3<br />
Exam Details ....................................................................................................................... 5<br />
Recommended Exam Preparation ............................................................................. 6<br />
Lesson One objectives .................................................................................................... 8<br />
Lesson Two objectives .................................................................................................... 11<br />
Lesson Three objectives ................................................................................................. 13<br />
Lesson Four objectives ................................................................................................... 15<br />
Lesson Five objectives .................................................................................................... 19<br />
Lesson Six objectives ....................................................................................................... 21<br />
Lesson Seven objectives ................................................................................................ 24<br />
Lesson Eight objectives ................................................................................................. 26<br />
Lesson Nine objectives .................................................................................................. 28<br />
Lesson Ten objectives ..................................................................................................... 31<br />
Lesson Eleven objectives ............................................................................................... 33<br />
Lesson Twelve objectives .............................................................................................. 35<br />
Taking the <strong>Final</strong> <strong>Cut</strong> <strong>Pro</strong> X certification exam ....................................................... 38<br />
<strong>Pro</strong>metric Exam FAQs ...................................................................................................... 38<br />
TM <strong>and</strong> © 2012 <strong>Apple</strong> Inc. All rights reserved. Other product <strong>and</strong> company names mentioned herein may be trademarks of<br />
their respective companies. Mention of third-party products is for information purposes only <strong>and</strong> constitutes neither an<br />
endorsement nor a warranty. <strong>Apple</strong> assumes no responsibility with regard to the selection, performance or use of these<br />
vendors or products.<br />
2
<strong>Final</strong> <strong>Cut</strong> <strong>Pro</strong> X Level One <strong>and</strong> Associate-Level Exam Preparation Guide<br />
About this Guide<br />
This guide provides all the information that you need to prepare to earn<br />
the <strong>Apple</strong> Certified Associate or <strong>Apple</strong> Certified <strong>Pro</strong> Level One status. From<br />
this guide you can:<br />
• Learn about <strong>Apple</strong> <strong>Certification</strong>.<br />
• Find out how to take an exam.<br />
• Locate resources to help you prepare for an exam.<br />
• Review the range of objectives that the exam may cover.<br />
• Get a feel for the type of questions that appear on the exam.<br />
Becoming an <strong>Apple</strong> Certified Associate or <strong>Apple</strong><br />
Certified <strong>Pro</strong><br />
The <strong>Apple</strong> <strong>Training</strong> & <strong>Certification</strong> program is designed to keep you at the<br />
forefront of <strong>Apple</strong> technology. <strong>Certification</strong> creates a benchmark to<br />
demonstrate your proficiency in specific <strong>Apple</strong> technologies <strong>and</strong> gives you<br />
a competitive edge in today’s evolving job market.<br />
<strong>Apple</strong> offers three levels of certification on <strong>Final</strong> <strong>Cut</strong> <strong>Pro</strong> X, <strong>Apple</strong> Certified<br />
Associate, <strong>Apple</strong> Certified <strong>Pro</strong> - Level One <strong>and</strong> <strong>Apple</strong> Certified <strong>Pro</strong> - Level<br />
Two. <strong>Certification</strong> exams do not require attendance at a class. Students<br />
who prefer to learn on their own or who already have the necessary skill<br />
set in the chosen application, may take an exam for a fee.<br />
<strong>Apple</strong> Certified Associate status validates basic entry level skills in a<br />
specific application. Unlike an <strong>Apple</strong> Certified <strong>Pro</strong> exam, you can take<br />
Associate exams online from the comfort of your own home or office.<br />
<strong>Apple</strong> Certified Associate status is appropriate for students, for someone<br />
who is preparing for a first job out or for college-level programs or for<br />
someone who is interested in validating entry level credentials.<br />
An <strong>Apple</strong> Certified <strong>Pro</strong> is a user who has reached the highest skill level in<br />
the use <strong>and</strong> operation of <strong>Apple</strong>’s <strong>Pro</strong> Applications as attested to by <strong>Apple</strong>.<br />
Students earn certification by passing the online certification exam<br />
administered only at <strong>Apple</strong> Authorized <strong>Training</strong> Centers (AATCs). <strong>Apple</strong><br />
Certified <strong>Pro</strong> status is appropriate for industry professionals.<br />
<strong>Apple</strong> Certified <strong>Pro</strong> - Level One attests to basic operational knowledge of<br />
a specific application. Level One exams are administered at the end of<br />
specific courses or you may take the exam at an <strong>Apple</strong> Authorized <strong>Training</strong><br />
Center (AATC) for a fee.<br />
<strong>Apple</strong> Certified <strong>Pro</strong> - Level Two attests to a deeper underst<strong>and</strong>ing of the<br />
application as well as mastery of advanced features. Level Two exams can<br />
be taken only after Level One certification is earned.<br />
Many <strong>Apple</strong> <strong>Certification</strong> exams are available in multiple languages. Even if<br />
an AATC does not offer localized courses, they can still offer localized<br />
exams. For details, visit training.apple.com/certification/localized.<br />
3
<strong>Final</strong> <strong>Cut</strong> <strong>Pro</strong> X Level One <strong>and</strong> Associate-Level Exam Preparation Guide<br />
What are the benefits of <strong>Apple</strong> <strong>Certification</strong>?<br />
Beside differentiating you as a skilled user of an <strong>Apple</strong> application,<br />
becoming an <strong>Apple</strong> Certified <strong>Pro</strong> allows you to leverage the power of the<br />
<strong>Apple</strong> br<strong>and</strong>. When you pass a <strong>Certification</strong> exam, you receive an email<br />
with a PDF copy of your <strong>Apple</strong> certificate, along with instructions on how<br />
to order a printed or a printed <strong>and</strong> framed certificate. The email includes<br />
LinkedIn, Facebook, <strong>and</strong> Twitter icons to make it easy for you to share your<br />
certification news with your networks on these sites.<br />
You also receive a login for the <strong>Apple</strong> <strong>Certification</strong> Records System, where<br />
you can:<br />
• Update your profile information <strong>and</strong> opt in to display your <strong>Apple</strong><br />
<strong>Certification</strong>(s) on the <strong>Apple</strong> Certified <strong>Pro</strong>fessionals Registry.<br />
• Review your certification progress.<br />
• Download your certification logo(s) to use on business cards, resumes,<br />
websites, <strong>and</strong> more.<br />
• <strong>Pro</strong>vide access to employers to verify your certifications.<br />
How do the Associate <strong>and</strong> Level One Exams Differ?<br />
“<strong>Final</strong> <strong>Cut</strong> <strong>Pro</strong> X” by Diana Weyn<strong>and</strong> is designed to prepare students to take<br />
either the Associate Level or Level One exam. Details on the specific exam<br />
objectives for each exam are noted in the specifics for each chapter later in<br />
this document. However, you can use the following guidelines to help<br />
determine which exam is right for you.<br />
The Associate Level exam is designed for a c<strong>and</strong>idate who meets the<br />
following prerequisites.<br />
• Limited experience with the editing process <strong>and</strong> terminology.<br />
• A student or someone who wants to validate entry level skills in<br />
preparation for an entry level job or college level programs. Once you<br />
gain more experience, you can later take the Level One exam.<br />
• Familiarity with the Macintosh operating system <strong>and</strong> software<br />
applications, including experience with navigational tools.<br />
• Entry level underst<strong>and</strong>ing of <strong>Final</strong> <strong>Cut</strong> <strong>Pro</strong> <strong>and</strong> the ability to edit a<br />
simple project, with basic operational skills to import <strong>and</strong> manage<br />
media, edit, apply effect templates, make simple color adjustments,<br />
<strong>and</strong> output a finished program.<br />
• Limited knowledge of keyboard shortcuts.<br />
The Level One exam is designed for a c<strong>and</strong>idate who meets the following<br />
prerequisites.<br />
• Knowledge of editing workflow <strong>and</strong> terminology in an industry setting.<br />
• A working professional such as an assistant editor, editor, director,<br />
producer, multimedia producer, or anyone involved in the broadcast,<br />
multimedia, video or film production or post-production process.<br />
• Very familiar with the Macintosh operating system <strong>and</strong> software<br />
applications, including experience with navigational tools.<br />
4
<strong>Final</strong> <strong>Cut</strong> <strong>Pro</strong> X Level One <strong>and</strong> Associate-Level Exam Preparation Guide<br />
• Fundamental underst<strong>and</strong>ing of <strong>Final</strong> <strong>Cut</strong> <strong>Pro</strong> <strong>and</strong> the ability to edit a<br />
complex project through completion, with operational skills to import<br />
<strong>and</strong> manage media, edit, create custom effects, apply complex manual<br />
color corrections, <strong>and</strong> output a finished program in a variety of<br />
formats.<br />
• Knowledge of keyboard shortcuts <strong>and</strong> other best practices that<br />
streamline workflow in a fast-paced professional setting.<br />
Exam Details<br />
“<strong>Final</strong> <strong>Cut</strong> <strong>Pro</strong> X” by Diana Weyn<strong>and</strong> prepares you to take one of two<br />
certification exams to earn either <strong>Apple</strong> Certified Associate or <strong>Apple</strong><br />
Certified <strong>Pro</strong> Status.<br />
Level One Exam Details<br />
The <strong>Final</strong> <strong>Cut</strong> <strong>Pro</strong> X Level One exam is a computer-based test offered at<br />
AATCs. To find the closest AATC, please visit training.apple.com/locations.<br />
Many AATCs schedule <strong>Certification</strong> Exam sessions at training.apple.com/<br />
schedule. If you don't see a session scheduled at your nearest AATC,<br />
contact the AATC <strong>and</strong> they will often schedule a session. Please note<br />
that all AATCs offer all Mac OS X <strong>and</strong> <strong>Pro</strong> Apps exams, even if they<br />
don’t offer the corresponding course.<br />
The exam timer does not start until you view the first technical question.<br />
You may not access any resources or references during the exam. Details<br />
on exam scoring are at training.apple.com/certification/faq. Some exams<br />
are also available in other languages; for details, visit training.apple.com/<br />
certification/localized.<br />
The <strong>Final</strong> <strong>Cut</strong> <strong>Pro</strong> X Level One exam details:<br />
• Exam number: 9L0-810<br />
• Number of test questions: approximately 59 technical, five<br />
demographic (unscored).<br />
• The exam uses a r<strong>and</strong>om pool of multiple-choice, fill-in-the-blank <strong>and</strong><br />
interactive-media questions.<br />
• Passing score: 80% (scores are not rounded; you must earn a score of<br />
80% or higher to pass the exam).<br />
• Exam duration: One hour thirty minutes.<br />
The exam timer does not start until you view the first technical question.<br />
You may not access any resources or references during the exam.<br />
Associate Level Exam Details<br />
The <strong>Final</strong> <strong>Cut</strong> <strong>Pro</strong> X Associate exam is an online exam that you can take<br />
from home. In addition, many schools offer this exam to their students.<br />
The <strong>Final</strong> <strong>Cut</strong> <strong>Pro</strong> X Associate Level exam details:<br />
• Exam number: 9L0-809<br />
5
<strong>Final</strong> <strong>Cut</strong> <strong>Pro</strong> X Level One <strong>and</strong> Associate-Level Exam Preparation Guide<br />
• Number of test questions: approximately 46 technical, five<br />
demographic (unscored).<br />
• The exam uses a r<strong>and</strong>om pool of multiple-choice, fill-in-the-blank <strong>and</strong><br />
interactive-media questions.<br />
• Passing score: 75% (scores are not rounded; you must earn a score of<br />
75% or higher to pass the exam).<br />
• Exam duration: One hour.<br />
The exam timer does not start until you view the first technical question.<br />
You may not access any resources or references during the exam.<br />
Recommended Exam Preparation<br />
We recommend the following exam preparation strategies:<br />
• Gain experience with the application.<br />
• Learn from experts: FCP 101: Introduction to <strong>Final</strong> <strong>Cut</strong> <strong>Pro</strong> or FCP 200:<br />
Comprehensive Study of <strong>Final</strong> <strong>Cut</strong> <strong>Pro</strong>.<br />
• Study the <strong>Apple</strong> <strong>Pro</strong> <strong>Training</strong> Series book “<strong>Final</strong> <strong>Cut</strong> <strong>Pro</strong> X” by Diana<br />
Weyn<strong>and</strong>.<br />
• Review the optional study materials.<br />
• Review the objectives <strong>and</strong> sample questions in this guide.<br />
Gain Experience with the Application<br />
Nothing can substitute for time spent learning the technology first h<strong>and</strong>.<br />
After you read the book <strong>and</strong>/or take the class, spend time increasing your<br />
familiarity with the software on your own to ensure your success on the<br />
certification exam.<br />
Learn from Experts<br />
<strong>Apple</strong> Authorized <strong>Training</strong> Centers (AATCs) offer classes where you can<br />
learn h<strong>and</strong>s-on with the technology <strong>and</strong> benefit from the expertise of<br />
<strong>Apple</strong> Certified Trainers <strong>and</strong> your peers. Visit the <strong>Apple</strong> <strong>Training</strong> &<br />
<strong>Certification</strong> website to find course offerings at nearby AATCs.<br />
Study the <strong>Apple</strong> <strong>Pro</strong> <strong>Training</strong> Series Book<br />
<strong>Apple</strong> <strong>Pro</strong> <strong>Training</strong> Series books are the basis for the related <strong>Apple</strong><br />
<strong>Certification</strong> exams. The book for this exam is <strong>Apple</strong> <strong>Pro</strong> <strong>Training</strong> Series . You<br />
can purchase the book at peachpit.com (click here for a 30% discount<br />
code). Creative Edge, an on-dem<strong>and</strong> digital library, offers subscription<br />
access to the <strong>Apple</strong> <strong>Training</strong> <strong>and</strong> <strong>Apple</strong> <strong>Pro</strong> <strong>Training</strong> Series, as well as<br />
thous<strong>and</strong>s of other reference videos <strong>and</strong> books. If you are an iPad user, an<br />
electronic version is available on the iBookstore. Some books are also<br />
available in other languages. Click here for details.<br />
Review the Optional Study Materials<br />
The following resources may also help you to prepare for your certification<br />
exam, as well as to exp<strong>and</strong> your general knowledge:<br />
6
<strong>Final</strong> <strong>Cut</strong> <strong>Pro</strong> X Level One <strong>and</strong> Associate-Level Exam Preparation Guide<br />
• Review the appropriate sections of the <strong>Final</strong> <strong>Cut</strong> <strong>Pro</strong> User Guide at:<br />
help.apple.com/helplibrary/ or launch the documentation from the<br />
Help menu when <strong>Final</strong> <strong>Cut</strong> <strong>Pro</strong> is launched.<br />
• Many online resources allow students to ask questions <strong>and</strong> learn tips<br />
<strong>and</strong> tricks. To access white papers, discussion forums, <strong>and</strong> learn about<br />
the many other online materials, visit www.apple.com/finalcutpro/<br />
resources/ <strong>and</strong> www.apple.com/finalcutpro/top-features/.<br />
• Designed for both iPad <strong>and</strong> iPhone, the Test Yourself app lets students<br />
review <strong>and</strong> assess their knowledge of the material in the <strong>Final</strong> <strong>Cut</strong> <strong>Pro</strong><br />
X Associate Level <strong>and</strong> Level One Exam. The app will be available in<br />
early 2012.<br />
• Students may also want to review the <strong>Final</strong> <strong>Cut</strong> <strong>Pro</strong> X <strong>Apple</strong> <strong>Pro</strong><br />
<strong>Training</strong> Video <strong>and</strong> “<strong>Final</strong> <strong>Cut</strong> <strong>Pro</strong> X Quick-Reference Guide” by Brendan<br />
Boykin (ISBN 0-321-69468-6). You can order the book with a 30%<br />
discount at Peachpit Press by entering discount code PP-APL-DISC at<br />
checkout.<br />
• For information on the <strong>Apple</strong> <strong>Pro</strong> <strong>Training</strong> <strong>Pro</strong>gram, visit<br />
training.apple.com/.<br />
• Read the <strong>Final</strong> <strong>Cut</strong> <strong>Pro</strong> News for information about <strong>Apple</strong> <strong>Pro</strong> Apps <strong>and</strong><br />
everything related to them.<br />
• Many third-party manufacturers create reference, troubleshooting <strong>and</strong><br />
tutorial DVDs for the novice to power user. A quick Internet search will<br />
provide you with dozens of options.<br />
• If you have any questions, you can post them to the <strong>Final</strong> <strong>Cut</strong> <strong>Pro</strong><br />
Discussion Forum, which is hosted by <strong>Apple</strong>. You can also post<br />
questions to the Yahoo group <strong>Final</strong><strong>Cut</strong><strong>Pro</strong>-L. You can join at the<br />
following link: movies.groups.yahoo.com/group/<strong>Final</strong><strong>Cut</strong><strong>Pro</strong>-L/.<br />
Review the Objectives <strong>and</strong> Review Questions<br />
Even if you’re self-taught or have taken courses that do not use the <strong>Apple</strong><br />
<strong>Pro</strong> <strong>Training</strong> Series curriculum, you can still prepare yourself for the<br />
certification exam by making sure that you can complete all the tasks <strong>and</strong><br />
answer all the review questions in the following sections.<br />
The Exam Objectives describe the knowledge domains assessed by the<br />
exam. The Review Questions summarize what you should have learned in<br />
each chapter. Please note that although this guide divides the objectives<br />
into lessons or knowledge areas, questions are presented r<strong>and</strong>omly during<br />
the exam. The objectives indicate which topics are not included on the<br />
Associate Level exam.<br />
The number of test questions drawn from each knowledge area is<br />
indicated for each of the following lessons. Please note that although this<br />
guide divides the objectives into 12 lessons or knowledge areas, questions<br />
are presented r<strong>and</strong>omly during the exam.<br />
7
<strong>Final</strong> <strong>Cut</strong> <strong>Pro</strong> X Level One <strong>and</strong> Associate-Level Exam Preparation Guide<br />
Lesson One objectives<br />
Upon completion of Lesson One, “Preparing to Edit in <strong>Final</strong> <strong>Cut</strong> <strong>Pro</strong> X” in<br />
“<strong>Final</strong> <strong>Cut</strong> <strong>Pro</strong> X,” you should be able to complete the following tasks. Eight<br />
items from this lesson are included in the pool of Level One exam<br />
questions; six items from this lesson are included in the pool of Associatelevel<br />
exam questions. Questions are drawn r<strong>and</strong>omly from the following<br />
objectives:<br />
• Overview of <strong>Final</strong> <strong>Cut</strong> <strong>Pro</strong> X Workflow<br />
• Open <strong>Final</strong> <strong>Cut</strong> <strong>Pro</strong><br />
• Explore the <strong>Final</strong> <strong>Cut</strong> <strong>Pro</strong> Interface<br />
• Work with shortcut menus <strong>and</strong> modifier keys<br />
• View, Sort <strong>and</strong> Select Events<br />
• Skim Clips<br />
• Change <strong>and</strong> adjust views in the Event Browser<br />
• Organize the <strong>Pro</strong>ject Library<br />
• Navigate <strong>Pro</strong>jects in the Timeline<br />
• Use the J, K, <strong>and</strong> L keys to navigate clips at different speeds<br />
• Hide <strong>and</strong> Quit <strong>Final</strong> <strong>Cut</strong> <strong>Pro</strong><br />
Please note that all learning objectives in this lesson, including the<br />
keyboard shortcuts, are included in the Associate Level Exam.<br />
Lesson One review questions<br />
After completing Lesson One, you should be able to answer the following<br />
questions.<br />
1. Describe three ways to open <strong>Final</strong> <strong>Cut</strong> <strong>Pro</strong>.<br />
2. Which four modifier keys are often used in conjunction with<br />
keyboard shortcuts to initiate functions or comm<strong>and</strong>s?<br />
3. How do you access a shortcut menu?<br />
4. What is an Event?<br />
5. How do you skim through a clip in the Event Browser?<br />
6. How do you set the Event Browser display so that a single<br />
thumbnail represents each clip?<br />
7. In addition to clicking the Play button, which keys on your<br />
keyboard can you press to play a clip or sequence forward?<br />
8. Which keys move the playhead forward or backward in oneframe<br />
increments in the Viewer <strong>and</strong> Timeline?<br />
9. What indicator in the Viewer window indicates that the<br />
playhead is on the first or last frame of an edited clip in the<br />
Timeline?<br />
8
<strong>Final</strong> <strong>Cut</strong> <strong>Pro</strong> X Level One <strong>and</strong> Associate-Level Exam Preparation Guide<br />
10. In the Event Browser, how do you toggle a clip’s audio<br />
waveforms on or off?<br />
11. What are the keyboard shortcuts to hide <strong>and</strong> quit <strong>Final</strong> <strong>Cut</strong><br />
<strong>Pro</strong>?<br />
Answers<br />
1. Double-click the application in the Applications folder; click<br />
the icon in the Dock; or from Launchpad, or click the <strong>Final</strong> <strong>Cut</strong><br />
<strong>Pro</strong> icon.<br />
2. The Shift, Control, Option, <strong>and</strong> Comm<strong>and</strong> keys<br />
3. Control-click or right-click an item.<br />
4. An Event is similar to a folder that holds video clips, audio<br />
clips, <strong>and</strong> still images. Each Event in the Event Library refers to<br />
a folder on a connected disk that contains the original source<br />
media files, any related render files, <strong>and</strong> a database file that<br />
tracks where everything is. When you import or record into<br />
<strong>Final</strong> <strong>Cut</strong> <strong>Pro</strong>, the source media files are stored in Events.<br />
5. In the Event Browser, move your pointer from one side of the<br />
clip thumbnail to the other. The skimmer travels as you move<br />
through the thumbnail, <strong>and</strong> the clip appears in the Viewer.<br />
6. Set the Duration Slider to All.<br />
7. The Spacebar <strong>and</strong> the L key.<br />
8. The Left Arrow <strong>and</strong> Right Arrow keys.<br />
9. An L in the lower left means you’re on the first frame of the<br />
edited clip, <strong>and</strong> a reverse L in the lower right means you’re on<br />
the last frame.<br />
10. In the Event Browser, click the Clip Appearance button. In the<br />
Clip Appearance pop-up, deselect Show Waveforms.<br />
11. Press Comm<strong>and</strong>-H to hide the application, <strong>and</strong> press<br />
Comm<strong>and</strong>-Q to quit the application.<br />
9
<strong>Final</strong> <strong>Cut</strong> <strong>Pro</strong> X Level One <strong>and</strong> Associate-Level Exam Preparation Guide<br />
Keyboard Shortcuts<br />
Control-click or<br />
right-click<br />
Open shortcut menu<br />
F Label clip or selection as a Favorite<br />
A Choose the Select tool<br />
Comm<strong>and</strong>-0 Show/Hide <strong>Pro</strong>ject Library<br />
Comm<strong>and</strong>-5 Show/Hide the Effects Browser<br />
Option-Shift-N Show/Hide Clip Names<br />
S Turn skimming off or on<br />
Shift-S Turn audio skimming off or on<br />
Space bar Start or pause playback<br />
J Play a clip or project backward<br />
K Stop a clip or project<br />
L Play a clip or project forward<br />
J-K Play backward in slow motion<br />
K tap J Move playhead one frame to the left<br />
K-L Play forward in slow motion<br />
K tap L Move playhead one frame to the right<br />
Shift-Space bar Play clip or project in reverse<br />
Return Open the selected project into the Timeline<br />
Home Position the playhead at the head of the<br />
project<br />
End Position the playhead at the end of the project<br />
Down Arrow Move the playhead forward in the Timeline to<br />
the head of the next clip or edit point, or in the<br />
Event Browser, select the next clip<br />
Up Arrow Move the playhead backward in the Timeline<br />
to the head of the previous clip or edit point,<br />
or in the Event Browser, select the previous clip<br />
Left Arrow Move the playhead backward 1 frame<br />
Right Arrow Move the playhead forward 1 frame<br />
Shift-Left Arrow Move the playhead backward 10 frames<br />
Shift-Right Arrow Move the playhead forward 10 frames<br />
Comm<strong>and</strong>-H Hide <strong>Final</strong> <strong>Cut</strong> <strong>Pro</strong><br />
Comm<strong>and</strong>-Q Quit <strong>Final</strong> <strong>Cut</strong> <strong>Pro</strong><br />
10
<strong>Final</strong> <strong>Cut</strong> <strong>Pro</strong> X Level One <strong>and</strong> Associate-Level Exam Preparation Guide<br />
Lesson Two objectives<br />
Upon completion of Lesson One, “Importing” in “<strong>Final</strong> <strong>Cut</strong> <strong>Pro</strong> X,” you<br />
should be able to complete the following tasks. Ten items from this lesson<br />
are included in the pool of Level One exam questions; three items from<br />
this lesson are included in the pool of Associate-level exam questions.<br />
Questions are drawn r<strong>and</strong>omly from the following objectives:<br />
• Create a new Event<br />
• Import files<br />
• Import files as Keyword Collections<br />
• Transcode media during import<br />
• Analyze video <strong>and</strong> audio during import<br />
• Import from a camera or camera card<br />
• Create a camera archive<br />
• Import stills, music, <strong>and</strong> other projects<br />
Please note that all learning objectives in this lesson are included in the<br />
Associate Level Exam. However, the Associate Level Exam does not include<br />
any of the keyboard shortcuts used in this lesson.<br />
Lesson Two review questions<br />
After completing Lesson Two, you should be able to answer the following<br />
questions.<br />
1. How do you create a new Event?<br />
2. How do you import media files into an Event?<br />
3. What happens if you select the Find People option when<br />
importing media?<br />
4. If you select the “Analyze for Balance Color” option when<br />
importing media, how do you view the color balance<br />
correction?<br />
5. How would you automatically identify a clip that displays<br />
excessive shaking from a h<strong>and</strong>held camera?<br />
6. What are the advantages to transcoding your media files?<br />
7. How do you set importing options if you want to drag media<br />
files directly from the Finder or another application to an<br />
Event?<br />
8. How do you create a Keyword Collection when importing<br />
clips from a specific folder?<br />
9. What are the four ways to access the Import From Camera<br />
window?<br />
10. Why would you want to create a camera archive as a backup?<br />
11
<strong>Final</strong> <strong>Cut</strong> <strong>Pro</strong> X Level One <strong>and</strong> Associate-Level Exam Preparation Guide<br />
Answers<br />
1. If you don’t see the Event Library, click the Event Library<br />
button at the bottom-left corner of the Event Browser.<br />
Choose File > New Event (or press Option-N).<br />
2. Select an Event <strong>and</strong> click the Import Files button in the Event<br />
Browser, choose File > Import, use a keyboard shortcut, or<br />
Control-click the Event in the Event Library.<br />
3. The Find People option analyzes images <strong>and</strong> creates Keyword<br />
Collections based on the number of people present <strong>and</strong> the<br />
shot type. After analysis, any of the following keywords are<br />
added: One Person, Two Persons, Group, Close Up Shot,<br />
Medium Shot, <strong>and</strong> Wide Shot.<br />
4. In the toolbar, click the Inspector button. Click the Video tab<br />
in the Inspector <strong>and</strong> select the box next to Balance to enable<br />
the color balance effect.<br />
5. Select the “Analyze for stabilization <strong>and</strong> rolling shutter” option<br />
when you import the clips. <strong>Final</strong> <strong>Cut</strong> <strong>Pro</strong> will perform a<br />
stabilization analysis <strong>and</strong> apply a keyword to any clip with<br />
excessive shaking.<br />
6. <strong>Final</strong> <strong>Cut</strong> <strong>Pro</strong>’s transcoding optimizes media for better editing<br />
<strong>and</strong> rendering performance <strong>and</strong> improved color quality. The<br />
transcode process copies your original media files using<br />
<strong>Apple</strong>’s <strong>Pro</strong>Res digital intermediate codecs while retaining the<br />
original media files.<br />
7. To import without using the Import comm<strong>and</strong>, you set the<br />
specific import options before you import. Choose <strong>Final</strong> <strong>Cut</strong><br />
<strong>Pro</strong> > Preferences, or press Comm<strong>and</strong>-, (comma). At the top of<br />
the Preferences window, click the Import button <strong>and</strong> set your<br />
options.<br />
8. Make sure that the “Import folders as Keyword Collections”<br />
option is selected in the Import dialog to create a Keyword<br />
Collection for each media folder you import. This is the<br />
default option.<br />
9. Click the Import From Camera button in the Event Browser,<br />
click the Import media from connected device button<br />
(appears as a camera with a plus sign) in the toolbar, choose<br />
File > Import From Camera, or press Comm<strong>and</strong>-I.<br />
10. A camera archive frees your camera or capture media for<br />
reuse, preserves <strong>and</strong> protects your media for future use, <strong>and</strong><br />
helps preserve the data structure used by your camera to<br />
make it easier to store <strong>and</strong> access your files.<br />
12
<strong>Final</strong> <strong>Cut</strong> <strong>Pro</strong> X Level One <strong>and</strong> Associate-Level Exam Preparation Guide<br />
Keyboard Shortcuts<br />
Option-N<br />
Create new Event<br />
Comm<strong>and</strong>-A Select all items in the current folder or location<br />
Shift-click Select a group of contiguous items<br />
Comm<strong>and</strong>-click Select a group of noncontiguous items<br />
Comm<strong>and</strong>-Shift-I Open the Import Files window<br />
Comm<strong>and</strong>-9 Open <strong>and</strong> close the Background Tasks window<br />
Comm<strong>and</strong>-4 Open <strong>and</strong> close the Inspector<br />
Comm<strong>and</strong>-W Close an active window<br />
Comm<strong>and</strong>-I Open the Import From Camera window<br />
Comm<strong>and</strong>-, (comma) Open the <strong>Final</strong> <strong>Cut</strong> <strong>Pro</strong> Preferences window<br />
Lesson Three objectives<br />
Upon completion of Lesson Three, “Organizing Clips in an Event” in “<strong>Final</strong><br />
<strong>Cut</strong> <strong>Pro</strong> X,” you should be able to complete the following tasks. Eight items<br />
from this lesson are included in the pool of Level One exam questions; five<br />
items from this lesson are included in the pool of Associate-level exam<br />
questions. Questions are drawn r<strong>and</strong>omly from the following objectives:<br />
• Underst<strong>and</strong> metadata<br />
• Use metadata to customize Events<br />
• Add keywords to clips<br />
• Assign multiple keywords to clips<br />
• Apply keywords to a clip range<br />
• Rate clips <strong>and</strong> clip selections<br />
• Sort <strong>and</strong> search using metadata<br />
• Add notes to clips<br />
• Create Smart Collections<br />
Please note that all learning objectives in this lesson are included in the<br />
Associate Level Exam. However, the Associate Level Exam does not include<br />
any of the keyboard shortcuts used in this lesson.<br />
Lesson Three review questions<br />
After completing Lesson Three, you should be able to answer the following<br />
questions.<br />
1. In the Event Browser, what is indicated by a horizontal purple<br />
or blue line across the top of a clip?<br />
2. Name three methods that allow you to add a keyword to one<br />
or more clips.<br />
13
<strong>Final</strong> <strong>Cut</strong> <strong>Pro</strong> X Level One <strong>and</strong> Associate-Level Exam Preparation Guide<br />
3. How do you add a keyword to only the selected clip range?<br />
4. How do you delete a keyword from one or more clips?<br />
5. Describe how to add a note to a clip in the Event Browser.<br />
6. How do you view only those clips that were rated as<br />
Favorites?<br />
7. How do you rate a clip?<br />
8. What is the difference between a Keyword Collection <strong>and</strong> a<br />
Smart Collection?<br />
9. How do you create a Smart Collection?<br />
10. How do you search for a clip that isn’t part of a Keyword<br />
Collection?<br />
Answers<br />
1. A purple line indicates that a clip received a keyword during<br />
analysis; a blue line indicates that a keyword was applied to a<br />
clip.<br />
2. Select clips in the Event Browser, click the Keyword Editor<br />
button, or press Comm<strong>and</strong>-K. Then type your keyword, <strong>and</strong><br />
press Return. If you created a keyword shortcut, you can<br />
select clips <strong>and</strong> press the shortcut. You can also drag clips<br />
from the Event Browser to an existing Keyword Collection in<br />
the Event Library.<br />
3. Skim a clip in the Event Browser <strong>and</strong> press I to set a Selection<br />
Start <strong>and</strong> O to mark a Selection End. Then use one of the<br />
three available methods to add a keyword.<br />
4. In the Event Browser, select a range for one or more clips.<br />
Choose Mark > Remove All Keywords, or press Control-0.<br />
5. Select a clip, click in the Note column field in the Event<br />
Browser, enter your text, <strong>and</strong> press Return.<br />
6. In the Event Library, select the Events you want to search.<br />
Choose Favorites from the Filter pop-up menu at the top of<br />
the Event Browser.<br />
7. In the Event Browser, select one or more clips. Click the<br />
Favorite button in the toolbar, or press the F key, or click the<br />
Reject button in the toolbar, or press the Delete key. In the<br />
Event Browser, a green line appears at the top of favorite<br />
frames <strong>and</strong> a red line appears at the top of rejected frames.<br />
8. A Keyword Collection gathers all clips to which you or <strong>Final</strong><br />
<strong>Cut</strong> <strong>Pro</strong> assigned a specific keyword. A Smart Collection<br />
gathers all clips that match multiple search criteria. Unlike<br />
Keyword Collections, which are text based, Smart Collections<br />
can be based on camera metadata, such as frame rate or size.<br />
Clips can be assigned to multiple Keyword Collections <strong>and</strong><br />
Smart Collections.<br />
14
<strong>Final</strong> <strong>Cut</strong> <strong>Pro</strong> X Level One <strong>and</strong> Associate-Level Exam Preparation Guide<br />
9. Select an Event <strong>and</strong> use the Filter window to search for clips<br />
based on specified criteria. In the Filter window, click the New<br />
Smart Collection button. A new, untitled Smart Collection<br />
appears in the Event Library. Type a name for the Smart<br />
Collection, <strong>and</strong> press Return.<br />
10. In the search field, enter the clip name. Only clips with<br />
matching text in their names or notes will appear in the list.<br />
Keyboard Shortcuts<br />
Comm<strong>and</strong>-A Select all items in the current folder or location<br />
Comm<strong>and</strong>-F Show the Filter window (does not hide it)<br />
Comm<strong>and</strong>-K Show or hide the Keyword Editor<br />
Comm<strong>and</strong>-Shift-K Create a new Keyword Collection<br />
Comm<strong>and</strong>-Z Undo the last comm<strong>and</strong><br />
Comm<strong>and</strong>-Delete Move the selection to the Finder Trash<br />
Option-N Create a new Event<br />
I Set the start point for a selection<br />
O Set the end point for a selection<br />
Left-Arrow Move the playhead to the previous frame<br />
Right-Arrow Move the playhead to the next frame<br />
Slash (/) Play the selection<br />
Spacebar Start or pause playback<br />
Control-F Show Favorite clips <strong>and</strong> ranges<br />
Control-H Hide rejected clips <strong>and</strong> ranges<br />
Control-Y Show or hide clip information when skimming<br />
in the Event Browser<br />
U Remove ratings from the selection<br />
Delete Reject the Event Browser selection<br />
Lesson Four objectives<br />
Upon completion of Lesson Four, “Building the Rough <strong>Cut</strong>” in “<strong>Final</strong> <strong>Cut</strong> <strong>Pro</strong><br />
X,” you should be able to complete the following tasks. Seven items from<br />
this lesson are included in the pool of Level One exam questions; seven<br />
items from this lesson are included in the pool of Associate-level exam<br />
questions. Questions are drawn r<strong>and</strong>omly from the following objectives:<br />
• Work with projects<br />
• Screen <strong>and</strong> mark clips<br />
• Use the append edit option<br />
15
<strong>Final</strong> <strong>Cut</strong> <strong>Pro</strong> X Level One <strong>and</strong> Associate-Level Exam Preparation Guide<br />
• Arrange clips in the Timeline<br />
• Work with the Magnetic Timeline<br />
• Insert clips<br />
• Use drag-<strong>and</strong>-drop editing<br />
• Make changes to project clips<br />
• Track changes <strong>and</strong> create backups<br />
• Connect clips to the primary storyline<br />
Please note that all learning objectives in this lesson are included in the<br />
Associate Level Exam. However, the Associate Level Exam does not include<br />
any of the keyboard shortcuts used in this lesson.<br />
Lesson Four review questions<br />
After completing Lesson Four, you should be able to answer the following<br />
questions.<br />
1. What methods can you use to create a new project?<br />
2. What four different methods allow you to edit clips into your<br />
project?<br />
3. What is an append edit?<br />
4. How can you zoom in or out of an area of the Timeline?<br />
5. How do you change the display size of the clips in the<br />
Timeline?<br />
6. How can you view a list of all clips in the project in the<br />
Timeline?<br />
7. How can you quickly adjust a clip’s volume in the Timeline?<br />
8. How can you mute specific audio tracks for a clip in the<br />
Timeline?<br />
9. Why would you want to select the Duplicate <strong>Pro</strong>ject <strong>and</strong><br />
Referenced Events option when duplicating a project?<br />
10. How can you toggle snapping on or off?<br />
11. When you drag clips to rearrange their positions in the<br />
Timeline, what visual indicator shows where the clip will be<br />
positioned when you release the mouse button?<br />
12. How would you connect music or B-roll to the primary<br />
storyline in your Timeline?<br />
Answers<br />
1. Click the New <strong>Pro</strong>ject button (plus sign); Control-click a folder<br />
or drive, <strong>and</strong> from the shortcut menu, choose New <strong>Pro</strong>ject; or<br />
select the target location, <strong>and</strong> choose File > New <strong>Pro</strong>ject, or<br />
press Comm<strong>and</strong>-N.<br />
16
<strong>Final</strong> <strong>Cut</strong> <strong>Pro</strong> X Level One <strong>and</strong> Associate-Level Exam Preparation Guide<br />
2. To create an edit, click an edit button in the toolbar; choose<br />
an editing comm<strong>and</strong> from the Edit menu, such as Append;<br />
press a keyboard shortcut; drag a clip from the Event<br />
Browser, from a media browser such as the Photos Browser, or<br />
from the Finder.<br />
3. An append edit adds one or more clips to the end of a<br />
project or storyline. insertion<br />
4. Press Comm<strong>and</strong>-= (equal sign) to zoom in, <strong>and</strong> press<br />
Comm<strong>and</strong>-– (minus sign) to zoom out. You can also zoom in<br />
<strong>and</strong> out by dragging the Zoom control in the lower right of<br />
the Timeline.<br />
5. Click the Clip Appearance button in the lower-right corner of<br />
the Timeline. In the Clip Appearance window, drag the Clip<br />
Height slider to the left to decrease the clip height, or to the<br />
right to increase the clip height.<br />
6. In the lower-left corner of the Timeline, click the Timeline<br />
Index button, or press Comm<strong>and</strong>-Shift-2. The Timeline Index<br />
pane appears to the left of the Timeline <strong>and</strong> displays clips <strong>and</strong><br />
tags (such as keywords) used in the current project in their<br />
order of appearance.<br />
7. Position your pointer over the volume line in the Timeline.<br />
When the pointer turns into a vertical resize pointer, drag<br />
down to lower the volume or drag up to raise it. To facilitate<br />
your adjustments, turn on audio waveforms in the Clip<br />
Appearance window. Audio that approaches peak levels<br />
appears yellow in the waveform; audio that exceeds peak<br />
levels appears red.<br />
8. Select the clip in the Timeline, click the Inspector button in<br />
the toolbar, <strong>and</strong> then click the Audio tab <strong>and</strong> deselect the<br />
appropriate tracks.<br />
9. You would select this option when you want to copy the<br />
project <strong>and</strong> all of the source clips in the associated Events to<br />
another hard disk.<br />
10. Click the Snapping button in the Timeline, press N, or choose<br />
View > Snapping.<br />
11. A blue insertion line indicates where clips will be placed.<br />
12. Position the playhead in the Timeline where you want to<br />
connect one or more clips. Select the clips in the Event<br />
Browser. In the toolbar, click the Connect button, or press Q. A<br />
blue insertion line in the Timeline indicates the connection<br />
point.<br />
17
<strong>Final</strong> <strong>Cut</strong> <strong>Pro</strong> X Level One <strong>and</strong> Associate-Level Exam Preparation Guide<br />
Keyboard Shortcuts<br />
N Turn snapping off <strong>and</strong> on<br />
Comm<strong>and</strong>-N Create a new project<br />
Comm<strong>and</strong>-F Open the Filter window<br />
, (comma) Move selection to the left 1 frame<br />
. (period) Move selection to the right 1 frame<br />
Shift-, (comma) Move selection to the left 10 frames<br />
Shift-. (period) Move selection to the right 10 frames<br />
Comm<strong>and</strong>-0 (zero) Open the <strong>Pro</strong>ject Library<br />
Comm<strong>and</strong>-1 Go to the Event Browser<br />
Comm<strong>and</strong>-2 Go to the Timeline<br />
Comm<strong>and</strong>-Shift-2 Open the Timeline Index<br />
Comm<strong>and</strong>-- (minus) Zoom out of the Timeline, Event Browser, or<br />
Viewer<br />
Comm<strong>and</strong>-= (equal<br />
sign)<br />
Zoom in to the Timeline, Event Browser, or<br />
Viewer<br />
Shift-I Move the playhead <strong>and</strong> skimmer to the<br />
beginning of the range selection<br />
Shift-O Move the playhead <strong>and</strong> skimmer to the end of<br />
the range selection<br />
Shift-Z Zoom the contents to fit the size of the Event<br />
Browser, the Viewer, or the Timeline<br />
Shift-S Toggle audio skimming<br />
S Toggle video <strong>and</strong> audio skimming<br />
Q Connect to primary storyline<br />
W Insert<br />
E Append to storyline<br />
F Rate selection as Favorite<br />
J Play reverse<br />
K Stop<br />
L Play forward<br />
I Set selection start point<br />
O Set selection end point<br />
Spacebar Play/Pause<br />
18
<strong>Final</strong> <strong>Cut</strong> <strong>Pro</strong> X Level One <strong>and</strong> Associate-Level Exam Preparation Guide<br />
Lesson Five objectives<br />
Upon completion of Lesson Five, “Finishing the Rough <strong>Cut</strong>” in “<strong>Final</strong> <strong>Cut</strong> <strong>Pro</strong><br />
X,” you should be able to complete the following tasks. Four items from<br />
this lesson are included in the pool of Level One exam questions; three<br />
items from this lesson are included in the pool of Associate-level exam<br />
questions. Questions are drawn r<strong>and</strong>omly from the following objectives:<br />
• Add markers to project clips<br />
• Connect clips to the primary storyline<br />
• Replace clips<br />
• Overwrite clips<br />
• Audition clips<br />
• Create <strong>and</strong> change new storylines<br />
Please note that the Associate Level Exam does not include any questions<br />
on auditions or any of the keyboard shortcuts used in this lesson.<br />
Lesson Five review questions<br />
After completing Lesson Five, you should be able to answer the following<br />
questions.<br />
1. How can you add a marker to the Timeline <strong>and</strong> name it?<br />
2. How do you move to a specific marker in the Timeline?<br />
3. How do you disable the audio <strong>and</strong>/or video for a specific clip?<br />
4. How do you move a connection line for a clip that is<br />
connected to the primary storyline without moving the clip?<br />
5. How do you create a to-do market in the Timeline?<br />
6. How does an overwrite edit differ from a replace edit?<br />
7. How do you create an audition in the Timeline?<br />
8. How do you utilize the audition feature?<br />
9. How do you create a new storyline that is connected to your<br />
primary storyline?<br />
Answers<br />
1. Skim to where you want to create a marker <strong>and</strong> choose Mark<br />
> Markers > Add Marker or press M. Double-click a marker to<br />
rename it. In the Marker pop-up window, enter a name in the<br />
Text field, <strong>and</strong> click Done. Alternatively, press Option-M to<br />
create a marker <strong>and</strong> open the Marker window in one step.<br />
2. In the lower-left corner of the Timeline window, click the<br />
Timeline index button. In the Timeline index, click Tags then<br />
click the Markers button. Click a marker in the list to move the<br />
playhead to that marker’s location.<br />
3. Control-click a clip <strong>and</strong> choose Disable from the shortcut<br />
menu or press V or select the clip <strong>and</strong> choose Clip > Disable.<br />
19
<strong>Final</strong> <strong>Cut</strong> <strong>Pro</strong> X Level One <strong>and</strong> Associate-Level Exam Preparation Guide<br />
4. Skim to the desired location in the Timeline <strong>and</strong> Comm<strong>and</strong>-<br />
Option-click to move the connection line.<br />
5. Skim to the desired location in the Timeline, press Option-M.<br />
In the Marker window, enter a name, click Make To Do Item,<br />
<strong>and</strong> click Done. The to-do marker appears red on the clip.<br />
6. Drag a clip from the Event Browser to the clip that you want<br />
to replace. When the clip receives a white outline <strong>and</strong> a green<br />
circle with a plus sign appears, release the clip. From the<br />
shortcut menu, choose Replace. This new clip replaces the<br />
original clip <strong>and</strong> the project duration adjusts to<br />
accommodate the new clip’s range or duration.<br />
7. An overwrite edit overwrites one or more clips in a storyline,<br />
starting at a range selection start point or at the playhead or<br />
skimmer position. Use an overwrite edit when you want to<br />
edit media for a specific span of time. No clips ripple, so the<br />
project duration remains the same. In contrast to overwrite<br />
edits, replacing only works on whole Timeline clips <strong>and</strong> can<br />
change the project duration.<br />
8. Drag a clip from the Event Browser to a clip in the Timeline<br />
that you want to include in the audition. When the clip<br />
highlights with a white outline <strong>and</strong> a green circle with a plus<br />
sign appears, release the clip. In the shortcut menu, choose<br />
Add to Audition. A small spotlight icon in the clip name area<br />
indicates that the clip is part of an audition. To add additional<br />
clips, simply repeat this process.<br />
9. Click the Audition spotlight icon to open the Audition<br />
window. Press the Right or Left Arrow keys to switch to the<br />
next alternate clip, <strong>and</strong> skim through its thumbnail display.<br />
Continue to press the Left or Right Arrow keys to switch to<br />
alternate audition clips.<br />
10. Select the clips that you want to include in the new Storyline,<br />
Right-click the selection, <strong>and</strong> from the shortcut menu, choose<br />
Create Storyline, or press Comm<strong>and</strong>-G.<br />
Keyboard Shortcuts<br />
M Set a marker in the Timeline ruler; when on a<br />
marker, open the Edit Marker dialog<br />
Comm<strong>and</strong>-Y Create audition clips<br />
Comm<strong>and</strong>-Control-Y Preview the audition clips<br />
Shift-Option-Y <strong>Final</strong>ize the audition<br />
Comm<strong>and</strong>-G Create a storyline<br />
Shift-Delete Lift the Timeline selection <strong>and</strong> leave a gap<br />
Delete Remove the Timeline selection <strong>and</strong> ripple the<br />
following edits up the duration of the gap<br />
20
<strong>Final</strong> <strong>Cut</strong> <strong>Pro</strong> X Level One <strong>and</strong> Associate-Level Exam Preparation Guide<br />
Control-’ (apostrophe) Move the playhead to the next marker<br />
Control-; (semi-colon) Move the playhead to the previous marker<br />
Control-M Delete marker at current playhead location<br />
Double-click Open a marker’s Edit Marker dialog<br />
Comm<strong>and</strong>-Shift-1 Close the Event Library<br />
Lesson Six objectives<br />
Upon completion of Lesson Six, “Fine-tuning the Rough <strong>Cut</strong>” in “<strong>Final</strong> <strong>Cut</strong><br />
<strong>Pro</strong> X,” you should be able to complete the following tasks. Two items from<br />
this lesson are included in the pool of Level One exam questions; four<br />
items from this lesson are included in the pool of Associate-level exam<br />
questions. Questions are drawn r<strong>and</strong>omly from the following objectives:<br />
• Remove selected ranges<br />
• Duplicate a project<br />
• Add gap clips<br />
• Use the Range Selection tool<br />
• Underst<strong>and</strong> trimming<br />
• Ripple trim with the Select tool<br />
• Ripple <strong>and</strong> roll trim with the Trim tool<br />
• Precision trimming<br />
• Slip a clip<br />
• Slide a clip<br />
• Extend edit points<br />
Please note that the Associate Level Exam does not include any questions<br />
on extend edits or any of the keyboard shortcuts used in this lesson.<br />
Lesson Six review questions<br />
After completing Lesson Six, you should be able to answer the following<br />
questions.<br />
1. How do you remove a single clip from the Timeline without<br />
leaving a gap?<br />
2. How do you insert a gap clip into the Timeline to act as a<br />
placeholder?<br />
3. How do you choose the Range Selection tool to select a<br />
range in the Timeline?<br />
4. What happens when you ripple trim the outgoing clip by<br />
dragging to the right?<br />
5. Which two sets of shortcut keys allow you to adjust edit<br />
points one frame <strong>and</strong> ten frames at a time?<br />
6. Which two edit points does a roll trim adjust?<br />
21
<strong>Final</strong> <strong>Cut</strong> <strong>Pro</strong> X Level One <strong>and</strong> Associate-Level Exam Preparation Guide<br />
7. What happens when you slip a clip?<br />
8. Which clips are altered when you slide a clip, <strong>and</strong> how are<br />
they affected?<br />
9. How do you open the Precision Editor to see an exp<strong>and</strong>ed<br />
view of the clips on either side of the edit point as well as the<br />
clip h<strong>and</strong>les?<br />
10. How do you view the detailed trimming feedback?<br />
Answers<br />
1. Select the clip, <strong>and</strong> choose Edit > Delete, or press the Delete<br />
key. The selected clip is removed from the Timeline <strong>and</strong> any<br />
clips to the right of the selection ripple to close the region.<br />
2. Place the playhead where you want to insert the gap, <strong>and</strong><br />
choose Edit > Insert Gap, or press Option-W. A three-second<br />
gap clip is inserted into the Timeline by default, <strong>and</strong> you can<br />
trim its duration.<br />
3. From the Tools pop-up menu, choose Range Selection, or<br />
press R. Then drag in the Timeline to make your selection.<br />
4. Rippling adjusts a clip’s Start or End point without leaving a<br />
gap. The duration change ripples outward, moving all<br />
subsequent clips earlier or later in the Timeline. Dragging to<br />
the right lengthens the outgoing clip, so clips to the right of<br />
the edit ripple accordingly <strong>and</strong> increase the project duration.<br />
5. Press the . (period) <strong>and</strong> , (comma) keys to nudge right <strong>and</strong> left<br />
one frame at a time. Press Shift-. (period) <strong>and</strong> Shift- , (comma)<br />
to nudge right <strong>and</strong> left 10 frames at a time.<br />
6. A roll trim adjusts the outgoing clip’s End point <strong>and</strong> the<br />
incoming clip’s Start point without changing the duration of<br />
the project.<br />
7. A slip trim adjusts the Start <strong>and</strong> End points of a single clip<br />
without changing the duration of the project. This edit is<br />
appropriate when you like the clip’s length <strong>and</strong> Timeline<br />
location, but want to use a different selection of the media.<br />
8. Sliding affects the position of the middle clip, <strong>and</strong> the<br />
duration of the two surrounding clips. When you slide a clip,<br />
you don’t change its length or the selection of original<br />
content. You change only its location in the project.<br />
9. In the toolbar, from the Tools pop-up menu, choose the Select<br />
tool or Trim tool <strong>and</strong> double-click the edit point you want to<br />
trim in the Timeline. Alternatively, select an edit point <strong>and</strong><br />
press Control-E.<br />
10. Choose <strong>Final</strong> <strong>Cut</strong> <strong>Pro</strong> > Preferences, or press Comm<strong>and</strong>-,<br />
(comma), <strong>and</strong> click Editing. In the Timeline section, select the<br />
“Show detailed trimming feedback” checkbox. The two-up<br />
display appears in the Viewer when you use a supported edit<br />
type or trim in the Precision Editor.<br />
22
<strong>Final</strong> <strong>Cut</strong> <strong>Pro</strong> X Level One <strong>and</strong> Associate-Level Exam Preparation Guide<br />
Keyboard Shortcuts<br />
A Choose the default Selection tool<br />
B Choose the Razor Blade tool<br />
H Choose the H<strong>and</strong> tool<br />
I Set selection Start point<br />
M Set a marker in the Timeline ruler<br />
O Set a selection End point<br />
P Choose the Position tool<br />
R Choose the Range tool<br />
T Choose the Trim tool<br />
Z Choose the Zoom tool<br />
Shift-Z Zoom to fit<br />
Comm<strong>and</strong>-Shift-A Deselect any selected clips or gaps.<br />
Comm<strong>and</strong>-Shift-Z Recover steps forward<br />
Control-S Exp<strong>and</strong> Audio/Video<br />
Down Arrow Go to the next item (in the Event Browser) or<br />
the next edit point (in the Timeline)<br />
Option-W Insert gap clip<br />
Option-] (right bracket) Trim the End point <strong>and</strong> remove all frames to<br />
the right of the skimmer location<br />
Option-[ (left bracket) Trim the Start point <strong>and</strong> remove all frames<br />
to the left of the skimmer location<br />
Shift-/ (slash) Play around an edit.<br />
23
<strong>Final</strong> <strong>Cut</strong> <strong>Pro</strong> X Level One <strong>and</strong> Associate-Level Exam Preparation Guide<br />
Lesson Seven objectives<br />
Upon completion of Lesson Seven, “Applying Transitions” in “<strong>Final</strong> <strong>Cut</strong> <strong>Pro</strong><br />
X,” you should be able to complete the following tasks. Five items from this<br />
lesson are included in the pool of Level One exam questions; three items<br />
from this lesson are included in the pool of Associate-level exam<br />
questions. Questions are drawn r<strong>and</strong>omly from the following objectives:<br />
• Apply a video transition<br />
• Use the Transitions Browser<br />
• Modify a transition<br />
• Change parameters in the Inspector<br />
• Search for transitions<br />
• Copy <strong>and</strong> replace transitions<br />
• Delete transitions<br />
• Create a compound clip<br />
• Add transitions to a storyline <strong>and</strong> compound clip<br />
• Apply audio transitions<br />
Please note that the Associate Level Exam does not include any questions<br />
on compound clips or any of the keyboard shortcuts used in this lesson.<br />
Lesson Seven review questions<br />
After completing Lesson Seven, you should be able to answer the<br />
following questions.<br />
1. Name three ways to apply a cross dissolve video transition.<br />
2. If you want to apply the same transition to all clips in your<br />
project, what must you do first?<br />
3. If you want to add a transition without changing the duration<br />
of your project, what must you do before adding the<br />
transition?<br />
4. How can you adjust the duration of a transition in the<br />
Timeline?<br />
5. How can you delete all transitions of the same type?<br />
6. How do you change a parameter in the Transition Inspector?<br />
7. How can you copy a transition from one edit point to<br />
another?<br />
8. How do you create a compound clip in the Timeline?<br />
Answers<br />
1. Select an edit point <strong>and</strong> choose Edit > Add Cross Dissolve, or<br />
press Comm<strong>and</strong>-T. Alternatively, select an edit point, click the<br />
Transitions Browser button, <strong>and</strong> double–click the Cross<br />
Dissolve thumbnail in the Dissolves category.<br />
24
<strong>Final</strong> <strong>Cut</strong> <strong>Pro</strong> X Level One <strong>and</strong> Associate-Level Exam Preparation Guide<br />
2. With the Timeline selected but before applying a transition,<br />
you must press Comm<strong>and</strong>-A to select all the clips in the<br />
Timeline.<br />
3. In the menu bar, choose <strong>Final</strong> <strong>Cut</strong> <strong>Pro</strong> > Preferences. Click the<br />
Editing button, <strong>and</strong> set the Apply Transitions Using pop-up<br />
menu to Available Media. Doing so uses the available h<strong>and</strong>les<br />
for the transition <strong>and</strong> maintains the project duration. The<br />
default option, Full Overlap, shortens the project by the<br />
length of the transition.<br />
4. Drag the edge of the transition icon. For more precise<br />
control, Control-click the transition icon, <strong>and</strong> from the<br />
shortcut menu, choose Change Duration. When the<br />
Dashboard highlights in blue, type a new duration, <strong>and</strong> press<br />
Return.<br />
5. Open the Timeline Index. In the search field, enter the name<br />
of the transition type that you want to delete. When these<br />
transitions are listed beneath the search field, select them all<br />
<strong>and</strong> press Delete.<br />
6. Select a transition <strong>and</strong> in the toolbar, click the Inspector<br />
button, or press Comm<strong>and</strong>-4. The parameters you can adjust<br />
depend on the selected transition, but you can adjust<br />
parameters using a slider, a numerical field, a menu, an image<br />
well, or a color well.<br />
7. Select a transition <strong>and</strong> Option-drag it to a new edit point.<br />
8. Select one or more clips in the Timeline. The selected clips<br />
can be any combination of contiguous or noncontiguous<br />
clips, compound clips, primary storyline clips, or connected<br />
clips. Choose File > New Compound Clip, or press Option-G;<br />
or Control-click the selection, <strong>and</strong> from the shortcut menu,<br />
choose New Compound Clip.<br />
Keyboard Shortcuts<br />
Comm<strong>and</strong>-T Apply default cross dissolve<br />
Comm<strong>and</strong>-, (comma) Open Preferences window<br />
Control-R Render selection<br />
Comm<strong>and</strong>-Z Undo<br />
Shift-? (question mark) Play around edit point<br />
Comm<strong>and</strong>-4 Toggle Inspector open or closed<br />
Comm<strong>and</strong>-G Create storyline<br />
Option-G New compound clip<br />
25
<strong>Final</strong> <strong>Cut</strong> <strong>Pro</strong> X Level One <strong>and</strong> Associate-Level Exam Preparation Guide<br />
Lesson Eight objectives<br />
Upon completion of Lesson Eight, “Working with Sound” in “<strong>Final</strong> <strong>Cut</strong> <strong>Pro</strong><br />
X,” you should be able to complete the following tasks. Four items from<br />
this lesson are included in the pool of Level One exam questions; five items<br />
from this lesson are included in the pool of Associate-level exam<br />
questions. Questions are drawn r<strong>and</strong>omly from the following objectives:<br />
• Monitor <strong>and</strong> adjust audio levels in the Timeline<br />
• Add sound effects <strong>and</strong> music<br />
• Adjust audio levels in the Audio Inspector<br />
• Fade audio<br />
• Apply crossfades<br />
• Record voiceovers<br />
• Use auditions<br />
• Correct audio problems<br />
• Add keyframes<br />
Please note that the Associate Level Exam does not include any questions<br />
on auditions, keyframing or the keyboard shortcuts used in this lesson.<br />
Lesson Eight review questions<br />
After completing Lesson Eight, you should be able to answer the following<br />
questions.<br />
1. Describe three methods you can use to display the large<br />
Audio Meters pane in the Timeline.<br />
2. What do yellow audio meters for a clip indicate?<br />
3. How can you adjust the volume of all Timeline clips at one<br />
time while preserving each clip’s relative volume?<br />
4. How can you solo one or more clips in the Timeline?<br />
5. How do you preview one of <strong>Final</strong> <strong>Cut</strong> <strong>Pro</strong>’s royalty-free sound<br />
effects?<br />
6. How do you set a keyframe on the volume control line?<br />
7. How do you adjust the volume of a clip on the fly during<br />
playback?<br />
8. How do you create an audio fade-in or fade-out in the<br />
Timeline?<br />
9. How do you adjust the fade options in the Timeline?<br />
10. How do you create an audio crossfade between two clips in a<br />
storyline?<br />
11. You created an audition to preview several versions of an<br />
audio track. How do you finalize your pick?<br />
26
<strong>Final</strong> <strong>Cut</strong> <strong>Pro</strong> X Level One <strong>and</strong> Associate-Level Exam Preparation Guide<br />
12. What tool would you use to automatically correct a clip that<br />
includes audio hum?<br />
13. What tool do you use to record your own voiceover, <strong>and</strong><br />
where do you access it?<br />
Answers<br />
1. In the toolbar, to the right of the Dashboard timecode<br />
display, click the Audio Meter icon to open the Audio Meters<br />
pane to the right of the Timeline. Choose Window > Show<br />
Audio Meters. Press Shift-Comm<strong>and</strong>-8.<br />
2. The audio meters change color according to a clip’s decibel<br />
(dB) level. As the audio level approaches the 0 dB peak, the<br />
meter color turns from green to yellow. When the audio level<br />
exceeds 0 dB, the meter color turns from yellow to red.<br />
3. Press Comm<strong>and</strong>-A to select all clips, then press Control- =<br />
(equal) or Control- - (minus) to raise or lower clip volume 1 dB<br />
at a time.<br />
4. Select one or more clips in the Timeline, then Control-click<br />
one of the clips, <strong>and</strong> from the shortcut menu, choose Solo, or<br />
press Option-S.<br />
5. In the toolbar, click the musical note button to open the<br />
Music <strong>and</strong> Sound Browser. Select the <strong>Final</strong> <strong>Cut</strong> <strong>Pro</strong> Sound<br />
Effects folder, <strong>and</strong> in the lower-right corner of the Browser,<br />
double-click a file to preview it.<br />
6. To manually add a keyframe to the volume control line,<br />
Option-click the line where you want to place the keyframe.<br />
You can drag the keyframe up <strong>and</strong> down to adjust the<br />
volume level, or left <strong>and</strong> right to change its timing.<br />
7. In the toolbar, click the Inspector button, <strong>and</strong> click the Audio<br />
tab at the top of the window. In the Timeline, play a clip. Drag<br />
the Volume slider right or left to increase or decrease the<br />
volume. While adjusting on the fly, other audio clips may cut<br />
out. They will become audible when you stop adjusting the<br />
volume.<br />
8. Drag the fade h<strong>and</strong>les that appear when you place the<br />
pointer over the upper-left or upper-right corner of the audio<br />
waveform. Drag up <strong>and</strong> down to adjust the volume, or left<br />
<strong>and</strong> right to change its timing.<br />
9. Place your pointer over the clip’s fade h<strong>and</strong>le to select it.<br />
Control-click to open the shortcut menu, <strong>and</strong> choose one of<br />
the fade options: Linear, S-curve, + 3 dB, or - 3 dB.<br />
10. Click the edge of the edit point between two clips in a<br />
storyline, <strong>and</strong> choose Edit > Add Cross Dissolve, or press<br />
Comm<strong>and</strong>-T.<br />
11. In the Audition window, select the clip that you want to<br />
finalize, <strong>and</strong> click Done. In the Timeline, Control-click the clip<br />
27
<strong>Final</strong> <strong>Cut</strong> <strong>Pro</strong> X Level One <strong>and</strong> Associate-Level Exam Preparation Guide<br />
<strong>and</strong> choose Audition > <strong>Final</strong>ize Audition, or press Option-<br />
Shift-Y.<br />
12. Select a clip, <strong>and</strong> then choose Window > Show Audio<br />
Enhancements, or press Comm<strong>and</strong>–8. In the Hum category, a<br />
red warning sign indicates a 60Hz electrical hum. To fix this,<br />
click the Auto Enhance button at the bottom of the Audio<br />
Enhancements Inspector.<br />
13. Open the Record Audio window by choosing Window ><br />
Record Audio.<br />
Keyboard Shortcuts<br />
Control-= (equals) Raise the audio volume by 1 dB<br />
Control-- (minus) Lower the audio level by 1 dB<br />
Comm<strong>and</strong>-8 Show or hide Audio Enhancements<br />
Inspector<br />
Shift-Comm<strong>and</strong>-8 Show or hide the Audio meters<br />
V Enable or disable a clip for playback<br />
Option-S Solo selected items in the Timeline<br />
Shift-S Turn on audio skimming<br />
Option-G Create a new compound clip<br />
Comm<strong>and</strong>-G Create a storyline from a selection of<br />
connected clips<br />
Comm<strong>and</strong>-T Add a cross dissolve to the selection<br />
Y Open the selected audition<br />
Option-Shift-Y <strong>Final</strong>ize an audition<br />
Option-click Add a keyframe to a clip’s volume control<br />
Comm<strong>and</strong>-Right Arrow Move the playhead to the next subframe<br />
Comm<strong>and</strong>-Left Arrow Move the playhead to the previous<br />
subframe<br />
Lesson Nine objectives<br />
Upon completion of Lesson Nine, “Working with Titles, Generators, <strong>and</strong><br />
Themes” in “<strong>Final</strong> <strong>Cut</strong> <strong>Pro</strong> X,” you should be able to complete the following<br />
tasks. Three items from this lesson are included in the pool of Level One<br />
exam questions; two items from this lesson are included in the pool of<br />
Associate-level exam questions. Questions are drawn r<strong>and</strong>omly from the<br />
following objectives:<br />
• Use the Titles Browser<br />
28
<strong>Final</strong> <strong>Cut</strong> <strong>Pro</strong> X Level One <strong>and</strong> Associate-Level Exam Preparation Guide<br />
• Add a lower third<br />
• Display the title safe <strong>and</strong> action safe zones<br />
• Make changes in the Inspector<br />
• Reposition titles in the Viewer<br />
• Add bumpers <strong>and</strong> credits<br />
• Import still images to bumper/opens<br />
• Work with generators<br />
• Underst<strong>and</strong> Gap Clips vs. Placeholders<br />
• Explore title themes<br />
Please note that the Associate Level Exam does not include any questions<br />
on the keyboard shortcuts used in this lesson.<br />
Lesson Nine review questions<br />
After completing Lesson Nine, you should be able to answer the following<br />
questions.<br />
1. How do you open the Titles Browser?<br />
2. How do you insert a title between two clips in the Timeline?<br />
3. How would you superimpose a lower third title over a<br />
Timeline clip in the primary storyline?<br />
4. How do you change the text in a title in your Timeline?<br />
5. How do you display the title safe <strong>and</strong> action safe zones?<br />
6. How do you adjust the color of a title?<br />
7. How would you reposition a title in the Viewer?<br />
8. What is an easy way to find a specific title in the Timeline?<br />
9. How can you find <strong>and</strong> replace specific text in a title, for<br />
example in a long credit roll?<br />
10. What happens when you double-click a generator in the<br />
Generators Browser?<br />
11. Why would you use a Placeholder generator instead of a gap<br />
clip?<br />
12. How do you assign an image to a drop zone in a theme?<br />
Answers<br />
1. In the toolbar in the upper-right corner of the Timeline, click<br />
the Titles Browser button.<br />
2. Drag a title from the Titles Browser to the edit point between<br />
the clips. Alternatively, you can insert a title by positioning the<br />
playhead where you want to insert the title, selecting the title<br />
in the Browser, <strong>and</strong> pressing W.<br />
29
<strong>Final</strong> <strong>Cut</strong> <strong>Pro</strong> X Level One <strong>and</strong> Associate-Level Exam Preparation Guide<br />
3. In the Titles Browser, double-click a title thumbnail. The title is<br />
connected over the clip at the playhead position in the<br />
primary storyline.<br />
4. In the Viewer, double-click to highlight the text. Type your<br />
new text <strong>and</strong> press Esc.<br />
5. Choose View > Show Title/Action Safe Zones.<br />
6. Select a title in the Timeline <strong>and</strong> click the Inspector button in<br />
the toolbar. Click the Title button at the top of the pane that<br />
appears. Click the color tile to open the Colors window <strong>and</strong><br />
choose a new color.<br />
7. In the Viewer, select the text you want to move, <strong>and</strong> then<br />
drag the position button.<br />
8. Open the Timeline Index <strong>and</strong> click the Titles tab. When the list<br />
of titles appears, click the appropriate title. The playhead<br />
moves to the title <strong>and</strong> automatically selects it.<br />
9. Select the clip <strong>and</strong> choose Edit > Find <strong>and</strong> Replace Title Text.<br />
In the window that appears, enter the text to find in the Find<br />
field <strong>and</strong> the replacement text in the Replace field. In the<br />
“Search in” pop-up menu, choose Selected Title, <strong>and</strong> then click<br />
Replace All.<br />
10. Because generators are often used as backgrounds, doubleclicking<br />
a generator clip inserts it into the primary storyline.<br />
This differs from a title, where double-clicking a title clip<br />
connects it to a primary clip.<br />
11. A gap clip simply reserves a specific duration in the Timeline.<br />
A Placeholder lets you enter information about the missing<br />
clip such as framing, how many people will be in the scene,<br />
the background, whether it is an interior shot, a night or day<br />
scene, <strong>and</strong> how many people will be in the scene. You can<br />
also add specific notes.<br />
12. In the Inspector, click a drop zone <strong>and</strong> then click the image in<br />
the Event Browser. In the “Select a Source Clip” window that<br />
appears, click Apply Clip.<br />
Keyboard Shortcuts<br />
Control-D Change duration<br />
Shift-Comm<strong>and</strong>-I Import File<br />
Comm<strong>and</strong>-C Copy<br />
Comm<strong>and</strong>-V Paste<br />
Comm<strong>and</strong>-4 Open/Close Inspector window<br />
30
<strong>Final</strong> <strong>Cut</strong> <strong>Pro</strong> X Level One <strong>and</strong> Associate-Level Exam Preparation Guide<br />
Lesson Ten objectives<br />
Upon completion of Lesson Ten, “Retiming <strong>and</strong> Transforming Clips” in “<strong>Final</strong><br />
<strong>Cut</strong> <strong>Pro</strong> X,” you should be able to complete the following tasks. Six items<br />
from this lesson are included in the pool of Level One exam questions;<br />
three items from this lesson are included in the pool of Associate-level<br />
exam questions. Questions are drawn r<strong>and</strong>omly from the following<br />
objectives:<br />
• Underst<strong>and</strong> <strong>Final</strong> <strong>Cut</strong> <strong>Pro</strong> retiming<br />
• Reverse clip direction<br />
• Change clip speed<br />
• Apply a freeze frame<br />
• Apply speed changes to selection<br />
• Apply rewind <strong>and</strong> instant replay effects<br />
• Transform <strong>and</strong> crop clips<br />
• Create keyboard shortcuts<br />
Please note that the Associate Level Exam does not include any questions<br />
on the keyboard shortcuts used in this lesson.<br />
Lesson Ten review questions<br />
After completing Lesson Ten, you should be able to answer the following<br />
questions.<br />
1. How can you apply a 50% constant speed change to a clip?<br />
2. What indicators show that a clip’s speed has been changed?<br />
3. How can you precisely set a custom speed for a clip?<br />
4. How do you reset a speed setting?<br />
5. How do you create a freeze frame?<br />
6. You created a slow motion segment within a clip. How can<br />
you quickly adjust the end frame?<br />
7. How do you automatically ramp down the speed of a clip?<br />
8. Where do you access speed presets such as Instant Replay or<br />
Rewind?<br />
9. How do you access the Transform controls?<br />
10. How do you crop a clip while maintaining its aspect ratio?<br />
11. What three crop options does <strong>Final</strong> <strong>Cut</strong> <strong>Pro</strong> offer?<br />
12. How do you apply the Ken Burns effect?<br />
13. How do you open the Comm<strong>and</strong> Editor to create custom<br />
keyboard shortcuts?<br />
31
<strong>Final</strong> <strong>Cut</strong> <strong>Pro</strong> X Level One <strong>and</strong> Associate-Level Exam Preparation Guide<br />
Answers<br />
1. In the Timeline, select a clip. From the Retime pop-up menu<br />
in the toolbar, choose Slow > 50%. You can also set the speed<br />
option in the Modify menu.<br />
2. A blue speed bar in the Timeline indicates an increased speed<br />
while an orange speed bar indicates a decreased speed.<br />
3. From the Retime pop-up menu, choose Show Retime Editor,<br />
or press Comm<strong>and</strong>-R, to display the Retime Editor above the<br />
selection in the Timeline. Drag the retiming h<strong>and</strong>le to set the<br />
speed that you want.<br />
4. In the Timeline, select a range, a whole clip. Choose Modify ><br />
Retime > Reset Speed.<br />
5. Move the playhead to the frame you want to freeze, <strong>and</strong> from<br />
the Retime pop-up menu in the toolbar, choose Hold, or press<br />
Shift-H. You can also select this option in the Modify menu.<br />
6. In the Retime Editor, click the triangle next to the speed<br />
percentage, <strong>and</strong> choose Change End Source Frame from the<br />
pop-up menu. When the tiny filmstrip icon appears, drag it<br />
left or right <strong>and</strong> watch the Viewer until you see the frame you<br />
want to use.<br />
7. Select a clip in the Timeline, <strong>and</strong> from the Retime pop-up<br />
menu in the toolbar, choose Speed Ramp > to 0%. The clip is<br />
segmented into four parts with different speed percentages.<br />
To customize the speed ramp, drag any one of the four<br />
retiming h<strong>and</strong>les to set the speed you want.<br />
8. Choose a preset from the Retime pop-up menu in the toolbar.<br />
9. Click the Transform button in the lower-left corner of the<br />
Viewer, or press Shift-T.<br />
10. Select a clip in the Timeline, <strong>and</strong> click the Crop button in the<br />
lower-left corner of the Viewer, or press Shift-C. In the upperleft<br />
corner of the Viewer, click Crop. Drag the blue h<strong>and</strong>les at<br />
each corner of the clip to maintain the original aspect ratio.<br />
11. <strong>Final</strong> <strong>Cut</strong> <strong>Pro</strong> X includes Trim, Crop, <strong>and</strong> Ken Burns options.<br />
12. Select a clip in the Timeline. In the Viewer, click the Crop<br />
button, <strong>and</strong> choose Ken Burns as the crop type.<br />
13. Choose <strong>Final</strong> <strong>Cut</strong> <strong>Pro</strong> > Comm<strong>and</strong>s > Customize, or press<br />
Comm<strong>and</strong>-Option-K.<br />
Keyboard Shortcuts<br />
Comm<strong>and</strong>-Shift-2 Show/Hide the Timeline Index<br />
Comm<strong>and</strong>-R Show/Hide the Retime Editor<br />
Comm<strong>and</strong>-Option-R Reset speed to clip default<br />
32
<strong>Final</strong> <strong>Cut</strong> <strong>Pro</strong> X Level One <strong>and</strong> Associate-Level Exam Preparation Guide<br />
Shift-H Create two-second hold of the frame at the<br />
playhead location<br />
Control-V Show/Hide the Video Animation menu<br />
Comm<strong>and</strong>-Option-K Open the Comm<strong>and</strong> Editor<br />
Shift-T Activate Transform properties in Viewer<br />
Shift-C Activate Crop properties in Viewer<br />
Option-K Set a keyframe at playhead location<br />
Comm<strong>and</strong>-Control-R Reverse speed on selected clip or range<br />
Lesson Eleven objectives<br />
Upon completion of Lesson Eleven, “Applying Effects <strong>and</strong> Enhancing Color”<br />
in “<strong>Final</strong> <strong>Cut</strong> <strong>Pro</strong> X,” you should be able to complete the following tasks.<br />
Four items from this lesson are included in the pool of Level One exam<br />
questions; two items from this lesson are included in the pool of Associatelevel<br />
exam questions. Questions are drawn r<strong>and</strong>omly from the following<br />
objectives:<br />
• Apply video effects<br />
• Modify effects parameters<br />
• Audition effects<br />
• Animate effects using keyframes<br />
• Apply audio effects<br />
• Underst<strong>and</strong> color correction<br />
• Balance color<br />
• Use the Color Board<br />
• Match colors<br />
Please note that the Associate Level Exam does not include any questions<br />
on auditions, keyframing effects, the Color Board or on the keyboard<br />
shortcuts used in this lesson.<br />
Lesson Eleven review questions<br />
After completing Lesson Eleven, you should be able to answer the<br />
following questions.<br />
1. Describe two ways to apply a video or audio effect.<br />
2. How do you view <strong>and</strong> disable effects applied to Timeline<br />
clips?<br />
3. How do you modify the priority of effects applied to project<br />
clips?<br />
4. How do you delete one or more effects from a project clip?<br />
33
<strong>Final</strong> <strong>Cut</strong> <strong>Pro</strong> X Level One <strong>and</strong> Associate-Level Exam Preparation Guide<br />
5. How do you copy a customized effect from one clip to one or<br />
more clips in the Timeline?<br />
6. How do you activate the graphic controls in the Viewer to<br />
modify an effect?<br />
7. How do you create duplicates of a clip so you can audition<br />
multiple versions of effects?<br />
8. How can you quickly fade an effect in or out?<br />
9. How do you add keyframes in the Video Animation Editor?<br />
10. How do you automatically color balance multiple clips at<br />
once?<br />
11. How do you ensure that all scenes depicting the same<br />
location have the same color balance?<br />
Answers<br />
1. Select one or more clips in the Timeline. Then, in the Effects<br />
Browser, double-click an effect thumbnail, or drag the<br />
thumbnail to the clips in the Timeline.<br />
2. Select the clip in the Timeline. Click the Inspector button in<br />
the toolbar, or press Comm<strong>and</strong>-4. Click the Video tab, if<br />
necessary. To disable an effect, deselect the blue checkbox<br />
next to the effects you don’t want to view.<br />
3. With the clip selected in the Timeline, in the Video tab of the<br />
Inspector, drag the effect title bar above or below another<br />
effect.<br />
4. To remove a single effect, click its name in the Inspector, <strong>and</strong><br />
press Delete. To remove contiguous effects, click the top<br />
effect, Shift-click the bottom effect, <strong>and</strong> press Delete. To<br />
remove two or more non-contiguous effects, click one effect,<br />
Comm<strong>and</strong>-click the additional effects, <strong>and</strong> press Delete.<br />
5. Select the clip with the custom effect, <strong>and</strong> choose Edit ><br />
Copy, or press Comm<strong>and</strong>-C. Now select one or more clips in<br />
the Timeline, <strong>and</strong> choose Edit > Paste Effects, or press<br />
Comm<strong>and</strong>-Option-V.<br />
6. Select the clip in the Timeline, <strong>and</strong> then in the Video tab of<br />
the Inspector, select the effect you want to adjust. Onscreen<br />
controls will appear in the Viewer that allow you to adjust<br />
parameters such as Center Point.<br />
7. Control-click the clip in the Timeline, <strong>and</strong> from the shortcut<br />
menu, choose Duplicate as Audition, or press Control-Y. Then<br />
click the Audition spotlight next to the clip name to open the<br />
Audition window.<br />
8. In the Video Animation Editor, double-click the effect name in<br />
the menu. Fade h<strong>and</strong>les appear at either end of a parameter<br />
line. Drag right or left to fade an effect in or out.<br />
34
<strong>Final</strong> <strong>Cut</strong> <strong>Pro</strong> X Level One <strong>and</strong> Associate-Level Exam Preparation Guide<br />
9. In the Video Animation Editor, double-click the name of the<br />
effect you want to adjust. Position your pointer on the<br />
parameter line where you want to start or end a change, <strong>and</strong><br />
then Option-click the parameter line, or press Option-K, to<br />
create a keyframe.<br />
10. Select the clips in the Timeline, <strong>and</strong> choose Modify > Balance<br />
Color, or press Comm<strong>and</strong>-Option-B.<br />
11. In the Timeline, click to set the playhead at a frame you want<br />
to correct. In the Color section of the Video inspector, select<br />
the Match Color checkbox. Find a frame with the color<br />
balance you want to match, <strong>and</strong> click to preview that balance<br />
applied to the selected clip. To match the current color<br />
balance, click Apply Match in the Match Color window.<br />
Keyboard Shortcuts<br />
Comm<strong>and</strong>-4 Open Inspector<br />
Comm<strong>and</strong>-6 Show/Hide Color Board<br />
Comm<strong>and</strong>-7 Show/Hide video scopes (histogram)<br />
Comm<strong>and</strong>-C Copy<br />
Control-A Show/Hide Audio Animation Editor<br />
Control-V Show/Hide Video Animation Editor<br />
Option-K Add a keyframe<br />
Option-Y Duplicate as audition<br />
Comm<strong>and</strong>-Option-V Paste effects<br />
Y Open audition<br />
Lesson Twelve objectives<br />
Upon completion of Lesson Twelve, “Exporting <strong>and</strong> Sharing Your <strong>Pro</strong>ject” in<br />
“<strong>Final</strong> <strong>Cut</strong> <strong>Pro</strong> X,” you should be able to complete the following tasks. Two<br />
items from this lesson are included in the pool of Level One exam<br />
questions; three items from this lesson are included in the pool of<br />
Associate-level exam questions. Questions are drawn r<strong>and</strong>omly from the<br />
following objectives:<br />
• Adjust audio peaks<br />
• Conform video levels for broadcast<br />
• Export a QuickTime movie<br />
• Export an audio file<br />
• Publish to iTunes <strong>and</strong> <strong>Apple</strong> devices<br />
• Share with the Media Browser<br />
• Publish to YouTube <strong>and</strong> other video sharing sites<br />
35
<strong>Final</strong> <strong>Cut</strong> <strong>Pro</strong> X Level One <strong>and</strong> Associate-Level Exam Preparation Guide<br />
• Export a still frame<br />
• Burn to discs <strong>and</strong> create an .img file<br />
• Back up projects <strong>and</strong> Events<br />
Please note that the Associate Level Exam does not include any questions<br />
on the keyboard shortcuts used in this lesson.<br />
Lesson Twelve review questions<br />
After completing Lesson Twelve, you should be able to answer the<br />
following questions.<br />
1. How would you correct an audio clip that displays red peak<br />
indicators for only a few frames?<br />
2. How do you set the Timeline appearance to display video<br />
clips as large thumbnails without any audio waveforms?<br />
3. How can you display the video scopes to determine whether<br />
an image falls within the broadcast-safe range?<br />
4. How do you view the luma levels in the waveform display to<br />
check for broadcast-safe video levels?<br />
5. How do you open the Color Board to prepare your project for<br />
output?<br />
6. What does the Share icon in the <strong>Pro</strong>ject Library indicate?<br />
7. How do you track the progress of an export?<br />
8. How can you post a project on YouTube?<br />
9. How do you set who can view a movie that you post on<br />
Facebook?<br />
10. How can you export a still image from a project?<br />
11. How can you create a backup that includes only the media<br />
that was used in the project?<br />
12. How can you email a copy of a movie?<br />
13. Why would you want to create a disk image?<br />
Answers<br />
1. Option-click the volume control line in the Timeline to create<br />
keyframes that allow you to adjust that specific section of the<br />
clip.<br />
2. Below the Timeline, click the Clip Appearance button, <strong>and</strong><br />
select the fifth clip icon to show only the video display. If<br />
necessary, adjust the clip height to see all the clips in the<br />
Timeline.<br />
3. Choose Window > Show Video Scopes, or press Comm<strong>and</strong>-7.<br />
The Viewer splits into two windows, with a smaller Viewer on<br />
the right <strong>and</strong> the video scopes window to the left.<br />
36
<strong>Final</strong> <strong>Cut</strong> <strong>Pro</strong> X Level One <strong>and</strong> Associate-Level Exam Preparation Guide<br />
4. From the Settings pop-up menu in the video scopes window,<br />
choose Display > Waveform. Then, from the Settings pop-up<br />
menu, choose Channels > Luma.<br />
5. In the toolbar, click the Enhancement Menu button, <strong>and</strong><br />
choose Show Color Board, or press Comm<strong>and</strong>-6. In the Color<br />
Board, click the Exposure tab.<br />
6. The Share icon next to the project name indicates that the<br />
project has been exported or published. This icon also<br />
appears next to the project name in the Timeline.<br />
7. After you click Share, click the Share Monitor button that<br />
appears under the progress bar to display the export<br />
progress. You can also click the Show Info button for<br />
additional information, such as percent complete or error<br />
warnings.<br />
8. In the <strong>Pro</strong>ject Library, select the project you want to share,<br />
<strong>and</strong> choose Share > YouTube.<br />
9. Choose Share > Facebook, <strong>and</strong> click the Options tab. The<br />
“Viewable by” pop-up menu offers four options to set who<br />
can view your movie on Facebook.<br />
10. Move the playhead to the frame you want to export, <strong>and</strong><br />
choose Share > Save Current Frame.<br />
11. In the <strong>Pro</strong>ject Library, Control-click the project, <strong>and</strong> choose<br />
Duplicate <strong>Pro</strong>ject from the shortcut menu. Select “Duplicate<br />
<strong>Pro</strong>ject + Used Clips Only” to copy the project <strong>and</strong> only the<br />
media used in the project. When this option is selected, a new<br />
Event is created, <strong>and</strong> you must enter a new name for the<br />
backup.<br />
12. Select the project, <strong>and</strong> choose Share > Email. In the Share<br />
Email window, choose a movie size <strong>and</strong> compression from the<br />
menus, <strong>and</strong> then compose a message <strong>and</strong> send it.<br />
13. A disk image (.img) file is a useful way to share a project, <strong>and</strong><br />
a convenient way to preserve <strong>and</strong> archive it as well.<br />
Keyboard Shortcuts<br />
Comm<strong>and</strong>-E Export movie<br />
Comm<strong>and</strong>-Shift-8 Show Audio meters<br />
Comm<strong>and</strong>-6 Open the Color Board<br />
Comm<strong>and</strong>-7 Open the Video scopes<br />
Comm<strong>and</strong>-9 Open Background Tasks window<br />
Comm<strong>and</strong>-W Close the Share Monitor window<br />
37
<strong>Final</strong> <strong>Cut</strong> <strong>Pro</strong> X Level One <strong>and</strong> Associate-Level Exam Preparation Guide<br />
Taking the <strong>Final</strong> <strong>Cut</strong> <strong>Pro</strong> X certification exam<br />
The Level One certification exam must be taken at an <strong>Apple</strong> Authorized<br />
<strong>Training</strong> Center (AATC) in a proctored setting. To find the closest AATC,<br />
please visit training.apple.com/aatc.<br />
Many AATCs schedule "<strong>Certification</strong> Exam Sessions" at training.apple.com/<br />
schedule. However, if you don't see a session scheduled, you can contact<br />
the AATC <strong>and</strong> they will often schedule one for you. Please note that all<br />
AATCS can offer all Mac OS X <strong>and</strong> <strong>Pro</strong> Apps exams, even if they don’t offer<br />
the corresponding course.<br />
If you prefer, you may take the Associate-level exam from home. Please<br />
review the section earlier in the document to determine which exam is<br />
right for you.<br />
Taking the Associate-level exam<br />
Owners of the <strong>Apple</strong> <strong>Pro</strong> <strong>Training</strong> Series book “<strong>Final</strong> <strong>Cut</strong> <strong>Pro</strong> X” are eligible<br />
to take the <strong>Final</strong> <strong>Cut</strong> <strong>Pro</strong> X Associate-level One certification exam online for<br />
$65.00 USD. If you do not have an exam code from this book, you can use<br />
the code in the following instructions to take the exam online.<br />
If you do not pass the exam on the first try, retake instructions are included<br />
in the results email, so do not discard this email. Retakes are $65. You can<br />
only take the exam once per week, so please plan accordingly.<br />
Please note that you may not use any study materials, including the book,<br />
or open the <strong>Final</strong> <strong>Cut</strong> <strong>Pro</strong> X application while taking your exam.<br />
1. Go to ibt.prometric.com/apple on a system that meets the<br />
minimum system requirements: Mac OS X 10.6 or higher,<br />
Safari 3.2.2 or higher (other browsers are not fully supported)<br />
<strong>and</strong> a Cable / DSL / broadb<strong>and</strong> connection. If your system<br />
does not meet the requirements, you are not eligible to take<br />
the exam online <strong>and</strong> will need to take it at an AATC.<br />
2. Follow the steps in this short video, <strong>and</strong> enter FCPXASCPP in<br />
the Private Tests box when asked.<br />
<strong>Pro</strong>metric Exam FAQs<br />
Please visit training.apple.com/certification/faq for a list of Frequently<br />
Asked Questions. If you do not find the answer to your question, then<br />
email us. Please allow at least two business days for a response.<br />
38