SMARTSTOR - Download site Koncar-INEM
SMARTSTOR - Download site Koncar-INEM
SMARTSTOR - Download site Koncar-INEM

You also want an ePaper? Increase the reach of your titles
YUMPU automatically turns print PDFs into web optimized ePapers that Google loves.
<strong>SMARTSTOR</strong>NASProduct ManualVersion 1.0
Copyright© 2010 Promise Technology, Inc. All Rights Reserved.Copyright by Promise Technology, Inc. (Promise Technology). No part of thismanual may be reproduced or transmitted in any form without the expressed,written permission of Promise Technology.TrademarksPromise, and the Promise logo are registered in U.S. Patent and TrademarkOffice. All other product names mentioned herein may be trademarks orregistered trademarks of their respective companies.Important data protection informationNoticeYou should back up all data before installing any drive controller or storageperipheral. Promise Technology is not responsible for any loss of data resultingfrom the use, disuse or misuse of this or any other Promise Technology product.Although Promise Technology has attempted to ensure the accuracy of thecontent of this manual, it is possible that this document may contain technicalinaccuracies, typographical, or other errors. Promise Technology assumes noliability for any error in this publication, and for damages, whether direct, indirect,incidental, consequential or otherwise, that may result from such error, including,but not limited to loss of data or profits.Promise Technology provides this publication “as is” without warranty of anykind, either express or implied, including, but not limited to implied warranties ofmerchantability or fitness for a particular purpose.The published information in the manual is subject to change without notice.Promise Technology reserves the right to make changes in the product design,layout, and driver revisions without notification to its users.This version of the Product Manual supersedes all previous versions.RecommendationsIn this Product Manual, the appearance of products made by other companies,including, but not limited to software, servers, and disk drives, is for the purposeof illustration and explanation only. Promise Technology does not recommend,endorse, prefer, or support any product made by another manufacturer.ii
Table of ContentsChapter 1: About This Manual................................................................................. 1Chapter 2: SmartStor NAS Introduction ................................................................. 22.1 Specifications ................................................................................................ 2Chapter 3: Installation and Setup............................................................................ 43.1 Task 1: Unpacking the SmartStor NAS .......................................................... 43.2 Task 2: Installing Disk Drives ......................................................................... 73.3 Task 3: Connecting to the Network ................................................................ 83.4 Task 4: Connecting the Power....................................................................... 83.5 Task 5: Installing the SmartNAVI(Recommend)............................................. 83.6 Connecting to Web Promise Advanced Storage Manager (WebPASM) ...... 123.7 Shutting Down the SmartStor ...................................................................... 14Chapter 4: File and Printer Sharing by the SmartStor NAS ................................ 154.1 Setting up a Network Drive on a Windows PC ............................................ 154.2 Setting up a Network Drive on a UNIX or Linux PC..................................... 184.3 Setting up a Network Drive on a Mac .......................................................... 224.4 Connecting a USB Printer to SmartStor....................................................... 264.5 Setting up the Print Server on SmartStor..................................................... 264.6 Setting up Windows Printing........................................................................ 274.7 Setting up Linux Printing.............................................................................. 294.8 Setting up Mac Printing ............................................................................... 324.9 Connecting a USB Drive.............................................................................. 344.10 Disconnecting a USB Drive ....................................................................... 36Chapter 5: SmartNAVI ............................................................................................ 375.1 Setting up the SmartStor ............................................................................. 375.2 Managing Users and Groups....................................................................... 435.3 Managing RAID Volumes ............................................................................ 535.4 Managing Backups ...................................................................................... 585.5 Managing Share Folders ............................................................................. 765.6 Making Management Settings ..................................................................... 865.7 Managing <strong>Download</strong>s ................................................................................ 1065.8 Using Media Center....................................................................................1165.9 Managing Photo Albums............................................................................ 121Chapter 6: WebPASM ........................................................................................... 1326.1 Choosing a Language ............................................................................... 1326.2 Navigating in WebPASM............................................................................ 1326.3 Logging out of WebPASM.......................................................................... 1326.4 Managing Monitor and Wizard................................................................... 1336.5 Managing Users and Groups..................................................................... 135iii
6.6 Managing File & Print Services ................................................................. 1426.7 Managing RAID Volumes & File System ................................................... 1576.8 Managing Backups .................................................................................... 1666.9 Managing the Network Connection ........................................................... 1736.10 Making Management Settings ................................................................. 1766.11 Managing the System .............................................................................. 1856.12 Media Center........................................................................................... 1926.13 <strong>Download</strong> ................................................................................................ 1976.14 iTunes Server .......................................................................................... 2006.15 Web File Manager ................................................................................... 2016.16 Database Server...................................................................................... 2036.17 Web Server.............................................................................................. 2036.18 Squeeze Center....................................................................................... 208Chapter 7: Technology Background ................................................................... 2097.1 Introduction to RAID .................................................................................. 2097.2 Choosing a RAID Level ............................................................................. 2127.3 Spare Drive................................................................................................ 2147.4 Automatic Rebuilding................................................................................. 2147.5 Partition and Format.................................................................................. 2147.6 RAID Volume Migration ............................................................................. 215Chapter 8: Troubleshooting................................................................................. 2168.1 Responding to an Audible Alarm ............................................................... 2168.2 Checking the System Status LED.............................................................. 2168.3 Checking Disk Status LEDs....................................................................... 2168.4 Replacing a Failed Disk Drive ................................................................... 2178.5 Checking RAID Volume Status in WebPASM ............................................ 2178.6 Checking File System Status in WebPASM ............................................... 2198.7 Checking the Event Log in WebPASM ...................................................... 2208.8 Checking Enclosure Status in WebPASM.................................................. 2248.9 Solving Network Connection Problems ..................................................... 2258.10 SmartStor Lockup.................................................................................... 2278.11 Checking Your Email Inbox...................................................................... 2298.12 Restoring the Default Password .............................................................. 2308.13 Resolving a Windows Firewall Issue ....................................................... 231Chapter 9: Support ............................................................................................... 2339.1 Frequently Asked Questions...................................................................... 2339.2 Contacting Technical Support .................................................................... 2369.3 Limited Warranty ....................................................................................... 2389.4 Returning Product For Repair.................................................................... 240Appendix A: Important Information..................................................................... 242GNU General Public License........................................................................... 242Battery............................................................................................................. 242iv
Chapter 1: About This ManualThis Product Manual describes how to setup, use, and maintain the SmartStorNAS. It also describes how to use:․ SmartNAVI software that you install and run on your Windows or Mac․ Web Promise Advanced Storage Manager (WebPASM) software that runson the SmartStor NASAlso included are four levels of notices:NoteA Note provides helpful information such as hints or alternativeways of doing a task.ImportantAn Important calls attention to an essential step or point requiredto complete a task. Important items include things often missed.CautionA Caution informs you of possible equipment damage or loss ofdata and how to avoid them.WarningA Warning notifies you of probable equipment damage or loss ofdata, or the possibility of physical injury, and how to avoid them.1
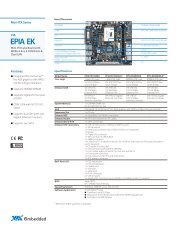
SmartStor NAS Product ManualChapter 2: SmartStor NAS Introduction2.1 SpecificationsProduct 4 Bay NAS 2 Bay NASApplied Model NS4600 NS2600Hot-swappable Yes YesEthernet x1 x1eSATA port x1 NoUSB 2.0 port x2 x1Internal HDD Support 3.5" SATA I/II 3.5" SATA I/IIRAID 0 Yes YesRAID 1 Yes YesRAID 5 Yes NoRAID 10 Yes NoiSCSI Target Service 16 NoPrinter Server Yes YesHDD S.M.A.R.T Yes YesSMB/CIFS (Windows) Yes YesNFS (Linux client support) Yes YesAFP (Mac) Yes YesBonjour Yes YesWindows AD Service Yes YesWeb Advance Management WebPASM 2.0 (AJAX) WebPASM 2.0 (AJAX)Client Management Utility SmartNAVI 2.0 SmartNAVI 2.0HTTPS Yes YesWeb File Management Yes YesNAS Remote Replication Yes NoExternal HDD Backup/restore Backup/restore Backup/restoreFTP Server Yes YesWeb <strong>Download</strong> Station BT/emule/HTTP/FTP BT/emule/HTTP/FTPWeb Server Yes YesSQL Server Yes YesDLNA Certificated DLNA 1.5 DLNA 1.5Facebook upload Yes YesuPnP/DLNA Media Server Yes YesiTunes Server Yes YesSqueezebox Server Yes NoMobile Media Center Yes YesPhoto Album Yes Yes2
Chapter 2: SmartStor NAS IntroductionWake On LAN Yes YesPower on/off schedulely Yes YesDisk Spin-Down Yes YesMax User Accounts 512 512Max Group 256 256Max Shared Folder 1024 1024Max Concurrent Connections 64 64Max Mail Alert e-mail address 32 32UPS Support Yes YesNetwork Recycle Bin Yes YesDynamic DNS Yes Yes3
SmartStor NAS Product ManualChapter 3: Installation and Setup3.1 Task 1: Unpacking the SmartStor NASThe SmartStor NAS box contains the following items:․ SmartStor NAS Unit․ Quick Start Guide․ Screws for disk drives (1 package)․ Ethernet cable․ Power cord․ CD with SmartNAVI software, Product Manual and Quick Start GuideWarningThe electronic components within the SmartStor are sensitive todamage from Electro-Static Discharge (ESD). Observeappropriate precautions at all times when handling the SmartStoror its subassemblies.ImportantTo configure the SmartStor, you must install SmartNAVI. See“Installing the SmartNAVI(Recommend)” on page 8.4
Chapter 3: Installation and SetupFigure 1. SmartStor 2 Bay NAS Front ViewDisk DriveDrive CarrierDrive Status LEDDrive Activity LEDEthernet Activity LEDPower ButtonSystem Status LEDFigure 2. SmartStor 2 Bay Rear ViewCooling FanRJ45 Network ConnectionPower ConnectionUSB Connection5
SmartStor NAS Product ManualFigure 3. SmartStor 4 Bay NAS Front ViewNote: This SmartStor is shown without the front door.WarningPlease note that the keyhole of the upper and lower side, to avoidthe machine damage or can not be used.Figure 4. SmartStor 4 Bay Rear View6
3.2 Task 2: Installing Disk DrivesChapter 3: Installation and SetupYou can populate the SmartStor NAS with SATA 1.5 Gb/s or 3.0 Gb/s disk drives.For optimal performance, install disk drives of the same model and capacity.Your disk drives will become a RAID Volume on the SmartStor.To install disk drives:1. Open the door on the front of the SmartStor enclosure.2. Pull a disk drive carrier from the enclosure. See Figure 1.3. Carefully lay the disk drive into the drive carrier, so that the screw holes onthe sides of the carrier align with the screw holes in the drive. See Figure 5.Figure 5. Disk drive installed in a drive carrierSATA Data and Power ConnectorsDisk Carrier Handle7
SmartStor NAS Product Manual4. Insert the screws through the holes in the drive carrier and into the sides ofthe disk drive.․ Install only the counter-sink screws supplied with the SmartStor.․ Install four screws per drive.․ Snug each screw. Be careful not to over-tighten.5. Reinstall the drive carrier into the SmartStor enclosure.Repeat steps 2 through 5 until all of your disk drives are installed.6. Close the door on the front of the SmartStor.3.3 Task 3: Connecting to the NetworkTo connect the SmartStor to your network:1. Attach one end of the network cable to the RJ45 network connection. SeeFigure 2 and 4.2. Attach the other end of the network cable to your Ethernet hub or switch.3.4 Task 4: Connecting the PowerTo power the SmartStor:1. Attach the power cord on the back of the SmartStor enclosure and plug theother end into the power source. See Figure 2 and 4.2. On the front of the SmartStor, press the power button. See Figure 1 and 3.It takes about a minute to boot the SmartStor. When fully booted:․ The System Status LED turns to normal status color. See Figure 1 and3.․ The system might take 2 minutes for boot up. After boot up successful,buzzer beeps one time.3.5 Task 5: Installing the SmartNAVI(Recommend)SmartNAVI is a client utility which helps users connect their PC/Mac toSmartStor NAS. It's also provide management and client backup function forSmartStor users.OS SupportThe following operating systems support SmartNAVI:․ Windows XP 32BIT Professional with SP3․ Windows XP 64BIT XP 64 with SP2․ Windows Vista 32/64 BIT Enterprise with SP2․ Windows Server 2003 R2 32/64 BIT with SP2․ Windows Server2008 32/64 BIT enterprise with SP2․ Windows 7 32/64 BIT8
Chapter 3: Installation and Setup․ Mac OS 10.4.x and aboveInstallation: WindowsTo install the SmartNAVI on a Windows PC:1. Insert the CD into your PC’s CD-ROM.2. Double-click the SmartNAVI installer icon (right).3. Click the Next button to begin installation.The License Agreement screen appears.4. Click the “I accept the terms...” option, then click the Next button.The Choose Destination Location screen appears.9
SmartStor NAS Product Manual5. Optional. Click the Browse... button to choose a new install location for thesoftware.Click the Next button.The Ready to Install screen appears.6. Click the Install button to proceed with installation.When the installation is finished, the final installation screen appears.10
Chapter 3: Installation and Setup7. Click to Finish button to close the installer.With the Online Registration box checked, your browser will open and godirectly to the Promise product registration web<strong>site</strong>. Thank you for taking thetime to register.The installer adds a SmartNAVI icon to the:․ Start menu․ Application traySmartNAVI loads automatically every time your Windows OS starts.Installation: Mac1. Please double-click the SmartNAVI.dmg file to open andinstall the disk of SmartNAVI Image. (right)2. Click the SmartNAVI Image to open the folder. (right)3. Drag the SmartNAVI.app icon to theright side Applications folder.11
SmartStor NAS Product Manual3.6 Connecting to Web Promise Advanced Storage Manager(WebPASM)The WebPASM software is factory-installed on the SmartStor system.WebPASM runs in the browser on your PC. You can access WebPASM:․ From browser directly . See page 12.․ Connect WebPASM form SmartNAVI. See page 13.From browser directlyTo log into WebPASM in your browser:In the Browser address field, type in the IP address of the SmartStor.Note that the IP address shown below is only an example. The IP addressyou type into your browser will be different.․ WebPASM uses an HTTP connection.............................................http://․ Enter the SmartStor’s IP address ......................................203.67.129.38․ Add.............................................................................................../admin/Together, your entry looks like this: http://203.67.129.38/admin/12
Chapter 3: Installation and SetupConnect WebPASM form SmartNAVITo log into WebPASM from SmartNAVI:1. Right-click the SmartStor NAS in the Device list.2. Choose the Open Advanced Management itemto start the browser and open WebPASM.SmartNAVI inWindowsSmartNAVI inMac OS XYour default browser starts and the WebPASM login screen displays.13
SmartStor NAS Product Manual4. Type admin in both the User Name and Password fields, then click theLogin button.The user name and password are case sensitive.Note: For more information about WebPASM, see “Chapter 6: WebPASM”on page 132.3.7 Shutting Down the SmartStorTo shut down the SmartStor, press and hold the power button for four seconds.The system status LED turns red, then goes dark.To restart the SmartStor, press the power button again.14
Chapter 4: File and Printer Sharing by the SmartStor NASChapter 4: File and Printer Sharing by the SmartStor NAS4.1 Setting up a Network Drive on a Windows PCYou can also use SmartNAVI for this purpose, see “Mounting a Share Folder /Creating a Network Drive” on page 83. If your PC does not have SmartNAVI, usethe following procedure to setup a Network Drive with My Network Places.To setup a network drive:1. On the Windows desktop, double-click the My Network Places icon.2. Click the Search button in the toolbar.If the Search button is not shown, from the View menu, choose Toolbars,then Standard Buttons.15
SmartStor NAS Product Manual3. In the Computer name field, type the IP address of the SmartStor and clickthe Search button.The SmartStor appears in the search results list.16
Chapter 4: File and Printer Sharing by the SmartStor NAS4. Double-click the SmartStor to show the Public folder and any other foldersyou have created.5. Right-click the folder you want and choose Map Network Drive from thedropdown menu.The Map Network Drive dialog box appears.17
SmartStor NAS Product Manual6. In the Map Network Drive dialog box, choose a drive letter and click theFinish button.7. Double-click the My Computer icon on your Windows desktop.The folder on the SmartStor appears under My Computer as a networkdrive.You can now copy files to and from the folder on the SmartStor.4.2 Setting up a Network Drive on a UNIX or Linux PCBefore you can access the SmartStor from a UNIX or Linux PC, you mustconfigure the SmartStor to communicate with UNIX and Linux.Step 1. Enable Linux/Unix NFS1. Click the Administration topic and choose the File & Print icon to expandthe Tree. (A)2. In the Tree, click the Protocol Control icon (B), then click the UNIX/Linuxtab (C).18
Chapter 4: File and Printer Sharing by the SmartStor NAS3. In the Services field, click the Enable option button (default). (D)4. Optional. To join a NIS Domain, click the UNIX/Linux tab (A), then click theYes button beside Services. (B)Note: If you join an NIS Domain, you automatically disable your AD Domainsettings. See “Setting up Windows Access” on page 142.5. Enter the Domain name into the field provided. (C)See your Network Administrator for help with this information.6. Click the OK button to save your settings. (D)The setting runs automatically.Step 2. Setting up File SharingFile access from UNIX and Linux PCs is controlled by specifying the IP addressof each PC that can access a given folder.You must designate the IP addresses for each folder individually. You can haveup to 256 IP addresses for all of your folders. You can use *.*.*.* to allow all IPaccess.To set up UNIX/Linux file sharing:1. Click the Administration topic and choose the File & Print icon to expandthe Tree. (A)2. In the Tree, click the Sharing Setup icon (B), then click the UNIX/LinuxSharing tab. (C)3. Choose a volume from the Volume dropdown menu. (D)4. Choose a folder from the Folder Name dropdown menu. (E)19
SmartStor NAS Product Manual5. In the New IP Address field, type the IP address of the UNIX or Linux PCfrom which you will access this folder, then click the Add button.6. Click the OK button in the confirmation box.On the UNIX/Linux PC with Command Line Interface1. Open a terminal window.2. Create a new folder for the SmartStor. Type mkdir SmartStor and pressEnter.3. Mount the SmartStor. Type mount SmartStor NAS IP/VOLUME1/PUBLIC/SmartStor and press Enter.Note that the IP address shown above is only an example.Volume1 and Public refer to the default Volume and folder created duringsetup. If you created a different volume or folder, use those names.4. Change to the SmartStor directory. Type cd /SmartStor and press Enter.You can now copy files to and from the folder on the SmartStor.When you are done with the SmartStor, type cd; umount /SmartStor andpress Enter.On the Linux PC with Graphic DesktopThis procedure is for a RedHat Enterprise Linux 4 configuration. If you run adifferent version of Linux, you might have to adapt the procedure. See your OSdocumentation.1. From the Applications menu, choose Network Servers.20
Chapter 4: File and Printer Sharing by the SmartStor NAS2. In the Network window, double-click Windows Network.3. Double-click the SmartStor NAS on the network.21
SmartStor NAS Product Manual4. Double-click the folder you want.If this is the first time you accessed this folder, an Authentication dialog boxopens.5. Type the user name and password in the respective fields, then click the OKbutton.The default user name is admin. The default password is admin.The user name and password are case sensitive.Leave the Domain field blank.The folder opens. You can now copy files to and from the folder on theSmartStor.4.3 Setting up a Network Drive on a MacBefore you can access the SmartStor from a Mac, you must configure theSmartStor to communicate with the MacOS.In WebPASM1. Click the Administration topic and choose the File & Print icon to expandthe Tree. (A)2. In the Tree, click the Protocol Control icon (B), then click the Mac tab. (C)3. In the Services field, click the Enable button (D).4. Optional. Type a message in the Login Message field. (E)5. Click the OK button to save your settings. (F)The optional login message appears on the Welcome screen when you loginto SmartStor from a Mac.22
Chapter 4: File and Printer Sharing by the SmartStor NASTo set up Mac file sharing:1. Click the Administration topic and choose the File & Print icon to expandthe Tree. (A)2. In the Tree, click the Sharing Setup icon (B), then click the Windows/Mac/FTP Sharing tab. (C)3. Choose a volume from the Volume dropdown menu. (D)4. Choose a folder from the Folder Name dropdown menu. (E)5. Check the Mac protocol box. (F)6. In the User/Group list, group names are preceded by the @ character. (G)7. Under Permissions, choose a permission level for this user or group: (H)8. Click the OK button to save your settings. (I)9. In the confirmation box, click the OK button.You can now access the specified folder from a Mac.The Mac file sharing enables Macs to access folders on the SmartStor. Inthis case, access is given for the PUBLIC folder.23
SmartStor NAS Product ManualOn the Mac Desktop1. From the Go menu, choose Connect to Server.2. In the Connect to Server dialog box, type afp://SmartStor NAS IP and clickthe Connect button.Note that the IP address shown below is only an example. The IP addressyou type in the dialog box on your Mac will be different.Click the + button to add this IP address to the Favorite Servers list.3. Type the user name and password in the respective fields, then click the OKbutton.The default user name is admin. The default password is admin.The user name and password are case sensitive.24
Chapter 4: File and Printer Sharing by the SmartStor NAS4. In the SmartStor NAS dialog box, click the folder you want, then click the OKbutton.5. In the SmartStor NAS Welcome screen, click the OK button.25
SmartStor NAS Product ManualA window opens on the Mac desktop to access the folder on the SmartStor.You can now copy files to and from the folder on the SmartStor.4.4 Connecting a USB Printer to SmartStorTo connect a USB printer to the SmartStor:1. Set up your printer and install the printer drivers onto your PC as describedin the printer’s Setup Guide or User Manual.2. Attach the USB cable from your printer to one of the USB connections on theback of the SmartStor.USB Connection4.5 Setting up the Print Server on SmartStorTo set up the SmartStor’s print server:26
Chapter 4: File and Printer Sharing by the SmartStor NAS1. Start WebPASM.See “From browser directly” on page 12, or “Connect WebPASM formSmartNAVI” on page 13.2. Click the Administration topic and choose the File & Print icon to expandthe Tree. (A)3. Click the Protocol Control icon (B), then click the Printer Server tab. (C)4. Click the Enable option button beside Printer Server. (D)5. Click the OK button to save your settings. (E)4.6 Setting up Windows PrintingIf your printer came with automatic configuration software, you might have tocomplete this procedure first to create a connection path. Then use theconfiguration software.To set up printing on a Windows PC:1. On the Windows desktop, double-click the My Network Places icon.2. Click the Search button in the toolbar.If the Search button is not shown, from the View menu, choose Toolbars,27
SmartStor NAS Product Manualthen Standard Buttons.3. In the Computer name field, type the IP address of the SmartStor and clickthe Search button in the side bar.The SmartStor appears in the search results list.4. In the computer list, double-click the SmartStor to open it.If the Connect to dialog box appears, type the user name and password inthe respective fields, then click the OK button.The default user name is admin. The default password is admin.The user name and password are case sensitive.5. Right-click the usbptr01 icon folder and choose Connect... from thedropdown menu.6. When the warning message about printer drivers appears, click the OKbutton to continue.28
Chapter 4: File and Printer Sharing by the SmartStor NAS7. In the Add Printer Wizard, click the Manufacturer and SmartStor NAS nameof your USB printer, then click the OK button.8. To verify printer installation, in the Windows Start menu, choose Settings,then Printers and Faxes.The Printers and Faxes screen appears. The usbptr01 is the USB printer onthe SmartStor.4.7 Setting up Linux PrintingThis procedure is for a RedHat Enterprise Linux 4 configuration. If you run adifferent version of Linux, you might have to adapt the procedure. See your OSdocumentation.1. From the Applications menu, choose System Settings, then Printing.Printer configuration window opens.2. Click the New button.Add a new print queue dialog box opens.3. Click the Forward button.29
SmartStor NAS Product Manual4. In the Name field, type a name for the printer, such as NAS_printer, adescription, and click the Forward button.5. From the Select a queue type dropdown menu, choose Network Windows(SMB).6. Scroll the list and click the triangle icon beside SmartStor NAS.USBPTR01 appears below SmartStor NAS. USBPTR01 represents the USBprinter connected to the SmartStor.7. Highlight USBPTR01 and click the Forward button.The Authentication dialog box opens.8. In the User name and Password fields, type admin, then click the OKbutton.The user name and password are case sensitive.30
Chapter 4: File and Printer Sharing by the SmartStor NASThe Printer Model dialog box opens.9. From the dropdown menu, choose the manufacturer of your printer.From the model list, highlight the model of your computer, then click theForward button.10. Click the Finish button.USBPTR01 is added to your printer list.31
SmartStor NAS Product Manual4.8 Setting up Mac PrintingTo set up printing on a Mac:1. From the Apple Menu, choose System Preferences.2. Double-click the Print & Fax icon.3. Click the Setup Printers button.4. In the Printer List, click the Add icon.The Printer List displays a new panel.5. In the new panel, from the popup menus, choose:․ Windows Printing․ Workgroup6. From the list, highlight the SmartStor, then click the Choose button.A user name and password dialog box appears.7. Type the user name and password in the respective fields, then click the OKbutton.The default user name is admin. The default password is admin.The user name and password are case sensitive.The printer list displays a new panel.32
Chapter 4: File and Printer Sharing by the SmartStor NAS8. Highlight the USBPTR01 in the list.USBPRT01 represents the USB printer connected to the SmartStor.9. In the Printer Model popup menu, choose the make of your printer.10. In the SmartStor NAS name list, choose the model of your printer.11. Click the Add button.USBPTR01 is added to your printer list.33
SmartStor NAS Product Manual4.9 Connecting a USB DriveTo connect a USB drive to the SmartStor, attach the USB cable from yourexternal drive to one of the USB connections on the back of the SmartStor.If you have a USB memory stick, attach it directly to one of the USB connectionsor use a USB cable, whichever is more convenient.USB ConnectionThe USB drive or memory stick appears as a folder called usbdisk when youcreate your network drive. See the instructions on the following page.SmartStor supports USB drives and memory sticks formatted to FAT32 and Ext3file formats. If the SmartStor does recognize the USB drive or memory stick, theusbdisk folder does not appear. See “Formatting an External USB Drive orMemory Stick” on page 163.Windows PCThe USB drive appears as a folder on the SmartStor when you create a networkdrive on a Windows PC.Follow the procedure “Setting up a Network Drive on a Windows PC” on page 15,but choose the usbdisk folder instead of the public folder.34
Linux PCChapter 4: File and Printer Sharing by the SmartStor NASThe USB drive appears as a folder on the SmartStor when you create a networkdrive on a Linux PC.Follow the procedure “Setting up a Network Drive on a UNIX or Linux PC” onpage 18, but choose the USBDISK folder instead of the PUBLIC folder.MacThe USB drive appears as a folder on the SmartStor when you create a networkdrive on a Mac.Follow the procedure “Setting up a Network Drive on a Mac” on page 22, butchoose the USBDISK folder instead of the PUBLIC folder.35
SmartStor NAS Product Manual4.10 Disconnecting a USB DriveTo disconnect a USB drive or memory stick from the SmartStor:1. Be sure that no files on the USB drive or memory stick are still open.2. Unplug the USB drive or memory stick from the SmartStor.The SmartStor automatically unmounts the USB drive or memory stick.36
Chapter 5: SmartNAVIChapter 5: SmartNAVI5.1 Setting up the SmartStorThe SmartNAVI performs the setup procedures on your SmartStor. After theprocedure is done, you will have a default folder on the SmartStor, set up as anetwork drive on your PC.You can change the network settings, create RAIDvolumes, add and mount folders on your SmartStorafter initial setup using SmartNAVI. You can alsomade more advanced settings using the WebPASMsoftware. See “Connecting to Web PromiseAdvances Storage Manager (WebPASM)” on page13.SmartNAVI inWindowsOpening SmartNAVI1. Double-click the SmartNAVI icon in the Windowsapplication tray or Mac Dock (right).The SmartNAVI Window opens.SmartNAVI inMac OS X2. From Language dropdown menu, choose the language you prefer.37
SmartStor NAS Product Manual3. Double-click the <strong>SMARTSTOR</strong> NAS in the Device list.4. Type admin in the Username, Password, and Confirm fields, then click theLogin button.This action creates a default user and logs the default user into SmartNAVI.The Main Window opens.38
5. Choose a Setup Mode and click the button:․ One Click Setup - Loads a collection of default settings.Recommended for most users.․ Advanced Setup - Enables you to make your own settings.Recommended for advanced users.One Click SetupTo configure your NAS system using One Click Setup:1. Go to the Main Window.See “Opening SmartNAVI” on page 37.2. Click the Setup Wizard icon.3. Click the One Click Setup button.4. Click the OK button to continue.Chapter 5: SmartNAVI5. Click the Yes button in the confirmation box.The NAS reboots. Then your RAID volume is ready.The PUBLIC folder on the RAID Volume appears under My Computer as anetwork drive.You are finished with the setup.If you chose Advanced Setup, continue under “Advanced Setup” on page40.39
SmartStor NAS Product ManualAdvanced SetupTo configure your NAS system using Advanced Setup:1. Go to the Main Window.See “Opening SmartNAVI” on page 37.2. Click the Setup Wizard icon. (A)3. Click the Advanced Setup button. (B)4. Choose Automatic (DHCP) or Manual network settings. (C)If you chose Manual settings, type entries for each of the followingparameters in the fields provided: (D)Click the Next button to continue. (E)5. Choose the following values from their respective dropdown menus:․ Timezone․ Year․ Month․ Day․ Time in Hours, Minutes, and SecondsClick the Next button to continue.40
Chapter 5: SmartNAVI6. Choose Automatic or Manual RAID Volume creation.If you chose Manual, choose the type of RAID Volume you want:․ Maximum Capacity and performance - RAID 0, using all disk drives․ Data Protection - RAID 5, using all disk drivesClick the Next button to continue.7. Choose a network drive letter from the dropdown menu.This drive will be mapped as a network drive on your PC.The list begins with S and goes in reverse alphabetical order.Click the Next button to continue.8. Review your parameters.To make changes, click the Previous button.To accept the parameters and configure your NAS system, click the OKbutton.41
SmartStor NAS Product Manual9. Click the Yes button in the confirmation box.10. The NAS reboots. Then your RAID volume is ready.The PUBLIC folder on the RAID Volume appears under My Computer as anetwork drive. See Figure 4.You are finished with the setup.Figure 4. The PUBLIC folder as a Windows network driveYou can now copy files to and from the folder on the SmartStor.To access this folder from other PCs, see “Chapter 4: Connecting to theSmartStor” on page 15.To create additional RAID Volumes and folders, see “Chapter 6: WebPASM” on page132.42
Chapter 5: SmartNAVI5.2 Managing Users and GroupsCreating a UserTo create a user:1. Go to the Main Window.2. Click the User Management icon. (A)3. Click the Create New User button. (B)4. Type a Username in the field provided. (C)Up to 16 characters, A-Z, 0-9, and _, first character must be a letter. Nospaces.5. Type a Password in the field provided. (D)Up to 16 characters, A-Z and 0-9. No spaces.6. Retype the Password in the Confirm field. (E)7. Click the OK button. (F)8. Click the Yes button in the confirmation box.9. User created successfully.NoteThese users can access the share folders but not SmartNAVI orWebPASM.43
SmartStor NAS Product ManualCreating the Default UserThis feature creates the default user for SmartNAVI.ImportantIf you change to a new default user, the previous default user’snetwork drives, backup schedules, username, and passwordinformation all will be deleted.To create the default user:1. Go to the Main Window.2. Right-click the system in the Device List.3. Choose Default NAS from the popup menu.4. Type the default username admin in the field provided.5. Type the default password admin in the field provided.44
Chapter 5: SmartNAVI6. Click the Login button.If you do not choose a default user, SmartNAVI sets the default user after youfirst log on.To create additional users, see “Creating the Default User” on page 44.Changing User PasswordsTo change a user’s password:1. Go to the Main Window.2. Click the User Management icon. (A)3. Click the Modify User button. (B)4. Click the user whose password you want to change. (C)45
SmartStor NAS Product Manual5. Admin user ONLY. Type the old password in the field provided.6. Type the new password in the field provided. (D)7. Retype the password in the Confirm field. (E)8. Click the OK button. (F)Viewing a List of UsersTo view a list of Users:1. Go to the Main Window.2. Click the User Management icon.The User List appears.46
Chapter 5: SmartNAVIDeleting a UserTo delete a user:1. Go to the Main Window.2. Click the User Management icon. (A)3. Click the Delete User button. (B)4. Click the user you want to delete. (C)5. Click the OK button. (D)6. Click the Yes button in the confirmation box.7. User deleted.Creating a GroupTo create a Group:1. Go to the Main Window.2. Click the User Management icon. (A)3. Click the Create New Group button. (B)4. Type a Group name in the field provided. (C)Up to 16 characters, A-Z, 0-9, and _. No spaces.5. Optional. Move members to the Selected User list to add them.Or add them later. (D)47
SmartStor NAS Product Manual6. Click the OK button. (E)Viewing a List of GroupsTo view a list of Groups:1. Go to the Main Window.2. Click the User Management icon.3. Click the Group List button.48
Chapter 5: SmartNAVIAdding Members to a GroupNoteA User can only belong to one Group. If a User already belongsto a Group and you add him to this Group, you automaticallydelete him from the previous Group.To add Users as Group members:1. Go to the Main Window.2. Click the User Management icon. (A)3. Click the Modify Group Member button. (B)4. Click the Group whose membership you want to change. (C)5. Move members to the Selected User list to add them. (D)6. Click the OK button. (E)Deleting Members from a GroupNoteDeleting a User from a Group does not delete the User from theSystem.To delete Users from a Group:1. Go to the Main Window.2. Click the User Management icon. (A)3. Click the Modify Group Member button. (B)49
SmartStor NAS Product Manual4. Click the Group whose membership you want to change. (C)5. Move members to the Available User list to delete them. (D)6. Click the OK button. (E)Deleting a GroupBefore you can delete a Group, you must first delete all of the Members from theGroup.To delete a Group:1. Go to the Main Window.2. Click the User Management icon. (A)3. Click the Delete Group button. (B)4. Click the Group you want to delete. (C)5. Click the OK button. (D)50
Chapter 5: SmartNAVI6. Click the Yes button in the confirmation box.Viewing QuotasQuotas are portions of storage space that you assign to each user or group.To view a quota:1. Go to the Main Window.2. Click the User Management icon.3. Click the Quota icon.Setting QuotasQuotas are portions of storage space that you assign to each user or group.Assigning quotas enables you to control how much storage space each user orgroup can access.By default, each user and group is assigned an unlimited quota, meaning thatany one user or group can access the entire storage space. In the Quota screen,the names of groups are preceded with a @ symbol.To set a quota:1. Go to the Main Window.2. Click the User Management icon. (A)3. Click the Quota icon. (B)4. Click the user or group whose quota you want to assign. (C)51
SmartStor NAS Product Manual5. From the dropdown menu, choose the RAID Volume to which thequotaapplies. (D)6. Click one of the following options: (E)․ Unlimited․ Limited Quota7. If you chose Limited Quota, type a number into the field provided. (E)This number represents how many MB of data the user or group can access.8. Click the OK button. (F)9. The setting succeeds.NoteIf you set different size quotas for the user and the group,SmartStor will use the smaller quota.52
Chapter 5: SmartNAVI5.3 Managing RAID VolumesCreating a RAID VolumeThis feature enables you to create a RAID volume or designate a disk drive as aspare.To create a RAID volume:1. Go to the Main Window.2. Click the Volume Configuration icon. (A)3. Click the Create Volume button. (B)4. Choose Automatic or Manual RAID Volume creation. (C)If you chose Manual, choose the type of RAID Volume you want: (D)․ Maximum Capacity - RAID 0, using all disk drives․ Data Protection - RAID 1, 5, or 10, depending on the number of diskdrives available5. Click the OK button. (E)The RAID volume takes several minutes to create and initialize, dependingon the size of your disk drives.NoteWhen you create your RAID volume in WebPASM, you canchoose additional options, such as Multiple RAID volumes.See “Setting up SmartStor with the Setup Wizard” on page 134.53
SmartStor NAS Product ManualExpanding a RAID VolumeThis feature adds all unassigned disk drives to your existing RAID volume.To expand a RAID volume:1. Go to the Main Window.2. Click the Volume Configuration icon.3. Click the Expand Volume button.4. Click the OK button.5. Click the Yes button in the confirmation box.The RAID volume might take couples of hours to expand and initialize.NoteExpansion is only available when your NAS system has theproper combination of RAID volume and free disk drives.For additional expansion options or to change the RAID level ofyour volume, use WebPASM.See “Migrating a RAID Volume” on page 159.54
Chapter 5: SmartNAVIViewing RAID Volume StatusRAID Volume status includes:․ RAID level․ Capacity․ Usage - Percentage of capacity used․ Disk drive model and capacityTo view the status of a RAID Volume:1. Go to the Main Window.2. Click the Volume Configuration icon.3. Click the Volume Status List button.The Volume Status appears.Viewing a List of RAID VolumesTo view a list of RAID Volumes:1. Go to the Main Window.2. Click the Volume Configuration icon.55
SmartStor NAS Product Manual3. Click the Volume List button.The Volume List appears.Recreating a RAID VolumeCautionWhen you recreate a RAID volume, you delete all the data savedin the volume.Back up any important data before you recreate a volume.To recreate a RAID volume:1. Go to the Main Window.2. Click the Volume Configuration icon. (A)3. Click the Recreate Volume button. (B)4. Choose Automatic or Manual RAID Volume creation. (C)If you chose Manual, choose the type of RAID Volume you want: (D)․ Maximum capacity and performance - RAID 0․ Data Protection - RAID 1, 5, or 10, depending on the NAS model andnumber of drives56
Chapter 5: SmartNAVI5. Click the OK button. (E)6. Click the Yes button in the first confirmation box.7. Type YES then click the OK button in the second confirmation box.The RAID volume takes several minutes to recreate and initialize, dependingon the size of your disk drives.57
SmartStor NAS Product Manual5.4 Managing BackupsCautionPlease do not close the SmartNAVI or logout the MS Windowssystem while you are setting a scheduled backup or running thebackup process. It will discontinue backup process.Doing a Backup NowThis feature enables you to perform an immediate schedule backup of your filesfrom your Windows or Mac to the NAS system (SmartNAVI).You can perform an immediate backup of your files from:․ SmartNAVI Main Window․ SmartNAVI Device List․ SmartNAVI tray icon (Windows PCs only)․ One Touch ButtonMain WindowIf you do not have a backup schedule for your PC, start your backup from theSmartNAVI Main Window.1. Go to the Main Window.2. Click the SmartSYNC icon.3. Click the Backup button.4. Under Backup your data to, choose:․ The SmartStor NAS or Local drive (your PC or MAC) from the firstdropdown menu.58
Chapter 5: SmartNAVI․ The letter designation of your PC or MAC drive under the seconddropdown menu.5. Do any of the following actions to select your backup folders:․ Check the Backup My Data box - Selects the My Documents, Favorites,and Desktop folders with all their contents.59
SmartStor NAS Product Manual․ Click the Add to Backup icon - Opens the My Documents folder.Click a folder you want to backup, and then click the Choose button.Repeat for additional folders.․ Drag and drop the folders you want to backup to the Backup your datafrom window.6. Click the Backup button.The backup begins immediately.60
Device ListChapter 5: SmartNAVIBefore you can do a backup from the SmartNAVI Main Window, you must createa backup schedule.1. Go to the Main Window.2. Right-click the system in the Device List whose backup you want to run.3. Choose the Backup Now item.The backup begins immediately.Tray IconBefore you can do a backup from the SmartNAVI tray icon, you must create abackup schedule and setup default NAS first. This feature applies to WindowsCs only.1. Right-click the SmartNAVI icon in the application tray.2. Choose Backup Now in the popup menu.The backup begins immediately.The amount of time required depends on the size and number of files beingbacked up.The backed up files will appear on the NAS system (SmartNAVI) in a folder61
SmartStor NAS Product Manualnamed BACKUPDATA_your username.You can restore the backup files to your PC at any time.See “Restoring Backed-up Files” on page 70.Scheduling a BackupYou can schedule backups by the hour, day, or week.To set a schedule for backing up files from your PC to the NAS system(SmartNAVI):1. Go to the Main Window.2. Click the SmartSYNC icon.3. Click the Backup button.4. Under Backup your data to, choose:․ The SmartStor NAS or Local drive (your PC or MAC) from the first dropdownmenu.․ The letter designation of your PC or MAC drive under the second dropdownmenu.62
5. Do any of the following actions to select your backup folders:Chapter 5: SmartNAVI․ Check the Backup My Data box - Selects the My Documents, Favorites,and Desktop folders with all their contents.․ Click the Add to Backup icon - Opens the My Documents folder.Click a folder you want to backup, and then click the Choose button.Repeat for additional folders.63
SmartStor NAS Product Manual․ Drag and drop the folders you want to backup to the Backup your datafrom window.6. Click the Schedule button.7. Click an option button for:․ Hour․ Day․ Day of the week8. Choose the corresponding values from the dropdown menus:․ Number of hours․ Time of day in hours and minutes․ Time of day and day of the week64
Chapter 5: SmartNAVI9. Click the Add button.The newly created schedule appears in the Schedule List.The backed up files will appear on the NAS in a folder named BACKUPDATA_your username.You can also click the Start button to run a scheduled backup immediately.65
SmartStor NAS Product ManualViewing Backup SchedulesTo view the list of current schedules:1. Go to the Main Window.2. Click the SmartSYNC icon.3. Click the Schedule List button.The list of all backup schedules appears.Changing a Scheduled BackupYou can schedule backups by the hour, day, or week.To change the scheduled backup of files from your PC to the NAS system(SmartNAVI):1. Go to the Main Window.2. Click the SmartSYNC icon. (A)3. Click the Schedule List button. (B)4. Click the schedule you want to change. (C)66
Chapter 5: SmartNAVI5. Click the Modify button. (D)6. Click the folder whose contents you want to backup.67
SmartStor NAS Product ManualClick the Add to Backupchoices.icon to expand the tree and narrow your7. Click the Schedule button.8. Click an option button for:․ Hour․ Day․ Day of the week9. Choose the corresponding values from the dropdown menus:․ Number of hours․ Time of day in hours and minutes․ Time of day and day of the week10. Click the Add button.The modified schedule appears in the Schedule List.68
Chapter 5: SmartNAVIYou can also click the Start button to run a scheduled backup immediately.Deleting a Scheduled BackupDeleting a scheduled backup has no effect upon any files previously backed-upto the NAS system (SmartNAVI).To delete a scheduled backup:1. Go to the Main Window.2. Click the SmartSYNC icon. (A)3. Click the Schedule List button. (B)4. Click the schedule you want to delete. (C)5. Click the Delete button. (D)69
SmartStor NAS Product Manual6. Click the Yes button in the confirmation box.Restoring Backed-up FilesYou can restore all or any portion of the files in the BACKUPDATA_yourusername folder on the NAS system (SmartNAVI).You can choose to restore the files to:․ Their original location on your PC or MAC․ An alternative location on your PC or MACThe original file structure is maintained during backup and restoration.CautionIf you restore to the original folders on your PC, the restorefunction will overwrite the files in those folders.Be careful which files you restore and where on your PC youdirect the backup files.To restore your backed-up files from the NAS system to your PC:1. Go to the Main Window.2. Click the SmartSYNC icon. (A)3. Click the Restore button. (B)4. Click the folder whose contents you want to restore. (C)Click the arrow icons to expand the tree and narrow your choices. (D)70
5. Click an option button for:Chapter 5: SmartNAVI․ Restore to original folder - The backup files will overwrite the files onyour PC (E)․ Restore to a specific folder - No files are overwritten on your PC (E)6. If you chose Restore to a specific folder, do one of the following actions:․ Type the name of an existing folder in the field provided․ Type the name of an new folder in the field provided․ Click the Folder icon - Opens the My Documents folder. (F)Click a folder you want to use for a target, then click the Open button (G)7. Click the Restore button. (H)71
SmartStor NAS Product Manual8. Click the Yes button in the confirmation box.The restoration begins immediately.The amount of time required depends on the size and number of files beingrestored.Viewing the Backup Event LogBackup events report on backups, schedules, and file transfers.Events are reported by date, time, severity (information or error) and description.To view Backup Event Log:1. Go to the Main Window.2. Click the SmartSYNC icon. (A)3. Click the Event Log button. (B)4. Optional. Set the Event Filter dropdown menu to display: (C)․ All events․ Information events only․ Error events only72
5. Optional. Click the arrow on the Date/Time header to reverse thechronological order. (D)Chapter 5: SmartNAVINoteFor NAS system events, see “Viewing the System Event Log” onpage 95.Saving the Event LogThis function saves a copy of the Backup Event Log as a text file onto your PC.The text file records the events displayed in the Event Log window.Set the Event Filter dropdown menu to display:․ All events․ Information events only․ Error events onlyClick the arrow on the Date/Time header to reverse the chronological order.To save a copy of the Backup Event Log as a text file:1. Go to the Main Window.2. Click the SmartSYNC icon.3. Click the Event Log button.73
SmartStor NAS Product Manual4. Click the Save button.5. Optional. Change the file name or save to a different location.6. Click the Save button in the Save dialog box.Clearing the Event LogNoteBefore you clear the Backup Event Log, consider saving a copyfor future reference. See “Saving the Event Log” on page 73.To clear the Backup Event Log:1. Go to the Main Window.2. Click the SmartSYNC icon.3. Click the Event Log button.74
Chapter 5: SmartNAVI4. Click the Clear All button.5. Click the Yes button in the confirmation box.Setting the PortBy using port setting, the public services like a WWW server or an FTP server,and others running on your private network may become accessible from theInternet.To set the Port:1. Go to the Main Window.2. Click the SmartSYNC icon.(A)3. Click the Setting button. (B)4. Type the Port number in the field provided. The default number is 873. (C)5. Click the OK button. (D)75
SmartStor NAS Product ManualThe setting begins immediately.6. Click the OK button in the confirmation box. The Setting is successful.5.5 Managing Share FoldersCreating a Share FolderTo create a new share folder:1. Go to the Main Window.2. Click the Share Folder icon. (A)3. Click the Create New Share Folder button. (B)4. Type a folder name in the field provided. (C)Use A-Z, 0-9, - and _. No spaces.5. Choose the RAID Volume from the dropdown menus. (D)6. For each user in the list, click one of the following options: (E)76
Chapter 5: SmartNAVI․Deny access․Read Only․ Read and Write“Guest” is the only other default user.7. Click the OK button. (F)8. Click the Yes button in the confirmation box.The permission has been set successfully.Opening a Share FolderThis feature opens share folders in the file browser.From the Device List:1. Right-click the system in the Device List whose share folders you want toopen.77
SmartStor NAS Product Manual2. Choose the Share Folders item.All share folders open in your PC’s file browser.From the Main Window:78
Chapter 5: SmartNAVI1. Click the Share Folder icon.2. Double-click the folder in the Share Folder List that you want to open.The share folder opens in your PC’s file browser.From the Tray Icon:1. Right-click the SmartNAVI icon in the application tray.2. Choose Share Folder in the popup menu.79
SmartStor NAS Product ManualAll share folders open in your PC’s file browser.Viewing a List of Share FoldersTo view a list of Share Folders:1. Go to the Main Window.2. Click the Share Folder icon.3. Click the Share Folder List button.The Share Folder List appears.80
4. Double-click the individual share folder to view its contents.Chapter 5: SmartNAVIChanging Share Folder PermissionsThe Admin user always has read and write permission. All other users haveRead Write permission by default.To change permissions:1. Go to the Main Window.2. Click the Share Folder icon. (A)3. Click the Share Folder Permission button. (B)4. Click the share folder whose permissions you want to change. (C)The folder name will become highlighted.5. For each user in the list, click one of the following options: (D)․Deny access․Read Only․ Read and Write“Guest” is the only other default user.81
SmartStor NAS Product Manual6. Click the OK button. (E)The permission change happens immediately.Deleting a Share FolderNoteFor NAS system events, see “Viewing the System Event Log” onpage 95.CautionWhen you delete a share folder, you delete all the data saved inthe folder.Back up any important data before you delete a folder.To delete a share folder:1. Go to the Main Window.2. Click the Share Folder icon.3. Click the Delete Share Folder button.82
Chapter 5: SmartNAVI4. Click the share folder you want to delete.The folder name will become highlighted.5. Click the OK button.6. Click the Yes button in the first confirmation box.7. Type Yes then click the OK button in the second confirmation box.Mounting a Share Folder /Creating a Network DriveTo mount a share folder or create a network drive (Windows):1. Go to the Main Window.2. Click the Share Folder icon. (A)3. Click the Mount Share Folder button. (B)Click the share folder you want to mount or make a network drive. (C)4. The folder name will become highlighted.5. Choose a device name (drive letter) from the dropdown menu. (D)83
SmartStor NAS Product Manual6. Click the Mount button. (E)The share folder appears on your PC as a mounted or network drive.Un-mounting a Share Folder /Disconnecting a Network DriveTo un-mount a share folder or disconnect a network drive (Windows):1. Go to the Main Window.2. Click the Share Folder icon. (A)3. Click the Mount Share Folder button. (B)4. Click the share folder you want to un-mount or delete as a network drive. (C)The folder name will become highlighted.84
Chapter 5: SmartNAVI5. Click the Un-Mount button. (D)6. Click the Yes button in the confirmation box.The share folder is un-mounted or disconnected but the link remains(Windows).Setting up a Share Folder for Time MachineTime Machine is a backup utility included with Mac OS X 10.5 “Leopard” ormore.Before you begin, be sure your Mac is running and connected to the samenetwork as the SmartStor.On SmartNAVITo set up a SmartStor folder for Time Machine backups:1. Go to the Main Window.2. Click the Share Folder icon.3. Click the Mount Share Folder button.4. Click the share folder you want to use for Time Machine backups.5. Check the Support TimeMachine box.6. Click the Mount button.If the process goes correctly, the following message appears:This folder has been set to a network drive.85
SmartStor NAS Product ManualOn the MacFollow this procedure if you have not set up Time Machine.To set up the Mac for backups with SmartStor:1. On the desktop, go to the Dock and click the Time Machine icon.A popup message informs you that no storage location is set up.2. In the popup message, click the Set Up Time Machine button.The Time Machine dialog box appears.3. In the Time Machine dialog box, click the Choose Backup Disk... button.4. In the list of external drives, choose the share folder that you mounted on theSmartStor and click the Use for Backup button.A Name and Password dialog box appears.5. In the dialog box, enter your username and password of NAS authentication,then click the Connect button.Pre-existing Time Machine Configuration on the MacFollow this procedure if you currently have a Time Machine configuration.To set up the Mac for backups with SmartStor:1. On the desktop, go to the Dock and click the Time Machine icon.The Time Machine dialog box appears.2. In the Time Machine dialog box, click the Change Disk... button.3. In the list of external drives, choose the share folder that you mounted on theSmartStor and click the Use for Backup button.A Name and Password dialog box appears.4. In the dialog box, enter your username and password, then click theConnect button.5.6 Making Management SettingsConfiguring a NAS SystemThe Setup Wizard has two modes:․ One Click Setup - Loads a collection of default settings. Recommended formost users.․ Advanced Setup - Enables you to make your own settings. Recommendedfor advanced users.CautionDo NOT run the Setup Wizard on a NAS system that is alreadyconfigured! That action will delete your data and network drives!86
Chapter 5: SmartNAVIOne Click SetupTo configure your NAS system using One Click Setup:1. Go to the Main Window.2. Click the Setup Wizard icon.3. Click the One Click Setup button.4. Click the OK button to continue.5. Click the Yes button in the confirmation box.The NAS reboots. Then your RAID volume is ready.Advanced SetupTo configure your NAS system using Advanced Setup:1. Go to the Main Window.2. Click the Setup Wizard icon. (A)3. Click the Advanced Setup button. (B)4. Choose Automatic (DHCP) or Manual network settings. (C)If you chose Manual settings, type entries for each of the followingparameters in the fields provided: (D)․ Computer (NAS system) Name․ IP Address․ Subnet Mask․ Gateway87
SmartStor NAS Product Manual․ Primary and Secondary DNS - optionalClick the Next button to continue. (E)5. Choose the following values from their respective dropdown menus:․ Timezone․ Year․ Month․ Day․ Time in Hours, Minutes, and SecondsClick the Next button to continue.6. Choose Automatic or Manual RAID Volume creation.If you chose Manual, choose the type of RAID Volume you want:․ Maximum Capacity and performance - RAID 0, using all disk drives․ Data Protection - RAID 5, using all disk drives (Note: Only for 4 BayNAS)88
Chapter 5: SmartNAVIClick the Next button to continue.7. Choose a network drive letter from the dropdown menu.This drive will be mapped as a network drive on your PC.The list begins with S and goes in reverse alphabetical order.Click the Next button to continue.8. Review your parameters.To make changes, click the Previous button.To accept the parameters and configure your NAS system, click the OKbutton.89
SmartStor NAS Product Manual9. Click the Yes button in the confirmation box.10. The NAS reboots. Then your RAID volume is ready.Changing Network SettingsCautionIf your NAS system is on a network, check with your NetworkAdministrator before you change the network settings. Incorrectsettings can result in address conflicts and connection failures.To change your network settings:1. Go to the Main Window.2. Click the NAS Management icon. (A)3. Click the Network Setting button. (B)4. Choose Automatic (DHCP) or Manual network settings. (C)If you chose Manual settings, type entries for each of the followingparameters in the fields provided: (D)․ Computer (NAS system) Name․ IP Address․ Subnet Mask․ Gateway․ Primary and Secondary DNS - optional90
Chapter 5: SmartNAVI5. Click the OK button. (E)6. Click the Yes button in the Network Setup box.7. The NAS reboots automatically.8. Click your system in the Device List.The Main Window reopens.Locating the SmartStorThis feature helps you to physically locate a NAS system.91
SmartStor NAS Product ManualTo locate a SmartStor:1. Go to the Main Window.2. Rignt-click the system in the Device List that you want to locate.3. Choose the Locate NAS item.On the NAS system you chose:․ The buzzer sounds three times․ The Status LED blinks RED three timesWake-on-LANThis feature allows you to turn on or wake up the SystemSmartStor by locate a NAS system.Status LEDTo wake up a SmartStor:1. Go to the Main Window.2. Rignt-click the system in the Device List that you want to wake up.92
Chapter 5: SmartNAVI3. Choose the Locate NAS item.It takes about a minute to boot the SmartStor. When fully booted:․ The System Status LED turns to normal status color.․ The buzzer beeps one time.Choosing a Default NAS SystemThis feature sets the default NAS system (SmartStor) for the Main Window andSmartNAVI tray icon. A default NAS activates several important functions,including:․ Share Folder: Opening a Share Folder․ Backup Now: Performing an Immediate Backup․ Open Advanced Management: Starting the Advanced Storage Manager․ Event Notice: Enabling Event NotificationIf you do not choose a default NAS, SmartNAVI sets the default NAS after youfirst log on.To set a default NAS:1. Go to the Main Window.2. Right-click the system in the Device List that you want to make the default.93
SmartStor NAS Product Manual3. Choose the Default NAS item.The default NAS is highlighted in the Device List.Enabling or Disabling Event NotificationThis feature displays popup notices of events on the default NAS system.Enabling Event NotificationTo enable event notification:1. Right-click the SmartNAVI icon in the application tray.2. Check Event Notice in the popup menu.SmartNAVI displays a popup message indicating that event notification isworking.94
Chapter 5: SmartNAVIDisabling Event NotificationTo disable event notification:1. Right-click the SmartNAVI icon in the application tray.2. Uncheck Event Notice in the popup menu.Viewing the System Event LogNAS events report functions and status of the NAS system. The Event Logdisplays the 20 most recent events.Events are reported by date, time, severity (information or warning) anddescription.To view the NAS systemís Event Log:1. Go to the Main Window.2. Click the NAS Management icon.3. Click the Event Log button.Click the arrow on the Date/Time header to reverse the chronological order.NoteFor backup system events, see “Viewing the Backup Event Log”on page 72.95
SmartStor NAS Product ManualAdding Application Plug-insApplication plug-ins are enhancements to SmartStorís capabilities.SmartNAVI installs plug-ins from your PC. WebPASM installs plug-ins from afolder on the SmartStor. Also see “Adding Application Plug-ins” on page 179.<strong>Download</strong> your plug-ins from the Promise Support Web<strong>site</strong>. Plug-in file namesend with a .ppg extension. Save the plug-in file to a convenient place on yourPC.To add a plug-in to SmartStor:1. Go to the Main Window.2. Click the NAS Management icon.3. Click the Add Plugin button.96
4. Do one of the following actions:․ Type the name of the plug-in fileChapter 5: SmartNAVI․ Click the folder icon, navigate to the plug-in file, click it, then click theOpen button5. Click the OK button.After a few moments, the plug-in is added.WarningDo not disconnect the power or shut down the SmartStor whilethe plug-in installation is running!6. Click the Configure Plugin button.The newly added plug-in appears in the list. Its Service Status is OFF.97
SmartStor NAS Product Manual7. Click the plug-in to choose it.The plug-inís name will become highlighted.8. Click the Enable button.After a moment, the Service Status changes to ON.The plug-in is now installed SmartStor.Viewing a List of Plug-insTo view a list of installed plug-ins:1. Go to the Main Window.2. Click the NAS Management icon.98
Chapter 5: SmartNAVI3. Click the Configuration Plugin button.Currently installed plug-ins appear in the Configuration Plugin list.Viewing Plug-in Version NumbersTo view plug-in version numbers:1. Right-click the SmartNAVI icon in the application tray.99
SmartStor NAS Product Manual2. Choose About from the popup menu.The About window appears. The About window includes a list of installedplug-ins and their version numbers.When you are done with the About window, click the Close button.Enabling and Disabling Plug-insEnabling Plug-insYou must add a plug-in to SmartStor before you can use this function.To enable a plug-in:1. Go to the Main Window.2. Click the NAS Management icon. (A)3. Click the Configuration Plugin button. (B)4. Click the Plug-in you want to enable. (C)The plug-inís name will become highlighted.100
Chapter 5: SmartNAVI5. Click the Enable button. (D)After a moment, the Service Status changes to ON.The plug-in is now enabled on SmartStor.Disabling Plug-insDisabling a plug-in saves memory space and processing time on the SmartStor.If you do not use a feature, consider disabling its plug-in.To disable a plug-in:1. Go to the Main Window.2. Click the NAS Management icon (A).3. Click the Configuration Plugin button (B).4. Click the Plug-in you want to disable (C).The plug-inís name will become highlighted.101
SmartStor NAS Product Manual5. Click the Disable button (D).After a moment, the Service Status changes to OFF.The plug-in is now disabled.Removing Plug-insThere are two reasons to remove a plug-in:․ To replace the old plug-in with a new one․ You know that you will never use the plug-inBefore you remove a plug-in, consider disabling it, instead. See “Enabling andDisabling Plug-ins” on page 100.To remove a plug-in:1. Go to the Main Window.2. Click the NAS Management icon. (A)3. Click the Configuration Plugin button. (B)102
Chapter 5: SmartNAVI4. Click the Plug-in you want to remove. (C)The plug-inís name will become highlighted.5. Click the Remove button. (D)6. Click the Yes button in the confirmation box.The plug-in is removed from SmartNAVI.If you need the plug-in later, you can reinstall it. See “Adding ApplicationPlug-ins” on page 96.Rebooting the SmartStorNormally you will only need to reboot the SmartStor is after a firmware upgradeor plug-in installation. During the reboot, none of your folders will be accessiblerom your networked PCs.To reboot the SmartStor:1. Go to the Main Window.2. Click the NAS Management icon. (A)3. Click the Shutdown button. (B)4. Click the Restart option (C)103
Shutting Down the SmartStorChapter 5: SmartNAVIThe only time you need to shut down the SmartStor is to eplace the disk drivecooling fan or the power supply.During and after the shutdown, none of your folders will be accessible from youretworked PCs.Using SmartNAVITo shut down the SmartStor:1. Go to the Main Window.2. Click the NAS Management icon. (A)3. Click the Shutdown button. (B)4. Click the Shutdown option. (C)5. Click the OK button. (D)6. The shutdown runs automatically.105
SmartStor NAS Product ManualDirectlySystemStatus LEDPower ButtonTo shut down the SmartStor, press and hold the power utton on theback of the SmartStor enclosure for five econds (top, right). Thesystem status LED turns red, then goes dark (bottom, right).Restarting the SmartStorTo restart the SmartStor after a shutdown, press the power button onthe back of the SmartStor enclosure (top, right).When the SmartStor is fully booted:․ The system status LED turns to normal status color (bottom,right)․ The buzzer beeps one time (if the buzzer is enabled)See “Enabling and Disabling the Buzzer” on page 180.5.7 Managing <strong>Download</strong>sAdding a LinkNoteThis feature requires the BT server plug-in for each NAS system.See “Adding Application Plug-ins” on page 96.SmartNAVI and the NAS system can download files using several protocols,including:․ Torrent․ HTTP․ FTP․ eDonkeyFor Torrent files, use your browser to locate the file you want on the Internet anddownload its link to your PC. Then add the Torrent file link to the <strong>Download</strong>Station as described below.To add a Torrent file download link:1. Go to the Main Window.2. Click the <strong>Download</strong> Station icon.106
SmartStor NAS Product Manual5. Click the Add button.The Torrent files are added to the <strong>Download</strong> List and begin to downloadautomatically. The Torrent files are saved to the download folder on the NASsystem.Drag and Drop FilesDrag and drop supports HTTP, FTP, and Torrent files. The process includes twoactions:․ Showing the Dropzone icon on your desktop․ Dragging and dropping files onto the Dropzone iconWindowsTo show the Dropzone icon in Windows, right-click the SmartNAVI icon in theWindows tray and choose Dropzone from the popup menu.The Dropzone icon appears on the desktop.Mac OS XTo show the Dropzone icon in Mac OS X:1. Go to the Main Window.2. From the Function dropdown menu, choose Dropzone.The Dropzone icon appears on the desktop.108
Chapter 5: SmartNAVIDragging and dropping filesDrag and drop your files onto the Dropzone icon.Torrent files are added to the <strong>Download</strong> List and begin todownload automatically. Files are saved to the download folder onthe NAS system.To close the Dropzone icon, choose Dropzone again in the popup (Windows) ordropdown (Mac OS X) menu.Batch <strong>Download</strong>ing FilesYou can batch-download files from a server. The files must have the same namewith sequential numbering. You might have to rename your files to use thisfeature.To add a series of sequential download links:1. Go to the Main Window.2. Click the <strong>Download</strong> Station icon.3. Click the Add New Link button.4. Click the Batch button.A dialog box appears.5. In the field provided, type the URL of the file server. Then type a slash (/)and the file name with an asterisk (*). (A)6. Choose one of the following values for the asterisk:109
SmartStor NAS Product Manual․ Numbering from 0 to 20, Maximum Length is in 1 to 4 places (B)․ Lettering from a to z or A to Z for Case Sensitive. (C)A list of files appears in the window. (D)7. Click the OK button. (E)The batch-download files are added to the <strong>Download</strong> List and begin todownload automatically. The files are saved to the download folder on theNAS system.Viewing the <strong>Download</strong> ListThe Torrent files in this list have not been downloaded yet.To view the <strong>Download</strong> List:1. Go to the Main Window.2. Click the <strong>Download</strong> Station icon.3. Click the <strong>Download</strong> List button.110
<strong>Download</strong>ing began automatically when you added the links.Chapter 5: SmartNAVITorrent files are saved to the download folder on the NAS system.Removing a LinkWhen you remove a link, the <strong>Download</strong> Station does not download thecorresponding Torrent file.To remove a Torrent file download link:1. Go to the Main Window.2. Click the <strong>Download</strong> Station icon.3. Click the <strong>Download</strong> List button.4. Click the file link you want to remove.111
SmartStor NAS Product Manual5. Click the Remove button.6. Click the Yes button in the confirmation box.Pausing and Resuming a <strong>Download</strong>Pausing a <strong>Download</strong>To pause a Torrent file download:1. Go to the Main Window.2. Click the <strong>Download</strong> Station icon.3. Click the <strong>Download</strong> List button.4. Click the link of the file download you want to pause.112
Chapter 5: SmartNAVI5. Click the Pause button.Resuming a <strong>Download</strong>To resume a Torrent file download:1. Go to the Main Window.2. Click the <strong>Download</strong> Station icon.3. Click the <strong>Download</strong> List button.4. Click the link of the paused file download you want to resume.5. Click the Start button.Viewing the <strong>Download</strong>ed ListThe Torrent files in this list have been downloaded.To view a list of downloaded files:1. Go to the Main Window.113
SmartStor NAS Product Manual2. Click the <strong>Download</strong> Station icon.3. Click the <strong>Download</strong>ed List button.Torrent files are saved to the download folder on the NAS system.Opening a <strong>Download</strong>ed FileNoteThis feature requires a plug-in for each NAS system. See “AddingApplication Plug-ins” on page 96.To open a downloaded file:1. Go to the Main Window.2. Click the <strong>Download</strong> Station icon.3. Click the <strong>Download</strong>ed List button.4. Click the file you want to open.114
Chapter 5: SmartNAVI5. Click the Open button.Deleting a <strong>Download</strong>ed FileCautionThe feature deletes Torrent files from the download folder on theNAS system.To delete a downloaded Torrent file:1. Go to the Main Window.2. Click the <strong>Download</strong> Station icon.3. Click the <strong>Download</strong>ed List button.4. Click the file you want to delete.5. Click the Delete button.115
SmartStor NAS Product Manual6. Click the Yes button in the confirmation box.The link and corresponding Torrent file in the download folder on the NASsystem are deleted.5.8 Using Media CenterMedia Center contains the Media Library, which enables you to organize andplay your music and video files that are saved on the NAS system.Note that there are two features called Media Center. This section deals withMedia Center in SmartNAVI. See “Media Center” on page 192.ImportantThis feature requires the DLNA plug-in to be installed andenabled on the NAS system.Your music and video files must be saved in the MUSIC andVIDEO folders, respectively, on the NAS system.Viewing PlaylistsTo view a Playlist:1. Go to the Main Window.2. Click the Media Center icon.The Media Library window appears with List highlighted.A list of playlists appears in the List Window.116
Chapter 5: SmartNAVIPlaylists are shown by name and the number of files in the playlist.Creating a PlaylistThis function requires a LAN connection to the NAS system.To create a Playlist:1. Go to the Main Window.2. Click the Media Center icon.The Media Library window appears with List highlighted.3. Click the Create Playlist icon.4. Type a name for the playlist in the highlighted box and press Enter.5. Click and drag files from the folder list to the Playlist icon.The playlist is stored in the DLNA database on the NAS system.Playing a PlaylistTo play a Playlist:1. Go to the Main Window.2. Click the Media Center icon.117
SmartStor NAS Product ManualThe Media Library window appears with List highlighted.3. Right-click the playlist in the List Tree or the List Window and choose Playfrom the dropdown menu.The List TreeThe List WindowRenaming a PlaylistThis function requires a LAN connection to the NAS system.To rename a Playlist:1. Go to the Main Window.2. Click the Media Center icon.The Media Library window appears with List highlighted.3. Right-click the playlist in the List Tree you want to rename and chooseRename from the dropdown menu.4. Type a name for the playlist in the highlighted box and press Enter.5. Right-click the playlist in the Window you want to rename and chooseRename from the dropdown menu.Deleting a PlaylistThis function requires a LAN connection to the NAS system.To delete a Playlist:1. Go to the Main Window.2. Click the Media Center icon.The Media Library window appears with List highlighted.118
Chapter 5: SmartNAVI3. Right-click the playlist in the List Tree or the List Window you want to deleteand choose Delete from the dropdown menu.4. Click the Yes button in the confirmation box.The playlist is deleted.Playing a Single Music or Video FileTo play a single music or video file:1. Go to the Main Window.2. Click the Media Center icon.The Media Library window appears with List highlighted.3. Click the Music or Video folder icon.4. Right-click on the file you want to play and choose Play from the dropdownmenu.Using the Panel1. Go to the Main Window.2. Click the Media Center icon.The Media Library window appears with List highlighted.3. Click the Music or Video folder icon.119
SmartStor NAS Product Manual4. Click the arrow on the list header to reverse the chronological order byName, Artist, Genre and Length.5. In the Media Library window, click these icons as desired to apply theireffects:IconFunctionMedia LibraryMedia PlayerMuteVolumePlayStopPreviousNextNo RepeatShuffleRepeat OneRepeat All120
5.9 Managing Photo AlbumsMaking an AlbumChapter 5: SmartNAVIAn album is a collection of photo files that you can browse by means of AdobeFlash® and HTML technology. You can make any number of albums usingphotos in a variety of file formats. And you can use the same photos in multiplealbums.Part 1: Making your AlbumTo make a new album:1. Go to the Main Window.2. Click the Photo Album icon.The Make Album screen appears.3. Click the Select button and choose From folder in the dropdown menu.121
SmartStor NAS Product Manual4. In the Open dialog box, navigate to the folder that contains the photo filesyou want to add to your album and click the Open button.Thumbnails of the photos in the folder appear in the left window.5. Click and drag the photos to the right window to add them to your album.122
Chapter 5: SmartNAVIOptional:․ To view a photo, click the Viewicon.123
SmartStor NAS Product Manual․ To sort the photos, click the Sort icon and choose a sort methodby name, size or data from the dropdown menu.․ To delete a photo, click the photo, then click the Deleteicon.6. When you finish your selection of photos, click the Next button.The Album Style Setting screen appears.7. Type a Title for your album in the Title field. (A)Or accept the default title.8. Choose the Date with year, month and day in the dropdown menus. (B)9. Choose a Style from the list. (C)An example of the highlighted Style appears in the Preview window.Your photos do not appear in the Preview window.124
Chapter 5: SmartNAVIPart 2: Exporting or Uploading your AlbumYou now have the choice of:․ Exporting (saving) the album to your PC․ Uploading (saving) the album to the NAS system․ Both actionsTo export the album to your PC:1. Click the Export Album icon.2. In the Final Confirm box:․ Type the name of the destination folder where you want the Album to besaved.․ Navigate to the place where you want the destination folder created.․ Click the Confirm button.125
SmartStor NAS Product Manual3. When the album success message appears, click the Confirm button.The album has been saved in the destination folder.To upload the album to the NAS system:1. Click the Upload Album icon.2. When the album success message appears, click the Confirm button.The album has been uploaded to the WWW\Album folder on the NASsystem.126
Chapter 5: SmartNAVIPart 3: Viewing your AlbumTo view your album, open its folder and double-click the index.html file.The album opens in your default browser.Viewing an AlbumTo view an album:1. Go to the Main Window.2. Click the Photo Album icon. (A)3. Click the Manage Album button. (B)The Manage Album screen appears.4. Choose the location, year, and month in the dropdown menus. (C)Local means on your PC. Other names apply to NAS systems.The albums matching the criteria appear in the Manage Album list. (D)127
SmartStor NAS Product Manual5. Click the album you want to view and click the View button. (E)In the View window, click these icons as desired to apply their effects:- Rotate left- Rotate right- Zoom in- Zoom out- Default size- Color/grayscale toggle- Photo metadata128
Chapter 5: SmartNAVI- Add/view/delete comments- Full screen viewEditing an AlbumThe album must be on saved your PC for editing.To edit an album:1. Go to the Main Window.2. Click the Photo Album icon. (A)3. Click the Manage Album button. (B)The Manage Album screen appears.4. Choose Local, the year and month in the dropdown menus. (C)The albums matching the criteria appear in the Manage Album list. (D)5. Click the album you want to edit and click the Edit button. (E)129
SmartStor NAS Product ManualThe Make Album screen appears.To continue, go to “Making an Album” on page 121.Deleting an AlbumCautionDeleting an album deletes the photo files saved in the albumitself.Deleting an album does not delete the original photo files that youcopied when you created the album or later added to it.To delete an album:1. Go to the Main Window.2. Click the Photo Album icon. (A)3. Click the Manage Album button. (B)The Manage Album screen appears.Choose the location, year, and month in the dropdown menus. (C)Local means on your PC. Other names apply to NAS systems.The albums matching the criteria appear in the Manage Album list. (D)130
4. Click the album you want to delete and click the Delete button. (E)Chapter 5: SmartNAVI5. In the Confirmation box, click the Yes button.The album is deleted.131
SmartStor NAS Product ManualChapter 6: WebPASM6.1 Choosing a LanguageTo choose a language, click the Language menu in the WebPASM Header andchoose the language you prefer.6.2 Navigating in WebPASMThe Tree is the primary navigation tool in WebPASM. Categories of functionslisted with icons for different topics.Icons for specific functions are listed under the categories. Click the icon to showthe functions.Click the function icons to display their information on the screen. Each functionhas one or more tabs in its screen.The Tree expands and contracts in DHTML-capable browsers. If your browserdoes not support DHTML, the Tree is expanded all of the time. The functions arenot affected.6.3 Logging out of WebPASMThere are two ways to log out of WebPASM:132
Chapter 6: WebPASM․ Close your browser window.․ Click Logout in the WebPASM Header.Clicking Logout brings you back to the Login Screen. After logging out, youmust enter your user name and password in order to log in again.6.4 Managing Monitor and WizardViewing the information of the Resource MonitorTo view the Resource Monitor:1. Click the Administration topic and choose the Monitor & Wizard icon toexpand the Tree.2. Click the Resource Monitor icon.The Resource Monitor displays information about the hardware and software asfollowing:File System:․ Volume․ Capacity․ Free Capacity․ Used Capacity․ UsageSystem Information:․ CPU Usage․ Memory Usage․ Network Flow: inflow and outflow․ Up TimeEnclosure Information:․ System Temperature133
SmartStor NAS Product Manual․ System Fan SpeedSetting up SmartStor with the Setup WizardIf you used the SmartNAVI Setup Wizard to set up your SmartStor, you do notneed to run the Setup Wizard in WebPASM.If you have not yet set up your SmartStor:1. Click the Administration topic and choose the Monitor & Wizard icon toexpand the Tree.2. In the Tree, click the Setup Wizard icon to display the Setup Wizard screen.3. The Setup Wizard screen appears.The Setup Wizard tab enables you to modify the network parameters of theSmartStor.Changing the Default Computer Name1. Click the Administration topic and choose the Monitor & Wizard icon toexpand the Tree.2. In the Tree, click the Setup Wizard icon.3. Under network setting, enter a name for the SmartStor in the ComputerName field. Use only letters, numbers, and the underscore character for thename.4. Click the OK button.5. In the confirmation box, click the OK button.Setting Network ConfigurationYou can configure your network connection automatically. This option requiresyou to have a DHCP server on your network. If you do not have a DHCP server,use the manual configuration as below.1. Click the Administration topic and choose the Monitor & Wizard icon toexpand the Tree.2. In the Tree, click the Setup Wizard icon.134
3. Under network setting, choose one of the following options:Chapter 6: WebPASM․ Obtain an IP address automatically - Choose this option if yournetwork has a DHCP server with addresses available․ Specify an IP address - Choose this option if you want to set the IPaddress and other network setting manually4. If you chose the Specify an IP address option, type the followinginformation in the fields provided:․ IP Address․ Subnet Mask․ Default Gateway IP Address․ Primary DNS․ Secondary DNSContact your Network Administrator for help with these settings.5. Click the OK button.6. In the confirmation box, click the OK button.The new network settings are applied.Viewing File System1. Click the Administration topic and choose the Monitor & Wizard icon toexpand the Tree.2. In the Tree, click the Setup Wizard icon.3. The File System list displays the following information:․ File System․ RAID Level․ Total Capacity․ Free Capacity․ Used Capacity․ RAID Status6.5 Managing Users and GroupsViewing a List of UsersTo view the list of Users:1. Click the Administration topic and choose the Users & Group icon toexpand the Tree. (A)2. In the Tree, click the User Management icon. (B)A list of users appears on the Information tab.3. Click the Information tab. A list of users appears under the User List. (C)135
SmartStor NAS Product ManualCreating a UserYou can create up to 512 Users.To create or add a new user:1. Click the Administration topic and choose the Users & Group icon toexpand the Tree. (A)2. In the Tree, click the User Management icon. (B)3. Click the Create User tab. (C)4. Type a user name in the User Name field provided. (D)5. Type a password into the New Password field provided. (E)6. Type a password into the Retype Password field provided. (F)7. Click the OK button. (G)8. In the confirmation box, click the OK button.Changing the User’s PasswordTo change the User’s password:1. Click the Administration topic and choose the Users & Group icon toexpand the Tree. (A)2. In the Tree, click the User Management icon. (B)3. Click the Change Password tab. (C)4. From the User Name drop-down menu, choose the name of the user whosepassword you want to change. (D)5. Type a new password into the fields provided. (E)6. Type the new password again in the Retype Password field. (F)7. Click the OK button. (G)136
Chapter 6: WebPASM8. In the confirmation box, click the OK button.If you forget your new password, you reset the SmartStor to the defaultAdministrator’s password. See “Restoring the Default Password” on page 230.Deleting a UserYou cannot delete the Administrator (admin). To delete any other user:1. Click the Administration topic and choose the Users & Group icon toexpand the Tree. (A)2. In the Tree, click the User Management icon. (B)3. Click the Delete User tab. (C)4. Click the option button to the left of the user you want to delete. (D)5. Click the OK button. (E)6. In the confirmation box, click the OK button.Viewing a List of GroupsGroups are composed of users. You can assign permissions to a group, thesame as you would do with individual users.To view a list of groups:1. Click the Administration topic and choose the Users & Group icon toexpand the Tree. (A)2. In the Tree, click the Group Management icon. (B)3. Click the Information tab. A list of groups appears under the Group List. (C)137
SmartStor NAS Product ManualCreating a GroupGroups are composed of users. You can assign permissions to a group, thesame as you would do with individual users. You can create up to 256 groups.To create a group:1. Click the Administration topic and choose the Users & Group icon toexpand the Tree. (A)2. In the Tree, click the Group Management icon. (B)3. Click the Create tab. (C)4. Type a group name in the field provided. (D)5. Click the OK button. (E)6. In the confirmation box, click the OK button.Adding Members to a GroupYou must create a group before you can assign members to it. See “Creating aGroup” on page 138.To add members to a group:1. Click the Administration topic and choose the Users & Group icon toexpand the Tree. (A)2. In the Tree, click the Group Management icon. (B)3. Click the Group Members tab. (C)4. From the dropdown menu, choose a group to which you want to addmembers. (D)5. Highlight users in the Users column (E) and click the >> button to move themto the Members column. (F)138
Chapter 6: WebPASMRemoving Members from a Group1. Click the Administration topic and choose the Users & Group icon toexpand the Tree. (A)2. In the Tree, click the Group Management icon. (B)3. Click the Group Members tab. (C)4. From the dropdown menu, choose a group from which you want to removemembers. (D)5. Highlight users in the Members column (E) and click the
SmartStor NAS Product Manual5. Click the OK button. (E)6. In the confirmation box, click the OK button.Viewing QuotasQuotas are portions of storage space that you assign to each user or group.To view a quota:1. Click the Administration topic and choose the Users & Group icon toexpand the Tree. (A)2. In the Tree, click the Quota icon. (B)3. Click the Information tab. (C)4. From the Volume dropdown menu, choose the RAID Volume you want. (D)A list of users and groups, and the following data appear under the QuotaInformation List. (E)․ Groups & Users name: User group names are preceded with an @symbol.․ RAID Volume․ Currently assigned quotas․ Used space․ Free space․ Usage140
Setting QuotasChapter 6: WebPASMQuotas are portions of storage space that you assign to each user or group.Assigning quotas enables you to control how much storage space each user orgroup can access.By default, each user and group is assigned an unlimited quota, meaning thatany one user or group can access the entire storage space. In the Quota screen,the names of groups are preceded with a @ character.To set a quota:1. Click the Administration topic and choose the Users & Group icon toexpand the Tree. (A)2. In the Tree, click the Quota icon. (B)3. Click the Settings tab. (C)4. From the dropdown menu, choose the RAID Volume to which the quotaapplies. (D)5. Under the Quota Information List, click one of the following options: (E)․ Unlimited․ Limited Quota6. If you chose Limited Quota, type a number into the field provided.This number represents how many MB of data the user or group can access.7. Click the OK button. (F)8. In the confirmation box, click the OK button.NoteIf you set different size quotas for the user and the group,SmartStor will use the smaller quota.141
SmartStor NAS Product Manual6.6 Managing File & Print ServicesViewing a List of ProtocolsTo view the list of Protocols:1. Click the Administration topic and choose the File & Print icon to expandthe Tree.(A)2. In the Tree, click the Protocol Control icon.(B)3. Click the Information tab. A list of protocols appears on the Protocol List.(C)4. The built-in protocols are: Windows, Mac, FTP Sharing, UNIX/Linux, andPrint Server. (D)5. Click the Enable/Disable button to activate or deactivate the protocolservice, then the Status will show ON/ OFF. (E)Setting up Windows AccessSetting up Windows ServiceThe Windows tab enables you to activate the Windows service for the SmartStorand provides options to set up the Windows workgroup.With the Windows service, Windows PC users can access the SmartStor fromthe network and use it for data storage.To set up access from a Windows PC:1. Click the Administration topic and choose the File & Print icon to expandthe Tree. (A)2. In the Tree, click the Protocol Control icon (B), then click the Windows tab.(C)3. In the Services field, click the Enable option button. (D)142
Chapter 6: WebPASMTo change the SmartStor’s default computer name, go to the Setup wizardor Network Setup. (E)4. Optional. Type a new Computer Description into the field provided. (F)5. Optional. Click the Enable option button beside Recycle Bin. (G)․ Enabled - Deleted files move the Recycle Bin. You must empty theRecycle Bin to remove them from the SmarStor. Uses more space.․ Disabled - Default. Deleted files are immediately removed from theSmartStor. Saves space but has no chance of file recovery.6. Choose the option button to make the SmartStor a member of: (H)․ An Active Directory (AD) Domain․ A WorkgroupNote: If you join an AD Domain, you automatically disable your NIS Domainsettings. See “Setting up UNIX/Linux Access” on page 144.7. Optional. If you chose an AD Domain, enter the following in the fieldsprovided: (H-1)․ Domain or Workgroup Name. This name appears in the WindowsNetwork Neighborhood.․ Domain Controller․ Administrator Account․ Administrator PasswordSee your Network Administrator for help with this information.8. Optional. If you chose an Workgroup, enter the Workgroup name into thefield provided:(H-1)This name appears in the Windows Network Neighborhood. See yourNetwork Administrator for help with this information.9. Click the OK button to save your settings. (I)Setting up File SharingTo set up Windows file sharing:1. Click the Administration topic and choose the File & Print icon to expandthe Tree. (A)143
SmartStor NAS Product Manual2. In the Tree, click the Sharing Setup icon (B), then click the Windows/Mac/FTP Sharing tab. (C)3. Choose a Volume from the Volume dropdown menu. (D)4. Choose a folder from the Folder Name dropdown menu. (E)5. Check the Windows protocol box. (F)6. In the User/Group list, group names are preceded by the @ character. (G)7. Under Permissions, choose a permission level for this user or group: (H)․ Deny Access - Visible only, cannot open․ Read Only․ Read and Write - Default8. Click the OK button to save your settings. (I)9. In the confirmation box, click the OK button.You can now access the folder you chose from a Windows PC.See “Chapter 4: Connecting to the SmartStor” on page 15 for informationabout the settings that you must make on your PC.NoteWindows support is only through SMB and CIFS protocols.SmartStor supports the Recycle Bin feature. When you delete afile, the file is moved to the Recycle Bin, a hidden folder in theshare folder.Setting up UNIX/Linux AccessSetting up UNIX/Linux ServiceThe Unix/Linux tab enables you to activate the Unix and Linux service for theSmartStor.With the Unix/Linux service, Unix/Linux PC users can access the SmartStor fromthe network and use it for data storage.144
Chapter 6: WebPASMTo set up access from a UNIX or Linux PC:1. Click the Administration topic and choose the File & Print icon to expandthe Tree. (A)2. Click the Protocol Control icon (B), then click the UNIX/Linux tab (C).3. Click the Enable option button (default). (D)4. Optional. To join a NIS Domain, click the UNIX/Linux tab (A), then click theYes button beside Services. (B)Note: If you join an NIS Domain, you automatically disable your AD Domainsettings. See “Setting up Windows Access” on page 142.5. Enter the Domain name into the field provided. (C)See your Network Administrator for help with this information.6. Click the OK button to save your settings. (D)The setting runs automatically.Setting up File SharingFile access from UNIX and Linux PCs is controlled by specifying the IP addressof each PC that can access a given folder.You must designate the IP addresses for each folder individually. You can haveup to 256 IP addresses for all of your folders.To set up UNIX/Linux file sharing:1. Click the Administration topic and choose the File & Print icon to expandthe Tree. (A)2. Click the Sharing Setup icon (B), then click the UNIX/Linux Sharing tab.(C)3. Choose a volume from the Volume dropdown menu. (D)145
SmartStor NAS Product Manual4. Choose a folder from the Folder Name dropdown menu. (E)5. In the New IP Address field, type the IP address of the UNIX or Linux PCfrom which you will access this folder, then click the Add button.6. Click the OK button in the confirmation box.You can now access the folder you chose from a UNIX or Linux PC.See “Chapter 4: Connecting to the SmartStor” on page 15 for informationabout the settings that you must make on your UNIX or Linux PC.Setting up Mac AccessSetting up Mac ServiceThe Mac tab enables you to activate the Mac service for the SmartStor.With the Mac service, Mac computer users can access the from the network anduse it for data storage.To set up access from a Mac:1. Click the Administration topic and choose the File & Print icon to expandthe Tree. (A)2. Click the Protocol Control icon (B), then click the Mac tab. (C)3. Click the Enable button (D).4. Optional. Type a message in the Login Message field. (E)146
Chapter 6: WebPASM5. Click the OK button to save your settings. (F)The optional login message appears on the Welcome screen when you loginto SmartStor from a Mac.Setting up File SharingTo set up Mac file sharing:1. Click the Administration topic and choose the File & Print icon to expandthe Tree. (A)2. Click the Sharing Setup icon (B), then click the Windows/Mac/FTPSharing tab. (C)3. Choose a volume from the Volume dropdown menu. (D)4. Choose a folder from the Folder Name dropdown menu. (E)5. Check the Mac protocol box. (F)6. In the User/Group list, group names are preceded by the @ character. (G)7. Under Permissions, choose a permission level for this user or group: (H)․ Deny Access - Visible only, cannot open․ Read Only․ Read and Write - Default8. Click the OK button to save your settings. (I)147
SmartStor NAS Product Manual9. In the confirmation box, click the OK button.You can now access the specified folder from a Mac.See “Chapter 4: Connecting to the SmartStor” on page 15 for informationabout the settings that you must make on your Mac.Setting up FTP AccessSetting up FTP ServiceThe FTP Sharing tab enables you to activate the file transfer protocol (FTP)service for the SmartStor. This service enables the to act as an FTP server.To set up FTP access for your folders:1. Click the Administration topic and choose the File & Print icon to expandthe Tree. (A)2. In the Tree, click the Protocol Control icon (B), then click the FTP Sharingtab. (C)3. In the Services field, click the Enable option button. (D)4. To specify a new Command Port number, type the number into the fieldprovided. (E)Port 21 is typically used for the Command Port.5. To specify a range of passive data port numbers, type those numbers intothe fields provided. (F)The port range is 1024 to 65535.Be sure the port numbers you enter are enabled on your firewall and server.In active mode, the FTP server uses port 20 for the data port.6. If your FTP client uses double-byte characters but does not support Unicode,choose your FTP client’s encoding from the Client Coding Type dropdownmenu, shown here translated to English. Choose from: (G)․ English (Unicode)․ Japanese․ Simplified Chinese․ Traditional Chinese․ Korean148
Chapter 6: WebPASM7. Click the Enable/ Disable option to activate or deactivate the ExplicitEncryption. (H)8. Click the OK button to save your settings. (I)Setting up File SharingTo set up FTP file sharing:1. Click the Administration topic and choose the File & Print icon to expandthe Tree. (A)2. In the Tree, click the Sharing Setup icon (B), then click theWindows/Mac/FTP Sharing tab. (C)3. Choose a Volume from the Volume dropdown menu. (D)4. Choose a folder from the Folder Name dropdown menu. (E)5. Check the FTP Sharing protocol box. (F)6. In the User/Group list, group names are preceded by the @ character. (G)7. Under Permissions, choose a permission level for this user or group: (H)․ Deny Access - Visible only, cannot open․ Read Only․ Read and Write - Default8. Click the OK button to save your settings. (I)9. In the confirmation box, click the OK button.You can now access the specified folder from your PC using FTP.149
SmartStor NAS Product ManualSetting up your Print ServerThe Printer Server tab enables you to activate the printer server capability of theSmartStor. You can connect a network-shared printer to either of theSmartStor’s two USB ports.You can only connect one printer at a time.You must activate Windows service (on the Windows tab) before you start theprinter server. See “Viewing a List of Protocols” on page 142.To set up the SmartStor as a printer server:1. Click the Administration topic and choose the File & Print icon to expandthe Tree. (A)2. Click the Protocol Control icon (B), then click the Printer Server tab. (C)3. Click the Enable option button beside Printer Server. (D)4. Click the OK button to save your settings. (E)Note․ The Printer Server tab also verifies that your USB printer isconnected and online. If you do not see your printer on thePrinter Server tab, take the necessary action to connect andpower the printer. See “Connecting a USB Printer toSmartStor” on page 26.․ The software driver for your printer must be installed on yourPC before you can print from the PC. See the printer’s SetupGuide or User Manual.Setting up your DLNA ServerThe Digital Living Network Alliance (DLNA) service enables the UniversalPlug-and-Play (UPnP) protocol, so your SmartStor can function as a DigitalMedia Server (DMS). When your DLNA service is enabled, you can connectyour DLNA control unit or UPnP client on the network where the SmartStor is150
Chapter 6: WebPASMconnected, and use the SmartStor to play image, audio, and AV media.You must install the optional DLNA plug-in before you can make this setting anduse the UPnP protocol. See “Adding Application Plug-ins” on page 179.The media content directory is under /VOLUME1/. Three share folders arecreated when you install the DLNA plug-in: PICTURE, MUSIC, and VIDEO.With the DLNA plug-in, SmartStor supports these media formats:․ Picture - bmp, gif, jpg, jpeg, png, tif․ Music - mp3, pcm, wma․ Video - avi, mpg, mpeg, wmv, tts, vobViewing a List of Application Plug-insTo view a list of installed plug-ins:1. Click the Administration topic and choose the File & Print icon to expandthe Tree. (A)2. In the Tree, click the Protocol Control icon. (B)3. A list of installed application plug-ins, version numbers and status appear onthe Information tab. (C)Many plug-ins have a clickable link that takes you to their managementinterface.Enabling and Disabling Application Plug-insEnabling Application Plug-insYou must add a plug-in to SmartStor before you can use this function. To add aplug-in to SmartStor, see “Adding Application Plug-ins” on page 179.To enable a plug-in:1. Click the Administration topic and choose the File & Print icon to expandthe Tree. (A)2. In the Tree, click the Application Plug-in icon. (B)151
SmartStor NAS Product Manual3. In the Information tab, click the Enable button on the end of the plug-in listyou want to enable. (C)4. Click the OK button in the confirmation box.After a moment, the Service Status changes to ON.The plug-in is now enabled.Disabling Application Plug-insDisabling a plug-in saves memory space and processing time on the SmartStor.If you do not use a feature, consider disabling its plug-in.To disable a plug-in:1. Click the Administration topic and choose the File & Print icon to expandthe Tree. (A)2. In the Tree, click the Application Plug-in icon. (B)3. In the Information tab, click the Disable button on the end of the plug-in listyou want to disable. (C)4. Click the OK button in the confirmation box.After a moment, the Service Status changes to OFF.The plug-in is now disabled.Viewing a List of FoldersA folder is the entity that appears as a Network Drive on your PC.To view the list of folders:1. Click the Administration topic and choose the File & Print icon to expandthe Tree. (A)2. In the Tree, click the File Sharing icon. (B)A list of current folders appears in the Information tab. (C)Services enable different types of PCs to access your folders. Use this152
Chapter 6: WebPASMfunction to add or remove a service for a specific folder.3. Check the boxes beside the services you want to use. (D)4. Click the OK button. (E)5. In the confirmation box, click the OK button.If the service you want is OFF, see:“Setting up Windows Access” on page 142“Setting up UNIX/Linux Access” on page 144“Setting up Mac Access” on page 146“Setting up FTP Access” on page 148Adding a FolderA folder is the entity that appears as a Network Drive on your PC.To add a folder:1. Click the Administration topic and choose the File & Print icon to expandthe Tree. (A)2. In the Tree, click the File Sharing icon. (B)3. Click the Create tab. (C)4. From the Volume dropdown menu, choose the RAID Volume in which youwant to create a new folder. (D)5. In the Folder Name field, type a name for your new folder. (E)6. Click the types of file systems that you want to associate with the folder. TheService Status column displays ON when a service is activated.153
SmartStor NAS Product Manual7. Click the OK button. The new folder is created. (G)To access the new folder from a Windows PC, see “Setting up FolderSharing: Windows, Mac, FTP” on page 155.To access the new folder from a UNIX or Linux PC, see “Setting up FolderSharing: UNIX and Linux” on page 156.To make the folder a network drive on your PC, see “Chapter 4: Connectingto the SmartStor” on page 15.Deleting a FolderCautionWhen you delete a folder, you delete all the data saved in thefolder. Back up any important data before you delete a folder.To delete a folder:1. Click the Administration topic and choose the File & Print icon to expandthe Tree. (A)2. In the Tree, click the File Sharing icon. (B)3. Click the Remove tab. (C)4. Click the option button beside the folder you want to delete. (D)5. Click the OK button. (E)154
6. In the confirmation box, click the OK button to confirm.Note: The default folder cannot be removed from the folder list.Setting up Folder Sharing: Windows, Mac, FTPChapter 6: WebPASMSharing Setup assigns user access the folders on your SmartStor. By default allusers and groups have read and write access.To set up sharing for a folder:1. Click the Administration topic and choose the File & Print icon to expandthe Tree. (A)2. In the Tree, click the Sharing Setup icon. (B)3. Click the Windows/Mac/FTP Sharing tab. (C)4. From the Volume dropdown menu, choose the RAID Volume containing thefolder you want to modify. (D)5. From the Folder Name dropdown menu, choose the folder you want tomodify. (E)6. Check the boxes for the protocols you want for this folder: (F)․ Windows․ Mac․ FTPIn the User/Group list, group names are preceded by the @ character.7. In the Permission list, click the option button for one of the followingpermissions for each group and user: (G)․ Deny Access - Visible only, cannot open․ Read Only․ Read and Write - Default8. Click the OK button. (H)9. In the confirmation box, click the OK button.Be sure the appropriate services are running for this folder. See:155
SmartStor NAS Product Manual“Setting up Windows Access” on page 142.“Setting up Mac Access” on page 146.“Setting up FTP Access” on page 148.Setting up Folder Sharing: UNIX and LinuxUNIX and Linux sharing designates which UNIX and Linux PCs can access thefolders on your SmartStor. You specify a UNIX or Linux PC by its IP address.You can add up to 256 IP addresses for all of your folders.You must designate the IP addresses for each folder individually.To set up UNIX and Linux sharing for a folder:1. Click the Administration topic and choose the File & Print icon to expandthe Tree. (A)2. In the Tree, click the Sharing Setup icon. (B)3. Click the UNIX/Linux Sharing tab. (C)4. From the Volume dropdown menu, choose the RAID Volume containing thefolder you want to modify. (D)5. From the Folder Name dropdown menu, choose the folder you want tomodify. (E)6. In the New IP Address field, type the IP address of the UNIX or Linux PCfrom which you will access this folder. (F)7. Click the Add button to add the computer to the access list. (G)8. In the confirmation box, click the OK button.Be sure the UNIX/Linux service is running for this folder. See “Setting upUNIX/Linux Access” on page 144.To remove a computer from the access list:1. Highlight the IP address of the computer you want to delete. (A)2. Click the Delete button. (B)156
Chapter 6: WebPASM3. Click the OK button in the confirmation box. The computer is removed fromthe list.6.7 Managing RAID Volumes & File SystemViewing RAID Volume StatusRAID status refers to the disk drives on your SmartStor and how they arearranged into a RAID Volume.To view the status of your RAID Volume:1. Click the Administration topic and choose the RAID & File System icon toexpand the Tree. (A)2. In the Tree, click the RAID Management icon. (B)The RAID Status tab displays the current RAID system and its status: (C)․ RAID Name - The name of your RAID, automatically assigned when itwas created․ RAID Level - RAID 0, 1, 5, or 10, specified when it was created․ Capacity - Data capacity of the RAID Volume in GB․ RAID Status - Functional is normal. Critical means a disk drive hasfailed. Offline means you cannot access your data.Critical and offline RAIDs require you to take corrective action. See“Replacing a Failed Disk Drive” on page 217.․ Action Status - Idle is normal. Rebuilding means the RAID Volume isbeing rebuilt after a disk drive failure. Migrating means the RAID Volumeis adding a disk drive or changing RAID levels.․ Background Activity - None is normal. Running means a backgroundactivity is in progress.157
SmartStor NAS Product ManualViewing Disk Drive InformationTo view information about a disk drive:1. Click the Administration topic and choose the RAID & File System icon toexpand the Tree. (A)2. In the Tree, click the RAID Management icon. (B)The RAID Status tab displays the current RAID system and its status.3. In the Disk List, double-click a disk drive icon. (C)The disk drive information displays under Disk Status as below: (D)․ Channel․ Model․ Firmware Version․ Serial Number․ Capacity․ Sectors․ Heads․ Cylinders․ Ultra DMA Mode․ PIO Mode Support․ Smart Support․ Smart EnableCreating a RAID VolumeOn SmartStor, the term RAID Volume refers to one or more disk drives workingtogether as a RAID logical drive.You can also use a USB disk to create a RAID Volume. See “Viewing anExternal USB Drive or Memory Stick” on page 162.You must have unassigned disk drives in your SmartStor to create a new RAID.To create a new RAID Volume:1. Click the Administration topic and choose the RAID & File System icon toexpand the Tree.158
Chapter 6: WebPASM2. In the Tree, click the RAID Management icon.3. Click the Create tab.4. From the RAID Level dropdown menu, choose the RAID level you prefer foryour disk array.See “Choosing a RAID Level” on page 212 for more information.5. Highlight disk drives in the Free Disks column and click the >> button tomove them to the Disks in RAID column.6. Click the OK button.7. In the confirmation box, click the OK button.The RAID Volume is created and formatting begins. Formatting requiresseveral minutes, depending on the size of your disk drives.After formatting is done, you must create folders on your RAID Volume. See“Adding a Folder” on page 153.Designating a Spare DriveIf you have an unassigned disk drive, you can assign it as a spare drive.For more information, see “Spare Drive” on page 214 and “AutomaticRebuilding” on page 214.To assign a spare drive:1. Click the Administration topic and choose the RAID & File System icon toexpand the Tree.2. In the Tree, click the RAID Management icon.3. Click the Create tab.4. From the RAID Level dropdown menu, choose Spare Disk.5. Highlight a disk drive in the Free Disks column and click the >> button tomove it to the Disks in RAID column.6. Click the OK button.7. In the confirmation box, click the OK button.Note: Only for 4 Bay NAS.Migrating a RAID VolumeTo migrate a RAID Volume means to change its RAID level or to add disk drives.See “RAID Volume Migration” on page 215 for more information.To migrate a RAID Volume:1. Click the Administration topic and choose the RAID & File System icon toexpand the Tree.2. In the Tree, click the RAID Management icon.3. Click the Modify tab.4. From the Current Volume dropdown menu, choose the RAID Volume whichyou want to modify.159
SmartStor NAS Product Manual5. In the Migrate to RAID Level dropdown menu, choose the target RAID Level.6. To add disk drives, highlight disk drives in the Free Disks column and clickthe >> button to move them to the Disks in RAID column.7. Click the OK button.The RAID Volume is modified as you directed. Migration can take up to twohours, depending on the size of your disk drives.During the modification, your RAID Volume and all of the folders on it arefully accessible.After the Migration is completed, you must extend the file system in order touse the storage space you have added. You can extend the file systemimmediately or wait until later.8. Click the File System Management icon.9. In the File System Status tab, click the Extend File System button.Deleting a RAID VolumeCautionWhen you delete a RAID Volume, you delete all the folders in theRAID volume and all the data saved in the folders. Back up anyimportant data before you delete a RAID Volume.NoteYou cannot delete a RAID Volume while a background activity isrunning, such as Migration or Rebuild. Wait until these activitiesare completed.To delete a RAID Volume:1. Click the Administration topic and choose the RAID & File System icon toexpand the Tree. (A)2. In the Tree, click the RAID Management icon. (B)3. Click the Delete tab. (C)4. Click the option button beside the RAID Volume you want to delete. (D)5. Click the OK button. (E)160
Chapter 6: WebPASM6. In the confirmation box, type YES into the field provided, then click the OKbutton.After a RAID Volume is deleted, the SmartStor reboots automatically. Whenthe SmartStor is fully booted:System․ The System Status LED turns to normal status Statuscolor (right)LED․ The buzzer beeps one time (if the buzzer isenabled)7. Close your browser then restart the browser to access WebPASM.Viewing the File System StatusTo view the status of your File System:1. Click the Administration topic and choose the RAID & File System icon toexpand the Tree. (A)2. In the Tree, click the File System Management icon. (B)3. This File System Status tab displays file and disk space information for theSmartStor as below: (C)․ Volume Name․ RAID Level․ RAID Status․ Total Capacity․ Free Capacity․ Used Capacity․ Usage․ Assign Capacity-Type the capacity you want into the Assign Capacitycolumn and click the Extend File System button.NoteYou can assign the reserve storage capacity from iSCSI space tothe total RAID capacity, but you cannot convert it back.If the capacity is exhausted, this information of Assign Capacityfield will not appear.161
SmartStor NAS Product ManualViewing an External USB Drive or Memory StickTo view a USB drive or memory stick attached to the SmartStor:1. Click the Administration topic and choose the RAID & File System icon toexpand the Tree. (A)2. In the Tree, click the RAID Management icon. (B)The USB drive or memory stick appears as a USB External Disk. (C)3. Click the File System Management icon. (D)The USB drive or memory stick appears as a Volume called USBDISK. (E)You do NOT create a RAID Volume or folders with the USB drive or memorystick as you would with the disk drives installed in the SmartStor enclosure.With the USB drive or memory stick connected to the SmartStor, create anetwork drive on your PC and choose the USB disk as the folder. Then you canaccess the USB drive or memory stick from your PC.See “Chapter 4: Connecting to the SmartStor” on page 15 for more information.162
Formatting an External USB Drive or Memory StickChapter 6: WebPASMThis option only appears when SmartStor does not recognize the file system onthe USB drive or memory stick.CautionWhen you format a USB drive or memory stick, you delete all thedata saved on it. Back up any important data before you format.To format a USB drive or memory stick:1. Attach the USB drive or memory stick to one of the USB ports on the back ofthe SmartStor.2. Click the Administration topic and choose the RAID & File System icon toexpand the Tree.3. In the Tree, click the File System Management icon.4. On the File System Status tab, highlight the USB drive.5. From the Format File System Type dropdown menu, choose a file system:․ FAT 32 - Use for Windows, Linux, and Macs, and SmartStor․ Ext3 - Use for UNIX and Linux PCs, and SmartStor6. Click the Format USB Disk button.7. In the confirmation box, type YES, then click the OK button.Formatting requires several minutes, depending on the size of your USB drive ormemory stick.Viewing the iSCSI StatusThe iSCSI Status screen allows you to set up the services setting and displaysinformation about the iSCSI on the SmartStor:iSCSI (Internet Small Computer System Interface) is an Internet Protocol (IP)-based storage networking standard for linking data storage facilitiesTo setup the iSCSI services settings:1. Click the Administration topic and choose the RAID & File System icon toexpand the Tree.2. In the Tree, click the iSCSI Management icon.3. In the iSCSI Status tab, click the Enable button in the Services field.4. Type the following items into their respective fields:․ iSCSI Port․ iSNS (Internet Storage Name Service)Server AddressContact your network administrator for help with these settings.5. Click the OK button.The iSCSI settings are applied.163
SmartStor NAS Product ManualThe following list displays the iSCSI Information for the:․ iSCSI name․ Volume (file system)․ iSCSI Size․ RAID status․ Action statusClick the Enable/Disable button in the Action column to activate or deactivatethe iSCSI service.To delete the iSCSI volume:1. Click the Delete button in the Action column.2. In the confirmation box, type YES in the field provided and click the OKbutton.The iSCSI volume is deleted.Creating the iSCSI VolumeTo create a iSCSI VOLUME (file system):1. Click the Administration topic and choose the RAID & File System icon toexpand the Tree.2. In the Tree, click the iSCSI Management icon.3. Type a new iSCSI name into the iSCSI Name field.4. Select a iSCSI VOLUME you want to create from the iSCSI Name dropdownlist.NoteThe Free Capacity shown here to let you know how muchcapacity you can create.5. Type a number of iSCSI capacity into the Capacity field.164
Chapter 6: WebPASM6. Click the OK button.The file system is created automatically.There are several levels of iSCSI security available with Storage Manager forSANs. The basic level is based on the CHAP (Challenge HandshakeAuthentication Protocol).To create the iSCSI type to CHAP:1. Click the CHAP option.2. Type your user name into the User Name field.3. Type your password into the Password field.4. Retype your password into the Retype Password field.5. Click the OK button to save your settings.Modifying the iSCSI VolumeThe Modify tab enables you to modify an existing iSCSI VOLUME(file system).To change the iSCSI’s default name:1. Click the Administration topic and choose the RAID & File System icon toexpand the Tree.2. In the Tree, click the iSCSI Management icon.3. Select a iSCSI VOLUME you want to modify from the iSCSI Name dropdownlist.4. Type a new iSCSI name into the Modify iSCSI Name field.5. Click the OK button.165
SmartStor NAS Product ManualThe new iSCSI name is applied.The list also displays the iSCSI information for the Volume and Capacity.There are several levels of iSCSI security available with Storage Manager forSANs. The basic level is based on the CHAP (Challenge HandshakeAuthentication Protocol).To modify the iSCSI type settings from “None” to “CHAP”:1. Click the CHAP option.2. Type your user name into the User Name field.3. Type your password into the Password field.4. Retype your password into the Retype Password field.5. Click the OK button to save your settings.6.8 Managing BackupsViewing a List of Snapshot BackupsTo view the list of Snapshot backups:1. Click the Administration topic and choose the Backup icon to expand theTree.2. In the Tree, click the Snapshot Backup icon.The current list of Snapshots displays on the Information tab as below:․ Timestamp of the snapshot․ VOLUME (file system)․ Status of the file system․ Capacity of the file system․ Usage in percent of the file systemSetting up a Snapshot BackupCautionSetting up a Snapshot will delete all existing Snapshots.166
Chapter 6: WebPASMTo setup a Snapshot Backup:1. Click the Administration topic and choose the Backup icon to expand theTree.2. In the Tree, click the Snapshot Backup icon.3. Click the Setup tab.4. From the Volume dropdown menu, choose the RAID Volume you want tobackup.5. Next to Snapshot Status, click the Enable option.6. In the Reserve Capacity dropdown menu, choose a portion in GB of theRAID Volume you want to reserve for snapshots.7. Choose the number of snapshots (1 to 4) you want from the Number ofSnapshots drop-down menu.8. Click the OK button.9. In the confirmation box, type yes into the filed provided than click the OKbutton.The snapshot backup settings are applied. The process takes a fewmoments. Click the Schedule tab for scheduling options.Scheduling a Snapshot BackupTo schedule a Snapshot Backup:1. Click the Administration topic and choose the Backup icon to expand theTree.2. In the Tree, click the Snapshot Backup icon.3. Click the Schedule tab.4. Click the option you want from the Schedule Type list.․ Disable - No snapshots will be taken.․ Do it at once - Snapshots will be taken now, one time only.․ Time interval by hour - Snapshots will be taken at the hourly intervalyou choose from the dropdown menu.․ Daily - Snapshots will be taken at the time of day you choose from thedropdown menus.․ Weekly - Snapshots will be taken on the day of the week, at the time ofday you choose from the dropdown menus.5. As needed, make your choices from the dropdown menus.167
SmartStor NAS Product Manual6. Click the OK button.7. In the confirmation box, click the OK button.The new backup schedule is applied. If you have not yet made yourSnapshot settings, click the Setup tab and make them now.Recovering Snapshot BackupsThe Snapshot recovery feature has two functions:․ Use a Snapshot to restore the data volume (VOLUME1 or VOLUMEx) to anearlier point in time.․ Export a Snapshot to the share folder. The recovered Snapshot volume isread-only.To recover a Snapshot backup:1. Click the Administration topic and choose the Backup icon to expand theTree.2. In the Tree, click the Snapshot Backup icon.3. Click the Recovery tab.The Recovery tab lists recovered snapshot backups and the followinginformation about them:․ Timestamp of the snapshot․ VOLUME (file system)․ Status of the file system․ Usage in percent of the file system4. Click the option button beside the Timestamp and Volume that you want torecover or export.168
Chapter 6: WebPASM5. Do one of the following actions:․ To restore the data volume using the Snapshot, click the OK button.․ To export the Snapshot to the share folder, click the Export button.SmartStor performs the action you specified.Viewing the NAS Replication ScheduleNAS Replication is a feature that uses one SmartStor to backup the data onanother SmartStor. The two SmartStor systems must be on the same network.To view the NAS Replication schedule:1. Click the Administration topic and choose the Backup icon to expand theTree.2. In the Tree, click the NAS Replication icon.The current schedule displays on the Information tab.․ Role:Standalone - No backup server was specifiedPrimary Server - This SmartStor is the primary, the other SmartStor is thebackupBackup Server - This SmartStor is the backup, the other SmartStor is theprimary․ Primary or Backup Server - The IP address of the other SmartStor on thenetwork.․ Schedule - Replication schedule in number of hours, daily or weekly.Appears on the primary server.Setting up NAS ReplicationTo set up NAS replication:1. Click the Administration topic and choose the Backup icon to expand theTree.2. In the Tree, click the NAS Replication icon.169
SmartStor NAS Product Manual3. Click the Setup tab.4. Under Settings, click the option button to assign a role to this SmartStor:․ Standalone - Use this option when you only have one SmartStor onyour network. This is the default setting and it disables NAS Replication.․ Primary - This SmartStor is the primary and the other SmartStor is thebackup server.․ Backup Server - The other SmartStor is the primary and this SmartStoris the backup server.5. Optional. If you chose Primary or Backup Server, type the IP address of theother SmartStor on your network.6. Under Schedule, click the option button for the schedule type you want:․ Disable - Disables NAS Replication․ Do it at once - Performs a NAS Replication when you click the OKbutton.․ Daily - Sets the time of day when the NAS Replications happen.․ Weekly - Sets the time of day and day of the week when the NASReplications happen.7. Click the OK button.8. In the confirmation box, click the OK button.Enabling One Touch BackupOne Touch Backup is a feature that enables you to backup specified foldersfrom your PC to the SmartStor by pressing a button on the front of theSmartStor.There are three settings under the One Touch Backup:․ Client Backup․ USB BackupTo enable One Touch Backup:1. Click the Administration topic and choose the Backup icon to expand theTree.170
Chapter 6: WebPASM2. In the Tree, click the Easy Backup icon.3. In the One Touch Backup tab, click the Enable option.4. Click the OK button.5. In the confirmation box, click the OK button.To disable One Touch Backup, click the Disable option, then click the OKbutton.You must create a backup schedule in SmartNAVI so the One Touch Backupfunction will know which folders and files to backup.Setting USB BackupThe USB Backup tab enables you to change the backup services of theSmartStor and the USB storage device.To set the USB Backup settings:1. Click the Administration topic and choose the Backup icon to expand theTree.2. In the Tree, click the Easy Backup icon.3. Click the USB Backup tab and then the Backup Services you want.․ Backup data from the USB storage device to Share Folder․ Backup data from Share Folder to the USB storage device4. Select a Backup Method you want from the drop-down list.․ Add Directory․ Copy․ Synchronize171
SmartStor NAS Product Manual5. Select a Folder Name you want from the drop-down list.If you chose the “Backup data from Share Folder to the USB storage device”,you can select the folder you want from the Select Folder list.6. Click the OK button.The above action will set the USB Backup and perform an initial replication(backup) of your data.You can set the schedule under the Schedule list. To set the replicationschedule:1. Choose the replication option you want.․ Do it at once—to set schedule immediately and one time only․ Daily․ Weekly2. If you chose Daily, select the time of day from the menus.If you chose Weekly, select the day of the week and time of day from themenus.172
Chapter 6: WebPASM3. Click the OK button.Replication will occur automatically as scheduled.6.9 Managing the Network ConnectionViewing Network Setup InformationTo view network setup information:1. Click the Administration topic and choose the Network icon to expand theTree.2. In the Tree, click the Network Setup icon.The current network setup for this SmartStor displays on the Information tab:․ Computer Name․ IP Address․ Subnet Mask․ Default Gateway IP Address․ Primary Domain Name Server IP Address․ Secondary Domain Name Server IP AddressTo change these settings, click the Setup tab.Making Network SettingsTo make network settings:1. Click the Administration topic and choose the Network icon to expand theTree.2. In the Tree, click the Network Setup icon.3. Click the Setup tab.4. Optional. Type a name for the SmartStor in the Computer Name field.5. Click an option button to choose an Internet Protocol option:․ Obtain an IP address automatically - Choose this option to let yourDHCP server make the network settings.․ Specify an IP address - Choose this option if you want to make yournetwork settings manually.173
SmartStor NAS Product Manual6. Optional. If you chose Specify an IP address, enter the following settings inthe fields provided:․ IP Address․ Subnet Mask․ Default Gateway IP Address․ Primary Domain Name Server IP Address․ Secondary Domain Name Server IP AddressSee your Network Administrator for help in making these settings.7. Click the OK button.8. In the confirmation box, click the OK button.Working with Jumbo FramesThe term jumbo frame refers to a frame on a local area network that is largerthan the standard 1518 byte size. SmartStor supports jumbo frames up to 9000bytes.On SmartStor, the frame size setting is called Maximum Transmission Unit(MTU). The default MTU or frame is 1500 bytes. This setting is appropriate formost users. See your Network Administrator before you change this setting.To make frame size settings:1. Click the Administration topic and choose the Network icon to expand theTree.2. In the Tree, click the Network Setup icon.3. Click the Jumbo Frame tab.4. From the MTU dropdown menu, choose the maximum MTU or frame size:․ 1500 bytes (default)․ 4000 bytes․ 7000 bytes․ 9000 bytes174
Chapter 6: WebPASM5. Click the OK button.6. In the confirmation box, click the OK button.Working with DDNSA Domain Name Service (DNS) translates human-readable host names, such aswww.promise.com, into IP addresses, such as 103.204.15.26, and back again.A Dynamic DNS (DDNS) is required because in many cases, IP addressesperiodically change. The DDNS enables you to keep up-to-date and stayconnected.There are two DDNS options:․ Provide your own DDNS server․ Register with an online DDNS serviceA free online DDNS service is available at http://www.dyndns.com/.Making DDNS SettingsWebPASM requires the DDNS domain name, user name, and password to workwith the DDNS server. See your Network Administrator or the online DDNSservice for this information.To make DDNS settings:1. Click the Administration topic and choose the Network icon to expand theTree.2. In the Tree, click the Network Setup icon.3. Click the DDNS tab.4. Click the Enable option.5. Type the required information in the fields provided:․ DDNS (domain) name․ User name․ Password175
SmartStor NAS Product Manual6. Click the OK button.7. In the confirmation box, click the OK button.6.10 Making Management SettingsViewing the Event LogThe event log keeps a log of the 20 most recent events on the SmartStor. Youcan use this information to review your actions and to diagnose problems.To view the Event Log:1. Click the Administration topic and choose the Management icon to expandthe Tree.2. In the Tree, click the Event Log icon.A list of the 50 most recent events displays on the Event Log tab.Events are ranked in severity as Information, Warning, and Error.Setting up SMTP AuthenticationIn order to set up email alerts over a network, you must enable the SMTPservice, specify a SMTP server, and in most cases, supply authenticationinformation.176
Chapter 6: WebPASMSee your Network Administrator for help with these settings.To set up SMTP authentication:1. Click the Administration topic and choose the Management icon to expandthe Tree.2. In the Tree, click the Mail Alert icon.3. Click the Setup tab.4. Next to Service, click the Enable option button.5. In the SMTP Server field, type the IP address or the DNS name of yourSMTP server.6. Optional. Type a new number in the Command Port field.25 is the default number.7. In the From field, the sender’s email address that you want to appear in thealert messages.8. Next to SMTP Authentication:․ Click the Yes option button to enable authentication.․ Click the No option button to disable authentication.Note that most SMTP servers require authentication.9. If you enabled authentication, to the following:․ In the User Name field, type the mail server account name.․ In the Password field, type the password of the mailer server account.10. Click the OK button.11. In the confirmation box, click the OK button.Sending a Test MessageBefore you can send a test message, you must set up SMTP authentication andhave at lease one email alert recipient.To send a test email message:1. Click the Administration topic and choose the Management icon to expandthe Tree.2. In the Tree, click the Mail Alert icon.3. Click the Setup tab.4. Click the Test button.177
SmartStor NAS Product Manual5. In the confirmation box, click the OK button.A test email message is sent to each recipient on the Mail List tab.Viewing the Email Alert ListThe SmartStor will send alerts via email to the recipients you designate.To view a list of Email Alert recipients:1. Click the Administration topic and choose the Management icon to expandthe Tree.2. In the Tree, click the Mail Alert icon.The list of recipients displays on the Mail List tab.See “Checking Your Email Inbox” on page 229 for an example of an emailalert message.Adding an Email Alert RecipientYou can have up to 32 Email Alert recipients.To add an Email Alert recipient:1. Click the Administration topic and choose the Management icon to expandthe Tree.2. In the Tree, click the Mail Alert icon.3. Click the Add tab.4. In the E-Mail Address field, type the recipient’s email address.178
Chapter 6: WebPASM5. Click the OK button.6. In the confirmation box, click the OK button.Deleting an Email Alert RecipientTo delete an Email Alert recipient:1. Click the Administration topic and choose the Management icon to expandthe Tree.2. In the Tree, click the Mail Alert icon.3. Click the Delete tab.4. Click the option button beside the E-Mail Address you want to delete.5. Click the OK button.6. In the confirmation box, click the OK button.Adding Application Plug-insThis feature enables you to upgrade the SmartStor by adding an applicationplugin.The procedure requires you to place the plug-in file into a folder on theSmartStor.WebPASM installs plug-ins from a folder on the SmartStor. SmartNAVI installsplugins from your PC. Also see “Adding Application Plug-ins” on page 96.<strong>Download</strong> your plug-ins from the Promise Support Web<strong>site</strong>. Plug-in file namesend with a .ppg extension. Place the plug-in file into a folder on the SmartStor.To create a new folder, click on the File & Print icon, then on the File Sharingicon, then click on the Create tab.To install the plug-in:Unzip the file if necessary.Click the Browse button to select the plug-in file (the file name ends with “.ppg”normally).179
SmartStor NAS Product ManualClick the OK button. The application plug-in installs automatically. The processtakes several minutes.WarningDo not disconnect the power or shut down the SmartStor whilethe plug-in installation is running!When the installation is done, WebPASM displays a notification dialog box.7. In the confirmation box, click the OK button.Removing Plug-insThere are two reasons to remove a plug-in:․ To replace the old plug-in with a new one․ You know that you will never use the plug-inBefore you remove a plug-in, consider disabling it, instead. See “Enabling andDisabling Application Plug-ins” on page 151.To remove a plug-in from SmartStor:1. In the Tree, click the + beside the Management icon.2. In the Tree, click the System Upgrade icon, then click the Delete Plug-intab.3. Click the option button to the left of the plug-in you want to delete.4. Click the OK button.5. In the confirmation box, click the OK button.Enabling and Disabling the BuzzerThe SmartStor has a buzzer that sounds when the SmartStor is finished bootingand when a problem is detected. The buzzer is enabled by default.Promise recommends that you leave the buzzer enabled.To disable the buzzer:1. Click the Administration topic and choose the Management icon to expandthe Tree.2. In the Tree, click the Buzzer&LED icon.3. Click the Buzzer setup tab and the Disable option button.180
Chapter 6: WebPASM4. Click the OK button.5. In the confirmation box, click the OK button.Click the Enable option button, then click the OK button to enable the buzzer,then click the OK button in the confirmation box.Enabling and Disabling the LEDThe LED Setup tab enables you to turn on or off the SmartStor LED and set thetime schedule.To activate the LED:1. Click the Administration topic and choose the Management icon to expandthe Tree.2. In the Tree, click the Buzzer&LED icon.3. Click the LED setup tab and the Disable option button.4. Click the Always ON button.5. Click the OK button.The LED is enabled.To deactivate the LED:1. Click the Always OFF button.2. Click the OK button.The LED is disabled.To set the time period for turning on/off the LED:1. Select the Daily button and select the time of day from the menus.181
SmartStor NAS Product Manual2. Click the OK button.The time setting is applied.Viewing UPS StatusIf you have an APC Uninterruptable Power Supply (UPS) attached to theSmartStor, you can check its status in WebPASM.To view UPS status:1. Click the Administration topic and choose the Management icon to expandthe Tree.2. In the Tree, click the APC UPS icon.The Information tab displays the status of the UPS.If there is no UPS connected or recognized, the Status field reports “NOUPS.”Setting up a UPSThis feature enables you to tell the SmartStor how long to run on UPS batterypower and when to shutdown, after a power failure.To set up a UPS:1. Attach the APC UPS to one of the SmartStor’s USB ports.2. Click the Administration topic and choose the Management icon to expandthe Tree.3. In the Tree, click the APC UPS icon.4. Click the Setup tab.5. Click the option button beside the shutdown option you want:․ Disable - Run until the UPS battery is depleted․ Run until the UPS battery reaches a certain percentage․ Run on the UPS battery for certain period of timeIf you chose battery percentage, type a percentage amount in the % field.If you chose running time, type the number of minutes into the Mins. field.6. Click the OK button.7. In the confirmation box, click the OK button.182
Setting up System StandbyChapter 6: WebPASMThis feature enables the SmartStor to shut down the disk drives in order to savepower. You choose the interval of inactivity on the SmartStor after which thedrives are powered down. System standby is disabled by default.To set up System Standby:1. Click the Administration topic and choose the Disk Status LEDManagement icon to expand the Tree.2. In the Tree, click the Power Options icon.3. From the dropdown menu on the System Standbytab, choose the time interval you want. Click theoption button beside the shutdown option youwant:․ After 3 minutes - Minimum․ After X minutes or hours․ After 5 hours - Maximum․ Never - DisabledDisk Activity LED4. Click the OK button.5. In the confirmation box, click the OK button.When the SmartStor is on standby, the Disk Status and Disk Activity LEDsgo dark.The System Status LED remains toEthernet activity LEDnormal status color.The Ethernet Activity LED continues toblink blue/green in response to networkactivity.SystemStatus LED183
SmartStor NAS Product ManualEnabling and Disabling the Power On LANThe Power On LAN tab allows you to enable or disable the Power On LANfunction, which enables SmartNAVI to change the Standby state to Poweredstate.1. Click the Administration topic and choose the Management icon to expandthe Tree.2. In the Tree, Click the Power Options icon.3. To enable Power On LAN, click the Enable option and click the OK button.4. To disable Power On LAN, click the Disable option and click the OK button.Power On/Off AutomaticallyThe Power On/Off Automatically tab allows you to set the AC power resumesand the power On/Off schedule.1. Click the Administration topic and choose the Management icon to expandthe Tree.2. In the Tree, Click the Power Options icon.3. The AC Power Resumes setting enables you to:․ Turn on the server automatically․ The server should remain off4. Click the button beside the option you want and click the OK button.The power On/Off schedule enables you to schedule when the SmartStor turnon and off. The options are:․ Disable--no power turn on and off automatically․ Daily--at a set time of day․ Weekly--on a certain day and timeTo specify a power on/off schedule:1. Click the button beside the option you want.2. If you selected Daily, choose the hour and minute (time of day) from thedropdown menus.If you selected Weekly, choose the day of the week, hour and minute (timeof day) from the dropdown menus.184
Chapter 6: WebPASM3. Click the OK button.The new power on/off schedule is applied.6.11 Managing the SystemSetting System Date and TimeTo set the date and time on the SmartStor:1. Click the Administration topic and choose the System icon to expand theTree.2. In the Tree, click the Date / Time icon.3. Click the Setup tab.4. From the dropdown menus, choose the time and date values.5. Click the OK button.6. In the confirmation box, click the OK button.Adjusting for Daylight Saving TimeTo adjust the SmartStor’s clock for daylight saving time:1. Click the Administration topic and choose the System icon to expand theTree.2. In the Tree, click the Date / Time icon.3. Click the Time Zone tab.4. Check the Adjust clock for daylight saving changes box.5. From the dropdown menu, choose the increment for daylight saving time inyour location.185
SmartStor NAS Product Manual6. Click the OK button.7. In the confirmation box, click the OK button.Running the Network Time ProtocolYou can use the Network Time Protocol (NTP) to set the system date and timeon your SmartStor to synchronize itself with an external Time Server.To run the Network Time Protocol:1. Click the Administration topic and choose the System icon to expand theTree.2. In the Tree, click the Date / Time icon.3. Click the Time Zone tab.4. From the dropdown menu, choose the time zone for your location.5. Click the OK button.6. Click the NTP tab.7. In the Time Server field, type the URL of the time server you want to use.URL time.nist.gov is the default.8. Under Schedule, choose one of the options:․ Disable - Disables NTP synchronization․ Do it at once - Performs a synchronization when you click the OKbutton.․ Time interval by hour - Set an hourly interval for a synchronization tohappen.․ Daily - Sets the time of day when the synchronization happens.․ Weekly - Sets the time of day and day of the week when thesynchronization happens.186
Chapter 6: WebPASM9. Click the OK button.10. In the confirmation box, click the OK button.Viewing the Results of NTP SynchronizationTo view the results of an NTP synchronization:1. Click the Administration topic and choose the System icon to expand theTree.2. In the Tree, click the Date / Time icon.3. Click the NTP tab.The results of the latest synchronization are displayed:․ Last Synchronization Time - Time and date of the last synchronization․ Last Synchronization Result - OK means successRebooting the SmartStorNormally you will only need to reboot the SmartStor is after a firmware upgradeor a plug-in installation. During the reboot, none of your folders will be accessiblefrom your networked PCs.To reboot the SmartStor:1. Click the Administration topic and choose the System icon to expand theTree.2. In the Tree, click the Reboot / Shutdown icon.3. Click the Reboot option.187
SmartStor NAS Product Manual4. Click the OK button.5. In the confirmation box, click the OK button.SystemThe reboot runs automatically. When the SmartStor StatusLEDis fully booted:․ The system status LED turns to normal statuscolor (right)․ The buzzer beeps one time (if the buzzer is enabled)See “Enabling and Disabling the Buzzer” on page 180.Shutting Down the SmartStorThe only time you need to shut down the SmartStor is to replace the disk drivecooling fan or the power supply.During and after the shutdown, none of your folders will be accessible from yournetworked PCs.Using WebPASMTo shut down the SmartStor:1. Click the Administration topic and choosethe System icon to expand the Tree.2. In the Tree, click the Reboot / ShutdownPower Buttonicon.3. Click the Shutdown option.4. Click the OK button.188
5. In the confirmation box, click the OK button.DirectlyTo shut down the SmartStor, press and hold the power Systembutton for two seconds. The system status LED turns red,StatusLEDthen goes dark (right).Chapter 6: WebPASMRestarting the SmartStorTo restart the SmartStor after a shutdown, press the power buttonon the front of the SmartStor chassis (right).When the SmartStor is fully booted:․ The system status LED turns to normal status color (right)․ The buzzer beeps one time (if the buzzer is enabled)See “Enabling and Disabling the Buzzer” on page 180.SystemStatus LEDLocating the SmartStorIf your SmartStor in is on a rack with other equipment and youneed to locate it quickly, this function will assist you.To locate the SmartStor:1. Click the Administration topic and choose the System icon to expand theTree.2. In the Tree, click the System Information icon.3. Click the System Information tab.4. Click the Locate button.Power ButtonThe SmartStor’s buzzer beeps three times and the system status LED blinksRED three times (right).Viewing System InformationTo view system information:1. Click the Administration topic and choose the System icon to expand theTree.2. In the Tree, click the System Information icon.189
SmartStor NAS Product Manual3. Click the System Information tab.System Information includes:․ Operating System - Embedded Linux․ Firmware Version - Changes when you upgrade the firmware.․ CPU model - MPC 8343․ Network Adapter - Gigabit Ethernet․ MAC Address - MAC address of the Ethernet card․ Network Flow - Inflow and Outflow speeds in bits per secondViewing Enclosure InformationTo view enclosure information:1. Click the Administration topic and choose the System icon to expand theTree.2. In the Tree, click the System Information icon.190
Chapter 6: WebPASM3. Click the Enclosure Information tab.Enclosure Information includes:․ CPU temperature․ System Fan Speed․ Power Status 5V․ Power Status 12V․ Power Status 3.3VIf any values are out of specification, see “Checking Enclosure Status inWebPASM” on page 224.Enabling the Smart FanThe Smart Fan feature slows or turns off the fan to save energy and reducenoise when the fan is not needed to cool the SmartStor enclosure. The SmartFan is enabled by default.To enable the Smart Fan:1. Click the Administration topic and choose the System icon to expand theTree.2. In the Tree, click the System Information icon.3. Click the Enclosure Information tab.4. Under Fan Control, click the Enable option.191
SmartStor NAS Product Manual5. Click the OK button.6. In the confirmation box, click the OK button.6.12 Media CenterMedia Center enables you to play your picture, video, and music files from theSmartStor and to download those files to your PC.Note that there are two features called Media Center. This chapter deals withMedia Center on the SmartStor. See page 116 for Media Center in SmartNAVI.ImportantIn order for your music and video to play, your PC must have theproper software to support the file formats and codecs used tocreate those music and video files.You can identify a file’s format by its file extension. If you do notrecognize a file extension, look it up on a reference web<strong>site</strong> suchas Wikipedia or FILExt.com.You can download players for common music and video fileformats free over the Internet.192
Accessing Media CenterChapter 6: WebPASMTo access Media Center:1. Launch your Browser.2. In the Browser address field, type the IP address of the SmartStorsubsystem.Note that the IP address shown below is only an example. The IP addressyou type into your browser will be different.․ WebPASM uses an HTTP connection...........................................http://․ Enter the SmartStor’s IP address ....................................203.67.129.38․ add ............................................................................................./admin/Together, your entry looks like this: http://203.67.129.38/admin/The WebPASM login screen displays.3. Type admin in both the User Name and Password fields, then click theLogin button.The user name and password are case sensitive.193
SmartStor NAS Product Manual4. Click the Media Center icon.The Media Center screen displays.Using Media CenterMedia Center enables you to play your music, video and picture files from theSmartStor and to download those files to your PC or upload those files to theSmartStor.ALLThe ALL tab enables you to play your entire folder by <strong>Download</strong>, music, picture,upload and video type name.MusicClick the musicTo play a music file:icon to access your music files.1. Choose and click a music folder by Browse, Album, Artist, Genre,Playlist, Tracks or Year to view your music files.2. Click the music file icon or the play icon for the music file.To download a music file:194
Chapter 6: WebPASM1. Choose and click a music folder by Browse, Artist, Album, or Genreto view your music files.2. Click the download icon for the music file.To make a new Playlist:1. Choose and click a music folder by Browse, Artist, Album, or Genreto view your music files.2. Click the add-to-playlist icon for the music file.3. In the Playlist box, click the Save Playlist button.4. In the Playlist Name box, type the name for the Playlist and click the OKbutton.5. In the confirmation box, click the OK button.To add a music file to an existing Playlist:1. Choose and click a music folder by Browse, Artist, Album, or Genreto view your music files.2. Click the add-to-playlist icon for the music file.3. In the Playlist box, click the Save button.4. In the Playlist Name box, type the name of the Playlist to which you want toadd the music file, and click the OK button.If the name does not match an existing Playlist, a new Playlist is createdwith the name that you just typed.5. In the confirmation box, click the OK button.To play music files from a Playlist:1. Click the Playlist folder icon to view your Playlists.2. Click the Playlist icon to choose a Playlist.3. Click the play icon to play a single music file. Or Click the Play ALLicon to play all music files in the playlist.To delete a Playlist:1. Click the Playlist folder icon to view your Playlists.2. Click the delete icon for the Playlist.195
SmartStor NAS Product ManualVideoClick the videoicon to access your video files.To play a video, click the video file icon or the play icon for thevideo file.To download a video, click the downloadicon for the video file.PictureClick the pictureicon to access your picture files.To display a picture, click the picture icon or the display icon forthe picture file.To download a picture, click the downloadicon for the picture file.ConfigurationThe Configuration tab enables you to change the service status andconfiguration value and lists Media center information.․ ServiceTo activate/deactivate the DLNA Server service:Click the Stop/Start the Server action button to activate or deactivate the DLNAserver.To activate the File Scanner service:Click the Sta rt Full Re-Scan action button to activate the File Scanner service.․ ConfigurationTo set the configurations for skip scanning files:This setting enables you to set the value for skip scanning images, audio orvideo files smaller than the value you want.1. Type the value number you want to skip scanning into the Value field.2. Click the Apply Change action button to activate the skip scanning service.․ InformationThe Information lists the statistics of songs, videos and pictures.196
Chapter 6: WebPASM6.13 <strong>Download</strong>TransfersThe Transfers tab displays a list of download process information as below:․ ID․ Network․ Filename․ Size․ <strong>Download</strong>ed․ Percentage %․ Sources․ Speed (kb/s)․ ETA․ Priority․ ActionIn the action field, you can click the Pause, Resume or Cancel button to activateor deactivate the download process.Add <strong>Download</strong>The Add <strong>Download</strong> tab enables you to add the Input Link to download the fileyou want and load torrent file.• Input LinkTo add the Input Link to download:1. Type the URL/FTP Link into the input link field.2. Click the download button to start the download action.• Load TorrentTo add the Torrent file to load:1. Click the Browse button the select the torrent file you want.2. Click the Load button to load the file.197
SmartStor NAS Product ManualOptionsThe Options tab enables you to set and change the value of download item youwant.The option list displays the information as below:․ Item․ Value․ ActionTo set and change the value:1. Type the value into each field.2. Click the change button to change the value.3. Click the OK button to the confirmation box.SearchThe Search tab enables you to search the download file and view the result.To search the download files:1. Type the keyword information in the Keyword field.2. Click the Search button to start the search action.The search list displays the information as below:․ ID․ Keyword․ Found․ Waiting․ Action198
Chapter 6: WebPASMIn the action field, you can click the View Result or Remove Search button todo the next download step.If you click the View Result button, the Results list display. It shows theinformation as below:․ ID․ Name․ Size․ Avail․ ActionIf you click the Remove Search button, click the OK button in the confirmationbox.ServersThe Servers tab enables you to connect servers and add eDonkey and eMuleserver you want.The Conn Servers list displays the information as below:․ ID․ Network․ Name․ IP․ Port․ Users․ Files․ State․ ActionTo add Server.met:1. Type the server information into the server field.2. Click the Add button to add the server into the servers.199
SmartStor NAS Product Manual6.14 iTunes ServerCreate PlaylistThe Create Playlist enables you to search the playlist by Titile, Artist, Album orGenre and create your new playlist.To create the playlist:1. Under the Searches list, type the keyword into the keyword field.2. Select the option from the drop-down menu you want.․ By Title․ By Artist․ By Album․ By Genre3. Click the Search button to search the songs related your keyword.4. The Result lists display the search results.5. Click the “+” add into playlist button or “-” remove from playlist button tocreate your playlist.200
6. A playlist window appears, click the Save the Playlist button.Chapter 6: WebPASM7. Type the playlist name you want and click the Save button.8. Click the OK button.The new playlist setting is applied.PlaylistThe Playlist displays the information about the Playlist Name.To change the playlist:1. Click the Edit button.2. A playlist window appears, click the Save the Playlist button.3. Type the playlist name you want and click the Save button.4. Click the OK button.The new playlist setting is applied.Click the Delete button to delete the playlist you want.6.15 Web File ManagerThe File Manager enables you to delete, download, rename, move or copy yourfiles to your destination folder. The File Management lists all the foldersdefaulted by the SmartStor and created by users.․ Admin․ DOWNLOAD․ MUSIC․ PICTURE․ PUBLIC201
SmartStor NAS Product Manual․ UPLOAD․ VIDEO․ Other folders created by usersTo delete a file:1. Select a file you want to delete.2. Click the delete icon.3. Click the OK button in the confirmation box.To download a file:1. Select a file you want to download.2. Click the download icon.3. Click the Save button and select your destination to save the file.To rename a file:1. Select a file you want to rename.2. Click the rename icon.3. Type the new file name in the New Name field.4. Click Rename button and the setting is applied.To move or copy a file:1. Select a file you want to move or copy.2. Click the move or copy icon.3. Select the destination folder from the drop-down menu.4. Click the Move to or Copy to button to move or copy a file to the other folderyou want.202
Chapter 6: WebPASM6.16 Database ServerThe Database Server enables you to view the database information and changesettings for the database server.To login the database server:1. Select the language you want from the drop-down menu.2. Type the default username “root” and password “password” into the loginfield.3. Click the Go button to access to the phpMyAdmin webpage.Note: Please be reminded to change your username and password first.6.17 Web ServerYou can set up your own web<strong>site</strong> by just uploading your web pages to the sharefolder “WWW”. You can simply upload your web pages to the SmartStor NAS bythe following 3 methods:․ Mapped Share folder․ SmartNAVI․ FTP UploadWindows Mapped SharesBy mapping the network shares (WWW) on the NAS server to a drive folder inWindows and you may refer to the step-by-step guide below.1. Right click on My Computer and select “Map Network Drive...”.203
SmartStor NAS Product Manual2. Select the Drive and Folder you want.3. Type your user name and password, and click the OK button.204
Chapter 6: WebPASM4. The uploaded web page appears in the drive folder.SmartNAVIBy mapping the network shares (WWW) on the NAS server to a drive folder inSmartNAVI and you may refer to the step-by-step guide below.1. Go to the Main Window.2. Click the Share Folder icon.3. Click the Mount Share Folder button.4. Click the share folder you want to mount or make a network drive.5. Choose a device name (driver letter) from the dropdown menu.6. Click the Mount button.205
SmartStor NAS Product Manual7. The share folder appears on our PC as a mounted or network drive.206
FTP UploadChapter 6: WebPASM1. Connect to the WWW share via any FTP client of your choice and type in theusername and password when prompted.2. Click the folder you want to transmit.3. The web page appears in the drive folder.207
SmartStor NAS Product Manual6.18 Squeeze CenterThe Squeeze Center is not installed by default. Please download the software byusers and refer to the “Adding Application Plug-ins” on page 96 for furtherinformation.Please refer to the Logitech Web<strong>site</strong> for all the functions and settings about theSqueeze Center.208
Chapter 7: Technology BackgroundChapter 7: Technology Background7.1 Introduction to RAIDRAID (Redundant Array of Independent Disks) allows multiple disk drives to becombined together into a RAID Volume. You create a RAID Volume on yourSmartStor when you perform the setup procedure, either in SmartNAVI or theWebPASM Setup Wizard.The benefits of a RAID can include:․ Higher data transfer rates for increased server performance․ Increased overall storage capacity for a single Volume․ Data redundancy/fault tolerance for ensuring continuous system operation inthe event of a disk drive failureDifferent RAID levels use different organizational models and have varyingbenefits. Also see “Choosing a RAID Level” on page 212. The following outlinebreaks down the properties for each RAID level supported on the SmartStor:Note: 2 Bay NAS only supports RIAD 0, 1.RAID 0 - StripeWhen a RAID Volume is striped, the read and write blocks of data areinterleaved between the sectors of multiple disk drives. Performance isincreased, since the workload is balanced between drives or “members” thatform the RAID Volume.Identical drives are recommended for performance as well as data storageefficiency.Data StripeDisk drivesFigure 1. RAID 0 Striping interleaves data across multiple drivesThe RAID Volume’s data capacity equals the capacity of the smallest disk drivetimes the number of disk drives. For example, one 100 GB and three 120 GBdrives will form a 400 GB (4 x 100 GB) RAID Volume instead of 460 GB.If disk drives of different capacities are used, there will also be unused capacityon the larger drives.Because RAID 0 does not offer Fault Tolerance, meaning that you cannotrecover your data after a disk drive failure, Promise does not recommend a209
SmartStor NAS Product ManualRAID 0 Volume for your SmartStor.RAID 0 Volumes on SmartStor consist of one or more disk drives.RAID 1 - MirrorWhen a RAID Volume is mirrored, identical data is written to a pair of disk drives,while reads are performed in parallel. The reads are performed using elevatorseek and load balancing techniques where the workload is distributed in themost efficient manner. Whichever drive is not busy and is positioned closer tothe data will be accessed first.With RAID 1, if one disk drive fails or has errors, the other mirrored disk drivecontinues to function. This is called Fault Tolerance. Moreover, if a spare diskdrive is present, the spare drive will be used as the replacement drive and datawill begin to be mirrored to it from the remaining good drive.Data MirrorDisk drivesFigure 2. RAID 1 Mirrors identical data to two drivesThe RAID Volume’s data capacity equals the smaller disk drive. For example, a100 GB disk drive and a 120 GB disk drive have a combined capacity of 100 GBin a mirrored RAID Volume.If disk drives of different capacities are used, there will also be unused capacityon the larger drive.RAID 1 Volumes on SmartStor consist of two disk drives.If you want a mirrored RAID Volume with more than two disk drives, see “RAID10 - Mirror / Stripe” on page 211.210
RAID 5 - Block Striping with Distributed ParityChapter 7: Technology BackgroundRAID 5 organizes block data and parity data across the disk drives. Generally,RAID level 5 tends to exhibit lower random write performance due to the heavyworkload of parity recalculation for each I/O. RAID 5 works well for file, database,application and web servers.Distributed ParityDataBlocksdisk drivesFigure 3. RAID 5 Stripes all drives with data and parity informationThe capacity of a RAID 5 Volume equals the smallest disk drive times thenumber of disk drives, minus one. Hence, a RAID 5 Volume with four 100 GBdisk drives will have a capacity of 300 GB. A RAID Volume with two 120 GB diskdrives and one 100 GB disk drive will have a capacity of 200 GB.RAID 5 is generally considered to be the most versatile RAID level.RAID 5 requires a minimum of three disk drives.RAID 10 - Mirror / StripeMirror/Stripe combines both of the RAID 0 and RAID 1 types. RAID 10 canincrease performance by reading and writing data in parallel while protectingdata with duplication. At least four disk drives are needed for RAID 10 to beinstalled.With a four-disk-drive RAID Volume, one drive pair is mirrored together thenstriped over a second drive pair.211
SmartStor NAS Product ManualData StripeData MirrorFigure 4. RAID 10 takes a data mirror on one drive pair and stripes it overtwo drive pairsThe data capacity RAID 10 Volume equals the capacity of the smallest disk drivetimes the number of disk drives, divided by two.In some cases, RAID 10 offers double fault tolerance, depending on which diskdrives fail.RAID 10 Volumes on SmartStor consist of four disk drives.Because all of the available disk drives are used for the RAID Volume, youcannot set up a spare drive with RAID 10.7.2 Choosing a RAID LevelDisk drivesThere are several issues to consider when choosing the RAID level for yourVolume. The following discussion summarizes some advantages,disadvantages and applications for each choice.RAID 0AdvantagesImplements a striped disk RAIDVolume, the data is broken down intoblocks and each block is written to aseparate disk driveI/O performance is greatly improvedby spreading the I/O load acrossmany channels and drivesNo parity calculation overhead isinvolvedDisadvantagesNot a true RAID because it is not faulttolerantThe failure of just one drive will resultin all data in an RAID Volume beinglostShould not be used in mission criticalenvironmentsRecommended applications for RAID 0:․ Image Editing212
Chapter 7: Technology Background․ Pre-Press Applications․ Any application requiring high bandwidthRAID 1AdvantagesSimplest RAID storage subsystemdesignCan increase read performance byprocessing data requests in parallelsince the same data resides on twodifferent drivesDisadvantagesVery high disk overhead - uses only50% of total capacityRecommended applications for RAID 1:․ Accounting/Financial․ Payroll․ Any application requiring very high availabilityRAID 5AdvantagesDisadvantagesHigh Read data transactionDisk failure has a medium impact onrateMedium Write data transaction throughputrateGood aggregate transferrateMost versatile RAID levelRecommended applications for RAID 5:․ File and Application servers․ WWW, E-mail, and News servers․ Intranet serversRAID 10AdvantagesDisadvantagesImplemented as a mirrored RAID Very high disk overhead - uses onlyVolume whose segments are RAID 0 50% of total capacityRAID Volumes High I/O rates areachieved thanks to multiple stripesegmentsRecommended applications for RAID 10:․ Imaging applications․ Database servers․ General fileserver213
SmartStor NAS Product Manual7.3 Spare DriveA spare is a disk drive that has been designated to replace a failed disk drive in aRAID Volume. In the event of the failure of a disk drive within a RAID 1 or threedrive RAID 5 Volume, the spare drive is activated as a member of the RAIDVolume to replace a disk drive that has failed.A spare drive cannot replace the failed drive in a RAID 0 Volume because of theway in which data is written to the disk drives under RAID 0.A spare drive is not available for a RAID 10 Volume because RAID 10 requiresall four disk drives in the SmartStor enclosure. However, when you replace thefailed disk drive, the SmartStor will automatically rebuild the RAID Volume usingthe new disk drive.You must designate a disk drive as a Spare. By default, and unassigned diskdrive is Free. Use WebPASM to designate the Free disk drive as a Spare. SeeMaintaining a spare drive is a good precaution to protect your RAID Volumeintegrity in the event of disk drive failure.7.4 Automatic RebuildingWhen a disk drive in your RAID 1, 5, or 10 Volume fails, and a replacement diskdrive becomes available, the RAID Volume will rebuild itself to the new disk driveautomatically.For RAID 1 and three-drive RAID 5 Volumes, you can designate a spare drive. Ifa spare drive is present when the RAID Volume experiences a disk drive failure,the rebuild will start automatically using the spare drive.For RAID 1, RAID 5, and RAID 10 Volumes without a spare drive, the RAIDVolume will begin to rebuild itself automatically when you remove the failed diskdrive and install a new disk drive.A RAID 0 Volume cannot be rebuilt because of the way in which data is written tothe disk drives under RAID 0. Even if there is a designated spare drive,rebuilding is not possible for RAID 0 Volumes.7.5 Partition and FormatWhen you create a RAID Volume on SmartStor, the RAID Volume isautomatically partitioned and formatted for you.To use your RAID Volume, you must create Folders on the RAID Volume andassign services to those Folders according to your requirements. SmartStorprovides file services for Windows, UNIX/Linux and Mac, so all of those PCs canaccess the folders on the SmartStor, even though each PC might have adifferent file system.214
7.6 RAID Volume MigrationMigration is the process of:․ Changing the RAID level․ Adding disk drives but keeping the same RAID levelChapter 7: Technology BackgroundIn the migration process, the existing RAID Volume is called the Source. Theproposed RAID Volume is called the Target. Each target RAID Volume hascertain requirements and they are different for each RAID level. You must meetall of the requirements in order to successfully migrate a RAID Volume.In most cases, you must add one or more disk drives during the migrationprocess. You can never reduce the number of disk drives.While the migration is running, you can still access the folders on your RAIDVolume and the data they contain.The tables below shows the migration options for a source RAID Volumeaccording to its RAID level. The available target RAID levels are shown with theirrequirements.RAID 0A RAID 0 source Volume can migrate to the following target RAID levels:TargetRequirementsRAID 0Add disk drives.RAID 12 disk drives only.Only a 1-drive RAID 0 can migrate to RAID 1. Add 1 diskdrive.RAID 53 disk drives minimum.At least 1 more disk drive than the RAID 0 RAID Volume.RAID 1RAID 5RAID 10A RAID 1 source Volume can migrate to the following target RAID level:TargetRequirementsRAID 53 disk drives minimum.At least 1 more disk drive than the RAID 0 RAID Volume.A RAID 5 source Volume can only add a drive.TargetRequirementsRAID 5Add a disk drive.A RAID 10 source Volume cannot migrate or add more disk drives.215
SmartStor NAS Product ManualChapter 8: TroubleshootingThis chapter deals problems you might encounter with your SmartStor and howto resolve them. Also see “Frequently Asked Questions” on page 233.8.1 Responding to an Audible AlarmThe SmartStor has two beep patterns․ Single beep, not repeated - The SmartStor is online․ Two beeps, continuously repeated - The SmartStor reports a problemWhen you boot or reboot the SmartStor, and the buzzer is enabled, the buzzersounds one time to indicate that the SmartStor is online.8.2 Checking the System Status LEDThe SmartStor system status LED (see Figure 1.) reports the condition of theEnclosure fan and power supply:․ Blue(NS4600)/Green(NS2600) - Normal Enclosure function․ Amber - There is a problem with the fan or power supply․ Red - The fan, power supply, or file system has failed.The system status LED blinks red three times when you click the Locate NASicon in SmartNAVI or the Locate button in WebPASM.If your SmartStor is configured to work with a UPS, it will continue to run after apower supply failure.8.3 Checking Disk Status LEDsThe disk status LEDs (see Figure 1.) report the condition of the disk drives:․ Blue(NS4600)/Green(NS2600) - Normal disk drive function․ Amber - Rebuilding to this disk drive․ Red - Failed disk drive․ Dark - No disk drive is installedThe disk status LEDs are also dark when the drives are powered down duringsystem stand-by.See “Replacing a Failed Disk Drive” on page 217.216
Chapter 8: TroubleshootingFigure 1. SmartStor Disk and System Status LEDsDisk Activity LEDDisk Activity LEDSystem Status LED8.4 Replacing a Failed Disk DriveIf a disk drive fails, the Disk Status LED is red. See Figure 1. If the disk drivebelongs to a RAID Volume, the Volume goes Critical or Offline. See “CheckingRAID Volume Status in WebPASM” on page 217.Replace the failed disk drive with a new disk drive of the same or slightly greatercapacity. You do not have to power down the SmartStor.1. Open the SmartStor’s front door.2. Pull out the drive carrier with the failed drive.3. Remove the failed disk drive from the drive carrier.4. Install a new disk drive into the carrier.5. Place the carrier with the new disk drive back into the open slot in theSmartStor.If the failed drive belonged to a RAID Volume, the RAID Volume will beginrebuilding as soon as the new drive is installed.During the Rebuild, the Disk Status LED show amber. When the Rebuild isfinished, the Disk Status LED turns to normal status color.If the replacement drive is free, that is, not assigned to a RAID Volume or as aspare, the Disk Status LED remains dark after you install the new drive.8.5 Checking RAID Volume Status in WebPASMTo view RAID Volume status:1. Start WebPASM.217
SmartStor NAS Product Manual2. Click the Administration topic and choose the RAID & File System icon toexpand the Tree.3. In the Tree, click the RAID Management icon.The status is displayed in the RAID Status tab.Figure 2. WebPASM reports a Critical RAID VolumeSmartStor Responds to a Critical RAID VolumeHow the SmartStor responds to a Critical RAID Volume depends on the RAIDlevel of your Volume and whether you have a spare drive available:․ For a RAID 1 Volume or a three-drive RAID 5 Volume, if a spare drive isavailable, the RAID Volume begins rebuilding itself automatically.․ For RAID 1, 5, and 10 Volumes, when no spare drive is available, you mustreplace the failed disk drive. The RAID Volume will begin rebuilding itselfwhen you install the new disk drive. See “Replacing a Failed Disk Drive” onpage 217.․ RAID 0 Volumes go offline after a disk drive failure. A RAID 0 Volume cannotbe rebuilt. All data on the Volume is lost.Additional Details about Rebuilds․ The Rebuild takes several minutes, depending on the size of your diskdrives.․ During a rebuild, you can access your folders on the SmartStor.․ RAID Critical icon.․ When you replace the failed disk drive with a new disk drive, the new diskdrive becomes a Free Drive.Responding to an Invalid RAID VolumeThe SmartStor considers a RAID Volume invalid when the RAID Volume wascreated by a different SmartStor. However, the RAID Volume itself remainsfunctional and the data on it is safe.This condition could happen when you:․ Move the disk drives from one SmartStor to a different SmartStor.218
Chapter 8: Troubleshooting․ Remove the disk drives in order to send your SmartStor for service.When the SmartStor’s memory does not recognize the RAID Volume, so ASMdisplays the RAID Volume as invalid. See Figure 3.Use the Recover function to validate the RAID Volume. The Recover tab is onlyactive when an invalid RAID Volume is present and can be recovered.Figure 3. An invalid RAID Volume in WebPASMUsing the Recover FunctionTo validate the RAID Volume:1. Click the Administration topic and choose the RAID & File System icon toexpand the Tree.2. In the Tree, click the RAID Management icon.3. Click the Recover tab.4. On the Recover tab, click the option button beside the invalid RAID Volume.5. Click the OK button.The SmartStor will reboot itself to update its configuration and recognize theRAID Volume.ImportantRunning the Recover function might erase some or all of yourSmartStor settings. If that condition happens, run the NAS SetupWizard. See “Setting up the SmartStor” on page 37.8.6 Checking File System Status in WebPASMTypically the first indication of a problem with the SmartStor’s file system is whenyour network drive becomes unavailable.You might also see the message, “File system contains errors. Please check.”when you click the icons under the File & Print menu.To view File System status:1. Start WebPASM.2. Click the Administration topic and choose the RAID & File System icon toexpand the Tree.219
SmartStor NAS Product Manual3. In the Tree, click the File System Management icon.4. Look for the RAID Volume icon on the File System Status tab.If the RAID Volume icon is Critical (has a yellow!), the file systemcontains errors and you must rebuild the file system. See below.Rebuilding the File SystemWhen you only have read access to your files or no access at all, the FileSystem might be damaged. This feature checks, and where necessary rebuildsthe File System without loss of data.You cannot access any data on the SmartStor while the check/rebuild operationis running.To rebuild a File System:1. Click the Administration topic and choose the RAID & File System icon toexpand the Tree.2. In the Tree, click the File System Management icon.3. In the File System Status tab, click the RAID Volume Critical icon to displaythe Check File System button.4. Click the Check File System button.5. In the confirmation box, type yes into the field provided, then click the OKbutton.During the File System Check or Rebuild, the System Status LED blinksamber and the Disk Activity LEDs blink blue/green. See page 217, Figure 1.The time needed to check and rebuild the File System depends on theamount of data on the SmartStor. The process can take anywhere from 10minutes to 2 hours.WarningDo not disconnect the power or shut down the SmartStor whilethe check/rebuild is running!8.7 Checking the Event Log in WebPASMTo view the Event Log in WebPASM:To check Enclosure status:1. Start WebPASM.2. Click the Administration topic and choose the Management icon to expandthe Tree.3. In the Tree, click the Event Log icon.The Event Log displays. See Figure 4.220
Chapter 8: TroubleshootingFigure 4. The WebPASM Event Log4. Check the Event Log for reports of disk drive failure or other problems.Responding to EventsAll events are reported in the Event Log. Most events are simply reports that theSmartStor is responding to your commands.Many events are also reported via email. The SmartStor’s buzzer sounds forserious events that require your attention.Reported EventCorrective ActionFile SystemFile system of volume X content The file system has a problem.errors! Check the system before Reboot the SmartStor and check filecontinuing.system again. If the event appearsagain, the file system has crashed.Rebuild the file system. See page219.File system capacity usage of volumeX is over 90%.File system capacity usage of volumeX is 100%.Rebuilding file system...Reduce the number or size of thefiles or expand the volume size. See“Migrating a RAID Volume” on page159.The file system is being rebuild byuser action.221
SmartStor NAS Product ManualReported EventNAS ReplicationNAS replication is completed.System is busy. NAS replication isabort!System is doing another replication.NAS replication is abort!NAS replication is failed!SnapshotsThe snapshot capacity usage whichtimestamp is [date and time] ofvolume X is over 90%.System is busy. Snapshot creationwas aborted!System is creating another snapshot.Snapshot creation was aborted!System (enclosure)System is starting to work. Normal.System is rebooting.System is shutting down.System was shut down abnormally.CPU temperature is higher than58°C/138°F.System will shut down.Corrective ActionNAS replication has finished. Normal.The RAID Volume is currentlyformatting, rebuilding, or migrating.Wait until this process is done. Thentry the replication again.The SmarStor is currently doing areplication. Wait until the currentreplication is done. Then try thesecond replication again.There is a failed network connectionbetween the two SmartStors. Correctthe problem and try again. See page225.Move the snapshot volume toanother storage location.Or delete the snapshot and thencreate a new one. See page 167.The RAID Volume is currentlyformatting, rebuilding, or migrating.Wait until this process is done. Thentry the snapshot again.The SmarStor is currently doing asnapshot. Wait until the currentsnapshot is done. Then try thesecond snapshot again.Normal.The SmartStor shut down incorrectlythe last time.See “Shutting Down the SmartStor”on page 188.Allow the SmartStor to cool forseveral minutes. Then restart theSmartStor and check systemtemperature and fan operation. Seepage 191.Be sure there is adequate aircirculation around the SmartStor.222
Chapter 8: TroubleshootingReported EventSystem fan speed is lower than 1800RPM. Check the system beforecontinuing.AC Power failure. System will shutdown.Disk DrivesTask X timeout on disk Y at LBA[address]Task X disk error on disk Y at LBA[address] with status ZCorrective ActionTry enabling or disabling the SmartFan. See page 191. If the fan stillruns below 1800 RPM, contactTechnical Support. See page 236.Restore the AC power. Then restartthe SmartStor.See “Connecting the Power” on page8.A LBA error. Check the disk drives.See page 217.Check the RAID Volume. See page217. Replace the disk drive or rebuildthe RAID Volume as needed.S.M.A.R.T threshold exceeded Check the disk drives. See page 217.Replace the failed drive. See page217.BSL update on disk X at LBA[address]BSL log disk X at LBA [address]clearedDelete Spare DiskRAID VolumesCreate [RAID name, RAID level andX number of disk drives]Delete RAID XMigration or Rebuilding on array Xstarted.Migration or Rebuilding on array X atY%.Migration or Rebuildingon array X paused at Y%Migration or Rebuildingon array X resumed at Y%Migration or Rebuilding on array Xcompleted.Bad sector on a disk drive. Check thedisk drives.See page 217. Replace the disk driveif it continues to receive BSLupdates.Check the disk drives. See page 217.Delete a spare drive. Normal.Create a RAID Volume. Normal.Delete a RAID Volume. Normal.RAID Volume Migration or Rebuildhas started. Normal.Progress report on RAID VolumeMigration or Rebuild. Normal.RAID Volume Migration or Rebuildwas paused temporarily by useraction.RAID Volume Migration or Rebuildwas paused and then resumed byuser action.RAID Volume Migration or Rebuildhas finished. Normal.223
SmartStor NAS Product ManualReported EventMigration or Rebuilding on array Xaborted at Y%Migration or Rebuilding on array Xaborted at Y% because of error.RAID status: “OFFLINE”.The SmartStor NAS X volume Y isoffline.RAID status: “CRITICAL”.The SmartStor NAS X volume Yis not functioning correctly.RAID X had some errors.Formatting was aborted!Corrective ActionRAID Volume Migration or Rebuildwas aborted (stopped) by useraction.RAID Volume Migration or Rebuildhas aborted (stopped) because of anerror. Check the disk drives.See page 217. Check the RAIDVolume. See page 217.Check the disk drives. See page 217.Replace the failed drive. See page217. Create a new RAID Volume.See page 158.Check the disk drives. See page 217.Replace the failed drive. See page217. The RAID Volume will rebuildautomatically.Check the disk drives. See page 217.Replace the failed drive. See page217.8.8 Checking Enclosure Status in WebPASMTo check Enclosure status:1. Start WebPASM.2. Click the Administration topic and choose the System icon to expand theTree.3. In the Tree, click the System Information icon.4. Click the Enclosure Information tab.See Figure 5.224
Chapter 8: TroubleshootingFigure 5. The Enclosure Information tab with malfunctions shownThe corrective action you take depends on the nature of the problem:․ If CPU temperature is above specification:․ Be sure there is adequate air flow around the SmartStor.․ Be sure the ambient temperature is below 35°C (95°F).․ Check the fan speed.․ If the fan speed is below specification, contact Technical Support. See page236.․ If any power status is out-of-specification, contact Technical Support. Seepage 236.8.9 Solving Network Connection ProblemsMost network connection problems are the result of poor connections.When the SmartStor is fully booted and connected to the network, the EthernetActivity LED indicates status and activity:․ Blue(NS4600)/Green(NS2600) - Network link is properly connected․ Flashing Blue/green - Network Activity․ Dark - No ConnectionSee Figure 6.If your SmartStor is connected to your network but the Ethernet Activity LED onyour SmartStor is dark, check the following items:․ Verify that the switch, hub, or facility network service connection that you areusing is operational.Switches and hubs have LEDs that light when there is a connection andflash when there is activity.Network service connections generally do not have LEDs to verify whetherthey actually are connected to the network. See your Network Administratorfor assistance.․ Be sure the network cable is firmly attached to the SmartStor network225
SmartStor NAS Product Manualconnector at one end and to the network switch, hub, or facility networkconnection at the other.․ If the cable connections are good, remove the existing network cable andinstall a known-good network cable.Figure 6. System Status and Ethernet Activity LEDsSystem StatusLEDEthernet ActivityLEDPOWER buttonIf you know your network devices are working properly and you know that yournetwork cable is good, but the Ethernet Activity LED remains dark, see“Contacting Technical Support” on page 236.The SmartNAVI application is designed to detect the SmartStor on your network.If SmartNAVI does not detect your SmartStor, check the following items:․ Be sure the SmartStor is powered up and fully booted.The System Status LED should be blue/green. See Figure 6.․ Be sure the SmartStor is properly connected to your network.The Ethernet Activity LED should be blue/green or blinking blue/green. SeeFigure 6.If the Ethernet Activity LED is dark, see “Solving Network ConnectionProblems” on page 225.․ Be sure that SmartNAVI is looking on the same network where youconnected the SmartStor.․ If you are running a personal firewall on your Windows PC, the firewall mightprevent you from accessing folders on the SmartStor. You must do one ofthe following actions:․ Disable the firewall․ Add an exception for the SmartStorSee “Resolving a Windows Firewall Issue” on page 231.226
Chapter 8: TroubleshootingVerifying Connections with SmartNAVIIf your PC has multiple network connections, you must verify thatSmartNAVI is looking on the network where the SmartStor isinstalled:Double-click the SmartNAVI icon in the Windows applicationtray or Mac Dock (right).The SmartNAVI Main Window opens.SmartNAVI inWindowsSmartNAVI inMac OS XIf your SmartStor does not appear in the SmartNAVI Main window, SmartNAVIdoes not detect the SmartStor on your network. If you have verified all otherfunctions, then you might have SmartNAVI and SmartStor on different etworks.8.10 SmartStor LockupOn rare occasions, SmartNAVI or WebPASM become unresponsive to yourinputs. If that happens, check the SmartNAVI Main window on your PC. SeeFigure 7.227
SmartStor NAS Product ManualFigure 7. SmartNAVI Main windowIf the SmartStor used to appear in the SmartNAVI Main window previously but isno longer there, the SmartStor is probably locked up or frozen and requires ahard reboot.CautionThis action is appropriate only when there are no data transfersor installations in progress.Do not disconnect the power to reboot the SmartStor unless theproper shutdown procedure does not work.Keep the SmartNAVI Main window open during this procedure.To hard reboot the SmartStor:1. Press and hold the Power button for two seconds.During a proper shutdown, the System Status LED turns RED, then goesdark.If the System Status LED stays the normal status color, the SmartStor islocked up.See Figure 8.228
Chapter 8: TroubleshootingFigure 8. SmartStor front and back viewsDisk Activity LEDSystem StatusLEDPower ButtonPowerConnection2. Disconnect the power cable from the SmartStor.3. Wait 10 seconds, then reconnect the power cable.4. Press the Power button.It takes about a minute to boot the SmartStor. When fully booted:․ The System Status LED turns the normal status color.․ The buzzer beeps one time.5. Verify that the SmartStor now appears in SmartNAVI Main window.The SmartStor automatically runs a File System Check due to the abnormalshutdown. During the File System Check, the System Status LED blinksamber and the Disk Activity LEDs blink blue/green. See page 219 for moreinformation.8.11 Checking Your Email InboxIf you enabled Mail Alert in WebPASM, the SmartStor will send you an emailmessage when a problem arises. Look for a message from “root.”229
SmartStor NAS Product ManualFigure 9. Email message from the SmartStor.See “Adding an Email Alert Recipient” on page 178 for more information aboutemail alerts.8.12 Restoring the Default PasswordNormally, you change your password in WebPASM. See “Changing the User’sPassword” on page 136.If you changed the password and then forgot the new password, you can resetthe SmartStor to the default password: admin. Use a straightened paper clip orthe tip of a ball-point pen as a reset tool.To reset the Administrator’s password:1. Verify that the SmartStor is fully booted.2. Insert your reset tool into the reset button hole on the back of the SmartStor.See Figure 10.3. Press and hold the reset button for Five seconds, until the System StatusLED flashes three times.See Figure 10. The Administrator’s password is now reset to admin.230
Chapter 8: TroubleshootingFigure 10. Reset button and System Status LEDReset buttonSystem StatusLED8.13 Resolving a Windows Firewall IssueIf you a running a personal firewall on your Windows PC, the firewall mightprevent the you from accessing the SmartStor over your network.Follow this procedure to add an exception for the SmartStor:1. From the Windows Start menu, choose Settings, then Network Connections.The Network Connections window opens.2. Right-click Local Area Connection and choose Properties from the popupmenu.The local Area Connection properties dialog box opens.3. Click the Advanced tab.4. Click the Settings button.The Windows Firewall dialog box opens.5. Click the Advanced tab.6. Under Network Connection Setting, click the Settings button.The Advanced Settings dialog box opens.7. Click the Add button.The Service Settings dialog box opens.8. In the Description of service field, type Promise NAS utility.9. In the Name or IP address field, type the IP address of the SmartStor.10. In the External Port field, type 49152.11. Click the UDP option button.231
SmartStor NAS Product Manual12. In the Internal Port field, type 49152.13. Click the OK button.Figure 11. Windows Firewall Advanced Service Settings14. Click the OK buttons in the Advanced Settings, Windows Firewall, and LocalArea Connection Properties dialog boxes.232
Chapter 9: SupportChapter 9: Support9.1 Frequently Asked QuestionsAlso see “Chapter 8: Troubleshooting” on page 216.The SmartStor worked OK until I turned it off. When I turned it on again, myWindows network drive connection no longer works.When you powered up the SmartStor, the DHCP server assigned a differentIP address to the SmartStor. Here are two possible solutions:․ You may be able to reset the SmartStor’s IP address manually. See“Mounting a Share Folder / Creating a Network Drive” on page 83 or“Changing Network Settings” on page 90.Note that changing the SmartStor’s IP address may cause an IP addressconflict on your network. Check with your Network Administrator beforetaking this action.․ If you cannot restore the previous IP address, you must create newnetwork drives and printer connections. See “Chapter 4: Connecting tothe SmartStor” on page 15.When I start Windows, a message displays that says, “Could not reconnectall network drives.”The SmartStor reconnects to your PC shortly after Windows starts. In mostcases, the SmartStor network drives will be available by the time you clickthem.The SmartNAVI application cannot access the SmartStor over the network.If you a running a personal firewall on your Windows PC, the firewall mightprevent you from accessing folders on the SmartStor. You must do one ofthe following actions:․ Disable the firewall․ Add an exception for the SmartStorSee “Resolving a Windows Firewall Issue” on page 231.I tried to connect my SmartStor as a network drive using SmartSYNC, butWindows displayed an error message.There might be an IP address conflict between the SmartStor and anotherdevice on your network. See your Network Administrator for assistance.I cannot log into the SmartStor with through the AD Domain.Be sure you use a “domain name\user name” when you log into theSmartStor using SMB, FTP, or AFP. You must use the “\” character.Many FTP clients do not support a space in the domain name or user name.233
SmartStor NAS Product ManualAlso, the SmartStor does not support a user home directory.How does the SmartStor integrate into an NIS Domain?If the NIS domain account or group name is the same as the SmartStor, theSmartStor will apply them to its account or group.If the SmartStor joins a NIS Domain, joining only affects the NFS service andQuota settings. The other services are not affected.How are non-ASCII folder file names displayed?The SmartStor supports Unicode, so you can use non-ASCII characters inyour folder names. Windows 98 and ME do not support Unicode, so theycannot display your folder names properly. But you can still access yourfolders.I tried to copy a Windows shortcut to my network drive, but an errormessage says there is not enough free disk space.Normally, you can copy a Windows shortcut to a network drive. However, ifthe network drive is a USB drive or memory stick with FAT32 file format, theSmartStor might not recognize the shortcut and prevent you from copying it.If this situation occurs, choose a different folder in which to copy theshortcut.Does SmartStor support a USB drive or memory stick with FAT16 fileformat?No. If you attach the FAT16 USB drive or memory stick to SmartStor, youcan see the files on it. But if you attempt to copy files to the drive or memorystick, Windows might display a disk full message.How do I remove a USB drive or memory stick from the SmartStor?Be sure that no files on the USB drive or memory stick are still open. Thenunplug the USB drive or memory stick from the SmartStor. The SmartStorautomatically unmounts the USB drive or memory stick.Can I do a One Touch Backup or a regular Backup on a protected folder orfile on my Windows PC?No. Windows does not allow SmartSYNC to access protected folders andfiles. If you want to perform a backup, you must first disable protection onyour folders and files.234
Chapter 9: SupportI enabled One Touch Backup and pressed the button on the SmartStor butno files were backed up. What happened?You must create a backup schedule using SmartNAVI. The backup scheduletells One Touch Backup which folders and files to backup from your PC ontothe SmartStor.Which FTP clients are compatible with the SmartStor’s FTP server?Promise recommends FTP clients that support Unicode, such as Filezilla orSmart FTP for Windows, Filezilla for Linux, and Transmit v3.5.5 for Mac.If your FTP client does not support Unicode, you have two choices:․ Use only ASCII characters to name your shared folders.․ Set your SmartStor for double-byte character encoding. See page 148.Can I move the disk drives from one SmartStor to a different SmartStor?Yes. However, to access the RAID Volume on the new SmartStor, you mustrun the Recover function. When SmartStor’s memory does not match theRAID Volume on the disk drives, the RAID Volume is considered invalid andthe Recover function becomes available. See “Responding to an InvalidRAID Volume” on page 218.I set up email alert recipients but they never receive any messages.In most cases, you must setup SMTP authentication in order for your alertmessages to pass your SMTP server. See “Setting up SMTP Authentication”on page 176.Can SmartStor handle jumbo frames?Yes. But you must set the maximum frame size in WebPASM. See “Workingwith Jumbo Frames” on page 174.I tried to create a share folder called “Admin” but the WebPASM softwarewould not let me.The Admin name is a reserved folder name. Choose another folder name.I created a share folder and gave it the same name as a local user. Thisaction caused a conflict.The system does not check share folder names against user names,therefore it is possible to create two folders with the same name. If thishappens, delete the share folder, so that only the user’s home folderremains.235
SmartStor NAS Product ManualIs there a Windows browser that supports the Bonjour service?Yes. Apple’s Safari browser supports Bonjour and is available for Windows.And a Bonjour for Windows plug-in is available for Internet Explorer.Why do my drives fill up when I regularly delete unused files?If you are running a Windows OS with the Recycle Bin enabled, you mustperiodically empty Recycle Bin. Deleted files move to the Recycle Bin, thesame as on a Windows PC. They are not deleted from the SmartStor untilyou empty the Recycle Bin.Where can I find a list of plug-ins installed on my SmartStor?You can view a list of installed plug-ins using NAS Management in theSmartNAVI Main Window or under File & Print, Protocol Control inWebPASM.On a Windows PC, you can also right-click the SmartNAVI tray icon andchoose About. On a Mac, you can also click the Help dropdown menu andchoose About.Where can I find a list of plug-ins available for my SmartStor?Check for the latest plug-ins on the Promise Support Web<strong>site</strong>. Plug-in filenames end with a .ppg extension.How do I make the SmartStor quieter?The loudest component on SmartStor is the cooling fan. But the fan can runat low speed part of the time and sometimes not at all. Be sure the SmartFan feature is enabled in WebPASM under System Management, EnclosureManagement.Does the SmartStor have a power-saving feature?Yes. The System Standby feature powers down the disk drives after aselected period of inactivity. To enable System Standby, go to Management,Power Options in WebPASM.9.2 Contacting Technical SupportPromise Technical Support provides several support options for Promise usersto access information and updates. We encourage you to use one of ourelectronic services, which provide product information updates for the mostefficient service and support.If you decide to contact us, please have the following information available:․ Product model and serial number236
․ BIOS, firmware, and driver version numbers․ A description of the problem / situationChapter 9: Support․ System configuration information, including: motherboard and CPU type,hard drive model(s), SAS/SATA/ATA/ATAPI drives & devices, and othercontrollers.Technical Support ServicesPromise OnlineWeb SiteUnited Stateshttp://www.promise.com/support/support_eng.asp(technical documents, drivers, utilities, etc.)E-mail Support e-Support On-LineFax Support(408) 228-1100 Attn: Technical SupportPhone Support (408) 228-1400 option 4If you wish to write usfor support:Promise Technology, Inc. 580 Cottonwood DriveMilpitas, CA 95035, USAThe NetherlandsE-mail Support e-Support On-LineFax Support+31 (0) 40 256 9463 Attn: Technical SupportPhone Support +31 (0) 40 235 2600If you wish to write usfor support:Promise Technology Europe B.V. Science ParkEindhoven 5542 5692 EL Son, The NetherlandsGermanyE-mail SupportFax Technical SupportPhone TechnicalSupportIf you wish to write usfor support:e-Support On-Line+49 (0) 2 31 56 76 48 - 29 Attn: Technical Support+49 (0) 2 31 56 76 48 - 10Promise Technology Germany Europaplatz 9 44269Dortmund, GermanyItalyE-mail Support e-Support On-LineFax Support0039 06 367 12400 Attn: Technical SupportPhone Support 0039 06 367 12626If you wish to write usfor support:Promise Technology Italy Piazza del Popolo 1800187 Roma, Italia237
SmartStor NAS Product ManualTaiwanE-mail Support e-Support On-LineFax Support+886 3 578 2390 Attn: Technical SupportPhone Support +886 3 578 2395 (ext. 8822, 8823)If you wish to write usfor support:Promise Technology, Inc. 2F, No. 30, Industry E.Rd. IX Science-based Industrial Park Hsin-Chu30075, Taiwan (R.O.C.)China – BeijingE-mail Support e-Support On-LineFax Support+86 10 8857 8015 Attn: Technical SupportPhone Support +86 10 8857 8085 or 8095If you wish to write us Promise Technology China - Beijing Room 1205,for support:Tower C Webok Time Center, No.17 South ZhongGuan Cun Street Hai Dian District, Beijing 100081,ChinaChina – ShanghaiE-mail Support e-Support On-LineFax Support+86 21 6249 4627 Attn: Technical SupportPhone Support +86 21 6249 4192, 4193, or 4199If you wish to write us Promise Technology China - Shanghai Room 508,for support:Leader Tower 1189 West Wu Ding Road Jing AnDistrict, Shanghai 200042, China9.3 Limited WarrantyPromise Technology, Inc. (“Promise”) warrants that this product, from the time ofhe delivery of the product to the original end user:a) all components for a period of two (2) years;b) will conform to Promise’s specifications;c) will be free from defects in material and workmanship under normal useand service.This warranty:a) applies only to products which are new and in cartons on the date ofpurchase;b) is not transferable;c) is valid only when accompanied by a copy of the original purchaseinvoice;d) Is not valid on spare parts.This warranty shall not apply to defects resulting from:238
Chapter 9: Supporta) improper or inadequate maintenance, or unauthorized modification(s),performed by the end user;b) operation outside the environmental specifications for the product;c) accident, misuse, negligence, misapplication, abuse, natural or personaldisaster, or maintenance by anyone other than a Promise or aPromise-authorized service center.Disclaimer of other warrantiesThis warranty covers only parts and labor, and excludes coverage on softwareitems as expressly set above.Except as expressly set forth above, Promise DISCLAIMS any warranties,expressed or implied, by statute or otherwise, regarding the product, including,without limitation, any warranties for fitness for any purpose, quality,merchantability, non-infringement, or otherwise. Promise makes no warranty orrepresentation concerning the suitability of any product for use with any otheritem. You assume full responsibility for selecting products and for ensuring thatthe products selected are compatible and appropriate for use with other goodswith which they will be used.Promise DOES NOT WARRANT that any product is free from errors or that it willinterface without problems with your computer system. It is your responsibility toback up or otherwise save important data before installing any product andcontinue to back up your important data regularly.No other document, statement or representation may be relied on to vary theterms of this limited warranty.Promise’s sole responsibility with respect to any product is to do one of thefollowing:a) replace the product with a conforming unit of the same or superiorproduct;b) repair the product.Promise shall not be liable for the cost of procuring substitute goods, services,lost profits, unrealized savings, equipment damage, costs of recovering,reprogramming, or reproducing of programs or data stored in or used with theproducts, or for any other general, special, consequential, indirect, incidental, orpunitive damages, whether in contract, tort, or otherwise, notwithstanding thefailure of the essential purpose of the foregoing remedy and regardless ofwhether Promise has been advised of the possibility of such damages. Promiseis not an insurer. If you desire insurance against such damage, you must obtaininsurance from another party.Some states do not allow the exclusion or limitation of incidental orconsequential damages for consumer products, so the above limitation may notapply to you.This warranty gives specific legal rights, and you may also have other rights thatvary from state to state. This limited warranty is governed by the State of239
SmartStor NAS Product ManualCalifornia.Your ResponsibilitiesYou are responsible for determining whether the product is appropriate for youruse and will interface with your equipment without malfunction or damage. Youare also responsible for backing up your data before installing any product andfor regularly backing up your data after installing the product. Promise is notliable for any damage to equipment or data loss resulting from the use of anyproduct.9.4 Returning Product For RepairIf you suspect a product is not working properly, or if you have any questionsabout your product, contact our Technical Support Staff through one of ourTechnical Services, making sure to provide the following information:․ Product model and serial number (required)․ Return shipping address․ Daytime phone number․ Description of the problem․ Copy of the original purchase invoiceThe technician will assist you in determining whether the product requires repair.If the product needs repair, the Technical Support Department will issue an RMA(Return Merchandise Authorization) number.ImportantObtain an RMA number from Technical Support before you returnthe product and write the RMA number on the label. The RMAnumber is essential for tracking your product and providing theproper service.Return ONLY the specific product covered by the warranty (do not ship cables,manuals, diskettes, etc.), with a copy of your proof of purchase to:USA and Canada:Promise Technology, Inc.Customer Service Dept.Attn.: RMA # ______ 47654 Kato RoadFremont, CA 94538240
Chapter 9: SupportOther Countries:Return the product to your dealer or retailer.Contact them for instructions beforeshipping the product.You must follow the packaging guidelines for returning products:․ Use the original shipping carton and packaging․ Include a summary of the product’s problem(s)․ Write an attention line on the box with the RMA number․ Include a copy of proof of purchaseYou are responsible for the cost of insurance and shipment of the product toPromise. Note that damage incurred due to improper transport or packaging isnot covered under the Limited Warranty.When repairing returned product(s), Promise may replace defective parts withnew or reconditioned parts, or replace the entire unit with a new or reconditionedunit. In the event of a replacement, the replacement unit will be under warrantyfor the remainder of the original warranty term from purchase date, or 30 days,whichever is longer.Promise will pay for standard return shipping charges only. You will be requiredto pay for any additional shipping options (such as express shipping).241
SmartStor NAS Product ManualAppendix A: Important InformationGNU General Public LicenseBatteryThis product includes copyrighted third-party software licensed under the termsof the GNU General Public License. Please see the GNU General PublicLicense (“GPL”) for the exact terms and conditions of this license atwww.gnu.org.The GPL source code incorporated into the product is available for freedownload at our web <strong>site</strong>www.promise.com/support/download/download_eng.asp.Subject to GPL, you may re-use, re-distribute and modify the GPL source code.Note that with respect solely to the GPL Software, no warranty is provided, wedo not offer direct support for the distribution.CautionRisk of explosion if battery is replaced by an incorrect type.Dispose of used batteries according to the instructions.242