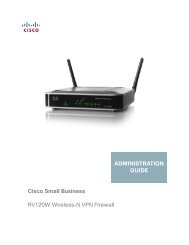
- Page 1 and 2: ADMINISTRATIONGUIDECisco Small Busi
- Page 3 and 4: ContentsNetwork Interfaces 28Wired
- Page 5 and 6: ContentsNavigating to an Access Poi
- Page 7 and 8: PrefaceTable 1 describes the typogr
- Page 9 and 10: 1Getting StartedThe Cisco Access Po
- Page 11: Getting StartedConnecting the Acces
- Page 15 and 16: Getting StartedConnecting the Acces
- Page 17 and 18: Getting StartedConnecting the Acces
- Page 19 and 20: Getting StartedConnecting the Acces
- Page 21 and 22: Getting StartedTroubleshooting Your
- Page 23 and 24: Getting StartedConfiguring the Acce
- Page 25 and 26: Getting StartedWireless Client Requ
- Page 27 and 28: Getting StartedConfiguring Security
- Page 29 and 30: 2StatusThe Status page provides inf
- Page 31 and 32: 2Table 3FieldDevice Information Pag
- Page 33 and 34: StatusTraffic Statistics2Figure 7Vi
- Page 35 and 36: StatusAssociated Clients2Associated
- Page 37 and 38: StatusRogue AP Detection2Link Integ
- Page 39 and 40: StatusRogue AP Detection2Table 6Fie
- Page 41 and 42: StatusRogue AP Detection2Table 6Fie
- Page 43 and 44: 3SetupLAN SettingsThe default wired
- Page 45 and 46: 3Table 7 describes the fields to vi
- Page 47 and 48: SetupConfiguring 802.1X Authenticat
- Page 49 and 50: SetupEnabling the Network Time Prot
- Page 51 and 52: SetupEnabling the Network Time Prot
- Page 53 and 54: SetupEnabling the Network Time Prot
- Page 55 and 56: 4WirelessModifying Wireless Radio S
- Page 57 and 58: 4Table 10FieldModeRadio Settings Fi
- Page 59 and 60: WirelessModifying Virtual Access Po
- Page 61 and 62: WirelessModifying Virtual Access Po
- Page 63 and 64:
WirelessModifying Virtual Access Po
- Page 65 and 66:
WirelessModifying Virtual Access Po
- Page 67 and 68:
WirelessModifying Virtual Access Po
- Page 69 and 70:
WirelessModifying Virtual Access Po
- Page 71 and 72:
WirelessModifying Virtual Access Po
- Page 73 and 74:
WirelessModifying Virtual Access Po
- Page 75 and 76:
WirelessModifying Virtual Access Po
- Page 77 and 78:
WirelessModifying Virtual Access Po
- Page 79 and 80:
WirelessClient Connection Control4C
- Page 81 and 82:
WirelessClient Connection Control4T
- Page 83 and 84:
WirelessModifying Advanced Settings
- Page 85 and 86:
WirelessModifying Advanced Settings
- Page 87 and 88:
WirelessModifying Advanced Settings
- Page 89 and 90:
WirelessModifying Advanced Settings
- Page 91 and 92:
WirelessModifying Advanced Settings
- Page 93 and 94:
WirelessModifying Advanced Settings
- Page 95 and 96:
WirelessConfiguring the Wireless Di
- Page 97 and 98:
WirelessConfiguring the Wireless Di
- Page 99 and 100:
WirelessBandwidth Utilization4Bandw
- Page 101 and 102:
WirelessConfiguring Quality of Serv
- Page 103 and 104:
WirelessConfiguring Quality of Serv
- Page 105 and 106:
WirelessConfiguring Quality of Serv
- Page 107 and 108:
5SNMPConfiguring SNMP on the Access
- Page 109 and 110:
5Table 25FieldSNMP Settings (Contin
- Page 111 and 112:
SNMPConfiguring SNMP on the Access
- Page 113 and 114:
SNMPConfiguring SNMP on the Access
- Page 115 and 116:
SNMPConfiguring SNMP on the Access
- Page 117 and 118:
SNMPConfiguring SNMP on the Access
- Page 119 and 120:
SNMPSNMP Targets5NOTEAfter you conf
- Page 121 and 122:
6AdministrationAdministratorUse thi
- Page 123 and 124:
6Access Point ConfigurationThe acce
- Page 125 and 126:
AdministrationAccess Point Configur
- Page 127 and 128:
AdministrationSoftware Upgrade6The
- Page 129 and 130:
AdministrationSoftware Upgrade6The
- Page 131 and 132:
AdministrationEvent Logs6Click Refr
- Page 133 and 134:
AdministrationEvent Logs6Configurin
- Page 135 and 136:
AdministrationConfiguring the Web S
- Page 137 and 138:
AdministrationCreating an Administr
- Page 139 and 140:
7Clustering Multiple Access PointsT
- Page 141 and 142:
7Figure 33Cluster Information and M
- Page 143 and 144:
Clustering Multiple Access PointsMa
- Page 145 and 146:
Clustering Multiple Access PointsMa
- Page 147 and 148:
Clustering Multiple Access PointsMa
- Page 149 and 150:
Clustering Multiple Access PointsCo
- Page 151 and 152:
Clustering Multiple Access PointsCo
- Page 153 and 154:
Clustering Multiple Access PointsVi
- Page 155 and 156:
Clustering Multiple Access PointsVi
- Page 157 and 158:
Clustering Multiple Access PointsVi
- Page 159 and 160:
8Configuration ExamplesThis chapter
- Page 161 and 162:
8VAP Configuration from the Web Int
- Page 163 and 164:
Configuration ExamplesConfiguring W
- Page 165 and 166:
Configuration ExamplesConfiguring t
- Page 167 and 168:
Configuration ExamplesConfiguring t
- Page 169 and 170:
Configuration ExamplesClustering Ac
- Page 171 and 172:
ADefault SettingsWhen you first pow
- Page 173 and 174:
Default SettingsATable 43UAP Defaul
- Page 175 and 176:
BWhere to Go From HereCisco provide


