Cartridge Valves Technical Information Introduction ... - Sauer-Danfoss
Cartridge Valves Technical Information Introduction ... - Sauer-Danfoss
Cartridge Valves Technical Information Introduction ... - Sauer-Danfoss

Create successful ePaper yourself
Turn your PDF publications into a flip-book with our unique Google optimized e-Paper software.
<strong>Introduction</strong><br />
INSPECT THE VALVE<br />
BLOCK<br />
PREPARE CARTRIDGE<br />
FOR INSERTION INTO THE<br />
BLOCK<br />
ASSEMBLY<br />
TEST<br />
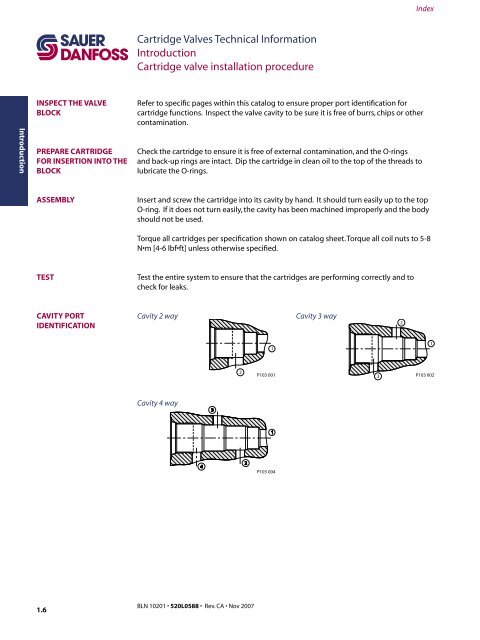
CAVITY PORT<br />
IDENTIFICATION<br />
1.6<br />
<strong>Cartridge</strong> <strong>Valves</strong> <strong>Technical</strong> <strong>Information</strong><br />
<strong>Introduction</strong><br />
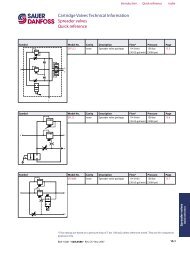
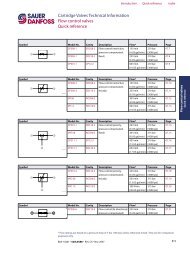
<strong>Cartridge</strong> valve installation procedure<br />
Refer to specific pages within this catalog to ensure proper port identification for<br />
cartridge functions. Inspect the valve cavity to be sure it is free of burrs, chips or other<br />
contamination.<br />
Check the cartridge to ensure it is free of external contamination, and the O-rings<br />
and back-up rings are intact. Dip the cartridge in clean oil to the top of the threads to<br />
lubricate the O-rings.<br />
Insert and screw the cartridge into its cavity by hand. It should turn easily up to the top<br />
O-ring. If it does not turn easily, the cavity has been machined improperly and the body<br />
should not be used.<br />
Torque all cartridges per specification shown on catalog sheet. Torque all coil nuts to 5-8<br />
N•m [4-6 lbf•ft] unless otherwise specified.<br />
Test the entire system to ensure that the cartridges are performing correctly and to<br />
check for leaks.<br />
Cavity 2 way Cavity 3 way<br />
Cavity 4 way<br />
BLN 10201 • 520L0588 • Rev. CA • Nov 2007<br />
4<br />
3<br />
2<br />
2<br />
1<br />
2<br />
Index<br />
P103 001 3<br />
P103 002<br />
1<br />
P103 004<br />
1