Motherboard Removal and Installation
Motherboard Removal and Installation
Motherboard Removal and Installation

You also want an ePaper? Increase the reach of your titles
YUMPU automatically turns print PDFs into web optimized ePapers that Google loves.
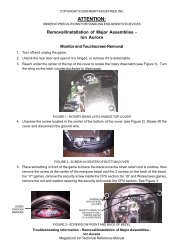
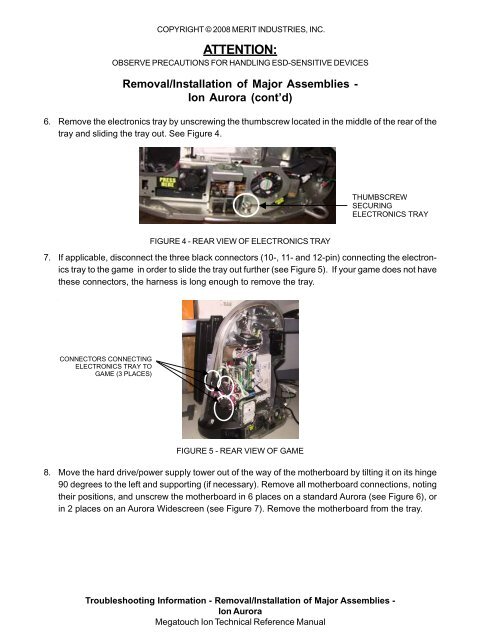
COPYRIGHT © 2008 MERIT INDUSTRIES, INC.ATTENTION:OBSERVE PRECAUTIONS FOR HANDLING ESD-SENSITIVE DEVICES<strong>Removal</strong>/<strong>Installation</strong> of Major Assemblies -Ion Aurora (cont’d)6. Remove the electronics tray by unscrewing the thumbscrew located in the middle of the rear of thetray <strong>and</strong> sliding the tray out. See Figure 4.THUMBSCREWSECURINGELECTRONICS TRAYFIGURE 4 - REAR VIEW OF ELECTRONICS TRAY7. If applicable, disconnect the three black connectors (10-, 11- <strong>and</strong> 12-pin) connecting the electronicstray to the game in order to slide the tray out further (see Figure 5). If your game does not havethese connectors, the harness is long enough to remove the tray.CONNECTORS CONNECTINGELECTRONICS TRAY TOGAME (3 PLACES)FIGURE 5 - REAR VIEW OF GAME8. Move the hard drive/power supply tower out of the way of the motherboard by tilting it on its hinge90 degrees to the left <strong>and</strong> supporting (if necessary). Remove all motherboard connections, notingtheir positions, <strong>and</strong> unscrew the motherboard in 6 places on a st<strong>and</strong>ard Aurora (see Figure 6), orin 2 places on an Aurora Widescreen (see Figure 7). Remove the motherboard from the tray.Troubleshooting Information - <strong>Removal</strong>/<strong>Installation</strong> of Major Assemblies -Ion AuroraMegatouch Ion Technical Reference Manual