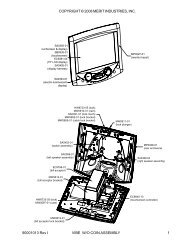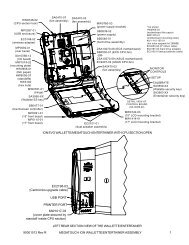
Motherboard Removal and Installation
Motherboard Removal and Installation
Motherboard Removal and Installation

Create successful ePaper yourself
Turn your PDF publications into a flip-book with our unique Google optimized e-Paper software.
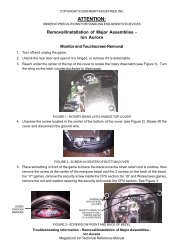
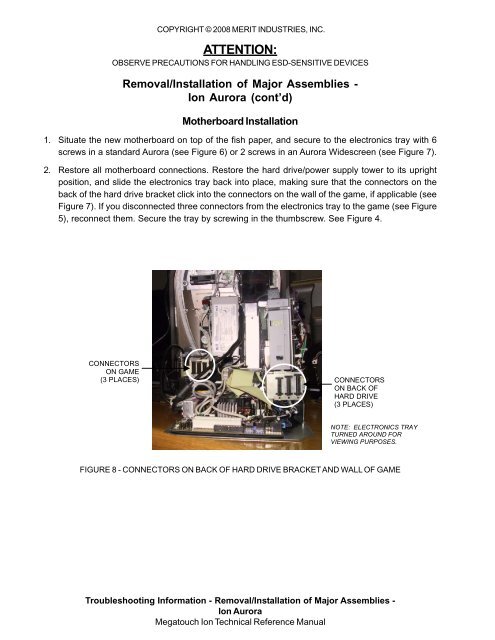
COPYRIGHT © 2008 MERIT INDUSTRIES, INC.ATTENTION:OBSERVE PRECAUTIONS FOR HANDLING ESD-SENSITIVE DEVICES<strong>Removal</strong>/<strong>Installation</strong> of Major Assemblies -Ion Aurora (cont’d)<strong>Motherboard</strong> <strong>Installation</strong>1. Situate the new motherboard on top of the fish paper, <strong>and</strong> secure to the electronics tray with 6screws in a st<strong>and</strong>ard Aurora (see Figure 6) or 2 screws in an Aurora Widescreen (see Figure 7).2. Restore all motherboard connections. Restore the hard drive/power supply tower to its uprightposition, <strong>and</strong> slide the electronics tray back into place, making sure that the connectors on theback of the hard drive bracket click into the connectors on the wall of the game, if applicable (seeFigure 7). If you disconnected three connectors from the electronics tray to the game (see Figure5), reconnect them. Secure the tray by screwing in the thumbscrew. See Figure 4.CONNECTORSON GAME(3 PLACES) CONNECTORSON BACK OFHARD DRIVE(3 PLACES)NOTE: ELECTRONICS TRAYTURNED AROUND FORVIEWING PURPOSES.FIGURE 8 - CONNECTORS ON BACK OF HARD DRIVE BRACKET AND WALL OF GAMETroubleshooting Information - <strong>Removal</strong>/<strong>Installation</strong> of Major Assemblies -Ion AuroraMegatouch Ion Technical Reference Manual