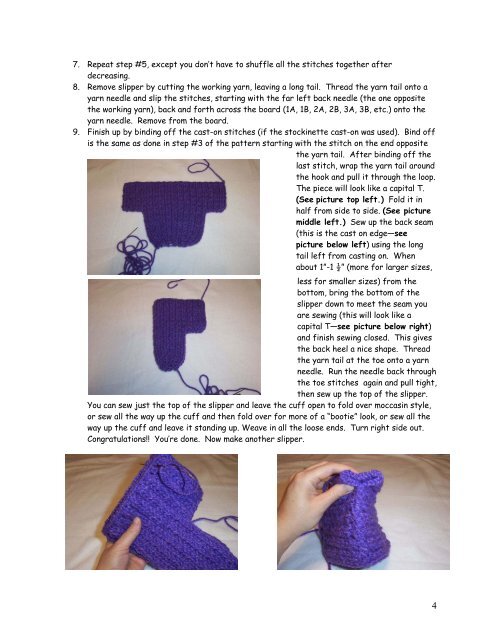
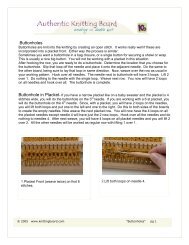
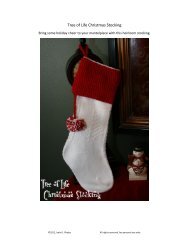
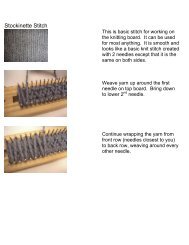
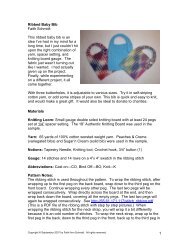
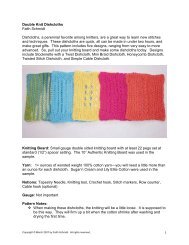
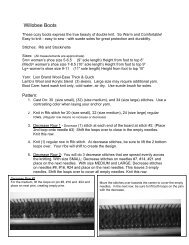
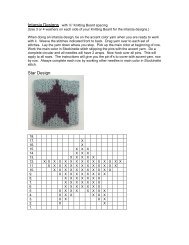
7. Repeat step #5, except you don’t have to shuffle all the stitches together afterdecreasing.8. Remove slipper by cutting the working yarn, leaving a long tail. Thread the yarn tail onto ayarn needle and slip the stitches, starting with the far left back needle (the one oppositethe working yarn), back and forth across the <strong>board</strong> (1A, 1B, 2A, 2B, 3A, 3B, etc.) onto theyarn needle. Remove from the <strong>board</strong>.9. Finish up by binding off the cast-on stitches (if the stockinette cast-on was used). Bind offis the same as done in step #3 of the pattern starting with the stitch on the end oppositethe yarn tail. After binding off thelast stitch, wrap the yarn tail aroundthe hook and pull it through the loop.The piece will look like a capital T.(See picture top left.) Fold it inhalf from side to side. (See picturemiddle left.) Sew up the back seam(this is the cast on edge—seepicture below left) using the longtail left from casting on. Whenabout 1”-1 ½” (more for larger sizes,less for smaller sizes) from thebottom, bring the bottom of theslipper down to meet the seam youare sewing (this will look like acapital T—see picture below right)and finish sewing closed. This givesthe back heel a nice shape. Threadthe yarn tail at the toe onto a yarnneedle. Run the needle back throughthe toe stitches again and pull tight,then sew up the top of the slipper.You can sew just the top of the slipper and leave the cuff open to fold over moccasin style,or sew all the way up the cuff and then fold over for more of a “bootie” look, or sew all theway up the cuff and leave it standing up. Weave in all the loose ends. Turn right side out.Congratulations!! You’re done. Now make another slipper.4
Help SectionWhen referring to the front <strong>board</strong>, this is the <strong>board</strong> nearest you when it is lying flat. The back<strong>board</strong> is the <strong>board</strong> furthest from you when lying flat.When making your calculations, you will run into partial numbers. You can either round up or rounddown. A lot depends on how stretchy your stitch or yarn is, if you want to leave “grow room”, andhow you like your slippers to fit. I usually round up so the slippers won’t end up too small. Whencalculating (W) and (L) round the number to the nearest hundredth (2 places to the right of thedecimal). For example if (W)=0.34373, record 0.34. But if the number in the thousandth place is 5or above then you would round up. So, 0.34573 would become 0.35.If you have measured correctly, your slippers should turn out the right size. If you are unsure, orjust want to check your measurements, measure the knitted piece at the end of step #2 and step#5. It should be the same as (B)(after step #2) and almost (D)(after step #5). If it’s shorter,add a row or two. If it’s a little longer, you could just leave it, or you could pull back a row or two.Remember when measuring after step #5 that the piece will be a bit shorter than (D) because youstill have 3 rows to knit. When in doubt, take the time to measure. You’ll be glad you did.After binding off from each end, you may have to adjust how you wrap your needles to keep yourstitch pattern. For example, when using ribbing you may (not always) have to switch from (1A to 3B)to (2A to 4B) to keep in pattern. By observing the pattern in the knitting, you will be able to tell ifyou need to adjust your wrapping. If using stockinette stitch, this will not be a problem.When wrapping the last 3 rows, I usually switch to stockinette stitch, as it’s easier to wrap with theempty needles.For a nicer finish when sewing up the front and back seam of the fold down cuff, sew the cuff seamon the right side (outside) of the slipper. The stitches will be hidden when the cuff is folded. Thisapplies only to the part of the seam that makes up the cuff. The rest of the top and back seam issewn on the wrong side (inside).Any size yarn can be used, but chunky/bulky yarn will give you more thickness and last longer.Ribbing is a very nice stitch to make slippers in, as it is thick and comfortable. If you are using alarger gauge knitting <strong>board</strong>, it may be helpful to wrap the <strong>board</strong> 3 times, when casting on, and thenlift the bottom loop over the top 2. Then wrap as normal, always lifting 1 over 2. This will give morethickness. Using two strands of worsted weight yarn, held together, will make a nice thick slipperand give you many color combinations. Baby booties can be made by using baby or sport weight yarnand a small or fine gauge knitting <strong>board</strong> set at ¼” spacing. For closer fitting, lightweight “footie”style slippers, sock yarn and a fine gauge knitting <strong>board</strong> work well. Crochet a chain and weave itthrough the cuff of the slipper and tie into a bow. Be creative!!Keep a record of your swatches. That way when you want to make a pair of slippers out of the sameyarn, you’ll already have that part done.5