Kerio Connect - Administrators Guide - Kerio Software Archive
Kerio Connect - Administrators Guide - Kerio Software Archive
Kerio Connect - Administrators Guide - Kerio Software Archive

Create successful ePaper yourself
Turn your PDF publications into a flip-book with our unique Google optimized e-Paper software.
© 2013 <strong>Kerio</strong> Technologies s.r.o.
Monitoring <strong>Kerio</strong> <strong>Connect</strong> . . . . . . . . . . . . . . . . . . . . . . . . . . . . . . . . . . . . . . . . . . . . . . . . . . . . . 82Monitoring overview . . . . . . . . . . . . . . . . . . . . . . . . . . . . . . . . . . . . . . . . . . . . . . . . . . . . . 82Monitoring incoming and outgoing messages . . . . . . . . . . . . . . . . . . . . . . . . . . . . . 82Viewing message status . . . . . . . . . . . . . . . . . . . . . . . . . . . . . . . . . . . . . . . . . . . 82Processing message queue . . . . . . . . . . . . . . . . . . . . . . . . . . . . . . . . . . . . . . . . 83Configuring message queue parameters . . . . . . . . . . . . . . . . . . . . . . . . . . . 83Traffic charts . . . . . . . . . . . . . . . . . . . . . . . . . . . . . . . . . . . . . . . . . . . . . . . . . . . . . . . . . . . . 84Viewing statistics . . . . . . . . . . . . . . . . . . . . . . . . . . . . . . . . . . . . . . . . . . . . . . . . . . . . . . . . 85Displaying users currently connected to <strong>Kerio</strong> <strong>Connect</strong> . . . . . . . . . . . . . . . . . . . . 85Monitoring CPU and RAM usage . . . . . . . . . . . . . . . . . . . . . . . . . . . . . . . . . . . . . . . . . . 86Services in <strong>Kerio</strong> <strong>Connect</strong> . . . . . . . . . . . . . . . . . . . . . . . . . . . . . . . . . . . . . . . . . . . . . . . . . . . . . 87Setting service parameters . . . . . . . . . . . . . . . . . . . . . . . . . . . . . . . . . . . . . . . . . . . . . . . 87What services are available . . . . . . . . . . . . . . . . . . . . . . . . . . . . . . . . . . . . . . . . . . . . . . . 88SMTP . . . . . . . . . . . . . . . . . . . . . . . . . . . . . . . . . . . . . . . . . . . . . . . . . . . . . . . . . . . . . 88POP3 . . . . . . . . . . . . . . . . . . . . . . . . . . . . . . . . . . . . . . . . . . . . . . . . . . . . . . . . . . . . . 89IMAP . . . . . . . . . . . . . . . . . . . . . . . . . . . . . . . . . . . . . . . . . . . . . . . . . . . . . . . . . . . . . 89NNTP . . . . . . . . . . . . . . . . . . . . . . . . . . . . . . . . . . . . . . . . . . . . . . . . . . . . . . . . . . . . 89LDAP . . . . . . . . . . . . . . . . . . . . . . . . . . . . . . . . . . . . . . . . . . . . . . . . . . . . . . . . . . . . . 89HTTP . . . . . . . . . . . . . . . . . . . . . . . . . . . . . . . . . . . . . . . . . . . . . . . . . . . . . . . . . . . . . 89Instant Messaging . . . . . . . . . . . . . . . . . . . . . . . . . . . . . . . . . . . . . . . . . . . . . . . . 90Restricting access to some services . . . . . . . . . . . . . . . . . . . . . . . . . . . . . . . . . . . . . . . 90Defining access policies . . . . . . . . . . . . . . . . . . . . . . . . . . . . . . . . . . . . . . . . . . . 90Assigning access policies to users . . . . . . . . . . . . . . . . . . . . . . . . . . . . . . . . . 90Troubleshooting . . . . . . . . . . . . . . . . . . . . . . . . . . . . . . . . . . . . . . . . . . . . . . . . . . . . . . . . . 91Protecting SMTP the server in <strong>Kerio</strong> <strong>Connect</strong> . . . . . . . . . . . . . . . . . . . . . . . . . . . . . . . . . . 92Why to configure the SMTP server . . . . . . . . . . . . . . . . . . . . . . . . . . . . . . . . . . . . . . . . 92How to configure who can connect to SMTP server . . . . . . . . . . . . . . . . . . . . . . . . 92How to configure security options of the SMTP server . . . . . . . . . . . . . . . . . . . . . 94How to send outgoing messages through another server . . . . . . . . . . . . . . . . . . 95Troubleshooting . . . . . . . . . . . . . . . . . . . . . . . . . . . . . . . . . . . . . . . . . . . . . . . . . . . . . . . . . 96Securing <strong>Kerio</strong> <strong>Connect</strong> . . . . . . . . . . . . . . . . . . . . . . . . . . . . . . . . . . . . . . . . . . . . . . . . . . . . . . . 97Issues to address . . . . . . . . . . . . . . . . . . . . . . . . . . . . . . . . . . . . . . . . . . . . . . . . . . . . . . . . 97Configuring your firewall . . . . . . . . . . . . . . . . . . . . . . . . . . . . . . . . . . . . . . . . . . . . . . . . . 97Password policy . . . . . . . . . . . . . . . . . . . . . . . . . . . . . . . . . . . . . . . . . . . . . . . . . . . . . . . . . 98Configuring secure connection to <strong>Kerio</strong> <strong>Connect</strong> . . . . . . . . . . . . . . . . . . . . . . . . . . 98Securing user authentication . . . . . . . . . . . . . . . . . . . . . . . . . . . . . . . . . . . . . . 98Encrypting user communication . . . . . . . . . . . . . . . . . . . . . . . . . . . . . . . . . . . 98Setting secure connection . . . . . . . . . . . . . . . . . . . . . . . . . . . . . . . . . . . . . . . . . 997
Configuring anti-spoofing in <strong>Kerio</strong> <strong>Connect</strong> . . . . . . . . . . . . . . . . . . . . . . . . . . . . . . . . . . . 100About anti-spoofing . . . . . . . . . . . . . . . . . . . . . . . . . . . . . . . . . . . . . . . . . . . . . . . . . . . . 100Configuring anti-spoofing in <strong>Kerio</strong> <strong>Connect</strong> . . . . . . . . . . . . . . . . . . . . . . . . . . . . . 100Enabling anti-spoofing per domain . . . . . . . . . . . . . . . . . . . . . . . . . . . . . . . . . . . . . 101Password policy in <strong>Kerio</strong> <strong>Connect</strong> . . . . . . . . . . . . . . . . . . . . . . . . . . . . . . . . . . . . . . . . . . . . 103About password policy . . . . . . . . . . . . . . . . . . . . . . . . . . . . . . . . . . . . . . . . . . . . . . . . . 103Creating strong user passwords . . . . . . . . . . . . . . . . . . . . . . . . . . . . . . . . . . . . . . . . 103Requiring complex passwords (for local users) . . . . . . . . . . . . . . . . . . . . . . . . . . 104Enabling password expiry (for local users) . . . . . . . . . . . . . . . . . . . . . . . . . . . . . . 105Protecting against password guessing attacks . . . . . . . . . . . . . . . . . . . . . . . . . . . 106Authenticating messages with DKIM . . . . . . . . . . . . . . . . . . . . . . . . . . . . . . . . . . . . . . . . . 107About DKIM . . . . . . . . . . . . . . . . . . . . . . . . . . . . . . . . . . . . . . . . . . . . . . . . . . . . . . . . . . . 107Enabling DKIM in <strong>Kerio</strong> <strong>Connect</strong> . . . . . . . . . . . . . . . . . . . . . . . . . . . . . . . . . . . . . . . . 107Configuring DNS for DKIM . . . . . . . . . . . . . . . . . . . . . . . . . . . . . . . . . . . . . . . . . . . . . . . . . . . 110Adding a DKIM record to your DNS . . . . . . . . . . . . . . . . . . . . . . . . . . . . . . . . . . . . . 110Acquiring DKIM public key in <strong>Kerio</strong> <strong>Connect</strong> . . . . . . . . . . . . . . . . . . . . . . . . . . . . 111Creating a short DKIM public key . . . . . . . . . . . . . . . . . . . . . . . . . . . . . . . . . . . . . . . 111Configuring spam control in <strong>Kerio</strong> <strong>Connect</strong> . . . . . . . . . . . . . . . . . . . . . . . . . . . . . . . . . . . 115Antispam methods and tests in <strong>Kerio</strong> <strong>Connect</strong> . . . . . . . . . . . . . . . . . . . . . . . . . . 115Spam score . . . . . . . . . . . . . . . . . . . . . . . . . . . . . . . . . . . . . . . . . . . . . . . . . . . . . . . . . . . . 116Monitoring spam filter’s functionality and efficiency . . . . . . . . . . . . . . . . . . . . 117Spam filter statistics . . . . . . . . . . . . . . . . . . . . . . . . . . . . . . . . . . . . . . . . . . . . . 117Graphical overviews . . . . . . . . . . . . . . . . . . . . . . . . . . . . . . . . . . . . . . . . . . . . . 118Logs . . . . . . . . . . . . . . . . . . . . . . . . . . . . . . . . . . . . . . . . . . . . . . . . . . . . . . . . . . . . 118Configuring greylisting . . . . . . . . . . . . . . . . . . . . . . . . . . . . . . . . . . . . . . . . . . . . . . . . . . . . . . . 119What is greylisting . . . . . . . . . . . . . . . . . . . . . . . . . . . . . . . . . . . . . . . . . . . . . . . . . . . . . 119Configuring greylisting . . . . . . . . . . . . . . . . . . . . . . . . . . . . . . . . . . . . . . . . . . . . . . . . . 119How greylisting works . . . . . . . . . . . . . . . . . . . . . . . . . . . . . . . . . . . . . . . . . . . . . . . . . 120What data is sent to <strong>Kerio</strong> Technologies . . . . . . . . . . . . . . . . . . . . . . . . . . . . . . . . 121Troubleshooting . . . . . . . . . . . . . . . . . . . . . . . . . . . . . . . . . . . . . . . . . . . . . . . . . . . . . . . 121Blocking messages from certain servers . . . . . . . . . . . . . . . . . . . . . . . . . . . . . . . . . . . . . . 122How to automatically block or allow messages from certain servers . . . . . . 122Blocking messages from spam servers — custom blacklists . . . . . . . . 123Blocking messages from spam servers — public databases . . . . . . . . 123Allowing messages from trusted servers — custom whitelists . . . . . 1248
Configuring Caller ID and SPF in <strong>Kerio</strong> <strong>Connect</strong> . . . . . . . . . . . . . . . . . . . . . . . . . . . . . . . 125What is Caller ID and SPF . . . . . . . . . . . . . . . . . . . . . . . . . . . . . . . . . . . . . . . . . . . . . . 125How to configure Caller ID . . . . . . . . . . . . . . . . . . . . . . . . . . . . . . . . . . . . . . . . . . . . . 125How to configure SPF . . . . . . . . . . . . . . . . . . . . . . . . . . . . . . . . . . . . . . . . . . . . . . . . . . 126Creating custom rules for spam control in <strong>Kerio</strong> <strong>Connect</strong> . . . . . . . . . . . . . . . . . . . . . 128Why to create custom rules . . . . . . . . . . . . . . . . . . . . . . . . . . . . . . . . . . . . . . . . . . . . 128Creating custom rules . . . . . . . . . . . . . . . . . . . . . . . . . . . . . . . . . . . . . . . . . . . . . . . . . 128Defining actions for custom rules . . . . . . . . . . . . . . . . . . . . . . . . . . . . . . . . . . . . . . 129Antivirus control in <strong>Kerio</strong> <strong>Connect</strong> . . . . . . . . . . . . . . . . . . . . . . . . . . . . . . . . . . . . . . . . . . . 130Antivirus in <strong>Kerio</strong> <strong>Connect</strong> . . . . . . . . . . . . . . . . . . . . . . . . . . . . . . . . . . . . . . . . . . . . . 130External antivirus . . . . . . . . . . . . . . . . . . . . . . . . . . . . . . . . . . . . . . . . . . . . . . . . . . . . . . 131Configuring Sophos in <strong>Kerio</strong> <strong>Connect</strong> . . . . . . . . . . . . . . . . . . . . . . . . . . . . . . . . . . . 131Configuring HTTP proxy server . . . . . . . . . . . . . . . . . . . . . . . . . . . . . . . . . . . 132Troubleshooting . . . . . . . . . . . . . . . . . . . . . . . . . . . . . . . . . . . . . . . . . . . . . . . . . . . . . . . 132Filtering message attachments in <strong>Kerio</strong> <strong>Connect</strong> . . . . . . . . . . . . . . . . . . . . . . . . . . . . . . 133Why to filter attachments . . . . . . . . . . . . . . . . . . . . . . . . . . . . . . . . . . . . . . . . . . . . . . 133How to configure attachment filter in <strong>Kerio</strong> <strong>Connect</strong> . . . . . . . . . . . . . . . . . . . . 133Troubleshooting . . . . . . . . . . . . . . . . . . . . . . . . . . . . . . . . . . . . . . . . . . . . . . . . . . . . . . . 134Using external antivirus with <strong>Kerio</strong> products . . . . . . . . . . . . . . . . . . . . . . . . . . . . . . . . . 135Antivirus SDK for <strong>Kerio</strong> products . . . . . . . . . . . . . . . . . . . . . . . . . . . . . . . . . . . . . . . 135Configuring IP address groups . . . . . . . . . . . . . . . . . . . . . . . . . . . . . . . . . . . . . . . . . . . . . . . 136When to use IP address groups . . . . . . . . . . . . . . . . . . . . . . . . . . . . . . . . . . . . . . . . . 136How to configure IP address group . . . . . . . . . . . . . . . . . . . . . . . . . . . . . . . . . . . . . 136Creating time ranges in <strong>Kerio</strong> <strong>Connect</strong> . . . . . . . . . . . . . . . . . . . . . . . . . . . . . . . . . . . . . . . 138What are time ranges . . . . . . . . . . . . . . . . . . . . . . . . . . . . . . . . . . . . . . . . . . . . . . . . . . 138Creating time ranges . . . . . . . . . . . . . . . . . . . . . . . . . . . . . . . . . . . . . . . . . . . . . . . . . . . 138Public folders in <strong>Kerio</strong> <strong>Connect</strong> . . . . . . . . . . . . . . . . . . . . . . . . . . . . . . . . . . . . . . . . . . . . . . 139What are public folders . . . . . . . . . . . . . . . . . . . . . . . . . . . . . . . . . . . . . . . . . . . . . . . . 139Creating public folders . . . . . . . . . . . . . . . . . . . . . . . . . . . . . . . . . . . . . . . . . . . . . . . . . 139Global vs. domain public folders . . . . . . . . . . . . . . . . . . . . . . . . . . . . . . . . . 139Assigning rights to create public folders . . . . . . . . . . . . . . . . . . . . . . . . . . 139Creating public folders . . . . . . . . . . . . . . . . . . . . . . . . . . . . . . . . . . . . . . . . . . . 140Viewing public folders . . . . . . . . . . . . . . . . . . . . . . . . . . . . . . . . . . . . . . . . . . . . . . . . . 140Global Address List . . . . . . . . . . . . . . . . . . . . . . . . . . . . . . . . . . . . . . . . . . . . . . . . . . . . 1419
Configuring instant messaging in <strong>Kerio</strong> <strong>Connect</strong> . . . . . . . . . . . . . . . . . . . . . . . . . . . . . . 142About instant messaging . . . . . . . . . . . . . . . . . . . . . . . . . . . . . . . . . . . . . . . . . . . . . . . 142Sending messages outside of your domain . . . . . . . . . . . . . . . . . . . . . . . . . . . . . . 143Securing instant messaging . . . . . . . . . . . . . . . . . . . . . . . . . . . . . . . . . . . . . . . . . . . . 143Limiting access to instant messaging . . . . . . . . . . . . . . . . . . . . . . . . . . . . . . . . . . . 144Disabling instant messaging . . . . . . . . . . . . . . . . . . . . . . . . . . . . . . . . . . . . . . . . . . . . 144Automatic contact list . . . . . . . . . . . . . . . . . . . . . . . . . . . . . . . . . . . . . . . . . . . . . . . . . 144Configuring IM clients . . . . . . . . . . . . . . . . . . . . . . . . . . . . . . . . . . . . . . . . . . . . . . . . . 145Troubleshooting . . . . . . . . . . . . . . . . . . . . . . . . . . . . . . . . . . . . . . . . . . . . . . . . . . . . . . . 145Configuring DNS for instant messaging . . . . . . . . . . . . . . . . . . . . . . . . . . . . . . . . . . . . . . . 146About SRV records . . . . . . . . . . . . . . . . . . . . . . . . . . . . . . . . . . . . . . . . . . . . . . . . . . . . . 146Configuring DNS records for server to server communication . . . . . . . . . . . . 146Configuring DNS records for client auto-configuration . . . . . . . . . . . . . . . . . . . 147Customizing <strong>Kerio</strong> <strong>Connect</strong> . . . . . . . . . . . . . . . . . . . . . . . . . . . . . . . . . . . . . . . . . . . . . . . . . . 148Defining custom email footers . . . . . . . . . . . . . . . . . . . . . . . . . . . . . . . . . . . . . . . . . 148Localizing the user interface . . . . . . . . . . . . . . . . . . . . . . . . . . . . . . . . . . . . . . . . . . . 149<strong>Kerio</strong> <strong>Connect</strong> client 8.1 and newer . . . . . . . . . . . . . . . . . . . . . . . . . . . . . . . 149<strong>Kerio</strong> <strong>Connect</strong> client 8.0 . . . . . . . . . . . . . . . . . . . . . . . . . . . . . . . . . . . . . . . . . . 149Old WebMail . . . . . . . . . . . . . . . . . . . . . . . . . . . . . . . . . . . . . . . . . . . . . . . . . . . . . 149Additional settings for old WebMail . . . . . . . . . . . . . . . . . . . . . . . . . . . . . . . . . . . . 150Translating <strong>Kerio</strong> <strong>Connect</strong> client to a new language . . . . . . . . . . . . . . . . . . . . . . . . . . 152Translating <strong>Kerio</strong> <strong>Connect</strong> client . . . . . . . . . . . . . . . . . . . . . . . . . . . . . . . . . . . . . . . 152Upgrading <strong>Kerio</strong> <strong>Connect</strong> . . . . . . . . . . . . . . . . . . . . . . . . . . . . . . . . . . . . . . . . . . . . . . 152Configuring data store in <strong>Kerio</strong> <strong>Connect</strong> . . . . . . . . . . . . . . . . . . . . . . . . . . . . . . . . . . . . . . 153How to set path to data store directory . . . . . . . . . . . . . . . . . . . . . . . . . . . . . . . . . 153How to configure full text search . . . . . . . . . . . . . . . . . . . . . . . . . . . . . . . . . . . . . . . 154Data store size . . . . . . . . . . . . . . . . . . . . . . . . . . . . . . . . . . . . . . . . . . . . . . . . . . . . . . . . 155Archiving in <strong>Kerio</strong> <strong>Connect</strong> . . . . . . . . . . . . . . . . . . . . . . . . . . . . . . . . . . . . . . . . . . . . . . . . . . 156What can you archive . . . . . . . . . . . . . . . . . . . . . . . . . . . . . . . . . . . . . . . . . . . . . . . . . . 156Configuring archiving . . . . . . . . . . . . . . . . . . . . . . . . . . . . . . . . . . . . . . . . . . . . . . . . . . 157Viewing archive folders . . . . . . . . . . . . . . . . . . . . . . . . . . . . . . . . . . . . . . . . . . . . . . . . 158Backups in <strong>Kerio</strong> <strong>Connect</strong> . . . . . . . . . . . . . . . . . . . . . . . . . . . . . . . . . . . . . . . . . . . . . . . . . . . . 159What backups include . . . . . . . . . . . . . . . . . . . . . . . . . . . . . . . . . . . . . . . . . . . . . . . . . 159Types of backups . . . . . . . . . . . . . . . . . . . . . . . . . . . . . . . . . . . . . . . . . . . . . . . . . . . . . . 159Configuring backups . . . . . . . . . . . . . . . . . . . . . . . . . . . . . . . . . . . . . . . . . . . . . . . . . . . 160Recovering data from backups . . . . . . . . . . . . . . . . . . . . . . . . . . . . . . . . . . . . . . . . . 161Data recovery examples . . . . . . . . . . . . . . . . . . . . . . . . . . . . . . . . . . . . . . . . . . . . . . . . 161Troubleshooting . . . . . . . . . . . . . . . . . . . . . . . . . . . . . . . . . . . . . . . . . . . . . . . . . . . . . . . 161Examples of data recovery in <strong>Kerio</strong> <strong>Connect</strong> . . . . . . . . . . . . . . . . . . . . . . . . . . . . . . . . . . 16210
Installing <strong>Kerio</strong> <strong>Connect</strong>Product editionsStandard installation package<strong>Kerio</strong> <strong>Connect</strong> is available as a standard installation package for:• Windows• Mac OS X• Linux RPM• Linux DebianVMware Virtual ApplianceVirtual appliance for VMware products.VMware Virtual Appliance is a software appliance edition pre-installed on a virtual hostfor VMware. The virtual appliance is distributed as OVF and VMX.See this article for detailed information.WindowsFor system requirements go to the product pages.1. Download the <strong>Kerio</strong> <strong>Connect</strong> installation file.2. Run the installation.<strong>Kerio</strong> <strong>Connect</strong> must be installed under the user with administration rights to the system.3. <strong>Kerio</strong> <strong>Connect</strong> is installed using the standard installation wizard. The initial configurationis performed (see section Configuration wizard).The <strong>Kerio</strong> <strong>Connect</strong> installation process is logged in a special file located infolder %TEMP% (kerio-connect.setup.log).<strong>Kerio</strong> <strong>Connect</strong> Engine is started (immediately or after restart). It runs as a service.Mac OS XFor system requirements go to the product pages.1. Download the <strong>Kerio</strong> <strong>Connect</strong> installation file.2. Run the installation.13
Installing <strong>Kerio</strong> <strong>Connect</strong><strong>Kerio</strong> <strong>Connect</strong> must be installed under the user with administration rights to the system.3. <strong>Kerio</strong> <strong>Connect</strong> is installed using the standard installation wizard into folder/usr/local/kerio/mailserver. The initial configuration is performed (see sectionConfiguration wizard)4. The <strong>Kerio</strong> <strong>Connect</strong> service starts automatically upon the computer system startup. To runor restart the service, run System Preferences → Other → <strong>Kerio</strong> <strong>Connect</strong> Monitor.You can also stop, start or restart <strong>Kerio</strong> <strong>Connect</strong> through Terminal or a SSH client with thefollowing commands with root access (for Mac OS X 10.5 Leopard or newer):Stopping <strong>Kerio</strong> <strong>Connect</strong> Enginesudo /usr/local/kerio/mailserver/<strong>Kerio</strong>MailServer stopRunning <strong>Kerio</strong> <strong>Connect</strong> Enginesudo /usr/local/kerio/mailserver/<strong>Kerio</strong>MailServer startRestarting <strong>Kerio</strong> <strong>Connect</strong> Enginesudo /usr/local/kerio/mailserver/<strong>Kerio</strong>MailServer restartIf possible, it is recommended to stop/start the service in System Preferences → Others →<strong>Kerio</strong> <strong>Connect</strong> MonitorUninstaller.Do not delete the <strong>Kerio</strong> <strong>Connect</strong> installation package — it includes <strong>Kerio</strong> <strong>Connect</strong>Linux — RPMFor system requirements go to the product pages.1. Download the <strong>Kerio</strong> <strong>Connect</strong> installation file.2. Run the installation.<strong>Kerio</strong> <strong>Connect</strong> must be installed under the user with root rights.For installations, <strong>Kerio</strong> <strong>Connect</strong> uses the RPM application.except the option of changing the <strong>Kerio</strong> <strong>Connect</strong> location.All functions are available3. <strong>Kerio</strong> <strong>Connect</strong> is installed into folder /opt/kerio/mailserver.4. Run the configuration wizard (see section Configuration wizard).New installationStart the installation using this command:# rpm -i 14
1.5 Linux — DEBExample:# rpm -i kerio-connect-8.0.0-6333.linux.rpmIn case of the recent versions of the distributions, problems with package dependenciesmight occur. If you cannot install <strong>Kerio</strong> <strong>Connect</strong>, download and install thecompat-libstdc++ package.It is recommended to read carefully the LINUX-README file immediately upon theinstallation. The file can be found in the installation directory in folder doc.When the installation is completed successfully, run the configuration wizard to set thedomain and the administrator’s account:cd /opt/kerio/mailserver./cfgwizardis running.The <strong>Kerio</strong> <strong>Connect</strong> Engine must be stopped while the configuration wizardStarting and stopping the serverOnce all settings are finished successfully in the configuration wizard, <strong>Kerio</strong> <strong>Connect</strong> isready to be started.Within the installation, the kerio-connect script is created in the /etc/init.ddirectory which provides automatic startup of the daemon (i.e. <strong>Kerio</strong> <strong>Connect</strong> Engine)upon a reboot of the operating system. This script can also be used to start or stop thedaemon manually, using the following commands:/etc/init.d/kerio-connect start/etc/init.d/kerio-connect stop/etc/init.d/kerio-connect restart<strong>Kerio</strong> <strong>Connect</strong> must be run under the user root.If your distribution has systemd available, use the following command tostart/stop <strong>Kerio</strong> <strong>Connect</strong>:systemctl start kerio-connect.servicesystemctl stop kerio-connect.serviceLinux — DEBFor system requirements go to the product pages.1. Download the <strong>Kerio</strong> <strong>Connect</strong> installation file.2. Run the installation.<strong>Kerio</strong> <strong>Connect</strong> must be installed under the user with root rights.3. <strong>Kerio</strong> <strong>Connect</strong> is installed into folder /opt/kerio/mailserver.4. Run the configuration wizard (see section Configuration wizard).15
Installing <strong>Kerio</strong> <strong>Connect</strong>New installationTo install either of the installation packages, double-click on its icon or use for examplethe following command in the terminal:# dpkg -i Example:# dpkg -i kerio-connect-8.0.0-1270.linux.i386.debIt is recommended to read carefully the DEBIAN-README file immediately upon theinstallation. The file can be found in the installation directory in folder doc.When the installation is completed successfully, run the configuration wizard to set thedomain and the administrator’s account:cd /opt/kerio/mailserverdpkg-reconfigure kerio-connectStarting and stopping the serverOnce all settings are finished successfully in the configuration wizard, <strong>Kerio</strong> <strong>Connect</strong> isready to be started.Within the installation, the kerio-connect script is created in the /etc/init.ddirectory which provides automatic startup of the daemon (i.e. <strong>Kerio</strong> <strong>Connect</strong> Engine)upon a reboot of the operating system. This script can also be used to start or stop thedaemon manually, using the following commands:/etc/init.d/kerio-connect start/etc/init.d/kerio-connect stop/etc/init.d/kerio-connect restart<strong>Kerio</strong> <strong>Connect</strong> must run under user root.When installing on Debian with a graphical user interface, open the installationpackage with the gdebi installer (right-click the file and Open with).Configuration WizardThe configuration wizard helps to set the basic parameters for <strong>Kerio</strong> <strong>Connect</strong>. These include:• primary domain• administrator’s account• data storeIt also creates special files where the server configuration is saved.If you do not use the configuration wizard, it will not be possible to login to the <strong>Kerio</strong><strong>Connect</strong>’s administration interface.16
1.6 Configuration WizardOn Windows and Mac, the configuration file is run automatically during the installation.On Linux, use the following commands:Linux — RPMcd /opt/kerio/mailserver./cfgwizardLinux — DEBcd /opt/kerio/mailserverdpkg-reconfigure kerio-connectWhen a corresponding package is installed, user will be informed that the wizard is available.This information is also provided by the daemon if it detects that the wizard has not beenused yet.wizard.<strong>Kerio</strong> <strong>Connect</strong> must be stopped while settings are changed in the configurationAfter running the wizard, existing configuration files will be deleted.Configuration filesThe wizard creates the following configuration files:users.cfgusers.cfg is an XML file with the UTF-8 coding which includes information about useraccounts, groups and aliases.mailserver.cfgmailserver.cfg is an XML file with the UTF-8 coding which contains any otherparameters of <strong>Kerio</strong> <strong>Connect</strong>, such as configuration parameters of domains, back-ups,antispam filter, antivirus.On Mac OS X and Linux systems, files can be maintained only if the user is logged inas the root user.17
Upgrading <strong>Kerio</strong> <strong>Connect</strong>What can be upgradedOnce you purchase <strong>Kerio</strong> <strong>Connect</strong> or extend your <strong>Software</strong> Maintenance, you are eligible toreceive new versions of <strong>Kerio</strong> <strong>Connect</strong> and its components as soon as they are available.You can upgrade:• <strong>Kerio</strong> <strong>Connect</strong> server• <strong>Kerio</strong> Outlook <strong>Connect</strong>or• <strong>Kerio</strong> Outlook <strong>Connect</strong>or (Offline Edition)• <strong>Kerio</strong> Sync <strong>Connect</strong>or<strong>Kerio</strong> <strong>Connect</strong> can automatically check whether there are new versions available:1. Go to section Configuration → Advanced Options → tab <strong>Software</strong> Updates.2. Select option Automatically check for new versions.3. <strong>Kerio</strong> <strong>Connect</strong> will checks for updates every 24 hours.4. For immediate check of new versions, click Check now.5. You can enable automatic updates of <strong>Kerio</strong> Outlook <strong>Connect</strong>or (Offline Edition) on clientstations.The Do not install updates option may come useful whenever the newversion of <strong>Kerio</strong> Outlook <strong>Connect</strong>or (Offline Edition) is released that does notaffect the module’s correct functionality (this also means that a popup notice isnot displayed upon every startup of Microsoft Outlook).If the new version is critical for correct functioning of the module (theversion installed is not compatible with the server version), this information willbe displayed in this section.Once a new version is available, the <strong>Software</strong> Updates tab will display a link to the downloadpage.18
2.2 Microsoft WindowsIf <strong>Kerio</strong> <strong>Connect</strong> is used in production, we do not recommend enabling Check alsofor beta versions.Configuring HTTP proxy serverIf the computer with <strong>Kerio</strong> <strong>Connect</strong> installed is behind a firewall, you can connect it to theInternet (for updates) via a proxy server.1. Go to section Configuration → Advanced Options → tab HTTP Proxy.2. Check option Use HTTP proxy for ...3. Specify the address and port of the proxy server.4. If required, enter the authentication data.5. Confirm the settings.Microsoft WindowsTo upgrade <strong>Kerio</strong> <strong>Connect</strong> on Microsoft Windows, simply download and run the installationpackage. The program will detect the installation directory, stop running components (<strong>Kerio</strong><strong>Connect</strong> engine and <strong>Kerio</strong> <strong>Connect</strong> Monitor) and replace files with new ones automatically. Allsettings and stored messages will be available after upgrade.If <strong>Kerio</strong> <strong>Connect</strong> is upgrade successfully, a backup of the configuration files ofthe previous version is saved in the directory where <strong>Kerio</strong> <strong>Connect</strong> is installed in folderUpgradeBackups.Mac OS XTo upgrade <strong>Kerio</strong> <strong>Connect</strong> on Mac OS X, simply download and run the installation package.The program will detect the installation directory, stop running components (<strong>Kerio</strong> <strong>Connect</strong>engine and <strong>Kerio</strong> <strong>Connect</strong> Monitor) and replace files with new ones automatically. All settingsand stored messages will be available after upgrade.Linux — RPMTo upgrade <strong>Kerio</strong> <strong>Connect</strong> on Linux RPM, use the following command:# rpm -U 19
Upgrading <strong>Kerio</strong> <strong>Connect</strong>Use this command to fix the current installation:# rpm -U --force Linux — DEBTo upgrade <strong>Kerio</strong> <strong>Connect</strong> on Linux Debian, use the same command as for installation:# dpkg -i <strong>Kerio</strong> <strong>Connect</strong> VMware Virtual ApplianceFor information on upgrading <strong>Kerio</strong> <strong>Connect</strong> VMware Virtual Appliance, read this article.TroubleshootingIf any problems regarding updates occur, check the Debug log — right-click the Debug log areaand check Messages → Update Checker Activity).20
Uninstalling <strong>Kerio</strong> <strong>Connect</strong>How to uninstall <strong>Kerio</strong> <strong>Connect</strong>Windows operating systemYou can uninstall the <strong>Kerio</strong> <strong>Connect</strong> through Control Panel using the standard uninstallwizard.Decide whether you wish to delete also the data store and configuration files of <strong>Kerio</strong><strong>Connect</strong>. The uninstall wizard offers an option to keep them.Mac OS X operating systemYou can uninstall <strong>Kerio</strong> <strong>Connect</strong> through <strong>Kerio</strong> <strong>Connect</strong> Uninstaller.installation package of <strong>Kerio</strong> <strong>Connect</strong> (your current version).It is available in theDecide whether you wish to delete also the data store and configuration files of <strong>Kerio</strong><strong>Connect</strong>. The uninstall wizard offers an option to keep them.Linux operating system — RPMYou can uninstall <strong>Kerio</strong> <strong>Connect</strong> using the following command:# rpm -e kerio-connect (for standard <strong>Kerio</strong> <strong>Connect</strong>)During the uninstallation, only file from the original package and unchanged files aredeleted. The configuration files, data store and other changed or added files will be kept onyour computer. You can delete them manually or use them for future installations.Linux operating system — DEBYou can uninstall <strong>Kerio</strong> <strong>Connect</strong> using the following command:# apt-get remove kerio-connect (for standard <strong>Kerio</strong> <strong>Connect</strong>)21
Uninstalling <strong>Kerio</strong> <strong>Connect</strong>During the uninstallation, only file from the original package and unchanged files aredeleted. The configuration files, data store and other changed or added files will be kept onyour computer. You can delete them manually or use them for future installations.To uninstall <strong>Kerio</strong> <strong>Connect</strong> completely including the configuration files, use command:# apt-get remove --purge kerio-connect (for standard <strong>Kerio</strong> <strong>Connect</strong>)22
Switching from 64-bit installation of <strong>Kerio</strong> <strong>Connect</strong>back to 32-bit installation on Microsoft WindowsSwitching from 64-bit installation to 32-bit installationWe recommend to perform full backup of <strong>Kerio</strong> <strong>Connect</strong> before proceedingTo switch your <strong>Kerio</strong> <strong>Connect</strong> from the 64-bit version back to 32-bit version, follow thesesteps:1. Uninstall the 64-bit version of your <strong>Kerio</strong> <strong>Connect</strong>.Do not remove configuration files and data store during the process.2. Move folder MailServer to directory Program Files (x86).From location C:\Program Files\<strong>Kerio</strong>\MailServer\ to location C:\ProgramFiles (x86)\<strong>Kerio</strong>\MailServer\3. Open file mailserver.cfg (located in C:\Program Files (x86)\<strong>Kerio</strong>\MailServer\)and change all paths from C:\Program Files\ to C:\Program Files (x86)\.4. Run the 32-bit installation.Do not change the destination folder and select option Keep existing configuration.23
<strong>Kerio</strong> <strong>Connect</strong> VMware Virtual ApplianceWhat is <strong>Kerio</strong> <strong>Connect</strong> VMware Virtual Appliance forA virtual appliance is designed for usage in VMware products. It includes the Debian Linuxoperating system and <strong>Kerio</strong> <strong>Connect</strong>.For supported VMware product versions, check the product pages.How to get <strong>Kerio</strong> <strong>Connect</strong> VMware Virtual ApplianceDownload the <strong>Kerio</strong> <strong>Connect</strong> installation package according to your VMware product type:• For VMware Server, Workstation and Fusion — download the VMX distribution package(*.zip), unzip and open it.• For VMware ESX/ESXi — import the virtual appliance from the OVF file’s URL —e.g.: VMware ESX/ESXi automatically downloads the OVF configuration file anda corresponding disk image (.vmdk).http://download.kerio.com/en/dwn/connect/kerio-connect-appliance-1.x.x-1270-linux.ovfTasks for shutdown or restart of the virtual machine will be set to default valuesafter the import. These values can be set to “hard” shutdown or “hard” reset. However,this may cause a loss of data on the virtual appliance. <strong>Kerio</strong> <strong>Connect</strong> VMware VirtualAppliance supports so called Soft Power Operations which allow to shut down or restarthosted operating system properly. Therefore, it is recommended to set shutdown or restartof the hosted operating system as the value.How to work with <strong>Kerio</strong> <strong>Connect</strong> VMware Virtual ApplianceWhen you run the virtual computer, <strong>Kerio</strong> <strong>Connect</strong> interface is displayed.Upon the first startup, configuration wizard gets started where the following entries can beset:• <strong>Kerio</strong> <strong>Connect</strong> administration account username and password,• primary domain,24
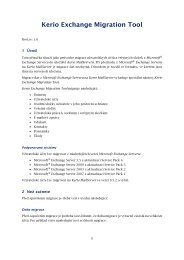
5.3 How to work with <strong>Kerio</strong> <strong>Connect</strong> VMware Virtual Appliance• DNS name of the server,• data store.This console provides several actions to be taken:• change network configuration• allow SSH connection• set time zone• change user root password• restart a disable <strong>Kerio</strong> <strong>Connect</strong> ApplianceFigure 1Console — network configurationAccess to the console is protected by root password. The password is at first set to:kerio (change the password in the console as soon as possible — under Change password).Network configurationThe network configuration allows you to:1. Viewing network adapters — MAC address, name and IP address of the adapter2. Setting network adapters25
<strong>Kerio</strong> <strong>Connect</strong> VMware Virtual Appliance• DHCP• static IP address (if you do not use DHCP, it is necessary to set also DNS)If you use a DHCP service on your network, the server will be assigned an IP addressautomatically and will connect to the network. If you do not use or do not wish to use DHCPfor <strong>Kerio</strong> <strong>Connect</strong>, you have to set the IP address manually.If the IP address is assigned by the DHCP server, we recommend to reserve an IP addressfor <strong>Kerio</strong> <strong>Connect</strong> so that it will not change.If you run <strong>Kerio</strong> <strong>Connect</strong> VMware Appliance in the local network, check that an IP addresshas been assigned by the DHCP server. If not, restart the appliance.Time zone settingsCorrect time zone settings are essential for correct identification of message reception timeand date, meeting start and end time, etc.It is necessary to restart the system for your time zone changes to take effect.How to update <strong>Kerio</strong> <strong>Connect</strong>A terminal is available for product and operating system updates. You can switchit by pressing the standard Alt+Fx combination (for example, Alt+F2) for running a newconsole.Before the first SSH connection to the terminal, it is necessary to enable the latter.<strong>Kerio</strong> <strong>Connect</strong> updates:1. Download the deb package to your computer2. Use SCP/SSH to move it to VMware Appliance3. Use command dpkg to upgradeDebian Linux updates: by the standard method using the apt-get command.26
Accessing <strong>Kerio</strong> <strong>Connect</strong>What interfaces are available in <strong>Kerio</strong> <strong>Connect</strong><strong>Kerio</strong> <strong>Connect</strong> includes two interfaces:• for administrators (<strong>Kerio</strong> <strong>Connect</strong> administration)• for users (<strong>Kerio</strong> <strong>Connect</strong> client / old WebMail)Use officially supported browsers to access the interfaces.The web interfaces are available in several languages. The default language is the language ofyour browser.<strong>Kerio</strong> <strong>Connect</strong> administrationHow to log inOnly users with corresponding access rights can login to the administration interface.To login to the <strong>Kerio</strong> <strong>Connect</strong> administration, open your browser and enter the DNS name of<strong>Kerio</strong> <strong>Connect</strong>:kerio.connect.name/adminYou can access the administration interface only via a secured connection over the HTTPSprotocol on port 4040. Your browser will automatically redirect you to:https://kerio.connect.name:4040/adminIf <strong>Kerio</strong> <strong>Connect</strong> is behind firewall, you must allow the HTTPS service on port 4040.On the login page, enter the username and password of <strong>Kerio</strong> <strong>Connect</strong> administrator.27
Accessing <strong>Kerio</strong> <strong>Connect</strong>Figure 1Admin loginIf the administrator does not belong to the primary domain, enter also the domainname (e.g. powaro@feelmorelaw.com).Once you login, confirm the security exception — <strong>Kerio</strong> <strong>Connect</strong> has issued a self-signedcertificate upon installation and since it is not signed by a certification authority, browsersrequire your confirmation.First loginIf you are logging in the administration interface for the first time, use the username andpassword of the administrator you created during the installation of <strong>Kerio</strong> <strong>Connect</strong>.How to log outIt is recommended to log out after finishing work in the administration interface.Disconnecting from <strong>Kerio</strong> <strong>Connect</strong> increases the security of data stored on the server.Automatic logoutIf any of the interfaces is idle for a pre-defined time, you will be automatically disconnected.28
6.2 <strong>Kerio</strong> <strong>Connect</strong> administrationTo set the period for automatic logout:1. In the administration interface, go to section Configuration → Advanced options → tab<strong>Kerio</strong> <strong>Connect</strong> client.2. In the Session security section, set the timeout for• session expiration — <strong>Kerio</strong> <strong>Connect</strong> will end the session after the set timeoutwithout any activity in an interfaceThe timeout is reset each time user performs an action.• maximum session duration — timeout after which users will be logged out evenif they actively use an interface3. As a protection against session hijacking you can force logout after <strong>Kerio</strong> <strong>Connect</strong> userchanges their IP address.Do not use this option, if your ISP changes IP addresses during theconnection (e.g. in case of GPRS or WiFi connections).4. Save the settings.Figure 2Session securityThe session security settings apply to both the administration interface and <strong>Kerio</strong><strong>Connect</strong> client.29
Accessing <strong>Kerio</strong> <strong>Connect</strong><strong>Kerio</strong> <strong>Connect</strong> clientWhat is <strong>Kerio</strong> <strong>Connect</strong> client<strong>Kerio</strong> <strong>Connect</strong> client is a user interface which allows users to work with:• email messages• calendars• contacts• notes• tasks• integration with other email and calendar clientsHow to loginTo login to <strong>Kerio</strong> <strong>Connect</strong> client, open your browser and enter URL in the following format:http://kerio.connect.name/On the login page, enter the username and password of <strong>Kerio</strong> <strong>Connect</strong> user.If the user does not belong to the primary domain, enter also the domain name (e.g.wsmith@notprimarydomain.com).30
Licenses in <strong>Kerio</strong> <strong>Connect</strong>Licenses in <strong>Kerio</strong> <strong>Connect</strong>Licenses are counted by number of users.Number of users means the number of mailboxes/accounts:• created in <strong>Kerio</strong> <strong>Connect</strong>• mapped from a directory serviceWhen mapped from the LDAP database of a directory service, allusers created in this database are counted as individual licenses (allactive users).• imported from a domainNumber of mailing lists, resources, aliases and domains is not limited.administrator account does not count as a license as well.The internalOnce the number of licensed users is exceeded no other users will be allowed to connect totheir accounts.If you wish to extend the number users allowed by your license, visit the <strong>Kerio</strong> <strong>Connect</strong>website.For information on how to register your licence, read this article.Optional components<strong>Kerio</strong> <strong>Connect</strong> has the following optional components:• Sophos antivirus• Exchange ActiveSync add-onThese components are licensed individually (visit the product pages of <strong>Kerio</strong> <strong>Connect</strong>).31
Registering <strong>Kerio</strong> <strong>Connect</strong>Why to register <strong>Kerio</strong> <strong>Connect</strong>Without registration, <strong>Kerio</strong> <strong>Connect</strong> behaves as a trial version. The limitations of the trialversions are:• Time — after 30 days from installation, <strong>Kerio</strong> <strong>Connect</strong> Engine will be disabled.• Sophos antivirus engine — the database cannot be updated for unregistered trialversions.• Exchange ActiveSync — disabled for unregistered trial versions.If you register a trial version, you will receive technical support during the entire trial period(for more information, visit the Support page at <strong>Kerio</strong> Technologies site).It is not necessary to reinstall <strong>Kerio</strong> <strong>Connect</strong> after registration.Registering <strong>Kerio</strong> <strong>Connect</strong> in the administration interfaceYou can register <strong>Kerio</strong> <strong>Connect</strong> from the Dashboard of the administration interface.During registration, <strong>Kerio</strong> <strong>Connect</strong> must contact the <strong>Kerio</strong> Technologies registrationserver. Allow outgoing HTTPS traffic for <strong>Kerio</strong> <strong>Connect</strong> at port 443 on your firewall.Registering a trial version1. Login to the administration interface and click on Become a registered trial user on theDashboard.2. Fill in the info in the opened dialog window.3. Confirm.A Trial ID is created.32
8.2 Registering <strong>Kerio</strong> <strong>Connect</strong> in the administration interfaceFigure 1Product RegistrationTrial IDYour Trial ID is displayed on the dashboard.technical support.Use this Trial ID whenever you contact theIf you decide to reinstall your trial version, backup the mailserver.cfg file (in the <strong>Kerio</strong><strong>Connect</strong> installation folder) which contains also your Trial ID.Registering full versionIf you registered a trial version and you have purchase the full version of <strong>Kerio</strong> <strong>Connect</strong>, thelicense file will be automatically imported to your product within 24 hours from your purchase.The Trial ID will become your license number.If you haven’t registered your trial version:1. In the <strong>Kerio</strong> <strong>Connect</strong> dashboard, click on Register product with a purchased licensenumber.2. Type the information required, including your license number (acquired upon purchase).3. <strong>Kerio</strong> <strong>Connect</strong> will contact the registration server, checks the validity of the data insertedand automatically downloads the license file (digital certificate).4. Finish the installation wizard.33
Registering <strong>Kerio</strong> <strong>Connect</strong>Installing license manuallyIf you have acquired the license file (*.key), you can import it to <strong>Kerio</strong> <strong>Connect</strong> by clicking onInstall license on the dashboard in the administration interface.Registering <strong>Kerio</strong> <strong>Connect</strong> via WWWYou purchased a license and your <strong>Kerio</strong> <strong>Connect</strong> cannot access the Internet?steps to register:Follow these1. Go to https://secure.kerio.com/reg/2. Register using your purchased license number.3. Once you register, you will receive a license key (the *.key file including the correspondingcertificate) which must be imported to <strong>Kerio</strong> <strong>Connect</strong>.The trial version of <strong>Kerio</strong> <strong>Connect</strong> cannot be registered via the website.34
Accessing <strong>Kerio</strong> <strong>Connect</strong> administrationAccessing <strong>Kerio</strong> <strong>Connect</strong> administrationYou can access the <strong>Kerio</strong> <strong>Connect</strong> administration only via secured connection (HTTPS) at:https://connect_server:4040/adminYou can use either the IP address or the DNS name of <strong>Kerio</strong> <strong>Connect</strong>.Type in connect_server/admin and the browser will automatically redirect you tothe secured connection and port 4040.Figure 1Welcome to <strong>Kerio</strong> administrationAccessing the administration interface remotely<strong>Administrators</strong> can access the administration interface:From the computer where <strong>Kerio</strong> <strong>Connect</strong> is installedDefault settings of <strong>Kerio</strong> <strong>Connect</strong>.35
Accessing <strong>Kerio</strong> <strong>Connect</strong> administrationFrom remote computersGo to section Configuration → Administration Settings and check option Allow administrationfrom remote host.You can specify allowed IP addresses group.Figure 2Configuring administration accessTypes of administrator accountsIn <strong>Kerio</strong> <strong>Connect</strong>, there are two types of administrator accounts:• built-in administrator• user with special access rights to the administration36
9.4 Creating administrator accountsindividual users/groups can be assigned these levels of access rights:• Whole server read/write — admin can view and edit the whole administrationinterface• Whole server read only — admin can view the whole administration interface• accounts — admin can view and edit their own domain settingsCreating administrator accountsTo specify access rights for a user/group:1. Double click the user/group in section Accounts → Users/Groups.2. On tab Rights, select the level of access rights.3. Confirm.Users can now login to the administration interface.folders.In <strong>Kerio</strong> <strong>Connect</strong>, users can also manage (be administrators of) public and archiveEnabling built-in administrator accountThe built-in administrator account is available solely for accessing the administrationinterface. Such account:• has the Whole server read/write access• has no email address and mailbox• does not consume a licenseTo configure the built-in admin:1. Go to section Configuration → Administration Settings.2. Check option Enable built-in administrator account.3. Enter and confirm the password.The username is set to Admin and cannot be changed.37
Accessing <strong>Kerio</strong> <strong>Connect</strong> administrationIf another user (in Accounts → Users) with username Admin exists, from now onthis user will be required to use their username including the domain to login to the <strong>Kerio</strong><strong>Connect</strong> administration.Example: admin@feelmorelaw.comthis account.The same policy as removing other administrator accounts is applied when disabling38
Domains in <strong>Kerio</strong> <strong>Connect</strong>What are domains in <strong>Kerio</strong> <strong>Connect</strong>Email domain is a unique identifier which is used to recognize to which server messages shouldbe delivered. In email address, the domain identifier follows the @ symbol.Email domain can differ from the name of the server where <strong>Kerio</strong> <strong>Connect</strong> is installed. See thefollowing example:• domain name — company.com• email domain name — mail.company.com• user email address — user@company.com<strong>Kerio</strong> <strong>Connect</strong> may include any number of mail domains. Various parameters can be definedfor each domain and its users.User accounts are defined separately in each domain. Therefore, domains must bedefined before accounts are created.Domains are managed in section Configuration → Domain.Figure 1Domains section39
Domains in <strong>Kerio</strong> <strong>Connect</strong>Internet hostnameTo make email deliverable to mail domains, <strong>Kerio</strong> <strong>Connect</strong> requires specification of a DNSname of the host where the server is running. Server names are also used for serveridentification while establishing the SMTP traffic.Upon initializing the SMTP communication, the EHLO command is used for retrieving reverseDNS record. The server that communicates with <strong>Kerio</strong> <strong>Connect</strong> can perform checks of thereverse DNS record.If <strong>Kerio</strong> <strong>Connect</strong> is running behind NAT, enter the Internet hostname that can beconverted to the IP address of the sending server, i.e. the Internet hostname of the firewall.To change the internet hostname, click on the Internet Hostname button in section Configuration→ Domains.Primary domainOne domain in <strong>Kerio</strong> <strong>Connect</strong> must be set as primary. Users defined in a primary domain donot have to use their full email address for authentication.Figure 2Login to <strong>Kerio</strong> <strong>Connect</strong> client for users in different domains in one instance of <strong>Kerio</strong> <strong>Connect</strong>By default, the first domains created automatically. When further domains are added, any ofthe domains can be set as primary (usually the one with the most users).To change the primary domain, select the domain and click on the Set as Primary button insection Configuration → Domains.40
10.4 Domains section in <strong>Kerio</strong> <strong>Connect</strong>Domains section in <strong>Kerio</strong> <strong>Connect</strong>In the administration interface, domains are managed in section Configuration → Domains.Various information (columns) can be displayed in the table. Right-click on any column nameand check the items you wish to display as Columns.Adding new domainsTo add a new domain to <strong>Kerio</strong> <strong>Connect</strong>, consult this article.41
Creating domains in <strong>Kerio</strong> <strong>Connect</strong>Adding domains in <strong>Kerio</strong> <strong>Connect</strong>Domains are defined in the <strong>Kerio</strong> <strong>Connect</strong> administration interface in section Configuration→ Domains:1. Click Add → Local Domain.2. Enter the domain name and description.domains.You should use description for better reference if you create multiple3. Set limit for the maximum number of domain users who can connected to <strong>Kerio</strong> <strong>Connect</strong>at a time (recommended for the ISPs).For better reference, the number of users in the User Count column indomain list gets red any time the limit is exceeded.4. Save the settings.Now the domain is ready. Additional settings are available.Additional configurationIn <strong>Kerio</strong> <strong>Connect</strong> you can also:• limit the message size and set items clean-out to save space on the server• connect to directory service and map users• customize <strong>Kerio</strong> <strong>Connect</strong>• forward emails to another server• create aliases for the domain42
11.3 Deleting domainsIn the Configuration → Domains section, you can also:• set new internet hostname• manage public folders• create distributed domainsDeleting domainsIf you wish to delete domains in <strong>Kerio</strong> <strong>Connect</strong>, the domain must not:• be a primary domain• contain any users• have aliases assigned43
<strong>Connect</strong>ing <strong>Kerio</strong> <strong>Connect</strong> to directory serviceSupported directory services in <strong>Kerio</strong> <strong>Connect</strong><strong>Kerio</strong> <strong>Connect</strong> supports the following directory services:• Microsoft Active Directory• Apple Open DirectoryWhy to connect to directory servicesMapping accounts from a directory service provides these benefits:• Easy account administration — you can manage user accounts from a single location.This reduces possible errors and simplifies administration.• Online cooperation of <strong>Kerio</strong> <strong>Connect</strong> and directory service — Adding, modifyingand removing user accounts/groups in the LDAP database is applied to <strong>Kerio</strong> <strong>Connect</strong>immediately.• Using domain name and password for login — Users can use the same credentialsfor <strong>Kerio</strong> <strong>Connect</strong> client (WebMail) login and domain login.• Mapping is one-way only. Data are synchronized from a directory service to <strong>Kerio</strong><strong>Connect</strong>. Adding new users/groups in <strong>Kerio</strong> <strong>Connect</strong> creates local accounts.• If a directory server is unavailable, it is not possible to access <strong>Kerio</strong> <strong>Connect</strong>. Createat least one local administrator account or enable the built-in admin.• Use ASCII for usernames when creating user accounts in a directory service.<strong>Connect</strong>ing to directory serviceTo connect domains to a directory service:1. In the administration interface, go to section Configuration → Domains.2. Double-click the domain and go to tab Directory Service.44
12.3 <strong>Connect</strong>ing to directory service3. Check option Map user accounts and groups from a directory service and select the typeof directory service.4. Configure the directory service.Microsoft Active Directory1. Type the DNS name or IP address of the Microsoft Active Directory server.If a non-standard port is used for communication of <strong>Kerio</strong> <strong>Connect</strong> withMicrosoft Active Directory, add it to the DNS name/IP address.2. Type Username and Password of a Microsoft Active Directory administrator with fullaccess rights to the administration.3. Enable secured connection (LDAPS) to protect fragile data (e.g. user passwords) sentfrom Microsoft Active Directory to <strong>Kerio</strong> <strong>Connect</strong> and vice versa.If you enable LDAPS, the DNS names is required in step 1.4. Test connection to verify you entered the correct data.5. Save the settings.Now you can map users to <strong>Kerio</strong> <strong>Connect</strong>.Install <strong>Kerio</strong> Active Directory Extension to fully benefit from the connection.45
<strong>Connect</strong>ing <strong>Kerio</strong> <strong>Connect</strong> to directory serviceFigure 1Configuring Microsoft Active DirectoryApple Open Directory1. Type the DNS name or IP address of the Apple Open Directory server.If a non-standard port is used for communication of <strong>Kerio</strong> <strong>Connect</strong> withApple Open Directory, add it to the DNS name/IP address.2. Type Username and Password of an Apple Open Directory administrator with full accessrights to the administration.3. Enable secured connection (LDAPS) to protect fragile data (e.g. user passwords) sentfrom Apple Open Directory to <strong>Kerio</strong> <strong>Connect</strong> and vice versa.If you enable LDAPS, the DNS names is required in step 1.4. Test connection to verify you entered the correct data.5. Save the settings.46
12.4 Mapping usersNow you can map users to <strong>Kerio</strong> <strong>Connect</strong>.Install <strong>Kerio</strong> Open Directory Extension to fully benefit from the connection.Figure 2Configuring Apple Open DirectoryMapping usersFor information on activating users, read article Creating user accounts in <strong>Kerio</strong> <strong>Connect</strong>.TroubleshootingAll information about directory service can be found in the Config log.47
Renaming domains in <strong>Kerio</strong> <strong>Connect</strong>What to prepareIf needed, <strong>Kerio</strong> <strong>Connect</strong> enables you to rename your domain in a simple way. Once a domainis renamed, the original name becomes an alias. This ensures that email messages sent toaddresses with the original name are always delivered.OriginalServer restartdomain nameold_domain.com new_domain.comnames_of_aliases alias.comold_domain.comalias.comTable 1Rename DomainThe domain configuration will not change after renaming.Any calendar events created before renaming will not be available for editing orremoving after application of the new name.How to rename domainsBefore you start the process, make sure:• to purchase a domain from your provider that its name is registered in DNS records— test it• to make a full backup of your message store before and after the renaming process1. In the administration interface, go to section Configuration → Domains.2. Double-click the domain you wish to rename.3. On the General tab, click on Rename, enter the new name and confirm.If you wish to cancel the domain rename action, you can do so before the nextserver restart. Click on Cancel Rename in the domain’s configuration.48
13.3 Post-renaming issues4. Restart the server.Before the restart, all operations will be performed using the original name.During the restart, the original domain name will automatically be replaced with the newname in the configuration files.Renaming distributed domainsBefore you start renaming distributed domains:1. Disconnect all servers.2. Rename each domain separately (as described above).3. Reconnect renamed servers to distributed domain.Post-renaming issuesIf user’s mail filters include addresses of users from the renamed domain, they need to changethe rules.If users have <strong>Kerio</strong> Outlook <strong>Connect</strong>or (Offline Edition) installed on their host, it is necessaryto empty the cache once the domain is renamed.49
Distributed domains in <strong>Kerio</strong> <strong>Connect</strong>Distributed domainsIf your company uses more <strong>Kerio</strong> <strong>Connect</strong> servers located in differentcities/countries/continents, you can use distributed domain.Distributed domain connects the servers together and moves all users across all servers intoa single email domain.Distributed domain requires users mapped from a directory service.For details read the Distributed domains manual.50
Creating user accounts in <strong>Kerio</strong> <strong>Connect</strong>What are user accountsIn <strong>Kerio</strong> <strong>Connect</strong>, user accounts represent physical email boxes.User accounts are used to:• authenticate users to their accounts (mail, calendar etc.)• set access rights to <strong>Kerio</strong> <strong>Connect</strong> administrationUsers are managed in the administration interface in section Accounts → Users.Figure 1UsersCreating user accountsYou can create either a local user or map existing users from a directory service.Accounts must belong to a domain. Each domain may include both local and mapped users.The number of accounts is limited only by your license.Local account can also be imported to <strong>Kerio</strong> <strong>Connect</strong>. Read this article for more info.51
Creating user accounts in <strong>Kerio</strong> <strong>Connect</strong>Creating local accountsLocal accounts are created and managed through the <strong>Kerio</strong> <strong>Connect</strong> administration interface.1. Go to section Accounts → Users and select a domain in which you want to create anaccount.2. Click Add → Add Local User (or use a template).3. On the General tab, enter a username and password.Usernames are not case-sensitive and cannot include spaces, national andspecial characters.4. Now, you can save the settings.Figure 2Adding usersAlthough other settings of user accounts are optional, you can:• create email address aliases• forward messages to another mailbox (within or outside <strong>Kerio</strong> <strong>Connect</strong>)• add users to groups52
15.3 Templates• set space quotas for users• configure access rights to the administration interface• manage account limits (message count, sending outgoing messages, etc.)• maintain accounts (message clean-out, etc.)• restrict access to servicesIf you store user passwords in the SHA format, use appropriate security policy.Mapping accounts from a directory serviceTo add users from a directory service, you must:• connect <strong>Kerio</strong> <strong>Connect</strong> to a directory service• activate users in the administration interfaceTo activate users:1. Go to section Accounts → Users and select a domain in which you want to create anaccount.2. Click Add → Add From a Directory Service.3. In the displayed dialog, select any users you wish to map to <strong>Kerio</strong> <strong>Connect</strong> (you can addusers later).4. Click on Next.5. Click Finish.The users are displayed in section Accounts → Users.TemplatesIf you plan to create numerous local accounts with similar settings, create a template.1. In the administration interface, go to section Configuration → Definitions → User Templates.2. Enter a name for the template and specify all settings which will be common for all users.53
Creating user accounts in <strong>Kerio</strong> <strong>Connect</strong>3. Save the settings.4. In section Accounts → Users, click on Add → Use Template and complete the usersettings.Deleting user accountsUser accounts can be suspended temporarily or deleted permanently.You cannot disable/delete the following user accounts:• your own account• user with higher level of administration rightsDisabling users temporarilyWhen you disable user accounts temporarily, users cannot login to <strong>Kerio</strong> <strong>Connect</strong>.However, all messages and settings of this user remain availbale in <strong>Kerio</strong> <strong>Connect</strong>.1. In the administration interface, go to section Accounts → Users.2. Double-click the user and on tab General uncheck option Account is enabled.3. Save the settings.User now cannot access <strong>Kerio</strong> <strong>Connect</strong> client (WebMail) or the <strong>Kerio</strong> <strong>Connect</strong> administration.To reverse the action, go to user’s settings and check otpion Account is enabled.occurs.This action is not identical to account blocking when a password guessing attackDeleting users permanently1. In the administration interface, go to section Accounts → Users.2. Select the user and click on Remove.3. You can:• delete the user’s mailbox• keep the user’s mailbox54
15.5 Troubleshooting4. Confirm.• transfer it to another account in <strong>Kerio</strong> <strong>Connect</strong>• delete other settings of the user (aliases, roles, etc.)Instant messaging files are always deleted.TroubleshootingAll information about users can be found in the Config log.Information about deleting users is logged in the Warning log55
Creating user groups in <strong>Kerio</strong> <strong>Connect</strong>What are user groupsWith user groups in <strong>Kerio</strong> <strong>Connect</strong>, you can:• set access rights to <strong>Kerio</strong> <strong>Connect</strong> administration for multiple users• deliver messages to multiple users via a single email address within a particulardomain (see also mailing lists)User groups are managed in the administration interface in section Accounts → Groups.Figure 1GroupsCreating user groupsYou can create either a local user group or map existing groups from a directory service.User groups must belong to a domain. Each domain may include any number of local andmapped groups. The number of groups is not limited by your license.Creating local groupsLocal groups are created and managed through the <strong>Kerio</strong> <strong>Connect</strong> administration interface.1. Go to section Accounts → Groups and select a domain in which you want to create agroup.2. Click Add.56
16.2 Creating user groups3. On the General tab, enter a group name.4. On tab Users click Add.5. Select users you wish to add to the group and confirm.You can also go to Accounts → Users and select a group in user’s settings.6. Save the settings.Although other settings of user groups are optional, you can:• create email addresses for groupsYou can create as many addresses as you wish. You can even usean existing username — just bear in mind that any messages meant forthe group will also be delivered to the original user.• configure access rights for the administration interface• export all members into a CSV file (with name users_domain_group_date.csv).Users from a directory service cannot be added to local groups.Mapping groups from a directory serviceTo add groups from a directory service, you must:• connect <strong>Kerio</strong> <strong>Connect</strong> to a directory service• activate groups in the administration interfaceTo activate the groups:1. Go to section Accounts → Groups and select a domain in which you want to create agroup.2. Click Add → Add From a Directory Service.3. In the displayed dialog, select groups you wish to map to <strong>Kerio</strong> <strong>Connect</strong> (you can addgroups later).57
Creating user groups in <strong>Kerio</strong> <strong>Connect</strong>4. Click Next.5. Click Finish.The groups are displayed in section Accounts → Groups.Local users cannot be added to groups from a directory service.Exporting group membersTo see alist of members in each group, <strong>Kerio</strong> <strong>Connect</strong> allows you to export members ofindividual groups into a CSV file.To export members of a group:1. In the administration interface, go to section Accounts → Groups.2. Double click a group.3. On tab Users click Export.<strong>Kerio</strong> <strong>Connect</strong> saves the CSV file to your harddrive with nameusers___.csvOpen the CSV file in a spreadsheet or a text editor.The data in the CSV file is organized as follows:• individual items are separated by semicolons• multiple information within individual items are separated by commasTroubleshootingAll information about groups can be found in the Config log.58
Setting access rights in <strong>Kerio</strong> <strong>Connect</strong>What levels of access rights are availableUsers/groups can have assigned the following levels of access rights:• no rights• domain read/write — can manage users, groups, aliases, mailing lists and resourcesin their own domain. It is recommended for large companies or Internet serviceproviders.• whole server read only• whole server read/writeFor access rights to public folders, read this article.For access rights to archive folders, read this article.How to set access rights1. In the administration interface, go to section Accounts → Users.2. Select a domain and double-click the user you wish to edit.3. Go to tab Rights and select the desired level of access rights.4. Confirm.59
Setting access rights in <strong>Kerio</strong> <strong>Connect</strong>Figure 1Access rightsBuilt-in administrator account<strong>Kerio</strong> <strong>Connect</strong> allows you to enable a special administrator account. This account:• has username Admin• doesn’t count into your license• has whole server read/write rights• doesn’t have an email address and message storeTo enable the built-in admin account:1. Go to section Configuration → Administration Settings2. Check option Enable built-in administrator account3. Enter a password for this administrator.60
17.3 Built-in administrator accountIf the built-in admin account is enabled and any of your standard users has usernameAdmin, the standard user must include their domain in the login dialog.If you wish to disable the built-in admin account, just unselect option Enable built-in administratoraccount in section Configuration → Administration Settings.The same rules as for disabling other admin accounts apply.61
Maintaining user accounts in <strong>Kerio</strong> <strong>Connect</strong>How to maintain users accountsIn <strong>Kerio</strong> <strong>Connect</strong>, you can:• delete old items in users’ mailboxes• recover deleted items• limit the size of outgoing messages• set quota for users’ mailboxesConfiguring automatic items clean-outIn <strong>Kerio</strong> <strong>Connect</strong> you can set a special rule which will delete all messages older than a specifiednumber of days (e.g. to save some space on your data store disk).data store.If you do not wish to lose any messages with the clean-out, archive or backup yourAutomatic clean-out can be applied to the following folders:• deleted items• spam• sent items• all folders (except contacts and notes)How to configure items clean-outThe automatic clean-out of items can be set for• individual users• per domain62
18.3 How to recover deleted itemsIf both are configured, settings per user are applied.Per domain1. Go to section Configuration → Domains and double-click the domain for which you wishto set the items clean-out.2. On tab Messages, select folders for automatic clean-out and set the number of days.3. Confirm.Per userBy default, new users inherit settings from their domain. If you want to change settings forindividual users, follow these steps:1. Go to section Accounts → Users, double-click the user for whom you wish to set the itemsclean-out.2. Go to tab Messages and in the Items clean-out section select option Use custom settingsfor this user.3. Select folders for automatic clean-out and set the number of days.How to recover deleted itemsIf anyone loses an important message which is accidentally moved to a folder which is cleanedup automatically, deleted messages can be simply recovered before the store with deleteditems is completely cleared out.The following items can be recovered — email messages, events, contacts, notes and tasks.Enabling deleted items recovery1. In the administration interface, go to section Configuration → Domains.2. Double-click the domain and go to tab Messages.3. Check option Keep deleted items for and specify number of days for which the items willbe available after deletion.4. Confirm.63
Maintaining user accounts in <strong>Kerio</strong> <strong>Connect</strong>Recovering deleted itemsOnce recovery is enabled for the user’s domain, follow these steps to recover their items:1. In the administration interface, go to section Accounts → Users.2. Select the user and click on More Actions → Recover Deleted Items.3. This will run the recovery process and you will see the result.If any items are restored, user will find them in their Deleted Items folder.If the Recover deleted items button is not active, deleted items recovery is notenabled for the particular domain. In such a case, the given deleted item can be lookedup in the archive if archiving has been used.How to limit size of outgoing messagesIf you wish to avoid overloading your server with large email attachments, you can limit thesize of outgoing messages per domain or per user.If both are configured, settings per user are applied.Per domain1. Go to section Configuration → Domains and double-click the domain.2. On tab Messages, check option Limit outgoing message size to.3. Set the maximum size of a message for this domain.4. Confirm.Per userBy default, new users inherit settings from their domain. If you want to change settings forindividual users, follow these steps:1. Go to section Accounts → Users and double-click the user for whom you wish to limit themessage size.2. Go to tab Messages and in section Maximum message size set the limit for outgoingmessages.64
18.5 How to limit size of incoming messages delivered via SMTPBy selecting the appropriate option, you can also disable any limits onmessage size for individual users.3. Confirm.Sent from <strong>Kerio</strong> <strong>Connect</strong> clientEach new message composed in <strong>Kerio</strong> <strong>Connect</strong> client is sent to <strong>Kerio</strong> <strong>Connect</strong> via so-calledHTTP POST request. Each request contains not only a message body, but also all headers andattachments. The limit set by this option narrows the size of any HTTP POST request directedfrom <strong>Kerio</strong> <strong>Connect</strong> client. This means that any limit set for requests also limits the size ofemail messages.1. In the administration interface, go to section Configuration → Advanced Options → tab<strong>Kerio</strong> <strong>Connect</strong> client.2. Specify the maximum size of outgoing messages.3. Confirm.4. Restart <strong>Kerio</strong> <strong>Connect</strong>.How to limit size of incoming messages delivered via SMTPYou can set a limit to the size of messages delivered via SMTP:1. In the administration interface, go to section Configuration → SMT server → tab SecurityOptions.2. Check option Limit maximum incoming SMTP message size to and specify the size.3. Confirm the settings.How to limit size of user mailboxesApart from limiting the size of messages, you can also set a limit to the size of users’ mailboxand the number of items it contains.1. Go to section Accounts → Users and double-click the user whom you wish to set limit totheir mailbox size.2. Go to tab Quota, select option you wish to limit and specify the disk space or item countfor the user.3. Confirm.65
Maintaining user accounts in <strong>Kerio</strong> <strong>Connect</strong>If a limit is reached, userNotifying users about reaching their quotasUsers may be notified if the quota of their message store reaches a certain limit. Thus usersmay delete messages in their mailboxes.To set the limit for notifying users:1. In the administration interface, go to section Configuration → Advanced Options → tabStore Directory.2. Set the Warning limit (in percent) the frequency in which users will be notified.3. You can specify an email address to which a message will be send if a user reaches thequota.4. Save the settings.66
Creating mailing lists in <strong>Kerio</strong> <strong>Connect</strong>About mailing listsMailing lists are group email addresses. Messages sent to these addresses are distributed toall members of the mailing list. Apart from the standard user groups, mailing lists allow:• subscribing/unsubscribing of members by email messages• mailing list moderating (moderators conduct users’ subscription/unsubscription,participation and message posting)• automatic modifications of message body or subject (by adding predefined text toeach message)• header substitution (hides sender’s email address)• disallowing messages that contain certain features (e.g. messages where subject is notdefined)Special mailing list addressesAll actions (subscribing, moderating, etc.) are performed by sending email messages to aspecial address — -@Users can send empty messages to those specific email addresses to performed desiredactions.The following suffixes are available:• subscribe — to subscribe to a mailing list,• unsubscribe — to unsubscribe from a mailing list,• help — to receive help info for the mailing list,• owner, owners — to send messages to the mailing list moderator (users do not haveto know their email addresses).Creating mailing lists1. Go to section Accounts → Mailing Lists and select a domain in which you want to createa mailing list.2. Click Add.67
Creating mailing lists in <strong>Kerio</strong> <strong>Connect</strong>3. Enter a name for the mailing list.The mailing list name must not:• contain suffixes used for special functions• contain the . symbol (dot)• be identical to other username or alias4. Select language for the automatic messages sent to users.You can create mailing lists in various languages on one server. Messagetemplates for individual languages are kept in the reports subdirectory where<strong>Kerio</strong> <strong>Connect</strong> is installed. Files are in UTF-8. You can modify individual reportsor add new language report versions.5. Enter an automatic welcome message. Add text that will be appended to each messagesent to the mailing list.6. Decide on the mailing list policy — you can moderate it or leave it without yourinterference.7. Add users on the Members tab or import them. You can also allow subscription viamessages sent to a special email address.8. Decide who can see the archive of the mailig list.9. Save the settings.Now users can subscribe and send message to mailing lsits.Importing users to mailing listsYou can create a CSV file with users’ email addresses and/or full names and import the file toa mailing list.Separate individual items by commas (,) or semicolons (;).The file may look as follows:psycho@yahoo.com;Peter SychoTo import CSV files to a mailing list:1. In section Accounts → Mailing Lists, double-click a mailing list and go to tab Members.2. Click Add → Import from a CSV file.3. Browse for the CSV file and confirm.68
19.3 Accessing the mailing list archiveThe users are now displayed on tab Members.Accessing the mailing list archiveMailing list archive is a special folder accessible via the NNTP service.You can enable archiving in the mailing list settings on tab Archiving.If you wish the archive to be accessible publicly (to anybody), you must allow anonymousaccess to the NNTP service:1. Go to section Configuration → Services.2. Double-click NNTP and on the Access tab check option Allow anonymous access.3. Save the settings.TroubleshootingIf any problem regarding mailing lists occurs, consult the Debug log (right-click the Debug logarea and enable Mailing List Processing in Messages).69
Importing users in <strong>Kerio</strong> <strong>Connect</strong>Where to import fromIn <strong>Kerio</strong> <strong>Connect</strong> you can import users from• CSV file• directory serviceImporting creates local user accounts..For information on importing users to a mailing list, read articleCreating mailing listsin <strong>Kerio</strong> <strong>Connect</strong>.Importing from a fileCreating a CSV fileYou can import users from a CSV file.correspond with <strong>Kerio</strong> <strong>Connect</strong>’s items.Headlines of individual columns in the file mustIndividual items can be divided by:• semicolons (;) — divide multiple items by commas (,)Name;Password;FullName;Description;MailAddress;Groupsabird;VbD66op1;Alexandra Bird;Development;abird;read,allabird;Ahdpppu4;Edward Wood;Sales;ewood,wood;sales,allmtaylor;SpoiuS158;Michael Taylor;Assistant;mtaylor,michael.taylor;all• commas (,) — put multiple items in quotation marks ("") and divide them by commas(,)Name;Password;FullName;Description;MailAddress;Groupsabird,VbD66op1,Alexandra Bird,Development,abird,”read,all"ewood,Ahdpppu4,Edward Wood,Sales,”awood,wood”,”sales,all"mtaylor,SpoiuS158,Michael Taylor,Assistant,”mtaylor,michael.taylor”,all70
20.3 Importing from a directory serviceThere is no rule for the order of the columns. Only the Name (username) is obligatory.Importing from a CSV fileTo import the file:1. Go to section Accounts → Users and select a domain to which you wish to import users.2. Click on Import and Export → Import from a CSV File.3. Select the CSV file and confirm.4. This displays a list of users from the CSV file — select those you wish to import (you caneven use a template) and confirm.Importing from a directory serviceWindows NT domainIf you wish to import users from Window NT domain, the computer with <strong>Kerio</strong><strong>Connect</strong> must be installed on Microsoft Windows and must belong to this domain.1. Go to section Accounts → Users and select a domain to which you wish to import users.2. Click on Import and Export → Import from a Directory Service.3. Enter the name of the Windows NT domain and confirm.During the import, sensitive data are transmitted (such as user passwords)— secure the communication by using an SSL encryption.4. This displays a list of users — select those you wish to import (you can use a template)and confirm.Microsoft Active Directory1. Go to section Accounts → Users and select a domain to which you wish to import users.2. Click on Import and Export → Import from a Directory Service.71
Importing users in <strong>Kerio</strong> <strong>Connect</strong>3. Enter the name of the Microsoft Active Directory domain, the name of the server withActive Directory and username and password of Active Directory user (with at least readrights). Confirm.During the import, sensitive data are transmitted (such as user passwords)— secure the communication by using an SSL encryption.4. This displays a list of users — select those you wish to import (you can use a template)and confirm.Novell eDirectory1. Go to section Accounts → Users and select a domain to which you wish to import users.2. Click on Import and Export → Import from a Directory Service.3. Enter the name of organization users will be imported from, the name or IP address of theserver on which the service for this domain is running and username and password of auser in this domain (with at least read rights). Confirm.During the import, sensitive data are transmitted (such as user passwords)— secure the communication by using an SSL encryption.4. This displays a list of users — select those you wish to import (you can use a template)and confirm.TroubleshootingEnable the Directory Service Lookup option in the Debug log before starting the importprocess. Logged information about the import process will help you where troubleshooting isnecessary.72
Exporting users in <strong>Kerio</strong> <strong>Connect</strong>What can be exportedIn <strong>Kerio</strong> <strong>Connect</strong> you can export lists of• users from a domain• members of a group• members of a mailing list<strong>Kerio</strong> <strong>Connect</strong> exports users to a CSV file. Individual items in the file are separated bysemicolons (;). Multiple information is separated by commas (,).<strong>Administrators</strong> with at least read rights can export users.Exporting users from a domain1. In the administration interface, go to section Accounts → Users.2. Select the domain to export from.3. Click Import and Export → Export to a CSV file.The file name is created by the following pattern: users__.csvExporting users from a group1. In the administration interface, go to section Accounts → Groups.2. Select the domain and double-click the group.3. On the Members tab click Export.The file name will be created by the following pattern:users___.csv73
Exporting users in <strong>Kerio</strong> <strong>Connect</strong>Exporting users from a mailing list1. In the administration interface, go to section Accounts → Mailing Lists.2. Select the domain where the mailing list is created.3. Click on Import and Export → Export to a CSV file.The file name will be created by the following pattern:users___.csv74
Creating aliases in <strong>Kerio</strong> <strong>Connect</strong>Aliases in <strong>Kerio</strong> <strong>Connect</strong>In <strong>Kerio</strong> <strong>Connect</strong>, aliases create virtual (alternative):• domain names (the part after @ changes)• user names (the part before @ changes)Both types of aliases can be combined:Figure 1Map of aliases for a single user accountDomain aliasesEach domain can have any number of alternative names — aliases.Domain aliases are used for email delivery. Users cannot use them to:• login to the <strong>Kerio</strong> <strong>Connect</strong> administration interface• login to <strong>Kerio</strong> <strong>Connect</strong> client• view the Free/Busy serverEach user in a domain with domain aliases has an according number of email addresses (withina single mailbox):75
Creating aliases in <strong>Kerio</strong> <strong>Connect</strong>Figure 2Domain aliasesOnce you rename a domain, an alias is automatically created from the original name.Creating domain aliasesTo create a domain alias in <strong>Kerio</strong> <strong>Connect</strong>:1. In the administration interface, go to Configuration → Domains.2. Double-click a domain and go to the Aliases tab.3. Click on Add and type an alias.4. Confirm and save.each alias.To make the alias exist in the Internet, create a corresponding MX record in DNS forUsername aliasesEach account or group can be associated with any number of aliases (i.e. different names).Aliases can be linked to:• a user• a group• an existing aliasIf a message is sent to a username, it is marked by a flag so thatthe aliases not get looped. If such message arrives to the usernamemarked by the flag, it will be stored in the mailbox that belongs to thelast unmarked alias:Each user with, for example, four aliases has four email addresses (within a single mailbox):76
22.3 Username aliasesFigure 3Domain aliasesCreating username aliasesTo create an email alias in <strong>Kerio</strong> <strong>Connect</strong>, follow these guidelines:1. In the administration interface, go to Accounts → Aliases.2. Select a domain where the aliases will be created. Click Add.3. Enter the name of the alias.The alias may contain the following characters:• a-z — all lower-case letters (no special characters)• A-Z— all upper-case letters (no special characters)• 0-9 — all numbers• . — dot• - — dash• _ — underscore• ? — question mark• * — asterisk4. The messages can be sent to:• an email address — click Select• public folder — enter the name of the public folder in this format:#public/folder_nameThis item is active only in case at least one public folderof the Mail type is created.5. Confirm and save.77
Creating aliases in <strong>Kerio</strong> <strong>Connect</strong>Example:Mr Sherlock Holmes has an account with username sherlock in domain holmes.com(therefore, his email address is sherlock@holmes.com).Since he finds himself very smart (what else), he wants another email address — genius@holmes.com.The problem is he does not want to manage two accounts.He orders Dr Watson to create an alias in section Accounts → Aliases. The alias is geniusand is delivered to email address sherlock@holmes.com.From now on, all messages sent to genius@homes.com will be delivered to sherlock@holmes.comusers:In user’s settings on tab Email Addresses, you can also specify aliases for individualFigure 4Domain aliasesThe same goes for groups — specify aliases on tab Email Addresses in the group’s settings.Special scenariosAlias for messages to be stored in a public folderMr Holmes wants messages sent to info@holmes.com to be store in the Info public folder.The alias is:Info → #public/Info78
22.3 Username aliasesAlias for messages sent to invalid addresses to be delivered to a specific userMr Holmes does not want to be troubled with people who cannot write correct addresses.Therefore, he has created an alias for such messages to be sent to Dr Watson so that hedoes not need to deal with them. This is done by this alias:* → will be sent to watsonIf this alias is not defined, <strong>Kerio</strong> <strong>Connect</strong> returns such messages to theirsenders as undeliverable.Alias as a protection against wrong spelling — one characterMr Sherlock Holmes wishes to filter messages which may contain interesting cases.These are messages sent to addresses like kill@holmes.com (potential murder cases)or will@holmes.com (interesting inheritance cases). To avoid creating many aliases, MrHolmes creates only the following one which will cover both addresses:?ill → will be sent to sherlockAlias as a protection against wrong spelling — numerous charactersSome languages have different spellings for one sound. Thus, Mr Holmes’s first name canbe written, for example, as sherlock, scherlock, serlock etc. The following alias willcover all these cases:*erlock → will be sent to sherlockChecking aliasesIn <strong>Kerio</strong> <strong>Connect</strong> you can verify all the aliases.1. In the administration interface, go to section Accounts → Aliases.2. Click the Check Address button (bottom right corner).3. Enter any email address — real, misspelled, virtual, alias, made-up, etc.4. Click Check.The Result table displays the target addresses to which messages sent to the entered addresswill be delivered.79
Configuring resources in <strong>Kerio</strong> <strong>Connect</strong>What are resourcesResources are meeting rooms and other facilities, such as conference rooms, cars, parkinglots.In email clients, resources can be scheduled by creating new events in calendars.Resources do not count into your license.Resource administratorsEach resource has a reservation manager. Reservation managers are users who manage theresource calendar. In <strong>Kerio</strong> <strong>Connect</strong> client, they can delete any reservation for a resource.You can set the reservation managers in the resource settings on tab Permissions.Creating new resourcesTo create a new resource in the administration interface, follow these steps:1. In section Accounts → Resources, select the domain to which you want to add a resourc.Click Add.2. Enter a name for the resource and select the type.3. Make sure the Resource is available option is checked.If you wish to temporarily remove a resource (e.g.repaired), uncheck this option.while a car is being4. By default, permissions to use resources are set to all users from the domain. You canadd or remove any user/group on tab Permissions.5. On tab Permissions, select a reservation manager.By default, the domain administrator is set.6. Confirm the settings.80
23.4 TroubleshootingTroubleshootingIf any problem regarding resources occur, consult the Debug log (right-click the Debug logarea and enable Resource Service).81
Monitoring <strong>Kerio</strong> <strong>Connect</strong>Monitoring overviewIn <strong>Kerio</strong> <strong>Connect</strong>, administrators can:• monitor incoming and outgoing messages• view connections to services, number of messages• view statistics (including antivirus and spam filter)• view who’s connected• monitor the CPU and RAM usageMonitoring incoming and outgoing messagesAn administrator can view all activities in <strong>Kerio</strong> <strong>Connect</strong> in great detail.information can be monitored:The following• status of all sent and received messages• connections to <strong>Kerio</strong> <strong>Connect</strong> interfacesViewing message statusAll messages that are being sent or received through <strong>Kerio</strong> <strong>Connect</strong> are stored in <strong>Kerio</strong> <strong>Connect</strong>installation directory in folder store/queue as the following file types:• *.eml — message itself• *.env — SMTP envelope of the messageThese messages are also displayed in section Status → Message Queue → tab Messages inQueue.In this section you can:• check whether messages are sent/received properly• remove messages from the queue• immediately send messages waiting in the queueThe Queue ID displayed in Status → Message Queue → tab Messages in Queueequals the filename in store/queue.82
24.2 Monitoring incoming and outgoing messagesFigure 1Viewing message queueProcessing message queueWhen processing the message queue, <strong>Kerio</strong> <strong>Connect</strong> creates a new process for each messagethat reports all actions (delivery to a local mailbox or a remote SMTP server, antivirus control,etc.) and then terminates.Several such processes can run simultaneously.Section Status → Message Queue → tab Messages Processing displays information about thecurrent statuses of messages currently processed.Figure 2Processing message queueConfiguring message queue parametersIn the administration interface in section Configuration → SMTP Server → tab Queue Options,you can specify:• limit the maximum number of messages being delivered at a time• interval in which <strong>Kerio</strong> <strong>Connect</strong> will retry to deliver messages83
Monitoring <strong>Kerio</strong> <strong>Connect</strong>• interval in which the undelivered message will be sent to sender• interval in which the sender will be notified that their message has not been deliveredyet and language for the notificationThese settings do not apply if you use a relay SMTP server.Traffic chartsIn the Status →Traffic Charts section of the <strong>Kerio</strong> <strong>Connect</strong> administration interface you canview (in graphical format) the number of connections to individual services of <strong>Kerio</strong> <strong>Connect</strong>and the number of processed messages (both incoming and outgoing) for a given period.Figure 3Traffic charts84
24.4 Viewing statisticsViewing statisticsStatistical data is displayed using the Status → Statistics section.Statistics are divided into groups for better readability (e.g. “Storage Occupied”, “Messagessent to parent SMTP server”, “Client POP3 statistics”, etc.). In each table, data of the sametopic are gathered.Figure 4<strong>Kerio</strong> <strong>Connect</strong> statisticsDisplaying users currently connected to <strong>Kerio</strong> <strong>Connect</strong>To display all network connections established with <strong>Kerio</strong> <strong>Connect</strong>, including all its services(SMTP, POP3, etc.) and the administration interface, go to section Status → Active <strong>Connect</strong>ions.Figure 5Active connections85
Monitoring <strong>Kerio</strong> <strong>Connect</strong>To display connections established to <strong>Kerio</strong> <strong>Connect</strong>’s web interfaces and session expiry times,go to section Status → Active <strong>Connect</strong>ions.Figure 6Active connections<strong>Kerio</strong> <strong>Connect</strong> also allows to view which email folders are being used by the users.To display currently opened folders, go to section Status → Opened Folders.Monitoring CPU and RAM usageNew in <strong>Kerio</strong> <strong>Connect</strong> 8.2!System → System Health shows the current usage of CPU, RAM and the disk space of thecomputer or device where <strong>Kerio</strong> <strong>Connect</strong> is running.Time intervalSelection of time period for which CPU load and RAM usage is displayed.CPUTimeline of the computer’s CPU load. Short time peak load rates (“peaks” of the chart)are not unusual and can be caused for example by the network activity.RAMRAM usage timeline.Storage usageCurrently used and free space on the disk or a memory card.TasksRestart of <strong>Kerio</strong> <strong>Connect</strong>.Lack of system resources may seriously affect functionality of <strong>Kerio</strong> <strong>Connect</strong>. If theseresources are permanently overloaded, restart <strong>Kerio</strong> <strong>Connect</strong> and then check systemresources usage again.86
Services in <strong>Kerio</strong> <strong>Connect</strong>Setting service parametersParameters for services can be set in section Configuration → Services.By default, all services are running on their standard ports upon the first startup of <strong>Kerio</strong><strong>Connect</strong>.If you know that any service will not be used, we recommend to disable them forsecurity reasons.For each service, you can:• specify whether the service will be run automatically upon <strong>Kerio</strong> <strong>Connect</strong> startup• add or remove listening IP addresses and ports• limit access to the service for specific IP addresses• specify the maximum number of concurrent connectionsWhen you plan to limit the number of connections, consider thenumber of server users. For unlimited number of connections set thevalue to 0.87
Services in <strong>Kerio</strong> <strong>Connect</strong>Figure 1Services in <strong>Kerio</strong> <strong>Connect</strong>If any services available in <strong>Kerio</strong> <strong>Connect</strong> is already running on the server, you havetwo possibilities:• change the traffic port for one of the services• reserve a different IP address for each instance of the service (on the same port)However, assigning the IP addresses is not recommended while using DHCP.What services are availableEach service is available in both unsecured and secured version (encrypted by SSL).following sections describe individual services.TheSMTPSMTP protocol server is used for sending outgoing email messages, for receiving incomingmessages and messages creating via mailing lists in <strong>Kerio</strong> <strong>Connect</strong>.Two methods can be used for encryption of SMTP traffic:• SMTP on port 25 with STARTTLS, if TLS encryption is supported — traffic on port 25starts as unencrypted. If both sides support TLS, TLS is started via STARTTLS.• SMTP on port 465 with SSL/TLS — the traffic is encrypted from the start.88
25.2 What services are availableSince public WiFi networks often do not support traffic on unencrypted protocols,SMTP on port 25 can be blocked. In such cases users cannot sent email out of the network.SMTPS on port 465 is usually allowed.SMTP Submission is a special type of communication which enables messages sent by anauthenticated user to be delivered immediately without antispam control. Allow SMTPSubmission if you use distributed domain.POP3POP3 protocol server allows users to retrieve messages from their accounts.IMAPIMAP protocol server allows users to access their messages. With this protocol, messages stayin folders and can be accessed from multiple locations at any time.NNTPNNTP is a transfer protocol for discussion groups over the Internet. The service allows usersuse messages of the news type and use the protocol to view public folders. Public folderscannot be viewed via NNTP if their name includes a blank space or the . (dot) symbol.LDAPLDAP server enables users to access centrally managed contacts. It provides read-only access— users are not allowed to create new nor edit the existing ones.If <strong>Kerio</strong> <strong>Connect</strong> is installed on a server which is used as a domain controller (in ActiveDirectory), it is necessary to run this service on non-standard ports or to disable them.HTTPHTTP protocol is used to:• access user mailboxes in <strong>Kerio</strong> <strong>Connect</strong> client• access the Free/Busy server• to automatically update <strong>Kerio</strong> Outlook <strong>Connect</strong>or (Offline Edition)• to synchronize via ActiveSync or NotifyLink (BlackBerry)• publish calendars in iCal format89
Services in <strong>Kerio</strong> <strong>Connect</strong>• (HTTPS) access <strong>Kerio</strong> <strong>Connect</strong> administration• (HTTPS) access <strong>Kerio</strong> <strong>Connect</strong> client (if set)Instant MessagingNew in <strong>Kerio</strong> <strong>Connect</strong> 8.1!Instant messaging allows user to chat with other users in or outside of their domain.Restricting access to some servicesIf you need to restrict access to any service for any users, you can define so-called User AccessPolicies. This means that you can allow or deny access to individual protocols from certain IPaddresses to individual users.Defining access policies1. In the administration interface, go to section Configuration → Definitions → User AccessPolicies.2. Click on Add Policy and enter a name for the policy.3. Click on the Add restriction link and select a protocol.4. Decide whether to allow it, allow it for certain IP addresses or deny it.5. Add as many restrictions as you wish.6. The group of the remaining (unselected) protocols can be also set in the same way.7. To remove a restriction or policy, select it and click on Remove.8. Save the settings.Assigning access policies to usersEvery new user is assigned the Default policy. To assign a different one:1. In the administration interface, go to section Accounts → Users.2. Double-click the user and go to tab Rights.90
25.4 Troubleshooting3. Select a User policy from the drop-down menu.4. Save the settings.TroubleshootingIf any problem regarding services occurs, consult the Debug log — right-click the Debug logarea and check the appropriate message type (service to be logged).SMTPIf any problems arise in the communication between the SMTP server and a client, it ispossible to use the SMTP Server and SMTP Client options.POP3When problems with POP3 server arise, enabling the POP3 Server option might be helpful.IMAPWhen problems with IMAP Server arise, enabling of the IMAP server logging might behelpful.NNTPWhen problems with NNTP server arise, a log that can be enabled by the NNTP Serveroption might help.LDAPWhen problems with LDAP server arise, a log that can be enabled by the LDAP Serveroption might help.HTTP• HTTP Server — this option enables logging of HTTP traffic on the server’s side.• WebDAV Server Request — this option enables logging of queries sent fromthe WebDAV server. It can be used in Microsoft Entourage or Apple Mail whereproblems with Exchange accounts arise.• PHP Engine Messages — enables log which may be helpful when solvingproblems with the <strong>Kerio</strong> <strong>Connect</strong> client interface.Instant messagingWhen problems with IM server arise, a log that can be enabled by Messages → InstantMessaging Server might help.Once your problems are solved, it is recommended to disable the logging.91
Protecting SMTP the server in <strong>Kerio</strong> <strong>Connect</strong>Why to configure the SMTP serverWhen correctly configured, the SMTP will protect your <strong>Kerio</strong> <strong>Connect</strong> from misuse. It enablesyou to define who will be allowed to send outgoing message via this server and what actionsthey can perform.Once an unprotected SMTP server is accessible from the Internet (anytime when at least oneMX record is directed to it and the port 25 is available for access), anyone can connect to theserver and send email messages through it (usually spam).Spammers may use your SMTP server to send out spam messages.company may be added to a spam blacklist.Thus yourHow to configure who can connect to SMTP serverTo configure SMTP settings, login to the administration interface:1. Go to section Configuration → SMTP Server → tab Relay Control.2. Select Allow relay only for.If you enable this option, users not specified will be able to send messagesonly to the local domains.3. Check Users from IP address group to specify a group of IP address which can sendoutgoing messages.Usually local addresses are added. However if you wish to protect userswho send messages from local addresses, check option Require authenticationwhen accepting message with sender from a local domain.4. Check Users authenticated through SMTP for outgoing mail to allow all <strong>Kerio</strong> <strong>Connect</strong>users sending outgoing messages.92
26.2 How to configure who can connect to SMTP server5. Check Users previously authenticated through POP3 .... to allow sending outgoingmessages to all users who have previously authenticated through POP3 from the sameIP address and specify the time between POP3 and SMTP authentication.Authentication by IP addresses is independent from authentication byusernames; therefore users must meet at least one of these conditions. If bothUsers from IP address group and Users authenticated through SMTP serveroptions are selected and the SMTP authentication fails, <strong>Kerio</strong> <strong>Connect</strong> does notverify, if the user belongs to the allowed IP addresses.6. Confirm the settings.Messages from allowed users will not be checked by SPF, Caller ID and SpamAssassin.Figure 1SMTP server93
Protecting SMTP the server in <strong>Kerio</strong> <strong>Connect</strong>How to configure security options of the SMTP serverIn <strong>Kerio</strong> <strong>Connect</strong>, you can configure several limits for IP addresses. This can be done in theadministration interface in section Configuration → SMTP Server → tab Security OptionsFor a single IP address, you can set:• Maximum number of messages sent in one hour — any new message sent from the IPaddress where the limit was exceeded in the recent our is discarded• Max. number of concurrent connections — protection from so-called DoS attackswhich overloads the server• Maximum number of unknown recipients — protection from so-called directoryharvest attacks when an application connects to your server and uses dictionary togenerate possible usernamesFigure 2SMTP serverSelect a group of trusted IP addresses which will not be affected by these settings.With the following additional options you can:• Block messages if the sender’s domain does not have a DNS record (or revers DNSentry) — protection from senders with fictional email addresses• Require authentication even when sender is from a local domain — ensures theauthenticity of anyone sending from a local domain• Set maximum number of recipients per message — protects from spam messages setto a large number of recipients• Maximum number of failed commands in SMTP session — spam is often sent byspecial applications that connect to SMTP servers and ignore its error reports. <strong>Kerio</strong>94
26.4 How to send outgoing messages through another server<strong>Connect</strong> will close the SMTP connection automatically after the defined number offailed commands is reached.Figure 3SMTP serverHow to send outgoing messages through another serverIn <strong>Kerio</strong> <strong>Connect</strong>, messages can be delivered• directly to destination domains using MX records or• through another SMTP server, so called relay SMTP serverThis can be configured in the administration interface in section Configuration → SMTP Server→ tab SMTP Delivery.95
Protecting SMTP the server in <strong>Kerio</strong> <strong>Connect</strong>Figure 4SMTP serverTroubleshootingWe strongly recommend to use these settings to protect your SMTP server. However,sometimes even a correct message can be rejected, e.g. when a sales person sends multiplemessages to customers, they may exceed the limits set. Thus whenever a problem withdelivering messages occurs, ask the users and check the SMTP server settings.96
Securing <strong>Kerio</strong> <strong>Connect</strong>Issues to address• Restrict communication on firewall to necessary IP addresses and ports• Create strong passwords policy• Configure security policy• Configure SMTP server• Use antispam and antivirus• Enable DKIM signature• Enable the sender anti-spoofing protectionConfiguring your firewallIf you install <strong>Kerio</strong> <strong>Connect</strong> in the local network behind a firewall, map the following ports:Service (default port)Incoming connectionSMTP (25)allowSMTPS (465)allowSMTP Submission (587) allowPOP3 (110)denyPOP3S (995)allowIMAP (143)denyIMAPS (993)allowNNTP (119)denyNNTPS (563)allowLDAP (389)denyLDAPS (636)allowHTTP (80, 4040, 8800) denyHTTPS (443, 4040, 8443) allowTable 1Services to be allowed on the firewall97
Securing <strong>Kerio</strong> <strong>Connect</strong>Password policyFor information on passwords, read article Password policy in <strong>Kerio</strong> <strong>Connect</strong>.Configuring secure connection to <strong>Kerio</strong> <strong>Connect</strong><strong>Kerio</strong> <strong>Connect</strong> can secure:• user authentication• whole communicationFor settings, go to section Configuration → Security → tab Security Policy (Configuration →Advanced Options → tab Security Policy for <strong>Kerio</strong> <strong>Connect</strong> 8.1 and older).You can define a group of IP addresses which will be allowed to authenticate insecurely (e.g.from local networks).Securing user authentication<strong>Kerio</strong> <strong>Connect</strong> will always require secure user authentication:• CRAM-MD5 — password authentication by using MD5 digests• DIGEST-MD5 — password authentication by using MD5 digests• NTLM — use only with Active Directory.• SSL tunnel (if no other authentication method is used)If users’ passwords are saved in the SHA format:• do not apply CRAM-MD5, DIGEST-MD5, NTLM• do not map users from a directory serviceEncrypting user communicationClient applications will connect to any service using encrypted connection (the communicationcannot be tapped).SSL must be allowed to all protocols on all client stations.Many SMTP servers do not support SMTPS and STARTTLS. To provide sufficient security, theSMTP server requires secure user authentication.98
27.4 Configuring secure connection to <strong>Kerio</strong> <strong>Connect</strong>Setting secure connection1. Go to section Configuration → Security → tab Security Policy (Configuration → AdvancedOptions → tab Security Policy for <strong>Kerio</strong> <strong>Connect</strong> 8.1 and older).2. Select a security policy.3. Select group of trustworthy IP addresses.4. Select authentication methods.If more methods are selected, they will be performed in order of appearanceand availability.If user passwords are saved in the SHA format, select either PLAIN and/orLOGIN. Otherwise, users will not be able to login to <strong>Kerio</strong> <strong>Connect</strong> client.5. Save the settings.99
Configuring anti-spoofing in <strong>Kerio</strong> <strong>Connect</strong>About anti-spoofingSpammers can "spoof" your email address and pretend their messages are sent from you.To avoid such possibility, enable anti-spoofing in <strong>Kerio</strong> <strong>Connect</strong>.First, configure anti-spoofing for your server. Then, enable anti-spoofing for each domain.Configuring anti-spoofing in <strong>Kerio</strong> <strong>Connect</strong>1. Go to section Configuration → Security → tab Sender Policy.2. Check option User must authenticate in order to send messages from a local domain.3. <strong>Kerio</strong> <strong>Connect</strong> can automatically Reject messages with spoofed local domain.Click the sender policy link to see which types of addresses will be available to your users.You can define a group of trusted IP addresses.100
28.3 Enabling anti-spoofing per domainFor more information about the security features in <strong>Kerio</strong> <strong>Connect</strong>, read article Securing <strong>Kerio</strong><strong>Connect</strong>.Enabling anti-spoofing per domain1. In the administration interface, go to section Configuration → Domains.2. Double-click a domain and go to tab Security.3. Check option Reject messages with spoofed sender identity.If the option is not available, you haven’t configured anti-spoofing for the server. Click thesecurity settings link, which will take you to the appropriate section.4. Save the domain settings.101
Configuring anti-spoofing in <strong>Kerio</strong> <strong>Connect</strong>102
Password policy in <strong>Kerio</strong> <strong>Connect</strong>About password policyTo secure users and their passwords in <strong>Kerio</strong> <strong>Connect</strong>:• advise users to create strong passwords• require complex passwords (for local users)• enable password expiry (for local users)• protect against login guessingCreating strong user passwordsStrong user passwords should be long and complex. The following guidelines may help you inadvising your users:LongPasswords should be at least 8 characters long.ComplexPasswords should contain all of the following:• lowercase letters• uppercase letters• numbers• special charactersValidUsers should change their password often.You can also read this Wikipedia article for more information.Generating strong passwordsNew in <strong>Kerio</strong> <strong>Connect</strong> 8.2!<strong>Kerio</strong> <strong>Connect</strong> can generate strong passwords for your users:1. Go to section Users and double-click a user.2. On tab General, click the Generate button.103
Password policy in <strong>Kerio</strong> <strong>Connect</strong>3. Copy the generated password and give it to user.4. Save the settings.Requiring complex passwords (for local users)New in <strong>Kerio</strong> <strong>Connect</strong> 8.2!In <strong>Kerio</strong> <strong>Connect</strong>, you can force local users to create strong and complex passwords.Complex password:• must be at least 8 characters long,• must include at least 3 types of characters (lowercase, uppercase, numbers, symbols),• cannot include user’s domain and username, and any part of user’s fullname (longerthan 2 characters).The settings are configured per domain.1. In the administration interface, go to section Configuration → Domains.2. Double-click a domain and go to tab Security.104
29.4 Enabling password expiry (for local users)3. Enable option User passwords must meet complexity requirements.4. Confirm.From now on, whenever a local user changes their password in <strong>Kerio</strong> <strong>Connect</strong> client, they willhave to create new password which complies with <strong>Kerio</strong> <strong>Connect</strong>’s complexity requirements.Remember to enable users to change their passwords in <strong>Kerio</strong> <strong>Connect</strong> client.Enabling password expiry (for local users)New in <strong>Kerio</strong> <strong>Connect</strong> 8.2!To secure local user passwords, you can enable password expiration.1. In the administration interface, go to section Configuration → Domains.2. Double-click a domain and go to tab Security.3. Enable option Enforce user password expiration after.4. Set the number of days after which users will have to change their password.5. Confirm.Any change to these settings (checking/unchecking the option) will reset the counterfor password expiry.105
Password policy in <strong>Kerio</strong> <strong>Connect</strong>Notifying about expiration<strong>Kerio</strong> <strong>Connect</strong>s sends notifications to users before their password expires. The notificationsare sent 21, 14 and 7 days before expiration, and then every day until the password expires.Users have to change their password in <strong>Kerio</strong> <strong>Connect</strong> client.If the user fails to change their password, they will not be able to login to their acount and willhave to contact their administrator (who changes the password for them in their user settings).If an administrator password expires, the administrator will be able to login to theadministration interface to change their password.Protecting against password guessing attacks<strong>Kerio</strong> <strong>Connect</strong> can block IP addresses suspicious of password guessing attacks (tenunsuccessful attempts in one minute).1. Go to section Configuration → Security → tab Security Policy (Configuration → AdvancedOptions → tab Security Policy for <strong>Kerio</strong> <strong>Connect</strong> 8.1 and older).2. Check option Block IP addresses suspicious of password guessing attacks.IP address is blocked for individual services. If POP3 is blocked, attackercan attempt logging via IMAP.3. You can select a group of trustworthy IP addresses.4. To block all services, check option Block user accounts probably targeted by passwordguessing to lock the affected accounts.5. Save the settings.When an account is blocked, user cannot log in. <strong>Kerio</strong> <strong>Connect</strong> unlocks the blocked accountsafter 5 minutes. For immediate unlocking (throughout all the domains), click Unlock AllAccounts Now.This action is not identical with temporary disabling user accounts.106
Authenticating messages with DKIMAbout DKIMNew in <strong>Kerio</strong> <strong>Connect</strong> 8.2!DomainKeys Identified Mail (DKIM) signs outgoing messages from <strong>Kerio</strong> <strong>Connect</strong> with aspecial signature to identify the sender. Your users thus take responsibility for the messagesthey send and the recipients are sure the messages came from a verified user (by retrievingyour public key).To sign messages with a DKIM signature:1. Enable DKIM authentication in your domain settings.2. Add the DKIM public key to your DNS settings.Enabling DKIM in <strong>Kerio</strong> <strong>Connect</strong>1. In the administration interface, go to section Configuration → Domains.2. Double-click your domain and go to tab General.3. Enable option Sign outgoing messages from this domain with DKIM signature.4. Save the settings.107
Authenticating messages with DKIMTo see which domains have DKIM enabled, add column DKIM enabled in section Configuration→ Domains.Your DNS records must include the DKIM public key for your domain. Without proper DNSrecords, <strong>Kerio</strong> <strong>Connect</strong> will send messages without the DKIM signature. Each message yourusers send will create an error message (see Error log).Read article Configuring DNS for DKIM for more information.108
30.2 Enabling DKIM in <strong>Kerio</strong> <strong>Connect</strong>AliasesIf the domain includes also aliases, add the DNS record also to all aliases.Testing the DKIM signatureIf you want to test whether your domain signs messages with DKIM, you can use for examplethe DomainKeys Test online tool.109
Configuring DNS for DKIMAdding a DKIM record to your DNSNew in <strong>Kerio</strong> <strong>Connect</strong> 8.2!The process of adding a DKIM record to your DNS may vary according to your provider.To add your DKIM public key to DNS, you can:• ask your provider to add the record for you• do it yourself in your DNS administrationYou can find the public key in <strong>Kerio</strong> <strong>Connect</strong>. The key includes two parts:• Record name (or selector)• TXT valueThe DKIM public key is the same for all domains on a single server (in a single <strong>Kerio</strong> <strong>Connect</strong>).The DKIM public key in <strong>Kerio</strong> <strong>Connect</strong> is 2048-bit. Some providers may restrict the lengthof the key (the TXT value) — read section Creating a short DKIM public key to get detailedinformation.If a domain includes aliases, add DNS record for DKIM also to all aliases.110
31.2 Acquiring DKIM public key in <strong>Kerio</strong> <strong>Connect</strong>Acquiring DKIM public key in <strong>Kerio</strong> <strong>Connect</strong>1. In the administration interface, go to section Configuration → Domains.2. Double-click your domain and go to tab General.3. Click the Show public key button.This opens a dialog with you domain public key.Copy the text to create your DNS DKIM record. Make sure the record contains the wholetext.Creating a short DKIM public key<strong>Kerio</strong> <strong>Connect</strong> includes a 2048-bit DKIM public key. If the public key is too long (someproviders may restrict the length of the TXT value), you can use an online DKIM key creator.See an example below.111
Configuring DNS for DKIMGenerating a short DKIM key with DKIM wizard1. Go to the DKIM wizard page.2. Fill in your Domain name and DomainKey Selector (use mail).3. Select Key size 1024.4. Click Generate.The page will display your public and private keys. Now, add the private key to <strong>Kerio</strong> <strong>Connect</strong>.112
31.3 Creating a short DKIM public keyAdding a new private key to <strong>Kerio</strong> <strong>Connect</strong>1. Stop the <strong>Kerio</strong> <strong>Connect</strong> server.2. Go to <strong>Kerio</strong> <strong>Connect</strong>’s installation directory to folder sslcert/dkim.3. Copy the generated private key to file private.key.We recommend to backup the original private key.4. Start the <strong>Kerio</strong> <strong>Connect</strong> server.113
Configuring DNS for DKIM<strong>Kerio</strong> <strong>Connect</strong> will now show the shorter public key in the domains’ configuration. You cannow create the DNS DKIM record with the new public key.If you use distributed domains, make sure the new private key is available on all servers.BIND DNS serverIf you use a BIND DNS server, you can split the original <strong>Kerio</strong> <strong>Connect</strong> DKIM public key TXTvalue by using the following format:TXT ( "part 1" "part 2" ..."part x")Example:"p=MIGfMA0GCSqGSIb3DQEBAQUAA4GNADCBiQKBgQDfl0chtL4siFYCrSPxw43fqc4z""Oo3N+Il220oK2Cp+NZw9Kuvg8iu2Ua3zfbUnZWvWK4aEeooliRd7SXIhKpXkgkwn""AB3DGAQ6+/7UVXf9xOeupr1DqtNwKt/NngC7ZIZyNRPx1HWKleP13UXCD8macUEb""bcBhthrnETKoCg8wOwIDAQAB")114
Configuring spam control in <strong>Kerio</strong> <strong>Connect</strong>Antispam methods and tests in <strong>Kerio</strong> <strong>Connect</strong>Spam is an unwanted, usually advertisement email. <strong>Kerio</strong> <strong>Connect</strong> includes many options andfeatures to dispose of spam.To detect and eliminate spam, <strong>Kerio</strong> <strong>Connect</strong> uses the following methods and tests:• Black/White lists — You can create and use lists of servers and automatically blockor allow all messages they send.Detailed information in this article.• SpamAssassin — SpamAssassin is a famous antispam filter which uses several testingmethods.• Caller ID and SPF — they allow to filter out messages with fake sender addresses.Detailed information in this article.• Greylisting — The greylisting method uses a special server which stores informationabout messages and delivers only messages from the known senders.Detailed information in article Configuring greylisting.• Delayed response to SMTP greeting (Spam Repellent) — Set a delayed SMTP greetingwhich will prevent delivery of messages sent from spam servers.Messages rejected Spam Repellent are not processed by otherantispam and antivirus tests. This decreases the load on your server.• Custom rules — You can create your own rules which will satisfy your needs.Detailed information in this article.Each test can be used separately or combined with the others. To achieve betterefficiency, it is recommended to combine as many antispam features as possible. The moretests are used, the denser is the antispam filter and the less spam will be delivered to user’smailbox. Also the spam detection will be more successful which will reduce number ofmessages marked as spam by mistake (so called “false positives”).115
Configuring spam control in <strong>Kerio</strong> <strong>Connect</strong>Each testing type uses specific methods to detect spam. There is, however, a feature most ofthe tests have in common. For all methods except the delayed response to SMTP greeting, twoactions can be set to specify how spam messages would be handled:• Messages will be denied — it helps reducing load on the server• So called message spam score will be raised — it helps eliminating possible “falsepositives”To set <strong>Kerio</strong> <strong>Connect</strong>’s spam filter, go to Configuration → Content Filter → Spam Filter.Spam scoreOnce a message is tested by all enabled tests and filters, it is rated by the result spam score.<strong>Kerio</strong> <strong>Connect</strong> then marks the message as spam or delivers it as a legitimate message.You can set the limit where messages are already marked as spam and where the spam scoreis so high that there is no doubt it is a spam and can be blocked:• Tag core — if the rating reaches or exceeds the value set, the message is marked asspam• Block score — if the rating reaches or exceeds the value set, the message is discardedIf the value is too low, legitimate messages might be discardedalong with spam. Therefore, it is recommended to use the Forward themessage to quarantine address option when testing and optimizing thespam filter and specify an account where copies of all blocked messageswill be delivered and stored.116
32.3 Monitoring spam filter’s functionality and efficiencyFigure 1Spam ratingMonitoring spam filter’s functionality and efficiency<strong>Kerio</strong> <strong>Connect</strong> includes several options of how to monitor spam filter’s functionality.Spam filter statistics<strong>Kerio</strong> <strong>Connect</strong> generates statistics of its spam filter. The statistics can be found in sectionStatus → Statistics.117
Configuring spam control in <strong>Kerio</strong> <strong>Connect</strong>Figure 2Spam Filter statisticsGraphical overviews<strong>Kerio</strong> <strong>Connect</strong> also uses traffic charts to trace certain values regarding spam email. There areseveral spam-related traffic charts which can be found in the Status → Traffic Charts section.The following graphs focus on spam:<strong>Connect</strong>ions/Rejected SMTPThe chart displays number of attempts of SMTP connection were rejected by the Spamrepellent tool in certain time period.Messages/SpamWith time dependence, the chart displays how large amount of spam is delivered to <strong>Kerio</strong><strong>Connect</strong> and when.LogsProblems that occur regarding the antispam filter might be solved with help of <strong>Kerio</strong> <strong>Connect</strong>’slogs.The following logs might be helpful:SpamAll messages marked as spam are recorded in this log.Debug logLogging of particular information can be performed by this special log. Spam issues maybe worked out by using of the following information (right-click the Debug log area andclick on Messages):• Spam Filter — the option logs spam rating of each message which passed throughthe <strong>Kerio</strong> <strong>Connect</strong>’s antispam filter.• SPF Record Lookup — the option gathers information of SPF queries sent toSMTP servers.• SpamAssassin Processing — the option enables tracing of processes occurredduring SpamAssassin antispam tests.118
Configuring greylistingWhat is greylistingTo fight spam more efficiently, <strong>Kerio</strong> <strong>Connect</strong> supports greylisting.Greylisting is an effective antispam method which complements other antispam methods andmechanisms.Configuring greylisting<strong>Kerio</strong> Greylisting Service in <strong>Kerio</strong> <strong>Connect</strong> is hosted by <strong>Kerio</strong> Technologies.It is available to:• registered trial users• licensed users with valid software maintenanceGreylisting is disabled by default. To enable it, follow these instructions:1. In the administration interface, go to section Configuration → Content filter → SpamFilter tab Greylisting.2. Check option Check incoming messages by <strong>Kerio</strong> Greylisting Service.Make sure your firewall allows outgoing connection on port 8045.3. You can create a list of IP addresses which will not be included in the greylisting check.4. Test <strong>Connect</strong>ion with the <strong>Kerio</strong> Greylisting Service.The connection is established every time <strong>Kerio</strong> <strong>Connect</strong> server is restarted.5. Save the settings.119
Configuring greylistingFigure 1GreylistingHow greylisting worksWhat happens when <strong>Kerio</strong> <strong>Connect</strong> receives a message?1. <strong>Kerio</strong> <strong>Connect</strong> contacts the greylisting server and provides information about the message.The greylisting server includes a list of trustworthy IP addresses.2. If the list does contain the message sender’s IP address, the message is deliveredimmediately.3. If the list does not contain the sender’s IP address, the greylisting server delays thedelivery — trustworthy mailservers retry to deliver messages later (spam senders usuallydo not).4. Once the message is received again, the <strong>Kerio</strong> Greylisting Service adds the sender’sIP address to the whitelist — all future messages from this sender will be deliveredimmediately (see step 2).120
33.4 What data is sent to <strong>Kerio</strong> TechnologiesTo learn more about the greylisting method, consult greylisting.org or Wikipedia.What data is sent to <strong>Kerio</strong> TechnologiesIf the greylisting is enabled, the <strong>Kerio</strong> Technologies greylisting server receives the followinginformation:• one-way hash (MD5) of the sender envelope email address and recipient envelope emailaddresses• the IP address of the host delivering the messageThe data is periodically deleted.If the greylisting is disabled, no data is sent to <strong>Kerio</strong> Technologies.<strong>Kerio</strong> Technologies uses the received data solely for the greylisting feature.To see the data sent by <strong>Kerio</strong> Greylisting Service, enable Greylisting in the Debug log.TroubleshootingIf the connection between your <strong>Kerio</strong> <strong>Connect</strong> server and <strong>Kerio</strong> Greylisting Service fails, makesure your firewall allows outgoing connection on port 8045.Users may experience a delay in delivery. This happens when the message with the particularparameters (described in section What data is sent to <strong>Kerio</strong> Technologies) is received. Thegreylisting server delays the delivery. Such problem is solved once another message isreceived.Messages can also be delivered in a different order due to the greylisting server. This problemis solved once another message with the same parameters is received.If you wish to see what data are sent to <strong>Kerio</strong> Technologies, enable Greylisting in the Debuglog.If <strong>Kerio</strong> <strong>Connect</strong> cannot contact the greylisting server, all incoming messages are deliveredimmediately. <strong>Kerio</strong> <strong>Connect</strong> will try to contact the greylisting server again.If you acquire or renew your license, it may take several minutes before the <strong>Kerio</strong> GreylistingService recognizes it. You may get warning messages in the meantime. This does not affectmessage delivery.121
Blocking messages from certain serversHow to automatically block or allow messages from certain serversIn <strong>Kerio</strong> <strong>Connect</strong> you can automatically block servers (IP addresses) which are known to besending spam messages (and automatically allow messages from those you trust).You can do so by:• creating your own lists of spam servers (blacklists) and trusted servers (whitelists)• using public Internet databases of spam serversFigure 1Blacklists tab122
34.1 How to automatically block or allow messages from certain serversBlocking messages from spam servers — custom blacklistsTo create your own Blacklists you need the IP addresses of the servers which you wish toblock1. In section Configuration → Definition → IP Address Groups create a new group with IPaddresses of spam servers.2. Go to section Configuration → Content Filter → Spam Filter → tab Blacklists.3. In section Custom blacklist of spammer IP addresses, check option Use IP addressgroup.4. Select or create a group of IP addresses in the drop-down menu.5. Select the action which will be performed once messages meet your criteria. You can:• block messages (mark them as spam)• add spam score to message rating6. Click on Apply in the bottom right corner.Blocking messages from spam servers — public databasesBy default, <strong>Kerio</strong> <strong>Connect</strong> contains a few databases which can be downloaded from the Internetfor free. It is also possible to define any other databases.If you wish to use blacklists from public databases, follow these steps:1. Go to section Configuration → Content Filter → Spam Filter → tab Blacklists.2. In section Internet blacklists, check all the public databases you wish to use.3. Double-click a blacklist to select the action which will be performed when <strong>Kerio</strong> oncemessages meet the blacklist’s criteria. You can:• block messages (mark them as spam)• add spam score to message rating4. Click on Apply in the bottom right corner.You can also add other blacklists from the Internet:1. In the same section, click on Add.2. Enter the DNS name of the server which handles the enquires of <strong>Kerio</strong> <strong>Connect</strong>.3. Select the action which will be performed once messages meet blacklist’s criteria. You can:123
Blocking messages from certain servers• block messages (mark them as spam)• add spam score to message rating4. Click on Apply in the bottom right corner.You can also change any blacklist by double-clicking on it.If you use a paid blacklist, always check option Ask blacklist DNS server directly....The licenses are associated with a particular IP address and queries are sent directly to thedatabase (not to parent DNS servers).Allowing messages from trusted servers — custom whitelistsMessages from servers included in your whitelist will not be checked by spam filters in <strong>Kerio</strong><strong>Connect</strong>.If you wish to create your own whitelist:1. In section Configuration → Definition → IP Address Groups create a new group with IPaddresses of trusted servers.2. Go to section Configuration → Content Filter → Spam Filter → tab Blacklists.3. In section Custom whitelist of IP addresses, check option Use IP address group.4. Select the group of IP addresses in the drop-down menu.5. Confirm.124
Configuring Caller ID and SPF in <strong>Kerio</strong> <strong>Connect</strong>What is Caller ID and SPFCaller ID and SPF allow to filter out messages with fake sender addresses.The check verifies whether IP addresses of the remote SMTP server are authorized to sendemails to the domain specified. Spammers thus have to use their real addresses and theunsolicited emails can be recognized quickly using different blacklists.You can use Caller ID and SPF only if messages are delivered by the SMTP protocol.How to configure Caller ID1. In the administration interface, go to section Configuration → Content Filter → Spamfilter → tab Caller ID.2. Enable option Check Caller ID of every incoming message.3. If a message is intercepted, <strong>Kerio</strong> <strong>Connect</strong> can• log it in the Security log• reject it• increase/decrease spam score of the message4. Caller ID is nowadays often used by domains in testing mode only. We recommend toenable Apply this policy also to testing Caller ID records.5. If messages are sent through backup server, create a group of IP addresses of such serverswhich will not be checked by Caller ID.6. Confirm.<strong>Kerio</strong> Technologies enables you to check your own DNS records. Link Check myemail policy DNS records in this tab will display a website where you can check them.Check this article for information about creating SPF and Caller ID records.125
Configuring Caller ID and SPF in <strong>Kerio</strong> <strong>Connect</strong>Figure 1Caller IDHow to configure SPF1. In the administration interface, go to section Configuration → Content Filter → Spamfilter → SPF.2. Enable SPF check of every incoming message.3. If a message is intercepted, <strong>Kerio</strong> <strong>Connect</strong> can• log it in the Security log• reject it• increase/decrease spam score of the message4. If messages are sent through backup server, create a group of IP addresses of such serverswhich will not be checked by SPF.5. Confirm.126
35.3 How to configure SPFFigure 2SPF127
Creating custom rules for spam control in <strong>Kerio</strong><strong>Connect</strong>Why to create custom rules<strong>Kerio</strong> <strong>Connect</strong> allows you to create your own antispam rules. Rules are based on filtering emailheaders and/or email bodies.Custom rules for spam control can be created in section Configuration → Content Filter →Spam Filter → tab Custom rules.Figure 1Custom rules for spam controlCreating custom rulesYou can create as many rules as you wish:1. In the administration interface, go to section Configuration → Content Filter → SpamFilter → tab Custom rules.2. Click on Add and enter a name for the rule.3. Decide whether to filter Mail header or Mail body and define the filter.128
36.3 Defining actions for custom rulesYou can use * (representing any number of characters) and ? (representing max. 1character) or regular expressions.4. Messages which match the filter:• marked as non-spam• mark as spam and rejected• increase/decrease spam score5. Confirm.Custom rules are processed in the same order as they are listed. If a message is marked asnon-spam or rejected, the following rules are not performed.Messages rejected by tests against the From and To headers are not processed by otherantispam and antivirus tests. Since this decreases the load on your server, place the testsat the top.For further information concerning "Regular expressions", please consult the Spamassassinpage.One example for regular expressions:• cialis should be blocked, but specialist, socialist etc., not• regular expression would look like this:If you define a filter which blocks messages including cialis not in the regular expressionsconvention, <strong>Kerio</strong> <strong>Connect</strong> will block all messages which include this string, e.g. messageswith the word specialist.Defining actions for custom rulesIf your custom rule rejects a message, <strong>Kerio</strong> <strong>Connect</strong> can:• Send bounce message to the sender — this option is not recommended. Spammersusually use fake addresses and your bounce message will be undeliverable.• Forward the message to quarantine address — this option is recommended due to thepossibility of missing important emails by false positives.129
Antivirus control in <strong>Kerio</strong> <strong>Connect</strong>Antivirus in <strong>Kerio</strong> <strong>Connect</strong><strong>Kerio</strong> <strong>Connect</strong> can check all incoming messages for viruses. For this purpose, purchase <strong>Kerio</strong><strong>Connect</strong> with the Sophos antivirus.Immediately after the installation of <strong>Kerio</strong> <strong>Connect</strong>, the internal Sophos antivirus startsautomatically.Figure 1<strong>Kerio</strong> <strong>Connect</strong> — antivirus sectionFor further information on how to secure your computer against viruses, read onfiltering message attachments.130
37.2 External antivirusExternal antivirusIf you are upgrading from an earlier version (pre 8.0) and have been using an external antivirusplugin, you can still use it after the upgrade to <strong>Kerio</strong> <strong>Connect</strong> 8.0 (read this article).<strong>Kerio</strong> Technologies has also issued an Antivirus SDK for <strong>Kerio</strong> <strong>Connect</strong> and <strong>Kerio</strong> Control.The Antivirus SDK includes a public API that can be used to write plugins for third-partyantivirus solutions.Read our blog to get detailed information.Configuring Sophos in <strong>Kerio</strong> <strong>Connect</strong>To configure the integrated Sophos:1. In the administration interface, go to section Configuration → Content Filter → Antivirus.2. Check option Use the integrated Sophos antivirus engine.3. Enable option Check for update every [hour]. Set the interval for the periodical updatesof the virus database.Provide persistent Internet connection (automated dialing is not supported).The database files are downloaded via the HTTP protocol.communication on your firewall or proxy server.Allow theVirus database updates are not available for unregistered trial versions.4. If virus is found, <strong>Kerio</strong> <strong>Connect</strong> will:• Discard the message• Deliver the message with the malicious code removed5. In addition, <strong>Kerio</strong> <strong>Connect</strong> can:• Forward the original message to an administrator address• Forward the filtered message to an administrator address6. If the message cannot be scanned, <strong>Kerio</strong> <strong>Connect</strong> will:• Deliver the original message with a warning• Reject the message7. Confirm the settings.131
Antivirus control in <strong>Kerio</strong> <strong>Connect</strong>Configuring HTTP proxy serverIf the computer with <strong>Kerio</strong> <strong>Connect</strong> is behind firewall, you can use proxy server to check forvirus database updates.1. Go to section Configuration → Advanced Options → tab HTTP Proxy.2. Check option Use HTTP proxy for ...3. Specify the address and port of the proxy server.4. If required, enter the authentication data.5. Confirm the settings.Go to section Configuration → Content Filter → Antivirus and click Update Now to check theconnection.TroubleshootingTo view the statistics of <strong>Kerio</strong> <strong>Connect</strong> antivirus control, go to section Status → Statistics.This section displays the number of messages checked, viruses and prohibited attachments.When troubleshooting consult these logs:• Security — information about virus database updates• Debug — right-click the Debug log area and enable Messages → Antivirus CheckingIf the time from the last update is several times greater than the set interval, updatemanually and check the Error and Security log.132
Filtering message attachments in <strong>Kerio</strong> <strong>Connect</strong>Why to filter attachmentsMany viruses are hidden as email message attachments.attachments according to your settings.<strong>Kerio</strong> <strong>Connect</strong> can filter emailFigure 1<strong>Kerio</strong> <strong>Connect</strong> — attachment filterHow to configure attachment filter in <strong>Kerio</strong> <strong>Connect</strong>To configure the attachment filter:1. In the administration interface, go to section Configuration → Content Filter → AttachmentFilter.2. Check option Enable attachment filter.133
Filtering message attachments in <strong>Kerio</strong> <strong>Connect</strong>3. Decide whether the sender will be warned if their attachment is blocked.4. Specify email addresses to which original and/or filtered messages will be sent (e.g. forverification of proper functionality of the attachment filter).5. Select any of the predefined filter rules or add a new one.Figure 2Filter ruleEach rule can allow or block one specific attachment.6. Confirm the settings.If a problematic attachment is detected, <strong>Kerio</strong> <strong>Connect</strong> removes it and delivers themessage without the attachment.TroubleshootingFor information on attachment filtering, consult the Security log.134
Using external antivirus with <strong>Kerio</strong> productsAntivirus SDK for <strong>Kerio</strong> products<strong>Kerio</strong> <strong>Connect</strong> and <strong>Kerio</strong> Control feature only the integrated Sophos antivirus.However, <strong>Kerio</strong> Technologies has issued an Antivirus SDK for <strong>Kerio</strong> <strong>Connect</strong> and <strong>Kerio</strong> Control.The Antivirus SDK includes a public API that can be used to write plugins for third-partyantivirus solutions.Get the SDK and read our blog to get detailed information.135
Configuring IP address groupsWhen to use IP address groupsIP address groups help easily define who has access, for example, to:• remote administration• <strong>Kerio</strong> <strong>Connect</strong> services• spam (creating whitelist, blacklists, etc.)Figure 1IP address groupsHow to configure IP address group136
40.2 How to configure IP address groupGroup of local IP addresses is created automatically.removed or otherwise manipulated.This group can be edited,1. In the administration interface, go to section Configuration → Definitions → IP AddressGroups.2. Click on Add and enter a name for the group (or select an existing one).3. Select the type and specify the address(es).The following types are available:• a single IP address (host)• range of IP addresses• net with corresponding mask• another IP address group4. You can add a description for better reference.5. Confirm.IP address groups are used in many settings in <strong>Kerio</strong> <strong>Connect</strong>. Whenever a section inthe administration interface allows IP groups, you will be to configure them directly fromthis section.137
Creating time ranges in <strong>Kerio</strong> <strong>Connect</strong>What are time rangesAll scheduled tasks in <strong>Kerio</strong> <strong>Connect</strong> can be restricted to certain time ranges.A time range may consist of multiple intervals with different settings.Figure 1Time rangesCreating time ranges1. In the administration interface, go to section Configuration → Definitions → TimeRanges.2. Click Add and• create a new group of time intervals, or• create an interval in an existing group3. Add a description for better reference.4. Configure the Time settings — frequency, time interval and days if applicable.5. Confirm.138
Public folders in <strong>Kerio</strong> <strong>Connect</strong>What are public foldersPublic folders are folders (mail, calendars, contacts, tasks, notes) which are available to allusers in a domain or <strong>Kerio</strong> <strong>Connect</strong>.Creating public foldersYou can create public folders in <strong>Kerio</strong> <strong>Connect</strong> client, Microsoft Outlook (with <strong>Kerio</strong> Outlook<strong>Connect</strong>or), Microsoft Outlook for Mac 2011 or Microsoft Entourage.Only users with appropriate rights can create public folders.Global vs. domain public foldersIn <strong>Kerio</strong> <strong>Connect</strong>, public folders can be• different for each domain• available to users of all domainsTo configure the public folders:1. Go to the administration interface to section Configuration → Domains.2. Click on Public Folders (right bottom corner) and select your option.3. Confirm.If you change the settings when the system of public folders has already beencreated, you have to create new public folders — users will not be able to see the old ones.Assigning rights to create public folders1. In the administration interface, go to section Accounts → Users.2. Double-click a user and go to tab Rights.3. Check option Public folders and save the settings.139
Public folders in <strong>Kerio</strong> <strong>Connect</strong>Creating public foldersTo create a public folder:1. Go to <strong>Kerio</strong> <strong>Connect</strong> client.2. In the left folder tree, right-click on Public folders and create a new one.3. By default, all newly created public folders are shared with all users of the domain (forviewing).To edit sharing rights, right-click the folder in <strong>Kerio</strong> <strong>Connect</strong> client and select Sharing.Similar procedures in Microsoft Outlook (with <strong>Kerio</strong> Outlook <strong>Connect</strong>or), MicrosoftOutlook for Mac 2011 or Microsoft Entourage.Viewing public foldersWhenever a public folder is available for a user, it is automatically displayed in <strong>Kerio</strong> <strong>Connect</strong>client (or other client).The table shows which public folders can be viewed by a particular user, depending on theemail account type or client.140
42.4 Global Address ListAccount Email Contacts Calendar Tasks Notes<strong>Kerio</strong> Outlook <strong>Connect</strong>or(Offline Edition)YES YES YES YES YES<strong>Kerio</strong> Outlook <strong>Connect</strong>or YES YES YES YES YES<strong>Kerio</strong> <strong>Connect</strong> client YES YES YES YES YESMicrosoft Outlook for Mac2011Exchange account inMicrosoft EntourageYES YES YES YES YESYES YES a YES a NO NOExchange account in YES YES YES YES YESApple Mail bIMAP (any client thatsupports the IMAPprotocol)YES (if the client can showthem)NO NO NO NOPOP3 (any client thatsupports the POP3protocol)NO NO NO NO NOabOnly for Microsoft Entourage 2004 SP2.Only if the full support for IMAP is set in the <strong>Kerio</strong> <strong>Connect</strong>’s configuration file.Table 1Viewing public folders in individual account typesGlobal Address ListIn <strong>Kerio</strong> <strong>Connect</strong>, all new users can be added into a public contacts folder which is used as aninternal source of company contacts (full names and email addresses).By default, this option is enabled. To disable it:1. In the administration interface, go to section Accounts → Users.2. Double-click the user and on tab General uncheck option Publish in Global Address List.If users are mapped from Active Directory or Apple Open Directory, the entire LDAPdatabase is synchronized every hour automatically.141
Configuring instant messaging in <strong>Kerio</strong> <strong>Connect</strong>About instant messagingNew in <strong>Kerio</strong> <strong>Connect</strong> 8.1!<strong>Kerio</strong> instant messaging service is based on XMPP, an open technology for real-timecommunication.The instant messaging (IM) service is running in <strong>Kerio</strong> <strong>Connect</strong> automatically.To check if the instant messaging is accessible, click on Check Service Accessibility in theadministration interface in section Configuration → Instant Messaging.Make sure to open the following ports on your firewall (both directions): 5222 (IM service),5223 (secured IM service), 5269 (if sending outside of your domain is allowed).DNS records must be configured for your domain. Read article Configuring DNS for instantmessaging for more information.142
43.2 Sending messages outside of your domainSending messages outside of your domainBy default, users can send messages only to members of the same domain.To enable sending/receiving instant messages to/from other domains (either within the <strong>Kerio</strong><strong>Connect</strong> server or outside), follow these steps:1. In the administration interface, go to section Configuration → Instant Messaging.2. Check option Allow users to send/receive messages to/from people outside of the domain.3. Save the settings.4. Check Service Accessibility.These settings are valid for all domains on the server. You can override them by individualuser settings (on tab Messages) or group settings (tab Rights).Remember to configure DNS for instant messaging.Securing instant messagingWe recommend to secure instant messaging by using TLS:• set security policy to require encrypted connection or secure authentication in sectionConfiguration → Security → tab Security Policy (Configuration → Advanced Options→ tab Security Policy for <strong>Kerio</strong> <strong>Connect</strong> 8.1 and older)• use unsecured instant messaging service (port 5222)You can also enable only the secure instant messaging service (port 5223) and use SSL.143
Configuring instant messaging in <strong>Kerio</strong> <strong>Connect</strong>Security policy is applied to all services in your <strong>Kerio</strong> <strong>Connect</strong>.Limiting access to instant messagingIf you need to restrict access to any users, you can define User Access Policies to:• disable access to IM• restrict access IM to specific addressesTo display which users are connected to the IM server, go to section Active <strong>Connect</strong>ions in theadministration interface.Disabling instant messagingYou can disable instant messaging by stopping the instant messaging services (see articleServices in <strong>Kerio</strong> <strong>Connect</strong>).Automatic contact list<strong>Kerio</strong> <strong>Connect</strong> automatically creates contact lists of all domain users who are published in theglobal address list.Once users login to an IM client, their account will display list of contacts of users from theirdomain (Colleagues).144
43.7 Configuring IM clientsIf a user is having problems with their contact list (e.g.restore their contact list:if they delete any users), you can1. In the administration interface, go to section Accounts → Users.2. Right-click the user and select More Actions → Restore IM Contact List.3. Confirm.Restoring contact lists discards any changes the user has made to their Colleagues list. Addedcontacts will remain preserved.Configuring IM clientsFor recommended clients and their configuration, read article Configuring clients for instantmessaging.TroubleshootingIf any problem regarding instant messaging occurs, consult the Debug log (right-click theDebug log area and enable Messages → Instant Messaging Server).If you rename a domain, users must re-configure their IM clients. All previous changes to theircontact list will be lost.145
Configuring DNS for instant messagingAbout SRV recordsSRV (service) records are entries in your DNS which specify the location of service servers. Youmust configure SRV records to make instant messaging in <strong>Kerio</strong> <strong>Connect</strong> accessible from otherservers.There are two types of SRV records:• xmpp-server — necessary if you enable sending messages outside of your domain• xmpp-clientGo to the <strong>Kerio</strong> <strong>Connect</strong> administration (Configuration → Instant Messaging) to check if theSRV records for your domain are configured (for detailed information, read article Configuringinstant messaging in <strong>Kerio</strong> <strong>Connect</strong>).You must add SRV records on your DNS server or using a management interface of your DNSregistrar.Visit XMPP wiki or Wikipedia for more information on SRV records.Configuring DNS records for server to server communicationFollow this example to add a server SRV record to your DNS:_xmpp-server._tcp.feelmorelaw.com. 18000 IN SRV 0 5 5269connect.feelmorelaw.com.The following items can be changed:feelmorelaw.com — domainconnect.feelmorelaw.com — instant messaging server (<strong>Kerio</strong> <strong>Connect</strong>)18000 — TTL0 — record priority5 — record weightDo not change the port number (5269).146
44.3 Configuring DNS records for client auto-configurationConfiguring DNS records for client auto-configurationIf the name of your domain differs from the name of the instant messaging server, you canadd a client SRV record to your DNS.This record will allow auto-configuration of instant messaging clients. Without the client SRVrecord, users must manually specify the server and port in their client configuration.Follow this example to add a client SRV record to your DNS:_xmpp-client._tcp.feelmorelaw.com. 18000 IN SRV 0 5 5222connect.feelmorelaw.com.The following items can be changed:feelmorelaw.com — domainconnect.feelmorelaw.com — instant messaging server (<strong>Kerio</strong> <strong>Connect</strong>)18000 — TTL0 — record priority5 — record weight5222 — port of the service147
Customizing <strong>Kerio</strong> <strong>Connect</strong>Defining custom email footersFor each domain, you can customize email footers which will be automatically added to allmessages sent from this domain.1. In the administration interface, go to section Configuration → Domains.2. Double-click the domain and go to tab Footer.3. Enable option Append the footer to outgoing messages.4. Create the footer (in plain text or HTML).5. If you do not want to append footers to messages for internal recipients, check theappropriate option.6. Confirm.Figure 1Email footers148
45.2 Localizing the user interfaceIf user defines their own email signature, this domain footer will be displayed underthe user’s signature.Localizing the user interface<strong>Kerio</strong> <strong>Connect</strong> client 8.1 and newerFor detailed information on how to localize <strong>Kerio</strong> <strong>Connect</strong> client, read article Translating <strong>Kerio</strong><strong>Connect</strong> client into a new language.<strong>Kerio</strong> <strong>Connect</strong> client 8.0<strong>Kerio</strong> <strong>Connect</strong> Client is available in various languages.In the current version of <strong>Kerio</strong> <strong>Connect</strong>, you cannot add new translations. However, you canoverwrite one of the existing translations:1. Go to the installation directory of <strong>Kerio</strong> <strong>Connect</strong>.2. Open folder web\webmail\translations3. Select language file to overwrite and open it in a text editor.The file contains both the source language (English) and the target language.4. Translate into the target language.5. Save the file and restart <strong>Kerio</strong> <strong>Connect</strong>.The text in the language files must be coded in UTF-8.Old WebMail<strong>Kerio</strong> old WebMail is available in various languages.The source files can be found in the <strong>Kerio</strong> <strong>Connect</strong> installation directory in foldertranslations .To prepare a new language version:1. Go to folder translations in the installation directory of <strong>Kerio</strong> <strong>Connect</strong>.2. Copy one of the files and rename it according to your target language.149
Customizing <strong>Kerio</strong> <strong>Connect</strong>3. Open the file in a XML/text editor and translate all text to the target language.The XML file starts and ends with the tag.Make sureindividual lines have the following form: User.4. Save the file and restart <strong>Kerio</strong> <strong>Connect</strong>.The text in the language files must be coded in UTF-8.Additional settings for old WebMailHow to add new dictionaries for spell-checkThe spell-check in <strong>Kerio</strong> WebMail is based on comparing the phrases with the dictionary, andit is therefore available only for the language versions available in the folder myspell wherelanguage databases for <strong>Kerio</strong> <strong>Connect</strong> are stored.These dictionaries are available on the Internet (e.g. at OpenOffice ). Each dictionary includestwo files, following the patterns language_name.aff (e.g. fr_FR.aff) and language_name.dic(e.g. fr_FR.dic). Copy both files to the myspell folder.To employ the dictionary in the spellchecker, it is necessary to set it as preferred in the oldWebMail settings.1. In the old Webmail interface, click on Settings and go to tab Mail composing.2. In the Spell-checker dictionary field, select your preferred dictionary.3. Confirm.How to add your own logo to old WebMail<strong>Kerio</strong> <strong>Connect</strong> can display your own logo in the old Webmail interface:• for all domains in <strong>Kerio</strong> <strong>Connect</strong>• for individual domains separatelyTo display your logo for all domains:1. In the administration interface, go to section Configuration → Advanced Options.2. Go to tab <strong>Kerio</strong> <strong>Connect</strong> client / WebMail.150
45.3 Additional settings for old WebMail3. Enable option Use custom logo in old WebMail.4. Specify the logo file.The logo must be a GIF file with size 200 x 40 pixels.5. Confirm.To configure custom logo for individual domains (other than the default one or other than thelogo specified in Configuration → Advanced Options as described above):1. In the administration interface, go to section Configuration → Domains.2. Double-click the domain and go to tab WebMail logo.3. Enable option Use custom logo for this domain in old WebMail.4. Specify the logo file.The logo must be a GIF file with size 200 x 40 pixels.5. Confirm.If the skin currently in use contains both the domain logos as well as the individualones, the domain logos will be used by default.151
Translating <strong>Kerio</strong> <strong>Connect</strong> client to a new languageTranslating <strong>Kerio</strong> <strong>Connect</strong> clientNew in <strong>Kerio</strong> <strong>Connect</strong> 8.1!version 8.0, read this article.For information on translating <strong>Kerio</strong> <strong>Connect</strong> client inTranslations of <strong>Kerio</strong> <strong>Connect</strong> client are saved in several files in the installation directory of<strong>Kerio</strong> <strong>Connect</strong>.To add a new language for <strong>Kerio</strong> <strong>Connect</strong> client, follow these steps:1. Go to the <strong>Kerio</strong> <strong>Connect</strong> installation directory to folder web/webmail/translations.Files with localizations are named using 2-letter language codes.2. Copy all files of one language (except English) and rename them according to the targetlanguage code.3. In file xx_definitions.xml, rewrite the code and name of the new language.4. In files xx.js and xx_login.js, translate all strings to the new language.Do not change the structure of any file.5. Restart <strong>Kerio</strong> <strong>Connect</strong>.The new language is now available in <strong>Kerio</strong> <strong>Connect</strong> client.Upgrading <strong>Kerio</strong> <strong>Connect</strong><strong>Kerio</strong> <strong>Connect</strong> upgrades may contain new or modified sentences. These will not be includedin your own translations and will be displayed in English.We recommend to use the original files (which you used as a template for the new language)and compare them with the same language files after the upgrade. You can then translate newsentences into your language.152
Configuring data store in <strong>Kerio</strong> <strong>Connect</strong>How to set path to data store directoryThe path to data store is first configured during the installation process.To change the data store folder:1. Create a new folder for the data store.No diacritics allowed in the folder name.Make sure there is enough free space for the data store.2. In the administration interface, go to section Configuration → Advanced Options → tabStore Directory.3. Select the new folder and confirm the settings.Do not use a UNC path.4. Stop <strong>Kerio</strong> <strong>Connect</strong>.5. Copy all files from the old store directory to the new one.6. Run <strong>Kerio</strong> <strong>Connect</strong>.153
Configuring data store in <strong>Kerio</strong> <strong>Connect</strong>Figure 1Store directoryHow to configure full text searchIn <strong>Kerio</strong> <strong>Connect</strong>, users can search their items using the full text search feature.To enable this option:1. In the administration interface, go to section Configuration → Advanced Options → tabStore Directory.2. Enable full text search.3. Specify a folder where the fulltext search index will be stored.154
47.3 Data store sizeDo not use a UNC path.4. To create a new index, click on Rebuild Index.You can rebuild the index for:• the whole server• one domain• one user5. Save the settings.Fulltext search may affect the performance of your server.Data store size<strong>Kerio</strong> <strong>Connect</strong> can notify you when the free space in your data store folder has dramaticallydecreased.Set the limits in the administration interface in section Configuration → Advanced Options→ tab Store Directory.Watchdog Soft LimitIf the free space on disk with the data store drops below this value, a message is displayedin the administration interface.Watchdog Hard LimitIf the free space on disk with the data store drops below this value, <strong>Kerio</strong> <strong>Connect</strong> stopsand a message is displayed in the administration interface.Information about reached limits is logged in the Error log.155
Archiving in <strong>Kerio</strong> <strong>Connect</strong>What can you archive<strong>Kerio</strong> <strong>Connect</strong> can store copies of email messages. If you need a particular or deleted message,you can recover them by using email recovery.You can archive:• local messages — local sender, local recipient• incoming messages — remote sender, local recipient• outgoing messages — local sender, remote recipient• relayed messages — remote sender, temote recipientAs opposed to backups, archiving stores only messages (not configuration or anyother administration settings).Archiving can be configured in section Configuration → Archiving and Backup.156
48.2 Configuring archivingFigure 1ArchivingFor archiving of mailing lists, read this article.Configuring archivingTo configure archiving:1. In the administration interface, go to section Configuration → Archiving and Backup →tab Archiving.2. Check Enable email archiving.3. Select folder where the archives will be stored.157
Archiving in <strong>Kerio</strong> <strong>Connect</strong>No diacritics allowed in the folder name.4. <strong>Kerio</strong> <strong>Connect</strong> can also sent archive files to a remote email address.5. To archive messages also to the <strong>Kerio</strong> <strong>Connect</strong> installation directory, check option <strong>Archive</strong>to the local subfolder.6. Select the types of messages you wish to archive.7. Decide whether to check messages for spam and viruses before archiving.8. Save the settings.When changing the archive directory, you need to restart <strong>Kerio</strong> <strong>Connect</strong>.Viewing archive folders<strong>Archive</strong> folders are displayed in <strong>Kerio</strong> <strong>Connect</strong> client or in Microsoft Outlook with <strong>Kerio</strong>Outlook <strong>Connect</strong>or (the online edition).By default, only the administrator of the primary domain can view archive folders. They canalso assign rights to other users:1. In the administration interface, go to section Accounts → Users.2. Double-click the user and go to tab Rights.3. Check option <strong>Archive</strong> folders and confirm.4. Save the settings.Since messages of all users are archived, only a confidential administrators shouldaccess archive folders.Whenever an archive folder is available for viewing, it is automatically displayed in <strong>Kerio</strong><strong>Connect</strong> client (or other client).158
Backups in <strong>Kerio</strong> <strong>Connect</strong>What backups includeIn <strong>Kerio</strong> <strong>Connect</strong>, the following items can be backed up:• user mailboxes• public folders• mailing lists• configuration files• licenses• SSL certificates• SpamAssassin database• contact lists in instant messagingFor backups, use any removable or network disk.You can confiure backups in section Configuration → Archiving and Backup.Types of backupsIn <strong>Kerio</strong> <strong>Connect</strong>, there are two types of backups — full backups and differential backups.• Full backup stores all files and items.• Differential backup stores files that have been added or changed since the last fullbackup.You can schedule any number of full and/or differential backups. The number of scheduledbackups may depend on:• size of the data store (influences the time each backup takes nad its size)• importance of data which might be lost (backups are more frequent in companieswhere email communication and message storing is important)If backups are performed frequently, minimum of data is lost if server fails.159
Backups in <strong>Kerio</strong> <strong>Connect</strong>Figure 1ArchivingConfiguring backupsTo configure the backup schedule:1. Go to section Configuration → Archiving and Backup → tab Backup.2. Check option Enable message store and configuration recovery backup.3. Click Add and select the type and time when the backup will be performed.4. Click on the Advanced button to specify the maximum size and number of backups.5. Define the folder where to store all backups (Target backup directory).If required, Specify the username and password for accessing a network drive (onMicrosoft Windows only).160
49.4 Recovering data from backupsNo diacritics allowed in the folder name.6. Enter an email address to which messages with info about backups will be delivered.7. Save the settings.If you wish to make an immediate backup, click on the Start Now button.Recovering data from backupsTo get instructions for data recovery, read this article.Data recovery examplesTo read through some examples of data recovery, see this article.TroubleshootingIf any problem regarding backups occur, consult the Debug log (right-click the Debug log areaand enable Store Backup).161
Examples of data recovery in <strong>Kerio</strong> <strong>Connect</strong>Data recovery in <strong>Kerio</strong> <strong>Connect</strong>The following sections contain examples of recovery of backed up data in <strong>Kerio</strong> <strong>Connect</strong>.Examples for Microsoft WindowsFull backup recoveryThe directory with configuration data is stored at the default location (as set as default duringthe installation), the store directory is located on a separate disk (RAID or a faster disk) of thesame computer where the configuration directory, and the backup directory is located on anexchangeable disk. For backup recovery, use full backup.Conditions:1. The configuration data is stored underC:\Program Files\<strong>Kerio</strong>\MailServer2. The store directory is located in directoryD:\store3. For security purposes, the backup directory is stored on the removable disc in directoryE:\backupSolution:The command must be run from the directory where <strong>Kerio</strong> <strong>Connect</strong> is installed. In this case,it is directoryC:\Program Files\<strong>Kerio</strong>\MailServerNow, two scenarios are possible:1. We want to recover the last complete backup (the most recent full and differential backupsor the most recent backup copy). The command will be as follows:kmsrecover E:\backup2. To recover a particular backup (except the last one), use the following format:kmsrecover E:\backup\F20051009T220008Z.zip162
50.2 Examples for Microsoft WindowsThe kmsrecover detects the path to the store (D:\store) automatically in the <strong>Kerio</strong> <strong>Connect</strong>’sconfiguration file and uses it.For example:If the parameter contains a space in a directory name, it must be closed in quotes.kmsrecover "E:\backup 2"Recovery of a single user’s mailbox• The directory with the backup is stored on an external disk E,• we need to get a single user’s mailbox from the backup,• the entire mailbox and its content will be saved out of the <strong>Kerio</strong> <strong>Connect</strong>’s store (folder\tmp).kmsrecover -d company.com -u smith -s D:\tmp E:\backup (for recovery from thelatest complete backup, i.e. combination of the latest full and differential backup)orkmsrecover -d company.com -u smith -s D:\tmp E:\backup\F20051009T220008Z.zip(for recovery from a particular backup)Recovery of a single folder of a user• The directory with the backup is stored on an external disk E,• one specific folder of the user mailbox must be gained from the backup (Sent Itemsin this case),• the command is run in the verbose mode (parameter -v) which allows to monitor therecovery process.kmsrecover -v -d company.com -u smith -f "Sent Items" E:\backup (for recoveryfrom the latest complete backup, i.e. combination of the latest full and differential backup)orkmsrecover -v -d company.com -u smith -f "Sent Items"E:\backup\F20051009T220008Z.zip (for recovery from a particular backup)Recovery of public folders of a particular domain• The directory with the backup is stored on an external disk E,163
Examples of data recovery in <strong>Kerio</strong> <strong>Connect</strong>• it is now necessary to recover the domain’s public folders (the public mask will beused here),• and the original public folders will be kept at the same time (status before using <strong>Kerio</strong><strong>Connect</strong> Recover). This will be done simply by using the -b parameter.kmsrecover -b -d company -m public E:\backupExamples for Mac OS XFull backup recoveryThe directory with configuration data is stored at the default location (as set as default duringthe installation), the store directory is located on a separate disk of the same computer wherethe configuration directory, and the backup directory is located on an exchangeable disk. Forbackup recovery, use the most recent full backup.Conditions:1. The configuration data is stored under/usr/local/kerio/mailserver2. The store directory is located in/store3. For security purposes, the backup directory is stored on the removable disk/Volumes/backupSolution:The command must be run from the directory where <strong>Kerio</strong> <strong>Connect</strong> is installed. Therefore, itis necessary to go to the directory:/usr/local/kerio/mailserverWe want to recover the last complete backup (the most recent full and differential backups orthe most recent backup copy). Now, the command pattern depends on the fact whether thepath to the <strong>Kerio</strong> <strong>Connect</strong> directory is included in the path variable or not. If the path is notset there, the command will be as follows:./kmsrecover /Volumes/backupOtherwise, it will be like this:kmsrecover /Volumes/backupThe kmsrecover detects the path to the store (/store) automatically in the <strong>Kerio</strong> <strong>Connect</strong>’sconfiguration file and uses it.164
50.3 Examples for Mac OS XRecovery of a single user’s mailbox• The directory with the backup is stored on an external disk,• we need to get a single user’s mailbox from the backup,• the entire mailbox and its content will be saved out of the <strong>Kerio</strong> <strong>Connect</strong>’s store (folder/Temp)../kmsrecover -d company.com -u wsmith -s /Volumes/Temp/Volumes/backup/F20051009T220008Z.zipRecovery of a single folder of a user• The directory with the backup is stored on an external disk,• one specific folder of the user mailbox must be gained from the backup (Sent Itemsin this case),• the command is run in the verbose mode (parameter -v) which allows to monitor therecovery process../kmsrecover -v -d company.com -u wsmith -f "Sent Items"/Volumes/backup/F20051009T220008Z.zipRecovery of public folders of a particular domain• The directory with the backup is stored on an external disk,• it is now necessary to recover the domain’s public folders (the public mask will beused here),• and the original public folders will be kept at the same time (status before using <strong>Kerio</strong><strong>Connect</strong> Recover). This will be done simply by using the -b parameter../kmsrecover -b -d company.com -m public /Volumes/backup165
Data recovery in <strong>Kerio</strong> <strong>Connect</strong>Recovering data from backupTo recover backup data, use a special tool, <strong>Kerio</strong> <strong>Connect</strong> Recover. The tool extracts theback-up and saves the data in their original location in the <strong>Kerio</strong> <strong>Connect</strong> hierarchy.To launch <strong>Kerio</strong> <strong>Connect</strong> Recover, run the kmsrecover command from the directory where<strong>Kerio</strong> <strong>Connect</strong> is installed:kmsrecover [options] |On Mac OS X and Linux, enter a command in the following format (if it has not already beenintroduced in the file of the path system variable):./kmsrecover [options] |To see details and examples of individual attributes run commands:kmsrecover -h or kmsrecover --helprecovery.If differential backup is used, use the last full and differential backups for the• Stop the <strong>Kerio</strong> <strong>Connect</strong> Engine prior to the recovery.• Launch kmsrecover from the computer where <strong>Kerio</strong> <strong>Connect</strong> is installed.• If <strong>Kerio</strong> <strong>Connect</strong> Recover is run without advanced parameters, all items in the <strong>Kerio</strong><strong>Connect</strong>’s data store, such as configuration files, licenses, mailing lists and data, willbe overwritten.166
51.1 Recovering data from backupAdvanced options of <strong>Kerio</strong> <strong>Connect</strong> RecoverAbbreviation Full option Mask Description-d --domain Recovers (or lists with parameter -l) all backed-up datafor the specified domain..-u --user Recovers (or lists with parameter -l) data of thespecified user.-f --folder This option recovers the specified folder of the user(this option requires setting of the -d and -u options).-s --store This option sets where SpamAssassin databases,mailing lists and emails (including events, notes,contacts, etc.) would be unpacked and stored. Bydefault, the store on the <strong>Kerio</strong> <strong>Connect</strong> from whichkmsrecover was launched is used.-c --cfgdir This option sets a directory where configuration files,SSL certificates and licenses would be stored. Bydefault, the current folder from which the kmsrecovercommand was started is used.-m --mask This option allows to set which parts of the back upwould be recovered. It requires setting of mask with -m or--mask=.The value standsfor any combination mentioned below. Example: -mcfg,license,sslca,sslcert — this commandrecovers license, SSL certificates and configuration files.cfgThis argument recovers only configuration filesmailserver.cfg and users.cfg where serverconfigurations are defined.167
Data recovery in <strong>Kerio</strong> <strong>Connect</strong>Abbreviation Full option Mask DescriptionmaillistsThis recovers only the \store\maildirectory.This argument recovers only configuration ofmailing lists (\store\lists).spamassassin This argument recovers only theSpamAssassin database.licensesslcasslcertpublicThis argument recovers the <strong>Kerio</strong> <strong>Connect</strong>license.This argument recovers certificates issued bycertification authorities.This argument recovers the <strong>Kerio</strong> <strong>Connect</strong>certificates.This argument recovers public folders.-b --backup This option performs an additional back-upbefore the recovery is started. The originaldirectory will have the BAK extension. If sucha file already exists, it will be replaced by thenew version. However, bear in mind thatbackup of the current status doubles thestore size. It is therefore not desirable to usethis option if there is not enough free diskspace available.-g --noprogress This option hides information about therecovery progress. It is useful especially ifthe recovery is recorded in the log.Information of how much time is left to thecompletion of the recovery process isirrelevant in that case.-l --listing This option lists the backup store content. Itis also possible to use additional parameters(such as -d and -u which lists only contentsof the mailbox of the specific user).-q --quiet Recovery progress information will not beprovided in the command line.-v --verbose Recovery progress information will beprovided in the command line.-h --help This option prints out the help file.168
51.2 Backup filesBackup filesFile namesEach archive name consists of backup type and date when it was created:Full backupF20120118T220007Z.zipF — full backup2012 — year01 — month18 — dayT220007Z — GMT timestamp (22:00:07); it always starts with T and ends with Z.Differential backupD20120106T220006Z.zipD — differential backup2012 — year01 — month06 — dayT220006Z — GMT timestamp (22:00:06); it always starts with T and ends with Z.Backup copy (manual backup)C20120117T084217Z.zip2012 — year01 — month17 — dayT084217Z — GMT timestamp (08:42:17); it always starts with T and ends with Z.File contentEach backup includes the following files and directories:• .version.txt — the file is created at the start of the backup creation process and itincludes the following information:• started — date of the start of the backup creation in pattern YYYY-MM-DDhh:mm:ss.• version — version of the backup tool.• hostname — DNS name of the <strong>Kerio</strong> <strong>Connect</strong> host which the backup wascreated for.• @backup — the main directory of the backup. This directory includes the followingitems.169
Data recovery in <strong>Kerio</strong> <strong>Connect</strong>• license — license backup• sslca — backup of certification authorities’ certificates.• sslcert — backup of <strong>Kerio</strong> <strong>Connect</strong>’s SSL certificates.• store — backup of the data store• mailserver.cfg — a file with the <strong>Kerio</strong> <strong>Connect</strong> configuration. All settings done inthe administration interface are saved in mailserver.cfg.• users.cfg — a file with user configuration. It involves all users and their parametersset in the <strong>Kerio</strong> <strong>Connect</strong>’s administration interface.• .summary.txt — the file is created at the end of the backup creation process and itincludes the following information:• started — date of the start of the backup creation in pattern YYYY-MM-DDhh:mm:ss.• finished — date of the backup completion in pattern YYYY-MM-DDhh:mm:ss.• count_files — number of backed-up files.• total_size — total size of the files (in bytes) which are backed-up in theinterval between creation of files .version.txt and .summary.txt.• duration — total time of the backup creation process in patternhh:mm:ss:msmsData recovery examplesTo read through some examples of data recovery, see this article.TroubleshootingIf any problem regarding backups occur, consult the Debug log (right-click the Debug log areaand enable Store Backup).170
Configuring SSL certificates in <strong>Kerio</strong> <strong>Connect</strong>About SSL certificatesYou need a SSL certificate if you wish to secure <strong>Kerio</strong> <strong>Connect</strong> by SSL/TLS encryption. SSLcertificates are used to authenticate an identity on a server.<strong>Kerio</strong> <strong>Connect</strong> creates the first self-signed certificate during the installation. Upon their firstlogin, users will have to confirm they want to go to a page which is not trustworthy. To avoidthis, generate a new certificate request in <strong>Kerio</strong> <strong>Connect</strong> and send it to a certification authorityfor authentication.To make the communication as secure as possible, you can:• disable all unsecured services or• set an appropriate security policyCertificates can be created in section Configuration → SSL Certificates.Figure 1SSL certificates<strong>Kerio</strong> <strong>Connect</strong> supports certificates in the following formats:• Certificate (public key) — X.509 Base64 in text format (PEM). The file has suffix .crt.• Private key — the file is in RSA format and it has suffix .key with 4KB max.Creating self-signed certificatesTo create a self-signed certificate, follow these steps:1. Go to section Configuration → SSL Certificates.2. Click on New → New Certificate.3. Fill in the information and save.171
Configuring SSL certificates in <strong>Kerio</strong> <strong>Connect</strong>To enable the server to use this certificate, select the certificate and click on the Set as Activebutton.Creating certificates signed by certification authorityTo use a certificate signed by a trustworthy certification authority, you must first generatea certificate request, send it to a certification authority and import a signed certificate uponreceiving it.1. Open section Configuration → SSL Certificates and click on New → New Certificate Request.2. Fill in the information and save.3. Select the certificate and click on the Export → Export Request button.4. Save the certificate to your disk and send it to a certification authority.Once you obtain your certificate signed by a certification authority:, and click on Import →Import Signed Certificate from CA.1. Go to section Configuration → SSL Certificates.2. Click on Import → Import Signed Certificate from CA.3. To enable the server to use this certificate, select the certificate and click on the Set asActive button.Intermediate certificates<strong>Kerio</strong> <strong>Connect</strong> allows authentication by intermediate certificates. To make authentication bythese certificates work, it is necessary to add the certificates to <strong>Kerio</strong> <strong>Connect</strong> by using any ofthe following methods:Locally on the computer where <strong>Kerio</strong> <strong>Connect</strong> is installedAdd the intermediate certificate file to the sslca directory and copy the server’scertificate with the private key to the sslcert directory. Both directories can be found inthe directory where <strong>Kerio</strong> <strong>Connect</strong> is installed.Remotely via the administration interface1. In a text editor, open the server certificate and the intermediate certificate.2. Copy the intermediate certificate into the server certificate file and save.The file may look like this:MIIDOjCCAqOgAwIBAgIDPmR/MA0GCSqGSIb3DQEBBAUAMFMxCzAJBgNVBAYTAlMSUwIwYDVQQKExxUaGF3dGUgQ29uc3VsdGluZyAoUHR5KSBMdGQuMR0wGwYDVQ..... this is a server SSL certificate ...172
52.4 Intermediate certificatesukrkDt4cgQxE6JSEprDiP+nShuh9uk4aUCKMg/g3VgEMulkROzFl6zinDg5grzQspOQTEYoqrc3H4Bwt8=-----END CERTIFICATE----------BEGIN CERTIFICATE-----MIIDMzCCApygAwIBAgIEMAAAATANBgkqhkiG9w0BAQUFADCBxDELMAkGA1UEBhWkExFTATBgNVBAgTDFdlc3Rlcm4gQ2FwZTESMBAGA1UEBxMJQ2FwZSBUb3duMR..... this is an intermediate SSL certificate whichsigned the server certificate...5BjLqgQRk82bFi1uoG9bNm+E6o3tiUEDywrgrVX60CjbW1+y0CdMaq7dlpszRBt14EmBxKYw==3. In the administration interface, go to section Configuration → SSL Certificates.4. Import the modified server certificate by clicking on Import → Import New Certificate.5. Save the settings.If you have multiple intermediate certificates, add them one by one to theserver certificate file.173
Managing logs in <strong>Kerio</strong> <strong>Connect</strong>What are <strong>Kerio</strong> <strong>Connect</strong> logs forLogs are files where information about certain events (e.g. error and warning reports,debugging information) is recorded. Each item is represented by one row starting witha timestamp (date and time of the event). Messages in logs are displayed in English for everylanguage version of <strong>Kerio</strong> <strong>Connect</strong>.Configuring logsLogs are available in the <strong>Kerio</strong> <strong>Connect</strong> administration interface in section Logs.There are several types of logs (see the following chapter).When you right-click in a log, you can configure the following settings (available in all logs):Save logYou can save whole logs or a selected part in a txt or HTML format. See also Log Settingsoption.HighlightingYou can save any part of text in logs for better reference. Specify a substring or regularexpression and all rows containing such text will be highlighted.Log SettingsApart from immediate savings, you can configure regular saves of individual logs,specifying the size and number of saved files.You can also enable external logging to a Syslog server.Physically, the logs are stored in the following default folders according to the operatingsystem:• Windows — C:\Program Files\<strong>Kerio</strong>\MailServer\store\logs• Mac OS X — /usr/local/kerio/mailserver/store/logs• Linux — /opt/kerio/mailserver/store/logsInformation about log settings are recorded in the Config log.174
53.3 Types of logsTypes of logsConfig logThe Config log keeps complete history of configuration changes.performed individual administration tasks and when.It tells you which userDebug logDebug log monitors various kinds of information and is used for problem-solving.It allows you to select which information it will display.1. Right-click in the log window and click on Messages.2. Check any option you wish to monitor and confirm.Too much information could be confusing and slows <strong>Kerio</strong> <strong>Connect</strong>’sperformance. Usually, you only need to display information relating to a particularservice or function.If a special option is necessary, you will be advised to check it in individual articles regarding<strong>Kerio</strong> <strong>Connect</strong>.Mail logThe Mail log contains information about individual messages processed by <strong>Kerio</strong> <strong>Connect</strong>.Security logThe Security log contains information related to <strong>Kerio</strong> <strong>Connect</strong>’s security.records about all messages that failed to be delivered.It also containsWarning logThe Warning log displays warning messages about errors of little significance. Events causingdisplay of warning messages in this log do not greatly affect <strong>Kerio</strong> <strong>Connect</strong>’s operation. They175
Managing logs in <strong>Kerio</strong> <strong>Connect</strong>can, however, indicate certain (or possible) problems. The Warning log can help if for examplea user is complaining that certain services are not working.Operations logThe Operations log gathers information about removed and moved items (folders, messages,contacts, events, tasks and notes) in user mailboxes. It is helpful especially if a user does notmanage to find a particular message in their mailbox.Error logThe Error log displays errors of great significance that usually affect the mailserver’s operation(in contrast to the Warning log).Typical error messages displayed in the Error log pertain to: service initiation (usually due toport conflicts), disk space allocation, antivirus check initialization, improper authentication ofusers, etc.Spam logThe Spam log displays information about all spam emails stored (or marked) in <strong>Kerio</strong> <strong>Connect</strong>.176
<strong>Kerio</strong> Active Directory ExtensionHow to use <strong>Kerio</strong> Active Directory ExtensionYou install <strong>Kerio</strong> Active Directory Extension into the Microsoft Active Directory and itemscontaining specific <strong>Kerio</strong> <strong>Connect</strong> information are added to Active Directory.User account will be managed in one place — in Microsoft Active Directory.<strong>Kerio</strong> Active Directory Extension is available only in English.How to install <strong>Kerio</strong> Active Directory ExtensionDownload <strong>Kerio</strong> Active Directory Extension at the <strong>Kerio</strong> <strong>Connect</strong> product pages.It can be installed on supported operating systems using a standard installation wizard.After the installation a new tab for creating a <strong>Kerio</strong> <strong>Connect</strong> account will be added to the dialogwindow for creating new users in Microsoft Active Directory.Depending on the version of your Microsoft Internet Explorer, you may be asked toinstall Microsoft XML Parser. Allow the installation — without it, the installation of <strong>Kerio</strong>Active Directory extension will not be completed!How to create users and groups <strong>Kerio</strong> <strong>Connect</strong> in Active DirectoryYou can create user accounts and groups in Microsoft Active Directory (using, for example,Active Directory Users And Computers) in a usual way — the standard wizard contains anew tab for <strong>Kerio</strong> <strong>Connect</strong>.Once you create users, map them to <strong>Kerio</strong> <strong>Connect</strong>.Usernames must be in ASCII or users will not be able to login to their accounts.TroubleshootingIf you encounter any problems during KADE installation, view/save the log during theinstallation process (View Log/Save Log File).177
<strong>Kerio</strong> Open Directory ExtensionHow to use <strong>Kerio</strong> Open Directory ExtensionYou install <strong>Kerio</strong> Open Directory Extension into the Apple Open Directory and items containingspecific <strong>Kerio</strong> <strong>Connect</strong> information are added to Open Directory.User account will be managed in one place — in Apple Open Directory.How to install <strong>Kerio</strong> Open Directory ExtensionDownload <strong>Kerio</strong> Open Directory Extension at the <strong>Kerio</strong> <strong>Connect</strong> product pages.It can be installed on supported operating systems using a standard installation wizard.When using configurations of Mac OS X servers of Master/Replica type, <strong>Kerio</strong> OpenDirectory Extension must be installed to the "master" server, as well as to all "replica"servers, otherwise the account mapping will not work.If the configuration is as follows:• you use <strong>Kerio</strong> Open Directory Extension 6.6 and newer,• servers run on OS X 10.5.3 and newer,• Replica servers were created after installation of <strong>Kerio</strong> Open Directory Extensionon the "master" server,then "replica" servers download the extension automatically from the "master" server duringthe creation process.If you install <strong>Kerio</strong> Open Directory Extension on "replica" servers by hand, the configurationwill not be affected.Setting user account mapping in <strong>Kerio</strong> <strong>Connect</strong>In Mac OS X Server, no other settings than <strong>Kerio</strong> Open Directory Extension installation areusually necessary.The usernames must be in ASCII. If the username includes special characters orsymbols, it might happen that the user cannot log in.178
55.4 TroubleshootingIn <strong>Kerio</strong> <strong>Connect</strong> the following settings must be specified:• Enable user mapping in domain settings.• Set user authentication via Kerberos in domain settings.• Set user authentication via Kerberos in user settings.TroubleshootingIf you encounter any problems during KODE installation, view/save the log during theinstallation process (View Log/Save Log File).179
Managing mobile devicesManaging mobile devices in <strong>Kerio</strong> <strong>Connect</strong>Beginning May 1, 2013, the support of Exchange ActiveSync in <strong>Kerio</strong> <strong>Connect</strong> isavailable as an add-on. For detailed information, read the Exchange ActiveSync FAQs.Each user can synchronize their <strong>Kerio</strong> <strong>Connect</strong> account with an unlimited number of mobiledevices.To see the list of supported devices, visit <strong>Kerio</strong> <strong>Connect</strong>’s product page.Unsupported devicesIf you purchase the Exchange ActiveSync add-on, you can enable support for devices not listedas supported by <strong>Kerio</strong> Technologies.Check option Allow synchronization of unsupported Exchange ActiveSync devices on tabMiscellaneous in section Configuration → Advanced Options.Viewing users devicesOnce a device is connected to <strong>Kerio</strong> <strong>Connect</strong>, administrators can view information about thedevice in the administration interface.1. Go to the administration interface, to section Accounts → Users.2. Select the user and click on More Actions → Mobile Devices.3. This displays a list of devices. Select a device and• display details about the device.• click on Remove to delete unused devices from the list.• click on Wipe to delete data from the device180
56.3 Remotely deleting data from a deviceFigure 1Mobile devices of a userRemotely deleting data from a deviceThe Wipe feature allows the <strong>Kerio</strong> <strong>Connect</strong> administrator to remove content of synchronizedfolders or even of the whole mobile device (so called hard reset) by a single click.This feature may be helpful when the device gets lost or stolen. In addition to data clear-out,this action also disables further connections of the device to <strong>Kerio</strong> <strong>Connect</strong> (using the originaluser login data).The wipe-out process will be completed the next time the device connects <strong>Kerio</strong> <strong>Connect</strong>. Userswho have lost their devices should be informed that they should not run the synchronizationif they find it and they should contact the administrators and ask them to cancel the wipe-outbefore the device is used again (the Cancel Wipe in user’s devices).Since the device types and operating systems are different, it depends on these conditionswhether it is possible to reset the device completely or only to clear out synchronized folders.181
Managing mobile devicesIt is not possible to use this feature to perform remote memory cards wipes. Memorycards usually store email attachments. ActiveSync supports wipe-out of any synchronizeddata, including the attachments. This means that the wipe removes all data on the device aswell as any attachments, including those which are stored on the memory card.Details of the wipe process are recorded in the Security log.User confirmation of the wipe actionOn Windows Mobile operating systems, users must agree that the administrator performs thewipe action. Therefore, a dialog appears which must be confirmed by the user during the firstdata synchronization between the device and <strong>Kerio</strong> <strong>Connect</strong>. If not confirmed, it is not possibleto complete the synchronization process. This measure is applied for security reasons.182
Support for BlackBerry devices in <strong>Kerio</strong> <strong>Connect</strong>Synchronizing <strong>Kerio</strong> <strong>Connect</strong> with BlackBerry devicesFrom <strong>Kerio</strong> <strong>Connect</strong> 8.1, <strong>Kerio</strong> <strong>Connect</strong>or for BlackBerry has been discontinued.To synchronize BlackBerry devices with <strong>Kerio</strong> <strong>Connect</strong>, you can use:• NotifySync — you can synchronize messages, calendars, contacts and tasks. For moreinfo, visit the Notify Technology website.• AstraSync — you can synchronize messages, calendars and contacts. For more info,visit the AstraSync website.• <strong>Kerio</strong> <strong>Connect</strong>or for BlackBerry183
Switching between <strong>Kerio</strong> <strong>Connect</strong> client and oldWebMailSetting a default user interface<strong>Kerio</strong> <strong>Connect</strong> offers two user interfaces — the new <strong>Kerio</strong> <strong>Connect</strong> client and old WebMail.<strong>Administrators</strong> can select a default interface for their users.domains within your <strong>Kerio</strong> <strong>Connect</strong>.These settings apply to all1. In the administration interface, go to section Configuration → Advanced Options.2. Go to tab <strong>Kerio</strong> <strong>Connect</strong> client / WebMail.3. From the Default web client drop-down menu, select one of the options.• <strong>Kerio</strong> <strong>Connect</strong> client• Old WebMail• Last used4. Confirm the settings.If user bookmarks, for example, <strong>Kerio</strong> <strong>Connect</strong> client and you switch the default clientto old WebMail, user will be directed to <strong>Kerio</strong> <strong>Connect</strong> client when using their bookmark.Switching from <strong>Kerio</strong> <strong>Connect</strong> client to old WebMailTo switch from <strong>Kerio</strong> <strong>Connect</strong> client to the old WebMail interface, click your name in the topright corner and select Old WebMail184
58.3 Switching from old WebMail to <strong>Kerio</strong> <strong>Connect</strong> clientuser’s name.In <strong>Kerio</strong> <strong>Connect</strong> 8.0, the link to old WebMail is available in the top blue bar next toSwitching from old WebMail to <strong>Kerio</strong> <strong>Connect</strong> clientTo switch from the old WebMail interface, click the <strong>Kerio</strong> <strong>Connect</strong> client link in the top bar ofold WebMail.185
<strong>Kerio</strong> <strong>Connect</strong> — Legal noticesTrademarks and registered trademarksMicrosoft ® , Windows ® , Windows NT ® , Windows Vista ® , Internet Explorer ® , Active Directory ® ,Outlook ® , ActiveSync ® , Entourage ® and Windows Mobile ® are registered trademarks ofMicrosoft Corporation.Apple ® , iCal ® , Mac OS ® , Safari, Tiger, Panther ® , Open Directory logo, Leopard ® , SnowLeopard ® and Lion ® are registered trademarks or trademarks of Apple, Inc.Palm ® , Treo, Pre and VersaMail ® are registered trademarks or trademarks of Palm, Inc.Red Hat ® and Fedora are registered trademarks or trademarks of Red Hat, Inc.SUSE ® , openSUSE ® and the openSUSE logo are registered trademarks or trademarks of Novell,Inc.Mozilla ® and Firefox ® are registered trademarks of Mozilla Foundation.Linux ® is registered trademark of Linus Torvalds.Kerberos is trademark of Massachusetts Institute of Technology (MIT).avast! ® is registered trademark of AVAST <strong>Software</strong>.eTrust is trademark of Computer Associates International, Inc.ClamAV is trademark of Tomasz Kojm.Cybertrust ® is registered trademark of Cybertrust Holdings, Inc. and/or their filials.Thawte ® is registered trademark of VeriSign, Inc.Entrust ® is registered trademark of Entrust, Inc.Sophos ® is registered trademark of Sophos Plc.ESET ® and NOD32 ® are registered trademarks of ESET, LLC.AVG ® is registered trademark of AVG Technologies.IOS ® is registered trademark of Cisco Systems, Inc.NotifyLink ® is registered trademark of Notify Technology Corporation.BlackBerry ® is registered trademark of Research In Motion Limited (RIM).RoadSync is trademark of DataViz Inc.Nokia ® and Mail for Exchange ® are registered trademarks of Nokia Corporation.Symbian is trademark of Symbian <strong>Software</strong> Limited.Sony Ericsson ® is registered trademark of Sony Ericsson Mobile Communications AB.186
59.2 Used open source softwareSpamAssassin is trademark of Apache <strong>Software</strong> Foundation.SpamHAUS ® is registered trademark of The Spamhaus Project Ltd.Android and Nexus One are trademarks of Google Inc. This trademark can be used only inaccord with Google Permissions.DROID is trademark of Lucasfilm Ltd. and affiliated companies.Motorola ® is registered trademark of Motorola, Inc.Used open source softwareThis product contains the following open-source libraries:Apache DerbyApache Derby is an open source relational database implemented entirely in Java.Copyright © 2004-2009, The Apache <strong>Software</strong> FoundationCopyright © 2004, 2005, IBM Corp.Copyright © 1992-2003, Corel CorporationCopyright © OSGi Alliance (2001, 2007). All Rights Reserved.Copyright © 2002, 2003, Stefan Haustein, Oberhausen, Rhld., Germany.Copyright © 2001-2002, Sun Microsystems.Copyright © 2000 World Wide Web ConsortiumCopyright © 1999-2002, Lotus Development Corporation.Apache LuceneApache Lucene is a Java library for text searching.Copyright © 1999-2009, The Apache <strong>Software</strong> FoundationCopyright © 1995-2008 International Business Machines CorporationCopyright © 2001, Dr Martin PorterCopyright © 2002, 2003, 2004, 2005, Marc Prud’hommeauxCopyright © 2002, Richard BoultonCopyright © 2002-2003, Geir LandröCopyright © 2001-2004 Unicode, Inc.Copyright © 2009 by www.imdict.netBerkeley DBBerkeley DB (BDB) is a computer software library that provides a "high-performance"embedded database, with bindings in C, C++, Java, Perl, Python, Ruby, Tcl, Smalltalk,and many other programming languages.The Regents of the University of California. All rights reserved.Copyright © 1987, 1993 The Regents of the University of California. All rights reserved.bindlibDNS resolver library, linked by PHP on Windows.Copyright © 1983, 1993 The Regents of the University of California. All rights reserved.Portions Copyright © 1993 by Digital Equipment Corporation.187
<strong>Kerio</strong> <strong>Connect</strong> — Legal noticesBluffBluff is a JavaScript port of the Gruff graphing library for Ruby. The Gruff libraryis written in Ruby.Copyright © 2008-2009 James Coglan.Original Ruby version © 2005-2009 Topfunky Corporation.excanvasThe ExplorerCanvas library allows 2D command-based drawing operations in InternetExplorer.Copyright © 2006 Google Inc.<strong>Kerio</strong> <strong>Connect</strong> Configuration Wizard for Linux<strong>Kerio</strong> <strong>Connect</strong> Configuration Wizard for Linux is an application helping with initialconfiguration of <strong>Kerio</strong> <strong>Connect</strong>.Copyright (c) <strong>Kerio</strong> Technologies, s.r.o<strong>Kerio</strong> <strong>Connect</strong> Configuration Wizard for Linux is distributed under GNU General PublicLicense, version 3.To download the complete source code, please go to http://download.kerio.com/archive/CppSQLiteA C++ wrapper around the SQLite embedded database library .Copyright ©2004 Rob Groves. All Rights Reserved.Firebird 2This software embeds modified version of Firebird database engine distributed underterms of IPL and IDPL licenses.All copyright retained by individual contributors — original code Copyright © 2000 InpriseCorporation.The modified source code is available athttp://download.kerio.com/archive/Heimdal KerberosHeimdal Kerberos is used only in Linux-oriented <strong>Kerio</strong> <strong>Connect</strong> versions.Heimdal is an implementation of Kerberos 5, largely written in Sweden. It is freelyavailable under a three clause BSD style license (but note that the tar balls includeparts of Eric Young’s libdes, which has a different license). Other free implementationsinclude the one from MIT, and Shishi. Also Microsoft Windows and Sun’s Java come withimplementations of Kerberos.Copyright ©1997-2000 Kungliga Tekniska Hogskolan (Royal Institute of Technology,Stockholm, Sweden). All rights reserved.Copyright ©1995-1997 Eric Young. All rights reserved.Copyright ©1990 by the Massachusetts Institute of TechnologyCopyright ©1988, 1990, 1993 The Regents of the University of California. All rightsreserved.Copyright ©1992 Simmule Turner and Rich Salz. All rights reserved.188
59.2 Used open source softwareICU (International Components for Unicode)ICU is a mature, widely used set of C/C++ and Java libraries providing Unicode andGlobalization support for software applications.Copyright © 1995-2009 International Business Machines Corporation and othersjabsorbjabsorb is a simple and lightweight Ajax/Web 2.0 framework.Copyright © 2007-2009 The jabsorb teamlibcurlLibcurl is a free and easy-to-use client-side URL transfer library. This library supports thefollowing protocols: FTP, FTPS, HTTP, HTTPS, GOPHER, TELNET, DICT, FILE and LDAP.Copyright ©1996-2008, Daniel Stenberg.libdkim++libdkim++ is a lightweight and portable DKIM (RFC4871) library for *NIX, supportingboth signing and SDID/ADSP verification sponsored by Halon Security. libdkim++ hasextensive unit test coverage and aims to fully comply with the current RFC.Copyright © 2009,2010,2011 Halon Security libiconvLibiconv converts from one character encoding to another through Unicode conversion.Copyright ©1999-2003 Free <strong>Software</strong> Foundation, Inc.Author: Bruno HaibleHomepage: http://www.gnu.org/software/libiconv/The libiconv library is distributed and licensed under GNU Lesser General Public Licenseversion 3.<strong>Kerio</strong> <strong>Connect</strong> includes a customized version of this library. Complete sourcecodes of the customized version of libiconv library are available at:http://download.kerio.com/archive/libmbfllibmbfl is a streamable multibyte character code filter and converter library. The libmbfllibrary is distributed under LGPL license version 2.Copyright ©1998-2002 HappySize, Inc. All rights reserved.The library is available for download at:http://download.kerio.com/archive/libspf2libspf2 implements the Sender Policy Framework, a part of the SPF/SRS protocolpair. libspf2 allows Sendmail, Postfix, Exim, Zmailer and MS Exchange check SPF records.It also verifies the SPF record and checks whether the sender server is authorized to sendemail from the domain used. This prevents email forgery, commonly used by spammers,scammers and email viruses/worms (for details, see http://www.libspf2.org/).Copyright ©2004 Wayne Schlitt. All rights reserved.189
<strong>Kerio</strong> <strong>Connect</strong> — Legal noticeslibstdc++C++ Standard Library is a collection of classes and functions, which are written in thecore language and part of the C++ ISO Standard itself.Copyright © 2001, 2002, 2004 Free <strong>Software</strong> Foundation, Inc.libxml2XML parser and toolkit.Copyright ©1998-2003 Daniel Veillard. All Rights Reserved.Copyright ©2000 Bjorn Reese and Daniel Veillard.Copyright ©2000 Gary Pennington and Daniel VeillardCopyright ©1998 Bjorn Reese and Daniel Stenberg.Mail-SpamAssassinThis product includes software developed by the Apache <strong>Software</strong> Foundation(http://www.apache.org/).SpamAssassin is trademark of Apache <strong>Software</strong> Foundation.myspellSpellcheck library.Copyright 2002 Kevin B. Hendricks, Stratford, Ontario, Canada And Contributors.rights reserved.AllOpenLDAPFreely distributable LDAP (Lightweight Directory Access Protocol) implementation.Copyright © 1998-2007 The OpenLDAP FoundationCopyright ©1999, Juan C. Gomez, All rights reservedCopyright ©2001 Computing Research Labs, New Mexico State UniversityPortions Copyright©1999, 2000 Novell, Inc. All Rights ReservedPortions Copyright ©PADL <strong>Software</strong> Pty Ltd. 1999Portions Copyright ©1990, 1991, 1993, 1994, 1995, 1996 Regents of the University ofMichiganPortions Copyright ©The Internet Society (1997)Portions Copyright ©1998-2003 Kurt D. ZeilengaPortions Copyright ©1998 A. HartgersPortions Copyright ©1999 Lars UffmannPortions Copyright ©2003 IBM CorporationPortions Copyright ©2004 Hewlett-Packard CompanyPortions Copyright ©2004 Howard Chu, Symas Corp.OpenSSLAn implementation of Secure Sockets Layer (SSL v2/v3) and Transport Layer Security (TLSv1) protocol.This product includes software developed by the OpenSSL Project for use in the OpenSSLToolkit (http://www.openssl.org/).This product includes cryptographic software written by Eric Young.This product includes cryptographic software written by Tim Hudson.190
PHPPHP is a widely-used scripting language that is especially suited for Web developmentand can be embedded into HTML.Copyright ©1999-2006 The PHP Group. All rights reserved.This product includes PHP software, freely available from http://www.php.net/software/sdbmThis product includes software developed by the Apache <strong>Software</strong> Foundation(http://www.apache.org/)ScoopyNGThis product includes software developed by Tobias Klein.Copyright ©2008, Tobias Klein. All rights reserved.slf4jslf4j is a simple logging facade for Java.Copyright ©2004-2010 QOS.CHCopyright ©2004-2005 SLF4J.ORGCopyright ©2005 - 2010, James AuldridgeCopyright ©1999-2005 The Apache <strong>Software</strong> Foundation.TigaseThe Tigase Jabber/XMPP Server is Open Source and Free (GPLv3) {Java} based server.Copyright ©2004 Tigase.org. Copyright ©2001-2006 Tigase Developers Team. All rights Reserved.Copyright ©2004-2011 "Artur Hefczyc" Copyright ©2009 "Tomasz Sterna" Copyright ©2001-2008 Julien Ponge, All Rights Reserved.Copyright© 2008 "Bartosz M. Małkowski" zlibGeneral-purpose library for data compressing and decompressing.Copyright ©1995-2005 Jean-Loup Gailly and Mark Adler.191